Apple Watch – Series 8 Battery Replacement
Duration: 45 minutes
Steps: 16 Steps
Heads up: Swapping the battery in the 41 mm Series 8 Apple Watch isn’t quite the same as the 45 mm model, so keep an eye out for the differences!
Pro tip: Lower your battery charge below 25% before starting. It helps keep things safe and drama-free.
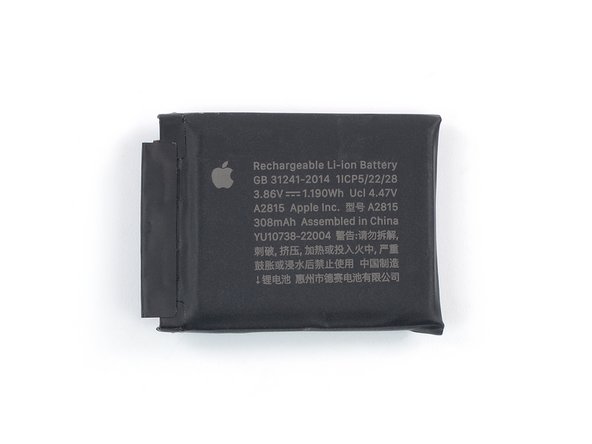
Time to swap out that tired, dead battery in your Apple Watch Series 8! Keep in mind, the 41mm and 45mm versions have a slightly different battery setup—this guide covers the 45mm model with its black connector and unique silver cover. Before diving in, double-check you’ve got the right replacement battery on hand. If your battery’s looking a little swollen, take extra precautions—safety first! For a safer repair, drain that battery below 25% before you start ripping into your watch. This helps minimize the risk if the battery gets damaged during the process. While this guide is for the cellular/LTE version, the GPS-only version is pretty much the same deal. You’ll also want some replacement adhesive to stick everything back together when you’re done. If you need help, you can always schedule a repair.
Step 1


If your touchscreen is busted and you can't turn off the watch normally, no worries—there's a workaround to power it down. Just follow this easy step to get your device under control again.
- Remove your watch from the charger and turn it off.
Step 2


Keep your fingers safely away from the iFlex edge—think of it as giving them a little personal space. If you're unsure, throw on a sturdy glove like a leather or garden glove to keep those digits protected. Be gentle and avoid pressing too hard—no need to turn the iFlex into a slip-and-cut adventure or risk damaging your device. And don't forget to gear up with eye protection; if things go awry or you apply too much pressure, tiny glass shards could fly—better to be safe than sorry. If you need help, you can always schedule a repair.
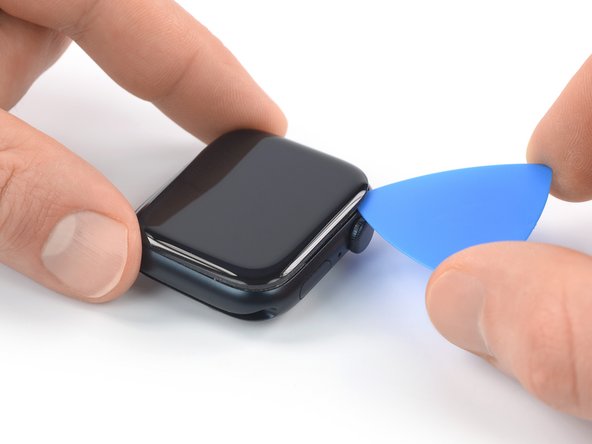
The gap between the screen and watch body is super slim, so we'll need an iFlex to carefully separate the two.
Go ahead and attach or remove the watch band as needed – it's all about giving you more control as you work through these repairs.
Step 3

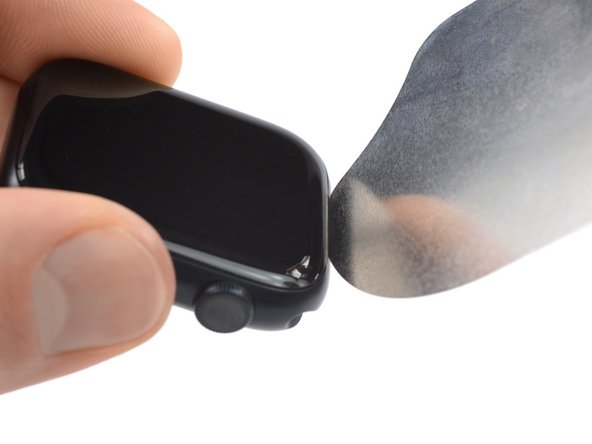
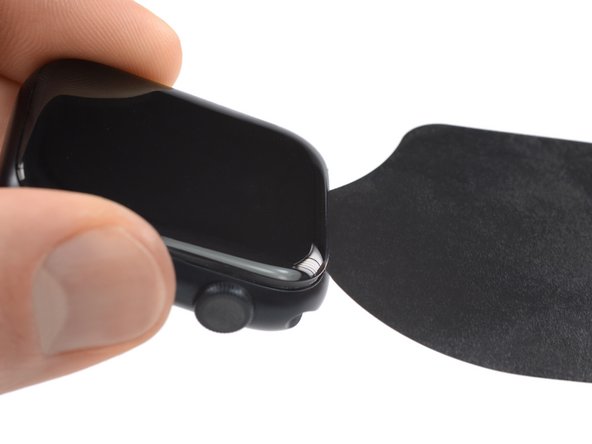
A heat source like a hair dryer, heat gun, or hot plate can do the trick, but keep an eye on things—overdoing it might damage the watch's display or internal battery. You might need to reheat the iOpener and go through this step a few times until the adhesive softens enough to lift the display easily.


Step 4

- Slide the iFlex into the slim gap next to the digital crown—like you’re sneaking into a secret club.
- Gently tilt the iFlex downward to pop the display up a bit, making a small space between the screen and the watch’s body.
Take your time and work carefully to avoid scratching the watch body with your iFlex. Keep in mind that the Apple Watch Series 8 display has a plastic bezel on the back. To avoid popping the bezel off if you want to keep your display intact, don't use too much pressure with the iFlex. If you need help, you can always schedule a repair.
Step 5

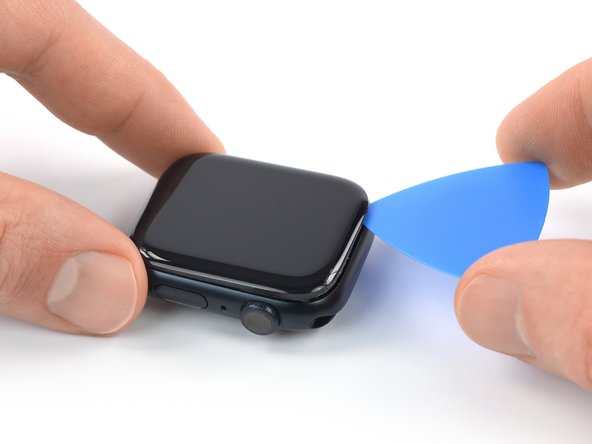
- Gently slide the tip of an opening pick into the gap you just created to get things started.
- Then, glide the pick along the short edge of the watch to carefully cut through the adhesive and free the components.
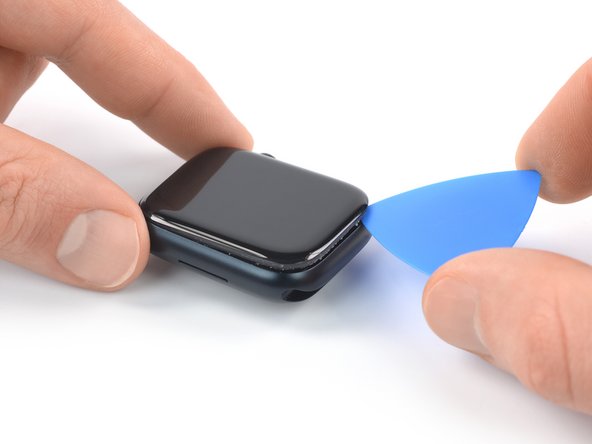
Step 6


- Take your opening pick for a spin around the corner, then glide it down the long side opposite the watch crown—you're slicing through that adhesive like a pro.
Step 7

- Gently slide the pry tool along the edge, carefully working around the corner and along the short side to loosen the adhesive. Keep it steady and patient—you're making progress! If you need a hand, you can always schedule a repair.
Step 8

Slide the pick just 2–3 mm along the crown edge—think of it as politely knocking, not barging in—so you don’t bump into the display cables. Keep the screen chill for now; it’s still tethered to the rest of the watch, so no yanking yet.
- Glide your opening pick around the corner, heading toward the watch crown, to cut through the last bits of stubborn adhesive. Almost there!
Step 9


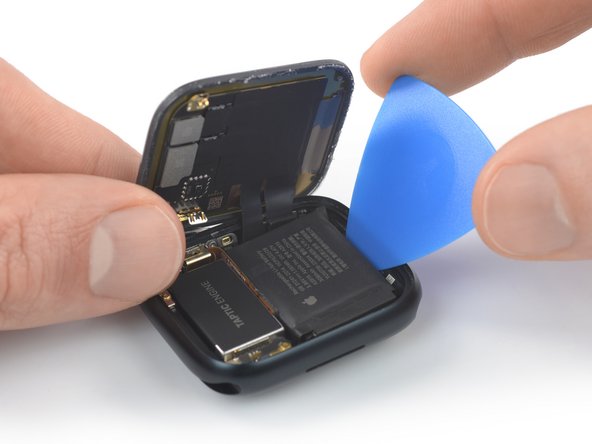
Handle with care: be gentle when opening the display to avoid putting unnecessary strain on those delicate display cables.
- Gently lift up the display and guide it towards the watch crown—no sudden moves!
- Flip the display upright like you’re showing off a new trick at a party.
- Ready to seal everything up? Check out the Apple Watch resealing guide for a smooth finish. If sealing sounds tricky, you can always schedule a repair.
Step 10

You can use a hair dryer, heat gun, or hot plate to loosen things up, but keep things cool—too much heat can mess with the display or battery. Stay chill and gentle with that warmth!
Step 11


Be super careful not to poke or twist the battery with your tool—if it gets damaged, it could leak some nasty chemicals or even cause a fire. Safety first!
Hold off on fully removing the battery just yet, it’s still hanging out with the motherboard. Let’s get them properly separated before going any further.
- Slide a pick into the gap between the watch case and the edge of the battery. Then, gently and steadily apply pressure to lift the battery away—no rush, just a slow and controlled pry.
Step 12
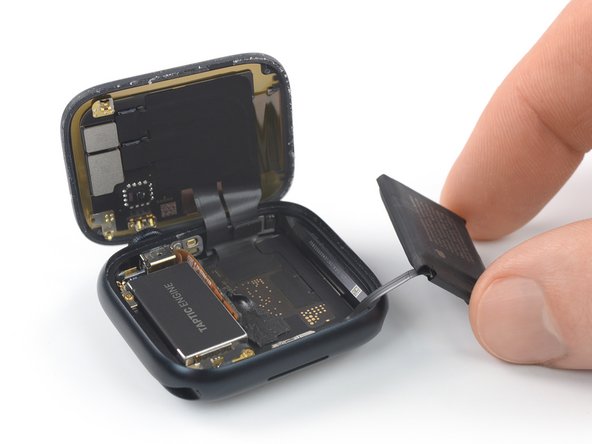

When you're lifting the battery out, be gentle with that flex cable - it's long enough to let you move the battery around, but try not to bend or strain it too much, or you might damage it.
- Gently pop the battery out of its spot and let it chill right next to the watch body.
Step 13

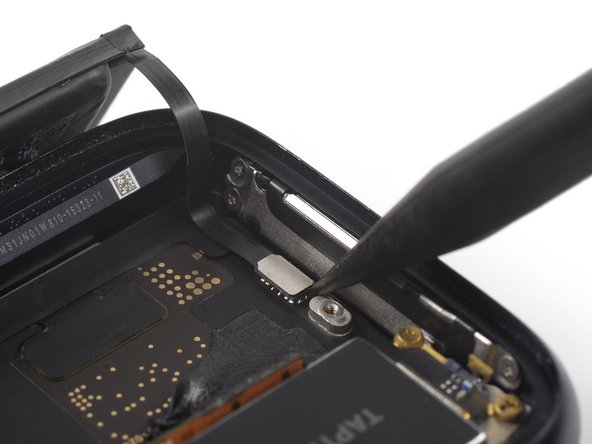
- Grab a Tri-Point Y000 screwdriver and gently remove the tiny 1.1 mm screw holding down the battery connector bracket. If you need a hand, you can always schedule a repair.
Tools Used

Step 14


- Grab some tweezers and gently lift out the battery connector bracket. Easy does it—no rush, and if you need a hand, you can always schedule a repair.
Tools Used

Step 15
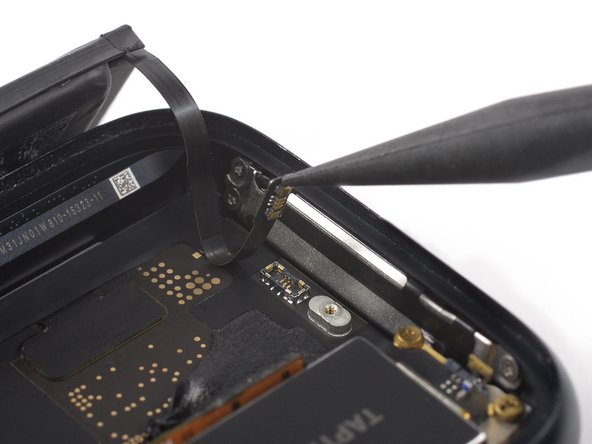
When snapping these connectors back in, start by lining them up and gently pressing down one side until it clicks—then do the same for the other. Skip pressing the middle, unless you’re into bent pins (trust us, you’re not). A misaligned connector can turn those tiny pins into sad little noodles, so take your time.
- Grab the pointed end of a spudger and gently pry the battery connector straight up from its socket. Easy does it—just enough to disconnect without forcing anything.
Tools Used

Step 16


If your battery looks squished, bent, or battered, don’t put it back in—swap it out for a new one instead. Nobody wants a phone that doubles as a hand warmer!
- Pop out that battery like a pro.
- Stick the new battery in place using pre-cut adhesive or double-sided tape. Here’s the trick: put the adhesive down in the battery spot where the old sticky stuff was—don’t slap it directly on the battery. Rip off the adhesive liners, press the battery down with confidence, and you’re golden.
- Reusing your old battery? Just use the leftover adhesive to keep it snug when you put it back together.