
Apple Watch Teardown
Duration: 45 minutes
Steps: 28 Steps
Update: Ready for some exciting Apple Watch teardown action? After you're done here, head over to our X-ray teardown for even more fun!
Time really does fly—it's been eight months since Apple launched its groundbreaking Apple Watch. Join us as we take a deep dive into its insides, tearing down this wearable to see what makes it tick. And hey, we've got even more Apple Watch teardown fun coming up! After you're done here, wander over to our X-ray teardown for a different perspective. The good times keep rolling at Salvation Repair—and if you'd like to be part of the action, follow us on Instagram, Twitter, and Facebook!
Step 1

One model comes in at 38 mm tall, rocking 272 x 340 pixels with a crisp 290 ppi, while the other model measures 42 mm vertically, boasting 312 x 390 pixels with an impressive 302 ppi
- Hey there, tech enthusiasts! The Apple Watch is here, and it's time to dive into the cool features that make it tick:
- A pressure-sensitive, flexible touchscreen AMOLED Retina display that responds to your every touch.
- Powered by a custom-designed Apple S1 SiP (System in Package) for that seamless experience.
- With 8 GB of onboard storage, there's plenty of room for your favorite apps.
- Stay connected with NFC, Wi-Fi 802.11b/g/n, and Bluetooth 4.0.
- Equipped with an accelerometer, gyroscope, heart rate monitor, microphone, and speaker to keep you in tune with your health.
- Running on the innovative Watch OS for a smooth user experience.
Step 2


- The wait is finally over! The Apple Watch is here, and our first step is to unbox this beauty.
- While we were dreaming of finding a golden ticket inside, we'll happily settle for the Apple Watch Sport, complete with its Sport Band, charging cradle, and power adapter.
- A huge shoutout to MacFixit Australia for letting us use their awesome space in Melbourne for this teardown adventure. They have a great selection of Mac and iPhone upgrades and accessories, plus our handy toolkits.
Step 3


- We were ready to take apart the Apple Watch when we got sidetracked by a cool graphic display—those colors are pretty mesmerizing. If you're wondering how to secure the Sport Band, don’t worry—Apple printed clear instructions right on the back of the band to guide you through. And for charging, there's no need for cords—MagSafe inductive charging makes it simple. Just snap the watch onto the charger magnetically, and it’s sealed up tight without any exposed contacts. If you need help with any step, you can always schedule a repair.
Step 4


- Let's flip to the back of the case, where we uncover a snazzy composite cover featuring hard-coated, optical polymer lenses that safeguard a dazzling array of LEDs and photodiodes.
- Our heart rate sensor is crafted with care, utilizing a mix of infrared and visible-light sensors to keep tabs on your heart rate like a pro.
- On the opposite side of the Digital Crown, you'll spot the microphone and speaker ports, ready to lend their audio magic.
- Unlike the sporty Apple Watch Sport, the back cases of the Apple Watch and the Apple Watch Edition flaunt a chic Zirconia ceramic cover adorned with sapphire lenses.
Step 5


To release the spring-loaded metal peg in the band, just press the button on the back cover. This will let the peg slide right out, making the band easy to remove. If you need a hand with this step, you can always schedule a repair.
- Let’s start with something easy before we break out the heavy tools: remove the band.
- The Sport Band is made entirely of elastomer—no metal pins like you’d find in traditional watch bands.
- Manufactured in China!
- If you want to swap out your bands, it’s a quick process. Just a heads up: Apple recommends matching bands to their intended collection. So, no Link Bracelets on the Watch Sport, please.
Step 6

What's this mysterious little door? Its secrets may be locked away forever... but around here, it’s usually the diagnostic port.
Apple Watch comes in two flavors: model A1553 for the 38 mm case, and model A1554 for the 42 mm case.
- Tucked away in the Sport Band slot, there’s a sneaky little cover—think of it as a secret door.
- Zoom in on the side of your Apple Watch and you’ll spot the model number: A1553.
Step 7


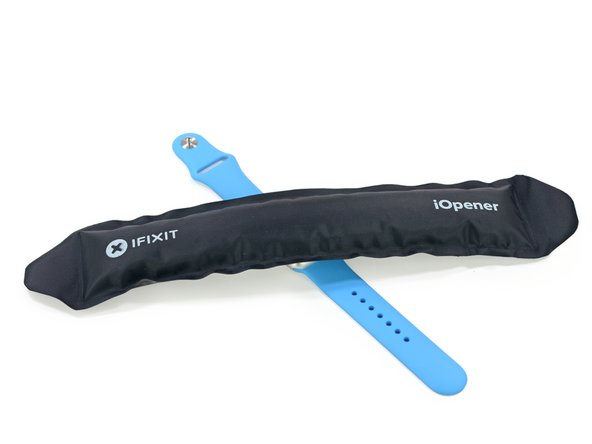
- No worries about those pesky external screws! We're going to reattach the Sport Band for some extra grip and pull out an iOpener to dive right into the heart of this device.
- Skipping the usual opening tools, we're going to give this display a serious push with our trusty Tech Knife.
- Now it's time to bring in our opening pick and wrap things up. Fingers crossed this doesn't turn into another one of Apple's wild adventures!
Tools Used

Step 8


- Gently lift the display, being ready for a tangle of cables—mainly the display and digitizer ones. Disconnecting the display can be tricky since those cables are tucked under a spring-loaded bracket (kind of like the Touch ID cover on an iPhone 5s). Our teardown pros know these tricks, so stay patient. If you need a hand, you can always schedule a repair.
Step 9


- Houston, we've got ourselves a display panel that's just begging to be removed. With that out of the way, let's take a quick peek at two iconic Apple Watch features: the Taptic Engine and the Digital Crown. They're just hanging out, waiting for their moment to shine.
- Even the humble Watch Sport isn't immune to a little sparkle. You’ll notice a touch of gold here, probably an antenna wrapped in Apple's signature gold finish. Classy, right?
Step 10


On the right, you’ve got a pocket watch mechanism from around 1890—still ticking along and aging like a champ. On the left, a 2015 smartwatch, bringing the tech century gap to your wrist.
- Let's kick things off by comparing the internals of the Apple Watch to that of a timeless classic—an old-school mechanical watch.
- While we're still talking about a watch, this second photo really shows how the tools needed for repairs have evolved over time.
- Which one of these will stand the test of time?
- You've probably already seen our trusty tools on the left: opening pick, tweezers, driver, and tech knife.
- On the right, we've got the tool with the Mickey Mouse ears—this is a pallet fork tool. Right next to it, you'll spot a pin vise. Below that, a roller jewel shlacking tool...
- ...and right beside that, tweezers! Some things just never change. (Though, our watchmaker likes to joke that it’s more of a 'lazy man's screw holder.')
Tools Used

Step 11


- A quick flick with your trusty plastic opening tool is all it takes to break free the light adhesive holding down the battery. Simple, right?
- This tiny 3.8 V, 0.78 Wh lithium-ion battery is the powerhouse of the 38 mm Apple Watch. No gears here! Apple promises the 205 mAh battery will last up to 18 hours, which equals 6.5 hours of audio, 3 hours of talk time, or 72 hours in Power Reserve mode.
- Apple also mentions that 'battery performance claims are based on tests from the 38 mm Apple Watch. If you're rocking a 42 mm version, you’ll likely get even more battery life.'
A 205 mAh battery might seem tiny compared to the 300 mAh batteries in the Moto 360 and Samsung Gear Live. Luckily, with Watch OS, Apple aims to give the battery life a boost so it can keep up without running out of juice too quickly. If you're looking to get the most out of your device, consider giving it a good charge or checking out options to optimize battery life. Need a hand? You can always schedule a repair.
Step 12


Level up! You've got this.
- As we approach the S1 SiP, we run into the tiniest tri-point screws you've ever seen—these little guys are micro in every sense. Don't worry if your usual tools aren’t quite up to the task; sometimes, these tiny screws need a tweak or two to get out. It’s all part of the process. If you find yourself in a bind, remember, you can always schedule a repair for extra help. And fair warning—Apple probably didn’t sketch out repairability plans when designing this one, but that’s just more reason to stay patient and keep at it.
Step 13


- Due to the snug fit inside the Apple Watch, the microphone ribbon cable is cleverly tucked away between the inner and outer layers of the case.
Step 14

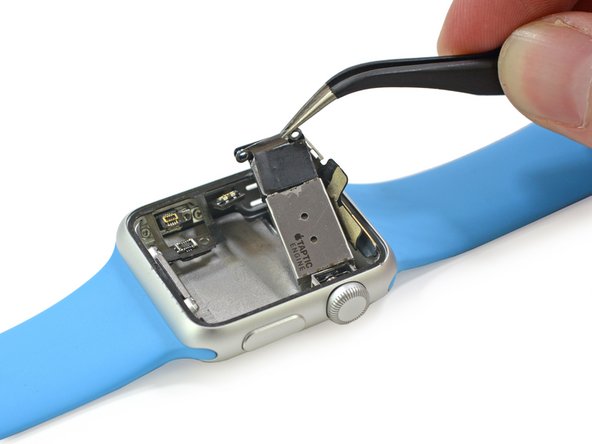

The Taptic Engine is Apple's version of a linear actuator. Instead of spinning like a regular motor, it moves back and forth in a straight line, giving you that signature haptic feedback when you tap, swipe, or get a notification.
- Let's get that Taptic Engine out of there! It's snugly attached to the speaker, so we'll need to give it a little nudge.
- The Taptic Engine and speaker are like best buddies. When they team up with the specially designed speaker driver, they create a delightful motion that adds a unique touch to your audio experience.
Step 15

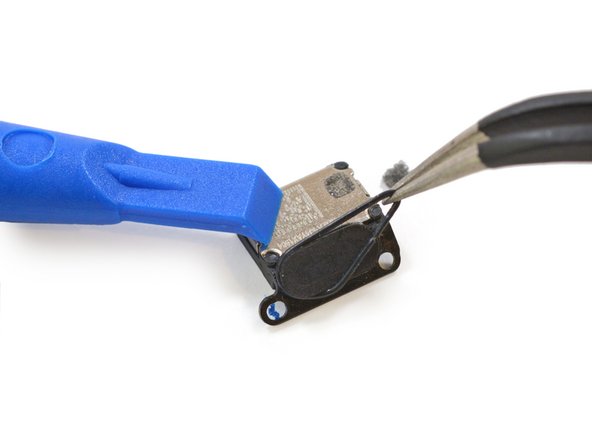
Apple has been bragging about the Watch's IPX7 water-resistance rating. Those handy gaskets do their job, but keep in mind that quick temperature shifts can make metal expand or contract, which might mess with those seals. Stay savvy and keep your device safe!
- The speaker features a tiny O-ring that helps keep water out—this little guy is all about that splash protection.
- For the tech specs crowd: IPX7 means your Apple Watch can chill under a meter of water for up to half an hour.
- But before you try turning your watch into a mini submarine, Apple suggests sticking to workouts, rain, and hand washing—full-on swim meets aren’t on the menu.
Step 16

This little chip is likely running the show for the Apple Watch’s Wi-Fi and Bluetooth connections. Some recent patents from Apple hint that the antenna setup might even be tucked right into the case itself.
- Let's gently pull out the antenna assembly, which is cleverly hidden away in the nooks and crannies of the case.
Step 17


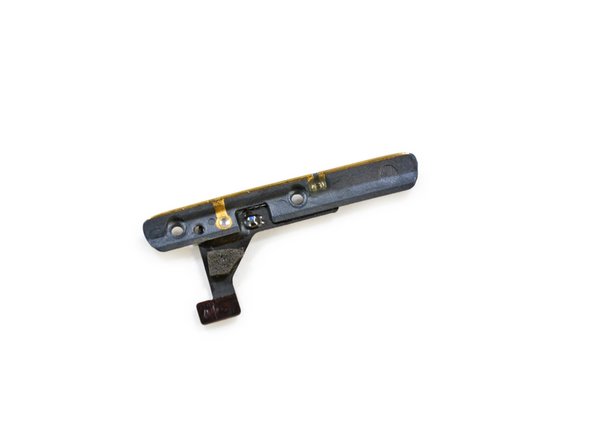
- Check out this tiny phone button - it's like a miniature version of the ones you'd find on a full-sized iPhone! You'll notice it's connected to a button cable with a mechanical button.
- The small button even has its own miniature button cover and gasket, because attention to detail matters, even in the tiny things.
Step 18


We know there’s a simpler way to get to the door without taking apart the entire watch, but alas, Apple keeps its tricks close to the chest!
- Start by removing two tiny tri-point screws that secure a small panel to the watch case. Don’t blink, or you might miss them.
- Lift away the panel to reveal some mysterious contacts, perfectly matched up with the secretive diagnostic port hiding underneath.
- Carefully unplug the small connector—no need to get zapped by surprise.
- If that diagnostic port door still won’t budge, gently push it out from the inside using the small holes in the case. Sometimes, it just needs a little nudge.
Step 19


- Take out the Digital Crown bracket—this is the last thing standing between you and the mighty S1 SiP.
- Now, gently lift the S1 out of its home. You're basically holding the future in your hands.
- The back of the S1 isn’t exactly winning any beauty contests. Ribbon cables are heading off in every direction, and there’s a fair bit of sticky adhesive holding it down. Things might get a little messy.
- Get ready for a dramatic reveal—the S1 rises from the case like a tech monolith.
Step 20


- Yanking out this bundle of chaos is definitely a one-way street—expect to break some soldered connections along the way. But hey, that’s how we finally get a peek at the S1!
- Our curiosity is met with a bit of a letdown: what looks like a shiny S1 cap is actually a solid chunk of resin, keeping all the goodies hidden out of sight.
- By the way: Chipworks confirmed this tiny chip is the STMicroelectronics C451, which packs both a gyroscope and an accelerometer.
- So, if you were dreaming of easy upgrades, this step makes it clear—that’s not really in the cards. Prying out the S1 is no walk in the park.
Step 21


- Once the S1 is out of the way, let's take a trip back to the display panel and hunt down a solitary chip.
- Gently use your tweezers to lift out what looks like the ambient light sensor—handle with care, it's a delicate little piece.
- Here's the Analog Devices AD7166, a snazzy ARM Cortex M3-based touchscreen controller.
Industry insiders have guessed that LG is the supplier behind the Apple Watch's Retina display, and our best bet is that it features a Plastic AMOLED screen made by LG. We're also pretty sure that one of the new sensors is a solar cell ambient light sensor, which lets it sit behind the display instead of sticking out on the surface like most phones and tablets. If you're curious about these details or need a hand with any repair, you can always schedule a repair.
Step 22


With every dongle, dock and disco light Apple sells, we keep asking: will there ever be an Apple Watch trade-up program? Getting the guts out is like removing glitter from carpet—doable, but not a five-minute Genius Bar visit. Maybe one day Apple will let us mail it in for a heart transplant.
Rotary encoders are the DJs of the circuit world: they spin, translate the groove (shaft angle) into sweet digital beats your gadget can jam to, and never drop the signal.
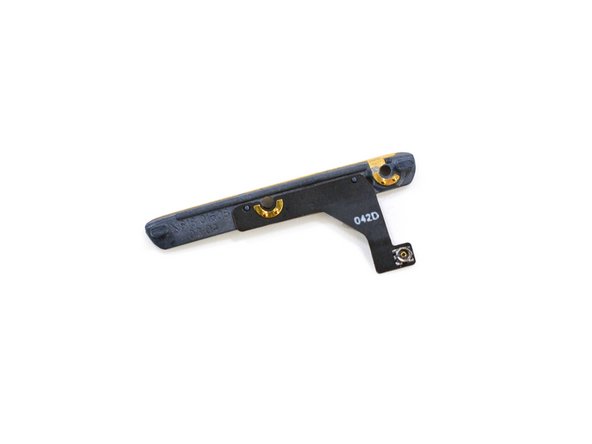
- The Digital Crown uses an encoder—think of it like the spinny magic behind a Nest Thermostat—to track your twists and turns.
- This encoder is teamed up with the button cable, which also includes the main push button and the diagnostic port connectors.
Step 23


Our best guesses point toward FDA regulations as the main factor here.
- At the bottom of the barrel watch case, we uncover the pulse-racing sensor action. And the lenses too, of course.
- Apple's heart rate monitor is actually a plethysmograph — it works like a pulse oximeter, but Apple doesn't claim it can measure your blood oxygen level. Why? Your guess is as good as ours.
- Inside the case, we also spot a magnet, designed to help the watch dock onto its inductive charger. Cool, right?
- We also find a coil of wire resting in the composite cover. We're guessing this is the inductive charging coil, just chilling in there.
- Update: Chipworks has identified the Texas Instruments OPA2376 Precision Op Amp as part of the sensor package. It's got low noise and low quiescent current. Fancy!
Step 24


- Hold on tight! We're not finished just yet.
- Apple's inductive charger is quite the sensation, and we're always eager to explore their latest adapters.
- Formally known as the Apple Watch Magnetic Charging Cable, it boasts a cradle that's 6.7 mm thick and has a diameter of 28 mm.
- After applying some heat, we attempt to pry it open, but end up tearing the back case of the mag-safe-ish charger.
- And guess what? It's packed to the brim with glue!
Step 25


It seems like Apple is taking a backseat in the battle for wireless charging standards. There are whispers that they might be cooking up their own unique approach to inductive charging. Recent patents from Apple hint at a combined NFC and inductive charging coil, adding some fuel to the speculation fire!
- Carefully cut away the housing to expose the little glue cake with its magnetic center. Once you've peeled back the weight, you'll notice some markings—nothing too crazy, just what’s there. Keep going steadily, and if you hit a snag, remember you can always schedule a repair with Salvation Repair to help out.
Step 26


- Salvation Repair gives the Apple Watch a repairability score of 5 out of 10 - it's not the easiest, but we've got you covered!
- The watch band is a breeze to remove and swap out for a new one, so that's the first hurdle cleared.
- Removing the screen is a bit of a challenge, but don't worry, it's doable - and it's the first component to come out, making replacement a whole lot simpler.
- Once you're inside, the battery is relatively easy to remove - just be gentle, as it's held in place by some mild adhesive.
- Those tiny tri-point screws might be a bit of a pain, but they're not a deal-breaker - just be patient and you'll be golden. We wish they'd used Torx or Phillips, but that's just the way it is!
- Unfortunately, removing any other component is pretty much impossible - all the peripheral cables are soldered onto the back of the S1, so it's not looking good for DIY repairs.
- The fully encased S1 system makes board-level repairs a no-go, sadly. If you're not feeling confident, don't worry - you can always schedule a repair and let the pros handle it.
Step 27


- Hold onto your gadgets, folks! For a limited time, check out one teardown and snag another one on us—yes, completely free!
- Say hello to the real deal: the Stainless Steel Apple Watch.
- Fun fact: the standard Apple Watch comes in a totally different box compared to the Watch Sport. This clever design helps fit those funky bands that just can't lay flat like the Sport Band.
Step 28


That's a wrap for now! There are still some puzzles left to solve, so stay tuned for more updates. If you hit a snag or want us to take a look, you can always schedule a repair.
- With our trusty pick technique dialed in, we lift the lid on the Apple Watch Stainless Steel.
- Inside, it’s the usual suspects: familiar clips and connectors waiting for us.
- Not a ton has shifted, but check out that beefed-up mounting bracket for the Digital Crown and those gold tri-point screws at the bottom.
- Want to see what’s hiding beneath the surface? Take a peek at our X-ray Teardown!


