Archos 5 Headphone Jack Repair
Duration: 45 minutes
Steps: 7 Steps
Get ready to tackle that pesky loose headphone jack on your Archos 5 tablet! This repair might take a little time, but don’t fret—you’ve got this! Just follow along and take it step by step, and soon enough, you’ll be back to your favorite tunes and podcasts. If you find yourself in a jam, just remember you can always schedule a repair!
Step 1

Make sure your gadget is taking a little nap, aka powered off, before diving into any repairs. It’s all about keeping things safe and sound!
Heads up! Keep in mind that following these steps could potentially void the warranty on your Archos 5. If you’re feeling unsure, don’t hesitate to schedule a repair for expert help.
Step 2


Time to get access to that fourth screw – simply lift the stand and you’re in business!
– Grab that trusty plastic opening tool and lift off the 3 black sticky pads hiding those screws. It’s like a mini treasure hunt!
– Now, take your PH000 screwdriver and carefully remove the screws tucked away underneath those pads. One of them is sneaky and hangs out under the stand, so keep an eye out!
Step 3


Watch out for that delicate foil connecting the LCD screen to the motherboard—let’s keep it intact and happy!
– Gently pop open all four corners of the Archos 5 with your trusty plastic opening tool. Think of it like giving your device a little hug!
– Once you’ve got all sides unsealed, carefully open up the device. It’s like revealing a surprise inside—just be gentle!
Step 4


Go for a plastic spudger instead of a metal one! Trust me, your device will thank you for it.
– Now that you’ve opened up your device, gently fold the screen back away from the battery. Take your time—there’s no rush!
– Next, unplug the touchpad from the motherboard. To do this, apply a bit of pressure to the thin black piece at the bottom of the metallic foil. Use your plastic spudger to gently press against it, and it should release with ease.
Step 5

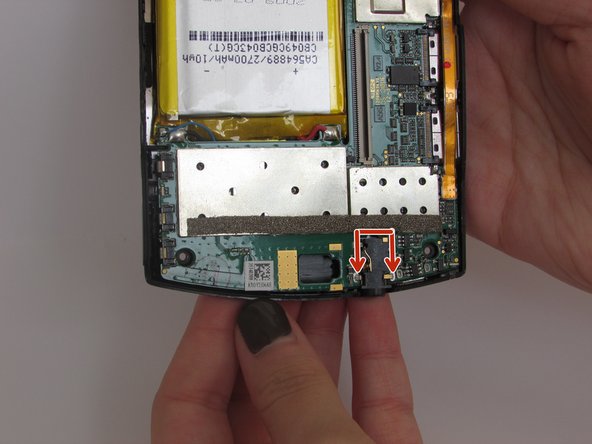
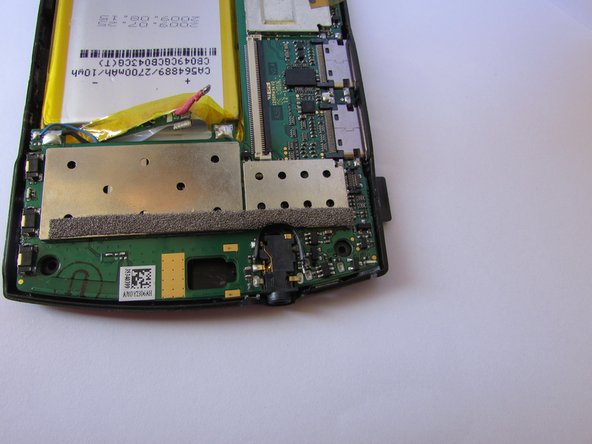
The headphone jack looks like a small black rectangle. It’s a simple, straightforward shape—nothing too fancy, just a solid, functional piece of tech.
– Alright, first things first—unplug that screen like a pro! Next up, your mission is to find the headphone jack. If you’re peeking at the right side of your device, it’s hanging out in the mid-upper corner, just waiting for you to give it some attention (check out the red box for a visual cue!).
Step 6

Make sure the wire wraps around the connector; otherwise, your device won’t close just right. You’ve got this!
– Snip off a piece of electrical wire that’s long enough to reach the ground connectors on both sides of the headphone jack. It’s a little wire adventure, just the right length to get the job done!
Step 7

Don’t dawdle while you’re soldering – take too long and your device might not be quite so happy!
Not a soldering pro yet? No worries—check out this cool guide to get you started! How To Solder.
– You’re almost done! To put everything back together, just follow these steps in reverse. Easy peasy!
– If you need help or have any questions, you can always schedule a repair with Salvation Repair.
Tools Used

Success!