Asus A53S Fan Assembly Replacement Guide DIY Tutorial
Duration: 45 minutes
Steps: 19 Steps
Hey there! Just a friendly reminder to take your time and double-check everything as you go. If you hit a snag or need a hand, don’t hesitate to schedule a repair. You’ve got this!
Welcome to your go-to guide for tackling the ASUS A53S fan replacement! We’ll walk you through each step with clear instructions and handy pictures to make the process a breeze. The fan is a superstar in your computer, keeping vital parts like the CPU nice and cool. If the fan starts acting up, it could lead to some serious overheating drama for your PC. Ready to dive in? If you need help, you can always schedule a repair.
Step 1


Go ahead and power down your device and pop out that battery. Let’s kick off this repair party in style!
– Alright, let’s flip that laptop over so we can get a good look at its underbelly!
– Grab your trusty Phillips #01 screwdriver and unscrew those two 6 mm screws like a pro.


Step 3


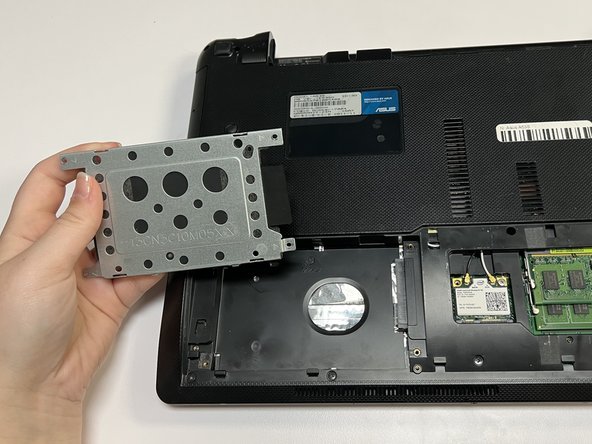
– Give that hard drive a little nudge to the left and slide it right out of there!
Step 4


– Grab your trusty Phillips #01 screwdriver and get ready to tackle those fifteen 6 mm screws. It’s time to unscrew your way to success!

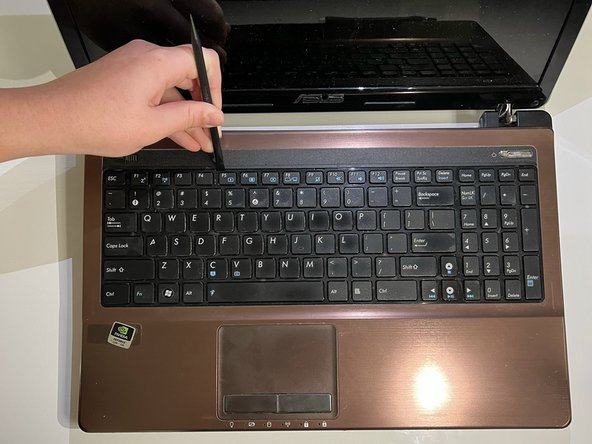

Step 7
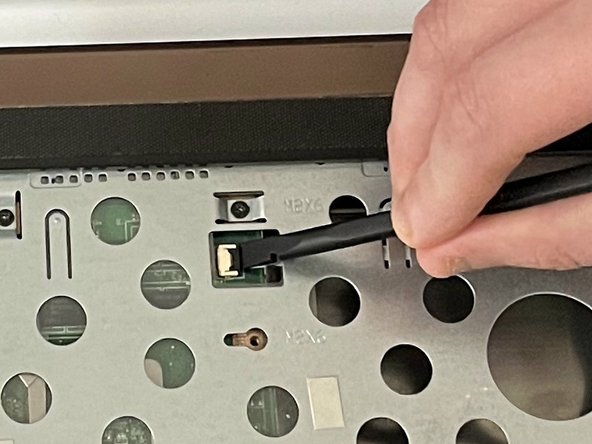

– Grab your trusty spudger and slide the flat end under the black lock bar that’s keeping the power switch in check. Give it a gentle push up and to the left to free that power switch like a pro!
– Now, let’s use that same spudger magic on the touchpad to disconnect it. You’ve got this!
Tools Used
Step 8

– Grab your trusty Phillips #01 screwdriver and get ready to tackle those seven 6 mm screws. Unscrew them with confidence!
Step 9

– Carefully wiggle out the optical drive, giving it the gentle nudge it needs to make its grand exit.
Step 10

– Alright, let’s flip that laptop over so it’s showing off its bottom side!
– Grab your trusty Phillips #01 screwdriver and get ready to tackle those three 6 mm screws like a pro.
Step 11
– Flip your laptop back over so it’s ready to be opened up.
– Carefully pry the cover away from the laptop using an opening tool to slip between the cover and the bottom part of the laptop.
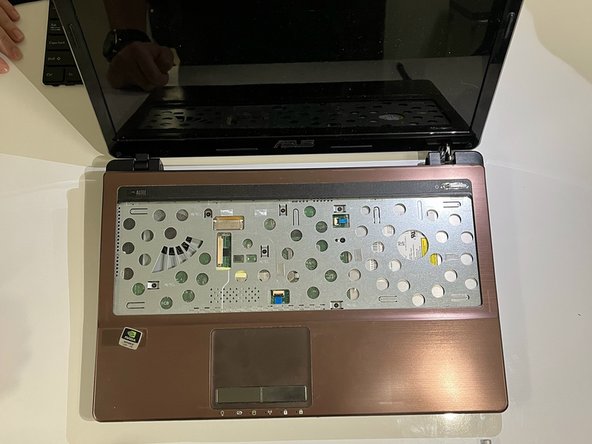
Step 12

– Peel off that yellow tape like it’s the last slice of pizza!
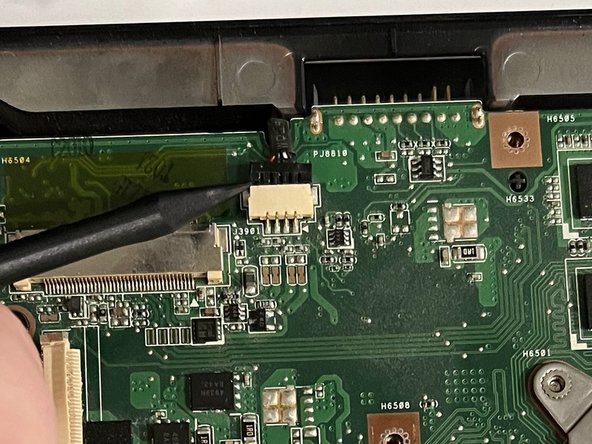
Step 13

– Grab your trusty spudger and gently lift the ZIF connector lock bar. This will disconnect the USB board from the motherboard, making way for your repair adventure!
Tools Used


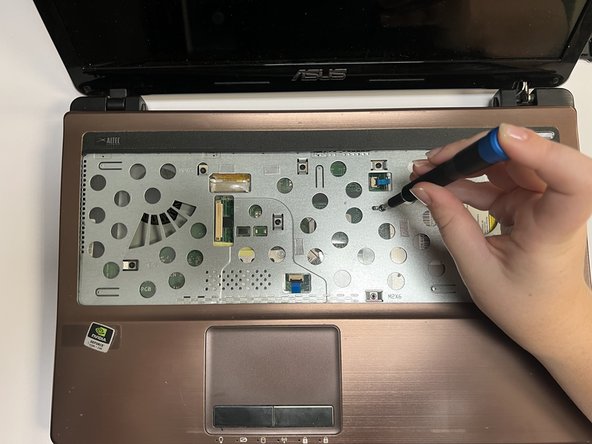
Step 16

Look for the tiny white arrows pointing to all the screws. They’re your trusty guides on this repair adventure!
– Grab your trusty Phillips #01 screwdriver and tackle the five 6 mm screws waiting for a break!
– Time to put that Phillips #01 screwdriver to work again on those 5 mm screws. You got this!
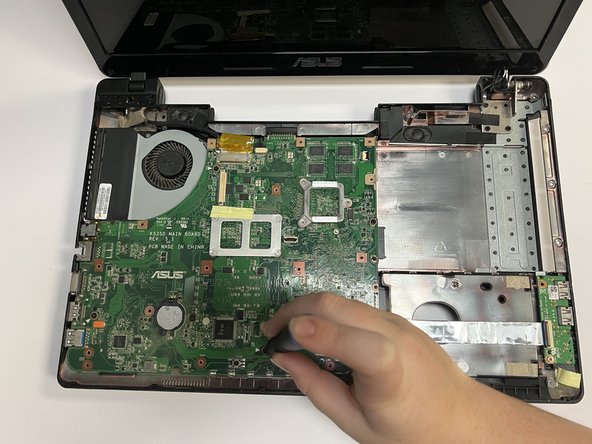
Step 17

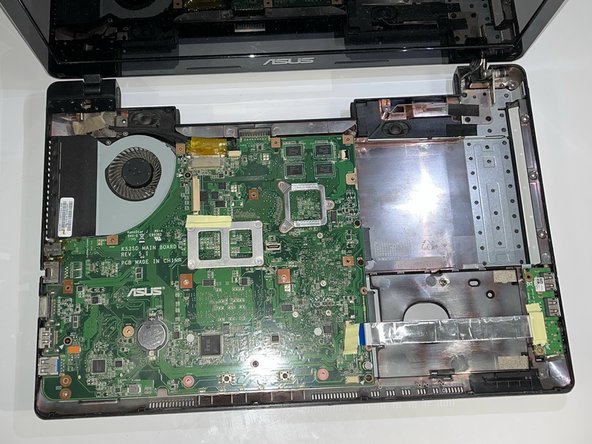
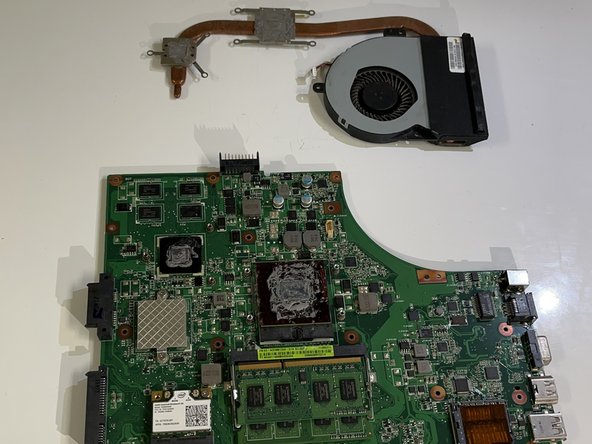
– Carefully lift the motherboard out of the laptop shell, like you’re unveiling a surprise gift!
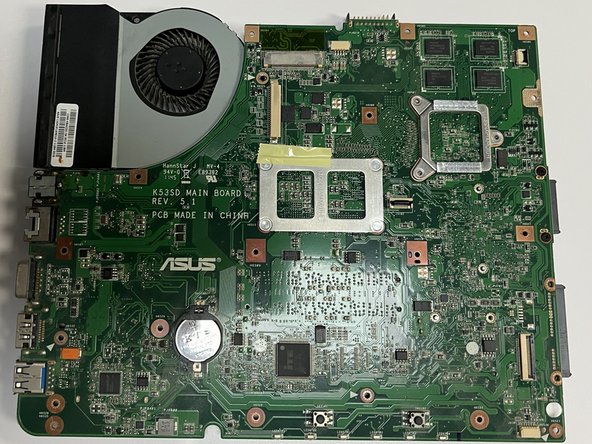
Step 18

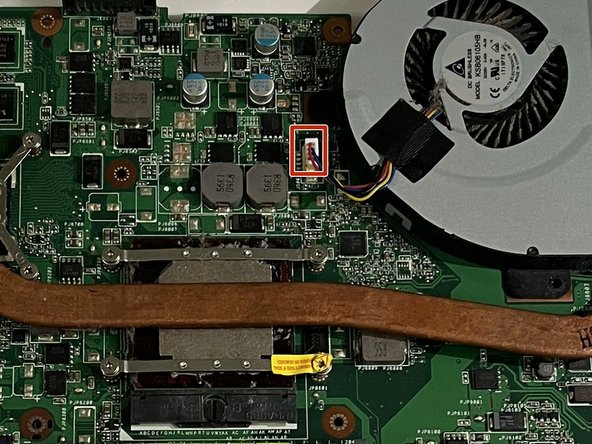
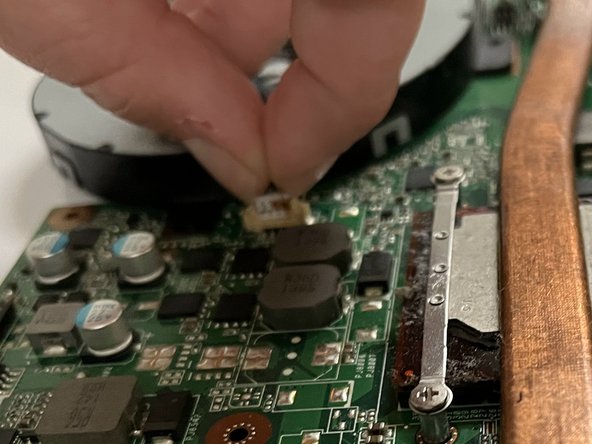
– Turn the motherboard over so the fan and heat sink are looking up at you, ready for action!
– Gently pinch the top part of the connector and pull it upwards, giving it a little wiggle side to side to free the fan. You’ve got this!
Step 19
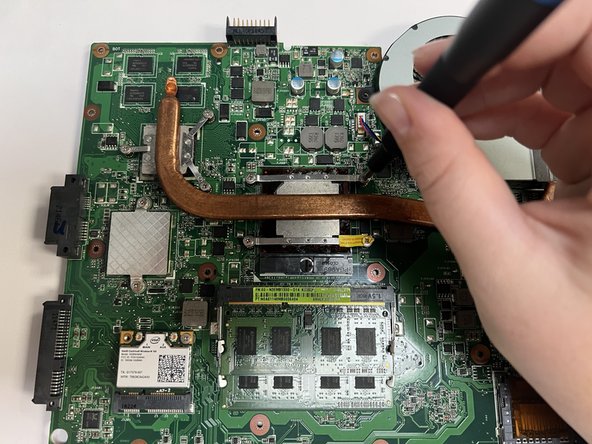

– Grab your trusty Phillips #01 screwdriver and tackle those seven 5 mm screws with gusto!
– It’s time to bid farewell to the fan assembly and show it the way out.


