Asus F6A-X2 Speaker Replacement Guide DIY Tutorial
Duration: 45 minutes
Steps: 23 Steps
Hey there! Just a friendly reminder to take your time and double-check everything as you go. If you hit a snag or need a hand, don’t hesitate to schedule a repair. You’ve got this!
Your laptop’s speakers are the life of the party, bringing tunes and sounds to your fingertips! When you’re swapping them out, just make sure you’ve got speakers that play nicely with your laptop. And hey, while you’re at it, keep that motherboard as dust-free as possible—no one likes a dirty party crasher!
Step 1

Before you dive into the guts of your laptop, make sure to unplug any power cords and power it down. Working on your device while it’s still powered up could lead to some shocking surprises—both for you and your laptop. Let’s keep it safe and sound!
The battery is playing hide and seek in this picture.
– Alright, let’s get this party started! Flip your laptop over and position it so the battery is grinning back at you.
– To set the battery free, place a finger on each of those two cheeky black slide tabs. Give them a gentle push toward the center of the laptop to unlock the magic.
– Now, slide that battery toward you like you’re pulling in a prize and lift it out of your laptop. Easy peasy!


Step 3


– Take a moment to find the slot between the laptop base and the hinge guard on the right side. Now, grab your trusty fingernail or the flat end of a spudger. Gently slide it in there and give the guard a little tug towards you until it pops off like a champ!
– Now, let’s do the same for the other guard. You got this!
Tools Used

Step 4

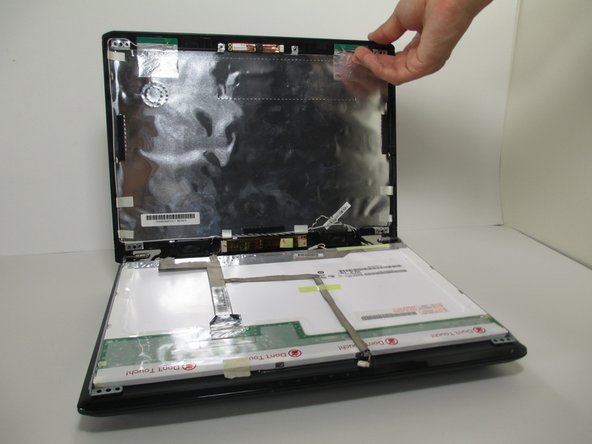
– After you’ve successfully peeled off the hinge guards, it’s time to lay your laptop down flat on its back. Now, gently lift that screen up as if you’re ready to dive into some serious work!
– Grab your trusty tweezers and carefully remove those six rubber cushions that are snugly sitting around the screen’s bezel. They’re just waiting to be set free!
Tools Used

Step 5


– Unscrew the six 2.0 mm Phillips #1 screws that are hanging out around the edge of the bezel. You’ve got this!
Step 6

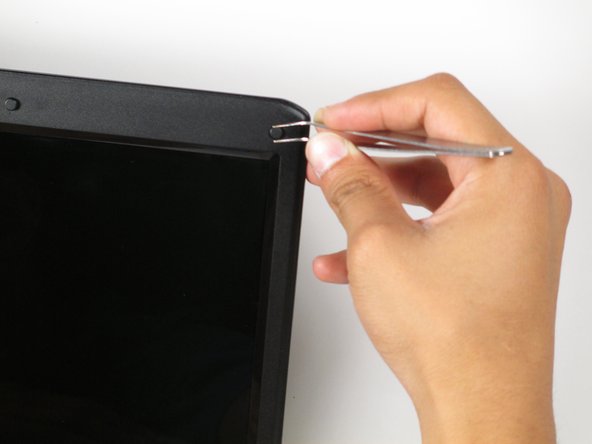
It’s totally normal to hear a little crackle! Don’t worry, the bezel is just fine through all this.
– Slide a fingernail or the flat edge of a spudger into the gap between the bezel and the back cover of your laptop.
– Gently wiggle and pull the bezel towards you to free it from the back panel.
– Keep prying around the edges of the laptop until you’ve successfully popped off the entire bezel.
Tools Used
Step 7


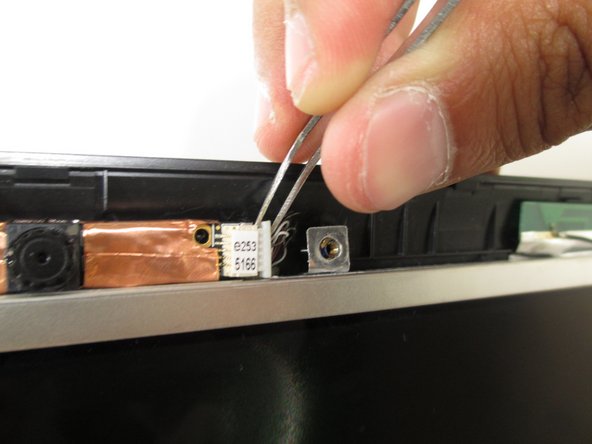
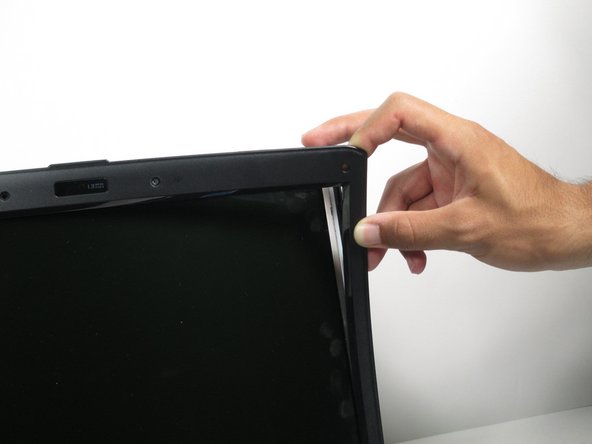
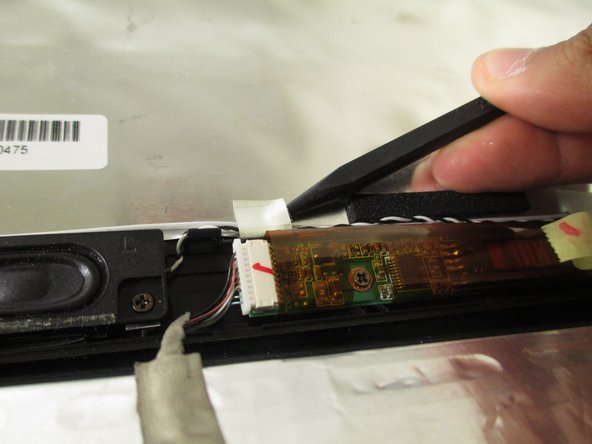
– Using a trusty pair of tweezers, gently grasp the white connector at the bottom of the screen. With a careful yet confident tug, slide the connector to the right to disconnect it.
– Now, let’s give some love to the white connector connected to the webcam above the screen. Just repeat the same smooth motion to detach it.
Tools Used
Step 8

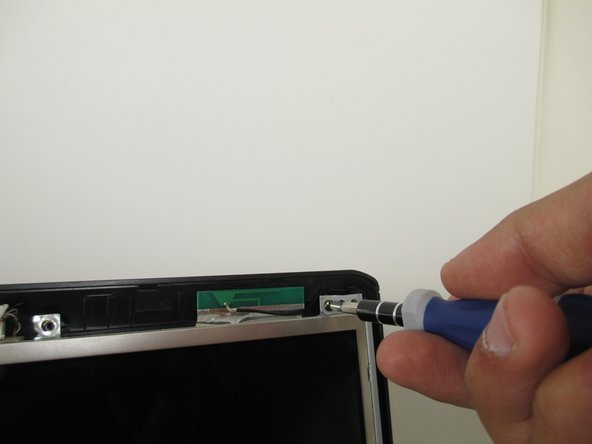
– Let’s kick things off by unscrewing those four 2.0 mm Phillips #1 screws nestled in each corner of the laptop screen. You’ve got this!
– When it’s time to put the screen back together, just remember to pop those 2.0 mm screws into the holes that are closest to the center of the laptop. Easy peasy!

Step 10


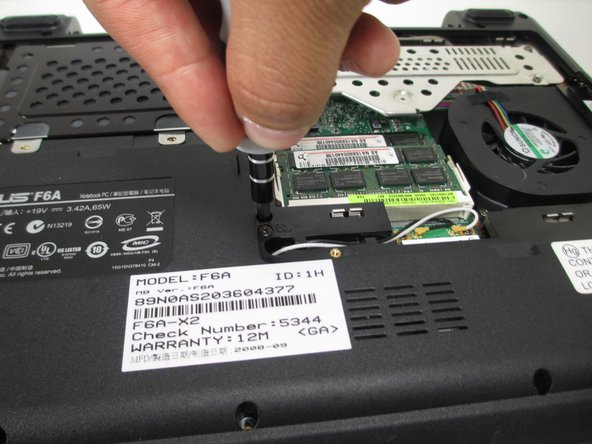
– Alright, let’s flip that laptop over! With the back facing you, give it a little twist so the battery pack is pointing away from your fabulous self.
– Time to unleash your inner tech wizard! Grab your trusty Phillips #1 screwdriver and remove those six 1.5 mm screws on the back panel. You’ve got this!
Step 11


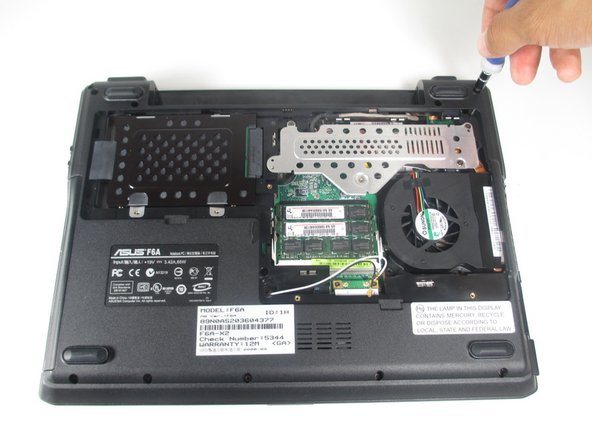
– Slide a finger into one of the nifty slots on the bottom panel.
– Gently lift it upwards, and voilà! The back panel of your laptop will pop off like a champ.
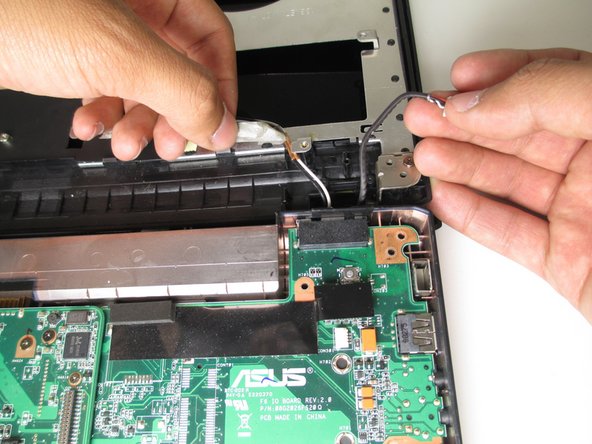
Step 12

There’s a sneaky little screw hiding behind a black wire that stretches across the top of your laptop. Just gently nudge that wire to the right, and you’ll be all set to free the screw!
– Let’s get started by removing the four screws that are keeping the base snugly attached to the motherboard:
– First up, there’s one 1.5 mm Phillips #1 screw hanging out near the center of the laptop.
– Next, you’ll find another 1.5 mm Phillips #1 screw at the top center, right next to the metal guard.
– And don’t forget the dynamic duo of 1.5 mm Phillips #1 screws located right by the fan.
Step 13

This will create some wiggle room when you’re taking the base off the motherboard.
– First up, let’s tackle those cables! Use your trusty tweezers to carefully detach the white and black cables from the graphics card. Just grab the gold node on each wire and give a gentle tug – they should pop right out of their sockets like magic!
– Quick reminder: the black wire loves hanging out at position 1, while the white wire prefers spot 2 on the graphics card. Keep that in mind as we move along!
– Oh, and don’t forget about that little hole on the motherboard! When you’re putting everything back together, make sure the black and white wires make their way through it. It’s like their secret passage!
Tools Used
Step 14

Look for the two screws nestled inside the big circles at the top corners of your laptop. You’ve got this!
– Time to get your screwdriver ready! Unscrew those eleven 1.5 mm Phillips #1 screws that are hanging out around the edge of your laptop. Let’s make some progress!
Step 15

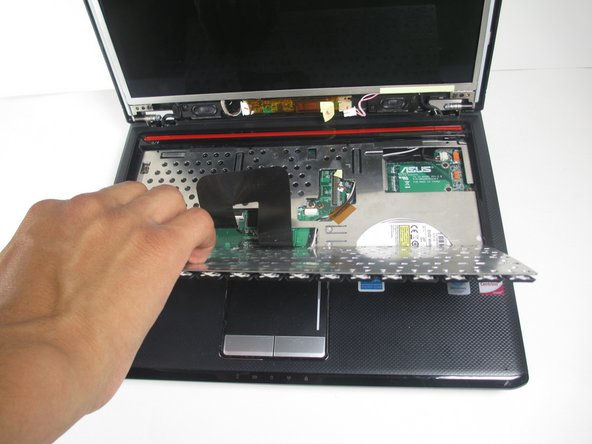
As you dive into this step, it’s time to gently detach the keyboard. Remember, it’s connected to the laptop by a delicate black ribbon, so take your time! Yanking it out too fast could lead to some unwanted ribbon drama. You’ve got this!
– Turn your laptop right side up and open it to uncover that lovely keyboard.
– With a finger or the flat end of a spudger, gently slide into the top left edge of the keyboard, right under the ‘Esc’ and ‘F1-F2’ keys.
– Carefully pull the keyboard towards you and lay it down flat. You might hear a little pop as it disconnects from the laptop, and that’s totally normal!
Tools Used
Step 16

Now that you’ve freed the ribbon, gently set the keyboard aside in a secure spot to keep it safe and sound.
– Ready to give that keyboard the boot? Let’s get it out of there! Start by carefully detaching the ribbon from your laptop.
– Grab your trusty tweezers and give that little white tab a gentle tug on both sides. With a bit of finesse, it will pop right out, freeing your computer from its keyboard companion!
Tools Used
Step 17
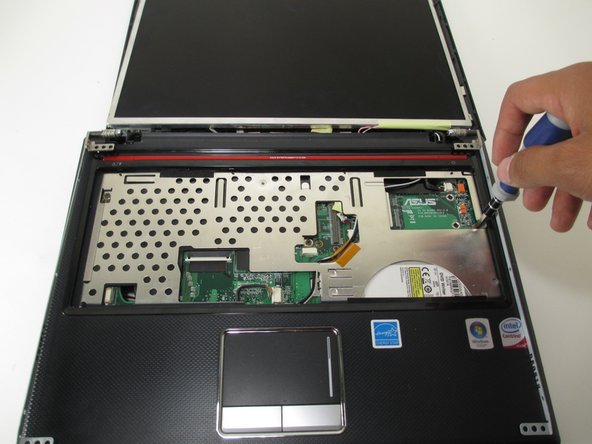

– Let’s kick things off by unscrewing those three 1.5 mm Phillips #1 screws from the metal guard of your laptop. Easy peasy!
– When you’re putting it all back together, just a quick heads-up: the screw on the far right is a bit longer than the other two. Keep that in mind!
Step 18
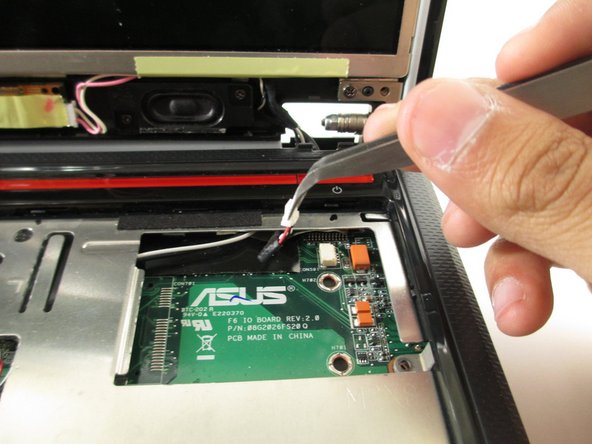

– Grab your trusty tweezers and gently detach those three white connectors from the motherboard. This will make it easier to get into the base without a hassle.
– For the connectors at the top right and the middle of the laptop, give them a little nudge to the left.
– Now, the connector nestled in between those two? It needs a gentle tug towards the back of the laptop.
Tools Used
Step 19

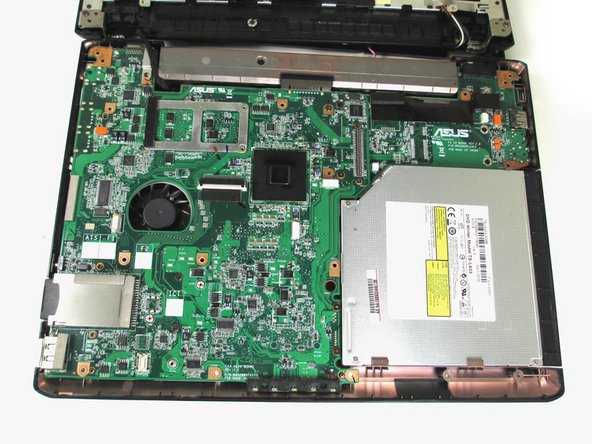
– Slide the flat end of your trusty spudger into the slim gap along the side of your laptop. Gently nudge it open around the edges to pop off the base like a pro.
– Once you’ve successfully separated the two halves, lay the top base flat against the back panel to unveil the circuit board. Time to see what’s inside!
Tools Used
Step 20

– Alright, let’s get started! Flip your laptop over so the bottom is resting on the table and the front is looking right at you. Now, gently lift just the back cover of the laptop to reveal what’s inside.
– Using the pointed end of your trusty spudger, carefully peel away the adhesive that’s holding those black and white cables snugly to the back panel. Take your time and make sure they’re completely free!
Tools Used
Step 21
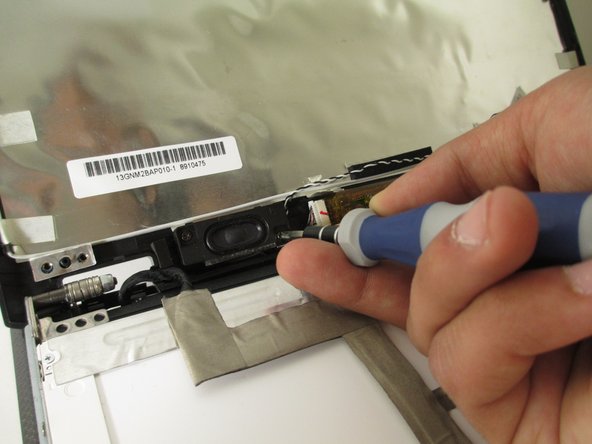
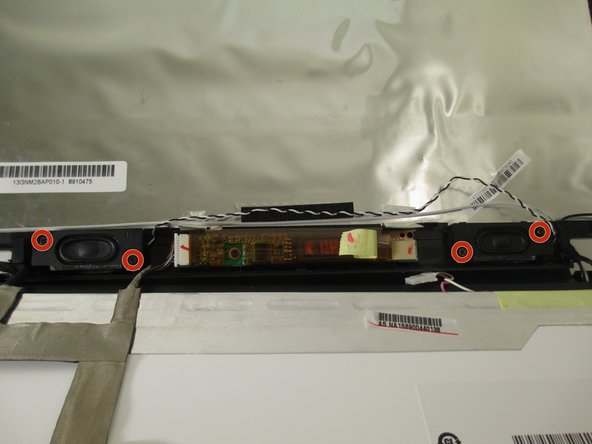
– Take off the two pairs of 1.5 mm Phillips #1 screws holding the speakers in place. You’re doing great!
Step 22

– Let’s get things started! Lay the top base gently on the back panel to reveal the circuit board.
– Now, let’s tackle that pesky adhesive at the bottom right of the base (you know, near the right hinge). Carefully peel away the right side to get it started.
– Next up, we need to disconnect that thick black cable connected to the speakers from the adhesive. Go ahead and remove it with care!
Step 23

– Using your fingers, gently reach behind the screen and locate the speakers. They look like two tiny, rectangular pieces of plastic with a little dip in the middle, just waiting for your attention.
– Carefully pull the speakers towards you, away from the laptop, to detach them. Just a heads up, there’s a black and white cable still connecting them, so you’ll be disconnecting that too. You’ve got this!