Asus K43SA DIY Thermal Compound Replacement Guide
Duration: 45 minutes
Steps: 26 Steps
Hey there! Just a friendly reminder to take your time and be careful while working on your device. If you run into any bumps along the way, don’t hesitate to reach out for help. You can always schedule a repair if you need a hand!
After years of loyal service, laptops can start to feel a bit hot under the collar and make some noise, primarily because of dust buildup and thermal paste that’s lost its mojo. Take a deep breath and tackle this task with care, as it’s easy to accidentally break something along the way. But don’t worry, it’s simpler than it sounds! Just remember to be patient! – First things first, unplug all power cables. – Slip on a grounded wrist strap or give a grounded metal object a good touch to keep static electricity at bay and protect that motherboard. – Keep your workspace tidy and avoid mixing up those pesky screws—they can be tricky! Reassembling takes longer if you do. Snap some photos while you take things apart if you think you might need a little memory jog later. This guide works wonders for the Asus K/A and X series (K43, K53, A43, A53, X43, X53). Just a heads up, opening up your laptop may void the warranty, so proceed with caution!
Step 1

Hey there! Just a friendly reminder to pop out that battery and back up your precious data before diving into the repair process. It’s like giving your device a little spa day!
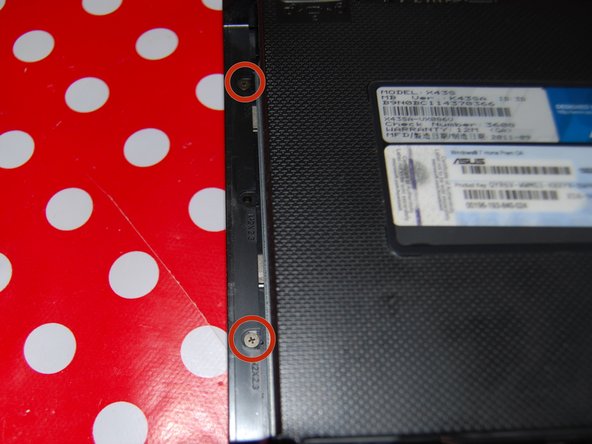
Step 2

– Unscrew those two Philips screws from the cover and let the adventure begin!
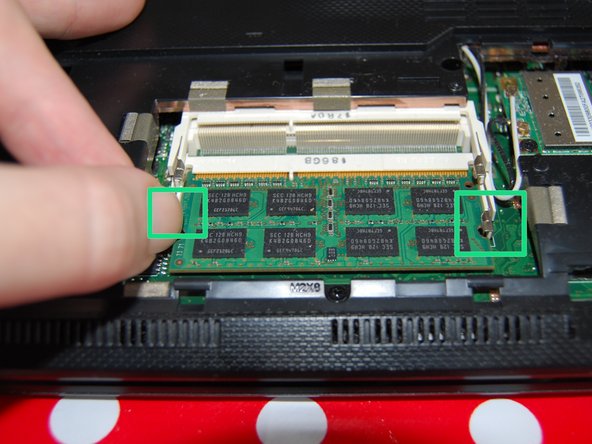
Step 3
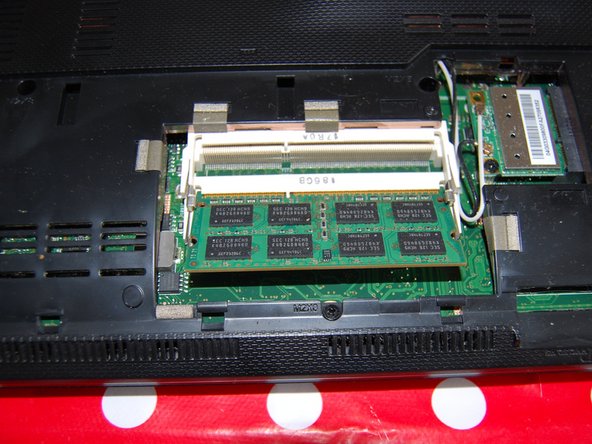

We’ve got a variety of components to explore here:
– Gently push the tabs on either side of the chip away from the RAM at the same time to release them. It’s like giving them a little nudge to say, ‘Time to go!’
– Wifi card
– Hard drive
– Ram memory
Step 4
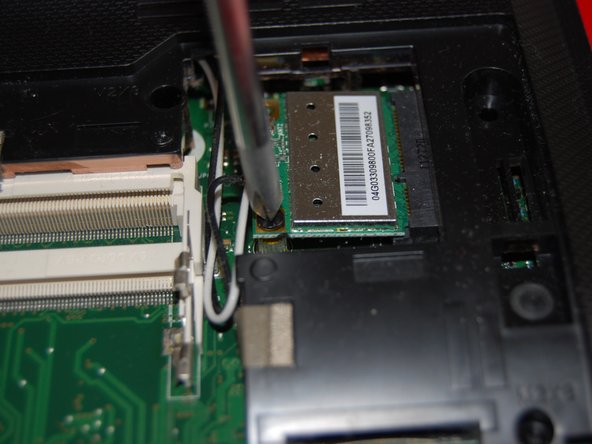
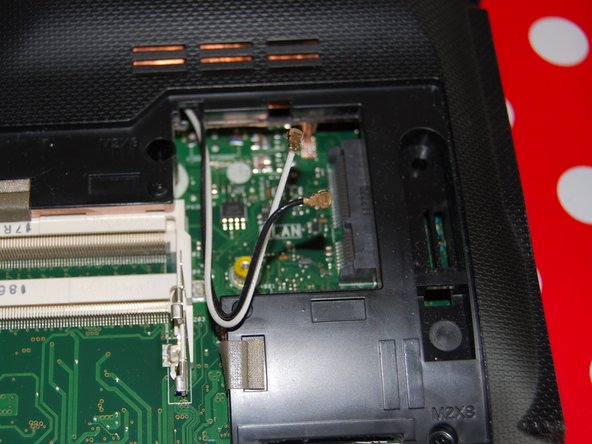

– Unscrew that lone screw holding the wireless card in place. It’s time for it to shine!
– Keep track of where those cables go. Just a heads up, the white cable likes to hang out on top of the Wi-Fi card.
Step 5


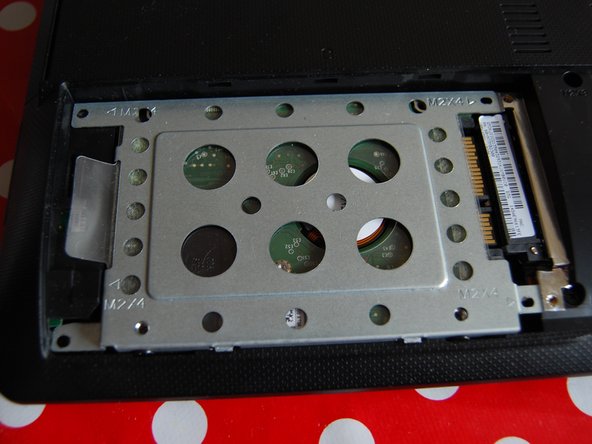
– Let’s kick things off by taking out those four screws holding the hard drive cage in place.
– Next up, slide that cage over to the left like you mean it.
– And voilà, time to lift out the hard drive and say hello to your next step!

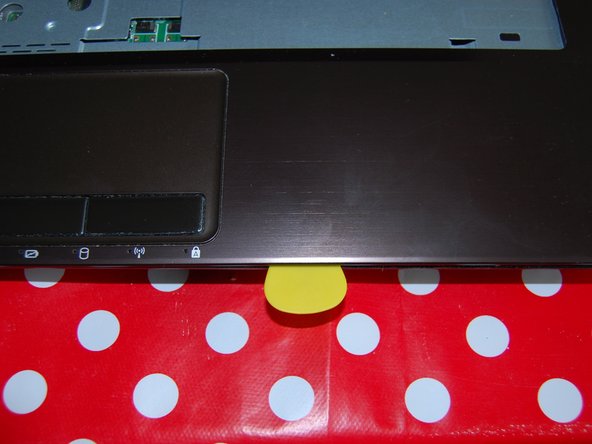
Step 7

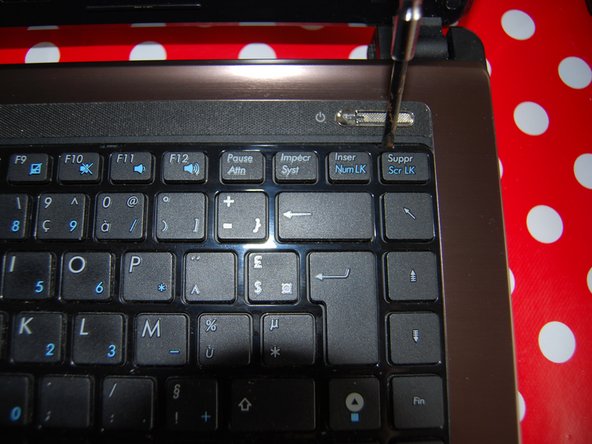
– Grab your trusty flathead screwdriver and gently nudge those clips to free the keyboard. You’ve got this!
– The keyboard is glued in place, so take your time and peel it away carefully.
– Just below the keyboard is its cable, waiting for you. Lift the top part of the keyboard gently to disconnect it.
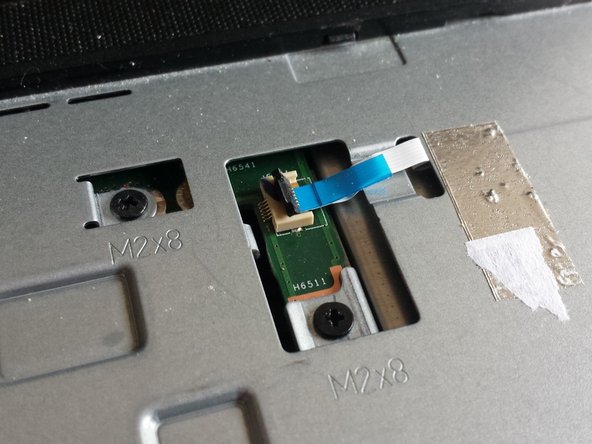
Step 8


– Alright, it’s time to gently detach the keyboard connector. Let’s make this smooth and easy!
– Using a pick, carefully nudge each side of the black part of the connector. No need to rush, take your time!
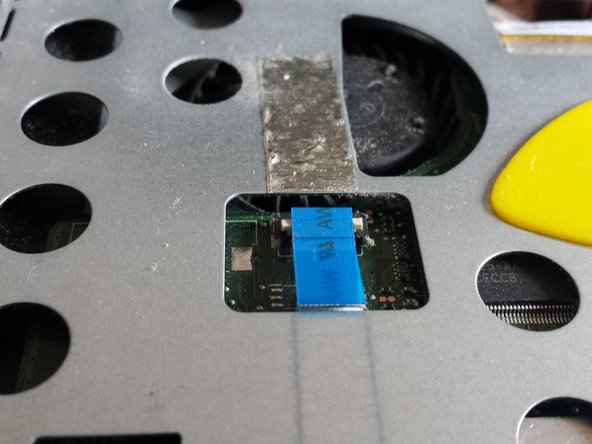
Step 9


Hey there! Just a quick heads-up when reconnecting those cables. Check out the second picture where you’ll spot a handy marker! Make sure the black line on the cable lines up perfectly with the white line on the motherboard. This little alignment trick means your cable is snugly fit into the connector—just the way we like it!
– Next up, let’s tackle the other two cables. It’s a bit of a twist here! Grab your trusty opening pick and gently lift the black part of the connector. Once that’s done, just give the cable a little tug to free it.
Step 10

– Just tackle that one the same way!
Step 11

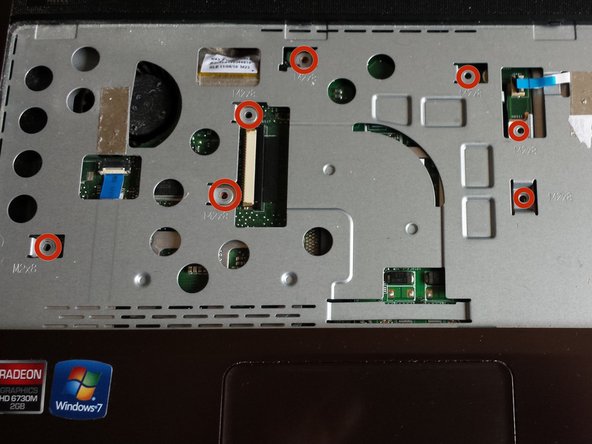
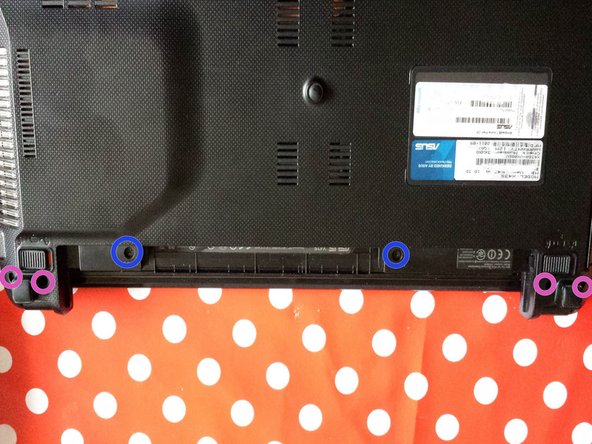
– Now, go ahead and take out all those pesky M2X8 screws! You’ve got this!
Step 12

– Time to say goodbye to that DVD/CD drive! It’s super easy to pop it out.
– Right beneath the DVD/CD drive, you’ll find two tiny screws waiting to be removed. Let’s get to it!
Step 13

– Time to say goodbye to that brown metallic cover! Grab a pick and gently slide it underneath. Don’t forget to work your way around the entire cover to lift it off smoothly.
– Great news! We’re now peeking at the motherboard.
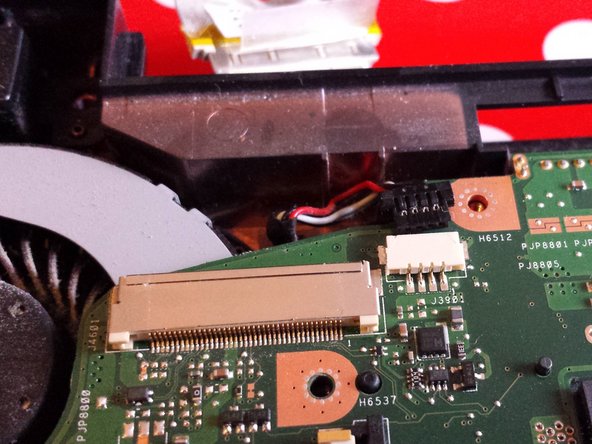
Step 14

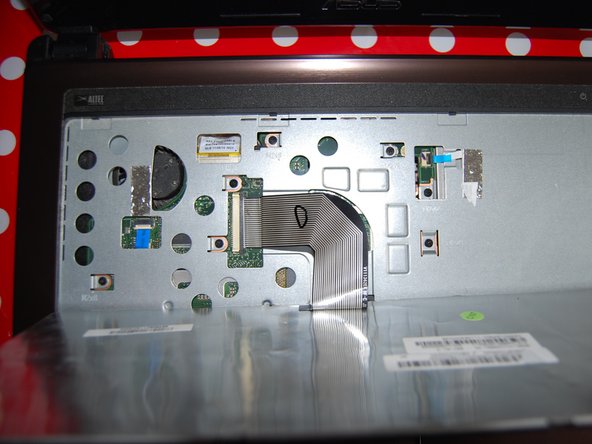
– Detach this cable just like you did in steps 9 and 10. You’re doing great!


Step 16
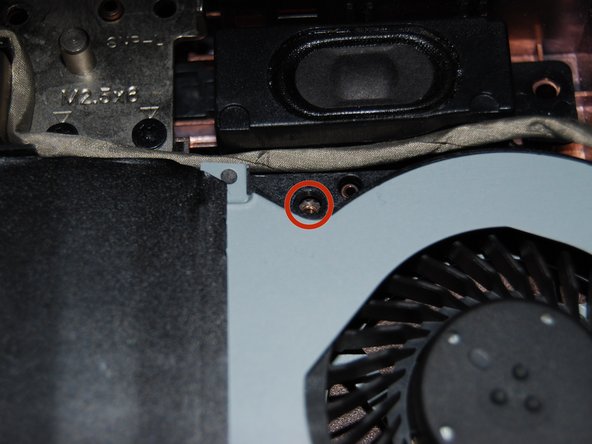

Keep an eye out for the little arrow pointing you right to the screw you need to take out!
– First things first, let’s get that motherboard free! Unscrew those two screws and you’re on your way.
– Now that the screws are out, you can gently lift the motherboard right out of the case. Easy peasy!
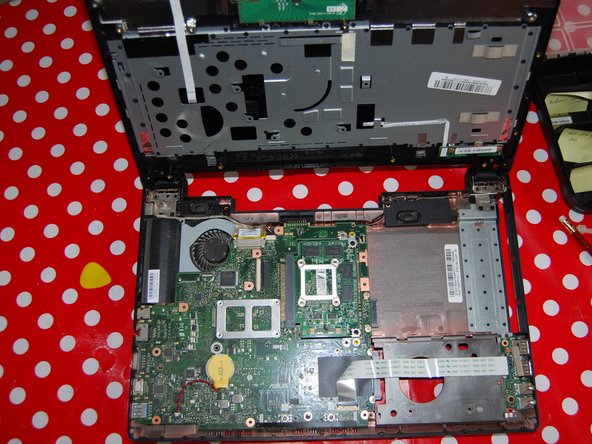
Step 17

There are two components in this section:
– Look at that! The motherboard is completely free now.
– Time to unplug the fan cable.
– Here’s the CPU.
– And now, the GPU.


Step 20
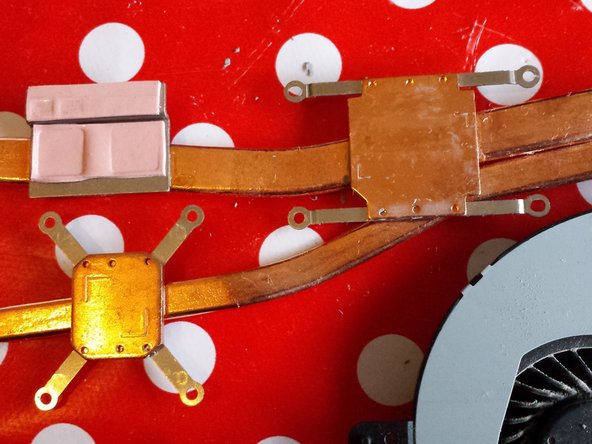

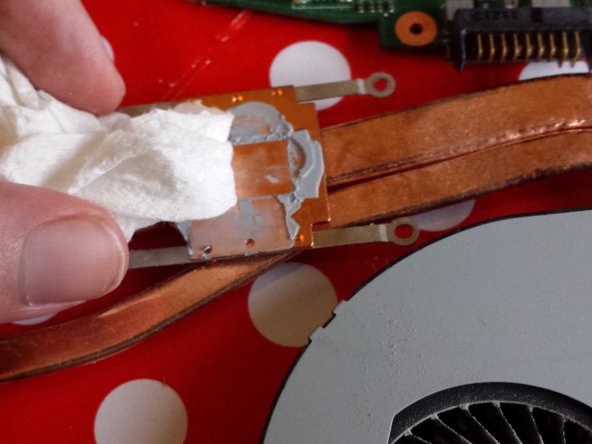
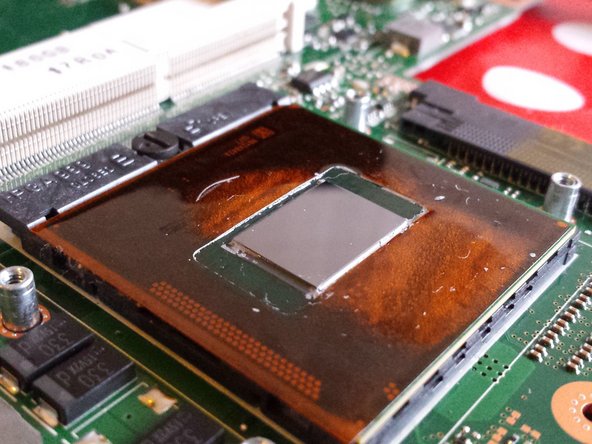
Once you take off the cooler from the motherboard, you’ll spot the old, crusty thermal paste just hanging out. Time for a refresh!
– Give both surfaces a good scrub with some alcohol and a paper towel to get them sparkling clean.
– Keep those pink thermal pads where they are; they’re doing a great job!
Step 21
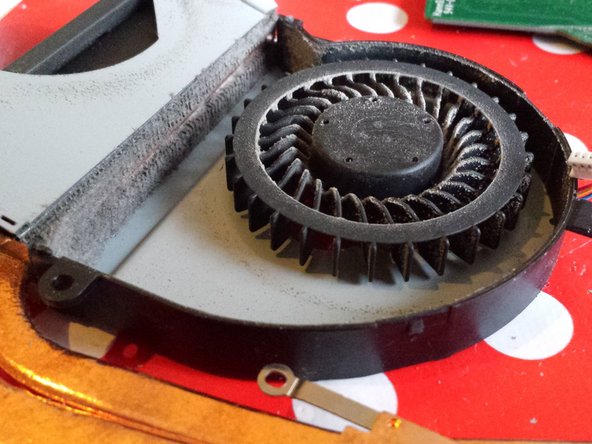

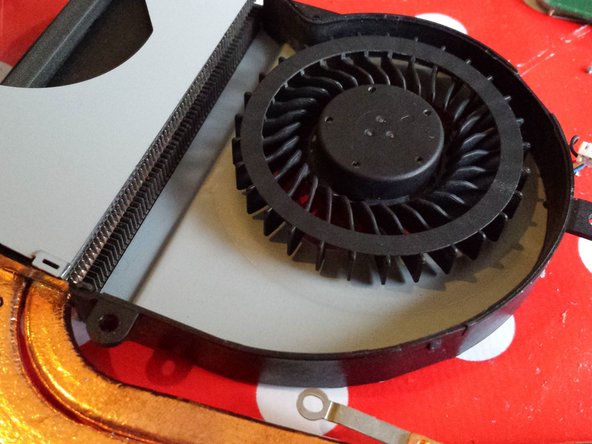
Whoa! Take a look at all that dust clinging to the cooler. It’s like a dust party in there!
This dust is a major player in the overheating game and is also the culprit behind that noisy laptop. Let’s give it some air!
– Let’s get that fan looking fresh! Grab your trusty vacuum and a brush to tidy everything up.
– Now, take a flathead screwdriver and gently unclip the gray part of the fan. Easy peasy!
Tools Used

Step 22

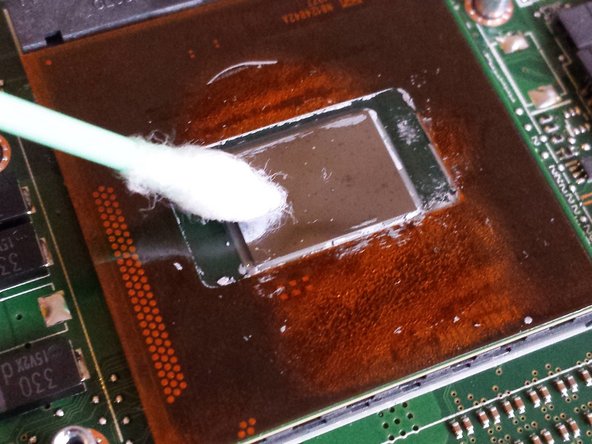
– Gently scrape away the old thermal paste from the CPU’s surface using a pick or a plastic opening tool. Think of it as giving your CPU a little spa treatment!
– Now, grab some alcohol, q-tips, and a paper towel to wipe away any stubborn remnants of that thermal paste. Make sure it’s spotless—your CPU deserves a clean slate!


Step 24

– Now’s the perfect moment to swap out that old paste for some fresh goodness! Grab yourself a high-quality paste to ensure your device stays cool as a cucumber.
Step 25

These are the handy usage instructions straight from Noctua.
– Drop a tiny dab (about the size of a marble, 4-5 mm in diameter) of thermal paste right in the center of the heat-spreader. You’ve got this!
Step 26


– Almost there! Time to give your CPU and GPU a little TLC. Gently wiggle the cooler in all directions to spread that thermal paste like butter on toast.
– Now, let’s secure the cooler with some screws.
– Remember to reconnect the fan cable so your machine can breathe easy.
– Put your laptop back together and… enjoy the peaceful hum of your newly refreshed computer!


