Asus MeMo Pad 10 ME102A Battery Replacement
Duration: 45 minutes
Steps: 6 Steps
Get ready to breathe new life into your Asus MeMo Pad 10 ME102A by replacing the battery. This step-by-step guide from Salvation Repair will walk you through the process, and if you need help along the way, you can always schedule a repair.
Step 1

When taking off the back panel, make sure to keep your device face down on a steady, flat surface—this way, you dodge any accidental drops, whether it’s the device itself or its internal bits!
– Gently slide the blue plastic opening tool into the groove between the back panel and the chassis. You’ve got this!
Step 2

– Gently slide that trusty plastic opener around the tablet. You might hit a few stubborn spots along the way. Just give them a little pop as you glide through the seam, and you’re on your way to success!
Step 3

– Once you’ve released all the clips, the back panel should now be easy to remove by hand, giving you access to the internal components.
Step 4


– Time to free that blue ribbon cable! It runs across the top of the battery near the left-hand speaker, connected at both ends to a white and black plug. To unplug it, grab a small plastic opening tool and gently lift the black tabs—like unlocking a tiny treasure chest. No force needed, just a careful nudge!
Step 5

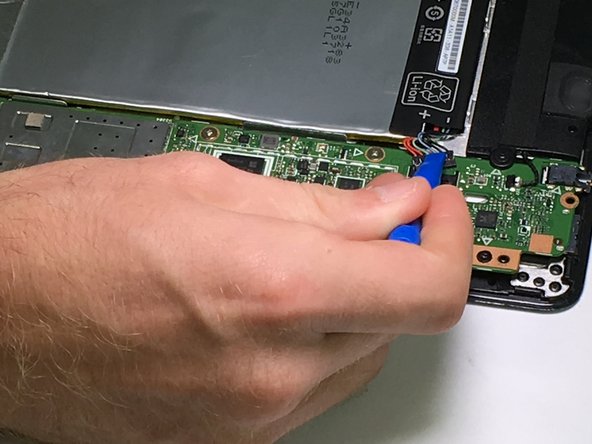
– Alright, time to set that battery cable free! It’s hanging out on the opposite side of the battery—spot it? Now, grab your trusty plastic opening tool and gently nudge the cable out of its socket on the motherboard. No yanking, no drama—just a smooth and steady push!
Step 6


A little bend is totally okay, but try not to go overboard with the battery bending.
Take it slow with the glue—it’s a patient game. A steady hand with the spudger will get the job done, but it may take a little time.
Your battery is hanging on for dear life with three glue strips: One is sneakily tucked under the blue ribbon cable, another is right in the middle of the battery, and the last one is lurking by the plug. Time to set them free!
– Time to get this battery out! Use your trusty nylon spudger to carefully slide under the battery along those 3 glue strips. Take your time and gently work the glue loose – it’s like persuading a stubborn sticker to let go. As you separate the glue, the battery will start to lift free, and before you know it, it’ll be outta there!
Tools Used

Success!