Asus MeMO Pad 7 ME170C Microphone Replacement
Duration: 45 minutes
Steps: 4 Steps
The microphone is where you make your voice heard – literally. It’s how you record voice memos, give commands to your device, or use voice-to-text functions. Think of it as the input for all your sound needs, while the speaker is the output. Now, let’s get started with the repair process.
Step 1


Before you start taking things apart, make sure to power down your device to avoid any unexpected surprises.
Be gentle, okay? We don’t want any accidental damage or cracked screens – that would be a bummer!
– Grab your Jimmy tool and gently slide it into the seam of your device. Nice and easy, no rush!
– Carefully work the Jimmy tool all around the seam, applying a little pressure here and there until the back panel pops off.
Tools Used

Step 2


– Alright, let’s get started! Find the black port on the motherboard and locate the white cable connector on the left side of your tablet. You’re almost there!
– Now, using the smallest opening tool, gently slide the white cable box out of the port in a smooth side-to-side motion. Move it all the way down towards the bottom of the device. Easy does it!
Step 3
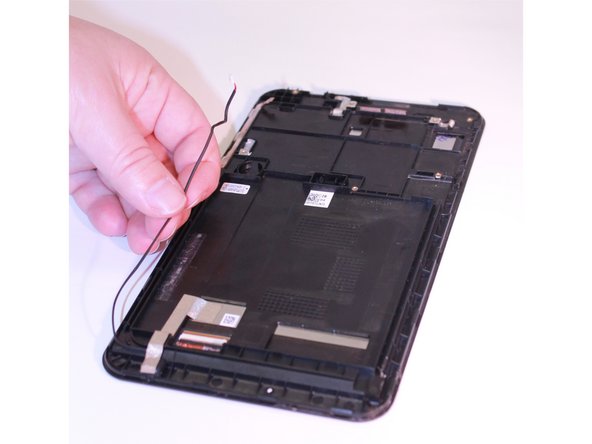

Just a heads-up: you should be able to gently tug that wire out of the panel without any hassle.
– Gently ease the wire out of its track. Take your time and keep it steady—no need to rush!
Step 4


Heads up: The end of the wire is connected to a little black box that’s taped up.
Just a friendly reminder: Once you peel off that tape, the black box will become a bit more relaxed!
– Grab your wide-nosed tweezers and gently lift the tape off the black box. Easy peasy!
– Now, carefully remove the component entirely from the device. You’ve got this!
Tools Used

Success!


