Asus MeMO Pad 7 ME170C Rear Facing Camera Replacement
Duration: 45 minutes
Steps: 14 Steps
Get ready to snap back to clarity. The rear-facing camera on your tablet is used to capture amazing photos from the back, but sometimes it can stop taking sharp pics and vids. Luckily, replacing it is a breeze – just remember to remove the motherboard first, and you’ll be golden. If you need help, you can always schedule a repair.
Step 1


Power down your gadget before you start taking it apart—let’s keep it chill and safe.
Handle with care! Too much muscle can leave you with a busted or cracked screen, and nobody wants that.
– Carefully use a Jimmy to pop the seam of the device all around, and just like that, the back panel will come off!
Tools Used

Step 2


– Grab an opening tool and glide it forward to coax the black bundle cable connector loose—easy does it! Just keep the tool moving straight ahead without pressing down on that connector.
Tools Used

Step 3


The battery should be sitting loose in its compartment, waiting to be freed.
– Grab your plastic opening tool and shimmy it around the edges of the battery like you’re unzipping a stubborn jacket.
– Gently lift the battery out of its snug spot—it’s like giving it a little pep talk before freedom!
Step 4


– Grab your trusty plastic opening tool and gently slide that white cable connector all the way out of the port. You’ve got this!
Step 5


– Lift that beige clip up to give the cable a little breather.
– Grab those wide-nosed tweezers and give the blue tab on the ribbon cable a gentle pinch.
– Now, with a steady hand, pull the blue tab to the side until it smoothly slides out of its spot.
Tools Used

Step 6


– Grab those wide-nosed tweezers and gently wiggle out that orange ribbon from the port on the motherboard. You’ve got this!
Tools Used
Step 7


– Gently push the white cable connector out of its port using a plastic opening tool, wiggling it from side to side until it comes free.
Step 8


Now it’s time to get screw-y. You should see two shiny silver screws and five sleek black screws.
– Grab your trusty Phillips #000 screwdriver and get ready to liberate these seven screws. Precision and patience are key—let’s unscrew them one by one!
Tools Used

Step 9


Once you’ve unscrewed everything, the speaker will be chillin’ loosely in the track, just waiting to be lifted out.
– Grab the metal spudger tool and carefully slide it under the edge of the speaker—you’re just lifting it gently, no superhero strength needed!
Tools Used

Step 10


– Let’s get started by carefully removing the silver tape from one corner using your trusty needle-nosed tweezers. Gently peel the tape away from the motherboard to begin the repair process.
Tools Used
Step 11


– Carefully grab those orange ribbon cables with your trusty needle-nosed tweezers and give them a gentle tug to pull them out of their cozy ports. You’re doing great!
Tools Used
Step 12


– Grab your trusty Phillips #000 screwdriver and get ready to set those screws free – all five of them need to come out, so let’s get unscrewing!
Tools Used
Step 13


– Carefully pry out the motherboard using the metal spudger tool—it’s like giving it a little nudge to free it from the device.
Tools Used
Step 14

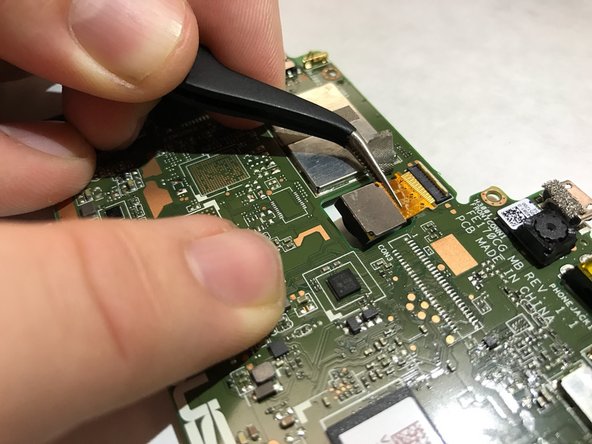
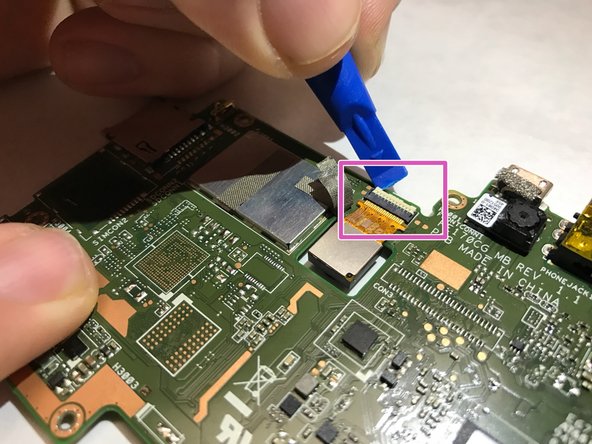
– With a gentle touch, peel away the grey tape that’s keeping the camera connector snug as a bug. Use your trusty tweezers for this delicate operation.
– Once the tape is off, grab your plastic prying tool and carefully unlock the connector that connects the camera wiring to the motherboard. Just a little twist upward, and it should pop right free!
– Now, it’s time to say goodbye to the camera! Using those tweezers again, lift the camera straight up from the motherboard. It should come out smoothly, like a well-rehearsed dance move!
Tools Used
Success!


