Asus MeMO Pad 8 ME181C Front Facing Camera Replacement
Duration: 45 minutes
Steps: 11 Steps
Step 1


– Slide a plastic opening tool into the gap between the back case and the screen—like a ninja sneaking into a fortress.
– Gently maneuver the plastic tool around the edges of your device to free the back case completely. You’re doing great!
Step 2


– Grab that trusty nylon spudger and gently lift up the retaining flap of the Zero Insertion Force (ZIF) connector that’s keeping the orange motherboard ribbon cable snug as a bug. You’ve got this!
Tools Used

Step 3


– Grab your trusty nylon spudger and gently lift up the retaining flap of the ZIF connector that’s keeping that black motherboard ribbon cable snug as a bug. You’re doing great!
Tools Used
Step 4


– Let’s get this repair started. Use the pointed end of your trusty nylon spudger to gently pry up the battery connector.
– When you’re reconnecting the battery cable after swapping out the old battery, simply press the battery connector firmly with your finger until you hear it click into place – easy peasy.
Tools Used
Step 5


If you find yourself needing to remove the motherboard, consider tackling this step alongside the motherboard later on. It might just make things a tad smoother for you!
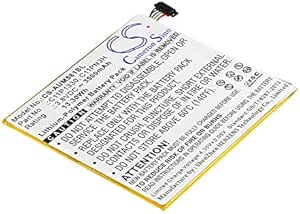
The battery is glued in place, so you’ll need a little muscle to pop it free from the device. Don’t worry, just apply a bit of force and it should come off without a hitch!
– Grab the flat end of your trusty nylon spudger and gently work it under the battery—give it a careful lift, like you’re prying open a treasure chest (but with way less drama).
Tools Used
Step 6

– Alright, starting from the top, use your trusty #000 Phillips head driver to pop out all the screws—yep, all (20) of them. Just think of it as your screwdriver workout!
– Spot the (2) screws chilling in the top corners—they’re in the speakers, so don’t miss them.
– Then move to the battery area—remove (4) screws along the top, (3) on each side, and (3) along the bottom. You’re basically the screw-removal MVP right now!
– Next up, locate the (1) screw smack-dab in the middle of the motherboard (on the orange ribbon cable side), and don’t forget the (4) screws hanging out at the bottom of the motherboard.
Step 7

– Ensure the battery is safely unplugged from the motherboard by disconnecting those ribbon cables. It’s like giving your device a little spa day—no interruptions allowed!
Step 8


– Before you get too ahead of yourself and take out the whole assembly, take a moment to unplug those side buttons and cameras from the motherboard using your trusty tweezers.
– The motherboard is pretty chill about being removed, but it plays well with the battery. It’s actually easier to do both at once. Check out Step 5 for the deets.
Tools Used

Step 9


– Now that your device is wide open, take a moment to inspect the motherboard and its buddies for any hidden damage. It’s like a treasure hunt, but instead of gold, you’re looking for repairs!
Step 10

– Right in the heart of the motherboard, you’ll spot a small ribbon cable—your mission? Lift that white tab to free it!
Step 11


– You made it. To put everything back together, just reverse the steps you followed to get here. Nice job. If you need help or have any other devices that need some TLC, you can always schedule a repair.
–
Success!