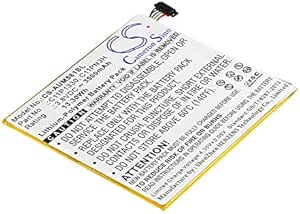
Asus MeMO Pad 8 ME181C Rear Facing Camera Replacement
Duration: 45 minutes
Steps: 6 Steps
Since you’re tackling a delicate component, it’s smart to throw on a pair of gloves—no one wants pesky skin oils messing up the camera lens and leaving it less than perfect. Plus, take extra care with those ribbon wires! They’re super fragile, and a snap or internal break could mean not only a busted camera but damage to other parts too. Handle with care, repair legend!
Step 1
– Start by inserting a plastic opening tool into the seam where the rear case meets the screen – this is where the magic begins!
– Carefully work the plastic opening tool around the edges of the device to release the rear case. Take your time and don’t be afraid to apply a bit of gentle pressure – it’s like opening a cleverly designed puzzle box!
Step 2
– Starting from the top and working your way down, unscrew all 20 screws using a #000 Phillips head driver.
– There are 2 screws in the top corners—heads up, they’re tucked away in the speakers.
– You’ll find 4 screws along the top of the battery, 3 along each side, and 3 at the bottom of the battery.
– Locate 1 screw right in the middle of the motherboard on the side with the orange ribbon cable, plus 4 screws at the bottom of the motherboard.
Step 3
– First, let’s get started by disconnecting the battery from the motherboard. To do this, simply unplug the ribbon cables – easy peasy!
Step 4
– Before diving into the assembly removal fun, make sure to gently unplug the side buttons and cameras from the motherboard using your trusty tweezers.
– For an easier time, consider removing the motherboard together with the battery. Check out Step 5 for all the juicy details!
Tools Used
Step 5
– Now that you’ve got your device open, take a moment to inspect the motherboard and other related parts for any additional damage. It’s a great chance to get a closer look and make sure everything is in good shape before you move forward with the repair.
Step 6
Take it easy with the spudger – you don’t want it to slip and accidentally mess with any other parts of the tablet. A steady hand goes a long way!
– To get your device up and running again, just reverse the steps you followed to take it apart. Easy peasy! If you need help or want some extra guidance, you can always schedule a repair with Salvation Repair.
–
Tools Used
Success!


