ASUS Transformer Book Flip TP500LA Motherboard Replacement
Duration: 45 minutes
Steps: 12 Steps
If your device is acting up or flashing that infamous blue screen, it might be time to swap out the motherboard. Here’s a step-by-step guide to help you replace the motherboard in your ASUS Transformer Book Flip TP500LA. Let’s get your tech back in action!
Step 1


– Take out the ten 10 mm Phillips #0 screws from the back of your device. Keep those little guys safe—they like to roll away when you’re not looking!
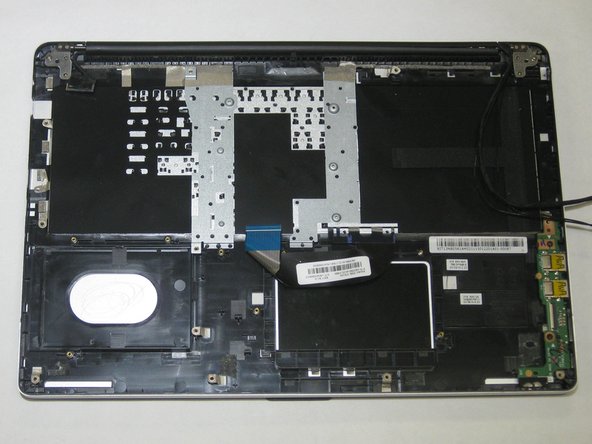
Step 2


– Gently insert a sturdy spudger between the back cover and the device.
– Carefully work your way around the edges to unclip and loosen the back cover from the main body.
– Lift off the back cover gently to reveal the internal components.
Tools Used

Step 3


– Carefully slide a sturdy spudger into the ZIF connector and gently lift the retaining flap to unlock it.
– Grab the blue tab and give it a gentle pull to remove the ribbon.
Tools Used
Step 4


– Start by unscrewing the three 5 mm Phillips #0 screws to free the part.
– Next, locate the single 6 mm Phillips #0 screw and remove it to continue disassembly.
Step 5


Be extra careful when removing the white 8-pin connector—those black 8-pin connectors on the motherboard can be a bit delicate!
– Grab the heavy-duty spudger and gently work it under the white 8-pin connector to lift it off the motherboard.
– Carefully detach the connector from the motherboard by pulling it away with a bit of finesse.
Tools Used
Step 6

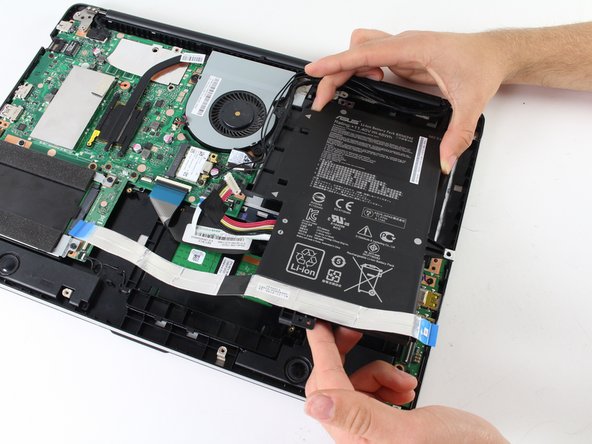
– Grab your blue plastic opening tool and gently pry loose those three pesky black wires from the battery—no force needed, just a little finesse.
– Carefully slide the battery out of the device to complete the removal—easy does it!
Step 7

– Remove the six 5 mm Phillips #0 screws—don’t lose them, they’re tiny escape artists!
Step 8

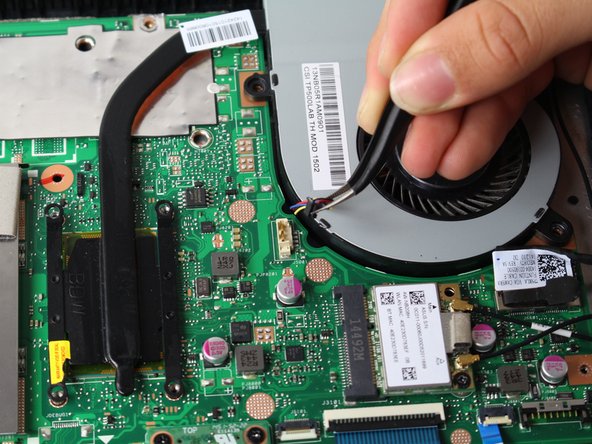

– Grab the top of the 3-pin connector using your tweezers with a steady hand.
– Gently wiggle the connector back and forth until it starts to come loose from the motherboard.
– Carefully lift the connector up, freeing it from its spot on the motherboard.
Tools Used

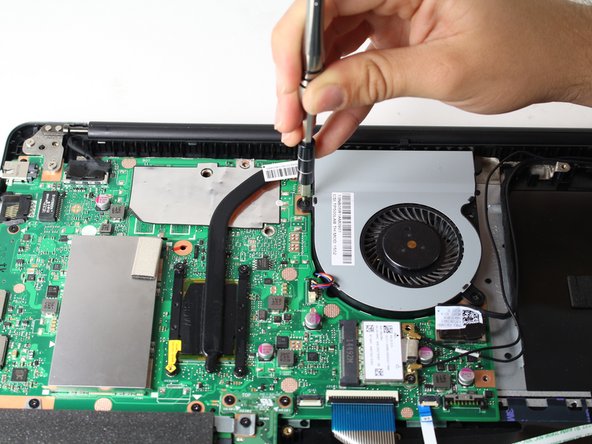
Step 9

Don’t forget! The fan has thermal paste on it, and you’ll need to reapply it when you put the fan back on the motherboard. Follow this guide to make sure you’re doing it right. It’s easier than it sounds!
– Gently lift the fan away from the motherboard, making sure not to force anything. Take your time and keep it steady—you’re doing great! If you need help at any point, you can always schedule a repair.
Step 10

– Gently disconnect the two display cables from the motherboard, making sure not to bend or damage the connectors. If you need assistance, you can always schedule a repair.
Step 11

– Grab your Phillips #0 screwdriver and get ready to unscrew! Take out the three screws that are keeping the motherboard snug in its place. Careful not to lose them – they’re tiny but mighty!
Tools Used

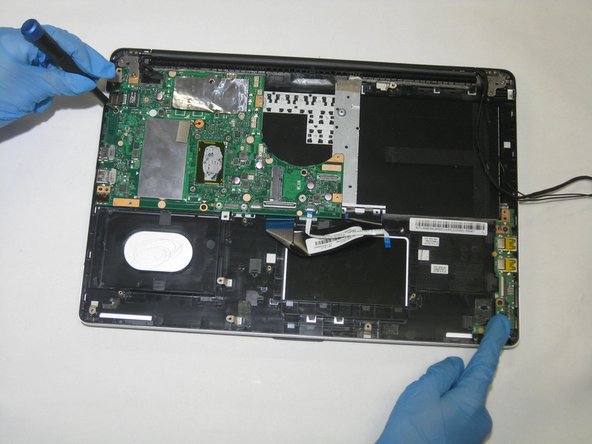
Step 12

– Remove the motherboard from the device.
Success!
