Asus Transformer Pad Infinity Teardown
Duration: 45 minutes
Steps: 19 Steps
Step 1

– This Transformer Pad Infinity has landed on the wrong desk and is about to face its ultimate teardown challenge. Let the fun begin!
– Step one: Power it down 🙂
Step 2
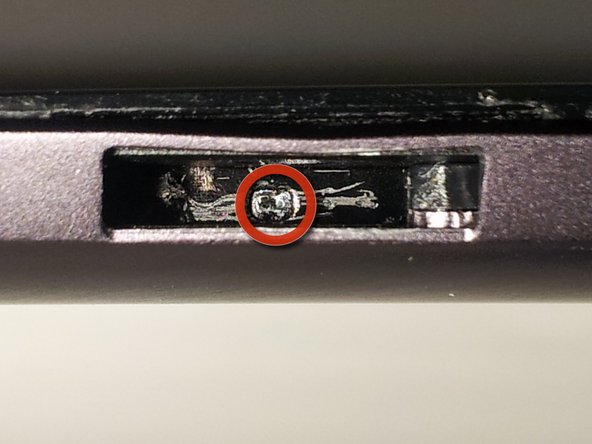
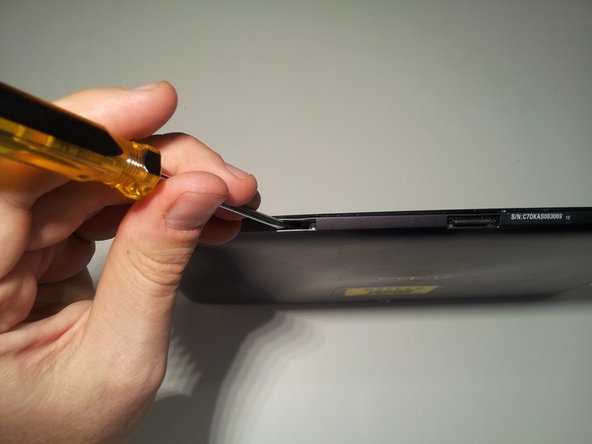

– Let’s get started by inserting a small flat head screwdriver into the 2 docking station guide ports on the bottom of the tablet. This is the first step to unlocking the screen from the casing.
– Now, use your screwdriver to gently push the small tab inside the bottom of the port to the right until it clicks. This will unlock the bottom tabs that hold the screen in place. You’re making great progress!
– If you’ve successfully unlocked it, you should see a small arrow in the bottom of the port that points to the left. This arrow indicates which way to push the tab to relock the tabs when you’re reassembling everything. Take a mental note of this for later.
– Just to make sure everything is unlocked and ready to go, be sure to repeat the process and unlock the tabs in both docking station guide ports. If you need help or get stuck, don’t worry – you can always schedule a repair with Salvation Repair.
Step 3


– Take a peek at the locking assembly you unhooked back in Step 2—you’re doing great!
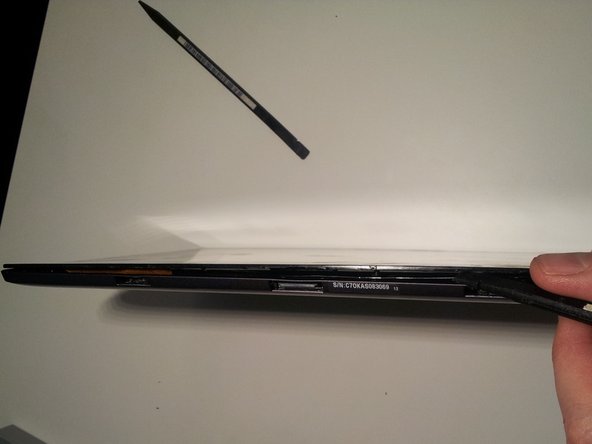
– Now, grab your trusty spudger or your favorite opening tool and give a gentle nudge upwards (toward the screen) on those tiny plastic tabs sitting at the top of the docking station guide ports. This little push should move the screen away from the frame just enough to wiggle in another spudger’s flat side to help you pry the bottom of the screen free from the case.
– Slide that flat end of your spudger along the bottom edge of the tablet, and work your magic to release those plastic tabs from the locking mechanism inside.
Tools Used

Step 4


– Alright, time to pop open those plastic tabs on either side of your tablet. There are 4 tabs on each side, all lined up in the same spot. Use your spudger to gently work them free.
– Quick heads-up: These tabs are pretty delicate, so be careful! I may have broken almost all of them during my first attempt. Trust me, you don’t want that!
– A good way to open them is by applying light pressure to the case, then carefully prying it away from the screen. Once the tab loosens, it should pop open, no need to rush or yank it like I did.
– Now that you’ve got those tabs freed, you can hinge the screen open from the top edge and completely detach it from the body.
Tools Used
Step 5


Right next to the battery connector, there’s a stealthy internal power switch that shuts down the whole device while you work—so you won’t accidentally bring it back to life mid-repair!
– Remember to flip that power switch back on when you’re putting everything back together!
Step 6


– With the tricky bits behind you, let’s dive into the tech goodness!
– Grab your trusty spudger and gently disconnect the two digitizer ribbon cables from the mainboard. You’ll find them chillin’ on the left side of the tablet, nestled between the micro-HDMI and microSD slots.
– Now, give your spudger another whirl to detach the LCD cable from the back of the LCD. Nice and easy!
– Once that’s done, you should be ready to pop the screen assembly away from the tablet body. Set it aside for a little later inspection!
Tools Used
Step 7


– At this stage, your tablet’s insides probably look a bit less dramatic than mine did. I snapped my photos during re-assembly, so my device bears the battle wounds!
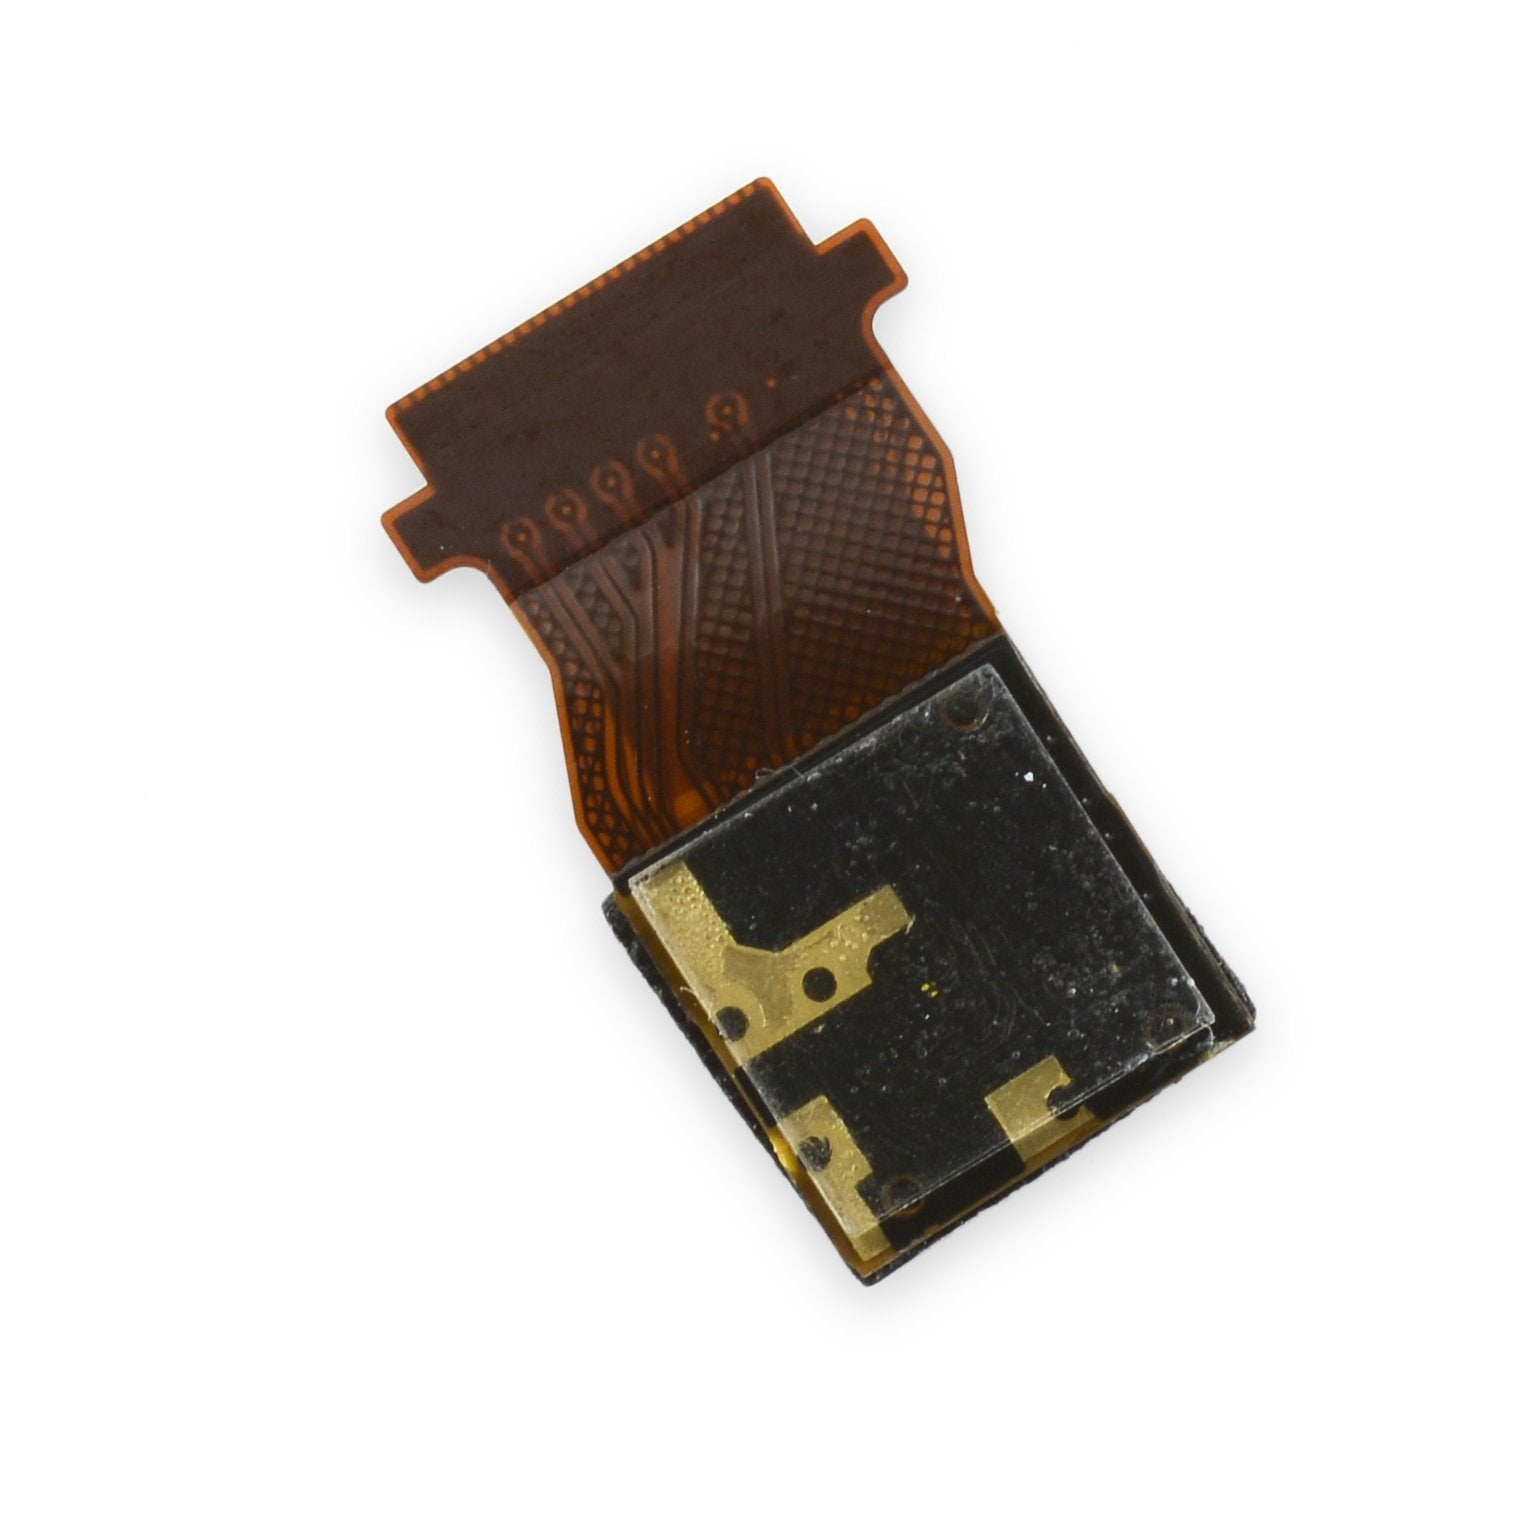
– To free the front-facing camera (on the right), gently use your spudger to unlock that ribbon cable and slide the camera right out.
– For the rear-facing camera (on the left), simply unplug it from its socket by applying some light lifting pressure to the back of the cable. Easy peasy!
– Next up, let’s tackle the backup battery on the right side. Unplug the cable from the motherboard with your trusty spudger, then pry it out gently. It’s just lightly glued down, so it shouldn’t put up too much of a fight.
Tools Used
Step 8


– Time to set those screws free! Remove 14 screws to take out the motherboard, daughterboard, and dock connector.
– Before you go any further, don’t forget to unplug the speaker connector from the motherboard. It’s like giving it a little breather.
– Now, flip the motherboard from the top edge of the tablet down towards the battery, revealing the battery connector. Gently unplug it using your trusty spudger—no need to wrestle with it!
– Next up, disconnect the motherboard from the daughterboard by gently unlocking the ribbon cable at the back of the daughterboard. Piece of cake!
Tools Used
Step 9


– To free the battery from its sticky situation, start by removing the 8 screws, then carefully slide your trusty spudger underneath the battery between the 2 cells to gently pry it loose from the adhesive that’s holding it in place.
Tools Used
Step 10


– First, let’s get that speaker out. Use your trusty spudger to gently pry it away from the adhesive that’s holding it in place. Work your way underneath it until it’s free from the case.
– Next up, we’ve got the bottom screen attachment locking mechanism. To remove it, simply take out the 8 screws and lift the pieces out. Easy peasy!
Tools Used
Step 11


– Alright, we’ve got ourselves a plain old shell here. Let’s go back to that LCD assembly we set aside in Step 5 and bring it back into action!
– First, let’s pop off those 4 screws. Then, grab your trusty spudger and gently slide it under the edges of the LCD to separate it from the Gorilla Glass front. There’s a bit of light adhesive holding things together, so just take your time!
Tools Used
Step 12


– You’ve made it – the LCD is now free, and you can spread out all the parts to see what’s underneath those heatsinks and tape. Now it’s time to dig in and explore what’s been hiding beneath the surface.
Step 13


– The back of the motherboard doesn’t have a lot going on, but that’s okay! It’s a bit of a quiet zone back there. Just make sure everything looks tidy and in place before moving on. If you run into any tricky spots, remember, you can always schedule a repair.
Step 14


– …but we’ve got some close-ups for you to check out, just in case!
Step 15


– The front side of the motherboard is where the magic happens—think of it as the VIP lounge of your device.
– Tegra 3 quad-core processor T33-P-A3—the muscle that keeps things running smooth.
– 2x Elpida memory J4216EBBG-GNL-F—because one just isn’t enough for all that speed.
– Realtek ALCS631—bringing the sound to life, crystal-clear and all.
– Hynix H26M64002BNR e-NAND—the unsung hero for storing all your digital treasures.
Step 16


– Now let’s get up close and personal with some awesome closeups!
Step 17


– Let’s take a look at both the front and back of the daughterboard.
Step 18


– Check out the back of the LCD.
Step 19


– Here’s a little peek behind the scenes.
– That’s all I’ve got, folks! I apologize for any blurry shots since my trusty sidekick here is my cell phone (<3 Samsung Galaxy Note). I genuinely hope your tear-downs go a lot smoother than mine did. Best of luck!
– …and yes, it still works like a charm after putting it back together. Thanks for your curiosity!
Success!