Asus Transformer Pad TF103C Speakers Replacement
Duration: 45 minutes
Steps: 9 Steps
Ready to perk up the sound on your Asus Transformer Pad TF103C tablet? This guide is here to help you swap out those built-in speakers that crank out the tunes! If your device is making noise that sounds more like a crackling campfire than a concert, or if the sound is just plain missing, it’s time to dive in. Check out the Asus website for a full list of symptoms to see what your tablet might be up to. Just a heads up, we’ll be tinkering with some electrical wires, so let’s keep it safe and fun! If you need help, you can always schedule a repair.
Step 1

– First things first, power down your tablet. It’s always a good idea to work with a powered-off device.
– Grab your trusty plastic opening tool and gently slide it into the side of the tablet.
– Now, with a little finesse, pull upwards and carefully pry open the tablet. Take it slow, and you’ll be fine!
Step 2

– Gently glide the tool around all four edges of the tablet while slowly lifting it up. Take it easy, a little patience goes a long way here!
Step 3

– Gently detach the back cover after you’ve loosened it from the tablet. Place the back cover somewhere safe for later.
– Turn the tablet around to align it with the picture provided.
Step 4

– Gently disconnect the vibrant rainbow cable from the motherboard—handle it like you’re untangling fairy lights!
Step 5

– Grab your trusty plastic opening tool and gently work that battery free from its frame. Easy does it—show it some love!
Step 6


– Grab your trusty JIS #000 screwdriver and get ready to remove those four screws – it’s time to get this repair started!
– Keep all the screws in one place, nice and tidy. If you’re feeling extra organized, go ahead and label them so you know exactly where they go later on.
Tools Used

Step 7

Handle that wire gently, friend—yanking it too hard might send it packing!
If you accidentally snap the wire, no worries! Just solder it back on and keep moving forward.
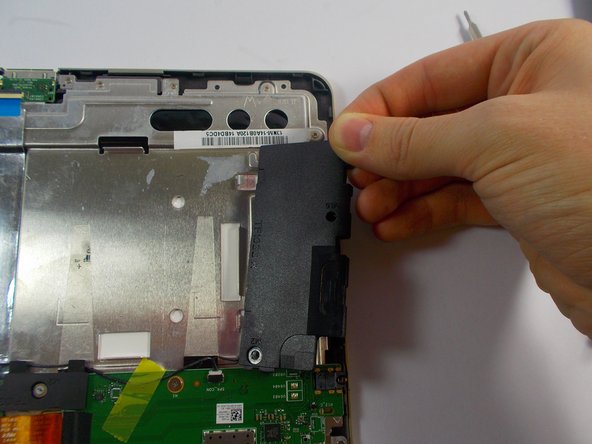
– Gently disconnect the ground wire from the top of the left TF103C-L speaker. Easy does it!
Step 8

– Peel off the tape and disconnect the wire connecting the speakers. It’s like giving them a little breather before the big comeback!
Step 9

– Now that you’ve tackled this repair like a pro, it’s time to put everything back together—just follow the steps in reverse and you’re golden!
–