Asus VivoBook Flip 14 Battery Replacement
Duration: 45 minutes
Steps: 5 Steps
Ready to swap out or remove the battery in your Vivo FlipBook 14? No worries! This step-by-step guide walks you through the process, making it straightforward and stress-free. Just follow along, take your time, and you’ll have your device powered up with a fresh battery in no time. If you run into any tricky spots, you can always schedule a repair for extra help. Let’s get started!
Step 1


Worried about losing track of your screws? Grab a flat fridge magnet and park them in the same spots you pulled them from—no more mystery leftovers at the end!
– Power down the laptop, unplug it, and flip it over to get to the bottom side.
– Take out the four long screws, highlighted in red, and set them aside.
– Remove the six shorter screws, marked in orange, and keep them safe for reassembly.
Step 2


Be careful not to slide your pry tool too deep into the case, especially under the front area. Poking the lithium battery could lead to leaks or even a dangerous explosion, so take it slow and steady.
The pictures show a metal pry tool, but to be safe, a plastic tool or spudger is the better choice, as it will not short out the electronics inside the device.
– Kick things off by sliding a flat pry tool near the power button, sneaking it between the side and the back of your laptop. Give it a gentle twist to start popping the back cover loose.
– Work your way along the hinge side, making sure you’re sticking that tool right in the seam—no shortcuts! Keep prying those clips free as you go.
– With the sides and rear clips no longer holding you back, swing the back cover open like a door to unclip the front. Take it slow, and you’ll have the back off in no time!
Step 3

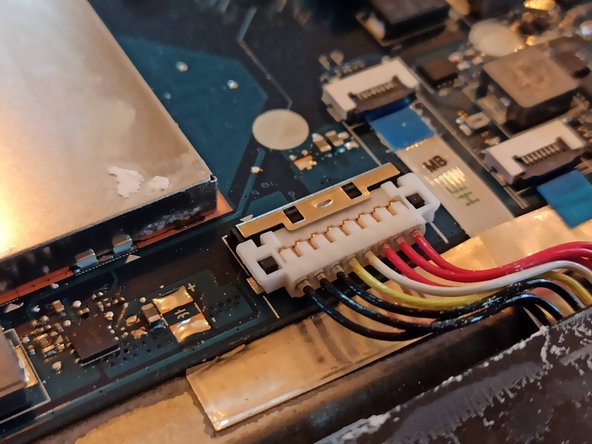
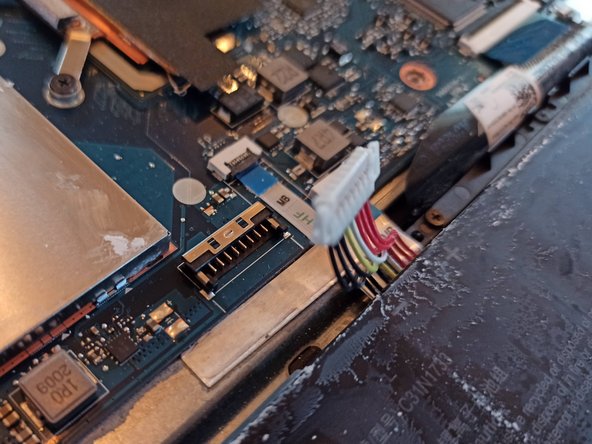
Make sure that the white battery clip stays far away from any other electronics. Gently bend the wires so they stay clear and out of the way.
– Let’s zero in on the battery connector, marked in green. It’s a perpendicular plug-in—think straight up and down—rather than sliding in from the side. Easy does it!
– Grab a plastic spudger and gently slide that metal retaining clip away from the battery, about 2 or 3mm—just enough to loosen it up.
– Next, slip the spudger under either side of the white plastic battery connector and lift it up and away from the motherboard. You’re doing great—keep it gentle!
Step 4

Keep the battery straight and chill—no bending, twisting, or squishing. A damaged battery might leak or even pop, and nobody wants that.
The battery isn’t glued down or taped—just those four screws holding it in place. Easy enough, right?
– Take out the four screws holding the battery in place, then gently lift the battery out of the laptop shell.
Step 5
Make sure you’re using the right screws and placing them in the right spots to avoid damaging your laptop case. If you’re unsure, check out the handy diagram in Step 1.
You don’t need to muscle the laptop screws in place—those blue thread-lockers have your back. Just give them a gentle snug fit, and you’re good to go!
– Now, put everything back together by retracing your steps in the reverse order. Easy peasy!
Success!
