Asus VivoBook Flip 14 Hard Drive Replacement
Duration: 45 minutes
Steps: 5 Steps
Ready to give your VivoBook Flip 14 a storage boost? This guide walks you through swapping out or upgrading the hard drive. Your laptop uses an M.2 2280 connector, so double-check that your new drive is the right size before you start. Heads up: this guide sticks to hardware—no operating system installs or data recovery covered here.
Step 1
– Once you’ve removed the hard drive, remember that your laptop won’t have any data or operating system left. Make sure to back up any important files to an external drive or cloud storage before you start. Also, keep your OS installation media or recovery disks handy so you can reinstall everything smoothly on your new hard drive. If you need help along the way, you can always schedule a repair.
Step 2


If you’re worried about losing track of your screws, grab a flat refrigerator magnet and stick those tiny bits to it as you go. Place each screw on the magnet right after removing it, so they stay organized and easy to find when you’re ready to put everything back together.
– Power down your laptop, unplug it, and flip it over so you can get to the screws.
– Grab your screwdriver and remove the four longer screws marked in red, setting them aside safely.
– Next, unscrew the six shorter screws marked in orange and keep them separate as well.
Step 3


– Start at the power button corner and carefully insert a flat pry tool between the side and back of the laptop. Gently lever the back away from the main case. Move around to the hinge side, making sure to insert the tool into the correct seam. Once the sides and hinge area are loosened, gently swing the back panel away to unclip it from the front. If you need assistance at any point, you can always schedule a repair.
Be careful not to shove your pry tool in too deep, especially near the front area. You don’t want to accidentally damage the lithium battery—it’s not just a bummer, but could lead to leaks or even an explosion! Keep it gentle.
These pictures show a metal pry tool in action, but we recommend using a plastic tool or spudger instead. It’s safer for the electronics inside, helping you avoid any unwanted shorts. Keep things cool and smooth while you work!
Step 4
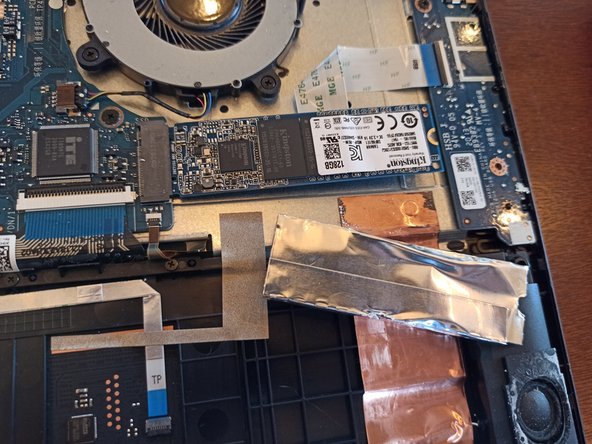

– Zero in on the M.2 hard drive—that’s the green-highlighted star of this show.
– Unscrew the orange-marked retention screw and put it somewhere safe (pockets do not count).
– Slide the sleeve off the drive, then grab the long edges and give it a gentle wiggle to free it from the black connector on the motherboard.
Step 5
Make sure your new M.2 Hard Disk slides in nice and snug before you add the screw. It should fit in smoothly!
No need to go overboard with tightening those laptop screws. They usually come with a blue thread-locker, so just a light, snug twist will do the trick!
– You made it! If you ran into any snags or want a hand with your device, you can always schedule a repair and let the pros handle it.
Success!
