Asus VivoTab RT TF600T Screen charging port Replacement
Duration: 45 minutes
Steps: 17 Steps
If your Asus Vivo Tab won’t charge and you’re sure your charger isn’t the culprit, you’re in the right place. This guide will walk you through how to remove the tablet’s charging port and swap in a new one—no sweat!
Step 1


Make sure your tablet is powered off before diving in.
To detach the keyboard, just press the switch on the left side of the screen and gently lift the tablet portion away. If you need help, you can always schedule a repair.
– Gently lift the tablet away from the keyboard attachment. You’re all set for the next step!
Step 2


Grab your Phillips screwdriver size PH000 and carefully remove those two 1.59 mm screws. You’re making progress—keep it up! If you need help along the way, you can always schedule a repair.
– Flip the device 180°, then grab your precision screwdriver and remove the two 1.59 mm screws nestled at the bottom. Easy peasy—you’re on your way to the next step! If you need help, you can always schedule a repair.
Step 3


Grab your plastic opening tool and gently work around the edges to lift the screen away from the back panel. Take your time and have patience—careful prying helps keep everything in good shape. If you need a hand, you can always schedule a repair.
– Start by sliding the plastic opening tool into the bottom right corner. Gently work your way in to loosen the screen from the device.
– Once you feel the screen start to separate, keep the momentum going by carefully running the tool along the edges until the whole screen pops off.
Step 4
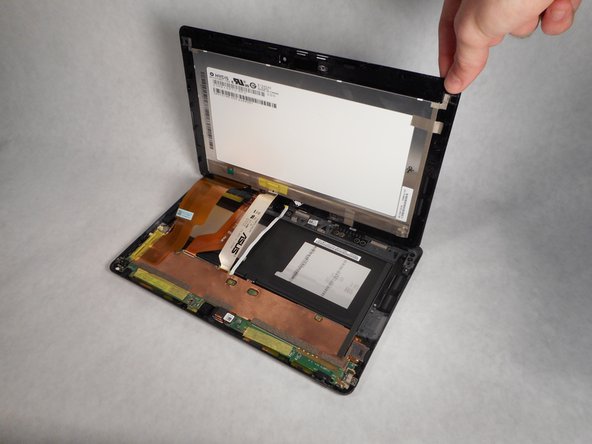

– Alright, you’ve got the screen off! Now, carefully place the back panel on a smooth surface – no need to rush, just take your time.
– Gently lift the screen to peek inside the tablet. It’s like opening a little tech treasure chest!
Step 5


Since the battery is hooked up to the motherboard, make sure to flip the switch labeled DIP to OFF before proceeding. This helps prevent any accidental shorts. Need a hand? You can always schedule a repair with us.
– Before you start disconnecting display cables, make sure to flip the switch labeled DIP off—that’s the system’s way of cutting the power. Keep it safe and energized-free before proceeding. If you need help, you can always schedule a repair.
Step 6


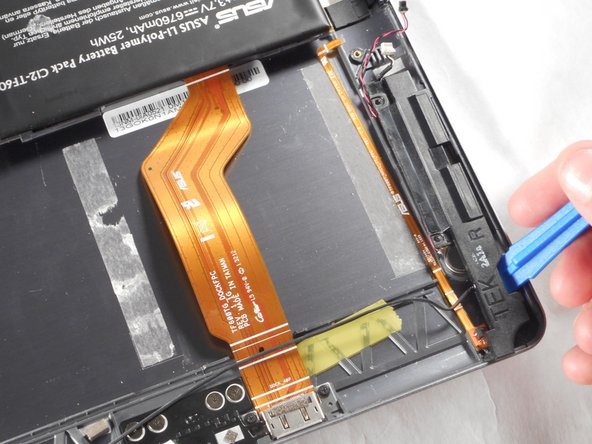
– Peel off the yellow tape hanging out on the ends of those cables—think of it as giving your device a little fresh air.
Step 7


Grab your trusty plastic opening tool and gently push those levers into place. It’s like giving your device a little nudge in the right direction!
– After lifting the yellow tape, you should be able to see a white strip. The white strip is actually a lever.
Step 8


– With all three white levers pushed in, gently tug on each display cable until it pops free. Take your time—patience is key to avoiding any damage. If you need a hand, you can always schedule a repair.
Step 9

– Gently lift the screen upwards to detach it from the device.
Step 10

– Give your tablet a little twist to the right, bringing that charging port right in front of you.
– Using your trusty Philips #00 screwdriver, unscrew the two 0.79 mm screws from the charging port. Careful not to lose them!
Step 11


– Slide the plastic opening tool under the charging port, aiming for the edge closest to the outer rim of your device.
– Carefully wiggle and lift the charging port away from the frame—slow and steady wins the race!
Step 12


– Grab your Phillips #000 screwdriver and carefully remove the eleven 0.79 mm #000 screws that hold the motherboard in place. Keep them safe—you’ll need them later—then move on to the next step.
Step 13


– Grab your trusty nylon or metal spudger and gently work it between the motherboard and the back panel to loosen things up.
– Once the motherboard is free from the glue holding it in place, use your hand to lift it up and swing it toward the opposite end of the back panel. Easy does it!
Tools Used

Step 14


– Use your trusty plastic opening tool to gently flip up the white lever. This will release the connection and get you one step closer to fixing your device.
Step 15


– Carefully lift the charging port ribbon from the motherboard using your fingers. It should come away smoothly—no force needed!
Step 16


Gently use the nylon or metal spudger to carefully lift the battery off the back panel. Take your time, and remember, no need to rush! If you’re finding this tricky, don’t hesitate to schedule a repair.
– Gently flip the right side of the battery upward to reveal the charging port cable, making it easier to access for your repair needs.
Tools Used
Step 17


– Pop out the charging port and swap it with a shiny new one.
Success!