Asus ZenFone 5 Charging Port Replacement Guide: DIY Repair Solution
Duration: 45 minutes
Steps: 10 Steps
The power hub, or charging port, is found on the bottom of your phone. If it’s not working right, your phone may not charge or take a looong time to do so. We’re using friendly tools close to the power hub in this guide. To be extra safe, and keep that battery happy and whole, use plastic tools that are ESD-safe. Like, really, play it safe and go with the flow – plastic tools, not metal ones!
Step 1
Heads up! When you’re heating up that iOpener, be sure to grab it by the sides to keep your hands safe and sound.
– Let’s get this microwave party started! Warm up that iOpener for 30 seconds, and let the magic happen. You’re doing great, and this repair is going to be a breeze! If you ever need a hand, don’t hesitate to schedule a repair.
Step 2
– Grab your trusty iOpener and place it against one side of the phone. Now, just chill for a bit—about 10-15 minutes should do the trick while the iOpener works its magic and cools down.
– Once the iOpener has had its moment, give it another quick heat-up and then stick it to the other side of the phone. You’ve got this!
Step 3
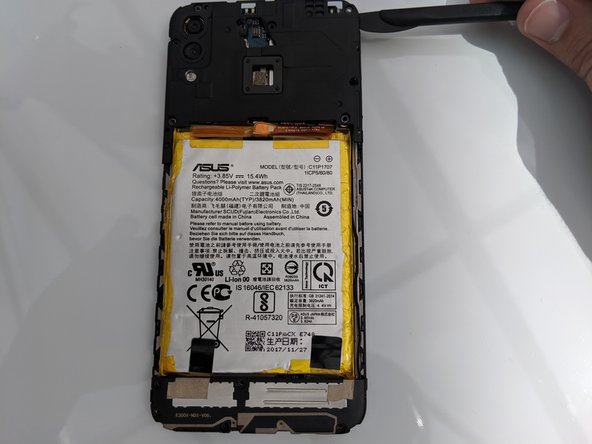
Whoa there, fancy using a metal tool to pry open that case? Not the best idea, seeing as how the battery is exposed and all! Hold up and check out some ESD safe tools instead, or head over to our repair schedule if you need help!
There are 6 different tabs on each side of the phone that might need a bit of muscle to separate.
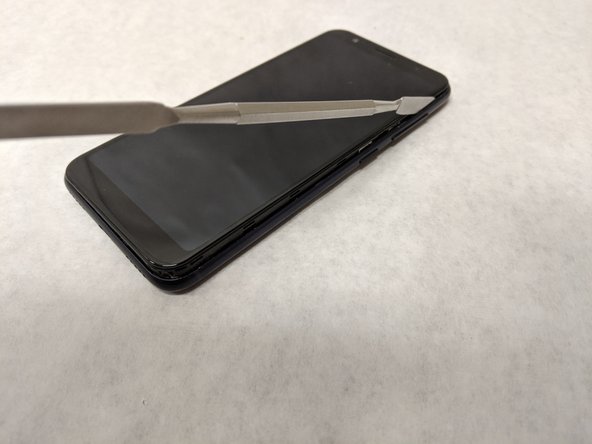
– Begin by carefully gliding the jimmy along the phone’s edges to loosen that stubborn adhesive.
– Grab your trusty opening picks and tool to gently pop off the back cover.
– Keep up the heat and prying dance until the back cover is ready to come off completely.
Tools Used
Step 4
– Grab your trusty #00 Phillips head screwdriver and let’s tackle those six #00 3.175mm screws on the top cover plate. You’ve got this!
– Now, take your spudger and gently work it along the edge of the top plate to pop those clasps loose. Easy does it!
Tools Used
Step 5
– Unplug the press fit connector nestled in the upper right corner of the battery to safely separate it from the motherboard. You’re doing great!
Step 6
– Grab that trusty screwdriver and take out those five Phillips #00 screws, each measuring 3.96mm, along the bottom plate. You’ve got this!
– Now, let’s bring in the spudger to gently nudge that bottom plate off. You’re doing great!
Tools Used
Step 8
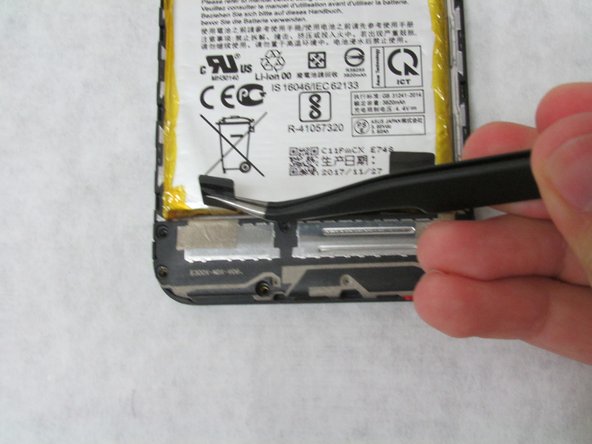
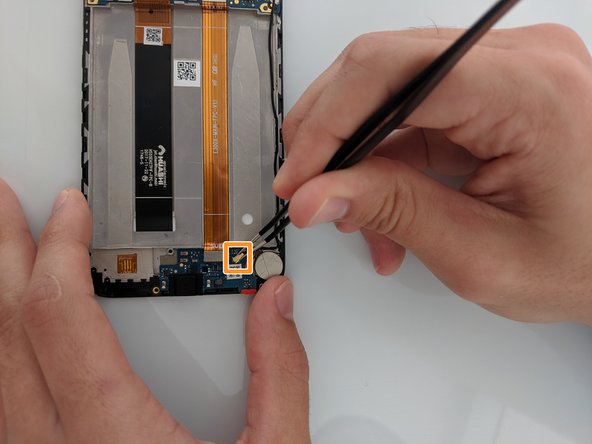
– Peek at the bottom of your phone and give that silver press-fit connector a little lift—it’s just chilling below the battery.
– Next, gently coax the gold-headed coaxial cable away from the motherboard. Easy does it—just guide it out of the phone.
Step 9
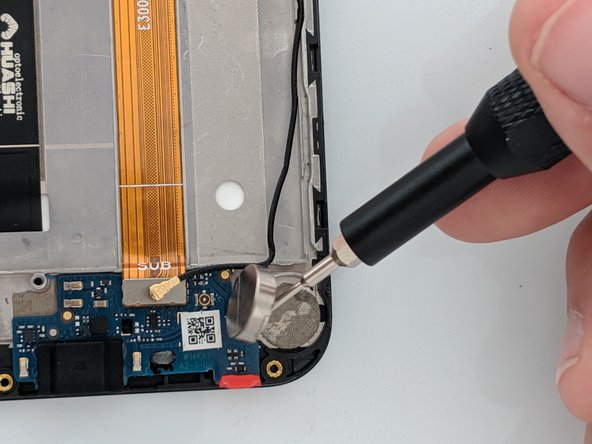
Using a screwdriver as a prying tool, like in the photos, can be risky business, especially when you’re dealing with a battery. It’s best to opt for a nice ESD-safe tool instead. Stay safe and keep your repair journey smooth!
You’ll want to tackle this removal in the cozy little pocket where the wire gives the battery a friendly hug at the bottom.
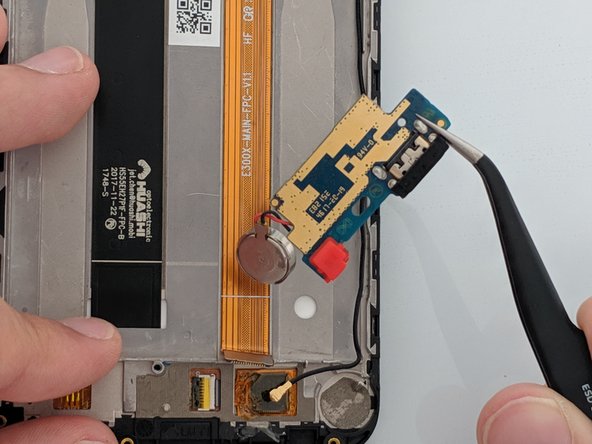
– Grab your trusty spudger and gently wiggle it to pop off the cell battery, getting in there right where that shiny gold wire was hanging out.
– Once you’ve liberated the battery, set it aside with care so it’s not in your way as you continue on this repair adventure.
Tools Used
Step 10
– Now that you’ve tackled the teardown, it’s time to put it all back together! Just retrace your steps and follow these instructions in reverse. Easy peasy!
– If you’re feeling like you need a helping hand, remember you can always schedule a repair.
–
Success!


