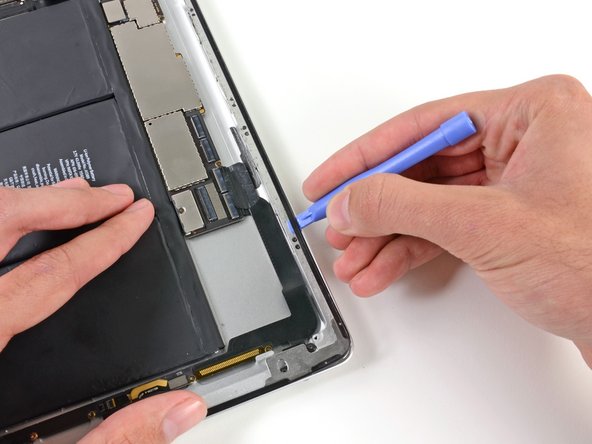
iPad Mini 2 LTE Wi-Fi/Bluetooth Antenna Replacement

Duration: 45 minutes
Steps: 59 Steps

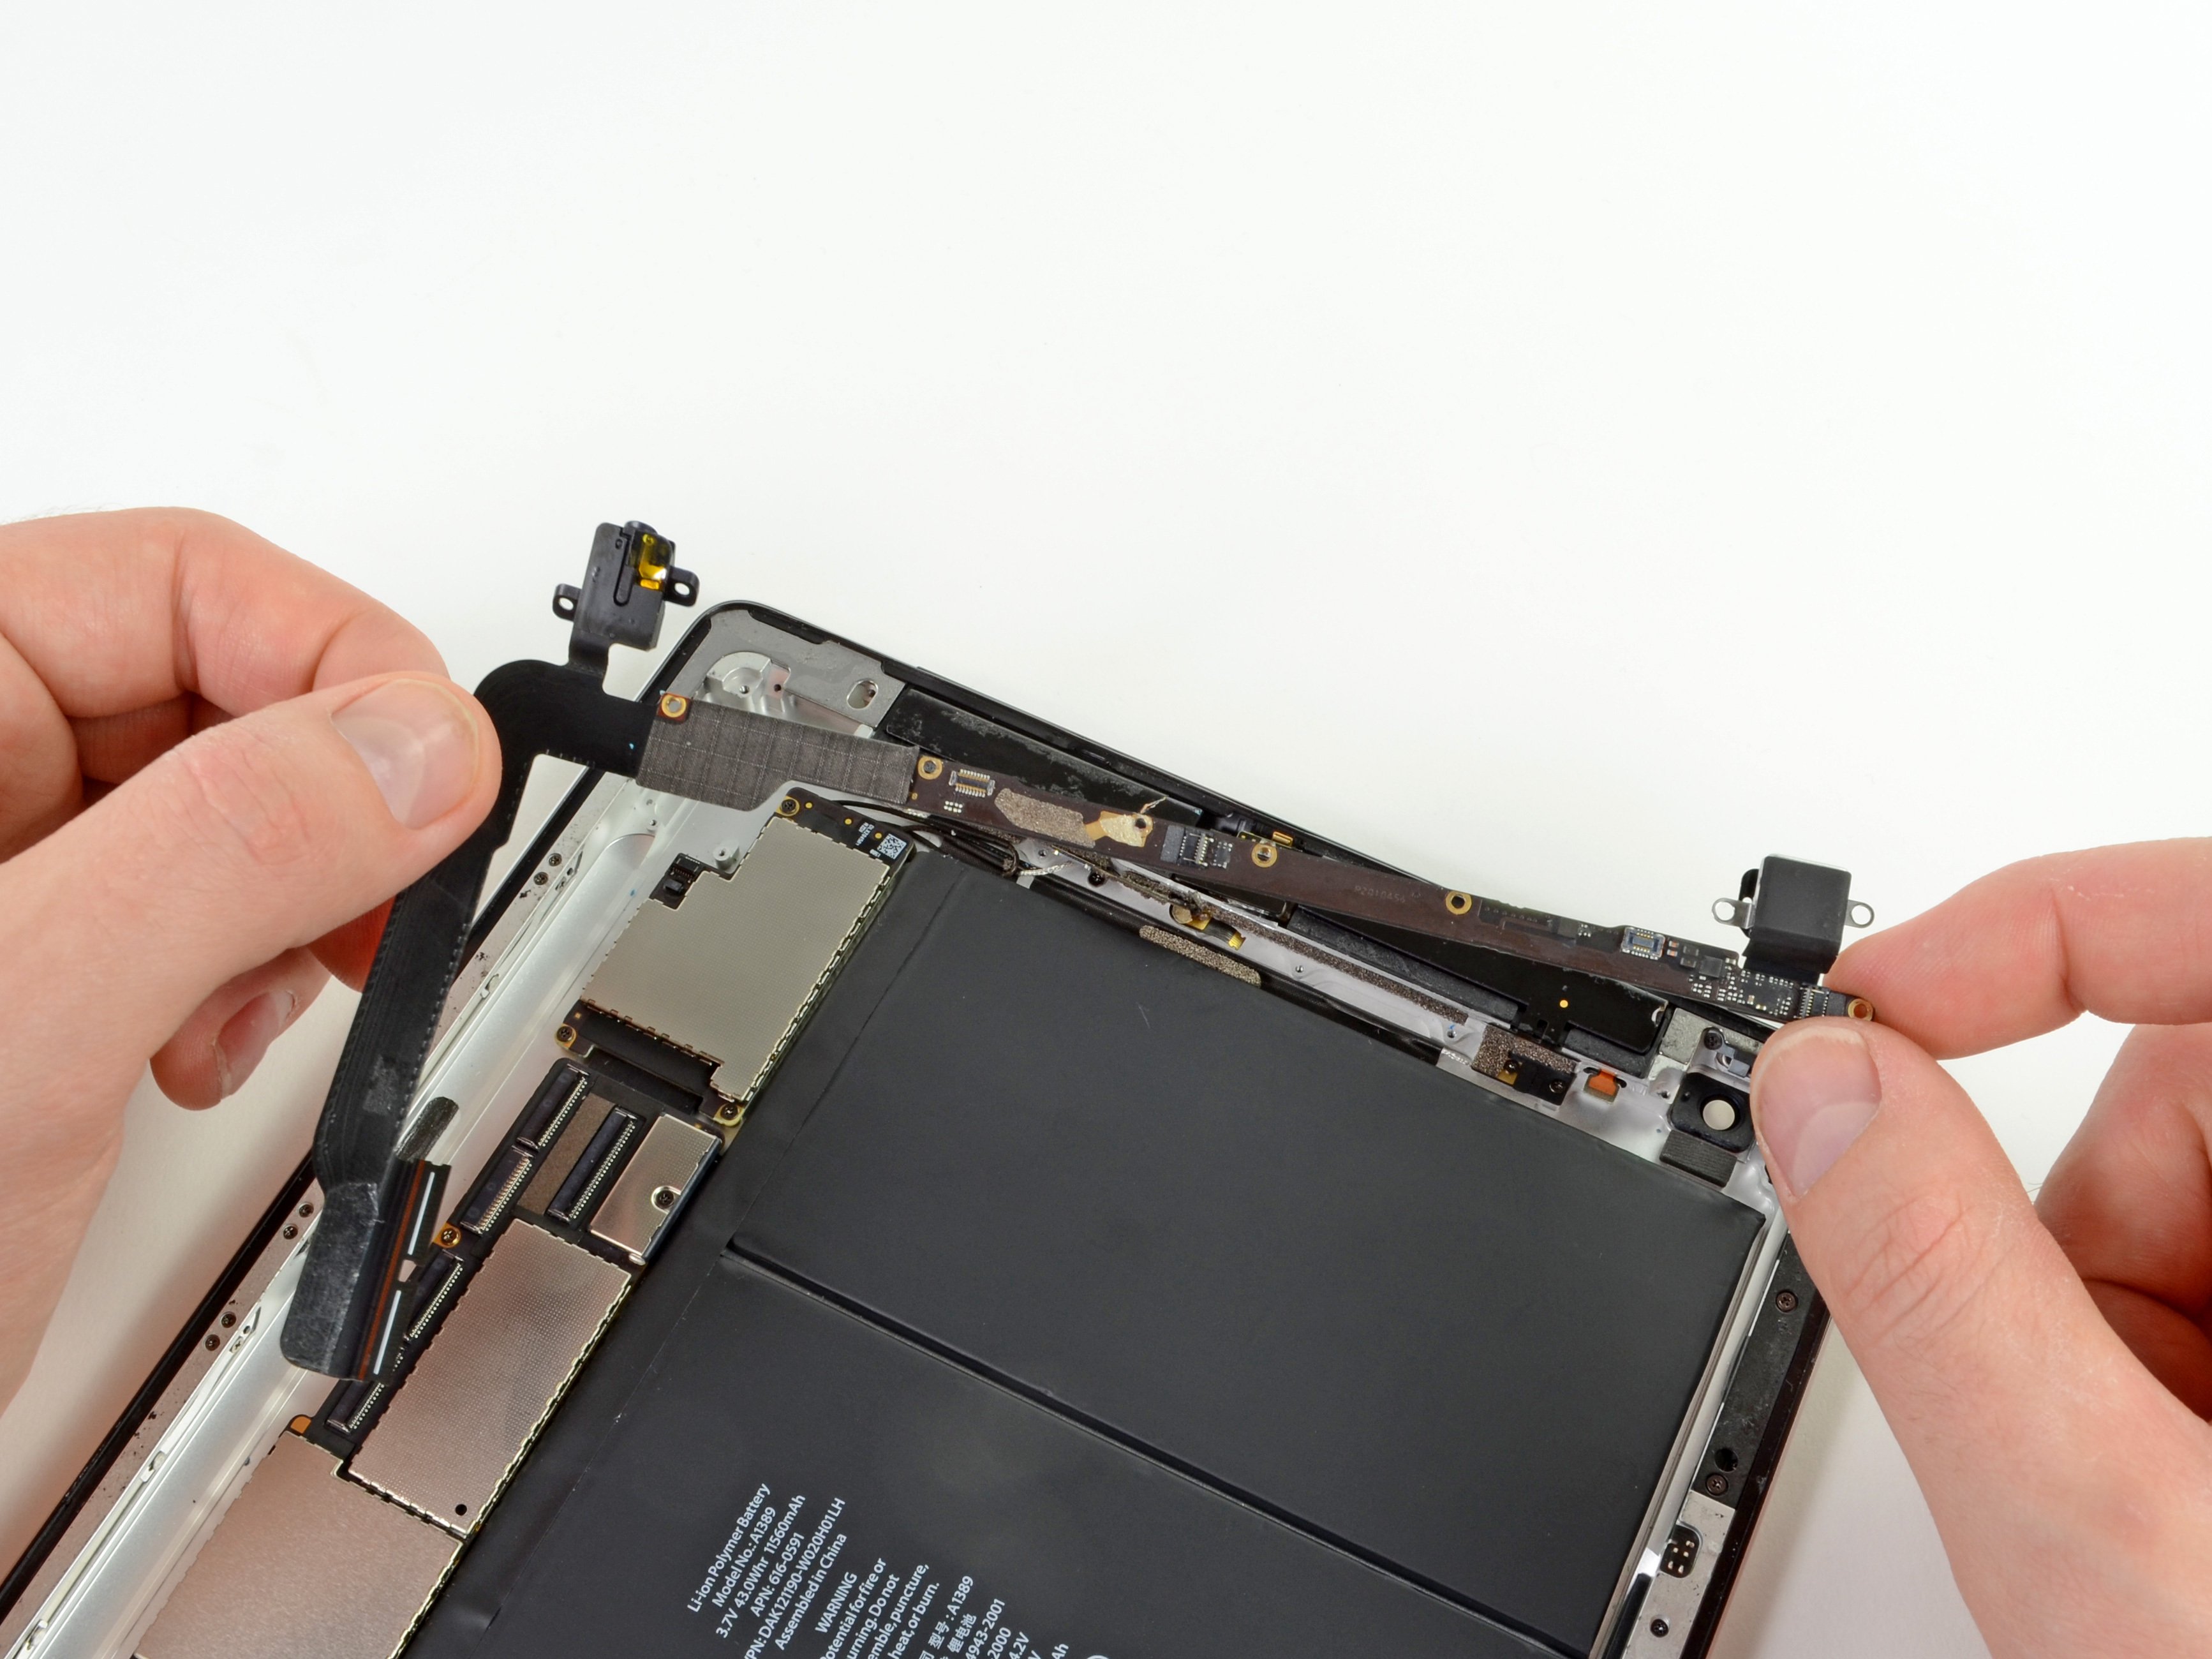
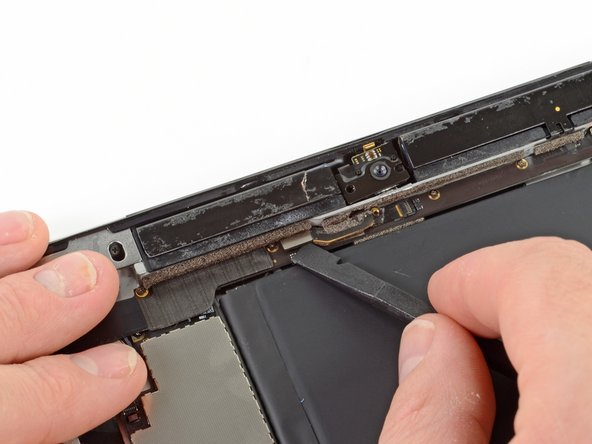
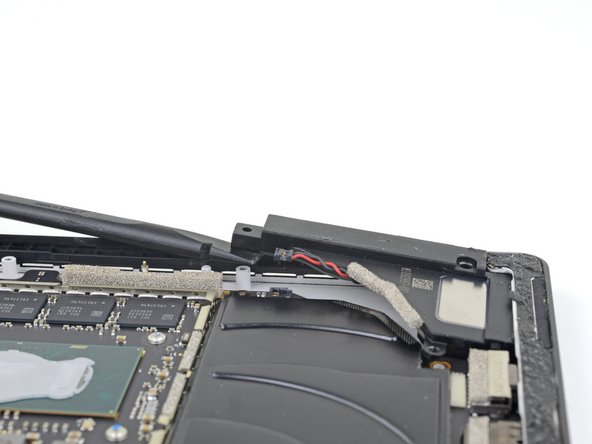
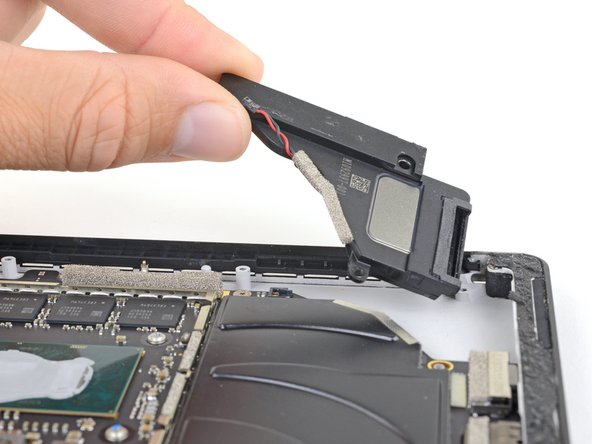
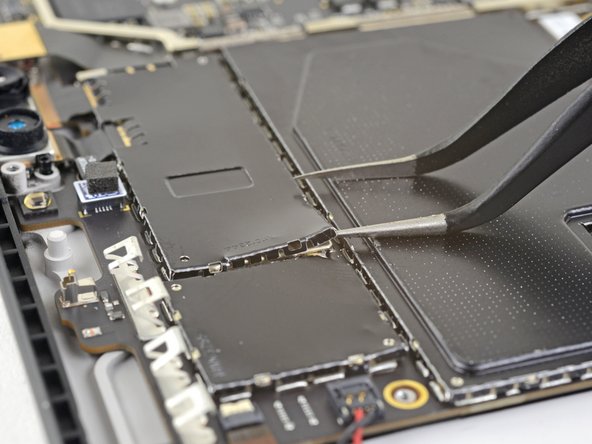
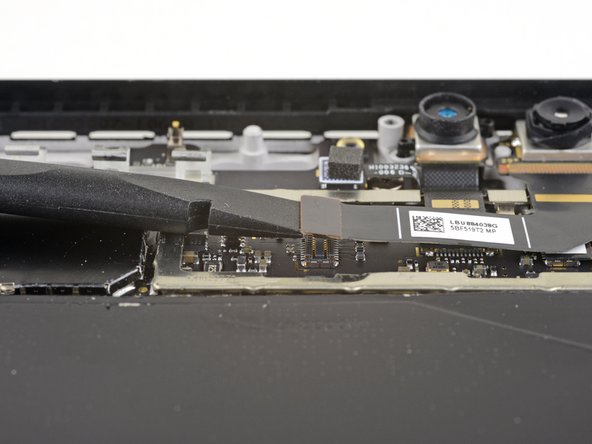
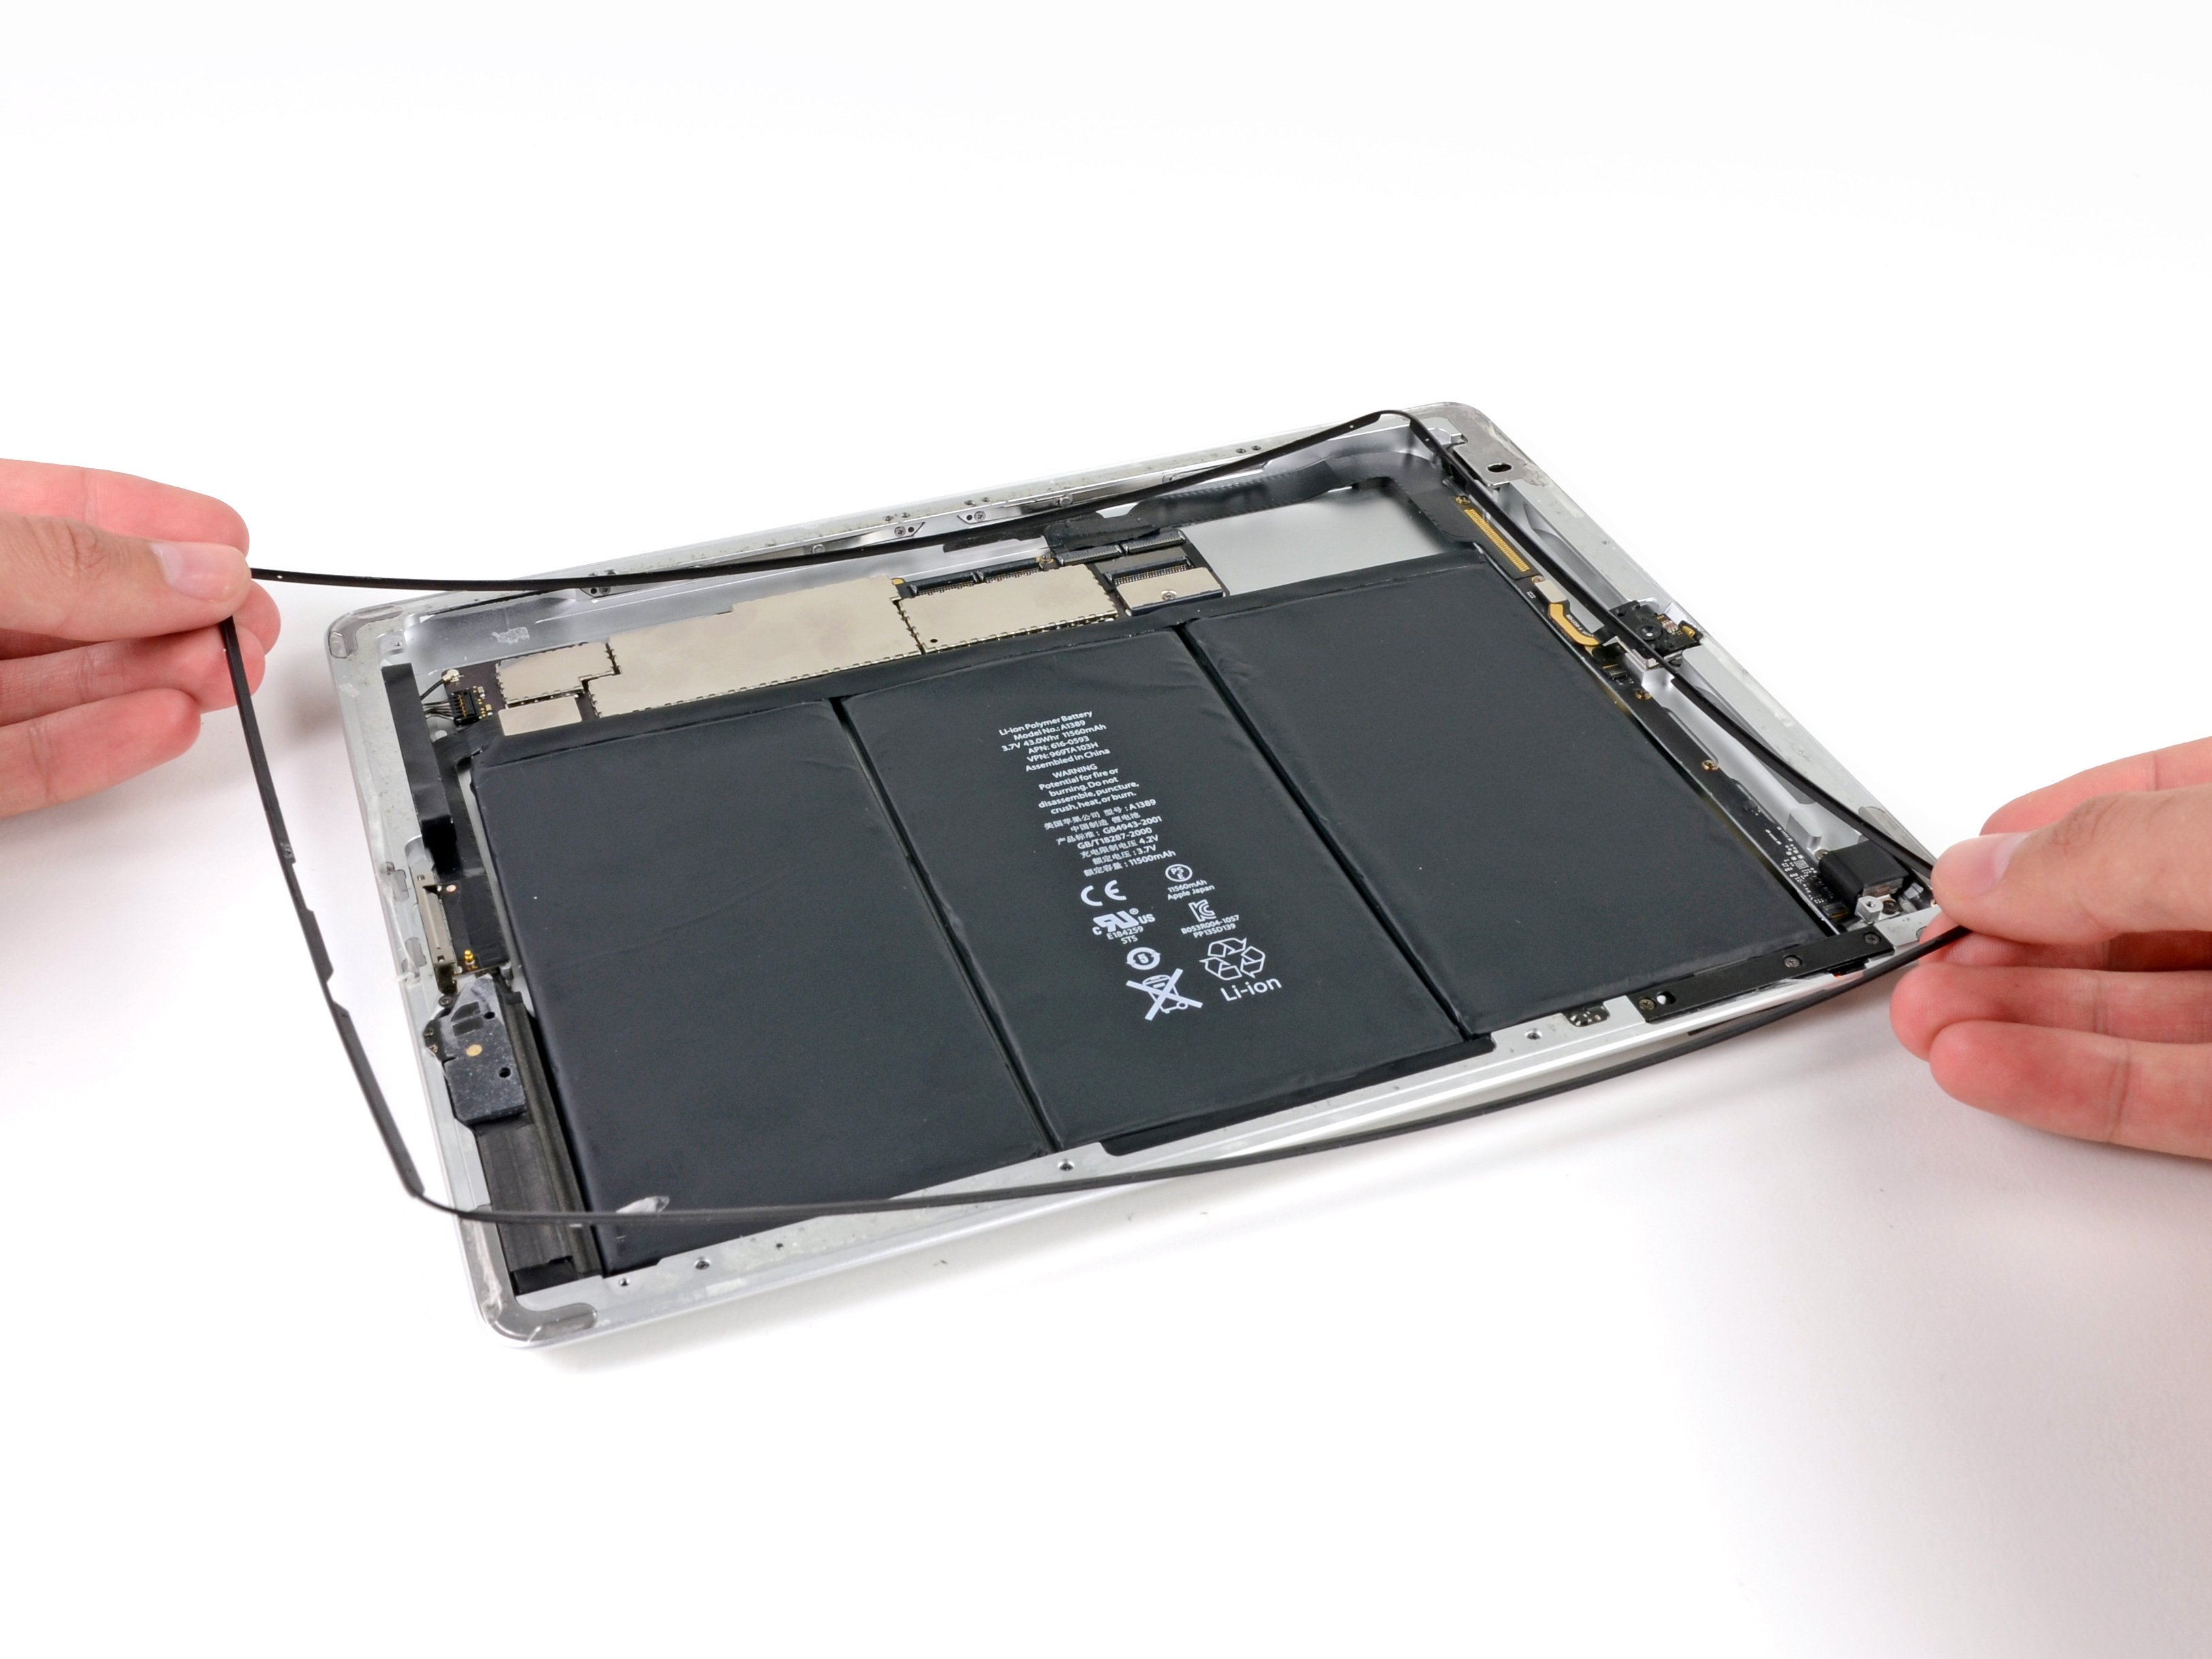
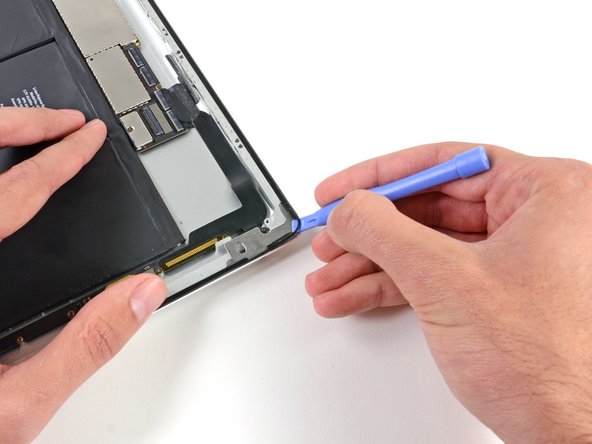
Follow this guide to swap out the left-hand antenna—the one handling your iPad Mini 2 LTE’s Wi-Fi and Bluetooth. Some pics might show the Wi-Fi-only model, so the inside might look a bit different, but don’t worry—the steps are the same for both, except where we point out otherwise.

Step 1

– Place the iOpener right in the middle of the microwave. Give it a comfy spot, so it heats up evenly and gets ready for action.

Tools Used
  1. iOpeneriPad Mini 2 LTE Wi-Fi/Bluetooth Antenna Replacement

Step 2

– Warm up the iOpener in the microwave for about thirty seconds to get it ready.

– As you work, if the iOpener starts to cool down, just pop it back in the microwave for another thirty seconds to keep things toasty.

Tools Used
  1. iOpeneriPad Mini 2 LTE Wi-Fi/Bluetooth Antenna Replacement

Step 3

– Carefully take the iOpener out of the microwave, holding it by one of the flat ends to keep away from the hot center. Safety first, but you’re doing great!

Tools Used
  1. iOpeneriPad Mini 2 LTE Wi-Fi/Bluetooth Antenna Replacement

Step 4

– Fill a pot or pan with enough water to completely submerge your iOpener.

– Bring the water to a boil and then turn off the heat.

– Drop the iOpener into the hot water for 2-3 minutes, ensuring it’s fully submerged.

– Use tongs to carefully take out the iOpener from the water.

– Dry the iOpener thoroughly with a towel.

– Your iOpener is good to go! If you need to reheat it, simply bring the water to a boil again, turn off the heat, and give it another 2-3 minutes in the water.

Tools Used
  1. iOpeneriPad Mini 2 LTE Wi-Fi/Bluetooth Antenna Replacement

Step 5

– If your display glass is cracked, tape it up to keep the shards in check and avoid any accidental ouch moments while you work.

– Cover the entire iPad screen with overlapping strips of clear packing tape until it’s fully wrapped.

– Follow the rest of the guide as best as you can. Just a heads up: once the glass is broken, it might keep cracking as you go, so be ready to carefully scoop out pieces with a metal prying tool.

Step 6

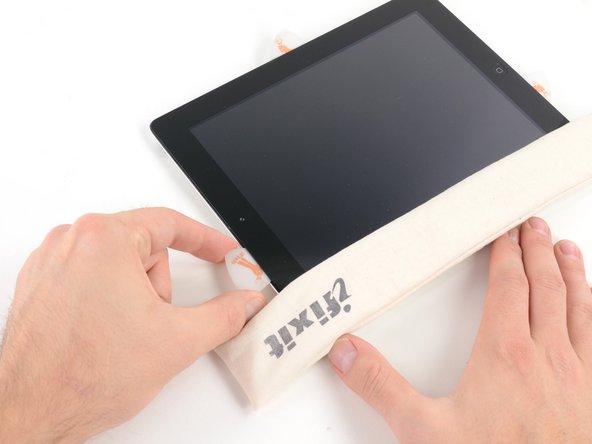
– Grab the tab and gently place the heated iOpener on the left side of the iPad, right next to the home button assembly.

– Let it chill there for about five minutes so the adhesive under the glass gets nice and soft.

Tools Used
  1. iOpeneriPad Mini 2 LTE Wi-Fi/Bluetooth Antenna Replacement

Step 7

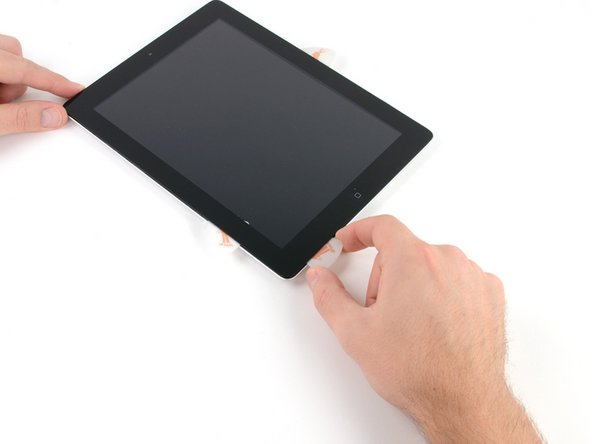
– Gently place the suction cup about halfway up the heated side.

– With one hand holding the iPad steady, pull up on the suction cup just enough to separate the front glass from the rear case a little bit.

– Make sure the cup is perfectly flat on the screen to get a good seal before you pull.

Step 8

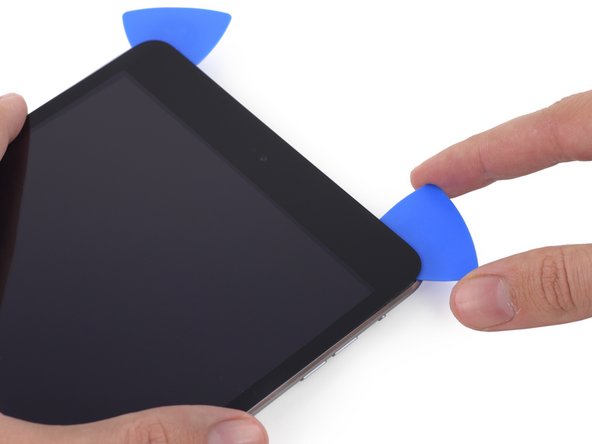
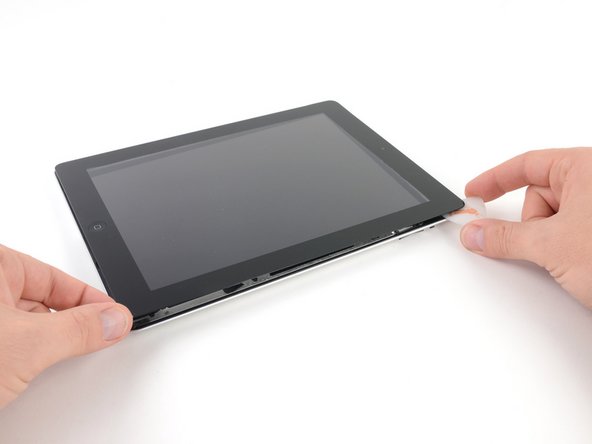
– Grab the suction cup and use it to gently lift the glass. Then, slide the pointed end of an opening pick into the space between the glass and the iPad’s body.

– Pull the plastic nub on the suction cup to break the vacuum seal and carefully remove the suction cup from the display assembly.

Step 9

– Warm up the iOpener again and put it back in place.

– Give it a few minutes to work its magic on the left edge of your iPad.

Tools Used
  1. iOpeneriPad Mini 2 LTE Wi-Fi/Bluetooth Antenna Replacement

Step 10

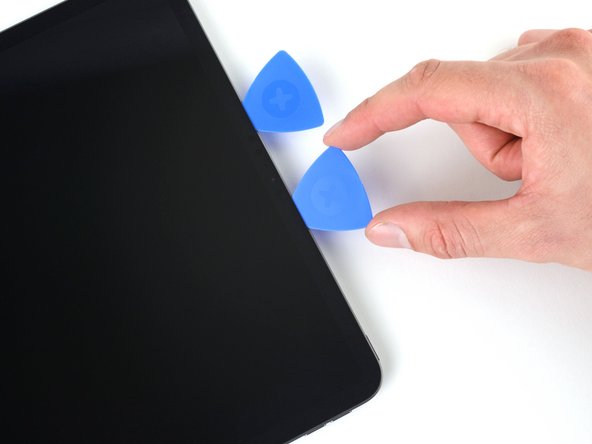
– Grab a second opening pick and slide it down the edge of the iPad right next to the first one, gently loosening that adhesive as you go along.

Step 11

– Keep sliding the opening pick along the side of the display to carefully break the adhesive seal.

– If the pick gets caught in the adhesive, just give it a little ‘roll’ along the side of your device, and keep going to release the sticky stuff.

Step 12

– Grab the first pick you inserted and gently slide it up toward the top corner of your iPad.

– If you spot the tip of the opening pick through the front glass, don’t sweat it—just pull it back a little. Everything should be just fine, but try to avoid this as it could leave some adhesive on the LCD that’s tricky to clean off.

Step 13

– Warm up the iOpener again and chill it right on the top edge of the iPad, right above the front-facing camera.

Tools Used
  1. iOpeneriPad Mini 2 LTE Wi-Fi/Bluetooth Antenna Replacement

Step 14

– Carefully slide the opening pick along the top-left corner of your iPad to gently loosen the adhesive. Take your time, no rush!

Step 15

– Gently slide the opening pick along the top edge of your iPad, but stop just before reaching the camera. Take your time here, you’re almost there!

Step 16

– Gently pull the pick just a little, and carefully glide the tip along the top edge, right over the front-facing camera section. Easy does it!

Step 17

– Slip the opening pick just past the front-facing camera. Not too far, just enough to get the job done.

– Now grab a second pick and slide it to the left of the camera, where the first one was. Gently push it back to the corner to slice through any last bits of adhesive.

– Leave that second pick in place to keep the corner adhesive from sealing back up while it cools off.

Step 18

– Gently push the previous pick a little deeper into the iPad, then slide it away from the camera and toward the corner. Keep it smooth and steady!

Step 19

– Stick those three picks in the corners of your iPad to keep the front panel adhesive from sticking back down while you work your magic.

– Now, reheat the iOpener and place it on the remaining long side of your iPad, right along where the volume and lock buttons are. It’s time to melt that adhesive!

Tools Used
  1. iOpeneriPad Mini 2 LTE Wi-Fi/Bluetooth Antenna Replacement

Step 20

– Gently slide the top right opening pick around the corner to pop free the top edge of the glass like a pro.

Step 21

– Grab a new opening pick and slide it along the right edge of your iPad. Keep going until you hit the middle, and as you do, you’ll hear that satisfying adhesive release. Just take it slow and steady!

Step 22

– Keep sliding the pick down the right side of the iPad to gently loosen that sticky adhesive—smooth moves here!

Step 23

– Keep those opening picks right where they are and give the iOpener another warm-up.

– Place the freshly reheated iOpener on the home button side of your iPad and let it hang out for a few minutes to loosen up that adhesive under the glass.

Tools Used
  1. iOpeneriPad Mini 2 LTE Wi-Fi/Bluetooth Antenna Replacement

Step 24

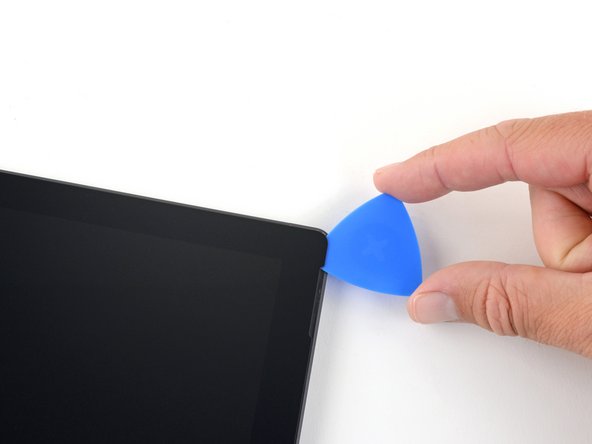
– Gently slide the pick into the lower left corner to start cutting through the adhesive. Take it slow and steady.

– Once the pick is in place, leave it there for now. No need to pry any further, and definitely don’t remove the pick from the iPad just yet.

– These next steps are where we’ll guide you on where to pry safely. Trust the process, and only apply heat and pry where we say to. No shortcuts here!

– Watch out for those antennas – they’re delicate.

– The home button cavity is another sensitive area. Proceed with care.

– Don’t forget the digitizer cable – it’s crucial, so be gentle!

Step 25

– Grab a fresh pick and carefully slide it along the left-hand antenna, stopping just before you reach the home button.

– Keep that pick right where it is before moving on to the next step.

Step 26

– Slide one more pick next to the last one, and gently wedge it under the home button.

– Now, gently push the pick a bit deeper, and work it back toward the home button.

Step 27

– Warm up the iOpener again and gently press it onto the top bezel of your iPad to make things nice and cozy. This will help loosen things up before we move on.

Tools Used
  1. iOpeneriPad Mini 2 LTE Wi-Fi/Bluetooth Antenna Replacement

Step 28

– At the top of the iPad, just opposite the home button, you should see a pick snugly placed in each corner. Gently twist the picks to lift the glass ever so slightly, helping you peel away the last of the sticky adhesive around the edges. You’ve got this!

Tools Used
  1. iOpeneriPad Mini 2 LTE Wi-Fi/Bluetooth Antenna Replacement

Step 29

– Take it slow and steady, gently lifting to peel away the adhesive from the lower edge. No rush—let it come off nice and easy!

Step 30

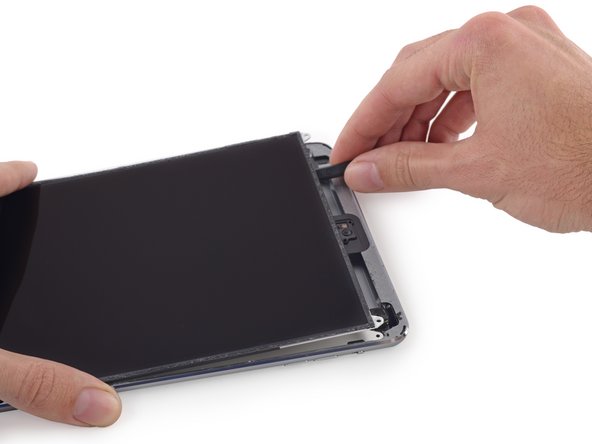
– After you’ve carefully loosened all the adhesive, gently open the front glass like it’s a book and let it rest on your work surface.

– If you’re reusing the front panel assembly, you’ll want to swap out the old display adhesive. Follow our display adhesive application guide to put on fresh adhesive and seal your device up tight.

Step 31

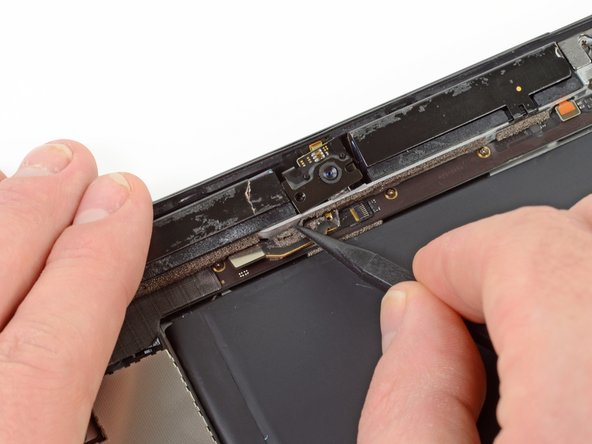
– Gently lift the camera housing from one edge to break it free from the sticky adhesive, then carefully remove it from the front panel.

– Place the front-facing camera housing back into its snug spot in the rear case, making sure it sits comfortably.

Step 32

– Let’s get those screws out! Grab your Phillips #00 screwdriver and remove these screws holding the LCD in place:

– Three 3.3 mm screws

– One 4.5 mm screw

Tools Used
  1. TweezersiPad Mini 2 LTE Wi-Fi/Bluetooth Antenna Replacement

Step 33

– Slide the flat end of a spudger carefully beneath the LCD, right between it and the LCD shield plate, then lift it up gently—treat it like you’re waking a sleeping cat!

Tools Used
  1. SpudgeriPad Mini 2 LTE Wi-Fi/Bluetooth Antenna Replacement

Step 34

– Gently slide the spudger between the LCD and the LCD shield plate, then carefully glide it all the way to the edge of the iPad. Take it slow, and let the tools do the work!

Tools Used
  1. SpudgeriPad Mini 2 LTE Wi-Fi/Bluetooth Antenna Replacement

Step 35

– Grab the LCD with one hand and hold the iPad’s rear body with the other to keep it steady.

– Carefully pull the LCD away from the speakers to peel apart the tape, but watch out—don’t tug on the digitizer cable!

Step 36

– Gently flip the iPad’s LCD like you’re turning the page of a book, starting near the camera and smoothly pivoting it over the home button end of the back case.

– Rest the LCD on the front panel glass so you can easily access the display cables.

Step 37

– Wedge the tip of a spudger gently between the LCD and the sticky tabs to loosen the display.

– Carefully nudge between each of the two adhesive tabs; watch out for nearby cables so they stay safe and sound.

Tools Used
  1. SpudgeriPad Mini 2 LTE Wi-Fi/Bluetooth Antenna Replacement

Step 38

– Take out the seven 1.8 mm Phillips #00 screws holding the LCD shield plate in place.

Step 39

– Gently slide the flat end of a spudger under the LCD shield plate and lift it up and away from the iPad.

– Take the LCD shield plate off and set it aside.

Tools Used
  1. SpudgeriPad Mini 2 LTE Wi-Fi/Bluetooth Antenna Replacement

Step 40

– First things first! Grab your trusty screwdriver and unscrew the following Phillips #00 screws from the display cable bracket:

– One screw, 2.7 mm in size

– Two screws, each 1.4 mm

Step 41

– Carefully lift off the display cable bracket from the iPad to get things moving.

Step 42

– Carefully slide the flat tip of your spudger under the battery connector and lift it up gently from its socket on the logic board.

Tools Used
  1. SpudgeriPad Mini 2 LTE Wi-Fi/Bluetooth Antenna Replacement

Step 43

– Gently pry the LCD connector up from its socket on the logic board using a spudger—easy does it!

Tools Used
  1. SpudgeriPad Mini 2 LTE Wi-Fi/Bluetooth Antenna Replacement

Step 44

– Gently lift the LCD off the iPad Mini and set it aside with care.

Step 45

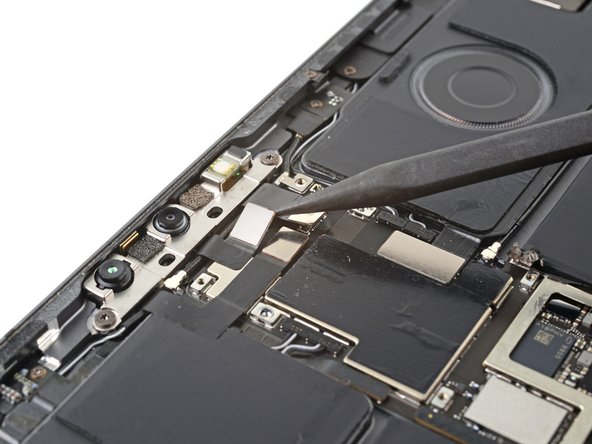
– Grab your trusty spudger and gently peel off the tape securing those antenna cables near the logic board. Keep it smooth and steady!

Tools Used
  1. SpudgeriPad Mini 2 LTE Wi-Fi/Bluetooth Antenna Replacement

Step 46

– Gently use the tip of a spudger to pry apart the adhesive that’s sticking the antennas to the right speaker.

Tools Used
  1. SpudgeriPad Mini 2 LTE Wi-Fi/Bluetooth Antenna Replacement

Step 47

– Carefully use the tip of a spudger to gently pry the antenna cable adhesive away from the rear case.

Tools Used
  1. SpudgeriPad Mini 2 LTE Wi-Fi/Bluetooth Antenna Replacement

Step 48

– Time to get those screws out! Start by removing these Phillips #00 screws from the left antenna:

– One 2.6 mm screw – this one’s a bit of a solo act.

– Two 1.5 mm screws – they’re paired up and ready to go.

Step 49

– Grab the flat end of a spudger and gently work your way under the foam adhesive holding the Wi-Fi antenna to the left speaker. A little patience goes a long way here!

Tools Used
  1. SpudgeriPad Mini 2 LTE Wi-Fi/Bluetooth Antenna Replacement

Step 50

– Grab the flat end of your trusty spudger and gently peel back the wide tape strip on the left side, revealing the left speaker underneath.

Tools Used
  1. SpudgeriPad Mini 2 LTE Wi-Fi/Bluetooth Antenna Replacement

Step 51

– Take your spudger and use the tip to gently lift the antenna cable tape off the rear case of the iPad.

– Now, carefully guide the antenna cable out of the way, making sure to work along the tape to free it without letting it stick back down.

Tools Used
  1. SpudgeriPad Mini 2 LTE Wi-Fi/Bluetooth Antenna Replacement

Step 52

– Gently unplug the antenna cable from its clip behind the Lightning connector.

Step 53

– Gently pull the wide tape toward the battery, keeping a steady hand as you peel it away from the antenna cable that’s stuck between it and the speaker.

– Carefully slip a plastic opening tool into the narrow space between the wide tape and the antenna cable to loosen the sticky bond holding them together.

– Run the plastic opening tool along the antenna cable’s length to fully separate it from the tape without any drama.

Step 54

– Gently peel back the antenna cable tape from behind the right speaker.

Step 55

– Gently slide the antenna cable out from beneath the corner of the right speaker.

Step 56

– Grab your spudger and gently nudge the antenna cable clip toward the battery. This will give you the freedom to access those cables like a pro.

Tools Used
  1. SpudgeriPad Mini 2 LTE Wi-Fi/Bluetooth Antenna Replacement

Step 57

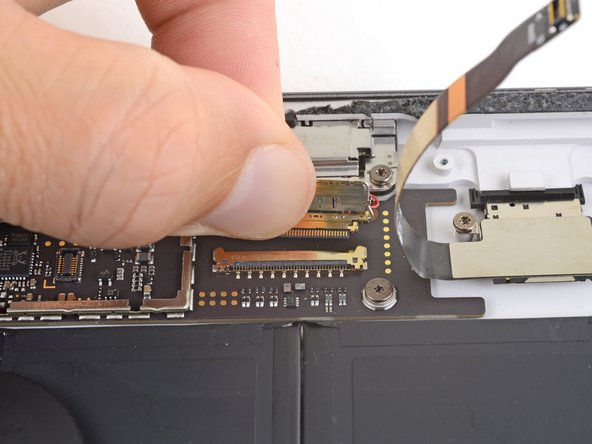
– Gently free the antenna cable from its little holding clip.

Step 58

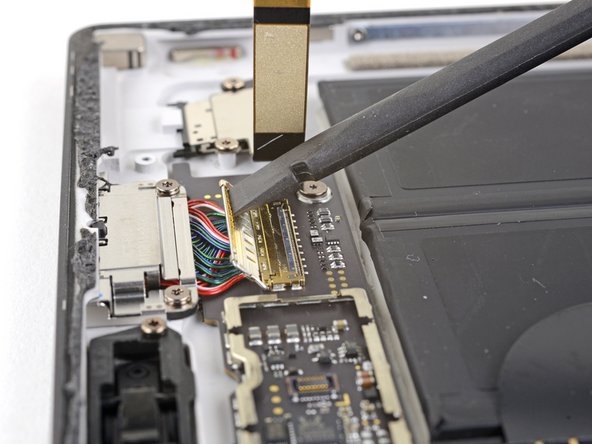
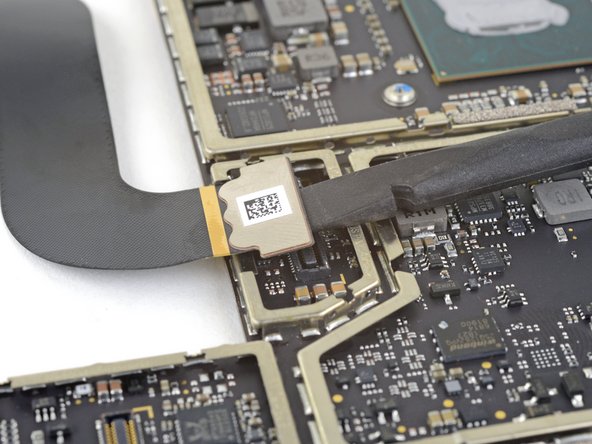
– Gently use the pointy end of a spudger to pop the left antenna cable connector straight up and off its spot on the logic board.

Tools Used
  1. SpudgeriPad Mini 2 LTE Wi-Fi/Bluetooth Antenna Replacement

Step 59

– Put your device back together by reversing these steps—easy peasy!

– If you hit a snag or just want to be sure, you can always schedule a repair with Salvation Repair.

Success!
Now, it’s time to put everything back together—just retrace your steps in reverse, and you’ll be good to go.
If you find yourself stuck at any point, don’t hesitate to schedule a repair. We’re here to help!

iPad 4 GSM LCD Replacement

Duration: 45 minutes
Steps: 32 Steps

Follow this guide to swap out your LCD like a pro.

Step 1

– Pop the iOpener right in the middle of the microwave. It’s like giving it a cozy little spot to warm up, but without the popcorn.

Tools Used
  1. iOpeneriPad 4 GSM LCD Replacement

Step 2

– Warm up the iOpener for about thirty seconds to get it nice and toasty.

– As you go through the repair, if the iOpener starts to cool down, just pop it back in the microwave for another thirty seconds to keep the heat going.

Tools Used
  1. iOpeneriPad 4 GSM LCD Replacement

Step 3

– Carefully take the iOpener out of the microwave by grabbing one of the flat ends—steer clear of the hot middle to keep those fingers safe!

Tools Used
  1. iOpeneriPad 4 GSM LCD Replacement

Step 4

– Grab a pot or pan and fill it with enough water to totally immerse an iOpener.

– Bring that water to a boil, then turn off the heat.

– Now, drop the iOpener into the hot water and let it soak for 2-3 minutes, making sure it’s completely submerged.

– Carefully use tongs to take the hot iOpener out of the water.

– Give the iOpener a good drying off with a towel.

– And that’s it! Your iOpener is good to go! If you need to reheat it, just repeat the process: boil the water, turn off the heat, and let the iOpener soak for 2-3 minutes.

Tools Used
  1. iOpeneriPad 4 GSM LCD Replacement

Step 5

– Got a cracked display? Keep things from getting worse and avoid hurting yourself while fixing it by taping up the glass.

– Grab some clear packing tape and lay down overlapping strips over the iPad’s display until the whole thing is covered.

– Follow the rest of the guide as closely as you can. Just a heads up: once the glass cracks, it might keep cracking as you work. If it gets tricky, don’t hesitate to grab a metal prying tool to help get that glass out.

Step 6

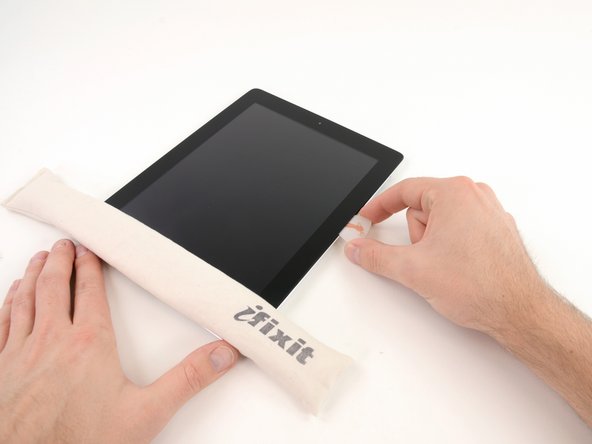
– Place the iOpener flat along the right edge of the iPad, making sure it’s nicely pressed down so it hugs the surface well.

– Let it chill there for about 90 seconds to warm things up before you try popping open the front panel.

Tools Used
  1. iOpeneriPad 4 GSM LCD Replacement

Step 7

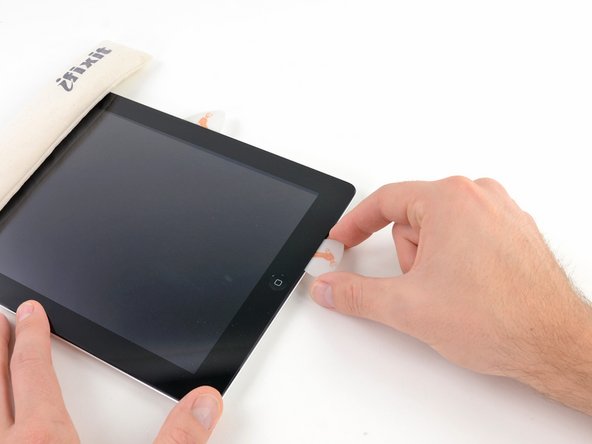
– There’s a tiny gap in the iPad’s adhesive ring at the upper right corner, about 2.0 inches (~5 cm) down from the top. This little spot is your entry point.

– Line up your tool with the mute button. Gently slide the tip of a plastic opening tool into the crack between the front glass and the plastic bezel—just enough to pry it open a bit.

Step 8

– Carefully slide your tool in right where the plastic display bezel meets the front panel glass—getting in that perfect spot is key!

Step 9

– Gently slide the plastic opening pick into the gap right next to the plastic opening tool, keeping the tip wedged between the front glass and plastic bezel. This will help you separate them without causing any damage. Take it slow and steady—patience is key here!

Step 10

– Gently pull out the plastic opening tool from the iPad, then slide the opening pick a bit deeper under the front glass—about half an inch—to keep things moving smoothly.

Step 11

– As you work on loosening the adhesive along the right edge of the iPad, go ahead and reheat the iOpener, then pop it back on the bottom edge to keep things nice and toasty.

Tools Used
  1. iOpeneriPad 4 GSM LCD Replacement

Step 12

– As the iOpener warms up the bottom edge, start loosening the adhesive from the right side of your iPad.

– Gently slide the opening pick down along the iPad’s edge, peeling away the adhesive bit by bit.

Tools Used
  1. iOpeneriPad 4 GSM LCD Replacement

Step 13

– If the opening pick gets stuck in the adhesive, try gently rolling it along the side of the iPad to keep loosening the adhesive. Patience is key here—just keep at it and it will eventually give way.

Tools Used
  1. iOpeneriPad 4 GSM LCD Replacement

Step 14

– Before popping that first pick into the bottom corner of the iPad, slide a second pick under the right edge of the front glass. This will keep the adhesive from sticking back down on you—let’s avoid a sticky situation.

– Give that iOpener another round of heat, then move it up to the top edge of the iPad. You’re almost there, just a little more to go!

Tools Used
  1. iOpeneriPad 4 GSM LCD Replacement

Step 15

– Alright, let’s take it slow here. This next part requires a bit of finesse.

– You’re going to need to carefully release the adhesive holding the antenna to the front panel, but don’t worry—just be gentle around the delicate parts connecting the antenna to the bottom of the iPad. Keep following the steps closely and you’ll be fine!

Step 16

– Carefully slide the opening pick around the bottom right corner of the iPad to loosen the adhesive hiding out there.

Step 17

– Gently slide the tip of your opening pick along the bottom edge of the iPad to carefully loosen the adhesive around the Wi-Fi antenna.

Step 18

– Alright, now that you’ve passed the Wi-Fi antenna (around 3″ (75 mm) from the right edge or right near the home button), slide that opening pick back in fully.

– Gently push the pick to the right to break the adhesive holding the Wi-Fi antenna to the front glass.

– The antenna is secured to the bottom of the iPad with screws and a cable. By completing this step, you’re safely detaching the antenna from the front panel, so when you remove the panel, the antenna stays safe and sound.

Step 19

– Carefully continue releasing the adhesive along the bottom of the iPad. As you pull the opening pick out, make sure it goes around the home button. Once it’s past the home button, reinsert it about 1/2 inch (10 mm) deep to keep things secure.

Tools Used
  1. iOpeneriPad 4 GSM LCD Replacement

Step 20

– Work your way along the bottom edge of the iPad, peeling off the adhesive. It’s like peeling the perfect sticker, just keep going!

– Once you’ve got some space, slide the opening pick right under the front glass near the home button. It’s going to be your trusty sidekick for the next step.

Step 21

– Pop the iOpener back in the microwave to warm it up again, then place it along the left edge of the iPad to gently loosen the adhesive there.

Tools Used
  1. iOpeneriPad 4 GSM LCD Replacement

Step 22

– Gently slide the opening pick along the top edge of your iPad, carefully guiding it around the front-facing camera bracket. A little wiggle here will do the trick!

– The adhesive in this section is pretty thick, so you’ll need to apply some steady pressure. Take it slow, avoid any sudden moves, and make sure you and your iPad stay in one piece!

– If the opening pick gets stuck due to the adhesive, just give it a little roll, as shown in step 9, to keep things moving smoothly.

Tools Used
  1. iOpeneriPad 4 GSM LCD Replacement

Step 23

– Keep peeling off that sticky adhesive along the top edge of the iPad, then grab your opening pick and gently slide it around the top left corner.

Tools Used
  1. iOpeneriPad 4 GSM LCD Replacement

Step 24

– Gently slide the opening pick along the left edge of the iPad, carefully releasing the adhesive as you go. Be mindful of the digitizer on the left side, as the adhesive is a bit thinner here. Keep the pick no deeper than 1/2 inch (about 10 mm) to avoid causing any damage to the digitizer.

Step 25

– With the opening pick still tucked under the bottom edge of the iPad, carefully slide it to loosen the adhesive at the bottom left corner.

Step 26

– Grab one of those trusty opening picks and gently wedge it under the bottom right corner of your iPad, then lift it up and hold on tight!

Step 27

– Grab the iPad firmly by the top and bottom right corners, then gently swivel the front glass away from the device.

– When putting everything back together, give the LCD a quick once-over with a microfiber cloth and some compressed air to wipe away any dust or smudges before snapping the glass back on.

Step 28

– Unscrew the four tiny 2 mm Phillips #00 screws holding the LCD onto the aluminum frame—time to get that screen free!

Step 29

– Grab your plastic opening tool or a spudger, and carefully lift the right edge of the LCD away from the iPad.

– Now, gently rotate the LCD along its left edge and rest it carefully on top of the front glass panel.

Tools Used
  1. SpudgeriPad 4 GSM LCD Replacement

Step 30

– Gently lift the piece of tape covering the LCD ribbon cable connector using the tip of your trusty spudger.

Tools Used
  1. SpudgeriPad 4 GSM LCD Replacement

Step 31

– Flip open the little retaining flap on the LCD ribbon cable ZIF connector. It’s like giving it a tiny hug, just enough to release it.

– Using your fingers or a pair of tweezers, gently pull the LCD ribbon cable out of its socket on the logic board. No wrestling here, just a smooth pull.

– If the LCD screen doesn’t light up after reconnecting the ZIF connector, try holding the power button and home button together for at least ten seconds. If all goes well, you should see the Apple logo pop up. If that’s still not doing the trick, don’t worry, you can always schedule a repair.

Step 32

– Carefully lift the LCD off the front panel, making sure not to touch the screen directly. Keep it gentle – no sudden moves!

Success!

iPad Pro 12.9″ 3rd Gen Logic Board Replacement

Duration: 45 minutes
Steps: 62 Steps

Ready to replace the logic board in your iPad Pro 12.9″ 3rd Gen? Here’s the scoop: the logic board is connected to the front camera assembly. So, if you go ahead and swap out the logic board on its own, say goodbye to Face ID. This guide is based on the WiFi + Cellular version (Model A2014), so if your model differs slightly, don’t worry – just a few minor visual tweaks, but the steps stay the same. Some of the photos in this guide show the battery connector blocked with two card strips. While this method works, it’s much more reliable to fully discharge the battery first. Just keep moving through the steps, and if you need help, you can always schedule a repair.

Step 1

– Disconnect any cables and power off your iPad completely.

Step 2

– Grab your iOpener and heat it up a bit, then press it gently against the right edge of the screen. Let it sit there for two minutes, giving that screen some love and warmth. It’ll make the next steps easier, promise!

Tools Used
  1. iOpeneriPad Pro 12.9
  2. Heat GuniPad Pro 12.9

Step 3

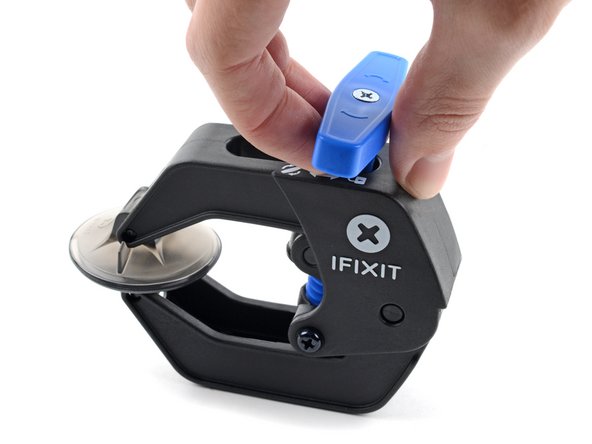
– Give the blue handle a little tug backward to unlock the Anti-Clamp’s arms and set the stage.

– Rest your iPad on a soft object, making sure it sits nice and level between the suction cups. Precision matters!

– Place one suction cup on the top and the other on the bottom, right near the middle of the right edge. They’re like buddies working together.

– Now, keep the bottom of the Anti-Clamp steady and give the top suction cup a good press. Watch the magic happen as it sticks!

Step 4

– Pull the blue handle forward to lock the arms in place.

– Give the handle a nice 360-degree twist (clockwise, of course!) or until the suction cups start to stretch.

– Double check that the suction cups stay nice and lined up. If they start slipping out of place, just loosen them a bit and give the arms a little realignment.

Step 5

– Take a breather for about a minute to give the adhesive some time to let go and create a little gap for you.

– If the screen’s not warming up enough, feel free to give the right edge of your iPad a quick blast with a hair dryer to help it along.

– Once the Anti-Clamp has created a nice enough gap, gently slide an opening pick underneath the screen.

– Feel free to skip the next step—you’re doing great!

Step 6

– Stick a suction handle onto the screen, aiming for the center of the right edge—precision is key!

– Give the suction handle a firm, steady tug upwards to gently pop open a little gap between the frame and screen.

– Slide an opening pick into that gap to keep things moving smoothly.

Tools Used
  1. iOpeneriPad Pro 12.9
  2. Suction HandleiPad Pro 12.9

Step 7

– The first magnet starts its gig about 3 cm down from the top edge of your iPad.

– The second magnet kicks in around 3 cm up from the bottom edge of your iPad.

Step 8

– Gently slide your opening pick down the right side of the screen to break that adhesive seal.

– Once you’ve made some progress, leave the pick snug in the bottom right corner to keep things in place as you move on.

Step 9

– Gently slide your opening pick around the bottom right corner of the screen to loosen the adhesive.

– Keep your pick lodged in that corner to stop the adhesive from snapping back together.

Step 10

– Place a warm iOpener on the bottom edge of the screen and let it chill there for two minutes.

Tools Used
  1. iOpeneriPad Pro 12.9

Step 11

– Gently slide a second opening pick under the bottom right corner of the screen.

– Carefully move your pick over to the bottom left corner to loosen the adhesive holding the bottom in place.

Step 12

– Gently glide your opening pick around the bottom left corner of the screen.

– Once it’s in place, leave the pick there to stop the adhesive from sealing back up.

Step 13

– Place a warm iOpener along the left edge of the screen for two minutes to get things nice and toasty.

Tools Used
  1. iOpeneriPad Pro 12.9

Step 14

– The upper cutout starts 4 cm down from the top of the frame and stretches 3 cm long.

– The middle cutout kicks off 12 cm from the top and spans 3 cm.

– The bottom cutout sits 4 cm from the bottom of the frame, also measuring 3 cm long.

Step 15

– Slide a third opening pick under the bottom left corner of the screen.

– Carefully glide your pick up to the top left corner to cut through the left adhesive, making sure to steer clear of the cutouts you spotted earlier.

– Keep the pick wedged in the top left corner before moving on to the next step.

Step 16

– Gently slide your opening pick around the top left corner of the screen, like you’re tracing a secret path!

– Leave your pick snug in the top left corner, just enough to keep that adhesive from sneaking back into place. You’ve got this!

Step 17

– Gently heat up your iOpener and apply it to the top edge of the screen for a solid two minutes. This’ll help loosen things up before you dive into the repair. Patience is key!

Tools Used
  1. iOpeneriPad Pro 12.9

Step 18

– While the top edge adhesive is softening, keep these tips in mind:

– There are two ambient light sensors tucked away near the corners. Be careful not to push your pick more than 1mm into this area.

– The front-facing camera and extra sensors are right in the middle of the top edge. Avoid inserting your pick here — there’s barely 1mm of adhesive, and you don’t want to risk damaging those delicate components.

Step 19

– Gently slide your opening pick about 9 cm toward the top right edge, stopping just before you reach the camera assembly.

– Keep your pick in place before moving on to the next step.

Step 20

– Pop a new opening pick on the opposite side of the camera assembly, about 4 cm away from the last one.

– Slide your pick toward the top right corner to carefully cut through the leftover adhesive.

Step 21

– Hold onto two opposite corners of the screen and gently lift it away from the frame.

– Slide the screen down and to the right until the ribbon cable near the top edge peeks out.

Step 22

– Grab your Phillips screwdriver and take out the two screws holding the upper cable shield in place:

– When you’re putting it back together, this is a great moment to power on your iPad and make sure everything’s working smoothly before sealing it up. Remember to shut it down again before moving on.

– One screw measuring 2.0 mm in length

– One screw measuring 1.8 mm in length

Step 23

– Carefully grab the upper cable shield with tweezers or your fingers and pull it off.

Step 24

– Gently use the spudger’s tip to lift and disconnect that upper sensors press connector. You’re doing great!

Tools Used
  1. SpudgeriPad Pro 12.9

Step 25

– Grab the right edge of the screen and swing it open like you’re flipping through a cool book.

– Gently lay the screen down over the left edge of the iPad.

Step 26

– Grab your Phillips screwdriver and loosen the five screws holding down the display cable bracket:

– Four screws measuring 1.1 mm in length

– One screw that’s a bit longer at 2.0 mm

Step 27

– Grab your trusty tweezers or just use your fingers to carefully pop off the display cable bracket.

Step 28

– Grab your trusty spudger and gently pry up the SIM card reader cable press connector to unplug it. Easy does it!

Tools Used
  1. SpudgeriPad Pro 12.9

Step 29

– Gently use tweezers or just your fingers to lift the SIM card reader cable off the battery connector. Easy does it!

Step 30

– Grab a Phillips screwdriver and carefully unscrew the 1.7 mm-long screw that’s holding the battery connector to the logic board. Take your time, it’s not in a rush!

Step 31

– Grab your trusty spudger and gently pry up to disconnect those two top display cable press connectors with a bit of flair.

Tools Used
  1. SpudgeriPad Pro 12.9

Step 32

– Grab your trusty spudger and carefully lift those bottom display cable press connectors off their pins. You’ve got this!

Tools Used
  1. SpudgeriPad Pro 12.9

Step 33

– Carefully take off the screen.

Step 34

– Grab an opening tool and gently lift the metal tape off the logic board. Once you’ve loosened it enough, use your trusty tweezers to pull it away. Easy does it!

Step 35

– Gently lift the tape from around the screw areas using tweezers. It’s like peeling off a sticker, but for your device.

Step 36

– Grab a Phillips screwdriver and get ready to unscrew the eight screws holding the logic board cover in place:

– Five screws, each 2.0 mm long

– Three screws, each 1.1 mm long

Step 37

– Gently lift and peel off the logic board cover to get it out of the way.

Step 38

– Grab your trusty spudger and gently pry up the front camera assembly cable connectors to disconnect them. Easy does it!

Tools Used
  1. SpudgeriPad Pro 12.9

Step 39

– Gently lift the left cable off the logic board using tweezers or just your fingers—easy does it!

Step 40

– Gently use tweezers or your fingers to lift the middle cable off the logic board. Take it slow and steady, you’ve got this!

Step 41

– Grab a T-3 screwdriver and unscrew the two 2.2 mm screws holding the front camera assembly in place. You got this!

Step 42

– Slide the flat end of your trusty spudger right under the front camera, snug between the middle and right cables.

– Give that spudger a little twist to gently break apart the epoxy holding the front camera in place.

– Carefully lift out the front camera like a pro.

– When putting everything back together, use your spudger to scrape away any leftover epoxy before reinstalling the front camera.

Tools Used
  1. SpudgeriPad Pro 12.9

Step 43

– Grab your Phillips screwdriver and twist out the 2.0 mm screw holding the bottom speaker bracket to the logic board. Easy does it!

Step 44

– Grab your tweezers or just use your fingers to gently lift off that bottom speaker bracket.

Step 45

– Gently use the tip of a spudger to lift and unplug the four speaker connectors at the bottom—careful does it!

Tools Used
  1. SpudgeriPad Pro 12.9

Step 46

– Grab a spudger and gently pry up to unplug the Smart Connector press connector located at the bottom of the logic board.

Tools Used
  1. SpudgeriPad Pro 12.9

Step 47

– Gently use the end of a spudger to lift and detach the four top speaker connectors.

Tools Used
  1. SpudgeriPad Pro 12.9

Step 48

– Grab a spudger and gently wiggle it under the rear camera cable press connector to lift and disconnect it. Take your time – this step doesn’t need a rush, just a steady hand!

Tools Used
  1. SpudgeriPad Pro 12.9

Step 49

– Grab a spudger and gently pry up the top microphone press connector to disconnect it. Easy does it!

Tools Used
  1. SpudgeriPad Pro 12.9

Step 50

– Grab your trusty spudger and carefully wedge its point right next to the coaxial connector to gently pry up and unplug that 5G mmWave antenna.

Tools Used
  1. SpudgeriPad Pro 12.9

Step 51

– Grab your trusty spudger and gently lift up the top antenna press connector to disconnect it. Nice and easy, no rush!

Tools Used
  1. SpudgeriPad Pro 12.9

Step 52

– Grab your trusty spudger and gently pry up that bottom antenna press connector to disconnect it—easy does it!

Tools Used
  1. SpudgeriPad Pro 12.9

Step 53

– Grab the point of your trusty spudger and gently pry up to disconnect the Wi-Fi antenna cable. Aim for the coaxial connector, and pry carefully right around it. A little precision goes a long way here!

Tools Used
  1. SpudgeriPad Pro 12.9

Step 54

– Gently peel the Wi-Fi cable toward the right edge of your iPad, like you’re sliding a bookmark into place.

Step 55

– Keep on peeling that cable down towards the bottom edge of the iPad to free it from the logic board. You’ve got this!

Step 56

– Grab your trusty spudger and gently pry up to disconnect the left microphone and Apple Pencil charger cable press connectors. Keep it smooth and steady!

Tools Used
  1. SpudgeriPad Pro 12.9

Step 57

– Grab some high-concentration (over 90%) isopropyl alcohol and gently apply it to the right edge of the logic board. Take your time and make sure it’s just enough to get the job done without overdoing it.

Step 58

– Gently lift the right side of the iPad, just enough to let that trusty isopropyl alcohol sneak underneath the logic board.

– Now, give it about a minute to let the alcohol work its magic and loosen up that adhesive.

Step 59

– Gently slide an opening pick under the top edge of the logic board to break free the bottom adhesive. Be careful, it can be a little sticky!

– Leave that opening pick in place to keep the adhesive from sealing up again. You’ve got this!

Step 60

– Carefully slide an opening pick under the top right corner of the logic board.

– Gently move the pick along toward the battery connector to loosen the right side adhesive.

– Leave the pick in place next to the battery connector to keep that adhesive from sticking back together.

Step 61

– Slip a fresh opening pick under the logic board, right across from the battery connector.

– Gently slide that pick down toward the bottom of the iPad to loosen the rest of the adhesive.

Step 62

– Time to put everything back together! Just follow the steps in reverse and you’re golden.

– Got some old electronics lying around? Don’t forget to send them to an R2 or e-Stewards certified recycler.

– Did things go a bit sideways? No worries, check out some basic troubleshooting or ask the community for tips on fixing your iPad 12.9″ 3rd Generation.

– If you’re still stuck, or want a pro to handle it, feel free to schedule a repair.

Success!
Put your device back together by reversing the steps you just followed.
When it’s time to part with your old electronics, drop them off at an R2 or e-Stewards certified recycler to keep things green.
If things didn’t quite go as planned, try some basic troubleshooting or reach out for help from our iPad 12.9″ 3rd Generation Answers community.
If you hit a wall, remember you can always schedule a repair with us.

iPad 4 GSM Home Button Assembly Replacement

Duration: 45 minutes
Steps: 45 Steps

Follow this guide to swap out the home button assembly from your front panel and get everything back in action. If things get tricky along the way, don’t hesitate to schedule a repair for extra support.

Step 1

– Pop the iOpener right in the center of the microwave. It’s the perfect spot to give it that warm-up boost!

Tools Used
  1. iOpeneriPad 4 GSM Home Button Assembly Replacement

Step 2

– Give the iOpener a quick 30-second warm-up in the microwave.

– As you work, if the iOpener cools down, just pop it back in the microwave for another 30 seconds to keep things nice and toasty.

Tools Used
  1. iOpeneriPad 4 GSM Home Button Assembly Replacement

Step 3

– Carefully take the iOpener out of the microwave by grabbing one of the flat ends—steer clear of the hot middle to keep your fingers safe!

Tools Used
  1. iOpeneriPad 4 GSM Home Button Assembly Replacement

Step 4

– Grab a pot or pan and fill it with enough water to fully cover your iOpener.

– Bring the water to a rolling boil, then turn off the heat.

– Carefully drop your iOpener into the hot water, making sure it’s completely submerged, and let it soak for 2-3 minutes.

– Use tongs to fish out the heated iOpener from the water—watch out, it’s hot!

– Give your iOpener a good dry-off with a towel so it’s ready to roll.

– Need to warm it up again? Just repeat the boiling and soaking steps for another 2-3 minutes.

Tools Used
  1. iOpeneriPad 4 GSM Home Button Assembly Replacement

Step 5

– If your display glass is cracked, keep the mess and potential ouchies at bay by taping over the glass before you start.

– Cover the entire iPad screen with overlapping strips of clear packing tape until it’s fully wrapped up.

– Follow the rest of the steps as usual, but heads up: once the glass is cracked, it might keep cracking as you go. You may need to carefully use a metal prying tool to scoop out the broken bits.

Step 6

– Place the iOpener flat along the right edge of the iPad, making sure it’s nicely smoothed out so it hugs the surface well.

– Let it chill there for about 90 seconds to warm things up before you try popping open the front panel.

Tools Used
  1. iOpeneriPad 4 GSM Home Button Assembly Replacement

Step 7

– Spot a tiny gap in the iPad’s adhesive ring near the upper right corner, about 2.0 inches (~5 cm) down from the top. This little gap is your secret entry point.

– Line up your tool with the mute button. Gently slip the tip of a plastic opening tool into the gap between the front glass and the plastic bezel. Just nudge the tip in just enough to pry the crack open a bit.

Step 8

– Place the tool carefully between the plastic display bezel and the front panel glass. Precision is key here – just give it a little nudge into the right spot and you’re good to go!

Step 9

– Keep the tip of your plastic opening tool snug between the front glass and the plastic bezel, then slide a plastic opening pick into the gap right beside it to gently work things apart.

Step 10

– Gently pull out the plastic opening tool from the iPad, then slide the opening pick a bit deeper under the front glass—aim for about half an inch.

Step 11

– As you carefully loosen the adhesive on the right side of the iPad, give that iOpener a quick zap to heat it back up and place it back on the bottom edge to keep things nice and warm.

Tools Used
  1. iOpeneriPad 4 GSM Home Button Assembly Replacement

Step 12

– As the iOpener warms up the bottom edge, start loosening the adhesive along the right edge of the iPad.

– Gently slide your opening pick down the side, carefully freeing the adhesive as you move.

Tools Used
  1. iOpeneriPad 4 GSM Home Button Assembly Replacement

Step 13

– If the opening pick gets stuck in the adhesive, try ‘rolling’ the pick along the side of the iPad to keep loosening the adhesive gently.

Tools Used
  1. iOpeneriPad 4 GSM Home Button Assembly Replacement

Step 14

– Before you take out that first opening pick from the bottom corner of the iPad, slide a second pick under the right edge of the front glass to keep that adhesive from sticking back together.

– Warm up the iOpener again, then shift it over to the top edge of the iPad to keep things nice and toasty.

Tools Used
  1. iOpeneriPad 4 GSM Home Button Assembly Replacement

Step 15

– Heads up: the next steps call for some serious care.

– You’ll need to carefully free the adhesive holding the antenna to the front panel without messing with the fragile parts connecting the antenna at the bottom of the iPad. Take it slow and follow along closely.

Step 16

– Gently slide the opening pick around the bottom right corner of your iPad to loosen the adhesive hanging out there.

Step 17

– Gently slide the tip of your opening pick along the bottom edge of the iPad to carefully loosen the adhesive holding down the Wi-Fi antenna. Keep it smooth and steady!

Step 18

– Alright, you’re doing great! Once you’ve passed the Wi-Fi antenna (that’s about 3 inches, or 75 mm from the right edge, right next to the home button), gently slide the opening pick back in to its full depth.

– Now, give that pick a little nudge to the right, and it’ll release the sticky stuff holding the Wi-Fi antenna to the front glass. Easy peasy.

– The antenna’s connected to the bottom of the iPad with screws and a cable, so this step is key to safely detaching it from the front panel. No worries, when you lift the panel, the antenna will stay intact and undamaged.

Step 19

– Carefully continue to release the adhesive along the bottom of the iPad. Gently pull the opening pick far enough to wrap around the home button, then re-insert it to a depth of about 1/2 inch (10 mm) once it’s past the button. Take your time and go slow—this part’s a bit tricky, but you’ve got this!

Tools Used
  1. iOpeneriPad 4 GSM Home Button Assembly Replacement

Step 20

– Keep peeling the adhesive along the entire bottom edge of the iPad like a pro.

– Leave the opening pick tucked under the front glass near the home button to hold your progress.

Step 21

– Pop the iOpener into the microwave for a quick heat-up, then place it on the left side of your iPad. Let the warmth work its magic on that adhesive—things are about to get sticky!

Tools Used
  1. iOpeneriPad 4 GSM Home Button Assembly Replacement

Step 22

– Gently slide the opening pick along the top edge of the iPad, nudging it out a bit to navigate around the front-facing camera bracket.

– Heads up: the adhesive here is super stubborn, so you might need to put in some elbow grease. Take it slow and steady to avoid any slips or scratches on yourself or your iPad.

– If the pick starts to get stuck in the adhesive, try “rolling” it as demonstrated in step 9 to keep things moving smoothly.

Tools Used
  1. iOpeneriPad 4 GSM Home Button Assembly Replacement

Step 23

– Keep peeling back the adhesive along the top edge of the iPad, and carefully slide your opening pick around the top left corner like a pro.

Tools Used
  1. iOpeneriPad 4 GSM Home Button Assembly Replacement

Step 24

– Gently slide the opening pick along the left edge of the iPad to lift the adhesive. The adhesive is a little thinner on this side because of the digitizer running along the left edge. Be careful not to push the pick too deep—stay around 10 mm (about half an inch) to avoid messing with the digitizer.

Step 25

– Using the opening pick still resting under the bottom edge of your iPad, gently lift the adhesive at the bottom left corner. It’s like peeling off a sticker – just be careful not to rush!

Step 26

– Grab one of your trusty opening picks and gently wedge it under the bottom right corner of the iPad. Once it’s popped up, snag it with your fingers and you’re good to go!

Step 27

– Grab the iPad by the top and bottom right corners and gently swivel the front glass away from the device.

– When putting it back together, grab a microfiber cloth and some compressed air to give the LCD a nice clean sweep—no dust or fingerprints allowed before you snap the glass back on.

Step 28

– Unscrew the four tiny 2 mm Phillips #00 screws that are holding the LCD onto the aluminum frame. You got this!

Step 29

– Grab a plastic opening tool or spudger and gently pry up the right edge of the iPad’s LCD.

– Carefully swing the LCD open along its left side and rest it face-up on top of the front glass panel.

Tools Used
  1. SpudgeriPad 4 GSM Home Button Assembly Replacement

Step 30

– Gently use the spudger’s tip to lift up the tape that’s keeping the LCD ribbon cable connector in place. Take your time – it’s a simple step, but a crucial one!

Tools Used
  1. SpudgeriPad 4 GSM Home Button Assembly Replacement

Step 31

– Gently flip up the little flap holding the LCD ribbon cable ZIF connector in place.

– Carefully wiggle the LCD ribbon cable free from its socket on the logic board using your fingers or tweezers.

– If the LCD screen doesn’t light up after reconnecting the ZIF cable, try a force restart by holding down both the power and home buttons for about ten seconds until the Apple logo shows up.

Tools Used
  1. TweezersiPad 4 GSM Home Button Assembly Replacement

Step 32

– Carefully lift the LCD away from the front panel—just don’t touch the screen side!

Step 33

Step 34

– Gently lift the little flap holding down the home button ribbon cable connector to unlock it.

Step 35

– Grab some tweezers and carefully pull the home button ribbon cable straight out from its socket on the logic board.

Tools Used
  1. TweezersiPad 4 GSM Home Button Assembly Replacement

Step 36

– Gently lift and slide the home button ribbon cable out from its snug spot in the rear case.

Step 37

– Grab the tip of your spudger and gently peel back the tape holding the digitizer ribbon cable to the logic board. Just take your time and go slow—it’s all about finesse here!

Tools Used
  1. SpudgeriPad 4 GSM Home Button Assembly Replacement

Step 38

– Gently lift the little flap holding down each digitizer ribbon cable in its ZIF connector.

Step 39

– Gently wedge the flat end of your spudger under the digitizer ribbon cable to carefully break up the adhesive holding it down.

– Pull the digitizer ribbon cable straight out from its connectors on the logic board without twisting or bending.

Tools Used
  1. SpudgeriPad 4 GSM Home Button Assembly Replacement

Step 40

– Gently peel back the digitizer ribbon cable, then use the flat end of a spudger to carefully pop loose the adhesive holding that cable down to the rear aluminum case.

Tools Used
  1. SpudgeriPad 4 GSM Home Button Assembly Replacement

Step 41

– Gently pull the digitizer ribbon cable out of its cozy little spot in the aluminum frame using your fingers. Be careful not to rush it!

– Now, go ahead and lift off the front panel from the iPad. It should come off smoothly – no force needed!

Step 42

– Pop the iOpener into the microwave and heat it up for one minute at full power (or just thirty seconds if you’re working with the newer gel-filled iOpener).

– Set the warm iOpener right on top of the home button along the front edge of the screen.

Tools Used
  1. iOpeneriPad 4 GSM Home Button Assembly Replacement

Step 43

– Gently lift the home button ribbon cable away from the front panel with care.

Step 44

– Slide the plastic opening tool under the right side of the home button assembly and gently pry upward to break free the adhesive on that side.

– Repeat the same clever move on the left side to release its adhesive grip.

– Carefully lift the home button mount off the front panel and set it aside.

Step 45

– Carefully slide the edge of your plastic opening tool under the home button mounting bracket.

– Gently glide the tool along the retaining spring bracket to loosen up that stubborn adhesive.

– Lift out the home button along with its mounting bracket from the front panel like a pro.

Success!
To put your device back together, just follow these steps in reverse order. Don’t forget to use our iPad 4 GSM Front Panel Adhesive strips guide to securely reattach the front panel. And if you hit a snag, you can always schedule a repair with us!

iPad 4 GSM Headphone Jack Board Replacement

Duration: 45 minutes
Steps: 59 Steps

Follow this guide to swap out that headphone jack board and get your device back to sounding great! It’s easier than it sounds, and with a little patience, you’ll have it done in no time. Need a hand? If things get tricky, don’t hesitate to schedule a repair.

Step 1

– Pop the iOpener right in the middle of your microwave, like it’s the star of the show.

Tools Used
  1. iOpeneriPad 4 GSM Headphone Jack Board  Replacement

Step 2

– Warm up the iOpener for 30 seconds, giving it a little heat love.

– As you continue with the repair, remember to give the iOpener a quick reheat in the microwave every 30 seconds as it cools down.

Tools Used
  1. iOpeneriPad 4 GSM Headphone Jack Board  Replacement

Step 3

– Carefully take the iOpener out of the microwave, holding it by one of the flat ends to steer clear of the hot center. Don’t burn your hands!

Tools Used
  1. iOpeneriPad 4 GSM Headphone Jack Board  Replacement

Step 4

– Grab a pot or pan and fill it with enough water to give your iOpener a nice bath.

– Heat that water up until it’s bubbling away, then turn off the heat.

– Carefully lower the iOpener into the steamy water for about 2-3 minutes—make sure it’s fully submerged and enjoying the warmth.

– Use some tongs to fish out the warmed iOpener from its cozy water bath.

– Give the iOpener a good towel-dry to get rid of any excess moisture.

– Voila! Your iOpener is all set for action! Should it need another round in the hot tub, just repeat the process: heat the water to a boil, turn off the heat, and let the iOpener soak for another 2-3 minutes.

Tools Used
  1. iOpeneriPad 4 GSM Headphone Jack Board  Replacement

Step 5

– Grab a SIM eject tool or a straightened paperclip and gently pop out the SIM tray.

Step 6

– Gently slide the SIM tray out from its slot and take it out of the iPad.

– If you’re swapping the SIM card, pop the old one out of the tray and slide the new one in.

Step 7

– Got a cracked screen? No worries! Keep things safe and stop shards from flying by taping over the glass before you dive in.

– Cover the iPad’s display with overlapping strips of clear packing tape until the whole front is snugly protected.

– Follow the rest of the guide as best you can. Heads up: broken glass can keep cracking as you work, so you might need a metal prying tool to carefully lift it out. Take it slow and if it gets tricky, you can always schedule a repair.

Step 8

– Place the iOpener flat along the right edge of the iPad, pressing it down so it makes good contact with the surface.

– Let it chill there for about 90 seconds to warm things up before you try to pry open the front panel.

Tools Used
  1. iOpeneriPad 4 GSM Headphone Jack Board  Replacement

Step 9

– Take a look at the upper right corner of your iPad – there’s a tiny gap in the adhesive ring, about 2 inches (~5 cm) down from the top. Time to use this to your advantage!

– Position your tool near the mute button. Gently slide the tip of a plastic opening tool into the gap between the glass and the bezel. Just get the very tip in there, just enough to pry open that little crack.

Step 10

– Place the tool carefully in the right spot—right between the plastic display bezel and the front panel glass. Take your time and make sure it’s snug in there, no rush!

Step 11

– Keep the tip of your plastic opening tool tucked between the front glass and plastic bezel, then slide a plastic opening pick right into the gap next to it. Easy does it!

Step 12

– Time to move that plastic opening tool out of the way! Now, grab the opening pick and slide it gently under the front glass, going in about 0.5 inches deep. You’ve got this!

Step 13

– As you carefully loosen the adhesive along the right edge of the iPad, go ahead and warm up your iOpener again, then place it back along the bottom edge to keep things toasty.

Tools Used
  1. iOpeneriPad 4 GSM Headphone Jack Board  Replacement

Step 14

– As the iOpener warms up the bottom edge, start loosening the adhesive along the right edge of the iPad.

– Gently slide the opening pick down the iPad’s edge, carefully freeing the adhesive as you go.

Tools Used
  1. iOpeneriPad 4 GSM Headphone Jack Board  Replacement

Step 15

– If your opening pick decides to play clingy with the adhesive, just roll it smoothly along the side of the iPad to keep peeling that glue away.

Tools Used
  1. iOpeneriPad 4 GSM Headphone Jack Board  Replacement

Step 16

– Before you pop that first pick into the bottom corner of your iPad, slide a second pick under the right edge of the front glass. This will help keep the adhesive from sticking back where it came from.

– Re-heat the iOpener and move it up to the top edge of the iPad. The heat will make everything much easier to work with!

Tools Used
  1. iOpeneriPad 4 GSM Headphone Jack Board  Replacement

Step 17

– Time to take things slow and steady—these next steps need a bit of finesse.

– Gently work on loosening the adhesive holding the antenna to the front panel. Be super careful around the sensitive parts that connect the antenna to the bottom of the iPad. Follow the upcoming steps closely to avoid any accidents.

Step 18

– Gently slide the opening pick around the bottom right corner of the iPad to loosen the adhesive hiding out there.

Step 19

– Gently slide the opening pick along the bottom edge of your iPad, easing up the adhesive over the Wi-Fi antenna. Take it slow, and remember, patience is key!

Step 20

– Once you’ve passed the Wi-Fi antenna (about 3″ (75 mm) from the right edge, or right by the home button), pop that opening pick back in all the way.

– Now, gently slide the pick to the right to break the adhesive holding the Wi-Fi antenna to the front glass. It’ll come right off.

– The antenna is screwed into the bottom of the iPad and connected via a cable. This step is key—it detaches the antenna from the front panel, making sure it stays safe when you remove the panel. No antenna damage here!

Step 21

– Keep sliding that adhesive release tool along the bottom edge of the iPad, carefully pulling the pick out far enough to loop it around the home button, then slide it back in about half an inch (10 mm) once you’re past the button.

Tools Used
  1. iOpeneriPad 4 GSM Headphone Jack Board  Replacement

Step 22

– Gently work your way along the bottom edge of the iPad, releasing the adhesive as you go. Keep it steady, we’re almost there!

– Place the opening pick carefully underneath the front glass near the home button, and leave it there for now. This will help keep things open while you move on to the next step!

Step 23

– Pop the iOpener back in the microwave to warm it up again, then place it on the left edge of your iPad to gently heat that stubborn adhesive.

Tools Used
  1. iOpeneriPad 4 GSM Headphone Jack Board  Replacement

Step 24

– Gently slide the opening pick along the top edge of your iPad, pulling it out a little as you work around the front-facing camera bracket.

– The adhesive here is pretty stubborn, so you might need to apply some muscle. Take it slow and steady—no rush! We don’t want any slips that could damage the iPad (or your fingers).

– If the pick starts to get stuck in the adhesive, try rolling it gently like shown in step 9. This should help it glide through!

Tools Used
  1. iOpeneriPad 4 GSM Headphone Jack Board  Replacement

Step 25

– Keep peeling the adhesive along the top edge of your iPad, then slide that opening pick around the top left corner like a pro.

Tools Used
  1. iOpeneriPad 4 GSM Headphone Jack Board  Replacement

Step 26

– Gently slide your opening pick along the left side of the iPad to loosen the adhesive bit by bit. Heads up: the adhesive is pretty thin here because of the digitizer running along this edge. Keep the pick shallow—no deeper than about 10 mm (half an inch)—to avoid any accidental digitizer drama.

Step 27

– With your trusty opening pick still hanging out under the bottom edge of your iPad, gently work it around the bottom left corner to break the adhesive seal. Take your time and be careful, it’ll pop right off!

Step 28

– Grab your opening pick and gently wedge it under the bottom right corner of the iPad. Once it’s lifted, give it a little nudge with your fingers to pull it up.

Step 29

– Grab the iPad by the top and bottom right corners and gently twist the front glass away from the iPad. Easy does it!

– Before putting everything back together, use a microfiber cloth and some compressed air to give the LCD a quick clean. You want that fresh, spotless look before sealing it all up!

Step 30

– Take out those four tiny 2 mm Phillips #00 screws that are holding the LCD to the aluminum frame. They’re small, but they’re no match for your screwdriver skills!

Step 31

– Grab a plastic opening tool or a spudger and gently lift the right edge of the LCD from the iPad.

– Now, carefully rotate the LCD along its left edge and place it down onto the front glass panel, making sure everything is aligned.

Tools Used
  1. SpudgeriPad 4 GSM Headphone Jack Board  Replacement

Step 32

– Gently use the tip of a spudger to lift the tape shielding the LCD ribbon cable connector.

Tools Used
  1. SpudgeriPad 4 GSM Headphone Jack Board  Replacement

Step 33

– Lift up the retaining flap on the LCD ribbon cable ZIF connector with a gentle flick.

– With a light touch, either use your fingers or a pair of tweezers to slide the LCD ribbon cable out of its socket on the logic board.

– If your LCD screen is being a little shy and doesn’t light up after reconnecting the ZIF connector, a quick force restart might be needed. Hold the power and home buttons together for about ten seconds, and the Apple logo should make a grand reappearance.

Tools Used
  1. TweezersiPad 4 GSM Headphone Jack Board  Replacement

Step 34

– Gently lift the LCD off the front panel, but make sure not to touch the front of it. Just give it a little nudge and let it pop free!

Step 35

Step 36

– Lift up the flap on the home button ribbon cable ZIF connector with care, it’s just a small step, but we’re getting closer to fixing this thing!

Step 37

– Grab your tweezers and gently wiggle the home button ribbon cable straight out from its socket on the logic board. Keep it smooth and steady!

Tools Used
  1. TweezersiPad 4 GSM Headphone Jack Board  Replacement

Step 38

– Gently lift and slide the home button ribbon cable out from its cozy spot in the rear case.

Step 39

– Grab your trusty spudger and gently lift the tape holding the digitizer ribbon cable in place on the logic board. Take it slow, we don’t want to rip anything!

Tools Used
  1. SpudgeriPad 4 GSM Headphone Jack Board  Replacement

Step 40

– Gently lift the little flap locking each digitizer ribbon cable ZIF connector to free them up.

Step 41

– Grab your trusty spudger and use its flat end to gently loosen the adhesive holding down that digitizer ribbon cable.

– Now, carefully pull the digitizer ribbon cable straight out of its sockets on the logic board. Easy does it!

Tools Used
  1. SpudgeriPad 4 GSM Headphone Jack Board  Replacement

Step 42

– Gently lift the digitizer ribbon cable and use the flat end of a spudger to carefully loosen the adhesive holding it to the back of the aluminum case. Take your time, and remember, patience is key!

Tools Used
  1. SpudgeriPad 4 GSM Headphone Jack Board  Replacement

Step 43

– Gently use your fingers to wiggle the digitizer ribbon cable free from its snug spot in the aluminum frame.

– Lift the front panel off the iPad and set it aside.

Step 44

– Carefully peel back and remove the electrical tape covering the headphone jack cable connector. We know, it’s a bit sticky, but you’ve got this!

– Using your spudger, gently lift the retaining flaps on both ZIF connectors that are holding the headphone jack cable to the logic board. Don’t rush—steady hands will do the trick!

Tools Used
  1. SpudgeriPad 4 GSM Headphone Jack Board  Replacement

Step 45

– Gently slide the flat end of your spudger under the headphone jack assembly cable, and carefully peel away the adhesive that’s holding it onto the aluminum frame.

– Now, give the headphone jack assembly cable a straight pull, freeing it from its socket on the logic board.

Tools Used
  1. SpudgeriPad 4 GSM Headphone Jack Board  Replacement

Step 46

– Gently peel back and lift off the tape that’s keeping the SIM board cable ZIF connector under wraps.

– Flip up the little flap on the SIM board cable ZIF connector to release it.

– Use the tip of your trusty spudger to carefully slide the SIM board cable straight out of its home on the logic board.

Tools Used
  1. SpudgeriPad 4 GSM Headphone Jack Board  Replacement

Step 47

– Grab your trusty Phillips #00 screwdriver and remove the three 1.75 mm screws holding the SIM board in place on the aluminum frame.

Step 48

– Gently tuck the headphone jack assembly cable aside and then take out the SIM board from the iPad.

Step 49

– Carefully peel back and lift off the adhesive tape covering the headphone jack assembly.

Step 50

– Loosen and remove the single 2.6 mm Phillips #0 screw that’s holding the camera cable onto the headphone jack assembly.

Step 51

– Grab the flat end of your spudger and gently pop the front-facing camera out of its socket on the headphone jack assembly. Nice and easy, no rush!

– Now, without taking the spudger out, slide it to the right. This will release the adhesive holding the camera cable in place. Smooth and steady!

Tools Used
  1. SpudgeriPad 4 GSM Headphone Jack Board  Replacement

Step 52

– Gently use the spudger’s tip to flip up the little retaining flap on the microphone cable’s ZIF connector.

– Slide the spudger tip underneath the microphone ribbon cable and carefully lift it out of its ZIF connector.

– Smoothly slide the spudger to the left to peel back the adhesive holding the microphone ribbon cable to the headphone jack assembly.

Tools Used
  1. SpudgeriPad 4 GSM Headphone Jack Board  Replacement

Step 53

– Gently use the flat end of your spudger to pop the antenna connector cable out of its spot on the headphone jack assembly board. Keep it cool and steady!

Tools Used
  1. SpudgeriPad 4 GSM Headphone Jack Board  Replacement

Step 54

– Lift up the retaining flap that’s holding the volume/power button ribbon cable in place on the headphone jack assembly board.

– Gently detach the volume button ribbon cable from its ZIF connector.

Step 55

– Alright, let’s get those screws out of the headphone jack assembly. Here’s what you’ll need to do:

– Grab your Phillips #0 screwdriver and remove five 2.6 mm screws.

– Next, switch to your Phillips #00 screwdriver and take out two 2.2 mm wide head screws.

– Finally, grab that Phillips #00 again to remove two more 2.6 mm screws.

Step 56

– Grasp the headphone jack assembly’s ribbon cable and gently slide the assembly straight down, keeping it parallel to the iPad, towards the bottom edge.

Step 57

– Hold the headphone jack assembly firmly with both hands and gently pull it away from the iPad, keeping an eye out so no cables get tangled up.

Step 58

– Grab the flat end of your trusty spudger, and gently pry the rear-facing camera from its snug spot beneath the headphone jack assembly board. It might take a little finesse, but with a bit of patience, it’ll pop right out!

Tools Used
  1. SpudgeriPad 4 GSM Headphone Jack Board  Replacement

Step 59

– The headphone jack board is still in place.

Success!
To put your device back together, just follow these steps in reverse order. Don’t forget to check out our iPad 4 GSM Front Panel Adhesive strips guide to properly stick the front panel back on. And if things get tricky, you can always schedule a repair!

Quick Fixes: Locating Top-Rated Device Repair Shops

Why Finding Quality Device Repair Near Me Services Matters

Device repair near me services have become essential as our dependence on technology grows. With the global mobile device repair market projected to reach $115.7 billion by 2027, finding the right local repair shop can save you hundreds of dollars compared to buying new devices.

Quick Answer: Finding Device Repair Near Me

  1. Search locally – Look for shops within 5-10 miles for convenience
  2. Check certifications – Find Apple Authorized or Samsung certified technicians
  3. Compare warranties – Most quality shops offer 1-year to lifetime guarantees
  4. Read reviews – Look for 4+ star ratings and recent customer feedback
  5. Get quotes – Many shops offer free diagnostics and price matching

When your smartphone screen cracks or your laptop won’t charge, you need fast and reliable solutions. The average smartphone screen repair costs $100-$300, while battery replacements typically run $50-$100 – both significantly cheaper than replacement devices.

Most repair shops now complete common fixes like screen replacements in under an hour, with many offering same-day service. Quality repair centers also provide warranties ranging from one year to lifetime coverage on parts and labor.

The key is finding technicians who use premium quality parts and have proper certifications. Authorized service providers for major brands like Apple, Samsung, and Google ensure your device gets professional treatment while maintaining any existing warranties.

Infographic showing the journey from device damage through finding a local repair shop to getting your device fixed, including steps like getting a free diagnostic, receiving a quote with warranty information, and same-day repair completion - device repair near me infographic

What Can Be Fixed? A Guide to Common Device Repairs

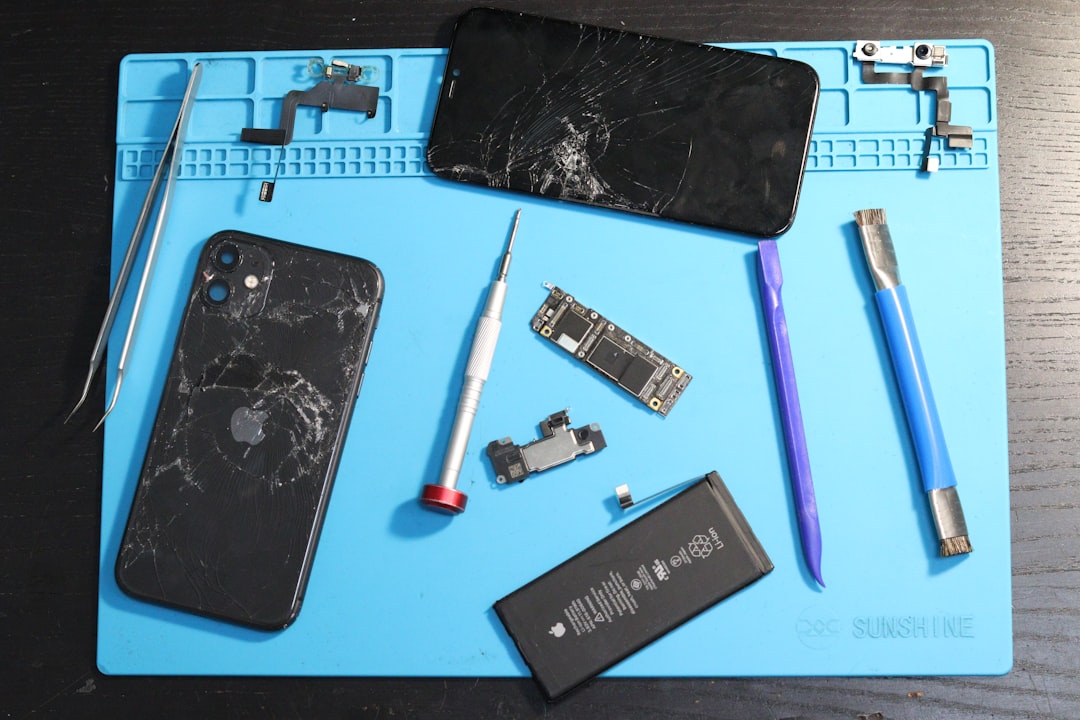
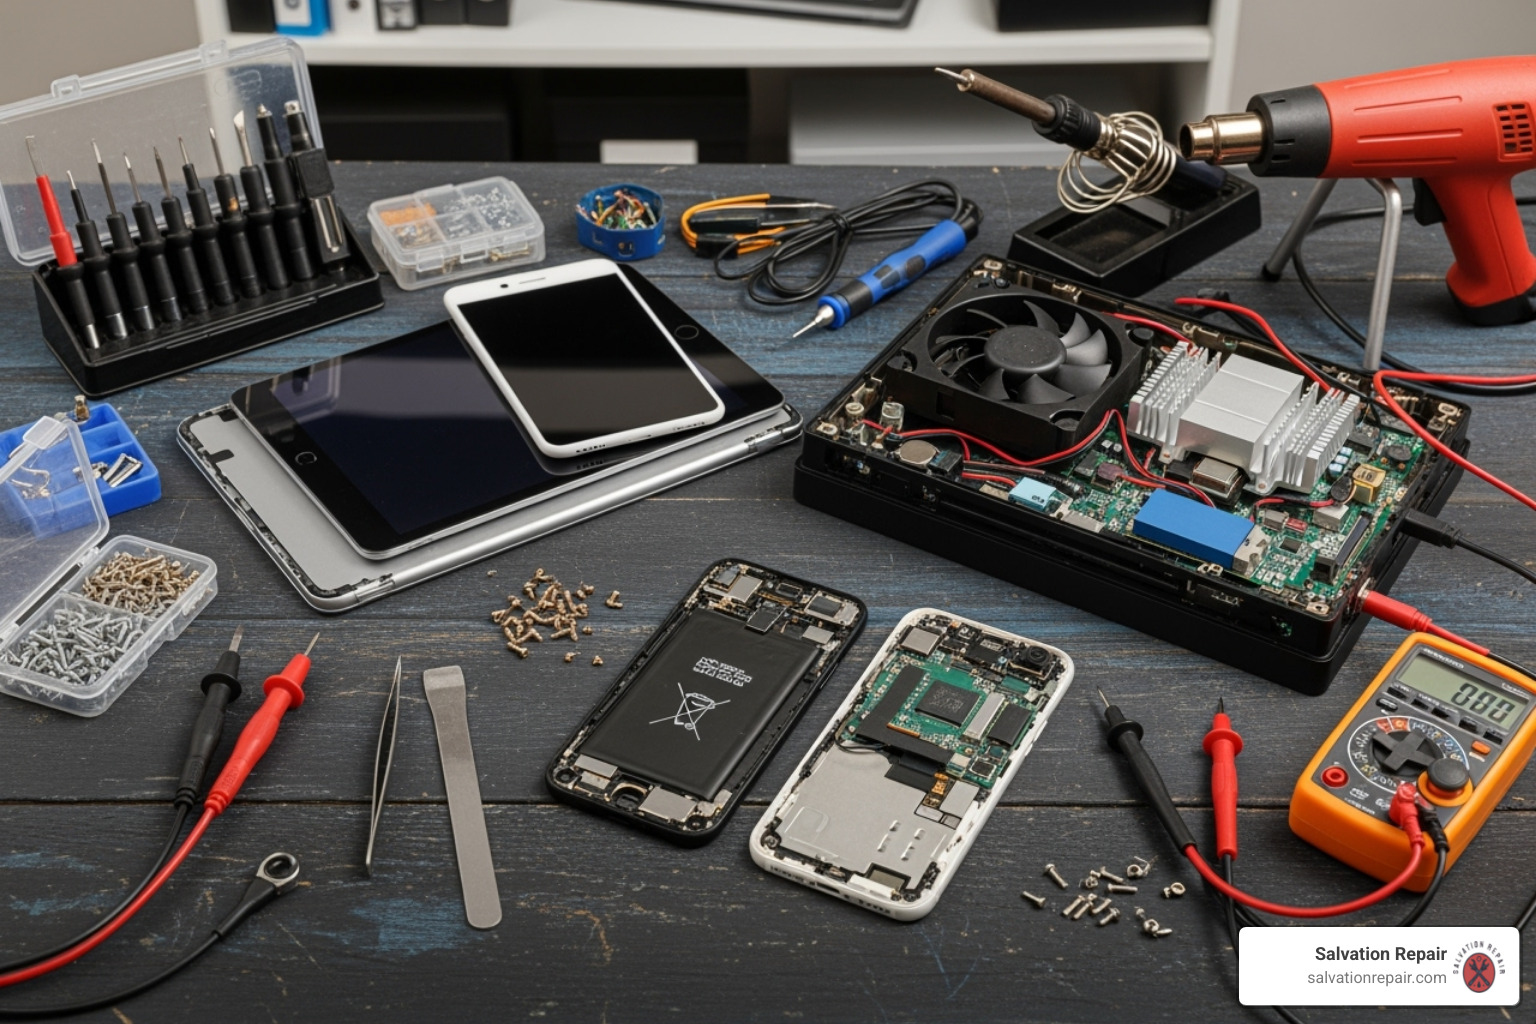
a technician's workbench with various disassembled devices (phone, tablet, console) - device repair near me

When your device breaks, that sinking feeling hits hard. But here’s some good news – nearly every electronic device with a power button can be brought back to life! The world of device repair near me services has grown way beyond just fixing cracked phone screens.

At Salvation Repair, we’ve seen it all. From smartphones that took a tumble down the stairs to gaming consoles that decided to give up mid-battle, most tech problems have solutions that won’t break the bank.

Smartphones are our bread and butter, and for good reason. Whether you’ve got the latest iPhone or an older Android device, these pocket computers face daily hazards. The smartphone repair market keeps growing because people realize fixing beats buying new every time.

Tablets like iPads face similar challenges to phones, just with bigger screens to crack. Laptops bring their own set of headaches – from keyboards that stick to screens that flicker. Game consoles are trickier beasts, with complex internal systems that can fail in surprising ways.

Here’s what we fix most often, and trust me, we’ve seen these issues thousands of times:

Cracked screens top our repair list. That heart-stopping moment when your phone hits concrete face-first? We get it. Screen repairs typically cost $100-$300, which beats spending $800+ on a replacement device. Plus, we can usually get you back up and running the same day.

Battery replacement becomes necessary when your device dies faster than your patience. Batteries naturally wear out over time, and replacement usually runs $50-$100. It’s amazing how much life this simple fix can breathe back into an old device.

Water damage requires immediate action. If your device takes an unexpected swim, don’t try turning it on. Seriously, resist that urge! Power plus water equals fried circuits. Bring it straight to us – the faster we can start the drying process, the better your chances.

Charging port issues sneak up on everyone. That loose cable connection or port that only works at weird angles? We can fix that. Camera problems turn your phone into a paperweight for capturing memories. Button malfunctions make basic functions impossible.

Back glass repair isn’t just cosmetic. Those beautiful glass backs on modern phones can shatter and expose your device’s guts to dust and moisture. It’s also surprisingly sharp – we’ve seen some nasty cuts from broken back glass.

Software glitches can be the most frustrating because you can’t see what’s wrong. Apps crash, phones freeze, or weird things just start happening. Sometimes it’s a simple fix, other times it needs professional attention.

Before we touch your device, we offer free diagnostics. No guessing, no surprise charges. We’ll figure out exactly what’s wrong and give you a clear quote with our lifetime warranty included. It’s our way of making sure you know exactly what you’re getting into before we start.

The best part? Most of these repairs happen fast. We’re talking same-day service for common issues, often in under an hour. Your device problems don’t have to ruin your whole week.

The Repair Process: What to Expect from a Device Repair Near Me Service

a "Same-Day Repair" sign in a shop window - device repair near me

Let’s be honest – when your phone screen shatters or your laptop won’t turn on, you need it fixed yesterday. The good news is that modern device repair near me services have evolved to meet our need for speed without sacrificing quality.

Gone are the days when device repairs meant being without your tech for weeks. Today’s repair shops understand that your devices aren’t just gadgets – they’re lifelines to work, family, and everything that matters to you.

Turnaround Times and Service Options

The beauty of choosing a local repair service is how quickly we can get your life back to normal. At Salvation Repair, we’ve streamlined our process to minimize your downtime because we know every minute without your device feels like an eternity.

Same-day repairs are our specialty for most common issues. Drop off your cracked iPhone in the morning, and you’ll likely be scrolling through your photos again by lunch. For simpler fixes like battery replacements or charging port repairs, we often complete the work under an hour. Yes, you read that right – many customers grab a coffee and return to find their device working like new.

If leaving your home or office isn’t convenient, our on-site services bring the repair shop to you. Our mobile repair vans serve the Laurel, MS area, handling everything from screen replacements to water damage recovery right in your driveway. It’s perfect for busy professionals or anyone who simply can’t make it to our shop.

Here’s what happens during a typical in-store repair:

  1. Free diagnostic – We identify exactly what’s wrong (no guessing games)
  2. Transparent quote – You get the full cost upfront, no surprises
  3. Expert repair – Our certified technicians work their magic
  4. Quality testing – We make sure everything works perfectly before you leave
  5. Device return – You walk out with a device that feels brand new

Whether you walk in without an appointment or schedule ahead, we’re ready to help. The flexibility means you can get assistance exactly when you need it most.

Understanding Costs and Warranties for a Device Repair Near Me

Here’s where repair really shines compared to replacement. While a new flagship smartphone can cost $1,000 or more, most repairs cost a fraction of that price.

Average screen repair costs typically range from $100 to $300 depending on your device model. Battery replacements usually run between $50 and $100. When you compare these numbers to buying new, the choice becomes clear – repair almost always wins.

We believe everyone deserves fair pricing, which is why we offer price matching. Find a lower advertised price for the same repair from another local shop? We’ll match it and often beat it. No need to shop around or negotiate – you automatically get the best deal.

But here’s where we really stand apart: our lifetime warranty. While many shops offer a standard 1-year warranty, we guarantee our work for the entire life of your device. If a part we’ve repaired fails due to our workmanship, we’ll fix it again at no charge. That’s the kind of peace of mind that lets you sleep better at night.

Battery replacements come with their own 1-year warranty since batteries naturally degrade over time. It’s honest protection that reflects how these components actually work in the real world.

The combination of fair pricing, competitive matching, and industry-leading warranties means you’re not just getting a repair – you’re getting a long-term solution you can trust.

How to Find and Prepare for Your Repair

a checklist for device repair preparation - device repair near me

When your device breaks, you want it fixed fast and right. But rushing to the first repair shop you find might not be the smartest move. Taking a few minutes to prepare your device and research your options can save you time, money, and potential headaches down the road.

Think of it like going to the doctor – you wouldn’t show up without knowing your symptoms or checking if they’re covered by your insurance. The same logic applies when looking for device repair near me services.

What to Do Before You Go

Before you walk out the door with your broken device, there are several important steps that can make your repair experience smoother and protect your valuable information.

Data backup is absolutely critical, and I can’t stress this enough. While reputable repair services take every precaution to protect your data, unexpected things can happen during repairs. Back up your photos, contacts, messages, and important documents to cloud storage like iCloud, Google Drive, or Dropbox. If your device is too damaged to backup yourself, some repair centers offer secure data backup services for a small fee.

Remove your SIM and SD cards before heading to the shop. This simple step protects your personal information and prevents these small components from getting lost during the repair process. It takes seconds but can save you major hassles later.

You’ll also want to disable passcodes and biometric security temporarily. This allows technicians to test your device after the repair without needing to constantly ask for your password. If you’re not comfortable doing this, you can set up a simple temporary passcode or stay with the technician during testing.

Write down exactly what’s wrong with your device. Note when the problem started, what you were doing when it happened, and any troubleshooting you’ve already tried. This detailed information helps technicians diagnose issues faster, which means you get your device back sooner.

Finally, charge your device if possible. A device with some battery life allows technicians to start diagnostics immediately rather than waiting for it to power up.

Finding a Reputable Device Repair Near Me

Finding a trustworthy repair shop is like finding a good mechanic – you want someone skilled, honest, and reliable. Here’s how to separate the gems from the duds.

Start by checking online reviews on Google, Yelp, and Facebook. Look for shops with consistently high ratings (4 stars and above) and read recent customer feedback. Pay attention to comments about speed, honesty, quality of work, and customer service. If you see multiple negative reviews mentioning unresolved issues or surprise charges, keep looking.

Certified technicians make a huge difference in repair quality. Look for shops that employ technicians with specialized training from major brands like Apple, Samsung, or Google. These certifications mean the technicians follow manufacturer-approved procedures and know what they’re doing.

Authorized service providers take things a step further. These shops are officially recognized by device manufacturers and use genuine parts. This authorization often comes with stricter quality standards and better warranty coverage.

Transparent pricing is non-negotiable. A reputable shop will offer free diagnostics and provide clear quotes before starting any work. Look for services that offer price matching – this shows they’re confident in their competitive pricing and willing to work with your budget.

The warranty policy tells you everything about a shop’s confidence in their work. While many shops offer standard one-year warranties, lifetime warranties on repairs show exceptional commitment to quality and customer satisfaction.

Consider the local presence too. Shops with multiple locations in your area, like here in the Laurel, MS region, often indicate an established and trusted business within the community. Local shops also understand the unique needs of their neighbors.

Don’t forget about data privacy protection. Ask about their policies for handling personal information during repairs. Reputable services have clear procedures for protecting your data and may even offer secure data wiping if you’re planning to sell your device after repair.

By taking these preparation steps and doing a bit of research, you’ll find a device repair near me service that gets your technology back in working order quickly, safely, and affordably.

Repair vs. Replace: Making the Smart Choice

When your device stops working, you face a familiar crossroads: fix it or get a new one? While that shiny new phone in the store window looks tempting, choosing device repair near me services is almost always the smarter move, both for your wallet and our planet.

Cost-Effectiveness

Let’s talk numbers, because they don’t lie. When you’re looking at a $150 screen repair versus buying a $800 replacement phone, the math is pretty straightforward. Even high-end repairs rarely exceed $300, while new devices can easily cost $1,000 or more.

Think about it this way – when your car gets a flat tire, you don’t buy a new car. You fix the tire and keep driving. Your smartphone, tablet, or laptop deserves the same logic. Most devices that feel “broken” actually just need one component replaced to work like new again.

Our price matching guarantee makes this choice even easier. We’ll match any local competitor’s price, so you know you’re getting the best deal possible. A device that’s running slow or has a cracked screen is usually perfectly healthy underneath – it just needs some professional attention.

Environmental Benefits and Sustainability

Here’s something that might surprise you: choosing repair over replacement is one of the most impactful environmental decisions you can make as a consumer. The electronics industry has a massive environmental footprint that most people never think about.

Reducing E-Waste is becoming critical as our digital world grows. Every year, millions of phones, tablets, and laptops end up in landfills when they could have been easily repaired. These devices contain toxic materials that can leak into soil and groundwater. When you repair your device instead of tossing it, you’re directly helping solve this growing problem.

Conserving Resources means fewer rare earth metals need to be mined from the ground. Your smartphone contains dozens of precious materials – gold, silver, lithium, and rare earth elements. Mining these materials is incredibly energy-intensive and often environmentally destructive. Keeping your current device running longer means less demand for new mining.

Lower Carbon Footprint happens naturally when you choose repair. Manufacturing a new smartphone generates roughly 70 kilograms of CO2 emissions. Shipping it around the world adds even more. A simple screen repair? Maybe 1-2 kilograms of emissions. The difference is enormous.

Certified Pre-Owned Devices

Sometimes a repair isn’t the right choice – maybe your device is very old or has multiple major issues. In these cases, we offer certified pre-owned devices that split the difference perfectly. These phones and tablets go through rigorous testing to ensure they work like new, but cost significantly less than brand-new models.

You get a device that feels fresh and modern, complete with warranty protection, while still making an environmentally conscious choice. It’s the best of both worlds when a repair doesn’t make sense.

Repair Type Average Repair Cost Average New Device Cost
Smartphone Screen Repair $100 – $300 $600 – $1000+
Smartphone Battery Replacement $50 – $100 $600 – $1000+
Laptop Component Replacement $150 – $600 $800 – $2000+
Game Console Repair $80 – $200 $300 – $500+

The numbers speak for themselves. Repair isn’t just a temporary fix – it’s a smart, sustainable choice that makes sense for your budget and your values. Plus, with our lifetime warranty, you can feel confident that your repaired device will serve you well for years to come.

Frequently Asked Questions about Device Repair

When you’re searching for device repair near me, it’s natural to have concerns about what happens to your precious device once it leaves your hands. We get these questions all the time at our repair shop, and honestly, they’re great questions to ask! Let’s walk through the most common worries people have.

Is my personal data safe during the repair?

Your phone holds your entire digital life – photos of your kids, private messages, banking apps, and so much more. It makes perfect sense that you’d be worried about who has access to all that information.

Here’s the truth: reputable repair services take your privacy seriously. Our technicians are trained in data security protocols and understand just how important your personal information is. We never snoop through your photos or messages – that’s not just unprofessional, it’s a violation of your trust.

That said, we always recommend backing up your data before bringing your device in. Think of it like wearing a seatbelt – you probably won’t need it, but it’s smart protection. Some repair shops can even help create a secure backup for you if you’re not sure how to do it yourself.

One helpful tip: temporarily disable your passcode before coming in. This lets our technicians run diagnostics and test your device after the repair without needing to bug you for your password. You can always set it back up when you pick up your fixed device.

What happens if my device can’t be fixed?

Nobody wants to hear that their beloved device is beyond saving, but sometimes it happens. Maybe your phone took a swim in the pool for too long, or your laptop suffered a catastrophic fall. We’ve seen it all over the years.

If we can’t fix your device, we’ll be completely honest with you. After our free diagnostic, if we determine that repair isn’t possible or would cost more than your device is worth, we’ll explain exactly why and what your options are.

In these rare cases, you won’t be stuck with a hefty bill for nothing. Most reputable shops either don’t charge anything if they can’t help, or they’ll waive any diagnostic fee. We believe in being upfront about costs from the start.

But don’t worry – we’ll still help you find a solution. We often have certified pre-owned devices that work like new at a fraction of the cost of buying brand new. And if your device truly is beyond hope, we can help you recycle it responsibly so it doesn’t end up harming the environment.

Do repair shops use original manufacturer parts?

This is where things get a bit technical, but stick with me – it’s important stuff to understand.

The answer depends on what type of repair shop you choose. Authorized service providers for brands like Apple or Samsung typically use genuine manufacturer parts. These are the exact same parts that were in your device when it was made.

Independent repair services like ours use what we call premium quality parts. These aren’t made by Apple or Samsung, but they’re designed to meet or exceed the same standards. Think of it like buying generic medicine at the pharmacy – different brand, same effectiveness, better price.

We’re always transparent about what parts we use because honesty builds trust. Our premium quality parts perform just as well as the originals, which is why we can back them with our lifetime warranty. If we weren’t confident in their quality, we couldn’t make that kind of guarantee.

One thing iPhone users should know: if your screen or battery gets replaced with non-Apple parts, your phone might show a notification about it. This doesn’t mean anything’s wrong – it’s just Apple’s way of letting you know. Your phone will work perfectly fine, and you’ll have saved money in the process.

The bottom line? A good repair shop will always tell you exactly what parts they’re using and why they chose them. If someone’s being vague about parts quality, that’s a red flag to keep looking for your device repair near me.

Conclusion: Your Local Solution for Fast, Reliable Repairs

When your phone screen shatters at the worst possible moment, or your laptop decides to take an unscheduled break right before an important deadline, it can feel like the world is ending. But here’s the good news: device repair near me services have evolved into incredibly efficient, affordable solutions that can get you back on track faster than you might imagine.

Throughout this guide, we’ve shown you just how much is possible with modern device repair. From cracked screens to water damage, from battery replacements to complex internal repairs, skilled technicians can breathe new life into almost any device with a power button. The best part? Most of these fixes happen the same day, often in under an hour.

The financial benefits alone make repair the smart choice. Why spend $800 on a new phone when a $200 screen replacement will make yours work perfectly again? Add in the environmental benefits of keeping devices out of landfills, and you’re making a decision that’s good for your wallet and the planet.

What sets apart truly exceptional repair services is their commitment to quality and customer peace of mind. At Salvation Repair, we understand that your devices aren’t just gadgets – they’re lifelines to your work, family, and memories. That’s why we back every repair with our lifetime warranty and offer price matching to ensure you get the best deal possible.

Our team of expert technicians serves the Laurel, MS area, including Jackson MS and Oxford MS, providing same-day repairs for iPhones, iPads, Samsung phones, laptops, and virtually any electronic device you can think of. Whether you need us to come to you with our on-site service or you prefer to visit one of our convenient locations, we’re here to help.

Don’t let a broken device slow you down another day. We’re ready to provide the fast, reliable repairs that will get your digital life back on track. Your device – and your sanity – will thank you for it!

Explore our phone repair guides

iPad 4 GSM Front Panel Replacement

Duration: 45 minutes
Steps: 49 Steps

Heads up: this guide covers swapping out a plain front panel from start to finish. If you’re working with a Front Panel Assembly instead, pause before yanking that home button off your old panel, and just follow the steps in reverse to pop in your new assembly.

Step 1

– Pop the iOpener right in the middle of the microwave to get it warmed up and ready to work its magic.

Tools Used
  1. iOpeneriPad 4 GSM Front Panel Replacement

Step 2

– Pop the iOpener in the microwave for about 30 seconds and get it nice and toasty.

– As you work your magic, keep an eye on the iOpener and reheat it every 30 seconds as it cools down—just a quick zap in the microwave and you’re good to go!

Tools Used
  1. iOpeneriPad 4 GSM Front Panel Replacement

Step 3

– Carefully take the iOpener out of the microwave by grabbing one of the two flat ends—steer clear of the hot center to keep your fingers happy.

Tools Used
  1. iOpeneriPad 4 GSM Front Panel Replacement

Step 4

– Grab a pot or pan and fill it with enough water to completely cover your iOpener.

– Turn up the heat and bring the water to a boil, then switch off the heat.

– Now, carefully place the iOpener in the hot water and let it soak for 2-3 minutes. Just make sure it’s fully submerged in the water.

– Once it’s heated, use some tongs to grab the iOpener from the water. No burns here, please!

– Dry it off with a towel, making sure it’s all nice and dry.

– And that’s it! Your iOpener is good to go. If you ever need to reheat it, just bring the water to a boil, switch off the heat, and let the iOpener chill in the water for another 2-3 minutes. Need help? You can always schedule a repair.

Tools Used
  1. iOpeneriPad 4 GSM Front Panel Replacement

Step 5

– If your display glass is cracked, keep it under control and avoid any accidental cuts during the repair by taping it up.

– Cover the iPad’s display with overlapping strips of clear packing tape until the whole screen is shielded.

– Stick with the guide for the rest of the steps. However, once the glass is cracked, it might keep breaking, so be ready to use a metal prying tool to gently lift out the pieces.

Step 6

– Place the iOpener flat on the right side of the iPad, giving it a smooth and even press so it makes solid contact with the surface of the device.

– Let the iOpener rest on the iPad for about 90 seconds before trying to open the front panel. Patience here pays off!

Tools Used
  1. iOpeneriPad 4 GSM Front Panel Replacement

Step 7

– There’s a tiny gap in the iPad’s adhesive ring in the upper right corner, about 2.0 inches (~5 cm) down from the top. Let’s make use of this little opening.

– Line up your tool with the mute button. Gently slide the tip of a plastic opening tool into the gap between the front glass and the plastic bezel. Just nudge the very tip in, enough to create a small opening.

Step 8

– Carefully slide your tool right in between the plastic display bezel and the front glass panel—make sure it’s in the perfect spot to avoid any hiccups!

Step 9

– Keep the tip of your plastic opening tool snugly tucked between the front glass and plastic bezel, then slide a plastic opening pick right next to it to gently ease apart the pieces.

Step 10

– Gently remove the plastic opening tool from the iPad and slide the opening pick a bit deeper under the front glass—aim for around 0.5 inches. Take your time, but don’t be afraid to get a little cozy with it.

Step 11

– As you work on loosening the adhesive along the right side of the iPad, go ahead and warm up the iOpener again, then set it back on the bottom edge to keep things nice and toasty.

Tools Used
  1. iOpeneriPad 4 GSM Front Panel Replacement

Step 12

– While the bottom edge is getting some warmth from the iOpener, start loosening the adhesive along the right side of your iPad.

– Gently slide the opening pick down the edge, easing the adhesive free as you go.

Tools Used
  1. iOpeneriPad 4 GSM Front Panel Replacement

Step 13

– If your opening pick gets stuck in the adhesive, just roll it gently along the edge of the iPad to keep loosening that stubborn glue.

Tools Used
  1. iOpeneriPad 4 GSM Front Panel Replacement

Step 14

– Before you pop that first opening pick from the bottom corner of the iPad, slip a second pick right under the right edge of the front glass to stop the adhesive from sticking back together.

– Give that iOpener a quick reheat, then move it up to the top edge of your iPad. You’re almost there!

Tools Used
  1. iOpeneriPad 4 GSM Front Panel Replacement

Step 15

– Heads up: the next steps call for some serious care and attention.

– You’ll need to carefully free the adhesive holding the antenna to the front panel without messing up the delicate connections attaching it to the bottom of the iPad. Take it slow and follow along closely.

Step 16

– Gently slide the opening pick around the bottom right corner of the iPad to peel back the adhesive. Take it slow and steady—you’ve got this!

Step 17

– Gently glide the opening pick along the bottom edge of the iPad, working your way across to release the sticky adhesive over the Wi-Fi antenna. Nice and easy, no rush!

Step 18

– Once you’ve passed the Wi-Fi antenna (it’s about 3″ (75 mm) from the right edge, or right near the home button), go ahead and slide that opening pick back in all the way.

– Now, gently slide the pick to the right and release the adhesive holding the Wi-Fi antenna to the front glass.

– The antenna is secured to the bottom of the iPad with screws and a cable. This step is crucial to safely detach the antenna from the front panel, ensuring that it stays intact when you remove the panel. No damage here!

Step 19

– Keep working that adhesive along the bottom of the iPad, and gently pull the opening pick out far enough to wrap around the home button. Once you’ve passed it, slide the pick back in about 1/2 inch (10 mm) deep to stay on track.

Tools Used
  1. iOpeneriPad 4 GSM Front Panel Replacement

Step 20

– Keep sliding that adhesive remover tool all along the bottom edge of your iPad like a pro.

– Let the opening pick chill just beneath the front glass near the home button to keep things ready for the next move.

Step 21

– Pop the iOpener back in the microwave for a quick warm-up, then place it on the left edge of the iPad to gently heat up that stubborn adhesive.

Tools Used
  1. iOpeneriPad 4 GSM Front Panel Replacement

Step 22

– Gently slide the opening pick along the top edge of the iPad, easing it out just enough to navigate around the front-facing camera bracket.

– Heads up: the adhesive here is seriously tough, so you might need to use a bit of muscle. Take it slow and steady to avoid any slips or scrapes on you or your iPad.

– If the pick starts to get stuck in the adhesive, try “rolling” it as demonstrated in step 9 to keep things moving smoothly.

Tools Used
  1. iOpeneriPad 4 GSM Front Panel Replacement

Step 23

– Keep peeling back the adhesive along the top edge of the iPad, and gently slide your opening pick around the top left corner like a pro.

Tools Used
  1. iOpeneriPad 4 GSM Front Panel Replacement

Step 24

– Gently slide the opening pick along the left edge of your iPad. The adhesive is a little thinner here because of the digitizer, so be mindful. Keep the pick shallow, no deeper than about 1/2 inch (10 mm), to avoid accidentally damaging the digitizer.

Step 25

– Use the opening pick tucked under the bottom edge of the iPad to gently loosen the adhesive around the bottom left corner. A little patience goes a long way here!

Step 26

– Grab one of your trusty opening picks, slide it under the bottom right corner of the iPad, and gently lift it up so you can get a good grip with your fingers.

Step 27

– Grab the iPad firmly by the top and bottom right corners, then carefully flip the front glass away from the device.

– When putting it back together, give the LCD a good once-over with a microfiber cloth and some compressed air to get rid of any dust or fingerprints before snapping the glass back on.

Step 28

– Grab your trusty screwdriver and remove the four 2 mm Phillips #00 screws holding the LCD to the aluminum frame. It’s a small step, but it’ll make a big difference in the process!

Step 29

– Grab your trusty plastic opening tool or spudger and gently lift the right edge of the LCD out of the iPad. Easy does it!

– Now, rotate the LCD along its left edge and carefully set it down on the front glass panel. You’re almost there!

Tools Used
  1. SpudgeriPad 4 GSM Front Panel Replacement

Step 30

– Grab the tip of your spudger and gently peel back the tape covering the LCD ribbon cable connector. Take your time, it’s a small move but an important one!

Tools Used
  1. SpudgeriPad 4 GSM Front Panel Replacement

Step 31

– Gently lift up the retaining flap on the LCD ribbon cable ZIF connector.

– Now, carefully pull the LCD ribbon cable out of its socket on the logic board using your fingers or tweezers.

– If the LCD screen doesn’t light up after reconnecting the ZIF connector, try a quick restart! Hold down the power and home buttons together for about ten seconds until you see the Apple logo. If you’re still stuck, you can always schedule a repair.

Tools Used
  1. TweezersiPad 4 GSM Front Panel Replacement

Step 32

– Carefully lift the LCD off the front panel—just don’t touch the front of the screen to keep it looking fresh!

Step 33

Step 34

– Gently lift the retaining flap on the home button ribbon cable ZIF connector.

Step 35

– Grab your trusty tweezers and carefully pull the home button ribbon cable straight out from its socket on the logic board.

Tools Used
  1. TweezersiPad 4 GSM Front Panel Replacement

Step 36

– Gently wiggle the home button ribbon cable out of its snug spot in the rear case. It’s a bit of a tight fit, but no worries, a little patience goes a long way!

Step 37

– Grab your spudger and gently lift that piece of tape holding the digitizer ribbon cable to the logic board. Easy does it!

Tools Used
  1. SpudgeriPad 4 GSM Front Panel Replacement

Step 38

– Gently lift the retaining flap on both ZIF connectors for the digitizer ribbon cable. Take it slow, and make sure those flaps stay intact!

Step 39

– Gently use the flat end of your spudger to wiggle and loosen the sticky adhesive hiding under the digitizer ribbon cable.

– Carefully pull the digitizer ribbon cable straight out from its connectors on the logic board—no side-to-side shimmy needed!

Tools Used
  1. SpudgeriPad 4 GSM Front Panel Replacement

Step 40

– Gently lift the digitizer ribbon cable and slide the flat end of a spudger underneath to loosen the sticky adhesive holding the cable to the back aluminum case.

Tools Used
  1. SpudgeriPad 4 GSM Front Panel Replacement

Step 41

– Gently grab the digitizer ribbon cable with your fingers and carefully pull it out of its cozy spot in the aluminum frame.

– Now, let’s go ahead and take the front panel off the iPad. A little wiggle and it should come right off!

Step 42

– Heat up the iOpener in the microwave for one minute on the highest setting (or just thirty seconds if you’re rocking the newer gel-filled iOpener).

– Set the warm iOpener right over the home button at the front edge of the display to get things ready.

Tools Used
  1. iOpeneriPad 4 GSM Front Panel Replacement

Step 43

– Gently lift the home button ribbon cable off the front panel, taking your time to avoid any snags.

Step 44

– Slide the plastic opening tool gently under the right side of the home button assembly and give it a little lift to break free the adhesive holding it down.

– Repeat the same smooth move on the left side to loosen up that adhesive as well.

– Carefully lift the home button mount away from the front panel, like peeling back a sticker but with a bit more finesse.

Step 45

– Gently slide the edge of your plastic opening tool under the home button bracket. Careful not to pry too hard!

– Now, glide the tool along the retaining spring bracket to break the adhesive’s grip. You’ve got this!

– Lift the home button with its bracket off the front panel. Easy does it!

Step 46

– Start by following the iOpener heating instructions from the iOpener section at the beginning of this guide. It’s easy, just give it a quick read to get everything lined up.

– Now, place the iOpener right over the front-facing camera, aligning it with the top edge of your display. This will help the heating pad do its job and get you closer to a perfect repair!

Tools Used
  1. iOpeneriPad 4 GSM Front Panel Replacement

Step 47

– Gently nudge the camera bracket off the sticky adhesive holding it to the front panel using the flat end of your trusty spudger.

Tools Used
  1. SpudgeriPad 4 GSM Front Panel Replacement

Step 48

– Gently lift the camera bracket off the front panel and set it aside.

Step 49

– To put your device back together, just follow these steps in reverse order. When it’s time to stick the front panel back on, use our iPad 4 GSM Front Panel Adhesive strips guide for a clean, secure fit. If things get tricky, remember you can always schedule a repair!

Success!
To put your device back together, just follow these steps in reverse. For reattaching the front panel, check out our iPad 4 GSM Front Panel Adhesive strips guide. And remember, if you hit a snag, you can always schedule a repair with us!

Microsoft Surface Pro 6 Motherboard Replacement

Duration: 45 minutes
Steps: 54 Steps

Ready to replace the motherboard in your Microsoft Surface Pro 6? Here’s a guide to help you out! One little tip: adding fresh thermal paste to the CPU when putting everything back together could give your Surface a nice performance boost. Make sure to grab some fresh thermal paste and high-concentration isopropyl alcohol or a thermal paste cleaner for the job. Heads up—there’s a good chance the display panel might be a little fragile, so be super careful when prying it off, and don’t forget to apply plenty of heat to make things easier. If you need a hand with any of these tricky steps, you can always schedule a repair.

Step 1

– If the screen glass is cracked, keep things safe and avoid making the mess worse by covering the glass with strips of clear packing tape. Overlap the tape until the entire screen is protected. Don’t forget to wear safety glasses to keep your eyes safe while working.

– Warm up an iOpener and place it on the right edge of the Surface’s screen for two minutes to loosen the adhesive.

Tools Used
  1. iOpenerMicrosoft Surface Pro 6 Motherboard Replacement

Step 2

– Before diving in, take a quick peek at the screen adhesive layout—this will save you some heartache later!

– The areas with only adhesive? Totally safe to cut. No worries there!

– The display board and those sneaky flex cables are hanging out near the edges. Slice carefully here and keep the pick shallow to avoid any accidents.

– Watch out for those fragile antenna cables hiding just below this part of the screen. Stay sharp, and be gentle! Also, this spot has the thickest adhesive, so take it slow and steady.

Step 3

– Gently slide an opening pick into the speaker hole on the screen and carefully work it underneath the glass. Be sure to avoid pressing the pick into the speaker grille, as it’s delicate and can tear easily.

Step 4

– Tilt the pick towards the bottom of the Surface and slide it gently underneath the lower edge of the speaker cutout. You’ve got this!

Step 5

– Gently slide the pick down along the right edge of your Surface to carefully cut through the adhesive holding the screen in place.

– Keep that pick wedged in the right edge to stop the adhesive from snapping back together.

Step 6

– Warm up the iOpener again and place it on the bottom edge of your Surface’s screen. Let it soak in the heat for two minutes to loosen things up.

Tools Used
  1. iOpenerMicrosoft Surface Pro 6 Motherboard Replacement

Step 7

– Place a new opening pick into the bottom right corner, then gently slide it around the corner and toward the bottom edge.

– Work the pick along the bottom edge to slice through that sticky screen adhesive.

– Leave the pick in place along the bottom edge to keep the adhesive from sealing back up.

Step 8

– Warm up the iOpener again and stick it on the left edge of the Surface’s screen for a solid two minutes to get things nice and toasty.

Tools Used
  1. iOpenerMicrosoft Surface Pro 6 Motherboard Replacement

Step 9

– Place your opening pick into the bottom left corner and gently slide it around the corner, moving toward the left edge.

– Now, slide that pick along the left edge of your device to slice through the screen adhesive like a pro.

– Leave the pick in place along the left edge so the adhesive doesn’t sneak back together on you.

Step 10

– Warm up the iOpener again and place it on the top edge of the Surface’s screen for a solid two minutes to get things nice and toasty.

Tools Used
  1. iOpenerMicrosoft Surface Pro 6 Motherboard Replacement

Step 11

– Gently curve the opening pick around the left corner and glide it along the top edge of the Surface. Pause when you reach about 2.75 inches (70 mm) from the left side.

Step 12

– Start by gently sliding the point of your pick under the display where you left off. Just a heads up—don’t push the pick in deeper than the edge of the bezel.

– Now, carefully roll the pick to the right. Press that long edge into the screen adhesive below the bezel and keep cutting through it as you go. Just be careful not to slide the pick along the edge of the Surface.

– Repeat this process: insert the pick where you last cut and roll to the right along the top edge of the Surface. Keep going until you’re about 2.5 inches (64 mm) away from the right edge. You got this!

Step 13

– After slicing through the adhesive covering the antennas about 8.5 inches (22 cm) from the left edge, smoothly glide your pick along the top edge, rounding the top right corner to cut through any stubborn adhesive left behind.

Step 14

– Gently lift the screen assembly away from the Surface case, but go slow and steady. If you feel any resistance, pause and double-check that all the adhesive has been fully separated.

– Grab an opening pick and use it to slice through any remaining adhesive that’s still holding things together.

– Watch out for the flash lens – it might slip out of the Surface case. Keep it safe, and make sure to place it back in its spot during reassembly.

Step 15

– Gently lift the top of the screen assembly away from the case while carefully guiding the bottom of the screen closer to the motherboard connectors. Take it slow, we’ve got this!

– Now, carefully lay the screen back on the case with the connectors facing up. Make sure not to kink the display cables—they’re more fragile than they look!

Step 16

– Grab an opening pick and gently lift one edge of the EMI shield that’s guarding the display board.

– Keep working your way around the shield, prying at different spots until it pops free.

Step 17

– Carefully detach the EMI shield from the display board and set it aside.

Step 18

– Grab your trusty spudger and gently use its flat end to lift the display interconnect cable straight up and out of its socket on the board. Keep it steady—no need for a heavy hand here!

Tools Used
  1. SpudgerMicrosoft Surface Pro 6 Motherboard Replacement

Step 19

– Gently slide one tip of a pair of pointed tweezers into a small gap along the edge of the EMI shield covering the digitizer connector.

– Carefully use the tweezers to lift the EMI shield away from the display, being mindful not to bend it out of shape.

– Keep working your way around the shield, prying at different spots until it pops free. Then, remove the shield completely.

Tools Used
  1. TweezersMicrosoft Surface Pro 6 Motherboard Replacement

Step 20

– Gently peel the rest of the shield away from the digitizer connector and set it aside. It’s like unwrapping a gift, just with a little more techy finesse.

Step 21

– Gently wiggle the tip of a spudger under the digitizer connector and lift it straight up out of its socket on the screen. Easy does it!

Tools Used
  1. SpudgerMicrosoft Surface Pro 6 Motherboard Replacement

Step 22

– Carefully lift the screen assembly out of the Surface device.

– When putting it back together, take a moment here to check out this guide for swapping out the screen adhesive.

Step 23

– Grab your trusty spudger and gently pop the microphone connector straight up and out from its spot on the motherboard.

Tools Used
  1. SpudgerMicrosoft Surface Pro 6 Motherboard Replacement

Step 24

– Grab your trusty T5 Torx driver and get ready to unscrew those four screws holding the antenna support in place:

– Three 4.5 mm screws

– One 6 mm screw

Step 25

– Grab a spudger and gently work it around the antenna support to pop it out of its snug spot in the Surface.

– Carefully remove the antenna support and set it aside.

Tools Used
  1. SpudgerMicrosoft Surface Pro 6 Motherboard Replacement

Step 26

– Take one point of your trusty pair of pointed tweezers and carefully slip it into the gap at the corner of the EMI shield covering the heat sink.

– Now, gently wiggle the tweezers to lift the EMI shield off the motherboard a little—just enough to create some space. Don’t go all the way yet, though. You’re just getting things started!

Tools Used
  1. TweezersMicrosoft Surface Pro 6 Motherboard Replacement

Step 27

– For each corner of the EMI shield covering the heat sink, repeat the same step. It’s like giving each corner some love, one at a time.

Step 28

– Carefully take off the heat sink shield to get things cooling down in style.

Step 29

– First things first, grab your trusty screwdriver and start removing the ten Torx screws that are holding the heat sink in place. Take your time, no rush!

– When you’re putting everything back together, make sure to tighten the heat sink screws in a criss-cross pattern, giving each screw one full turn at a time until they’re snug. This ensures an even fit!

– Start with the six 2.6 mm-long T3 screws. These little guys go first.

– Then, move on to the four 3.3 mm-long T5 screws.

– Screw 1: Tighten it up!

– Screw 2: You got this!

– Screw 3: Almost there!

– Screw 4: Last one, nice and tight!

Step 30

– Grab your trusty spudger and carefully lift the heat sink right off the CPU. A little wiggle should do the trick, just don’t rush it.

– When you’re putting everything back together, don’t forget to clean off both the heat sink and CPU. Apply fresh thermal paste to keep things running cool and smooth.

Tools Used
  1. SpudgerMicrosoft Surface Pro 6 Motherboard Replacement

Step 31

– Gently pry the left speaker connector from its socket on the motherboard using the point of a spudger. A little finesse here goes a long way!

Tools Used
  1. SpudgerMicrosoft Surface Pro 6 Motherboard Replacement

Step 32

– Gently use the tip of a spudger to lift the tiny locking flap holding the volume and power button cable’s ZIF connector in place.

– Carefully slide the volume and power button cable straight out from its socket on the motherboard.

Tools Used
  1. SpudgerMicrosoft Surface Pro 6 Motherboard Replacement

Step 33

– Gently use the tip of your spudger to pop the right speaker connector out from its socket on the motherboard.

Tools Used
  1. SpudgerMicrosoft Surface Pro 6 Motherboard Replacement

Step 34

– Grab your T5 Torx driver and loosen the two screws holding down the right speaker:

– One 6 mm screw

– One 3.7 mm screw

Step 35

– Grab your spudger and gently pry up the left side of the right speaker to give it some breathing room from the nearby parts.

– Once the left side is free, slide the speaker smoothly to the left, popping it straight out of its cozy spot in the case.

Tools Used
  1. SpudgerMicrosoft Surface Pro 6 Motherboard Replacement

Step 36

– Gently slide one tip of your pointed tweezers into a gap in the corner of the EMI shield that’s covering the camera connectors.

– Carefully use the tweezers to lift the EMI shield away from the motherboard, just enough to get some space without damaging it.

– Move to a few other spots around the shield and repeat the process until it’s fully free. Once that’s done, simply remove the shield.

Tools Used
  1. TweezersMicrosoft Surface Pro 6 Motherboard Replacement

Step 37

– Gently slide the flat end of your spudger under the front-facing camera connector and lift it out from its socket on the motherboard with care.

Tools Used
  1. SpudgerMicrosoft Surface Pro 6 Motherboard Replacement

Step 38

– Gently slide the flat end of your spudger under the face-detection camera connector and pop it up out of its motherboard socket like a pro.

Tools Used
  1. SpudgerMicrosoft Surface Pro 6 Motherboard Replacement

Step 39

– Gently use the flat end of a spudger to lift the rear-facing camera connector out of its spot on the motherboard. Be careful and take your time, this part’s easy with a little patience!

Tools Used
  1. SpudgerMicrosoft Surface Pro 6 Motherboard Replacement

Step 40

– Grab the flat end of a spudger and gently nudge the microphone connector out of its cozy spot on the motherboard. Take it slow and steady, and you’ll have it out in no time.

Tools Used
  1. SpudgerMicrosoft Surface Pro 6 Motherboard Replacement

Step 41

– Gently slip one tip of your pointed tweezers into a tiny gap at the corner of the EMI shield that’s protecting the microSD card reader connector.

– Carefully pry the shield away from the motherboard bit by bit, making sure not to bend it out of shape.

– Keep working your way around the shield, repeating the prying process at different spots until it pops free. Then, go ahead and remove the shield.

Tools Used
  1. TweezersMicrosoft Surface Pro 6 Motherboard Replacement

Step 42

– Gently slide the flat end of your spudger under the microSD card reader connector and lift it out of its socket on the motherboard with a smooth, confident motion.

Tools Used
  1. SpudgerMicrosoft Surface Pro 6 Motherboard Replacement

Step 43

– Gently slide the flat end of your spudger under the flap covering the SurfaceConnect port connector to lift it up.

Tools Used
  1. SpudgerMicrosoft Surface Pro 6 Motherboard Replacement

Step 44

– Gently wiggle the SurfaceConnect port connector and slide it out from its cozy spot on the motherboard. It’s like giving it a little hug—just enough to loosen it up!

Step 45

– Gently use the tip of a spudger to lift the tiny locking flap holding the headphone jack cable’s ZIF connector in place.

– Carefully slide the headphone jack cable straight out from its socket on the motherboard.

Tools Used
  1. SpudgerMicrosoft Surface Pro 6 Motherboard Replacement

Step 46

– Take a pair of pointy tweezers and gently slide one tip into the gap at the corner of the left-most large EMI shield.

– Carefully wiggle the tweezers to lift the shield away from the motherboard. Be cautious not to bend it!

– Work your way around the shield, repeating this process at different points until the shield is completely detached. Once it’s free, remove it from the device.

Tools Used
  1. TweezersMicrosoft Surface Pro 6 Motherboard Replacement

Step 47

– Go ahead and do the same thing as before to take off the last big EMI shield hanging out on the right side of the motherboard.

Step 48

– Grab your trusty T3 Torx driver and carefully unscrew the eight 2.2 mm screws holding the motherboard in place.

Step 49

– Gently lift the side of the motherboard opposite the ports just enough to clear the nearby components and the case edge.

– Carefully slide the motherboard away from the ports, making sure all ports are fully free from their slots before you proceed.

– Take the motherboard out.

Step 50

– Gently slide one tip of your pointed tweezers into a corner gap of the EMI shield covering the display interconnect connector.

– Carefully use the tweezers to lift the EMI shield away from the motherboard, taking care not to bend it out of shape.

– Keep working your way around the shield, lifting at different spots until it pops free. Then, remove the shield completely.

Tools Used
  1. TweezersMicrosoft Surface Pro 6 Motherboard Replacement

Step 51

– Gently use the flat end of a spudger to lift the display interconnect cable straight up and out of its socket on the motherboard. Take your time, no need to rush here!

Tools Used
  1. SpudgerMicrosoft Surface Pro 6 Motherboard Replacement

Step 52

– Slide one tip of your trusty pointed tweezers into a small gap along the edge of the EMI shield covering the digitizer connector.

– Gently wiggle and lift the shield away from the display as much as you can without bending it out of shape.

– Keep working your way around the shield, prying at different spots until it’s loose and ready to come off. Then, carefully remove the shield.

Tools Used
  1. TweezersMicrosoft Surface Pro 6 Motherboard Replacement

Step 53

– Grab the flat end of your spudger and gently lift the digitizer connector out of its socket on the motherboard. Keep it steady and take your time—this part’s all about precision!

Tools Used
  1. SpudgerMicrosoft Surface Pro 6 Motherboard Replacement

Step 54

– Check your shiny new part against the old one. If there are any extra bits or adhesive strips left on the new part, don’t forget to remove them before you start putting things back together.

– Now, just retrace your steps and put everything back in reverse order. Piece by piece, like a puzzle!

– Got some old tech lying around? Don’t toss it! Take it to a certified recycler, like an R2 or e-Stewards one, to give your e-waste a second chance.

– Things didn’t go as smoothly as you hoped? No worries! Try a little troubleshooting, or for extra help, ask our Answers community for some guidance.

Success!
Before you wrap things up, make sure to compare your shiny new replacement part with the original one. You might need to transfer some leftover bits or peel off the adhesive backings from the new part to get it ready.
Now, time to reassemble! Just follow the steps you did earlier, but in reverse order, and your device will be good to go.
Got some old e-waste lying around? Don’t toss it—take it to an R2 or e-Stewards certified recycler. They know how to handle it responsibly.
If things didn’t go quite as planned, don’t sweat it. Try some basic troubleshooting, or check out our Answers community for some extra help!

iPad 4 GSM Front Facing Camera Replacement

Duration: 45 minutes
Steps: 47 Steps

Time to swap out that front-facing camera! This guide will walk you through the steps to get it done. If you hit any roadblocks along the way, don’t worry—just schedule a repair and we’ll lend a hand!

Step 1

– Pop the iOpener right in the middle of your microwave. It’s ready for a quick heat-up, so it can do its magic!

Tools Used
  1. iOpeneriPad 4 GSM Front Facing Camera Replacement

Step 2

– Zap the iOpener in the microwave for 30 seconds to get it nice and toasty.

– As it cools down during your repair adventure, just pop it back in the microwave for another 30 seconds whenever you need a little extra heat boost.

Tools Used
  1. iOpeneriPad 4 GSM Front Facing Camera Replacement

Step 3

– Carefully take the iOpener out of the microwave, grabbing it by one of its flat ends to steer clear of the hot center. You’ve got this!

Tools Used
  1. iOpeneriPad 4 GSM Front Facing Camera Replacement

Step 4

– Grab a pot or pan and fill it with enough water to completely cover your iOpener.

– Bring the water to a boil, then turn off the heat to avoid overheating.

– Drop your iOpener into the hot water and let it soak for 2-3 minutes, making sure it’s fully submerged.

– Carefully fish out the warm iOpener using tongs—no burnt fingers here!

– Give your iOpener a good dry-off with a towel.

– And boom, your iOpener is good to go! Need it hotter? Just boil the water again, turn off the heat, and dunk it for another 2-3 minutes.

Tools Used
  1. iOpeneriPad 4 GSM Front Facing Camera Replacement

Step 5

– If your display glass is cracked, keep those shards in check and avoid any ouch moments by taping the glass up first.

– Cover the iPad’s screen with overlapping strips of clear packing tape until it’s fully wrapped like a tech burrito.

– Follow the rest of the steps as best you can. Just a heads up—once the glass is cracked, it might keep splitting as you work, so you might need to carefully pry out the pieces with a metal tool.

Step 6

– Place the iOpener gently on the right edge of your iPad, making sure it’s flat and that it’s making solid contact with the iPad’s surface.

– Let the iOpener hang out on the iPad for about 90 seconds before you try to open up the front panel.

Tools Used
  1. iOpeneriPad 4 GSM Front Facing Camera Replacement

Step 7

– There’s a tiny gap in the iPad’s adhesive ring located at the upper right corner, about 2.0 inches (~5 cm) down from the top edge. This little spot is your entry point.

– Line up your plastic opening tool with the mute button. Gently slip just the tip of the tool into the space between the front glass and the plastic bezel—just enough to nudge the crack open a bit.

Step 8

– Carefully slide your tool right where it belongs—between the plastic display bezel and the front panel glass—to get things moving smoothly.

Step 9

– Gently wedge the plastic opening tool between the front glass and the plastic bezel, then carefully slide a plastic opening pick into the gap, right next to the tool. Take it slow, and make sure everything is snug before moving forward!

Step 10

– Gently pull out the plastic opening tool from the iPad, then slide the opening pick a bit deeper under the front glass—about half an inch in. Keep it smooth and steady!

Step 11

– While you’re gently loosening the adhesive on the right side of the iPad, pop that iOpener back in the heat and let it work its magic on the bottom edge of the iPad. A little warmth goes a long way!

Tools Used
  1. iOpeneriPad 4 GSM Front Facing Camera Replacement

Step 12

– While the iOpener warms up the bottom edge, start loosening the adhesive along the right side of the iPad.

– Gently slide the opening pick down the edge, easing the adhesive free as you go.

Tools Used
  1. iOpeneriPad 4 GSM Front Facing Camera Replacement

Step 13

– If the opening pick gets caught in the sticky adhesive, just roll it along the edge of the iPad. Keep going, and the adhesive will gradually release. Take your time and let the pick do its thing!

Tools Used
  1. iOpeneriPad 4 GSM Front Facing Camera Replacement

Step 14

– Before you pop the first pick into the bottom corner of your iPad, slide a second pick gently under the right edge of the front glass. This keeps that pesky adhesive from sticking back down on you.

– Give the iOpener another warm-up, then move it to the top edge of the iPad. Let’s keep things toasty!

Tools Used
  1. iOpeneriPad 4 GSM Front Facing Camera Replacement

Step 15

– Alright, these next steps are a bit tricky, so make sure you’re careful and steady!

– You’re going to need to gently release the adhesive that’s holding the antenna to the front panel. Just take your time to avoid damaging the sensitive parts where the antenna connects to the iPad. Stick to the steps ahead and you’ll be golden!

Step 16

– Gently slide the opening pick around the bottom right corner of your iPad to free up the adhesive holding it in place.

Step 17

– Gently slide the opening pick along the bottom edge of the iPad to loosen the adhesive securing the Wi-Fi antenna—smooth moves here keep everything safe!

Step 18

– After you pass the Wi-Fi antenna (about 3″ or 75 mm from the right edge, right next to the home button), slide the opening pick all the way in.

– Gently slide the pick to the right to break free the adhesive holding the Wi-Fi antenna to the front glass.

– The antenna is screwed and cabled to the bottom of the iPad. This step carefully separates it from the front panel so you don’t accidentally mess it up when removing the panel.

Step 19

– Keep peeling the adhesive along the bottom edge of the iPad. When you get past the home button, pull the opening pick out enough to go around it, then slide it back in about half an inch (10 mm) to keep things moving smoothly.

Tools Used
  1. iOpeneriPad 4 GSM Front Facing Camera Replacement

Step 20

– Keep peeling away the adhesive along the bottom edge of the iPad until it’s all free.

– Leave the opening pick gently tucked under the front glass, right by the home button, for a little extra leverage.

Step 21

– Pop the iOpener back in the microwave to warm it up, then place it on the left edge of the iPad to gently heat and loosen the adhesive there.

Tools Used
  1. iOpeneriPad 4 GSM Front Facing Camera Replacement

Step 22

– Gently slide the opening pick along the top edge of the iPad, easing it out just enough to navigate around the front-facing camera bracket.

– Heads up: the adhesive here is seriously stubborn, so you might need to apply some firm pressure. Take it slow and steady to avoid any slips or accidental damage to yourself or your iPad.

– If your opening pick is getting stuck in the adhesive, try “rolling” it as demonstrated in step 9 for a smoother glide.

Tools Used
  1. iOpeneriPad 4 GSM Front Facing Camera Replacement

Step 23

– Gently keep sliding that adhesive-release pick along the top edge of your iPad, looping it around the top left corner like a pro—it’s like giving your device a little stretch!

Tools Used
  1. iOpeneriPad 4 GSM Front Facing Camera Replacement

Step 24

– Gently slide the opening pick along the left edge of the iPad to loosen the adhesive. Heads up: the adhesive here is pretty thin because of the digitizer running along this side. Keep the pick shallow—no deeper than half an inch (about 10 mm)—to avoid any unwanted damage to the digitizer.

Step 25

– With the opening pick still tucked under the bottom edge of the iPad, gently work it to loosen the adhesive at the bottom left corner.

Step 26

– Grab an opening pick and gently wedge it under the bottom right corner of the iPad, then lift it up enough to get a good grip with your fingers.

Step 27

– Grab your iPad by the top and bottom right corners, then gently rotate the front glass away from the device. Be careful, you don’t want to force it!

– Before putting everything back together, grab a microfiber cloth and some compressed air to give the LCD a nice clean-up. Dust and fingerprints? Gone. Now you’re ready to reinstall that glass!

Step 28

– Grab your trusty Phillips #00 screwdriver and remove the four 2 mm screws that are holding the LCD to the aluminum frame. Just a few turns, and you’ll be ready for the next step!

Step 29

– Grab your trusty plastic opening tool (or a spudger, if you’re feeling fancy) and gently pry up the right edge of the LCD from the iPad.

– Once you’ve got that edge lifted, carefully rotate the LCD around its left edge and let it rest on the front glass panel. Nice and easy!

Tools Used
  1. SpudgeriPad 4 GSM Front Facing Camera Replacement

Step 30

– Carefully use the tip of your trusty spudger to lift up the piece of tape that’s hiding the LCD ribbon cable connector underneath.

Tools Used
  1. SpudgeriPad 4 GSM Front Facing Camera Replacement

Step 31

– Gently lift the little flap holding the LCD ribbon cable in place on the logic board’s ZIF connector.

– Carefully wiggle the LCD ribbon cable free from its socket using your fingers or a pair of tweezers.

– If the LCD screen doesn’t light up after reconnecting the ZIF connector, try a force restart by holding down the power button and home button together for about ten seconds until the Apple logo appears.

Tools Used
  1. TweezersiPad 4 GSM Front Facing Camera Replacement

Step 32

– Carefully lift the LCD off the front panel—just don’t touch the front of the screen to keep it nice and safe!

Step 33

Step 34

– Gently lift up the little flap on the home button ribbon cable ZIF connector. It’s like giving it a friendly nudge to get things moving!

Step 35

– Grab a trusty pair of tweezers and gently wiggle that home button ribbon cable right out of its cozy little socket on the logic board. You’ve got this!

Tools Used
  1. TweezersiPad 4 GSM Front Facing Camera Replacement

Step 36

– Gently lift the home button ribbon cable out from its groove in the back case.

Step 37

– Gently use the tip of your trusty spudger to lift the tape holding the digitizer ribbon cable onto the logic board—easy does it!

Tools Used
  1. SpudgeriPad 4 GSM Front Facing Camera Replacement

Step 38

– Gently flip up the little retaining flap on each of those digitizer ribbon cable ZIF connectors to free them up.

Step 39

– Gently use the flat end of your spudger to ease up the adhesive under the digitizer ribbon cable. No rush here, just take your time!

– Once the adhesive is loosened, carefully pull the digitizer ribbon cable straight out from its socket on the logic board. A smooth, steady motion works best!

Tools Used
  1. SpudgeriPad 4 GSM Front Facing Camera Replacement

Step 40

– Gently lift the digitizer ribbon cable and use the flat end of a spudger to carefully loosen the adhesive holding the cable to the aluminum back case.

Tools Used
  1. SpudgeriPad 4 GSM Front Facing Camera Replacement

Step 41

– Gently wiggle the digitizer ribbon cable free from its snug spot in the aluminum frame using your fingers.

– Lift the front panel off the iPad carefully to avoid any surprises.

Step 42

– Gently peel back and take off the adhesive tape covering the headphone jack assembly.

Step 43

– Unscrew the single 2.6 mm Phillips #0 screw holding the camera ribbon cable in place, right by the headphone jack assembly.

Step 44

– Gently use the flat end of your spudger to lift the front-facing camera right off its socket on the headphone jack assembly.

– Keep the spudger in place and slide it to the right to carefully pop free the adhesive holding down the camera’s ribbon cable.

Tools Used
  1. SpudgeriPad 4 GSM Front Facing Camera Replacement

Step 45

– Gently use the tip of your spudger to lift the adhesive holding the camera ribbon cable onto the headphone jack assembly—nice and easy does it!

– Next, do the same with the adhesive foam tape that’s keeping the camera ribbon cable stuck to the aluminum frame. You got this!

Tools Used
  1. SpudgeriPad 4 GSM Front Facing Camera Replacement

Step 46

– Grab the flat end of your spudger and gently nudge the camera ribbon cable out of its cozy spot in the plastic antenna housing.

– Peel back the adhesive on the camera carefully, but take it slow to avoid ripping the metal EMI tape. Patience is key!

Tools Used
  1. SpudgeriPad 4 GSM Front Facing Camera Replacement

Step 47

– Gently ease the camera out of the iPad, guiding the camera cable smoothly through its slot in the aluminum frame.

– Take the camera completely out of the iPad.

Tools Used
  1. SpudgeriPad 4 GSM Front Facing Camera Replacement

Success!

iPad 4 GSM Display Bezel Replacement

Duration: 45 minutes
Steps: 47 Steps

If you’ve found yourself with a busted display bezel, don’t stress! This guide will walk you through replacing it. While it was originally designed for the iPad 3 Wi-Fi, good news—it works for the iPad 4 models too, whether you’ve got the 4G or Wi-Fi version. Just follow along and you’ll have your screen looking brand new in no time!

Step 1

– Pop the iOpener right in the middle of the microwave and get ready for some heat!

Tools Used
  1. iOpeneriPad 4 GSM Display Bezel Replacement

Step 2

– Pop the iOpener in the microwave for 30 seconds to give it a good heat-up.

– As you work through the repair, the iOpener will cool down, so just keep reheating it in the microwave for another 30 seconds whenever needed.

Tools Used
  1. iOpeneriPad 4 GSM Display Bezel Replacement

Step 3

– Carefully take the iOpener out of the microwave, gripping it by one of the flat ends. Watch out for the hot middle—give it some space so you don’t burn your hands.

Tools Used
  1. iOpeneriPad 4 GSM Display Bezel Replacement

Step 4

– Grab a pot or pan and fill it with enough water to dunk your iOpener completely.

– Bring that water to a rolling boil, then switch off the heat.

– Carefully place your iOpener into the hot water and let it soak for 2-3 minutes, making sure it’s fully submerged.

– Use tongs to fish the warm iOpener out of the water—no burnt fingers here!

– Give your iOpener a good dry off with a towel.

– And voilà, your iOpener is all warmed up and ready to get to work! If it cools down, just repeat the boil-and-soak routine for another 2-3 minutes.

Tools Used
  1. iOpeneriPad 4 GSM Display Bezel Replacement

Step 5

– Got a cracked display glass? No worries! To keep things in check and avoid further mess while you’re fixing it, stick some tape over the cracks to hold it together.

– Start by laying down a few strips of clear packing tape across the iPad’s screen, overlapping them until the whole surface is covered. It’s like putting a protective blanket on your device!

– Now, go ahead and follow the guide step by step. Just a heads up: once that glass is cracked, it might keep cracking as you work. You might even need to grab a metal prying tool to carefully lift the glass out. But don’t stress, we’ve got you covered!

Step 6

– Place the iOpener flat on the right edge of your iPad, making sure it’s in full contact with the surface. This will give it the perfect grip to work its magic.

– Let the bag chill on the iPad for about 90 seconds. That’s the sweet spot before you dive into opening up the front panel.

Tools Used
  1. iOpeneriPad 4 GSM Display Bezel Replacement

Step 7

– There’s a little gap in the iPad’s adhesive ring at the upper right corner, about 2 inches (5 cm) from the top. Time to take advantage of this spot.

– Line up your tool with the mute button. Gently insert the tip of your plastic opening tool into the gap between the front glass and the plastic bezel. Just slide in the tip – you don’t need to go too deep, just enough to open up the crack a bit.

Step 8

– Place the tool carefully in the sweet spot—right between the plastic display bezel and the front panel glass. This is where the magic happens, so make sure it’s just right!

Step 9

– Gently wedge the tip of the plastic opening tool between the front glass and plastic bezel. Then, slide a plastic opening pick into the gap, right alongside the plastic tool. You’re almost there – keep it steady!

Step 10

– Take out the plastic opening tool from your iPad and gently slide the opening pick a little further underneath the front glass—aim for about 0.5 inches in depth.

Step 11

– As you work on loosening the adhesive along the right edge of the iPad, pop the iOpener back in the microwave to warm it up again, then place it neatly on the bottom edge to keep things toasty.

Tools Used
  1. iOpeneriPad 4 GSM Display Bezel Replacement

Step 12

– While the bottom edge gets its warm-up from the iOpener, start peeling back the adhesive on the right side of your iPad.

– Carefully glide the opening pick down the edge, easing off the adhesive as you go. Take it slow, there’s no rush!

Tools Used
  1. iOpeneriPad 4 GSM Display Bezel Replacement

Step 13

– If the opening pick gets stuck in the adhesive, gently roll it along the side of the iPad, easing the adhesive away as you go.

Tools Used
  1. iOpeneriPad 4 GSM Display Bezel Replacement

Step 14

– Before you take that first pick from the bottom corner of your iPad, slide a second pick under the right edge of the front glass to keep the adhesive from sticking back down. Trust me, it’s worth it!

– Reheat your trusty iOpener, then move it up to the top edge of your iPad. Let’s get that glass ready to come off!

Tools Used
  1. iOpeneriPad 4 GSM Display Bezel Replacement

Step 15

– Alright, time to slow things down a bit and take it easy. These next steps need your full attention, so make sure you’re ready.

– Now, you’re going to need to carefully free up the adhesive holding the antenna to the front panel. The tricky part? You want to make sure you don’t accidentally damage those delicate parts that connect the antenna to the bottom of the iPad. Follow these steps closely, and you’ll be just fine.

Step 16

– Gently slide the opening pick around the bottom right corner of the iPad to release the adhesive. A little patience here will go a long way!

Step 17

– Gently slide the opening pick along the bottom edge of the iPad to loosen the adhesive holding down the Wi-Fi antenna.

Step 18

– Once you’ve passed the Wi-Fi antenna (roughly 3″ (75 mm) from the right edge, or right near the home button), go ahead and reinsert the opening pick all the way in.

– Gently slide the pick to the right to loosen the adhesive that’s holding the Wi-Fi antenna onto the front glass.

– The antenna is secured to the bottom of the iPad with screws and a cable. By detaching the antenna from the front panel now, you’ll ensure that when you remove the panel, the antenna stays safe and sound.

Step 19

– Keep sliding that opening pick along the bottom edge of the iPad, carefully pulling it out far enough to get past the home button. Once you’re past it, pop the pick back in about half an inch (10 mm) to keep that adhesive in check.

Tools Used
  1. iOpeneriPad 4 GSM Display Bezel Replacement

Step 20

– Keep peeling that adhesive all along the bottom edge of the iPad—slow and steady wins the race!

– Leave your opening pick chilling right under the front glass by the home button to keep things loose.

Step 21

– Pop the iOpener in the microwave for a quick heat-up and place it along the left edge of the iPad. This will help loosen up the adhesive in that area, making the next steps easier.

Tools Used
  1. iOpeneriPad 4 GSM Display Bezel Replacement

Step 22

– Gently slide the opening pick along the top edge of your iPad, giving it a little tug to get around the front-facing camera bracket.

– The adhesive in this area is pretty stubborn, so you might need to apply a bit of muscle here. Just take it slow and steady to avoid any accidental slips or bumps that could damage your iPad.

– If the opening pick gets stuck due to the adhesive, try giving it a little ‘roll’ as shown in step 9.

Tools Used
  1. iOpeneriPad 4 GSM Display Bezel Replacement

Step 23

– Keep peeling back the adhesive along the top edge of the iPad, then smoothly slide your opening pick around the top left corner like a pro.

Tools Used
  1. iOpeneriPad 4 GSM Display Bezel Replacement

Step 24

– Gently slide your opening pick along the left edge of the iPad to loosen the adhesive. Heads up: the adhesive is pretty thin here because of the digitizer running along this side. Keep your pick shallow—no deeper than about half an inch (10 mm)—to avoid any accidental damage to the digitizer.

Step 25

– Grab your opening pick and gently slide it under the bottom edge of your iPad. Now, with a bit of finesse, work it along the bottom left corner to peel away the adhesive. You got this!

Step 26

– Grab one of your trusty opening picks, gently wedge it under the bottom right corner of the iPad, then lift and hold it with your fingers.

Step 27

– Grab your iPad by the top and bottom right corners and gently swivel the front glass away from the device.

– When putting everything back together, give the LCD a quick once-over with a microfiber cloth and some compressed air to zap away any dust or fingerprints before you pop the glass back on.

Step 28

– Grab your Phillips #00 screwdriver and carefully take out the four 2 mm screws holding the LCD to the aluminum frame. Easy does it!

Step 29

– Grab that trusty plastic opening tool or spudger and gently pry up the right edge of the LCD from the iPad’s embrace.

– Now, swing the LCD around its left edge and let it rest comfortably on top of the front glass panel like it’s taking a little break.

Tools Used
  1. SpudgeriPad 4 GSM Display Bezel Replacement

Step 30

– Grab your trusty spudger and gently lift that piece of tape off the LCD ribbon cable connector. You’ve got this!

Tools Used
  1. SpudgeriPad 4 GSM Display Bezel Replacement

Step 31

– Gently flip up the locking flap on the LCD ribbon cable’s ZIF connector.

– Carefully slide the LCD ribbon cable out of its socket on the logic board using your fingers or tweezers.

– If the LCD screen doesn’t light up after reconnecting the ZIF connector, try a force restart by holding down both the power and home buttons for about ten seconds until the Apple logo shows up.

Tools Used
  1. TweezersiPad 4 GSM Display Bezel Replacement

Step 32

– Careful now, grab the LCD by the edges and gently lift it away from the front panel—no touching the front screen!

Step 33

Step 34

– Gently flip up the little flap holding the home button ribbon cable ZIF connector in place.

Step 35

– Grab your trusty tweezers and gently pull the home button ribbon cable straight out from its socket on the logic board. Easy does it!

Tools Used
  1. TweezersiPad 4 GSM Display Bezel Replacement

Step 36

– Carefully unplug the home button ribbon cable from its cozy spot in the back case.

Step 37

– Gently slide the tip of your spudger under the tape holding down the digitizer ribbon cable on the logic board, peeling it back like a pro.

Tools Used
  1. SpudgeriPad 4 GSM Display Bezel Replacement

Step 38

– Gently lift the retaining flap on both of the digitizer ribbon cable ZIF connectors. A little nudge should do the trick—no need to force it!

Step 39

– Grab your trusty spudger and use the flat end to gently loosen the adhesive that’s holding the digitizer ribbon cable down.

– Once it’s free, carefully pull the digitizer ribbon cable straight out of its snug sockets on the logic board.

Tools Used
  1. SpudgeriPad 4 GSM Display Bezel Replacement

Step 40

– Gently peel back the digitizer ribbon cable, then grab the flat end of your trusty spudger to carefully lift off the adhesive holding the cable in place against the rear aluminum case. Take your time – we’re all about precision here!

Tools Used
  1. SpudgeriPad 4 GSM Display Bezel Replacement

Step 41

– Gently use your fingers to lift the digitizer ribbon cable out of its snug spot in the aluminum frame.

– Carefully detach the front panel from the iPad. Easy does it!

Step 42

– Start by gently slipping the edge of your plastic opening tool between the plastic and aluminum frames at one of the corners. Be careful, but confident—it’s a small step with big rewards.

– Now, slowly and steadily glide the plastic tool along the edge of the iPad. You’ll feel the adhesive give way as you go. Keep it smooth and steady—you’re doing great!

Step 43

– Keep sliding that plastic opening tool along the entire left edge of the iPad, nice and steady, just like before.

Step 44

– As you reach the bottom left corner, twist the plastic opening tool around the edge and keep sliding it along the bottom.

Step 45

– Now, glide that plastic opening tool down the right side of your iPad like you’re peeling a sticker off – smooth and steady.

Step 46

– Keep an eye on that front-facing camera as you gently slide the plastic opening tool along the top edge of your iPad—no one wants a surprise selfie!

Step 47

– Once you’ve loosened the adhesive all around the edges, gently lift the plastic display bezel off your iPad and give yourself a little pat on the back!

Success!

🍪
Have a cookie! This site uses cookies to enhance your experience. Opt-Out Options.