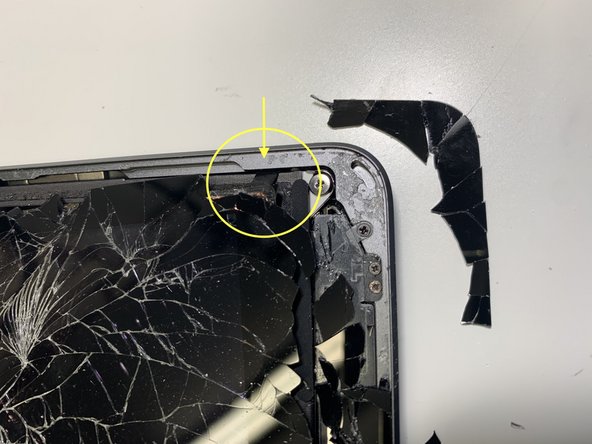
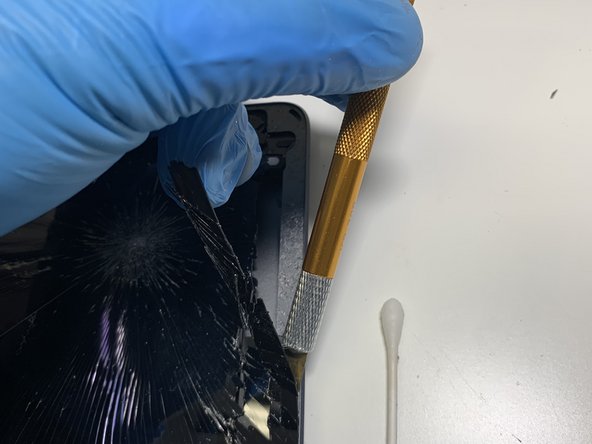
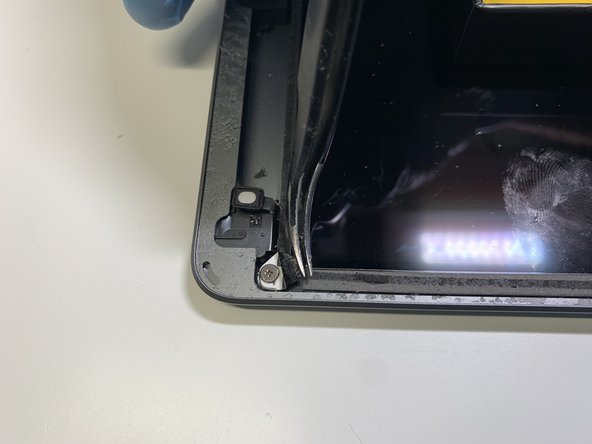
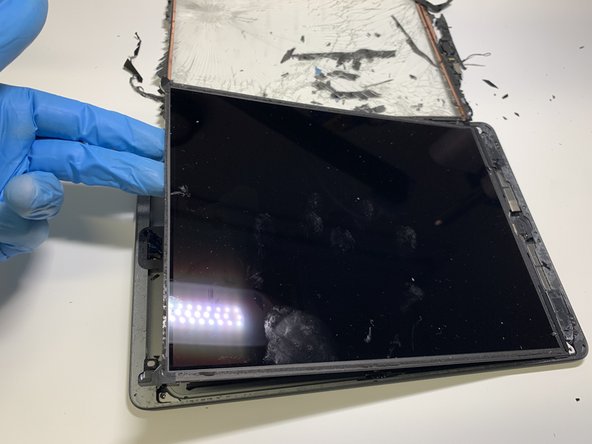
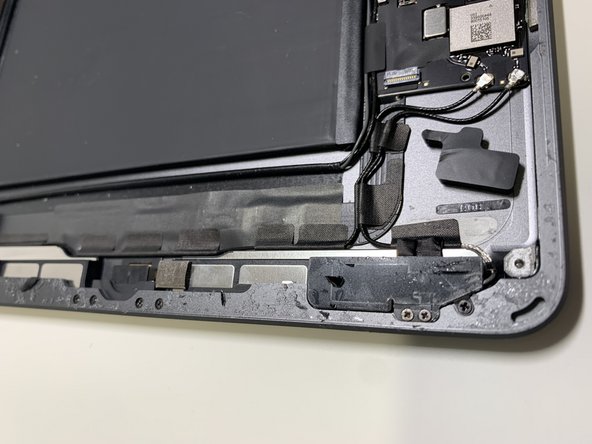
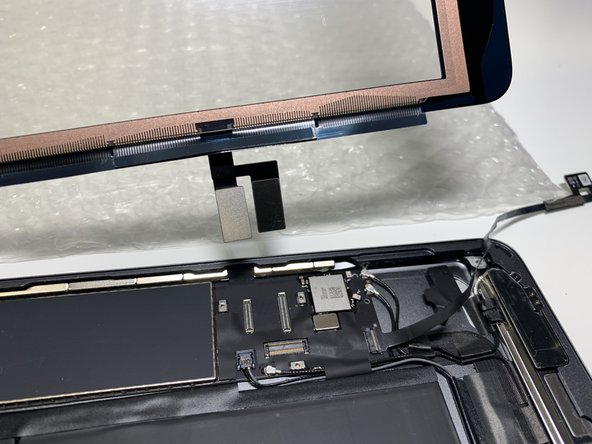
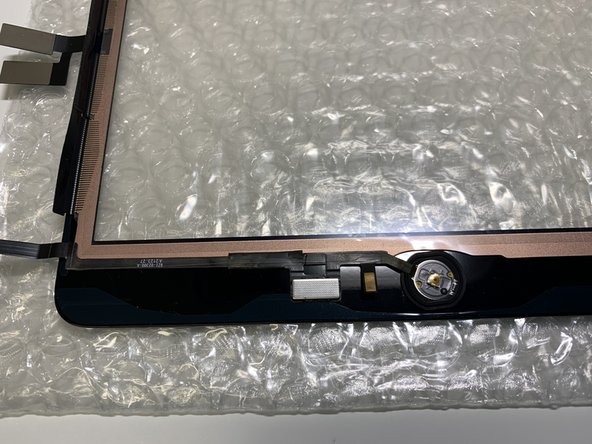
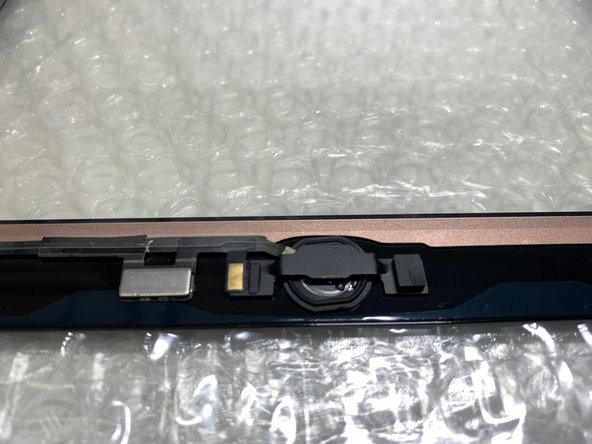
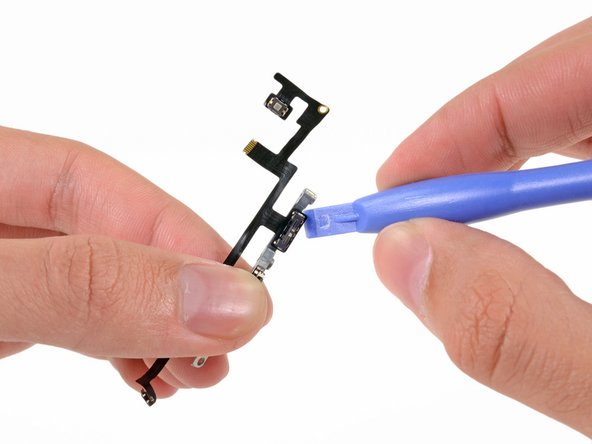
iPad 4 GSM Adhesive Strips Replacement (New Panel)

Duration: 45 minutes
Steps: 12 Steps

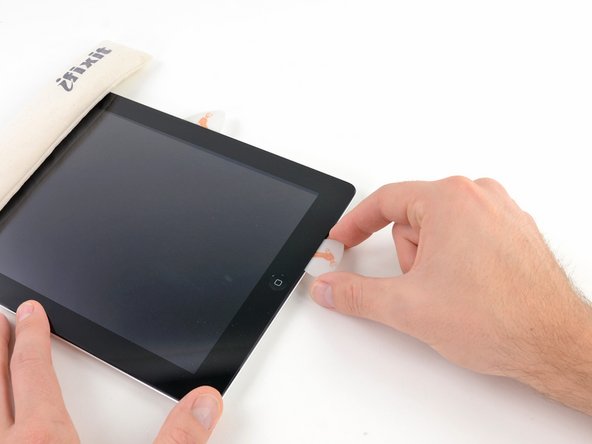
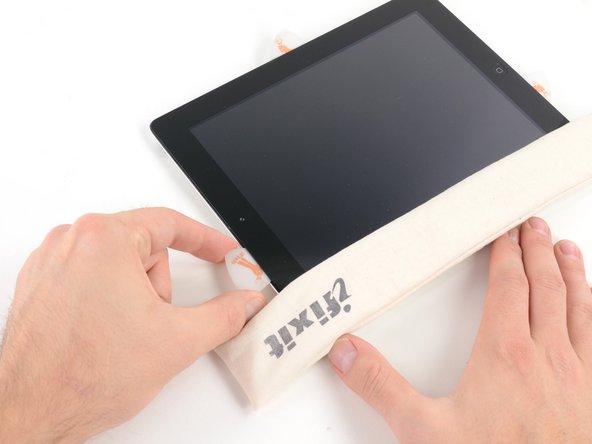
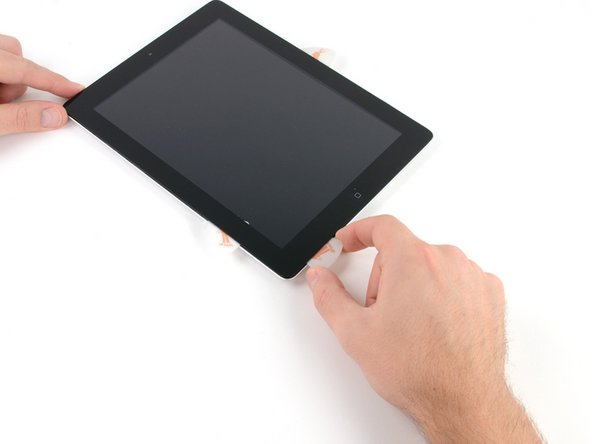
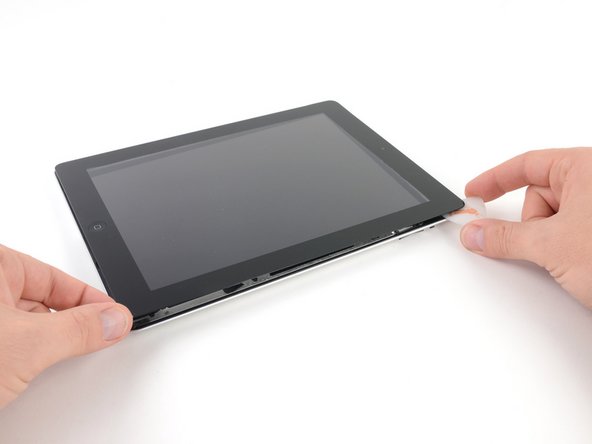
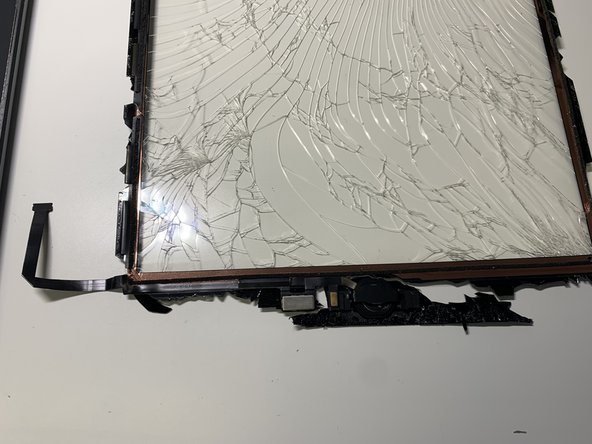
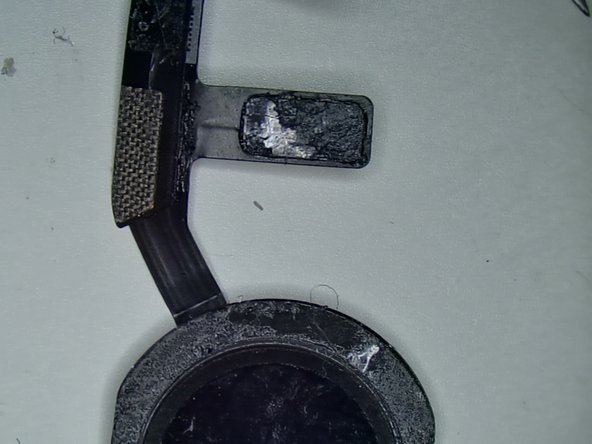
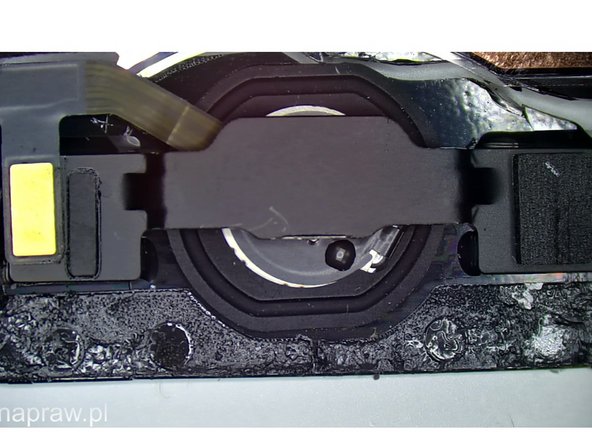
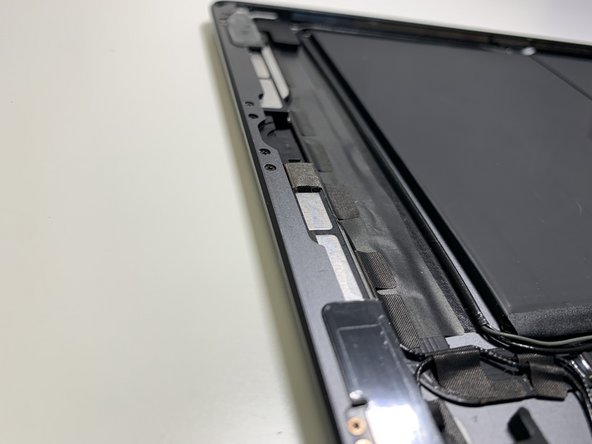
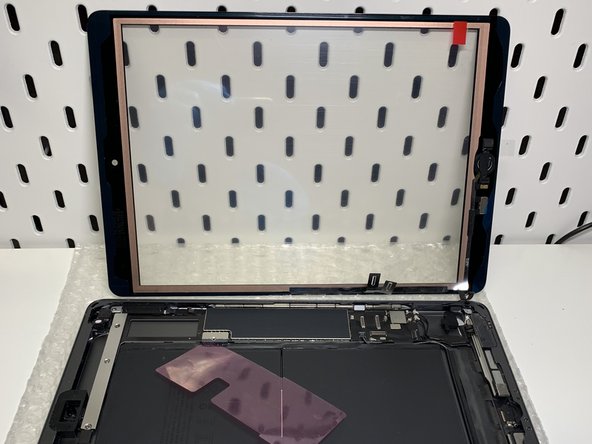
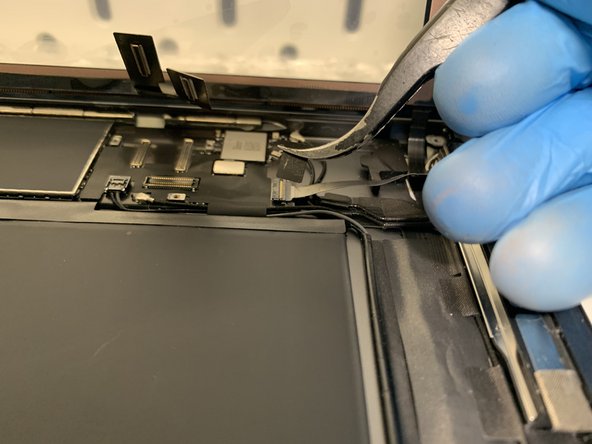
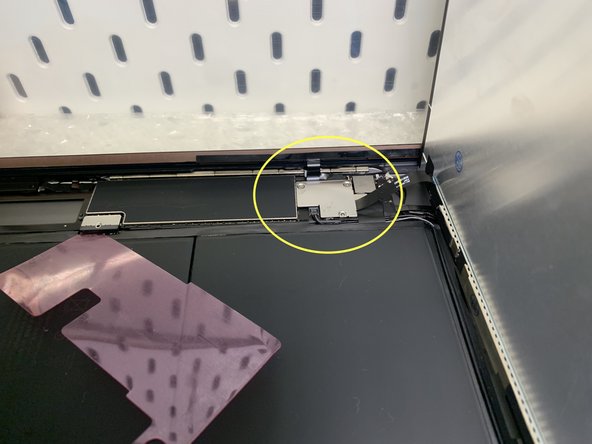
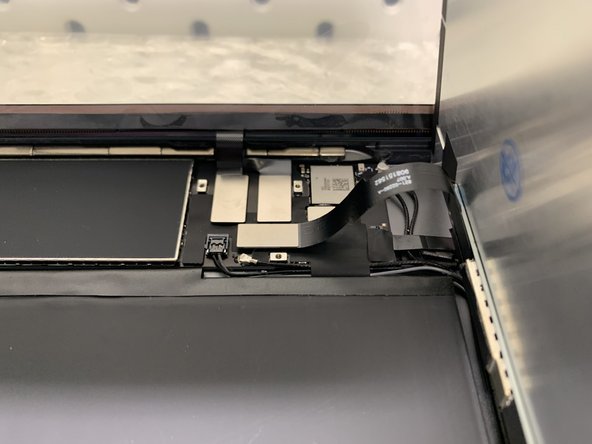
Follow this guide to stick adhesive strips onto a brand-new front panel assembly. Remember, this is only for use with fresh replacement front panels.

Step 1

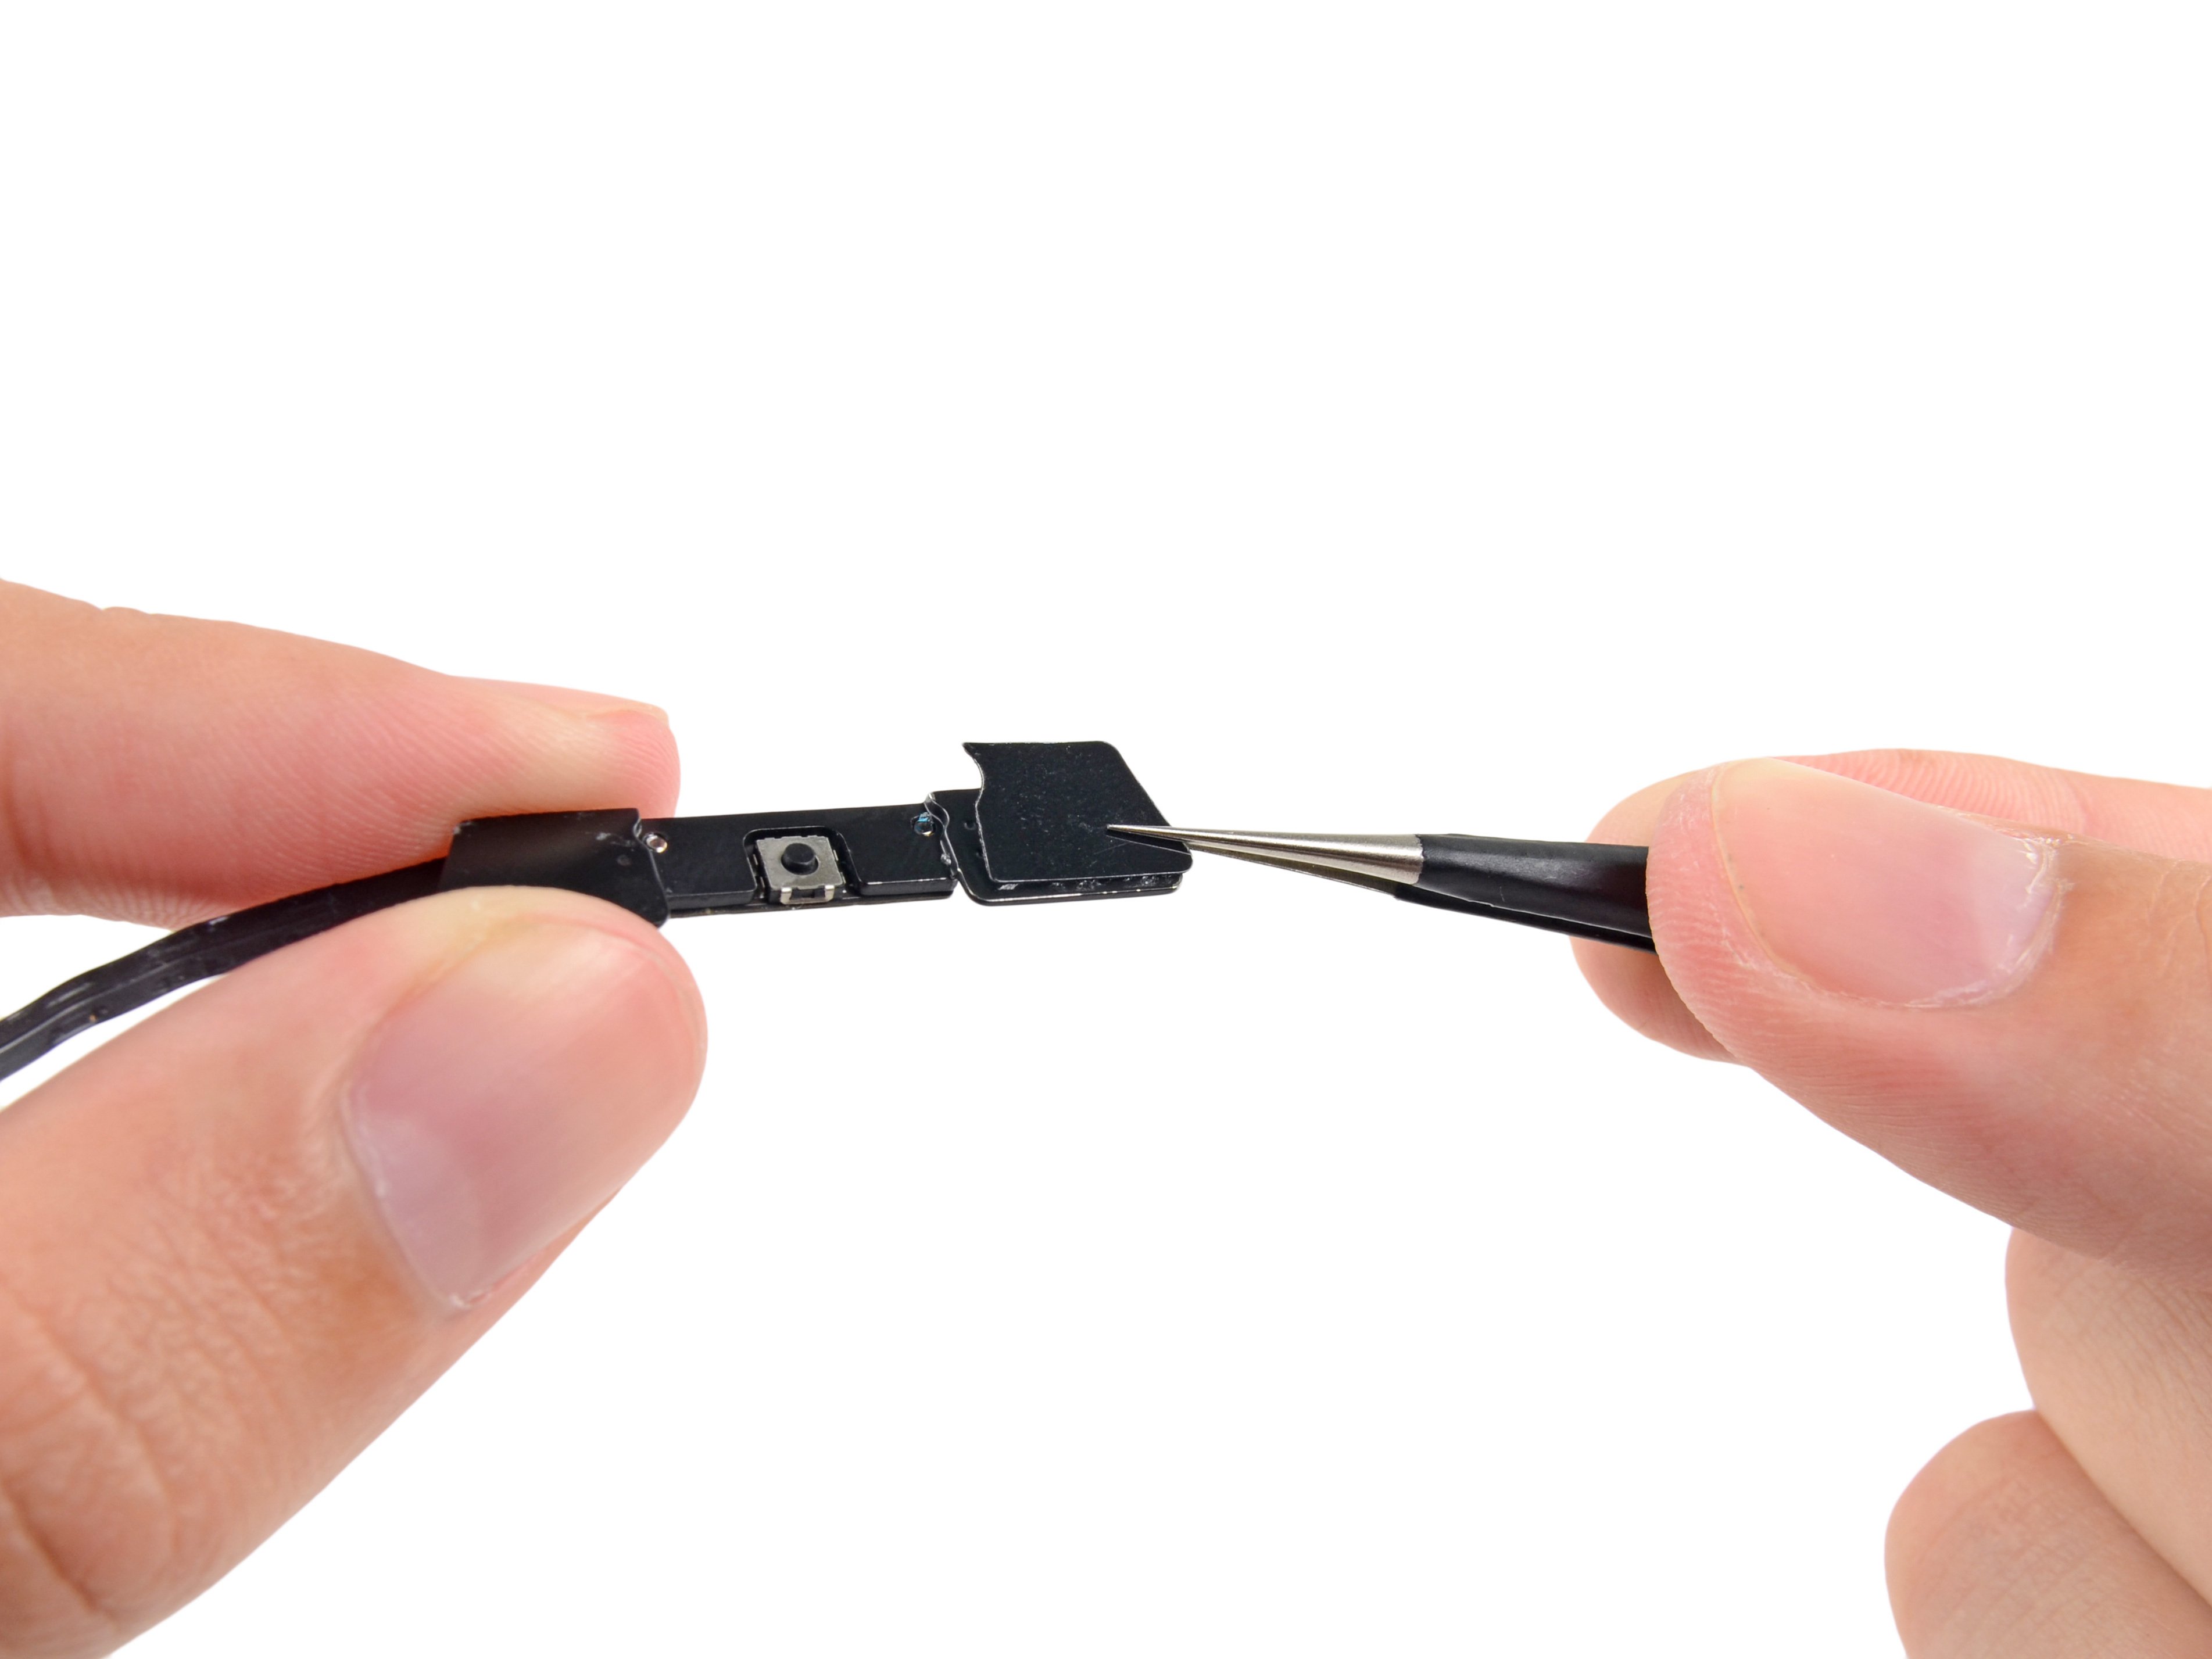
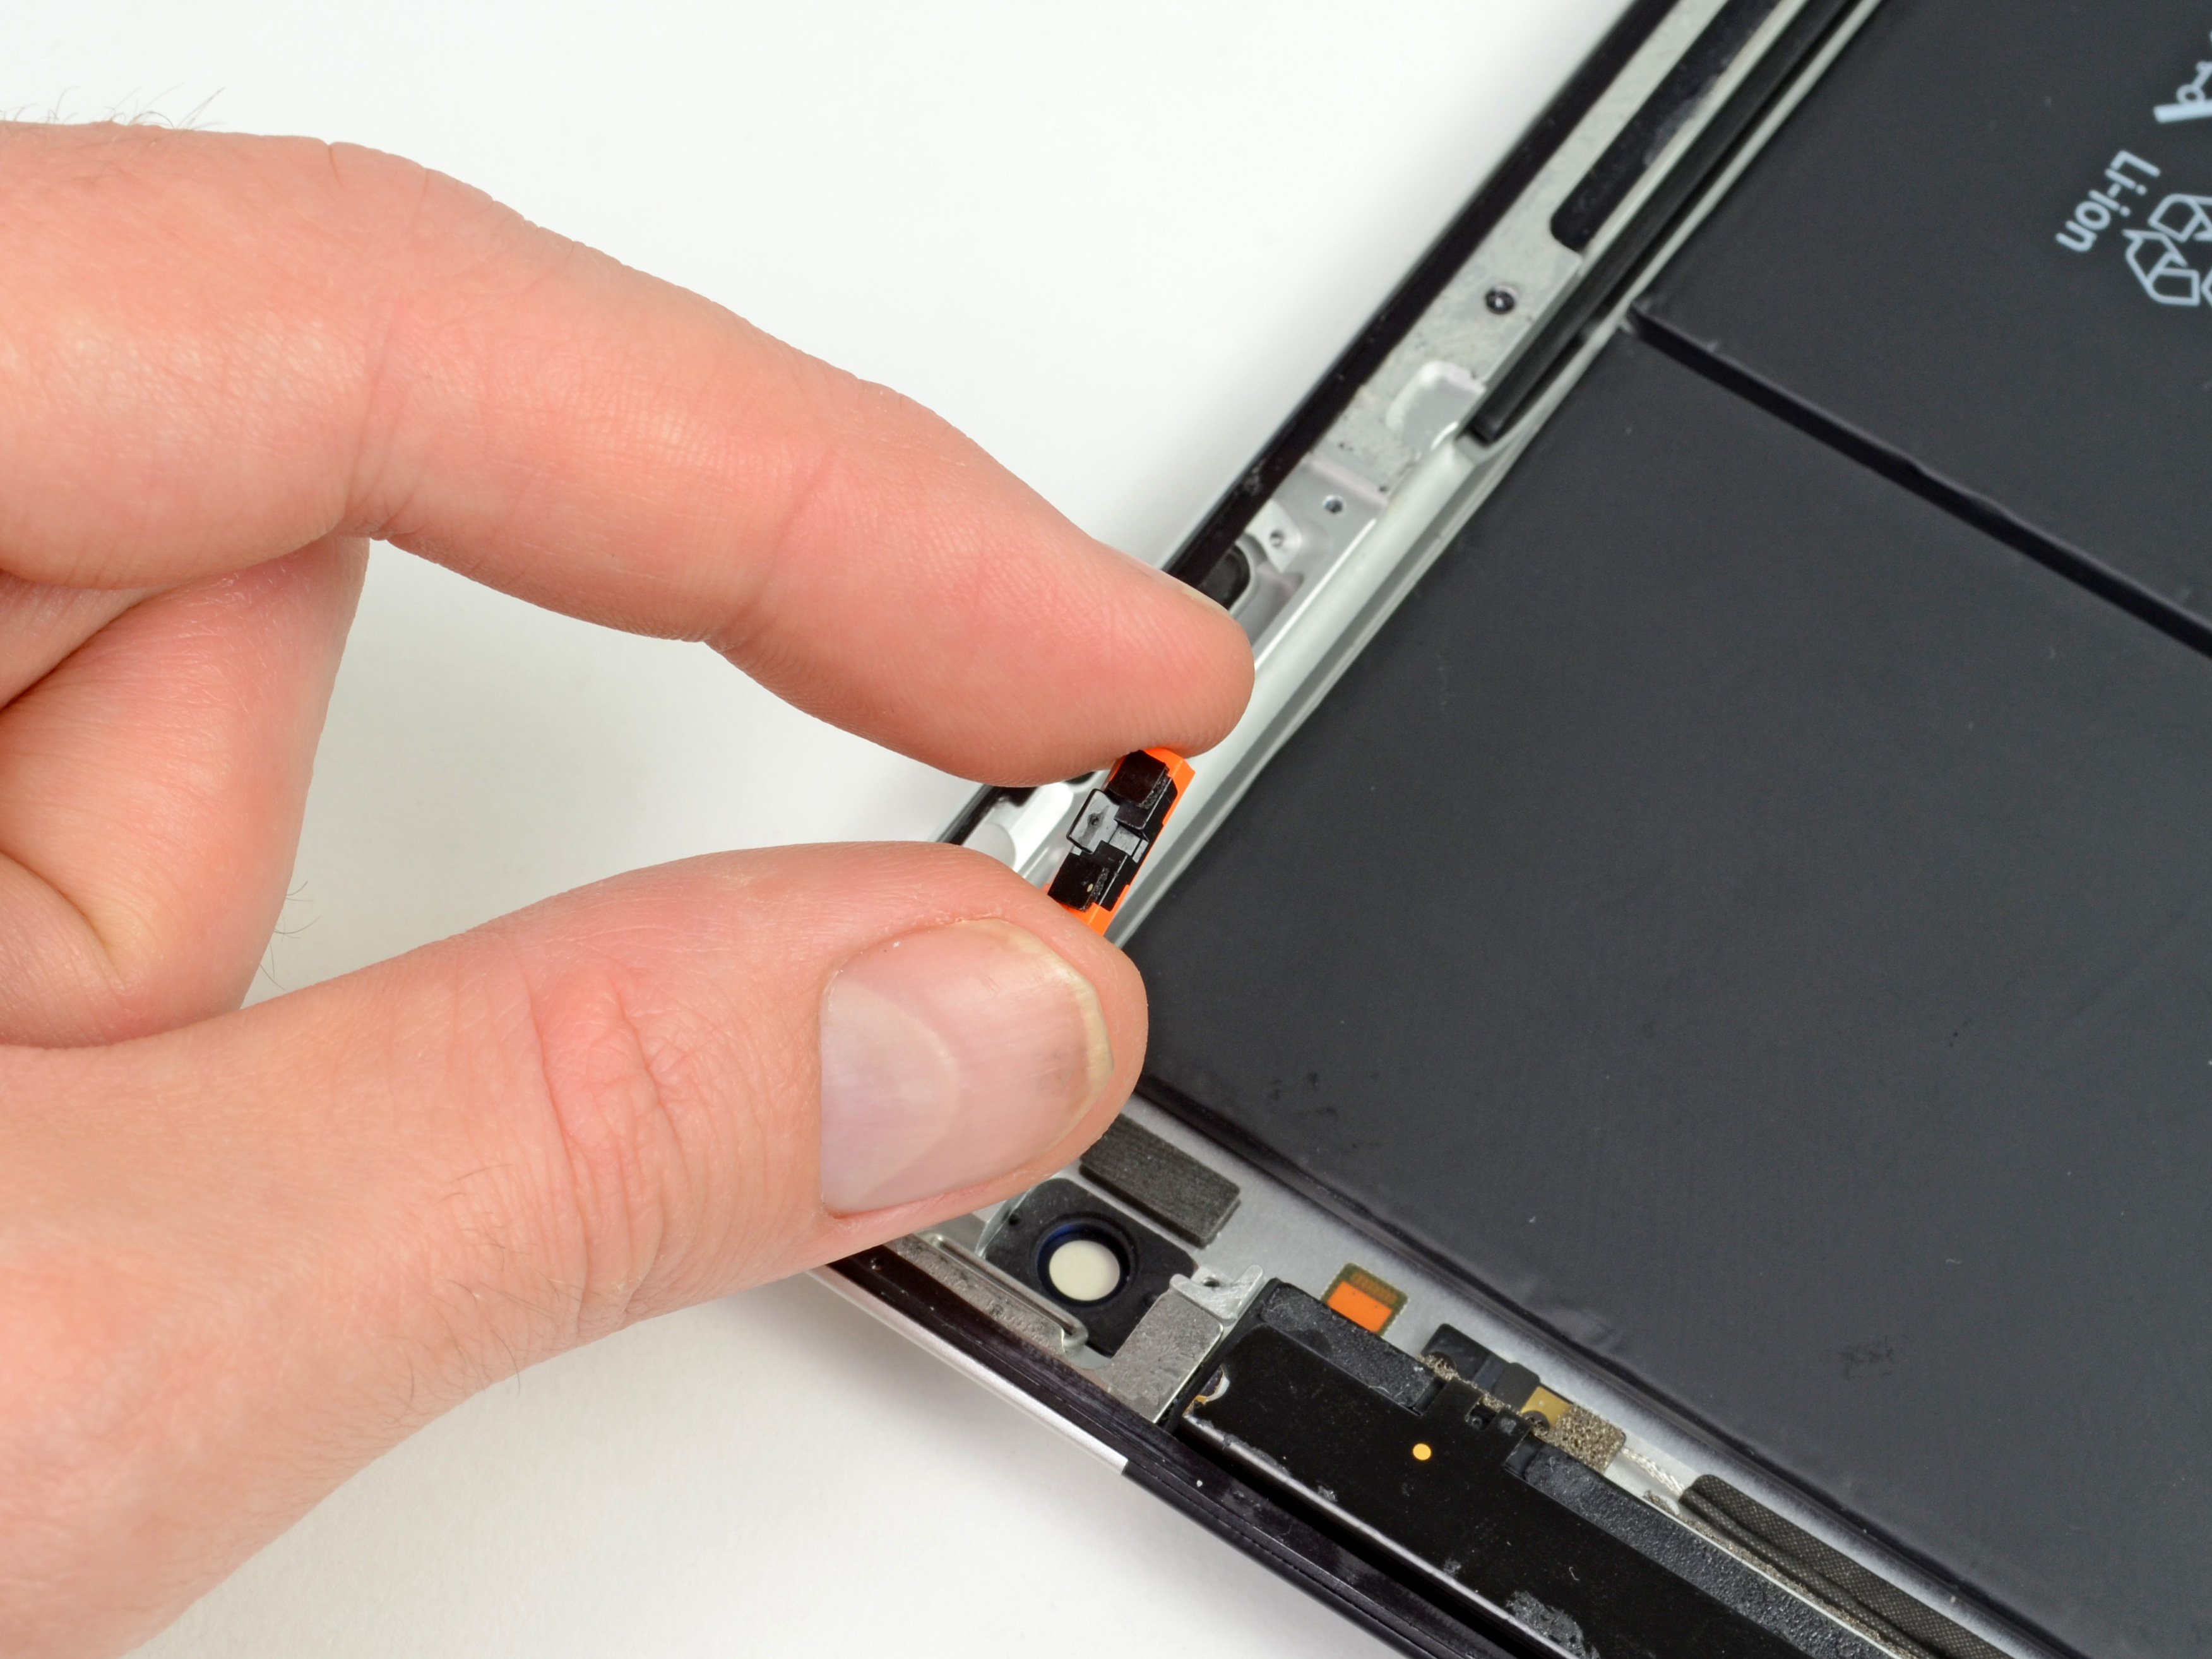
– Gently grab that first trapezoidal adhesive strip with your trusty tweezers and peel it off like a pro.

– Now, carefully place the first adhesive strip in its perfect spot on the home button mounting bracket, making sure it’s facing the right way.

– Repeat the process for the second adhesive strip—it’s just as easy as the first, so no worries!

Tools Used
  1. TweezersiPad 4 GSM Adhesive Strips Replacement (New Panel)

Step 2

– Grab a pair of tweezers and carefully pinch the corner of one of the adhesive strips on the mounting bracket.

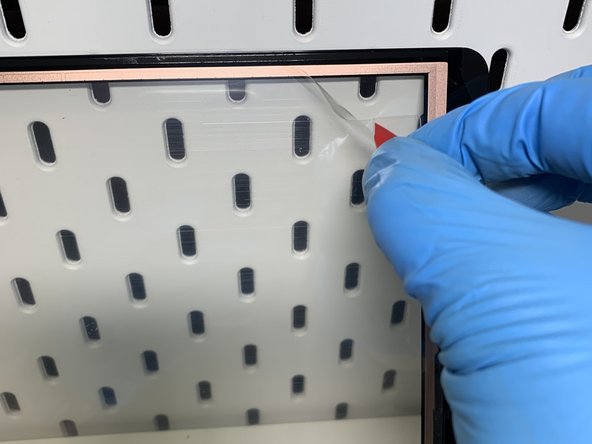
– Gently lift and peel back the clear backing from the adhesive strip to expose the black sticky side.

– Do the same for the second adhesive strip to get everything ready.

Tools Used
  1. TweezersiPad 4 GSM Adhesive Strips Replacement (New Panel)

Step 3

– Carefully set the home button mounting bracket right on top of the home button like a pro.

Step 4

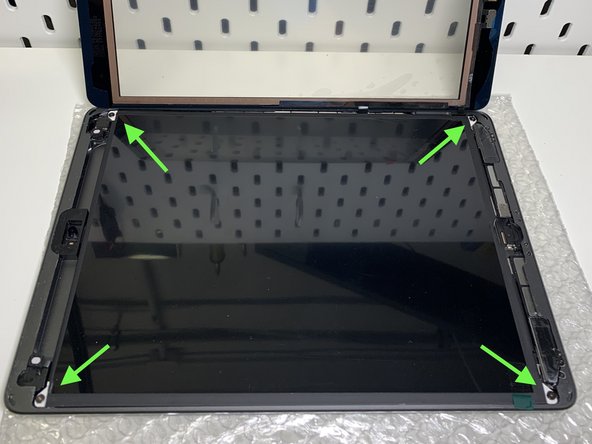
– Next up, you’ll be sticking down the rest of the adhesive pieces on the front panel.

– Hold off on peeling the clear backing from the strips just yet.

– Take the bridge-shaped adhesive strip and place it between the top edge of the front panel’s inner frame and the camera mounting bracket.

– Gently press the strip down starting from the center and work your way outwards, making sure no sneaky air bubbles get trapped underneath.

Step 5

– Stick the long, C-shaped adhesive strip along the right edge of the front panel—nice and neat!

Step 6

– Take the straight, medium-length adhesive strip and place it on the bottom right of the front panel, just under the home button ribbon cable. Keep it neat and lined up!

Step 7

– Stick the tabbed rectangular adhesive strip snugly onto the bottom right corner of the front panel.

Step 8

– Stick the long L-shaped adhesive strip onto the bottom left corner of the front panel, making sure it’s snug and secure.

Step 9

– Stick the short rectangular adhesive strip to the top-left corner of the front panel. Keep it snug and secure – it’s got your back.

Step 10

– Now, grab that last short L-shaped adhesive strip and place it right at the top left corner of the front panel. It’s like adding the finishing touch to a masterpiece!

Step 11

– Grab your trusty tweezers and gently lift the clear backing off the adhesive strip right under the home button ribbon cable.

– Carefully place the home button ribbon cable onto the adhesive strip, then smooth it out from the middle towards the edges, making sure no sneaky air bubbles get trapped between the strip and the front panel.

Tools Used
  1. TweezersiPad 4 GSM Adhesive Strips Replacement (New Panel)

Step 12

– Grab a soft, dry microfiber cloth and give the LCD and the inside of the front panel glass a gentle wipe-down. A quick blast of canned air or a puff from an air compressor works great to chase away stubborn dust.

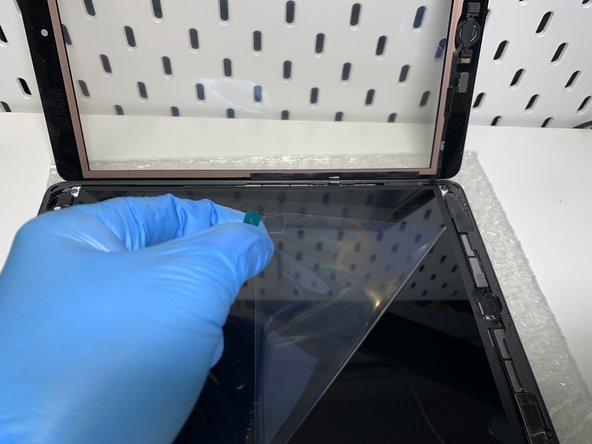
– Take your tweezers and carefully lift the clear backing off each adhesive strip. Nice and steady wins the game here.

Tools Used
  1. TweezersiPad 4 GSM Adhesive Strips Replacement (New Panel)

Success!

iPad 4 GSM Adhesive Strips Replacement (Existing Panel)

Duration: 45 minutes
Steps: 15 Steps

Follow this guide to swap out adhesive strips and reseal your iPad 4 after a repair. This is meant for use only with front panel assemblies you already have.

Step 1

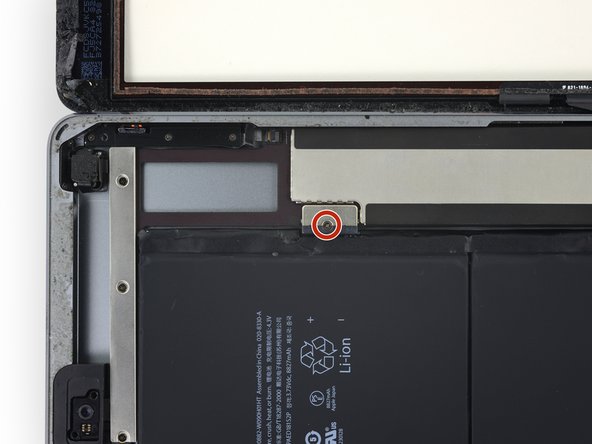
– Unscrew the two 2.1 mm Phillips #00 screws holding the home button control board to its mounting bracket. Keep these little guys safe!

Step 2

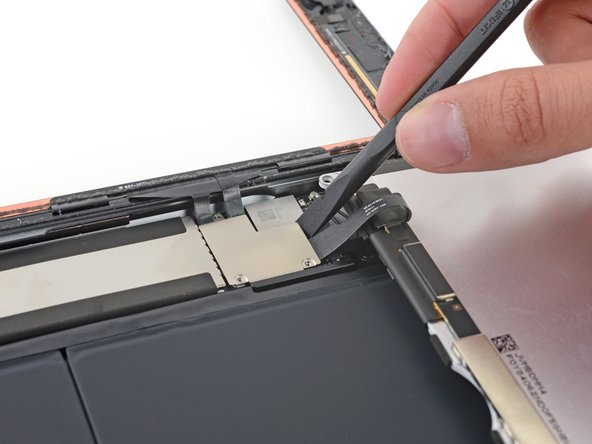
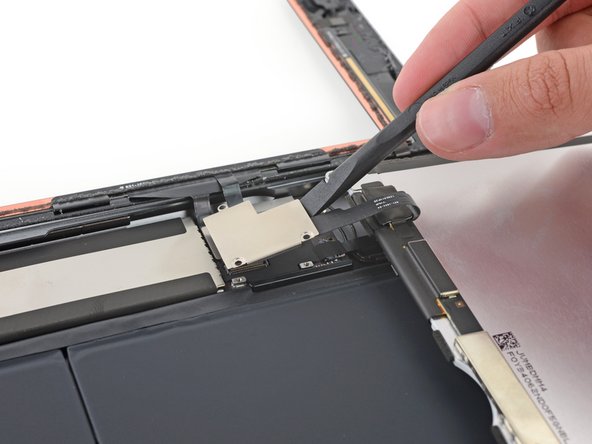
– Slide the flat edge of a plastic opening tool gently between the right side of the home button control board and the home button mounting bracket.

– Press the plastic opening tool down carefully to loosen the adhesive holding the home button control board to the mounting bracket.

– Do the same on the left side to free up the adhesive under the home button control board.

Step 3

– Carefully lift the home button control board away from its mounting bracket—like gently peeling a sticker, but with way more tech magic.

Step 4

– Grab your trusty spudger and use the flat edge to gently work away that old adhesive stuck in the bottom right corner of the front panel assembly. It’s like peeling off a sticker – just a little patience and you’ll be good to go!

Tools Used
  1. SpudgeriPad 4 GSM Adhesive Strips Replacement (Existing Panel)
  2. TweezersiPad 4 GSM Adhesive Strips Replacement (Existing Panel)

Step 5

– Carefully set the home button control board onto the home button bracket, making sure it sits nicely and aligns just right.

Step 6

– Grab those two 2.1 mm Phillips #00 screws and screw them back into the home button control board to snugly secure it against the mounting bracket. Almost there!

Step 7

– Now it’s time to get those adhesive pieces on the front panel. You’ve got this!

– Hold off on peeling the backing off those strips for now. Patience, it’s key.

– Next, take the bridge-shaped adhesive strip and place it carefully between the top edge of the inner frame of the front panel and the camera mounting bracket.

– Smooth the strip down from the center out. Make sure no pesky air bubbles sneak in between the strip and the panel. Take your time and make it neat!

Step 8

– Stick the C-shaped adhesive strip onto the right side of the front panel, making sure it lines up just right.

Step 9

– Place the adhesive strip, about medium length, on the bottom right side of the front panel, just under the home button ribbon cable. It should fit just right, like the perfect puzzle piece!

Step 10

– Stick that tabbed rectangular adhesive strip neatly on the bottom right side of the front panel.

Step 11

– Stick the long L-shaped adhesive strip snugly onto the bottom left corner of the front panel—precision is key!

Step 12

– Grab that short rectangular adhesive strip and stick it on the top left corner of the front panel. Nice and easy!

Step 13

– Take that last little L-shaped adhesive strip and place it on the top left corner of the front panel. Just a quick, easy stick to finish off this part!

Step 14

– Grab a pair of tweezers and gently lift off the clear backing from the adhesive strip underneath the home button ribbon cable.

– Now, carefully place the home button ribbon cable onto the adhesive strip. Smooth it out from the center outward, making sure there are no pesky air bubbles trapped between the strip and the front panel.

Tools Used
  1. TweezersiPad 4 GSM Adhesive Strips Replacement (Existing Panel)

Step 15

– To put your device back together, just go through these steps backward. Easy peasy!

Tools Used
  1. TweezersiPad 4 GSM Adhesive Strips Replacement (Existing Panel)

Success!
To put your device back together, just follow these steps in reverse—easy peasy! And if you hit a snag, remember you can always schedule a repair with us.

iPad Air Wi-Fi Right Antenna Replacement

Duration: 45 minutes
Steps: 53 Steps

Follow this guide to swap out the right-hand antenna in your iPad Air. When disconnecting the battery with a battery blocker, take extra care—those battery contacts are delicate and can cause permanent logic board damage if mishandled. If you decide to skip isolating the battery, steer clear of metal tools unless absolutely necessary (like for screws) to avoid short circuits and protect those sensitive circuit parts.

Step 1

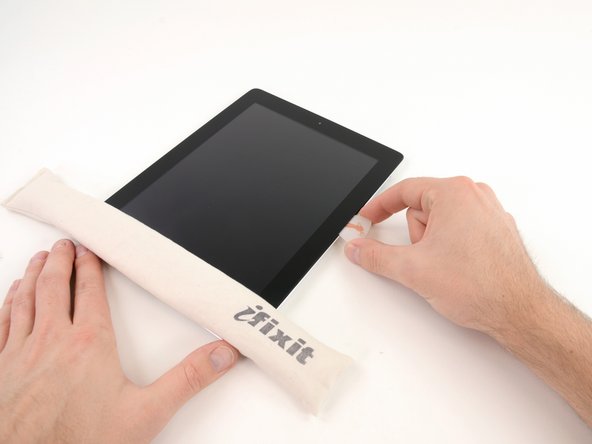
– Pop the iOpener right in the middle of the microwave. It’s like giving it a cozy spot to warm up!

Tools Used
  1. iOpeneriPad Air Wi-Fi Right Antenna Replacement

Step 2

– Warm up the iOpener in the microwave for 30 seconds to get it ready.

– As you work through the repair, if the iOpener cools down, just pop it back in the microwave for another 30 seconds to keep things nice and warm.

Tools Used
  1. iOpeneriPad Air Wi-Fi Right Antenna Replacement

Step 3

– Take the iOpener out of the microwave, grabbing it by one of the flat ends so you don’t burn your hands on the hot middle.

Tools Used
  1. iOpeneriPad Air Wi-Fi Right Antenna Replacement

Step 4

– Start by filling a pot or pan with enough water to completely cover an iOpener.

– Turn up the heat and bring that water to a rolling boil. Once it’s bubbling away, turn off the heat.

– Gently place your iOpener in the hot water for 2-3 minutes. Make sure it’s fully submerged in the water – no half measures!

– Use tongs to carefully pull out the iOpener from the hot water. Be cautious, it’s toasty!

– Dry off the iOpener with a towel to get rid of any moisture.

– And there you have it, your iOpener is good to go! Need to reheat it? Just bring the water back to a boil, switch off the heat, and give it another 2-3 minutes in the water.

Tools Used
  1. iOpeneriPad Air Wi-Fi Right Antenna Replacement

Step 5

– Got a cracked display glass? Keep those shards in check and avoid any ouch moments by taping the glass down first.

– Cover the iPad’s screen with overlapping strips of clear packing tape until the entire front is sealed up.

– Follow the rest of the guide as usual, but heads up: once the glass is cracked, it might keep cracking as you go. You may need to carefully use a metal prying tool to scoop out the glass pieces.

Step 6

– Grab the iOpener by its tag and gently place it on the left side of the iPad, right next to the home button assembly.

– Let it chill there for at least a minute so the adhesive under the glass gets nice and soft.

Tools Used
  1. iOpeneriPad Air Wi-Fi Right Antenna Replacement

Step 7

– While you’re following these steps, be extra careful around these areas to avoid any accidental damage:

– Front-facing camera

– Antennas

– Display cables

Step 8

– Grab the blue handle and give it a little pull back to release the Anti-Clamp’s arms. Easy peasy.

– Set your iPad on something soft and level to keep it steady between the suction cups. Make sure it’s comfy.

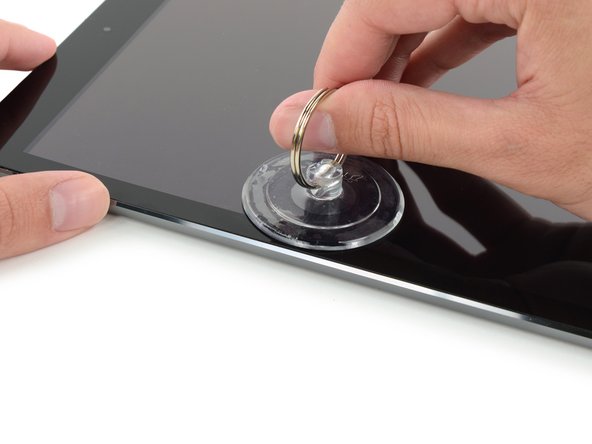
– Position the suction cups near the middle of the left edge, one on top and one on the bottom, like they’re giving your device a nice little hug.

– Now, hold the bottom of the Anti-Clamp in place and give the top suction cup a firm press. Let the suction do its magic!

Step 9

– Grab the blue handle and pull it forward to lock those arms in place.

– Give the handle a full 360-degree spin clockwise, or keep turning until the suction cups start to stretch a bit.

– Keep an eye on those suction cups—they need to stay perfectly aligned. If they start to drift, just loosen them slightly and realign the arms before moving on.

Step 10

– Give it a minute to let the adhesive loosen up and create a little gap to work with.

– If the screen isn’t warming up enough, grab a hair dryer and gently heat along the left edge of the iPad.

– When the Anti-Clamp opens a big enough gap, slide an opening pick underneath the screen.

– Go ahead and skip the next two steps.

Step 11

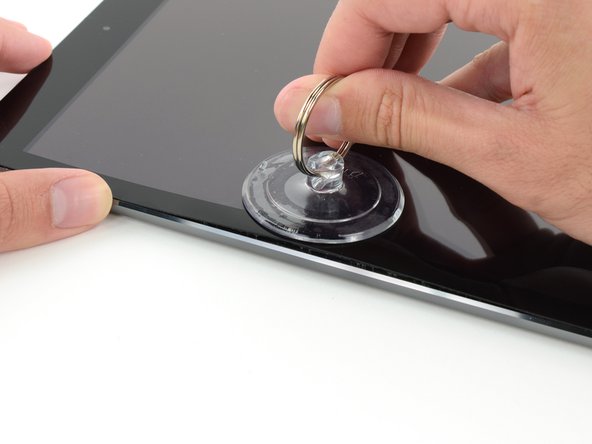
– Place a suction cup about halfway up on the heated side—make sure it’s sitting nice and flat.

– Hold the iPad steady with one hand, then gently pull up on the suction cup to nudge the front glass away from the back case just a bit.

– Double-check that the suction cup is fully flat against the screen to get the best grip.

Step 12

– Slide an opening pick into the gap created by the suction cup.

– Give the suction cup’s plastic nub a gentle pull to break the vacuum seal, then carefully lift it away from the display assembly.

Step 13

– Warm up the iOpener again and pop it back in place.

Tools Used
  1. iOpeneriPad Air Wi-Fi Right Antenna Replacement

Step 14

– Grab a second opening pick and slide it in next to the first one, then gently work it down the edge of the iPad to loosen the adhesive bit by bit.

Step 15

– Now, gently slide your opening pick down the side of the display to loosen up that stubborn adhesive.

– If the pick gets caught up in the sticky stuff, just roll it along the edge of your device and keep easing that adhesive off.

Step 16

– Grab the first pick you slid in and gently slide it up toward the top corner of the iPad.

– If you spot the tip of the opening pick peeking through the front glass, don’t stress—just pull it out a bit. Usually, it’s no big deal, but try to avoid this since it might leave some adhesive on the front of the LCD that’s a pain to clean.

Step 17

– Warm up the iOpener again and chill it right on the top edge of the iPad, hovering over the front-facing camera.

Tools Used
  1. iOpeneriPad Air Wi-Fi Right Antenna Replacement

Step 18

– Gently slide the opening pick around the top left corner of your iPad to loosen that sticky adhesive. It’s like peeling off a stubborn sticker—no rush, just a little patience!

Step 19

– Gently slide the opening pick along the top edge of your iPad, but make sure to stop just shy of the camera. You don’t want to mess with that sweet lens!

Step 20

– Gently pull the pick out a bit, then carefully slide its tip along the top edge near the front-facing camera—smooth and steady wins the race!

Step 21

– Keep the opening pick wedged in the iPad just past the front-facing camera.

– Grab a second pick, slide it in just to the left of the camera, then glide it along to the corner of the iPad to finish slicing through the adhesive on that side.

Step 22

– Slide the pick further into the iPad, moving it from the camera area towards the corner. Keep the motion steady and gentle as you go.

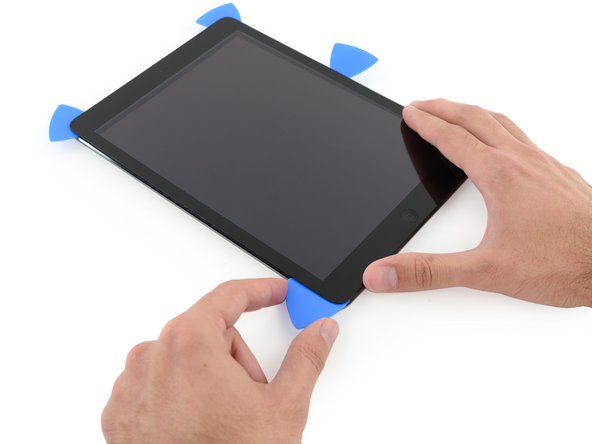
Step 23

– Keep those three picks chilling in the iPad’s corners to stop the front panel adhesive from sticking back together.

– Warm up the iOpener again and set it along the side with the volume and lock buttons to loosen things up.

Tools Used
  1. iOpeneriPad Air Wi-Fi Right Antenna Replacement

Step 24

– Gently slide the opening pick around the top right corner of the iPad to loosen the adhesive holding it in place.

Step 25

– Pop in a fresh opening pick and gently slide it toward the middle of the iPad’s right edge, easing through the adhesive like a pro.

Step 26

– Keep those opening picks right where they are, and place the reheated iOpener on the home button side of the iPad.

Tools Used
  1. iOpeneriPad Air Wi-Fi Right Antenna Replacement

Step 27

– Gently slide the pick down to the lower left corner to slice through the adhesive there.

– Keep the pick in place at the corner—no prying further and definitely don’t pull it out of the iPad yet.

– Next up, we’ll guide you exactly where to pry so you don’t accidentally mess with any sensitive bits. Only heat and pry where we say, and you’ll be golden.

Step 28

– Grab a fresh pick and carefully slide it along the left antenna, making sure to stop just before you reach the home button.

– Keep that pick in place before moving on to the next step.

Step 29

– Grab a fresh pick and gently slide it to the right of the one you just placed.

– Use the very tip of the pick to glide across the home button and the right-hand antenna, carefully peeling away the adhesive.

Step 30

– Now that the adhesive is loosened, gently slide your pick in near the right corner. Glide it leftward, stopping just before you reach the Home button. Easy does it!

Step 31

– Warm up the iOpener again and place it back on the volume control side of the iPad to keep things nice and toasty.

Tools Used
  1. iOpeneriPad Air Wi-Fi Right Antenna Replacement

Step 32

– On the side of the iPad opposite the volume buttons, you’ll find a pick tucked into each corner. Give those picks a little twist to gently lift the glass, loosening the last bit of adhesive along the edge where the display cable hangs out.

Tools Used
  1. iOpeneriPad Air Wi-Fi Right Antenna Replacement

Step 33

– Lift up slowly and carefully to loosen the adhesive along the edge of the display cable. Keep it chill and steady!

Step 34

– Hold the front panel glass steady and carefully use an opening pick to slice through the last bits of adhesive. Take your time here, it’s almost there!

Step 35

– Once all the sticky stuff is taken care of, gently open the glass panel like you’re flipping through a book and set it down on your workspace, nice and easy.

– When it’s time to put everything back together, don’t forget to tidy up! Use some isopropyl alcohol to clean up any leftover adhesive from the case (and the front glass if you’re reusing it) and follow our display adhesive application guide with those handy pre-cut adhesive strips.

– Watch out for those flex cables during reassembly—they can easily get pinched between the front glass and the iPad’s frame. Be sure to handle them with care, letting them fold and tuck nicely under the frame. If you squish those folds flat, they might just throw in the towel and stop working!

Step 36

– Peel back any tape that’s playing hide-and-seek over the LCD screws.

Step 37

– Let’s get these Phillips screws out so we can free up the LCD!

– Three screws, 4.0 mm each

– One screw, 4.8 mm

Step 38

– Gently wedge the flat end of a spudger under the LCD just enough to loosen it so you can grab it with your fingers.

– Carefully flip the iPad LCD like turning a page in a book, lifting near the camera and rotating it over the home button side of the back case.

– Set the LCD face down to get a clear shot at the display cables.

Tools Used
  1. SpudgeriPad Air Wi-Fi Right Antenna Replacement

Step 39

– Unscrew that single 2.3 mm Phillips screw holding the battery connector to the logic board. Easy does it!

– Now, gently slide the battery blocker under the battery connector area on the logic board. Leave it there while you work, and you’re golden.

Tools Used
  1. Battery BlockeriPad Air Wi-Fi Right Antenna Replacement

Step 40

– Unscrew the three 1.4 mm Phillips screws holding down the display cable bracket—time to loosen those little guys and keep the repair rolling!

Step 41

– Grab your trusty spudger and use the flat end to carefully lift the display cable bracket off the logic board. Take it slow and steady—you’ve got this!

Tools Used
  1. SpudgeriPad Air Wi-Fi Right Antenna Replacement

Step 42

– Carefully take out the LCD screen.

Step 43

– Carefully peel away any tape that’s hiding the home button ribbon cable connector.

Step 44

– Gently use the flat end of a spudger to lift up the little tab on the home button ribbon cable’s ZIF connector.

– Slowly slide the home button ribbon cable straight out from the ZIF connector, taking care not to tug or bend it.

Tools Used
  1. SpudgeriPad Air Wi-Fi Right Antenna Replacement

Step 45

– Grab the flat end of a spudger or your trusty fingernail and gently pop the two digitizer cable connectors straight up out of their sockets. Easy does it!

Tools Used
  1. SpudgeriPad Air Wi-Fi Right Antenna Replacement

Step 46

– Gently lift the home button ribbon cable off the adhesive that’s sticking it to the rear case. A little wiggle and you’ll be free!

Step 47

– Take off the front panel assembly carefully.

– When putting it back together, give the inside of the front panel assembly a good wipe to clear away any dust or fingerprints for a crisp, clean display.

– If your new display starts acting up with weird “ghost” or “phantom” touches, don’t worry! This usually means it needs a tiny layer of thin insulating tape, like Kapton (polyimide) tape, applied to the highlighted spots on the back of the panel. The panels here come properly insulated, so you probably won’t need to add tape.

– Without this insulation, parts of the digitizer might accidentally touch other components and cause touch glitches, so keep an eye out for that.

Step 48

– Slide a spudger gently under the antenna cable near the iPad’s edge and give it a little lift to unplug the antenna cable connector.

Tools Used
  1. SpudgeriPad Air Wi-Fi Right Antenna Replacement

Step 49

– There are two big pieces of tape keeping the right antenna cable securely attached to the back case. It’s doing its job, but time to get it off.

– Carefully peel the tape off the rear case. Take it easy, this part is a bit sticky.

– As you peel the tape off, try to leave it on the antenna cable. This will make reassembly a breeze later.

Step 50

– Gently slide an opening pick between the speaker enclosure and the antenna cable bracket.

– Carefully glide the pick toward the home button to slice through the adhesive.

– Nudge the bracket away from the speaker until it lifts clear of the tape underneath.

Step 51

– First up, let’s get those screws off the right antenna. Grab your Phillips #000 screwdriver and let’s do this!

– Unscrew the single 2.3 mm screw, nice and easy.

– Then, remove the two 1.4 mm screws—don’t forget, there’s two of ’em!

Step 52

– Gently slide the flat end of your spudger between the antenna and the speaker assembly like a pro.

– Carefully glide the spudger toward the home button to slice through the foam adhesive holding the antenna in place.

Tools Used
  1. SpudgeriPad Air Wi-Fi Right Antenna Replacement

Step 53

– To put your device back together, just follow these steps backward. Easy peasy! If you hit a snag, remember you can always schedule a repair with us.

Success!

iPad 4 CDMA Wi-Fi Antenna Replacement

Duration: 45 minutes
Steps: 51 Steps

Ready to get your Wi-Fi back up and running? Replacing your antenna is easier than it sounds! Follow this guide and you’ll be surfing the web in no time. If you hit any bumps along the way, no worries—just schedule a repair and we’ll help you out.

Step 1

– Pop the iOpener right in the middle of your microwave. Give it some space to warm up evenly.

Tools Used
  1. iOpeneriPad 4 CDMA Wi-Fi Antenna Replacement

Step 2

– Pop the iOpener in the microwave for 30 seconds to heat it up.

– As you go along with the repair, just reheat the iOpener every time it starts to cool down. Another 30 seconds in the microwave should do the trick!

Tools Used
  1. iOpeneriPad 4 CDMA Wi-Fi Antenna Replacement

Step 3

– Take the iOpener out of the microwave, but make sure to grab it by one of the two flat ends. You definitely don’t want to mess with the hot center. Handle with care and stay safe!

Tools Used
  1. iOpeneriPad 4 CDMA Wi-Fi Antenna Replacement

Step 4

– Grab a pot or pan and fill it with enough water to fully dunk your iOpener.

– Bring the water to a rolling boil, then turn off the heat.

– Submerge the iOpener in the hot water for 2-3 minutes, making sure it’s completely soaked.

– Use tongs to fish out the hot iOpener—careful, it’s warm!

– Dry it off thoroughly with a towel.

– Now your iOpener is good to go! Need it hotter? Just boil the water again, turn off the heat, and give it another 2-3 minute soak.

Tools Used
  1. iOpeneriPad 4 CDMA Wi-Fi Antenna Replacement

Step 5

– If your display glass is cracked, keep those pesky shards from spreading and avoid any ouch moments by taping over the glass before you start.

– Cover the iPad’s display with overlapping strips of clear packing tape until the entire front is wrapped up nicely.

– Follow the rest of the guide as best you can. Just a heads up: once that glass is cracked, it might keep cracking as you go, and you may find a metal prying tool handy to carefully scoop out the glass pieces.

Step 6

– Place the iOpener flat along the right edge of the iPad, pressing it down so it makes solid contact with the surface.

– Give it about 90 seconds to work its magic before you try popping open the front panel.

Tools Used
  1. iOpeneriPad 4 CDMA Wi-Fi Antenna Replacement

Step 7

– There’s a tiny gap in the iPad’s adhesive ring near the upper right corner, about 2.0 inches (~5 cm) down from the top. This little weak spot is your entry point.

– Line up your tool with the mute button, then gently slip the tip of a plastic opening tool into the space between the front glass and plastic bezel. Just a quick nudge with the tip to widen the crack is all you need.

Step 8

– Make sure you’re placing that tool in just the right spot—between the plastic bezel and the glass front panel. It’s like finding the perfect groove, so take your time!

Step 9

– Keep the tip of your plastic opening tool tucked between the front glass and the plastic bezel, then gently slide a plastic opening pick right next to it in the gap. Easy does it!

Step 10

– Gently remove the plastic opening tool from the iPad, then slide the opening pick a little deeper under the front glass, about 0.5 inches in. Take your time—this part can be tricky, but you’re doing great! If you run into any issues, don’t hesitate to schedule a repair.

Step 11

– While you’re gently working to free the adhesive on the right side of your iPad, go ahead and heat up your iOpener again. Then, place it on the bottom edge of your iPad to give it some extra heat love. That should help loosen things up nicely!

Tools Used
  1. iOpeneriPad 4 CDMA Wi-Fi Antenna Replacement

Step 12

– While the bottom edge gets its warm-up from the iOpener, start working on loosening the adhesive along the right edge of the iPad.

– Slide the opening pick carefully down the edge, gently peeling away the adhesive as you go. Take your time and let the pick do the work!

Tools Used
  1. iOpeneriPad 4 CDMA Wi-Fi Antenna Replacement

Step 13

– If the opening pick gets stuck in the adhesive, gently roll it along the edge of the iPad to keep freeing that stubborn glue.

Tools Used
  1. iOpeneriPad 4 CDMA Wi-Fi Antenna Replacement

Step 14

– Before you pull the first pick from the bottom corner of the iPad, slide a second pick underneath the right edge of the front glass to keep that sticky adhesive from getting all clingy again.

– Give your iOpener a quick reheat, then place it on the top edge of the iPad to get that adhesive loosened up.

Tools Used
  1. iOpeneriPad 4 CDMA Wi-Fi Antenna Replacement

Step 15

– Heads up—these next steps need a steady hand and a bit of patience.

– You’ll carefully loosen the adhesive holding the antenna to the front panel, making sure not to mess with the fragile parts connecting the antenna to the bottom of the iPad. Take it slow and follow each step closely.

Step 16

– Gently slide the opening pick around the bottom right corner of your iPad to break free the adhesive that’s holding it down. Take your time, and you’ll get there!

Step 17

– Gently slide the opening pick’s tip along the bottom of your iPad, loosening the adhesive around the Wi-Fi antenna. Take it slow and steady—it’s like peeling a sticker, but with more finesse.

Step 18

– After you’ve passed the Wi-Fi antenna—about 3″ (75 mm) from the right edge, right next to the home button—slide the opening pick all the way in.

– Gently slide the pick to the right to free up the adhesive holding the Wi-Fi antenna to the front glass.

– Keep in mind, the antenna is screwed and connected by a cable at the bottom of the iPad. This step safely separates it from the front panel so you don’t accidentally damage it when removing the panel.

Step 19

– Keep sliding the opening pick under the bottom edge of the iPad, carefully navigating around the home button. Once you’re past it, pop the pick back in about 1/2 inch (10 mm) deep and keep that gentle prying action going.

Tools Used
  1. iOpeneriPad 4 CDMA Wi-Fi Antenna Replacement

Step 20

– Keep sliding that adhesive separator all along the bottom edge of your iPad—slow and steady wins the race!

– Leave the opening pick snugly tucked under the front glass near the home button to keep things steady.

Step 21

– Pop that iOpener into the microwave for a little warmth therapy, then place it on the left edge of your iPad. This will help get the adhesive nice and toasty in that area!

Tools Used
  1. iOpeneriPad 4 CDMA Wi-Fi Antenna Replacement

Step 22

– Gently slide the opening pick along the top edge of your iPad, easing it out just enough to navigate around the front-facing camera bracket.

– Heads up: the adhesive here is super stubborn, so you might need to apply some solid pressure. Take it slow and steady to avoid any slips or scrapes on you or your device.

– If the pick starts to get stuck in the adhesive, try “rolling” it as demonstrated in step 9 to keep things moving smoothly.

Tools Used
  1. iOpeneriPad 4 CDMA Wi-Fi Antenna Replacement

Step 23

– Peel away the adhesive along the top edge of your iPad, then gently slide the opening pick around the top left corner to loosen it up.

Tools Used
  1. iOpeneriPad 4 CDMA Wi-Fi Antenna Replacement

Step 24

– Gently slide the opening pick along the left edge of your iPad to release the adhesive. The adhesive’s a bit thin here because of the digitizer running all along the left side. Keep your pick shallow (about 1/2 inch, or 10mm) to avoid any accidental damage to the digitizer—be cool, stay steady.

Step 25

– Carefully slide the opening pick underneath the bottom edge of the iPad and gently peel away the adhesive in the bottom left corner. Take your time and make sure to go slow, it’s all about precision here.

Step 26

– Take one of the opening picks and gently wedge it into the bottom right corner of the iPad. Once it’s in, give it a little tug with your fingers to lift it up. Easy does it!

Step 27

– Grab your iPad by the top and bottom right corners and gently twist the front glass away from the device. It’s like a little dance move, but for your tech!

– When you’re putting it all back together, whip out a microfiber cloth and some compressed air to give that LCD a sparkling clean before you seal the glass back on. Dust and fingerprints? Not on our watch!

Step 28

– Loosen and remove the four tiny 2 mm Phillips #00 screws holding the LCD snugly in place on the aluminum frame.

Step 29

– Grab a plastic opening tool or spudger and gently pop up the right edge of the iPad’s LCD.

– Swing the LCD open like a little door on its left side and carefully rest it on top of the front glass panel.

Tools Used
  1. SpudgeriPad 4 CDMA Wi-Fi Antenna Replacement

Step 30

– Gently slide the tip of your spudger under the tape covering the LCD ribbon cable connector and peel it back with care.

Tools Used
  1. SpudgeriPad 4 CDMA Wi-Fi Antenna Replacement

Step 31

– Gently lift the little retaining flap on the LCD ribbon cable’s ZIF connector—think of it like opening a tiny door.

– Carefully pull the LCD ribbon cable out of its socket on the logic board using your fingers or tweezers. No sudden moves!

– If the LCD screen doesn’t light up after reconnecting the ZIF connector during reassembly, try a force restart by holding down the power button and home button for about ten seconds until the Apple logo pops up.

Tools Used
  1. TweezersiPad 4 CDMA Wi-Fi Antenna Replacement

Step 32

– Carefully lift the LCD off the front panel, making sure to avoid touching the front of the screen.

Step 33

Step 34

– Gently flip up the little flap holding the home button ribbon cable in place on its ZIF connector.

Step 35

– Grab your trusty tweezers and gently wiggle the home button ribbon cable straight out from its socket on the logic board. Easy does it!

Tools Used
  1. TweezersiPad 4 CDMA Wi-Fi Antenna Replacement

Step 36

– Gently lift the home button ribbon cable out of its snug spot in the rear case.

Step 37

– Carefully use the tip of a spudger to lift and peel back the tape holding the digitizer ribbon cable onto the logic board. Take it slow and steady!

Tools Used
  1. SpudgeriPad 4 CDMA Wi-Fi Antenna Replacement

Step 38

– Gently lift the little flap on both digitizer ribbon cable ZIF connectors to unlock them.

Step 39

– Gently slide the flat end of your spudger under the digitizer ribbon cable to carefully pry up the adhesive holding it in place.

– Pull the digitizer ribbon cable straight out from its connectors on the logic board with a steady hand.

Tools Used
  1. SpudgeriPad 4 CDMA Wi-Fi Antenna Replacement

Step 40

– Gently peel back the digitizer ribbon cable and grab your trusty spudger. Use the flat end to carefully release the adhesive that’s holding the cable to the back of the aluminum case. Take your time, we don’t want any surprises!

Tools Used
  1. SpudgeriPad 4 CDMA Wi-Fi Antenna Replacement

Step 41

– Gently use your fingers to lift the digitizer ribbon cable from its cozy spot in the aluminum frame. No need to rush, just a smooth pull.

– Carefully detach the front panel from the iPad, making sure not to yank it. Just a little wiggle and it’ll come free!

Step 42

Step 43

– Unscrew the two 2.9 mm Phillips #00 screws holding the Lightning connector to the back case—time to let that connector go!

Step 44

– Grab the flat end of your spudger and gently lift the Lightning connector cable straight out of its home on the logic board. Take your time—this part’s a little delicate, but you’ve got this!

Tools Used
  1. SpudgeriPad 4 CDMA Wi-Fi Antenna Replacement

Step 45

– Carefully use the flat end of a spudger to lift the Lightning connector cable away from the aluminum frame without rushing it.

Tools Used
  1. SpudgeriPad 4 CDMA Wi-Fi Antenna Replacement

Step 46

– Gently pull the Lightning connector straight out from its spot in the rear case—easy does it!

Step 47

– Gently slide the tip of your spudger under the speaker and Wi-Fi antenna connectors, then lift them straight up off their sockets on the logic board. Easy does it!

Tools Used
  1. SpudgeriPad 4 CDMA Wi-Fi Antenna Replacement

Step 48

– Let’s start by loosening the screws holding the Wi-Fi antenna in place on the back case:

– Two tiny 1.75 mm Phillips #00 screws (small head)

– One 4.15 mm Phillips #00 screw

– One 1.8 mm Phillips #00 screw (wide head)

Step 49

– Gently slide the flat end of your spudger under the Wi-Fi antenna to carefully pry up the foam adhesive attaching it to the speaker assembly.

Tools Used
  1. SpudgeriPad 4 CDMA Wi-Fi Antenna Replacement

Step 50

– Grab the Wi-Fi antenna and speaker cable with a firm but gentle grip, like you’re holding onto your favorite snack.

– With a little care, lift the cables off the rear case, just enough to give them some breathing room.

Step 51

– To put your device back together, just follow these steps in reverse order and use our iPad 4 CDMA Front Panel Adhesive strips guide to stick the front panel back on. If you get stuck or want a hand, you can always schedule a repair with us!

Success!

iPad 4 CDMA SIM Board Replacement

Duration: 45 minutes
Steps: 48 Steps

Follow this guide to swap out the SIM Board with ease.

Step 1

– Pop the iOpener right in the middle of the microwave. It’s time for some heat to work its magic!

Tools Used
  1. iOpeneriPad 4 CDMA SIM Board Replacement

Step 2

– Warm up the iOpener in the microwave for about thirty seconds to get it good and toasty.

– As you work, if the iOpener starts cooling down, just pop it back in the microwave for another thirty seconds to keep things nice and warm.

Tools Used
  1. iOpeneriPad 4 CDMA SIM Board Replacement

Step 3

– Carefully take the iOpener out of the microwave by holding it at one of the flat ends—this will keep you away from the hot center. Safety first, always.

Tools Used
  1. iOpeneriPad 4 CDMA SIM Board Replacement

Step 4

– Grab a pot or pan and fill it with enough water to completely cover your iOpener.

– Bring the water to a boil, then turn off the heat—no need to keep it bubbling!

– Carefully drop your iOpener into the hot water and let it soak for 2-3 minutes, making sure it’s fully submerged.

– Use tongs to fish out the heated iOpener from the water—safety first!

– Dry off your iOpener thoroughly with a towel so it’s ready to work its magic.

– Your iOpener is good to go! Need to warm it up again? Just reheat the water to a boil, turn off the heat, and dunk the iOpener for another 2-3 minutes.

Tools Used
  1. iOpeneriPad 4 CDMA SIM Board Replacement

Step 5

– Grab a SIM eject tool or a straightened paperclip and gently pop out the SIM tray.

Step 6

– Gently slide the SIM tray out of its cozy home and say goodbye to it for now, just like that! It’s time to give your iPad a little TLC.

– If you’re swapping out the SIM card, just pop that old one out of its tray and slide in the shiny new one. Easy peasy!

Step 7

– Got a cracked display glass? No worries! Just to keep things safe and sound during your repair, throw some tape over that glass to prevent any more accidents.

– Grab some clear packing tape and lay down overlapping strips over your iPad’s display until it’s fully covered. Think of it as giving your device a stylish tape makeover!

– Now, just follow the guide as best as you can. Just a heads up—once the glass starts cracking, it might not stop right away. You might need to use a metal prying tool to gently scoop out the shards. If you find yourself in a jam, remember, you can always schedule a repair for some extra help!

Step 8

– Place the iOpener flat against the right edge of the iPad, pressing it down so it makes solid contact with the surface.

– Give it about 90 seconds to work its magic before you try opening up the front panel.

Tools Used
  1. iOpeneriPad 4 CDMA SIM Board Replacement

Step 9

– There’s a tiny gap in the iPad’s adhesive ring up in the upper right corner, about 2.0 inches (~5 cm) down from the top edge. This little spot is your entry point.

– Line up your tool with the mute button. Gently slip the tip of a plastic opening tool into the gap between the front glass and the plastic bezel—just barely enough to nudge the crack open.

Step 10

– Ensure you position the tool just right—nestled between the plastic display bezel and the front panel glass.

Step 11

– With the plastic opening tool securely in place between the front glass and plastic bezel, gently slide a plastic opening pick into the same spot, right alongside the tool. You’re doing great!

Step 12

– Gently pull out the plastic opening tool from the iPad, then slide the opening pick a bit deeper under the front glass—about half an inch—just like a smooth ninja move.

Step 13

– While you’re carefully working on peeling back the adhesive on the right side of the iPad, give your iOpener another heat-up and place it on the bottom edge of the iPad for a little extra help.

Tools Used
  1. iOpeneriPad 4 CDMA SIM Board Replacement

Step 14

– As the iOpener warms up the bottom edge, let’s get started on peeling away that adhesive from the right side of your iPad.

– Gently slide the opening pick down the edge of the iPad, making sure to free up that stubborn adhesive as you go.

Tools Used
  1. iOpeneriPad 4 CDMA SIM Board Replacement

Step 15

– If your opening pick gets caught in the adhesive, just gently “roll” it along the edge of the iPad to keep loosening that sticky stuff.

Tools Used
  1. iOpeneriPad 4 CDMA SIM Board Replacement

Step 16

– Before pulling out that first opening pick from the bottom corner of your iPad, slide a second pick under the right edge of the front glass to keep the adhesive from sticking back together.

– Warm up the iOpener again, then shift it to the top edge of your iPad to keep things nice and pliable.

Tools Used
  1. iOpeneriPad 4 CDMA SIM Board Replacement

Step 17

– These next few steps require a bit of extra care, so let’s take it slow and steady.

– Gently detach the adhesive holding the antenna to the front panel—be careful not to harm the delicate parts connecting it to the bottom of your device. Stick to the steps closely and you’ll be just fine.

Step 18

– Gently slide the opening pick around the bottom right corner of the iPad to loosen the stubborn adhesive hanging out there.

Step 19

– Gently slide the tip of your opening pick along the bottom edge of the iPad to break free the adhesive holding down the Wi-Fi antenna. Easy does it!

Step 20

– After you’ve passed the Wi-Fi antenna (about 3″ (75 mm) from the right edge, right next to the home button), slide the opening pick all the way in.

– Gently slide the pick to the right to loosen the adhesive holding the Wi-Fi antenna to the front glass.

– The antenna is screwed and connected by a cable at the bottom of the iPad. This step carefully frees the antenna from the front panel so you can remove the panel without causing any damage.

Step 21

– Keep on peeling away that adhesive at the bottom of your iPad! Gently pull the opening pick out just enough to wrap around the home button, then slide it back in until it’s about half an inch (10 mm) deep, right past that home button. You’ve got this!

Tools Used
  1. iOpeneriPad 4 CDMA SIM Board Replacement

Step 22

– Keep sliding that adhesive remover tool along the entire bottom edge of the iPad to free it up.

– Leave the opening pick tucked under the front glass right by the home button to keep things ready for the next step.

Step 23

– Pop the iOpener into the microwave for a quick heat-up, then place it along the left edge of your iPad. This will help warm up the adhesive in that spot, making your next steps smoother.

Tools Used
  1. iOpeneriPad 4 CDMA SIM Board Replacement

Step 24

– Gently slide that trusty opening pick along the top edge of your iPad, giving it a little tug to navigate around the front-facing camera bracket.

– Now, here’s the scoop: the adhesive in this area is pretty thick, so you might need to channel your inner strength! Take it easy and go slowly—no one wants a slip-up that could lead to an accidental ‘oops’ moment!

– If you find the pick getting a bit clingy with the adhesive, just ‘roll’ it like a pro, as demonstrated in step 9.

Tools Used
  1. iOpeneriPad 4 CDMA SIM Board Replacement

Step 25

– Keep peeling away the adhesive at the top edge of the iPad, and gently maneuver the opening pick around the top left corner.

Tools Used
  1. iOpeneriPad 4 CDMA SIM Board Replacement

Step 26

– Gently slide the opening pick along the left side of the iPad to loosen the adhesive. Heads up—the adhesive is pretty thin here because the digitizer runs along this entire edge. Keep the pick shallow, no more than about 10 mm (half an inch), to avoid any accidental digitizer damage.

Step 27

– With the opening pick still tucked under the bottom edge of your iPad, gently work it around to free the adhesive at the bottom left corner.

Step 28

– Grab one of those opening picks and gently wedge it under the bottom right corner of your iPad, then lift it up and hold it with your fingers.

Step 29

– Grab your iPad by the top and bottom right corners, and gently rotate the front glass away from the device. It’s like a little dance move for your iPad!

– When putting everything back together, use a microfiber cloth and a burst of compressed air to clear off any dust or fingerprints from the LCD before you carefully reinstall the glass. Keep it clean, keep it fresh!

Step 30

– Unscrew those four little 2 mm Phillips #00 screws that are keeping the LCD snug against the aluminum frame. You’ve got this!

Step 31

– Grab a plastic opening tool or a spudger, and gently lift the right edge of the LCD out of the iPad.

– Once you’ve got the edge free, rotate the LCD around its left side and carefully set it down on top of the front glass panel.

Tools Used
  1. SpudgeriPad 4 CDMA SIM Board Replacement

Step 32

– Gently use the tip of your spudger to lift the tape that’s hiding the LCD ribbon cable connector — careful does it!

Tools Used
  1. SpudgeriPad 4 CDMA SIM Board Replacement

Step 33

– Lift the little flap on the LCD ribbon cable ZIF connector like you’re unveiling a surprise!

– With a gentle tug from your fingers or some trusty tweezers, carefully pull the LCD ribbon cable out of its cozy home on the logic board.

– If your LCD screen decides to play hard to get and doesn’t light up after connecting the ZIF connector, just give your iPad a quick reboot! Press and hold the power button and the home button together for at least ten seconds, and watch for the Apple logo to pop up like a friendly ghost.

Tools Used
  1. TweezersiPad 4 CDMA SIM Board Replacement

Step 34

– Carefully peel the LCD away from the front panel—remember, no poking the screen face!

Step 35

Step 36

– Lift the little flap on the home button ribbon cable ZIF connector up and away. It’s like giving it a gentle nudge to get things rolling!

Step 37

– Grab your tweezers and gently pull the home button ribbon cable straight out from its socket on the logic board. Take it slow and steady!

Tools Used
  1. TweezersiPad 4 CDMA SIM Board Replacement

Step 38

– Gently guide the home button ribbon cable out of its snug little home in the rear case.

Step 39

– Gently use the tip of your trusty spudger to lift up the tape holding the digitizer ribbon cable onto the logic board. Slow and steady wins the race!

Tools Used
  1. SpudgeriPad 4 CDMA SIM Board Replacement

Step 40

– Gently lift the little flap holding down both digitizer ribbon cable ZIF connectors to free them up.

Step 41

– Use the flat side of your spudger to gently nudge that adhesive underneath the digitizer ribbon cable.

– Carefully pull the digitizer ribbon cable straight out of its sockets on the logic board.

Tools Used
  1. SpudgeriPad 4 CDMA SIM Board Replacement

Step 42

– Gently lift the digitizer ribbon cable and grab your trusty spudger. Use the flat end to carefully peel away the adhesive that’s keeping the cable snug against the rear aluminum case. You’re doing great!

Tools Used
  1. SpudgeriPad 4 CDMA SIM Board Replacement

Step 43

– Gently wiggle and pull the digitizer ribbon cable free from its cozy spot in the aluminum frame using your fingers.

– Lift the front panel off the iPad and set it aside.

Step 44

– Gently peel back and take off the piece of electrical tape hiding the headphone jack assembly cable connector — no tape left behind!

– Grab your trusty spudger and flip up the little retaining flaps on both ZIF connectors that hold the headphone jack cable snugly to the logic board.

Tools Used
  1. SpudgeriPad 4 CDMA SIM Board Replacement

Step 45

– Gently slide the flat end of your spudger underneath the headphone jack assembly cable. This will release the sticky adhesive that’s keeping it attached to the back aluminum frame.

– Now, carefully pull the headphone jack assembly cable straight out of its socket on the logic board. You got this!

Tools Used
  1. SpudgeriPad 4 CDMA SIM Board Replacement

Step 46

– Gently peel back and take off the tape that’s covering the SIM board cable ZIF connector.

– Flip up the little flap that locks the SIM board cable ZIF connector in place.

– Carefully use the tip of a spudger to pull the SIM board cable straight out from its socket on the logic board.

Tools Used
  1. SpudgeriPad 4 CDMA SIM Board Replacement

Step 47

– Unscrew the three 1.75 mm Phillips #00 screws holding the SIM board tight to the aluminum frame.

Step 48

– To put your device back together, just work through these steps in reverse order and use our iPad 4 CDMA Front Panel Adhesive strips guide to secure the front panel. If you hit any snags, remember you can always schedule a repair with us!

Success!
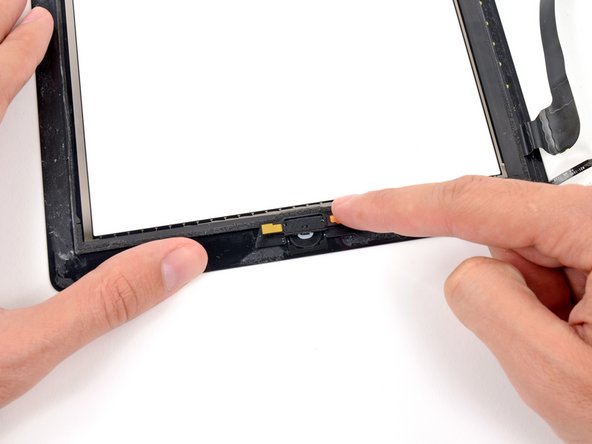
iPad 9 (2021) Screen and Touch Glass (WiFi & Cellular) Replacement

Duration: 45 minutes
Steps: 21 Steps

Here’s the deal: fixing your tablet at your kitchen table is totally doable, but keep in mind—it’s no walk in the park. This gadget can be a bit tricky to repair, and a little extra care goes a long way. Before diving in, make sure you know the safety rules and have the right tools on hand. Trust us, taking these steps will help you avoid making costly mistakes. Best of luck!

Step 1

– Sometimes, success comes down to having the right idea. In this case, your screen is totally shot.

– If both the digitizer and matrix are beyond repair, don’t stress! Just remove the broken parts and swap them out. But before diving in, it’s a good idea to double-check that your iPad is still working, despite the screen’s condition. You can easily do this by connecting it to your computer. If it pops up, you’re good to go!

– However, if your computer doesn’t recognize your iPad, it means the damage is probably a bit more severe. If that’s the case, it might be time to schedule a repair and let the pros take over.

Step 2

– Model 9 has its LCD display and digitizer as two separate parts, so keep that in mind when you’re replacing them.

– When you’re picking out a replacement digitizer, double-check that it has adhesive already attached. If not, don’t forget to grab an extra sheet of adhesive.

– Since the glass can break into tiny shards, it’s a good idea to wear safety glasses. After all, you’ve only got one set of eyes, so protect them! And if you’re feeling extra cautious, consider throwing on some protective gloves too.

– A small plastic blade will be super useful here. The plastic piece I mentioned earlier should be thin yet sturdy. If you’re in a pinch, a well-cut piece of paper from a notebook (non-conductive, of course) will work too!

Step 3

– Let’s kick things off at the spot marked with a cheerful yellow circle! Just follow the purple arrows on either side, but remember to hit the brakes before you reach the bottom edge!

– A little drop of isopropanol along with a spatula or a slim, flat screwdriver will be your trusty sidekick as you navigate every few inches.

– The yellow circle highlights the Touch.ID tape that runs from the digitizer beneath the display. Be gentle with this bend—it’s a bit on the sensitive side!

Step 4

– Hold your horses on peeling that button tape off the digitizer just yet! There’s a nifty shortcut that’ll give you plenty of room to work your magic.

– So, what’s this shortcut? It’s all about disconnecting the whole assembly! Start by disconnecting the battery voltage, then gently take out the matrix and digitizer along with that Touch.ID button tape.

– Check out the red circles marking the screws that are holding the matrix in place.

Step 5

– The northern screws are hiding under some isolator tape. Carefully peel it back without ripping—keep that tape safe! The southern screws might be covered with some black glue, but no stress there. Just unscrew them as usual; the glue will flex a bit.

– Once the matrix (held by 4 screws) is loose, gently lift it up from the northern edge. Keep an eye on those signal tapes connected to the motherboard so nothing gets tugged or torn.

Step 6

– So, your matrix is broken? No worries, it happens! If yours is still in one piece and you’re not planning to swap it out, just avoid touching that display surface (you know, the black part). Fingerprints are tough to get rid of!

– As you gently lift the matrix, you’ll spot the motherboard and the connected battery underneath. The red circle? That’s a power supply point that you should disconnect first. And the yellow circle? That’s where the digitizer and screen connect to the motherboard.

– For the safest way to remove power from the motherboard, go for the power connector. Just slide a thin, non-conductive layer between the power pins—especially the negative ones—to keep things safe and sound.

Step 7

– Once you’ve unscrewed the cover, you’ll find three connectors waiting for you: two parallel ones (that’s the digitizer) and one perpendicular (yep, that’s the matrix). Gently unclip them, and you can remove the matrix. If it’s damaged, like in my case, it’s time to say goodbye. But if it’s still good and you’re not swapping it out, just stash it somewhere safe.

– You’ll also see a couple more wires and a flat strip still connected. Unless you’re going all in and removing the motherboard (which I don’t think is necessary here), no need to stress about these. The only one you’ll need to keep an eye on is the flat tape – that’s for the Home button and Touch.ID functionality.

Step 8

– This connector is a bit unique compared to the others you’ve seen so far. Gently peel back the protective tape, then carefully flip up the lock bar on the opposite side of the tape.

– Next, remove the tape from the now-unlocked port, peel it away from the case, and set it aside safely.

Step 9

– Great news! You’ve successfully disconnected the digitizer from your tablet. If your digitizer is still in one piece, you can breeze right past steps 10 and 11. But if it’s shattered like mine, pay close attention!

– The entire home button strip is a clever little assembly of connected sections, some with a sprinkle of electronics, a clicking button, and a crucial bracket that keeps everything running smoothly.

– This whole setup features three key players: a tape with a button, a metal bracket, and a button-sized round washer (which, in my case, was stuck to the button’s body). Be sure that washer doesn’t get left behind on the glass. Give the entire assembly a thorough clean-up to get rid of any pesky glass shards and dirt!

Step 10

– Take your time and tread carefully at this point. Make sure to clear away any tiny shards of glass from the sticky surfaces, or gently eliminate any leftover adhesive using a cotton swab and some isopropanol. You’ve got this!

Step 11

– Tiny shards of broken glass hanging out on the contact surface of the housing? When you press the new digitizer glass and button tape down, those little troublemakers can scratch or even crack the fresh glass. So, take a moment to make sure everything is sparkling clean and totally particle-free.

– And hey, don’t forget to tidy up your workspace! Stray glass bits left on the table can leave some seriously ugly scratches on the case. Clean space, happy repair.

Step 12

– Alright, this step might not be the most fun, but it’s super important. These days, many of us grab non-original spare parts—usually because they’re cheaper or the real deal is hard to find. Heads up though: especially those from China can sometimes be incomplete or just not work right.

– Plug in the brand new parts to your tablet and give them a test run. If you keep those protective films on, returning faulty parts and getting a replacement or refund is way easier. Once you peel off that film, sellers might try to blame you for any issues, so don’t remove it until you’re sure everything works.

– Make sure to check all the new components thoroughly, especially the touch layer. If you spot any “dead lines,” unplug the digitizer and send it back to your seller. Oh, and before you do any of this, remember to take out the screw securing the battery port and protect the motherboard and battery pins.

Step 13

– Lay the digitizer flat on a clean surface right in front of you. Heads up: the inner touch side has a clear protective film too. Carefully flex the area around the connection tapes—don’t let the tape stick to the foil, make sure it sticks to the correct part of the screen.

– Peel off the tape that’s covering the adhesive on the inside of the tapes. This adhesive side is what will bond to the digitizer glass.

– Gently press the tape down onto the digitizer surface. The glue isn’t super strong, but it’s enough to hold things in place for now. Then, cover the taped area with the digitizer’s protective film you removed earlier. This little trick keeps the tape from peeling off.

Step 14

– Place the button where it belongs, and give that glass a good once-over to ensure all dirt and debris from the old digitizer is gone!

– Guide the cable along the digitizer’s edge to the left, keeping it parallel to the screen’s bottom edge. Whether or not the tape overlaps the digitizer layer (that’s the one with those tiny copper wires) depends on how the replacement shield is designed. In the original models, there’s a sweet little 0.5mm gap to work with.

– Position the home button bracket just right and secure it in place. For the originals, a thin layer of hot glue gives it that extra hold.

Step 15

– Attach the metal Home button bracket so that the round part lines up perfectly with the button’s micro-switch — this is key for the whole button to click just right.

– Press the rest of the button tape onto the glass. If your screen adhesive is already stuck inside the glass like mine, be careful not to stick the button to the protective film covering the adhesive. Gently lift that protective film and tuck the button elements underneath before sealing it back down.

Step 16

– You’re almost there! 🙂 Time to get a little crafty—apply some glue to the edge of the screen or the housing, depending on your setup. If you snagged a screen with glue already attached (like I did), you’re ready to move on to the next step!

– Having a support for the screen is super handy! Position the screen so it’s standing tall and straight against the housing, then connect that Home button ribbon with care.

Step 17

– Let’s get those connections sorted! First, connect the digitizer with both plugs. Make sure those connection ribbons are bending inwards—like a warm hug for your tablet! As you close it up, ensure the tapes tuck neatly under the housing edge.

– Now, place the matrix straight up against the housing and plug that connector right into the port. Feel free to secure it with a connector bracket. Don’t forget to remove the plastic cover from the battery port and tighten that screw back in place. Now it’s time for a little test run!

Step 18

– Carefully place everything back where it belongs, but remember to keep that protective foil intact over the glue and screen surface. Give the screen, touch, and buttons a quick test drive. If all systems are go, you’re ready to roll on to the next step!

Step 19

– Place the matrix carefully in the correct spot and tighten the securing screws (look for the green arrow). If the holes are clear, you can gently poke through the membranes with a thin screwdriver or similar tool.

Step 20

– Peel off that protective film covering the screen adhesive like a pro!

– Take off the protective film from the digitizer—it’s like unwrapping a present!

– Don’t forget to remove the protective film from the matrix (you’ve got this, trust me!)

Step 21

– Alright, it wasn’t a walk in the park, but you just kept a good chunk of cash in your pocket. Most repair shops charge between $150 and $200 for replacing a screen and digitizer.

– I grabbed the matrix for $42 and the digitizer for $12. Total damage: $54. So, by putting in some elbow grease, I saved around $150. Feeling good about what you did? Absolutely priceless.

Success!
It wasn’t a walk in the park, but hey, you’ve just pocketed some serious cash. Replacing that screen and digitizer at a shop would have cost you anywhere between $150-200.
The screen cost me $42 and the digitizer $12. Total: $54. So, by doing it yourself, you’ve saved around $150. And that feeling of accomplishment? Totally priceless.

iPad 4 CDMA Rotation Lock/Mute Switch Replacement

Duration: 45 minutes
Steps: 67 Steps

Ready to swap out that rotation lock/mute switch? No problem, we’ve got you covered! Just follow these simple steps, and you’ll have it back in action in no time. If things get tricky, don’t hesitate to schedule a repair. Let’s get started!

Step 1

– Pop the iOpener right in the middle of your microwave. Give it some space to work its magic.

Tools Used
  1. iOpeneriPad 4 CDMA Rotation Lock/Mute Switch Replacement

Step 2

– Pop the iOpener in the microwave for about 30 seconds to warm it up.

– As you go through the repair, if the iOpener cools down, just zap it again in the microwave for another 30 seconds to keep things nice and toasty.

Tools Used
  1. iOpeneriPad 4 CDMA Rotation Lock/Mute Switch Replacement

Step 3

– Carefully take the iOpener out of the microwave, gripping one of the flat ends to steer clear of that hot center.

Tools Used
  1. iOpeneriPad 4 CDMA Rotation Lock/Mute Switch Replacement

Step 4

– Grab a pot or pan and fill it with enough water to give your iOpener a nice, warm bath.

– Bring that water to a rolling boil and then turn off the heat—safety first!

– Carefully place your iOpener into the hot water for 2-3 minutes, ensuring it gets a good soak.

– Use some tongs to fish out the heated iOpener from the water—watch out, it’s toasty!

– Give the iOpener a good towel dry, making sure it’s all set for action.

– And voilà! Your iOpener is good to go! If it needs a little more heat, just repeat the water boiling and soaking process for another 2-3 minutes.

Tools Used
  1. iOpeneriPad 4 CDMA Rotation Lock/Mute Switch Replacement

Step 5

– Grab a SIM eject tool or straighten out a paperclip and pop that SIM tray right out!

Step 6

– Gently slide out the SIM tray from its slot, and give it a little pull to remove it from the iPad.

– If you’re swapping out the SIM card, carefully pop it out of the tray and slide in the shiny new one.

Step 7

– Got a cracked display glass? No worries! To keep those shards in check and avoid any ouch moments, slap some clear packing tape over the glass before you dive in.

– Cover the entire iPad face with overlapping strips of clear packing tape, like wrapping a present — but way cooler.

– Follow the rest of the guide as usual. Heads up: once the glass is cracked, it might keep cracking while you work, so you may need to carefully use a metal prying tool to scoop out the glass pieces.

Step 8

– Place the iOpener flat against the right edge of the iPad, making sure it’s nice and snug so that it connects well with the iPad’s surface.

– Give it around 90 seconds to work its magic before you dive in and try to lift the front panel.

Tools Used
  1. iOpeneriPad 4 CDMA Rotation Lock/Mute Switch Replacement

Step 9

– There’s a tiny little gap in the iPad’s adhesive ring, located in the upper right corner—about 2.0 inches (~5 cm) from the top. Let’s take advantage of this little sneaky spot!

– Position your tool near the mute button. Now, gently slide the tip of your plastic opening tool into the gap between the front glass and the plastic bezel. Just insert the very tip—enough to help widen that crack a bit.

Step 10

– Ensure you position the tool just right—nestled between the plastic display bezel and the front panel glass. You’ve got this!

Step 11

– Place the tip of the plastic opening tool in the gap between the front glass and the plastic bezel. Once it’s wedged in there, carefully slide a plastic opening pick right next to it. Easy does it!

Step 12

– Take that trusty plastic opening tool out of the iPad’s grip, and slide the opening pick in a little deeper under the front glass—aim for about half an inch down. You’re doing great!

Step 13

– As you tackle the adhesive on the right side of your iPad, don’t forget to give your iOpener a little reheat love and position it back on the bottom edge of the iPad.

Tools Used
  1. iOpeneriPad 4 CDMA Rotation Lock/Mute Switch Replacement

Step 14

– As the iOpener warms up the bottom edge, let’s get busy peeling off that adhesive from the right edge of your iPad.

– Gently slide the opening pick down the iPad’s edge, working your magic to release that stubborn adhesive as you go.

Tools Used
  1. iOpeneriPad 4 CDMA Rotation Lock/Mute Switch Replacement

Step 15

– If your opening pick gets stuck in the adhesive, just give it a little roll along the iPad’s edge to keep breaking that sticky seal.

Tools Used
  1. iOpeneriPad 4 CDMA Rotation Lock/Mute Switch Replacement

Step 16

– Before you start, pop the first opening pick into the bottom corner of your iPad. But wait, slide a second pick under the right edge of the front glass to stop the adhesive from sticking again. We don’t want any surprise re-adhering going on!

– Give the iOpener another heat-up, and gently move it to the top edge of the iPad. Time to soften up that adhesive for a smooth removal.

Tools Used
  1. iOpeneriPad 4 CDMA Rotation Lock/Mute Switch Replacement

Step 17

– Alright, time to be super careful. The next steps are a little delicate.

– You’ll need to carefully release the adhesive holding the antenna to the front panel. Be mindful of the fragile bits that connect the antenna to the bottom of the iPad. Follow the steps closely, and you’ll be just fine!

Step 18

– Gently glide that opening pick around the bottom right corner of the iPad to free up the adhesive. You’re doing great!

Step 19

– Gently slide the tip of your opening pick along the bottom edge of the iPad to carefully pop loose the adhesive holding down the Wi-Fi antenna.

Step 20

– Once you’ve passed the Wi-Fi antenna (about 3 inches or 75 mm from the right edge, right near the home button), slide the opening pick back in as far as it will go.

– Now, gently slide the pick to the right to free up the adhesive holding the Wi-Fi antenna to the front glass.

– The antenna is held in place by screws and a cable at the bottom of your device. By detaching it from the front panel, you’re making sure the antenna stays safe and sound while you remove the panel.

Step 21

– Keep sliding that opening pick along the bottom edge of the iPad, pulling it out just enough to curve around the home button, then pop it back in about 1/2 inch (10 mm) past the button to keep the adhesive release rolling.

Tools Used
  1. iOpeneriPad 4 CDMA Rotation Lock/Mute Switch Replacement

Step 22

– Gently peel the adhesive off the bottom edge of the iPad, taking it slow and steady.

– Keep the opening pick tucked underneath the front glass near the home button, like a secret spot for it to rest.

Step 23

– Pop the iOpener back in the microwave to warm it up, then place it on the left edge of the iPad to gently heat the adhesive in that area.

Tools Used
  1. iOpeneriPad 4 CDMA Rotation Lock/Mute Switch Replacement

Step 24

– Gently slide the opening pick along the top edge of the iPad, easing it out just enough to navigate around the front-facing camera bracket.

– Heads up: the adhesive here is seriously stubborn, so you might need to apply some firm pressure. Take it slow and steady to avoid slips or any accidental damage to you or your iPad.

– If the pick starts to get stuck in the adhesive, try “rolling” it as demonstrated in step 9 to help it glide through smoothly.

Tools Used
  1. iOpeneriPad 4 CDMA Rotation Lock/Mute Switch Replacement

Step 25

– Keep peeling away that sticky stuff along the top edge of your iPad, and gently glide the opening pick around the top left corner. You’ve got this!

Tools Used
  1. iOpeneriPad 4 CDMA Rotation Lock/Mute Switch Replacement

Step 26

– Gently slide your opening pick down the left side of the iPad, working your way along the edge and gradually loosening the adhesive. Keep in mind, the adhesive is a bit thinner here because of the digitizer running the full length. Make sure your pick doesn’t dive too deep—stay within a safe 10mm (about half an inch)—to avoid messing with that digitizer.

Step 27

– Slide the opening pick, which is still tucked under the bottom edge of the iPad, to gently peel away the adhesive at the bottom left corner.

Step 28

– Grab one of those nifty opening picks and gently lift the bottom right corner of your iPad. Give it a little wiggle and use your fingers to hold it steady.

Step 29

– Grab your iPad by the top and bottom right corners, and gently twist that front glass away from the device like you’re unveiling a surprise. It’s like magic, but with tech!

– When you’re piecing everything back together, don’t forget to whip out a microfiber cloth and some compressed air to give the LCD a little TLC—cleaning off any pesky dust or fingerprints before you seal the deal with the glass.

Step 30

– Let’s get started! Carefully unscrew those four 2 mm Phillips #00 screws that are holding the LCD snug against the aluminum frame. You’ve got this!

Step 31

– Grab a plastic opening tool or spudger and gently pry up the right edge of the iPad’s LCD.

– Swing the LCD up from its left side and carefully rest it on top of the front glass panel.

Tools Used
  1. SpudgeriPad 4 CDMA Rotation Lock/Mute Switch Replacement

Step 32

– Gently use the tip of your trusty spudger to lift and peel back the tape that’s hiding the LCD ribbon cable connector.

Tools Used
  1. SpudgeriPad 4 CDMA Rotation Lock/Mute Switch Replacement

Step 33

– Gently lift the retaining flap on the LCD ribbon cable ZIF connector.

– With a little finesse, use your fingers or tweezers to slide the LCD ribbon cable out of its socket on the logic board.

– If the LCD screen doesn’t turn on after reconnecting the ZIF connector, don’t worry! Just press and hold both the power and home buttons for about ten seconds to force a restart. You’ll see the Apple logo appear, and everything should be back in action.

Tools Used
  1. TweezersiPad 4 CDMA Rotation Lock/Mute Switch Replacement

Step 34

– Carefully lift the LCD off the front panel, but try to avoid touching the screen itself.

Step 35

Step 36

– Gently lift the little flap holding down the home button ribbon cable ZIF connector.

Step 37

– Grab your tweezers and gently pull the home button ribbon cable straight out from its socket on the logic board.

Tools Used
  1. TweezersiPad 4 CDMA Rotation Lock/Mute Switch Replacement

Step 38

– Gently guide the home button ribbon cable out from its cozy spot in the rear case. You’ve got this!

Step 39

– Carefully lift the tape holding down the digitizer ribbon cable on the logic board using the pointy end of your trusty spudger.

Tools Used
  1. SpudgeriPad 4 CDMA Rotation Lock/Mute Switch Replacement

Step 40

– Lift the retaining flap on each of the digitizer ribbon cable ZIF connectors.

Step 41

– Gently slide the flat end of a spudger under the digitizer ribbon cable to carefully loosen the adhesive holding it in place.

– Firmly but smoothly pull the digitizer ribbon cable straight out from its connectors on the logic board.

Tools Used
  1. SpudgeriPad 4 CDMA Rotation Lock/Mute Switch Replacement

Step 42

– Gently peel back the digitizer ribbon cable, then use the flat end of your spudger to carefully lift off the adhesive that’s holding the cable in place on the rear aluminum case.

Tools Used
  1. SpudgeriPad 4 CDMA Rotation Lock/Mute Switch Replacement

Step 43

– With a gentle touch, carefully pull the digitizer ribbon cable out of its cozy spot in the aluminum frame.

– Now, it’s time to take off the front panel from the iPad. You’ve got this!

Step 44

– Gently peel back and remove the electrical tape that’s covering the headphone jack assembly cable connector. It’s like peeling off a sticker, but with a bit more purpose.

– Now, grab your trusty spudger and carefully lift up the retaining flap on both ZIF connectors that are holding the headphone jack cable in place on the logic board. A little flip and you’re good to go!

Tools Used
  1. SpudgeriPad 4 CDMA Rotation Lock/Mute Switch Replacement

Step 45

– Gently slide the flat end of your spudger under the headphone jack assembly cable to break the seal of adhesive holding it down to the aluminum frame. Easy does it!

– Now, pull the headphone jack assembly cable straight out of its socket on the logic board. Don’t yank, just give it a gentle pull.

Tools Used
  1. SpudgeriPad 4 CDMA Rotation Lock/Mute Switch Replacement

Step 46

– Gently peel back and take off the tape that’s hiding the SIM board cable ZIF connector.

– Lift up the little flap holding down the SIM board cable ZIF connector.

– Carefully use the tip of a spudger to pull the SIM board cable straight out from its socket on the logic board.

Tools Used
  1. SpudgeriPad 4 CDMA Rotation Lock/Mute Switch Replacement

Step 47

– Unscrew the three 1.75 mm Phillips #00 screws that are holding the SIM board in place on the aluminum frame. You’ve got this!

Step 48

– Gently move the headphone jack assembly cable to the side and carefully take out the SIM board from the iPad. Easy does it!

Step 49

– Carefully lift and peel away the adhesive tape that’s covering the headphone jack assembly.

Step 50

– Unscrew the lone 2.6 mm Phillips #0 screw that’s holding the camera cable in place on the headphone jack assembly. You’re almost there!

Step 51

– Take the flat end of your spudger and gently pop the front-facing camera off its spot on the headphone jack assembly. It’s a smooth move, like peeling off a sticker!

– Keep that spudger in place, and slide it to the right to break the adhesive holding down the camera cable. You’ll feel it release—no sweat, just smooth sailing from here.

Tools Used
  1. SpudgeriPad 4 CDMA Rotation Lock/Mute Switch Replacement

Step 52

– Grab your spudger and gently flip up the retaining flap on the microphone cable ZIF connector—no need to rush, take it slow!

– Now, slide the spudger under the microphone ribbon cable and lift it out of its ZIF connector. Easy does it!

– Give the spudger a little slide to the left to loosen the adhesive that’s sticking the microphone ribbon cable to the headphone jack assembly. Almost there!

Tools Used
  1. SpudgeriPad 4 CDMA Rotation Lock/Mute Switch Replacement

Step 53

– Gently slide the flat end of your spudger under the antenna connector cable and lift it out of its socket on the headphone jack assembly board.

Tools Used
  1. SpudgeriPad 4 CDMA Rotation Lock/Mute Switch Replacement

Step 54

– Lift up the little flap holding down the volume/power button ribbon cable connector on the headphone jack assembly board.

– Gently pull the volume button ribbon cable out of its ZIF connector.

Step 55

– Time to get handy! Let’s tackle those screws holding the headphone jack assembly in place:

– First up, grab five of those 2.6 mm Phillips #0 screws.

– Next, you’ll need two 2.2 mm Wide Head Phillips #00 screws.

– And finally, finish strong with two more 2.6 mm Phillips #00 screws.

Step 56

– With a gentle grip on the ribbon cable of the headphone jack assembly, give it a careful tug straight out, moving it parallel to the iPad and toward the bottom. You’ve got this!

Step 57

– With both hands on the headphone jack assembly, gently tug it away from the iPad, being sure to keep an eye on any cables that might be hanging on for dear life.

Step 58

– Let’s start by loosening up the power & volume button cable from the aluminum frame. Grab your screwdriver and remove these screws:

– Two 5.5 mm Phillips #0 screws

– One 2.6 mm Phillips #0 screw

– Two 2.6 mm Phillips #0 screws

Step 59

– Carefully peel off the plastic shield hiding the volume buttons to get things moving.

Step 60

– Unscrew the lone 2.6 mm Phillips #00 screw that’s keeping the volume button frame cozy with the aluminum frame.

Step 61

– Gently slide the edge of a plastic opening tool under the sleep/wake sensor, taking care not to harm that delicate cable.

– Carefully maneuver the plastic opening tool around the sensor to loosen the adhesive.

Step 62

– Gently slide a spudger under the power and volume cables to break free the adhesive. Take it slow—patience is key, and this part is like peeling a sticker off a new gadget!

Tools Used
  1. SpudgeriPad 4 CDMA Rotation Lock/Mute Switch Replacement

Step 63

– With the pointed end of the spudger in hand, gently pry up the adhesive beneath the volume button section of the ribbon cable. You’ve got this!

Tools Used
  1. SpudgeriPad 4 CDMA Rotation Lock/Mute Switch Replacement

Step 64

– Keep sliding the spudger tip gently toward the top of the iPad to loosen that stubborn adhesive.

Tools Used
  1. SpudgeriPad 4 CDMA Rotation Lock/Mute Switch Replacement

Step 65

– With the spudger gently in place under the ribbon cable, carefully lift the power button out of its cozy home in the aluminum frame. Take your time and don’t rush—it’ll come out smoothly.

Tools Used
  1. SpudgeriPad 4 CDMA Rotation Lock/Mute Switch Replacement

Step 66

– Grab the power & volume button cable with both hands, and gently wiggle the volume buttons and lock switch free from their cozy spots in the aluminum frame.

– Now, carefully lift the power & volume button cable out of the rear aluminum case. It’s a smooth move, just take your time!

Step 67

– Grab your trusty spudger and gently nudge that mute/lock switch out of its cozy little home in the aluminum frame of your iPad. You got this!

– Now, lift that mute/lock switch right out of the rear aluminum case like a pro!

Tools Used
  1. SpudgeriPad 4 CDMA Rotation Lock/Mute Switch Replacement

Success!
Time to put your device back together! Just follow these steps in reverse and grab our iPad 4 CDMA Front Panel Adhesive strips guide to give that front panel a snug reattachment. If you find yourself scratching your head or need a little extra help, don’t hesitate to schedule a repair.

iPad 8 LTE LCD Replacement

Duration: 45 minutes
Steps: 46 Steps

Follow this guide to swap out the LCD on your iPad 8. Unlike the latest iPads and most smartphones, the glass digitizer and LCD on the iPad 8 are separate parts—not glued together. Heads up: this guide is for the LTE model only. If you have the Wi-Fi version, click here. When disconnecting the battery using a battery blocker, handle with care—the battery contacts are fragile and can bend or break, causing permanent damage. If you decide to skip isolating the battery, try to avoid metal tools except when absolutely necessary (like removing screws) to prevent short circuits and protect sensitive components. Some photos may show a different model and might look a bit different, but don’t worry, it won’t impact the steps. If you get stuck, you can always schedule a repair!

Step 1

– Warm up that iOpener and give it a cozy hug on the left edge of your device for about two minutes.

Tools Used
  1. iOpeneriPad 8 LTE LCD Replacement

Step 2

– While waiting for the adhesive to soften up, keep an eye out for these parts that don’t like being poked:

– Front camera

– Antennas

– Display cables

Step 3

– Give that blue handle a gentle tug back to free the Anti-Clamp’s arms.

– Set your iPad on something sturdy so it’s nice and level between the suction cups.

– Place the suction cups close to the center of the left edge—one at the top and one at the bottom.

– Keep the bottom of the Anti-Clamp steady and give a firm press down on the top cup to create a solid suction.

Step 4

– Slide the blue handle forward to lock those arms in place.

– Twist the handle a full 360 degrees clockwise (or until you see those cups start to stretch).

– Keep an eye on those suction cups—make sure they stay aligned. If they start to shift out of place, just loosen them a bit and realign the arms. Easy fix!

Step 5

– Give it a minute to let the adhesive loosen up and create a little gap for you to work with.

– If your screen isn’t warming up enough, grab a hair dryer and gently heat along the left edge of the iPad.

– Once the Anti-Clamp has made a decent opening, slide in an opening pick beneath the digitizer.

– You can skip the next step.

Step 6

– Once the screen is pleasantly warm to the touch, grab a suction handle and stick it to the left edge of the screen, as close to the edge as you can get.

– Gently lift the screen with the suction handle, just enough to create a tiny gap between the digitizer and the frame.

– Now, slide an opening pick into that gap you just created. It should fit perfectly and make the next step a breeze!

Step 7

– Slide a second opening pick into the gap you just made.

– Gently move the pick down toward the bottom-left corner to loosen the adhesive.

– Keep the pick wedged in the bottom-left corner so the adhesive doesn’t stick back together.

Step 8

– If your opening pick gets caught in the sticky adhesive, just give it a smooth little roll along the edge of the iPad to keep that separation groove going.

Step 9

– Gently slide that first opening pick up towards the top-left corner of your device to break free the adhesive hold.

– Keep that pick in place at the top-left corner to make sure the adhesive doesn’t sneak back into action.

Step 10

– Warm up your iOpener and place it on the top edge of your device for a solid two minutes.

Tools Used
  1. iOpeneriPad 8 LTE LCD Replacement

Step 11

– Gently spin the pick around the top-left corner of your device to break the adhesive’s grip. A little twist goes a long way here!

Step 12

– Gently glide the opening pick along the top edge of your device, making sure to stop just shy of the front camera. You’re doing great!

Step 13

– Gently pull the pick out so that just the tip stays wedged between the digitizer and the frame.

– Carefully slide the pick over the front camera area to loosen up the adhesive.

– Keep the pick resting near the right side of the front camera before moving on to the next step.

Step 14

– Grab that pick and slide it gently towards the top-right corner of your device to fully break free from the adhesive’s grip. You’re doing great!

– Once you’ve done that, keep the pick in the top-right corner to stop the adhesive from trying to stick again. Easy peasy!

Step 15

– Warm up an iOpener and stick it to the right edge of your device for a cozy two-minute spa session.

Tools Used
  1. iOpeneriPad 8 LTE LCD Replacement

Step 16

– Gently maneuver the pick around the top-right corner of your device to break that adhesive bond. You’ve got this!

Step 17

– Grab a fresh opening pick and gently slide it into the middle of the iPad’s right edge. You’re on your way to a great repair adventure!

Step 18

– Warm up your iOpener and let it work its magic on the bottom edge of your device for about two minutes. This will make everything a bit more pliable, so you can get into the action.

Tools Used
  1. iOpeneriPad 8 LTE LCD Replacement

Step 19

– Gently slide the pick down to the bottom-left corner to loosen up that adhesive.

– Keep the pick wedged in the corner before moving on to the next step.

Step 20

– Grab a fresh opening pick and slide it into the gap you just made along the bottom edge of your iPad.

– Carefully slide the pick across the antenna, stopping just shy of the home button.

– Keep the pick to the left of the home button and hold tight before moving on.

Step 21

– Gently slide an opening pick into the gap you just made.

– Carefully wiggle the pick under the home button, moving it toward the bottom-right corner—just the tip should sneak between the digitizer and the frame.

Step 22

– Slide the pick back in and gently glide it toward the home button to fully free the bottom adhesive.

– Keep the pick resting just to the right of the home button before moving on.

Step 23

– Warm up an iOpener and stick it on the right edge of your device for a solid two minutes to loosen things up.

Tools Used
  1. iOpeneriPad 8 LTE LCD Replacement

Step 24

– Gently twist the two opening picks at the left corners of the iPad to carefully lift the digitizer, loosening the last bit of adhesive holding it down.

Step 25

– Gently lift the left edge of the digitizer to ease the adhesive off the right side of the iPad. Take your time and let the adhesive slowly loosen up as you go—patience is key here!

Step 26

– As you hold the digitizer steady, gently slide an opening pick between the two display cables to break free the final bit of adhesive holding them together. Keep it smooth and steady—you’re doing great!

Step 27

– Once the adhesive is all separated, open the digitizer gently like a book and lay it flat next to the iPad.

– When putting everything back together, don’t forget to clean off any leftover adhesive from the frame—and from the digitizer if you’re reusing it—with some isopropyl alcohol. Pop in some fresh adhesive using our adhesive strips or pre-cut adhesive cards.

– Be extra careful with the display cables while reassembling. Make sure they’re tucked neatly under the LCD screen so they don’t get damaged.

Step 28

– Grab your trusty pair of tweezers and gently peel off the tape that’s keeping the home button cable ZIF connector in place. Easy does it!

Tools Used
  1. TweezersiPad 8 LTE LCD Replacement

Step 29

– Grab a spudger, an opening tool, or just your trusty fingernail and gently lift up that little hinged locking flap on the home button cable ZIF connector. You’ve got this!

Tools Used
  1. SpudgeriPad 8 LTE LCD Replacement

Step 30

– Grab your trusty tweezers and gently pull that home button ribbon cable straight out from the ZIF connector. Keep it steady and smooth—no rush!

Tools Used
  1. TweezersiPad 8 LTE LCD Replacement

Step 31

– Gently slide the flat end of a spudger under the two digitizer cable press connectors to carefully pop them loose.

Tools Used
  1. SpudgeriPad 8 LTE LCD Replacement

Step 32

– Grab your trusty spudger and gently lift the vibration isolator nestled right below the SIM card reader.

– Now, go ahead and take out that vibration isolator!

Tools Used
  1. SpudgeriPad 8 LTE LCD Replacement

Step 33

– Gently grab the home button cable with tweezers and lift it away from the rear case—think of it like giving it a little stretch, not a tug-of-war!

Tools Used
  1. TweezersiPad 8 LTE LCD Replacement

Step 34

– Carefully take off the front panel assembly.

– If your new display starts acting up with random, ghostly touches, a quick fix is to add a super thin insulating tape like Kapton (polyimide) tape to the highlighted spots on the back of the panel. Replacement digitizers usually come with this insulation, so you might not need extra tape.

– When putting everything back together, make sure to scrape off any leftover adhesive from the iPad, then clean those sticky areas using high concentration isopropyl alcohol (90% or higher) and a lint-free cloth. This gets the surface ready for fresh adhesive to stick like a charm.

– Give your iPad a full test to make sure everything’s working, then apply pre-cut adhesive strips to the back of the display following the adhesive application guide before sealing it up.

Step 35

– Grab some tweezers or just use your fingers to peel back any tape hiding those LCD screws. Easy does it!

Tools Used
  1. TweezersiPad 8 LTE LCD Replacement

Step 36

– Grab your Phillips screwdriver and carefully take out the four 4.3 mm screws holding the LCD screen in place.

Step 37

– Slide a spudger gently between the frame and the top-right corner of the LCD.

– Carefully wiggle the spudger to loosen the adhesive without rushing.

Tools Used
  1. SpudgeriPad 8 LTE LCD Replacement

Step 38

– Go ahead and do the same thing for the top-left corner of the LCD. You got this!

Step 39

– Gently wedge the flat tip of a spudger under the LCD just enough to get a good grip with your fingers.

– Flip the LCD over like turning a page in a book—lift near the camera and fold it back over the home button side of the frame.

– Place the LCD screen face down on a clean, soft, lint-free surface so you can easily access the display cables.

Tools Used
  1. SpudgeriPad 8 LTE LCD Replacement

Step 40

– Grab your Phillips screwdriver and carefully unscrew the tiny 2.3 mm screw that holds the battery connector to the logic board in place.

Step 41

Step 42

– Gently slide the battery blocker under the logic board’s battery connector, angling it at about 35 degrees. Think of it as giving your device a little nudge!

– Keep that battery blocker snugly in place while you tackle the next steps. You’re doing great!

Tools Used
  1. Battery BlockeriPad 8 LTE LCD Replacement

Step 43

– Grab your Phillips screwdriver and carefully take out the three 1.4 mm screws holding down the display cable bracket.

Step 44

– Grab your tweezers or just use your fingers to carefully lift off the display cable bracket.

Tools Used
  1. TweezersiPad 8 LTE LCD Replacement

Step 45

– Gently use the flat end of a spudger to lift and unplug the LCD cable press connector.

– When reconnecting press connectors like this one, line up one side carefully and press down until you hear a click, then do the same on the other side.

– Avoid pressing in the middle — if the connector is off-center, the pins might bend and cause permanent damage.

Tools Used
  1. SpudgeriPad 8 LTE LCD Replacement

Step 46

– Time to put your device back together! Just retrace your steps and follow these instructions in the opposite order.

– Got some e-waste? Don’t let it pile up! Take it to an R2 or e-Stewards certified recycler and do your part for the planet.

– If things didn’t go quite as expected, don’t sweat it! Give some basic troubleshooting a shot, or feel free to connect with our iPad 8 Answers community for a little extra support.

Success!
Now it’s time to put everything back together—just retrace your steps like a pro!
Got some e-waste? Don’t just toss it; make sure to drop it off at an R2 or e-Stewards certified recycler.
Things didn’t go quite as planned? No worries! Give some basic troubleshooting a shot, or pop into our iPad 8 Answers community for a helping hand.

iPad 4 CDMA Rear Facing Camera Replacement

Duration: 45 minutes
Steps: 59 Steps

Ready to bring your camera back to life? This guide will help you swap out that rear-facing camera like a pro! Let’s dive in and get your device snapping pictures again. If you need help, you can always schedule a repair.

Step 1

– Pop that iOpener right in the middle of the microwave and let it work its magic.

Tools Used
  1. iOpeneriPad 4 CDMA Rear Facing Camera Replacement

Step 2

– Give the iOpener a quick 30-second zap in the microwave to warm it up.

– Keep it toasty! Whenever the iOpener cools down during your repair, just pop it back in the microwave for another 30 seconds to bring the heat back.

Tools Used
  1. iOpeneriPad 4 CDMA Rear Facing Camera Replacement

Step 3

– Carefully grab the iOpener by one of its flat ends to avoid the hot middle, and take it out of the microwave.

Tools Used
  1. iOpeneriPad 4 CDMA Rear Facing Camera Replacement

Step 4

– Grab a pot or pan and fill it with enough water to completely cover your iOpener.

– Bring the water to a rolling boil, then turn off the heat.

– Drop your iOpener into the hot water and let it soak for 2-3 minutes, making sure it’s fully submerged.

– Carefully fish out the warmed iOpener using tongs.

– Dry it off thoroughly with a towel—no one likes a soggy tool!

– Your iOpener is now good to go! If it cools down, just repeat the boiling and soaking steps to heat it back up.

Tools Used
  1. iOpeneriPad 4 CDMA Rear Facing Camera Replacement

Step 5

– Grab a SIM eject tool or a straightened paperclip and gently pop out that SIM tray!

Step 6

– Gently slide the SIM tray out of its cozy little home and set it aside. Easy, right?

– If you’re swapping out the SIM card, just give it a little nudge to pop it out of the tray and replace it with the shiny new one. You’ve got this!

Step 7

– Got a cracked screen? No worries! To avoid any further mess and keep your fingers safe, cover the shattered glass with some tape.

– Grab some clear packing tape and start laying overlapping strips all over the iPad’s display until the whole front is sealed up tight.

– Keep moving through the guide as best as you can. But fair warning: once the glass starts cracking, it may keep splintering as you work. You might have to use a metal prying tool to scoop the glass out carefully.

Step 8

– Place the iOpener flat along the right edge of your iPad, making sure it sits nice and snug against the surface. A little smooth action here ensures that the iOpener is making solid contact.

– Give it about 90 seconds to work its magic on the iPad before you start tackling the front panel. Patience is key here—don’t rush!

Tools Used
  1. iOpeneriPad 4 CDMA Rear Facing Camera Replacement

Step 9

– There’s a tiny gap in the iPad’s adhesive ring in the upper right corner, about 2.0 inches (5 cm) from the top of the device. This is your entry point.

– Line up your tool with the mute button, then gently insert the tip of your plastic opening tool into the gap between the front glass and the plastic bezel. Just a small nudge to widen the crack a bit—that’s all it takes!

Step 10

– Carefully slide your tool right where the plastic display bezel meets the front panel glass—this is the sweet spot to get things moving.

Step 11

– Place the tip of the plastic opening tool snugly between the front glass and plastic bezel. Now, gently slide a plastic opening pick right next to it, squeezing into the gap.

Step 12

– Gently slip out the plastic opening tool from the iPad, then slide the opening pick a bit deeper under the front glass, about half an inch in.

Step 13

– While you’re carefully working to release the adhesive on the right side of your iPad, go ahead and reheat the iOpener. Place it on the bottom edge of the iPad to help loosen up the adhesive. A little extra heat goes a long way!

Tools Used
  1. iOpeneriPad 4 CDMA Rear Facing Camera Replacement

Step 14

– While the iOpener warms up the bottom edge, start loosening the adhesive along the right edge of your iPad.

– Gently slide the opening pick down the edge of your iPad, releasing the adhesive as you move along.

Tools Used
  1. iOpeneriPad 4 CDMA Rear Facing Camera Replacement

Step 15

– If the opening pick decides to get cozy with the adhesive, just give it a gentle roll along the side of the iPad. Keep at it and the adhesive will let go, no sweat.

Tools Used
  1. iOpeneriPad 4 CDMA Rear Facing Camera Replacement

Step 16

– Before pulling out that first opening pick from the bottom corner of your iPad, slide in a second pick under the right edge of the front glass. This little trick keeps the adhesive from sticking back together on you.

– Warm up your iOpener again, then shift it over to the top edge of the iPad to keep things nice and pliable.

Tools Used
  1. iOpeneriPad 4 CDMA Rear Facing Camera Replacement

Step 17

– Alright, here’s where you need to put on your careful hat. Take it easy and stay steady through the next steps.

– You’re about to loosen the adhesive holding the antenna in place, but be gentle! We don’t want any mishaps, so handle the delicate parts connecting the antenna to the bottom of the iPad with care. Follow these steps closely and you’ll be golden.

Step 18

– Gently slide the opening pick around the bottom right corner of the iPad to loosen the adhesive and get things moving.

Step 19

– Gently slide the opening pick along the bottom edge of the iPad, carefully loosening the adhesive near the Wi-Fi antenna.

Step 20

– Once you have moved past the Wi-FI antenna (approximately 3″ (75 mm) from the right edge, or right next to the home button) re-insert the opening pick to its full depth.

– Slide the pick to the right, releasing the adhesive securing the Wi-Fi antenna to the front glass.

– The antenna is attached to the bottom of the iPad via screws and a cable. This step detaches the antenna from the front panel, ensuring that when you remove the panel, the antenna will not be damaged.

Step 21

– Continue releasing the adhesive along the bottom of the iPad, pulling the opening pick out far enough to go around the home button, and re-inserting it to a depth of 1/2 inch (10 mm) once the pick is past the home button.

Tools Used
  1. iOpeneriPad 4 CDMA Rear Facing Camera Replacement

Step 22

– Continue releasing the adhesive all the way along the bottom edge of the iPad.

– Leave the opening pick wedged underneath the front glass near the home button.

Step 23

– Pop the iOpener into the microwave to get it nice and warm, then gently place it on the left edge of your iPad. This will help soften up the adhesive in that area, making things easier when you’re ready to peel it off.

Tools Used
  1. iOpeneriPad 4 CDMA Rear Facing Camera Replacement

Step 24

– Gently slide the opening pick along the top edge of the iPad, easing it out just enough to work around the front-facing camera bracket.

– Heads up: the adhesive here is super stubborn, so you might need to apply some serious elbow grease. Take it slow and steady to avoid any slips or scrapes on you or your iPad.

– If the pick starts to get stuck in the adhesive, try “rolling” it as demonstrated in step 9 to keep things moving smoothly.

Tools Used
  1. iOpeneriPad 4 CDMA Rear Facing Camera Replacement

Step 25

– Peel off the adhesive along the top edge of the iPad, and carefully slide the opening pick around the top left corner. Easy does it!

Tools Used
  1. iOpeneriPad 4 CDMA Rear Facing Camera Replacement

Step 26

– Gently slide the opening pick along the left edge of the iPad to loosen the adhesive bit by bit. Heads up: the adhesive here is pretty thin because of the digitizer running the length of this side. Keep your pick shallow—no deeper than about 10 mm (half an inch)—to avoid any accidental digitizer drama.

Step 27

– Keep that opening pick tucked under the bottom edge of the iPad and carefully peel away the adhesive at the bottom left corner.

Step 28

– Grab one of your trusty opening picks and gently wedge it under the bottom right corner of the iPad, then lift it up enough to get a good grip with your fingers.

Step 29

– Grab the iPad by the top and bottom right corners and gently swivel the front glass away from the device.

– When putting everything back together, give the LCD a good once-over with a microfiber cloth and some compressed air to blow off any dust or fingerprints before snapping the glass back on.

Step 30

– Unscrew the four 2 mm Phillips #00 screws that are holding the LCD to the aluminum frame. A little twist and you’ll be one step closer to victory!

Step 31

– Grab a plastic opening tool or spudger and gently pry up the right edge of the iPad’s LCD.

– Then, swing the LCD open like a door on its left side and rest it carefully on top of the front glass panel.

Tools Used
  1. SpudgeriPad 4 CDMA Rear Facing Camera Replacement

Step 32

– Grab your trusty spudger and gently peel back the tape that’s holding down the LCD ribbon cable connector. Take it slow and steady—you got this!

Tools Used
  1. SpudgeriPad 4 CDMA Rear Facing Camera Replacement

Step 33

– Gently flip up the retaining flap on the LCD ribbon cable ZIF connector. It’s like giving it a little stretch before the big move.

– Now, using your fingers (or tweezers if you’re feeling fancy), carefully pull the LCD ribbon cable out of its socket on the logic board. Take your time, no rush here!

– If the LCD screen stays stubborn and refuses to light up after reconnecting the ZIF connector, give your iPad a quick power reset by holding down the power and home buttons for about 10 seconds. The Apple logo should pop up, signaling the restart.

Tools Used
  1. TweezersiPad 4 CDMA Rear Facing Camera Replacement

Step 34

– Careful now, grab the LCD by the edges and gently lift it away from the front panel—no touching the front screen!

Step 35

Step 36

– Gently lift the little flap holding the home button ribbon cable in place. It’s like opening a secret door – easy, but rewarding!

Step 37

– Grab a pair of tweezers and carefully pull the home button ribbon cable out of its socket on the logic board. Nice and steady, you’ve got this!

Tools Used
  1. TweezersiPad 4 CDMA Rear Facing Camera Replacement

Step 38

– Carefully wiggle the home button ribbon cable out of its little home in the back case. A little patience goes a long way here, but you’ve got this!

Step 39

– Gently use the pointy end of your spudger to lift up the tape holding the digitizer ribbon cable onto the logic board. Take it slow and steady!

Tools Used
  1. SpudgeriPad 4 CDMA Rear Facing Camera Replacement

Step 40

– Gently flip up the little retaining flap on both digitizer ribbon cable ZIF connectors to unlock them.

Step 41

– Grab that trusty spudger and gently slide the flat end under the digitizer ribbon cable to break free the adhesive holding it in place.

– Now, with a smooth, steady motion, pull the digitizer ribbon cable straight out from its cozy little sockets on the logic board.

Tools Used
  1. SpudgeriPad 4 CDMA Rear Facing Camera Replacement

Step 42

– Gently lift the digitizer ribbon cable and use the flat end of a spudger to carefully loosen the adhesive holding it to the rear aluminum case. No need to rush, just take your time!

Tools Used
  1. SpudgeriPad 4 CDMA Rear Facing Camera Replacement

Step 43

– Gently wiggle the digitizer ribbon cable free from its slot in the aluminum frame using just your fingers.

– Lift the front panel off the iPad carefully.

Step 44

– Gently peel back and take off the piece of electrical tape hiding the headphone jack assembly cable connector.

– With the tip of your trusty spudger, carefully flip up the little retaining flap on both ZIF connectors that hold the headphone jack cable in place on the logic board.

Tools Used
  1. SpudgeriPad 4 CDMA Rear Facing Camera Replacement

Step 45

– Gently slide the flat end of your spudger under the headphone jack assembly cable, and free it from the adhesive that’s holding it against the rear aluminum frame.

– Now, carefully pull the headphone jack assembly cable straight out of its socket on the logic board. Nice and easy!

Tools Used
  1. SpudgeriPad 4 CDMA Rear Facing Camera Replacement

Step 46

– Gently peel away the tape that’s holding down the SIM board cable ZIF connector.

– Flip up the little flap on the ZIF connector to release the cable.

– Take your spudger, carefully pry the SIM board cable from its socket on the logic board, and pull it out straight. You got this!

Tools Used
  1. SpudgeriPad 4 CDMA Rear Facing Camera Replacement

Step 47

– Unscrew the three 1.75 mm Phillips #00 screws holding the SIM board to the aluminum frame. Keep them safe—you’ll need these little guys again!

Step 48

– Gently tuck the headphone jack assembly cable aside, then go ahead and lift the SIM board out of the iPad.

Step 49

– Gently peel away the adhesive tape covering the headphone jack assembly. Be careful not to damage anything while you’re at it!

Step 50

– Unscrew the 2.6 mm Phillips #0 screw that’s keeping the camera cable in place with the headphone jack assembly. Easy peasy!

Step 51

– Grab your trusty spudger and use the flat end to gently pry the front-facing camera out of its cozy spot on the headphone jack assembly.

– Still holding the spudger? Nice! Slide it over to the right to break the adhesive grip on the camera cable, and let it loose.

Tools Used
  1. SpudgeriPad 4 CDMA Rear Facing Camera Replacement

Step 52

– Grab the spudger and carefully lift the retaining flap on the microphone cable ZIF connector. Just a gentle nudge, and you’re in business!

– Now, gently slide the spudger under the microphone ribbon cable to disconnect it from the ZIF connector. A smooth, easy move.

– Next, move the spudger to the left to break the adhesive seal that’s holding the microphone ribbon cable to the headphone jack assembly. It should come off without a fuss.

Tools Used
  1. SpudgeriPad 4 CDMA Rear Facing Camera Replacement

Step 53

– Gently use the flat end of the spudger to lift the antenna connector cable out of its cozy home on the headphone jack assembly board. You’ve got this!

Tools Used
  1. SpudgeriPad 4 CDMA Rear Facing Camera Replacement

Step 54

– Gently flip up the little flap holding the volume/power button ribbon cable connector onto the headphone jack assembly board.

– Carefully slide the volume button ribbon cable out of its ZIF connector.

Step 55

– Let’s get those screws out of the headphone jack assembly! Grab your trusty tools and remove the following screws:

– Five 2.6 mm Phillips #0 screws

– Two 2.2 mm Wide Head Phillips #00 screws

– Two 2.6 mm Phillips #00 screws

Step 56

– Gently grip the ribbon cable of the headphone jack assembly and carefully slide it toward the bottom of the device, keeping it parallel to the iPad. Take your time, it’s just a little tug to get it moving!

Step 57

– With a firm grip on the headphone jack assembly using both hands, gently pull it away from the iPad, keeping an eye out for any cables that might get snagged along the way.

Step 58

– Gently wedge the flat end of your spudger under the rear facing camera and carefully pop it off its socket beneath the headphone jack assembly board.

Tools Used
  1. SpudgeriPad 4 CDMA Rear Facing Camera Replacement

Step 59

– To put your device back together, just follow these steps in reverse order and use our iPad 4 CDMA Front Panel Adhesive strips guide to stick the front panel back on. If things get tricky, no worries—you can always schedule a repair!

Success!
To put your device back together, simply retrace your steps in reverse and check out our iPad 4 CDMA Front Panel Adhesive strips guide to stick that front panel back on. If you hit any bumps along the way, don’t hesitate to schedule a repair for some extra support!

iPad 4 CDMA Power & Volume Buttons Replacement

Duration: 45 minutes
Steps: 71 Steps

Get ready to swap out those power and volume buttons! Just a heads up, some of the images in this guide are from a Wi-Fi model, so the insides might look a tad different from the cellular version. No worries though, the steps are the same for both models, with just a few exceptions noted. Let’s dive in and make your device as good as new!

Step 1

– Pop the iOpener right in the middle of the microwave, and let it soak up those warm vibes!

Tools Used
  1. iOpeneriPad 4 CDMA Power & Volume Buttons Replacement

Step 2

– Give your iOpener a warm hug in the microwave for thirty seconds. It’s like a cozy spa day for your tool!

– As you tackle the repair, keep that iOpener nice and toasty. If it starts to cool down, just pop it back in the microwave for another thirty seconds. Easy peasy!

Tools Used
  1. iOpeneriPad 4 CDMA Power & Volume Buttons Replacement

Step 3

– Carefully take the iOpener out of the microwave, grabbing it by one of the flat ends to keep your fingers away from the hot middle part.

Tools Used
  1. iOpeneriPad 4 CDMA Power & Volume Buttons Replacement

Step 4

– Grab a pot or pan and fill it with enough water to fully dunk your iOpener.

– Turn the heat up and bring the water to a boil, then switch the burner off.

– Pop your iOpener into the hot water for 2-3 minutes, making sure it’s completely submerged.

– Use some tongs to fish out the steamy iOpener from the water.

– Dry it off thoroughly with a towel so it’s ready to go.

– Your iOpener’s all set! If it cools down and you need more heat, just boil the water again, turn off the heat, and soak the iOpener for another 2-3 minutes.

Tools Used
  1. iOpeneriPad 4 CDMA Power & Volume Buttons Replacement

Step 5

– Grab a SIM eject tool or a straightened paperclip and gently pop out the SIM tray. Easy does it!

Step 6

– Gently slide out the SIM tray from its slot and set it aside. Easy does it, we don’t want to make things harder than they need to be.

– If you’re swapping out the SIM card, just pop the old one out of its tray and slide the fresh one in. It’s like a little puzzle, but way easier!

Step 7

– Got a cracked display glass? To keep those shards from flying and keep your fingers safe, slap some clear tape over the glass before you dive in.

– Cover the entire iPad screen with overlapping strips of clear packing tape until it’s fully wrapped up.

– Follow the rest of the guide as best you can. Just a heads up: once the glass is cracked, it might keep fracturing as you work, so you may need to carefully use a metal pry tool to scoop out the broken pieces.

Step 8

– Place the iOpener gently on the right edge of your iPad, making sure it’s nice and flat for the best contact. We want that iOpener and iPad to be best buddies!

– Let it chill there for about 90 seconds before you dive in and try to pop open the front panel. Patience is key, my friend!

Tools Used
  1. iOpeneriPad 4 CDMA Power & Volume Buttons Replacement

Step 9

– You’ll notice a tiny gap in the adhesive ring at the upper right corner of the iPad, about 2.0 inches (~5 cm) from the top. That’s your sweet spot to start working.

– Line up your tool with the mute button and gently slip the tip of a plastic opening tool into the gap between the front glass and plastic bezel. Just get the very tip in there – enough to widen that little crack.

Step 10

– Make sure to position your tool just right—nestled between the plastic display bezel and the front panel glass. You’ve got this!

Step 11

– Keep the tip of the plastic opening tool snugly tucked between the front glass and plastic bezel, then gently slide a plastic opening pick into the gap right next to it. Keep it smooth and steady!

Step 12

– Take that plastic opening tool out of the iPad and slide the opening pick a little deeper under the front glass, about half an inch in. You’re doing great!

Step 13

– As you gently work to release the adhesive on the right side of your iPad, go ahead and reheat your iOpener. Place it on the bottom edge of the iPad to soften the adhesive there. Keep things steady and be patient—you’re almost there!

Tools Used
  1. iOpeneriPad 4 CDMA Power & Volume Buttons Replacement

Step 14

– While you’re gently warming up the bottom edge with the iOpener, start loosening the adhesive from the iPad’s right edge.

– Grab your trusty opening pick and slide it down along the edge of the iPad, peeling away the adhesive as you go.

Tools Used
  1. iOpeneriPad 4 CDMA Power & Volume Buttons Replacement

Step 15

– If your opening pick is feeling a bit stuck in the adhesive, just give it a playful roll along the side of the iPad to keep releasing that sticky stuff and get back on track!

Tools Used
  1. iOpeneriPad 4 CDMA Power & Volume Buttons Replacement

Step 16

– Before you get started, pop a second opening pick under the right edge of the front glass to keep that pesky adhesive from sticking again. Once that’s done, gently remove the first pick from the bottom corner of the iPad.

– Give your iOpener a quick reheat, and then place it at the top edge of the iPad. You’re on the right track!

Tools Used
  1. iOpeneriPad 4 CDMA Power & Volume Buttons Replacement

Step 17

– Alright, listen up! The next few steps are a bit tricky, so let’s take it slow and steady.

– You’ll need to gently peel away the adhesive that’s holding the antenna to the front panel. Just be super careful not to harm the fragile bits that connect the antenna to the bottom of the iPad. Stick to the steps below like glue!

Step 18

– Gently maneuver the opening pick around the bottom right corner of the iPad to free up the adhesive. You’ve got this!

Step 19

– Gently slide the tip of your opening pick along the bottom edge of the iPad to carefully loosen the adhesive holding down the Wi-Fi antenna.

Step 20

– After you pass the Wi-Fi antenna (about 3″ or 75 mm from the right edge, right by the home button), slide the opening pick all the way in.

– Gently slide the pick to the right to loosen the adhesive holding the Wi-Fi antenna to the front glass.

– The antenna is screwed and connected by a cable at the bottom of the iPad. This step carefully separates the antenna from the front panel so it stays safe when you remove the panel.

Step 21

– Keep working that adhesive loose along the bottom of your iPad! Gently pull the opening pick out enough to loop around the home button, then pop it back in, ensuring it goes in about 1/2 inch (10 mm) past the home button. You’ve got this!

Tools Used
  1. iOpeneriPad 4 CDMA Power & Volume Buttons Replacement

Step 22

– Keep on peeling that adhesive all along the bottom edge of your iPad like a pro!

– Once you’re in, leave that opening pick right where it is, snug under the front glass near the home button. You’re doing great!

Step 23

– Pop that iOpener into the microwave for a quick warm-up and then lay it on the left edge of the iPad. This will help get that adhesive nice and cozy in that spot.

Tools Used
  1. iOpeneriPad 4 CDMA Power & Volume Buttons Replacement

Step 24

– Gently glide that opening pick along the top edge of your iPad, giving it a little tug to navigate around the front-facing camera bracket.

– This adhesive is pretty sticky, so you might need to put in some elbow grease. Take your time and be cautious—no one wants to accidentally hurt themselves or their iPad!

– If your opening pick seems to be stuck in that adhesive, try ‘rolling’ the pick just like we showed in step 9.

Tools Used
  1. iOpeneriPad 4 CDMA Power & Volume Buttons Replacement

Step 25

– Keep peeling back the adhesive along the top edge of the iPad, and carefully slide your opening pick around the top left corner like a pro.

Tools Used
  1. iOpeneriPad 4 CDMA Power & Volume Buttons Replacement

Step 26

– Gently glide the opening pick along the left side of your iPad, peeling away that pesky adhesive as you go. This area is a bit more forgiving since the digitizer runs along the entire left edge. Just be careful not to dive too deep (keep it to about 1/2 inch or 10 mm max) to avoid any damage to the digitizer. You’re doing great!

Step 27

– With the trusty opening pick still nestled under the bottom edge of the iPad, gently free the sticky adhesive at the bottom left corner.

Step 28

– Grab one of the opening picks and gently wedge it under the bottom right corner of the iPad, then pinch it with your fingers and give it a careful lift.

Step 29

– Grab your iPad by the top and bottom right corners, and gently twist that front glass away from the device like you’re unveiling a surprise!

– When you’re putting everything back together, don’t forget to give that LCD a little love with a microfiber cloth and some compressed air to zap away any dust bunnies or fingerprints before sealing the glass back on.

Step 30

– Unscrew the four tiny 2 mm Phillips #00 screws that hold the LCD onto the aluminum frame—small screws, big job!

Step 31

– Grab your trusty plastic opening tool or a spudger and gently pry up the right edge of the LCD. It’s like giving your iPad a little lift!

– Now, take that LCD and swing it over on its left edge, letting it rest comfortably on top of the front glass panel. Easy peasy!

Tools Used
  1. SpudgeriPad 4 CDMA Power & Volume Buttons Replacement

Step 32

– Grab the tip of your trusty spudger and gently lift that sneaky piece of tape hiding the LCD ribbon cable connector. You’ve got this!

Tools Used
  1. SpudgeriPad 4 CDMA Power & Volume Buttons Replacement

Step 33

– Gently lift up the little flap holding the LCD ribbon cable in place on the ZIF connector.

– Carefully pull the LCD ribbon cable out of its slot on the logic board using your fingers or some tweezers.

– If the LCD screen doesn’t light up after reconnecting the cable, try a hard restart by holding down the power and home buttons together for about ten seconds until the Apple logo pops up.

Tools Used
  1. TweezersiPad 4 CDMA Power & Volume Buttons Replacement

Step 34

– Gently lift the LCD off the front panel, but be careful not to touch the front of the screen.

Step 35

Step 36

– Gently lift up the little flap holding down the home button ribbon cable ZIF connector. You got this!

Step 37

– Grab a trusty pair of tweezers and gently wiggle the home button ribbon cable until it pops right out of its cozy little socket on the logic board. You’ve got this!

Tools Used
  1. TweezersiPad 4 CDMA Power & Volume Buttons Replacement

Step 38

– Gently ease the home button ribbon cable out of its snug spot in the back case.

Step 39

– Carefully use the tip of your spudger to lift up the little piece of tape holding the digitizer ribbon cable to the logic board. Take it slow and steady!

Tools Used
  1. SpudgeriPad 4 CDMA Power & Volume Buttons Replacement

Step 40

– Gently lift the retaining flap on both of the ZIF connectors for the digitizer ribbon cable. Take your time – we want to make sure everything stays in place!

Step 41

– Grab that trusty spudger and use its flat end to gently pry up the adhesive hiding beneath the digitizer ribbon cable.

– Once it’s loosened up, carefully pull the digitizer ribbon cable straight out of its sockets on the logic board. You’re doing great!

Tools Used
  1. SpudgeriPad 4 CDMA Power & Volume Buttons Replacement

Step 42

– Gently lift the digitizer ribbon cable and use the flat end of a spudger to carefully loosen the adhesive holding the cable to the back aluminum case.

Tools Used
  1. SpudgeriPad 4 CDMA Power & Volume Buttons Replacement

Step 43

– Gently use your fingers to wiggle out the digitizer ribbon cable from its cozy spot in the aluminum frame.

– Carefully lift the front panel off the iPad, like revealing a hidden treasure!

Step 44

– Gently peel back that piece of electrical tape that’s hiding the headphone jack assembly cable connector. It’s like unveiling a surprise!

– Now, grab your trusty spudger and carefully flip up the retaining flap on both ZIF connectors that are holding the headphone jack cable to the logic board. You’re doing great!

Tools Used
  1. SpudgeriPad 4 CDMA Power & Volume Buttons Replacement

Step 45

– Gently slide the flat end of a spudger under the headphone jack assembly cable, freeing it from the sticky grip of the adhesive holding it to the rear aluminum frame.

– Carefully pull the headphone jack assembly cable straight out of its cozy socket on the logic board.

Tools Used
  1. SpudgeriPad 4 CDMA Power & Volume Buttons Replacement

Step 46

– Gently peel back and remove the tape that’s keeping the SIM board cable ZIF connector under wraps.

– Lift up the little retaining flap on the SIM board cable ZIF connector—careful, don’t break it!

– With the tip of your trusty spudger, carefully slide the SIM board cable straight out from its socket on the logic board.

Tools Used
  1. SpudgeriPad 4 CDMA Power & Volume Buttons Replacement

Step 47

– Unscrew those three 1.75 mm Phillips #00 screws that are holding the SIM board in place on the aluminum frame. You’re almost there!

Step 48

– Gently shift the headphone jack assembly cable to the side and take out the SIM board from the iPad. You’re doing great!

Step 49

– Gently peel back and take off the sticky tape covering the headphone jack assembly.

Step 50

– Carefully take out the lone 2.6 mm Phillips #0 screw that is keeping the camera cable snugly attached to the headphone jack assembly.

Step 51

– Grab the flat side of your spudger and gently nudge the front-facing camera out of its cozy little spot on the headphone jack assembly.

– Keep your spudger in hand, then slide it to the right to peel off the adhesive that’s holding the camera cable in place.

Tools Used
  1. SpudgeriPad 4 CDMA Power & Volume Buttons Replacement

Step 52

– Hey there! Grab your spudger and gently lift the retaining flap on that microphone cable ZIF connector. You’re doing great!

– Next up, slide the tip of your spudger under the microphone ribbon cable and pop it out of the ZIF connector like a pro!

– Now, give that spudger a little slide to the left to break free the adhesive that’s keeping the microphone ribbon cable stuck to the headphone jack assembly. Almost there!

Tools Used
  1. SpudgeriPad 4 CDMA Power & Volume Buttons Replacement

Step 53

– Grab the flat end of your trusty spudger and gently lift the antenna connector cable out of its cozy spot on the headphone jack assembly board. No rush, just give it a little nudge and it’ll pop right out.

Tools Used
  1. SpudgeriPad 4 CDMA Power & Volume Buttons Replacement

Step 54

– Gently lift the little flap holding the volume/power button ribbon cable connector onto the headphone jack assembly board.

– Carefully slide the volume button ribbon cable out of its ZIF connector.

Step 55

– Time to tackle those screws holding the headphone jack assembly! Let’s get to it:

– First up, you’ll need to remove five 2.6 mm Phillips #0 screws. They’re waiting for you!

– Next, grab your tools and take out two 2.2 mm Wide Head Phillips #00 screws. Almost there!

– Finally, finish strong by unscrewing two more 2.6 mm Phillips #00 screws. You’ve got this!

Step 56

– With a gentle grip on the ribbon cable of the headphone jack assembly, carefully pull the assembly straight out towards the bottom of the iPad, keeping it parallel to the device. Let’s make some progress!

Step 57

– Hold the headphone jack assembly firmly with both hands and gently pull it out from the iPad, keeping an eye on any cables that might want to hang on for the ride.

Step 58

– Let’s start by loosening the screws holding the power & volume button cable to the aluminum frame:

– Two 5.5 mm Phillips #0 screws

– One 2.6 mm Phillips #0 screw

– Two 2.6 mm Phillips #0 screws

Step 59

– Peel off the plastic piece that’s covering the volume buttons. It’s like unwrapping a little gift, but the gift is your phone’s functionality!

Step 60

– Take out the lone 2.6 mm Phillips #00 screw that’s keeping the volume button frame snug against the aluminum frame. You’ve got this!

Step 61

– Carefully slide the edge of a plastic opening tool under the sleep/wake sensor—watch out for that delicate cable!

– Gently work the plastic tool around the sensor to loosen the adhesive and free it up.

Step 62

– Carefully slide a spudger under the power and volume cables to gently loosen the sticky adhesive holding them in place.

Tools Used
  1. SpudgeriPad 4 CDMA Power & Volume Buttons Replacement

Step 63

– Grab the spudger and use the sharp tip (not the wide side) to carefully lift the adhesive under the volume button ribbon cable. It’s a delicate move, so take your time!

Tools Used
  1. SpudgeriPad 4 CDMA Power & Volume Buttons Replacement

Step 64

– Keep pushing the spudger’s tip toward the top of the iPad, and watch as the adhesive lets go like it’s ready for a break!

Tools Used
  1. SpudgeriPad 4 CDMA Power & Volume Buttons Replacement

Step 65

– Keep the spudger tip tucked under the ribbon cable and carefully pry the power button free from its aluminum frame socket.

Tools Used
  1. SpudgeriPad 4 CDMA Power & Volume Buttons Replacement

Step 66

– Grab the power & volume button cable with both hands, and gently wiggle those volume buttons and lock switch free from their cozy spots in the aluminum frame. They’re just a little shy, so be patient!

– Once you’ve freed them, lift that power & volume button cable right out of the rear aluminum case like a pro.

Step 67

– Slide the tip of your trusty plastic opening tool right under the top edge of the power button.

– Gently lift the top part of the power button away from its bracket—it’ll pop right off!

Step 68

– Don’t forget to give some love to the underside of the power button just like you did before.

– Now, gently lift and take off the power button bracket from the power & volume button assembly. You’ve got this!

Step 69

– Slide the tip of your plastic opening tool under the top edge of the rotation lock/mute switch with a gentle wedge.

– Gently slide the tool downward to pop the top side of the rotation lock/mute switch out of its bracket.

Step 70

– Slide the tip of your trusty plastic opening tool under the top volume rocker and gently pry it upwards to pop it free from the volume buttons bracket. Easy peasy!

– Now, just do the same for the bottom volume rocker, separating it from the bracket like a pro!

Step 71

– Gently lift up and detach that power & volume button ribbon cable like a pro!

Success!
To put your device back together, simply retrace your steps in reverse and check out our iPad 4 CDMA Front Panel Adhesive strips guide for a smooth front panel reattachment. If you hit any snags, remember, you can always schedule a repair for extra support!

🍪
Have a cookie! This site uses cookies to enhance your experience. Opt-Out Options.