Black Screen Blues: How to Troubleshoot Your iPad

Understanding the iPad Black Screen Problem

An iPad dead screen can strike without warning, leaving you with a black, unresponsive display. This common issue leaves users wondering if their device is broken or just experiencing a temporary glitch.

Quick troubleshooting for iPad dead screen:

  1. Force restart – Press volume up, volume down, then hold power button until Apple logo appears
  2. Check charging – Connect to power for 30+ minutes using original charger
  3. Test brightness – Ask Siri to increase brightness or check in Control Center
  4. Clean charging port – Remove debris with non-metal tool
  5. Recovery mode – Connect to computer and use iTunes/Finder if other steps fail

The good news is that most iPad dead screen issues are fixable. Whether it’s a software glitch, a drained battery, or hardware damage, you can take steps to diagnose it before heading to a repair shop.

Simple problems include low brightness or a battery so depleted it can’t show the charging icon. Deeper issues involve corrupted firmware or a failed backlight requiring professional help.

I’m Ralph Harris from Salvation Repair. With over 20 years of experience, I’ve seen countless iPad dead screen cases. Most follow predictable patterns, meaning you can often diagnose and fix the problem yourself.

Infographic showing the top 5 common causes of iPad dead screen: depleted battery showing 0% charge, software crash with error symbols, hardware damage with cracked screen icon, faulty app with warning triangle, and brightness settings with dimmed screen symbol - iPad dead screen infographic

First-Aid Fixes: Simple Steps to Try Immediately

When your iPad dead screen strikes, don’t panic. These first-aid fixes tackle the most common culprits without affecting your data. These basic steps solve about 70% of the cases we see.

Basic Checks and Resets

The Force Restart – Your Best Friend

A force restart clears software hiccups that might be causing your screen to stay black. The process varies by model.

  • For newer iPads without a Home button: Press and release Volume Up, press and release Volume Down, then press and hold the top Power button until the Apple logo appears. Keep holding past the “slide to power off” message.

  • For older iPads with a Home button: Press and hold both the Home button and the top Power button simultaneously for up to 30 seconds until the Apple logo appears.

If your iPad restarts, you’ve likely solved a temporary software glitch.

iPad with and without Home button - iPad dead screen

Give Your iPad Some Juice

A completely drained battery may not even show the charging symbol. Use your original Apple charger or an MFi-certified cable and plug your iPad into a working wall outlet. Wait at least 30-60 minutes. If your iPad has been in extreme temperatures, let it return to room temperature before charging.

The Brightness Trick

Your iPad might be on, but with the screen brightness turned all the way down. If “Hey Siri” is enabled, say “Hey Siri, turn up the brightness.” Alternatively, try swiping to open the Control Center and adjust the brightness slider manually.

Clean Out That Charging Port

Pocket lint and debris can prevent your iPad from charging. Power off the device and inspect the port with a flashlight. Carefully remove any buildup with a non-metal tool like a wooden toothpick or plastic dental pick.

An Unconventional but Reported Fix

The Gentle Tap Method

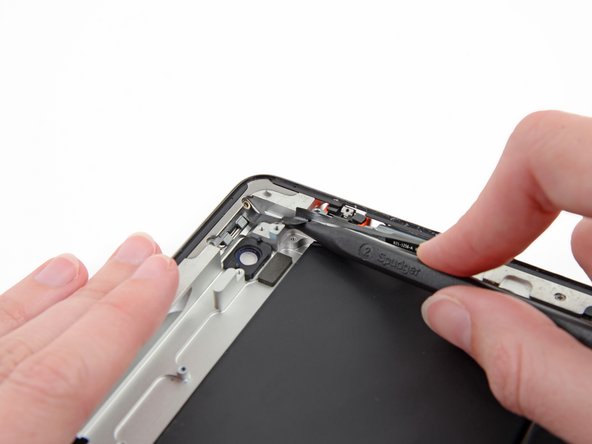
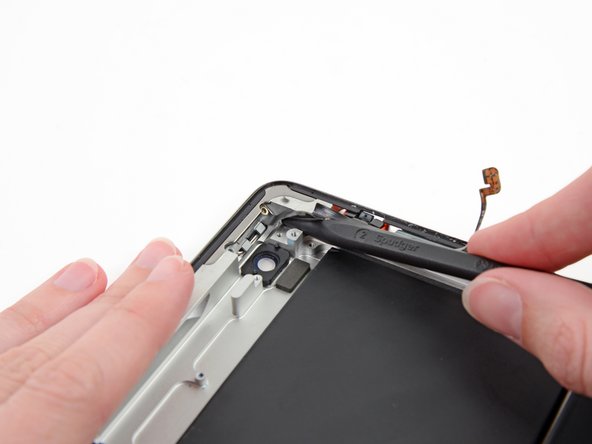
This quirky fix, the iPad “burp,” may help realign loose internal cables. While not an official fix, it’s generally harmless if done gently. Power off your iPad and wrap it in a soft microfiber towel. Gently but firmly pat the back of the iPad for about a minute, focusing on the center and edges. This vibration can sometimes reseat a loose connection. Afterward, try powering it on or performing another force restart.

Diving Deeper: Software vs. Hardware Issues

If your iPad dead screen persists, you need to determine if it’s a software or hardware issue. This distinction is key: software problems are often fixable at home, while hardware issues usually require professional help from a service like Salvation Repair.

Signs of a Software Problem

Software issues occur when the operating system glitches, while the physical components are fine. Here are the signs:

  • The iPad gets stuck on the Apple logo or a spinning wheel during startup.
  • The screen went black immediately after an iPadOS update attempt.
  • The issue appeared right after opening a specific app, suggesting an app crash.
  • A force restart works temporarily, but the black screen problem returns.
  • You can hear sounds or notifications, but the screen remains black, indicating a disconnect between the OS and the display.

For more guidance, Apple provides official instructions: If your iPad won’t turn on or is frozen.

Signs of a Hardware Problem

Hardware problems are physical issues with the iPad’s components. Identifying them helps you know when to seek professional repair.

  • Physical trauma is a clear indicator. If the iPad was dropped or exposed to water before the screen went black, it’s likely hardware damage.
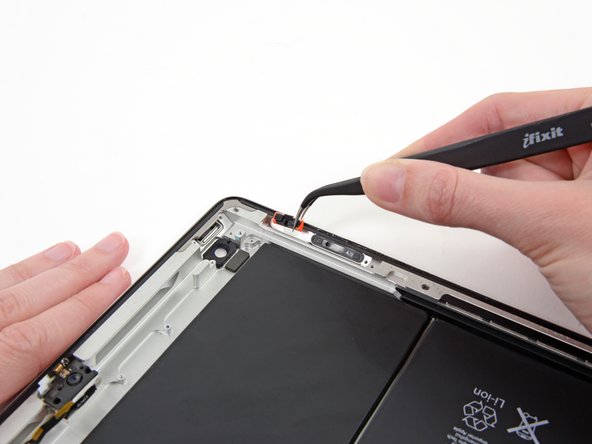
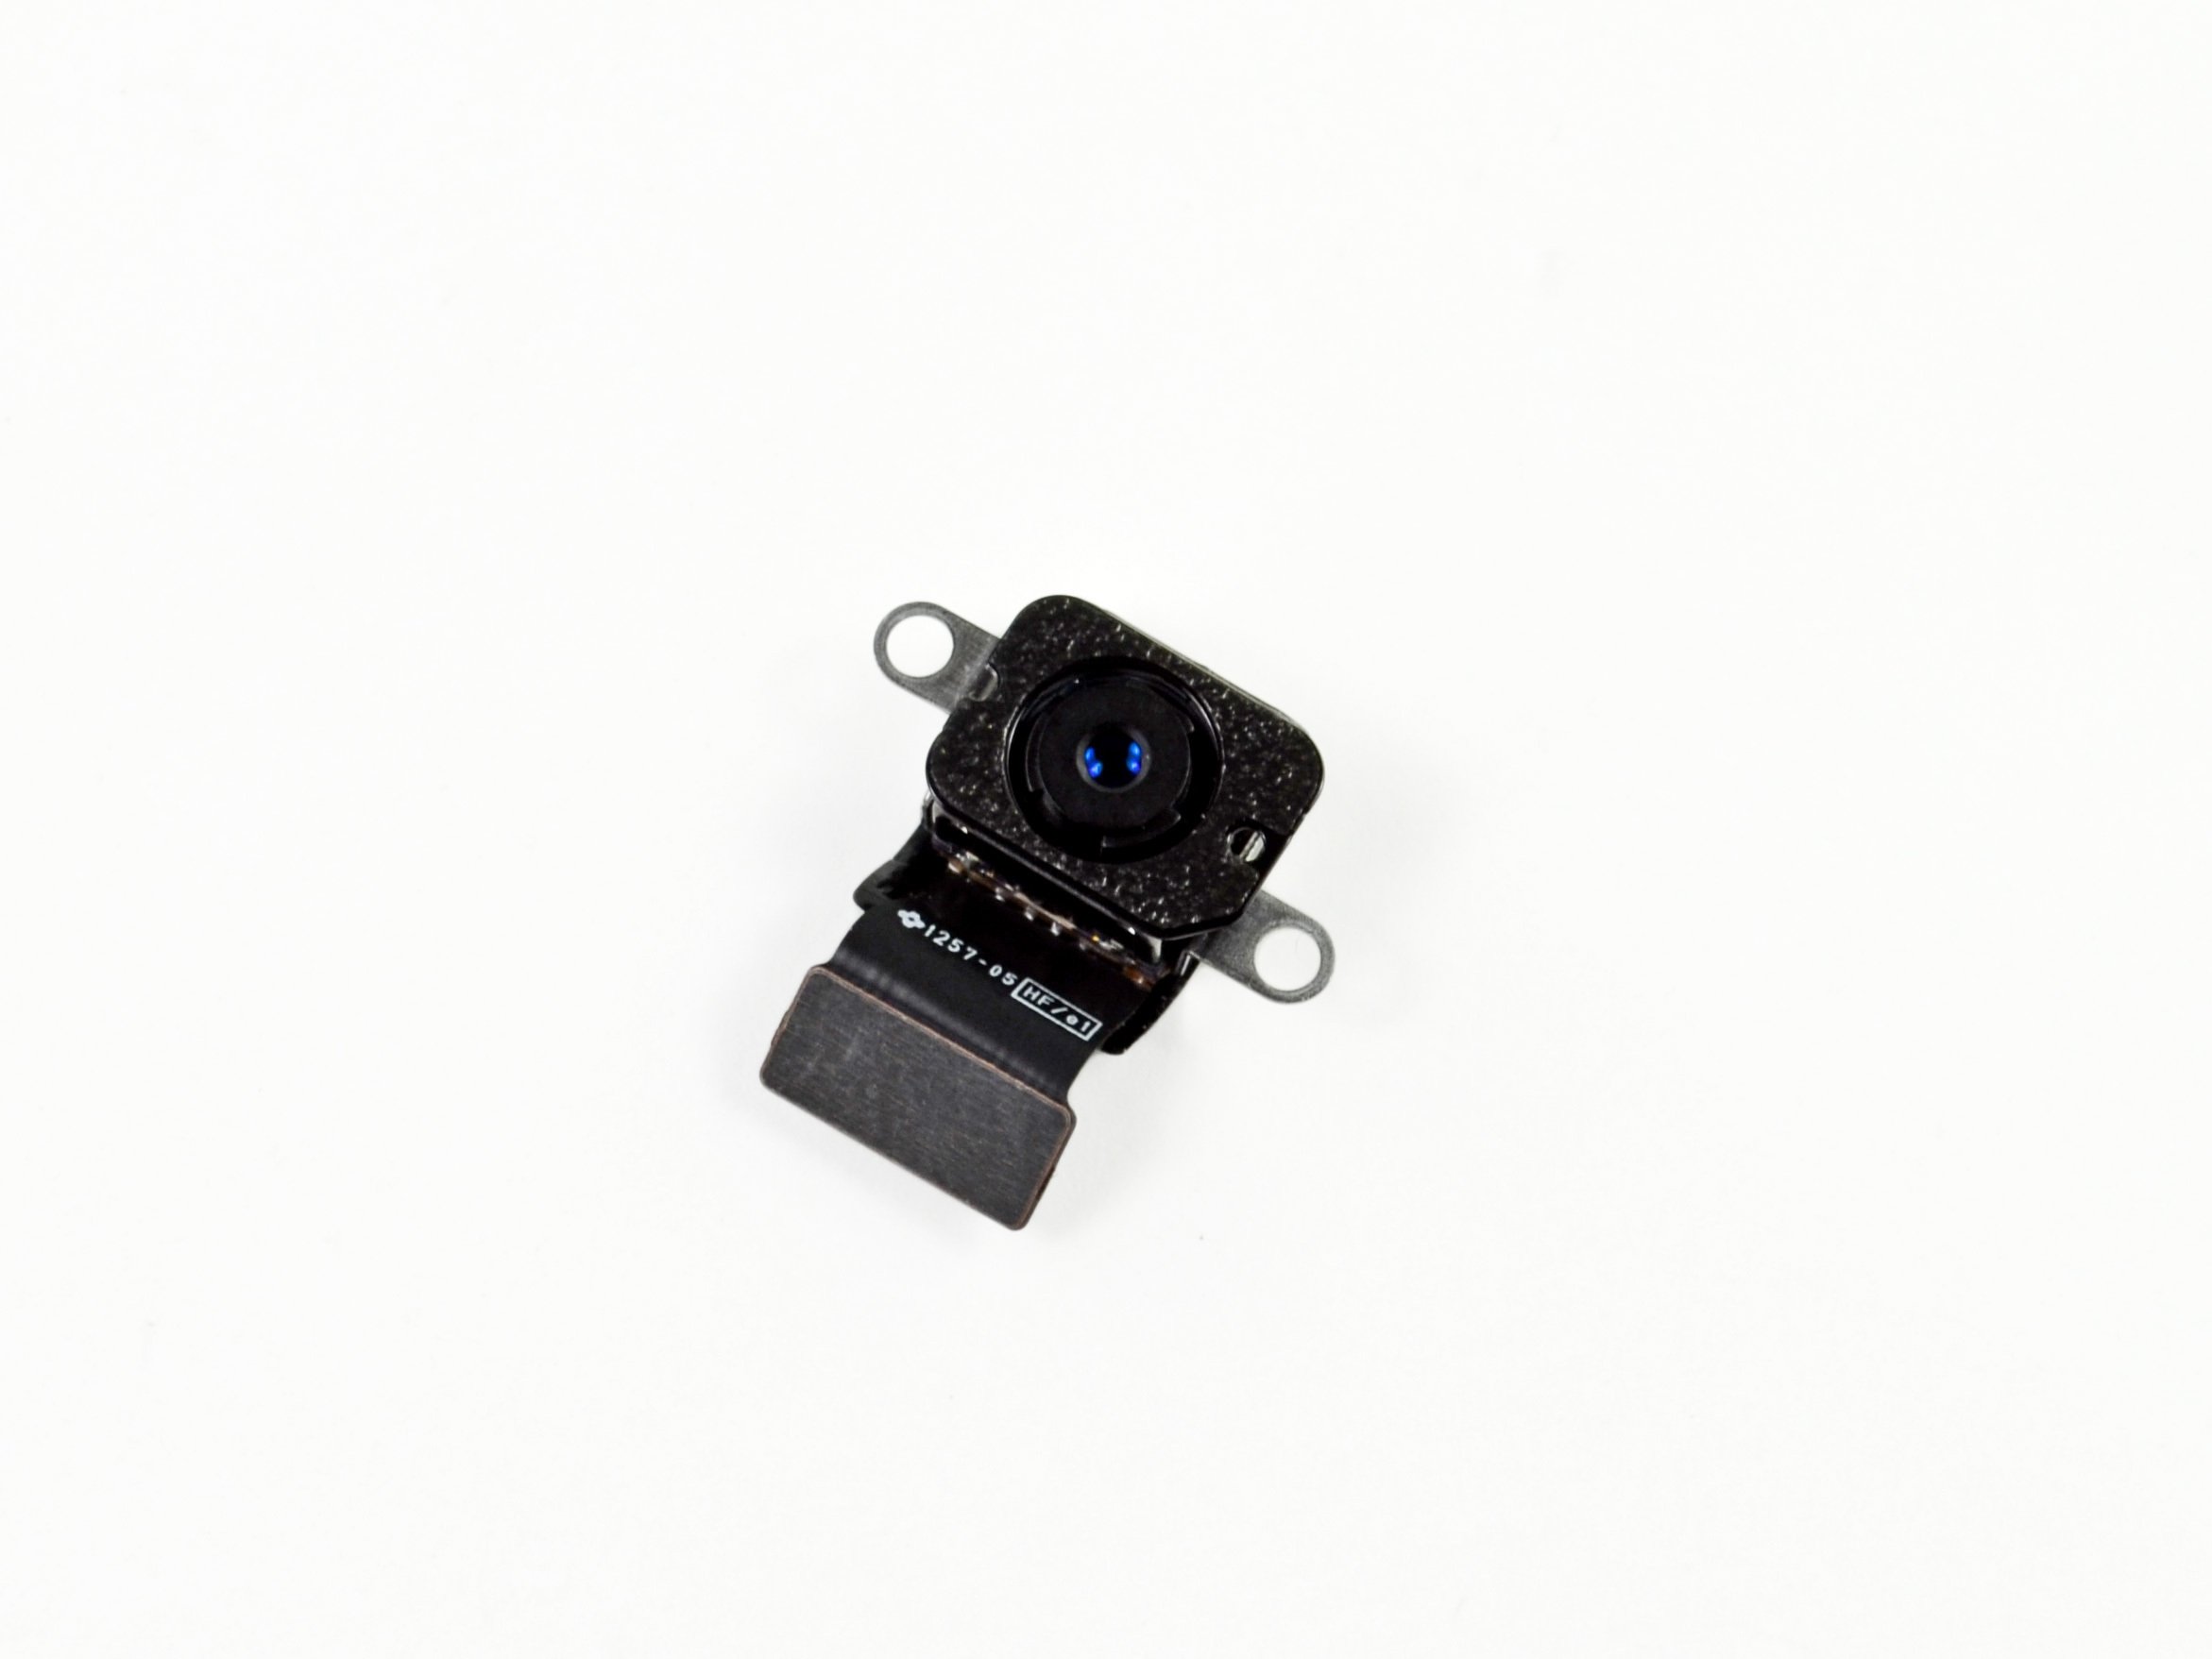
  • Failed backlight: Use the flashlight test. In a dark room, shine a bright flashlight on the screen. If you can see faint images or icons, the LCD is working, but its backlight has failed. This requires professional repair.

User shining flashlight on iPad screen - iPad dead screen

  • Your computer recognizes the iPad when plugged in, but the screen stays black. This points to a display-specific hardware problem, though your data is likely safe.
  • Complete unresponsiveness after trying all charging and restart methods suggests a serious hardware failure, like a dead battery or logic board issue.
  • Age can be a factor, as older iPads are more prone to hardware failure from wear and tear.

If you see these signs, it’s best to stop DIY fixes and seek expert help.

Advanced Solutions for an iPad Dead Screen

If simple fixes fail and you suspect a software issue, it’s time for advanced solutions. This involves connecting your iPad to a computer to refresh its software. Warning: Some of these steps can erase your data. Back up your files first if possible.

Using a Computer to Update or Restore

Your Mac (using Finder) or PC (using iTunes) can communicate with your iPad even when it won’t boot properly, allowing you to bypass the startup processes causing the problem.

Getting Into Recovery Mode

Recovery Mode is an emergency channel for your iPad to communicate with a computer. Connect your iPad via USB, then perform a force restart, but don’t let go of the buttons when the Apple logo appears. Keep holding until you see a screen showing a computer and a cable.

The Big Decision: Update or Restore?

In Recovery Mode, your computer will offer two options. Update attempts to reinstall iPadOS without erasing your data. Restore completely wipes your iPad and installs a fresh copy of the software, deleting all your data.

Action What Happens to Your Data When to Use It Risk Level
Update Everything stays First attempt, minor software issues Low
Restore Everything gets erased When Update fails or severe corruption High

Always try Update first. If it works, your problem is solved without data loss. If your iPad exits Recovery Mode during the process, simply repeat the steps to re-enter it.

When Everything Else Fails: DFU Mode

If Recovery Mode fails, Device Firmware Update (DFU) Mode is the deepest possible reset. It will erase everything on your iPad but can fix severe software corruption that other methods can’t.

The button sequence for DFU mode is tricky, and the screen will remain black throughout the process—that’s how you know it’s working. For iPads without a Home button, press Volume Up, then Volume Down, then hold the Power button until the screen is black. Then, hold both Power and Volume Down for five seconds. Release Power but keep holding Volume Down for another ten seconds. Your computer should then detect the iPad.

When to Consider a Full System Restore

A full system restore (using the “Restore” option) is necessary when the iPad is stuck in a boot loop, on the Apple logo, or when the “Update” option fails. It’s the last DIY step before seeking professional help.

The Backup Reminder

Before you restore, check if your computer can still recognize the iPad. If so, you may be able to perform a backup even with a black screen, saving your precious data.

iPad Connect to Computer screen - iPad dead screen

If even a full restore doesn’t fix the screen, you’re almost certainly dealing with a hardware problem that needs expert attention from a service like Salvation Repair.

When DIY Fails: Seeking Professional Help

If your troubleshooting efforts fail, it’s time to let the professionals step in. Pushing a device with a hardware problem can sometimes make the repair more complex. At Salvation Repair, we’re here to help when the DIY route hits a dead end.

Knowing When to Stop

Knowing when to stop troubleshooting is a skill. It’s time to seek professional help if you encounter:

  • Physical damage: If your iPad was dropped, has a visible crack, or was exposed to water, a software fix is unlikely to work.
  • Failed restore attempts: If you’ve tried Recovery and DFU Mode restores without success, it’s almost certainly a hardware issue.
  • Recurring problems: If the iPad dead screen keeps coming back after a temporary fix, there’s likely an intermittent hardware fault.
  • Device age: Older iPads are more prone to hardware failure from normal wear and tear.

In these situations, it’s time to let the pros take over.

What to Expect from a Repair Service

When you bring your iPad dead screen to us at Salvation Repair in Laurel, Jackson, Oxford, or elsewhere in Mississippi, here’s what you can expect:

  • Expert Diagnostics: We use specialized equipment to quickly and accurately pinpoint the cause of the black screen, whether it’s the display, battery, or logic board.
  • Transparent Repair Quote: You’ll receive clear, upfront pricing before any work begins. We also offer price matching.
  • Component-Level Repair: We focus on fixing the specific faulty part, such as a screen or battery, rather than suggesting a costly full replacement.
  • Same-Day Service: We know you need your iPad back fast and offer same-day service for many common issues.
  • Lifetime Warranty: We stand behind our work. If you ever have issues related to our repair, we’ll make it right.

Don’t let a black screen keep you disconnected. We’re here to get your device back up and running.

Frequently Asked Questions about the iPad Dead Screen

Here are answers to the most common questions we get about the iPad dead screen.

Why is my iPad screen black but I can still hear sounds?

This is great news in disguise. Hearing sounds means your iPad is on, but it has a display issue, most likely a backlight failure. The screen has two parts: the LCD that creates the image and the backlight that illuminates it. When the backlight fails, the image is still there but invisible.

You can test this in a dark room by shining a bright flashlight at the screen. If you can see faint icons or text, the backlight has failed. This is a hardware issue that requires professional repair, but your data is safe.

Can an iPadOS update cause a black screen?

Yes. A failed or corrupted iPadOS update can prevent your iPad from starting up correctly, resulting in a black screen or getting stuck on the Apple logo. The hardware is likely fine, but the operating system’s instructions are scrambled.

The fix usually involves putting your iPad into Recovery Mode and connecting it to a computer. As detailed in the “Advanced Solutions” section, you can often use the “Update” option to fix the issue without losing your data.

Will I lose my data if I fix the black screen?

It depends on the fix. Simple solutions like a force restart, charging, or cleaning the port are completely safe for your data.

Using Recovery Mode’s “Update” option also preserves your data. However, using the “Restore” option or DFU Mode will erase everything on your iPad. This is why regular backups to iCloud or a computer are so important.

Pro tip: If your computer recognizes your iPad even with a black screen, try backing it up immediately before attempting a restore. If you’re unsure, bring your iPad to us at Salvation Repair. We can diagnose the problem and advise you on the safest options for your data.

Conclusion

Dealing with an iPad dead screen is frustrating, but most cases are fixable. From a simple force restart or a full charge to more advanced software fixes using Recovery Mode, there is a logical path to follow.

The key is to work through the troubleshooting steps methodically and know when to stop. If you’ve tried our guide and the screen is still black, or if you know there’s been physical damage or a backlight failure, it’s time to call in the cavalry.

That’s where we come in at Salvation Repair. We’ve seen every type of iPad dead screen and know how to bring these devices back to life. Our same-day service gets you reconnected quickly, and our lifetime warranty ensures your repair will last.

Don’t let a black screen turn your iPad into a paperweight. We’re here to help.

Get professional help with your tablet repair

iPad 4 CDMA Battery Replacement

Duration: 45 minutes
Steps: 59 Steps

Get ready to give your device a boost! This guide will walk you through the steps to swap out that old battery and bring your gadget back to life. Let’s turn things around together!

Step 1

– Pop that iOpener right in the middle of the microwave!

Tools Used
  1. iOpeneriPad 4 CDMA Battery Replacement

Step 2

– Give your iOpener a quick spin in the microwave for thirty seconds to get it nice and toasty.

– As you work through the repair, keep an eye on the iOpener. When it starts to cool down, pop it back in the microwave for another thirty seconds to keep the heat flowing!

Tools Used
  1. iOpeneriPad 4 CDMA Battery Replacement

Step 3

– Carefully remove the iOpener from the microwave by grabbing one of the flat ends, steering clear of the hot center—trust us, it’s a lot warmer than it looks!

Tools Used
  1. iOpeneriPad 4 CDMA Battery Replacement

Step 4

– Grab a pot or a pan and fill it up with enough water to completely soak that iOpener.

– Crank up the heat until the water is boiling, then go ahead and turn it off.

– Carefully drop the iOpener into the hot water for about 2-3 minutes. Just make sure it’s fully submerged, okay?

– Use some tongs to fish out the warm iOpener from its steamy bath.

– Give the iOpener a good pat down with a towel until it’s nice and dry.

– And voilà! Your iOpener is all set to help you out! Need to heat it up again? Just repeat the water boiling dance for another 2-3 minutes.

Tools Used
  1. iOpeneriPad 4 CDMA Battery Replacement

Step 5

– Grab a SIM eject tool or an unfolded paperclip and give that SIM tray a gentle push. It’ll pop right out, no sweat!

Step 6

– Gently slide the SIM tray out of its cozy little spot and set it aside, ready for the next step.

– If you’re swapping out the SIM card, simply pop the old one out of its tray and slide in the shiny new card. You’re almost there!

Step 7

– If your display glass is cracked, make sure to keep things from getting worse and avoid any injury while working on it by covering the glass with some tape.

– Stick overlapping strips of clear packing tape over the screen of your iPad until it’s fully covered. This will help keep everything in one piece.

– Do your best to follow the rest of the guide as you go. But keep in mind, once the glass cracks, it’s probably going to keep breaking, so you may need to grab a metal prying tool to scoop out the glass.

Step 8

– Place the iOpener flat along the right edge of the iPad, pressing it down so it makes solid contact with the surface.

– Let it hang out there for about 90 seconds to warm things up before you try to pop open the front panel.

Tools Used
  1. iOpeneriPad 4 CDMA Battery Replacement

Step 9

– Spot the little gap in the iPad’s adhesive ring up in the upper right corner, about 2.0 inches (~5 cm) down from the top. This is your secret entrance.

– Line up your tool with the mute button. Gently slip the tip of a plastic opening tool into the crack between the front glass and plastic bezel. Just nudge it in enough to start prying that gap open.

Step 10

– Ensure you tuck that tool right where it needs to be—snugly between the plastic display bezel and the front panel glass.

Step 11

– Place the tip of your plastic opening tool between the front glass and plastic bezel. Then, gently slide a plastic opening pick into the gap right next to the tool. It’s like finding a hidden treasure—just a little patience and the right angle!

Step 12

– Gently pull out the plastic opening tool from the iPad, then slide the opening pick a bit deeper under the front glass—aim for about half an inch.

Step 13

– As you carefully loosen the adhesive on the right side of the iPad, pop that iOpener back in the microwave to warm it up again, then place it along the bottom edge to keep things nice and toasty.

Tools Used
  1. iOpeneriPad 4 CDMA Battery Replacement

Step 14

– As the iOpener warms up the bottom edge, start loosening the adhesive along the right edge of the iPad.

– Gently slide the opening pick down the iPad’s edge, carefully freeing the adhesive as you move.

Tools Used
  1. iOpeneriPad 4 CDMA Battery Replacement

Step 15

– If your opening pick gets a little stuck in the adhesive, gently roll it along the edge of the iPad to keep loosening the glue without stressing the device.

Tools Used
  1. iOpeneriPad 4 CDMA Battery Replacement

Step 16

– Alright, before you whip out that first opening pick from the bottom corner of your iPad, slide in a second pick under the right edge of the front glass. This will help keep that pesky adhesive from sticking again.

– Next up, give that iOpener a little heat love and place it at the top edge of the iPad. Let’s keep things warm and cozy!

Tools Used
  1. iOpeneriPad 4 CDMA Battery Replacement

Step 17

– Alright, things are about to get a bit tricky, so take it slow here.

– You’re going to need to carefully release the adhesive that’s holding the antenna to the front panel. Watch out for those delicate parts connecting the antenna to the bottom of the iPad—don’t want to damage anything! Stick to the steps closely, and you’ll be good to go.

Step 18

– Gently glide the opening pick around the bottom right corner of the iPad to free up that sticky adhesive. You’ve got this!

Step 19

– Gently slide the opening pick along the bottom edge of your iPad to loosen the adhesive near the Wi-Fi antenna—nice and easy does it!

Step 20

– After you’ve passed the Wi-Fi antenna area (about 3″ or 75 mm in from the right edge, right next to the home button), slide your opening pick all the way back in.

– Gently slide the pick to the right to break the adhesive holding the Wi-Fi antenna to the front glass.

– Remember, the antenna is screwed and connected by a cable at the bottom of the iPad. This step frees the antenna from the front panel so you can remove the panel without causing any damage.

Step 21

– Keep on gently peeling back the adhesive at the bottom of your iPad. As you do, slide that opening pick around the home button and give it a little extra push in there—about half an inch (10 mm) should do the trick once you’re past the home button. You’ve got this!

Tools Used
  1. iOpeneriPad 4 CDMA Battery Replacement

Step 22

– Keep gently peeling the adhesive all the way along the bottom edge of the iPad. Take your time—no rush!

– Once you’ve got the adhesive free, leave the opening pick snugly under the front glass near the home button. This keeps things steady while you work.

Step 23

– Pop the iOpener into the microwave for a quick warm-up. Once it’s ready, place it on the left side of your iPad to heat up the adhesive in that area. This will get things nice and toasty, making it easier to work with. Don’t rush, let the heat work its magic!

Tools Used
  1. iOpeneriPad 4 CDMA Battery Replacement

Step 24

– Gently glide the opening pick along the top edge of your iPad, giving it a little tug to navigate around the front-facing camera bracket.

– The adhesive in this area is pretty sturdy, so don’t be shy about applying some muscle. Just take your time and be cautious to avoid any slips that might harm you or your iPad.

– If the opening pick seems to be sticking to the adhesive, try ‘rolling’ the pick as demonstrated in step 9.

Tools Used
  1. iOpeneriPad 4 CDMA Battery Replacement

Step 25

– Keep peeling back the adhesive along the top edge of the iPad, and carefully slide your opening pick around the top left corner like a pro.

Tools Used
  1. iOpeneriPad 4 CDMA Battery Replacement

Step 26

– Gently slide the opening pick along the left edge of your iPad, letting it work its magic on that adhesive. It’s pretty thin along the left side thanks to the digitizer, so keep it light and breezy! Just remember, no need to go deeper than 1/2 inch (10 mm) to keep that digitizer safe and sound. You’ve got this!

Step 27

– With your trusty opening pick still tucked under the bottom edge of your iPad, give a gentle nudge to loosen the adhesive in the bottom left corner. You’re doing great!

Step 28

– Take an opening pick and carefully lift the bottom right corner of the iPad. Once it’s up, grab it gently with your fingers. You’ve got this!

Step 29

– Grab your iPad by the top and bottom right corners and gently twist the front glass away from the device. Think of it as a little dance move!

– When you’re putting everything back together, don’t forget to use a microfiber cloth and some compressed air to wipe away any pesky dust or fingerprints from the LCD before you lay the glass back on. Your screen deserves a clean start!

Step 30

– Unscrew the four tiny 2 mm Phillips #00 screws holding the LCD onto the aluminum frame—think of it as gently freeing the screen from its cozy metal hug.

Step 31

– Grab a plastic opening tool or spudger and gently pry up the right edge of the iPad’s LCD.

– Swing the LCD up around its left edge and rest it carefully on top of the front glass panel.

Tools Used
  1. SpudgeriPad 4 CDMA Battery Replacement

Step 32

– Grab your trusty spudger and gently lift up the tape that’s covering the LCD ribbon cable connector. Go slow and steady – you’ll be done in no time!

Tools Used
  1. SpudgeriPad 4 CDMA Battery Replacement

Step 33

– Gently lift the little flap on the LCD ribbon cable ZIF connector—think of it like opening a tiny secret door.

– Carefully slide the LCD ribbon cable out of its socket on the logic board using your fingers or a pair of tweezers. Take it slow and steady!

– If the screen doesn’t light up after reconnecting the LCD ribbon cable, do a force restart by holding down the power button and home button for at least ten seconds until the Apple logo appears.

Tools Used
  1. TweezersiPad 4 CDMA Battery Replacement

Step 34

– Gently lift the LCD off the front panel, but be sure not to touch the front of it. Keep it cool and steady, just like a pro.

Step 35

Step 36

– Gently lift the retaining flap on the home button ribbon cable ZIF connector.

Step 37

– Grab your trusty tweezers and gently pull the home button ribbon cable straight out from its socket on the logic board. Easy does it!

Tools Used
  1. TweezersiPad 4 CDMA Battery Replacement

Step 38

– Gently pop the home button ribbon cable out of its snug little nook in the rear case.

Step 39

– Gently use the tip of your spudger to lift and peel back the tape that’s holding the digitizer ribbon cable onto the logic board. Take it slow and steady!

Tools Used
  1. SpudgeriPad 4 CDMA Battery Replacement

Step 40

– Gently lift the little flap on both digitizer ribbon cable ZIF connectors to free them up.

Step 41

– Gently wedge the flat end of your spudger under the digitizer ribbon cable to break up the sticky adhesive holding it down.

– Carefully pull the digitizer ribbon cable straight out from its connectors on the logic board—steady hands win the race!

Tools Used
  1. SpudgeriPad 4 CDMA Battery Replacement

Step 42

– Gently lift the digitizer ribbon cable, then use the flat end of your spudger to carefully loosen the glue holding the cable to the back aluminum case.

Tools Used
  1. SpudgeriPad 4 CDMA Battery Replacement

Step 43

– With a gentle touch, coax the digitizer ribbon cable out of its snug home in the aluminum frame using your fingers.

– Carefully lift off the front panel from the iPad and set it aside.

Step 44

– Carefully peel back the electrical tape that’s cozying up to the headphone jack assembly cable connector and set it aside.

– Grab your spudger and gently flip up the retaining flaps on both ZIF connectors that are holding the headphone jack cable in place on the logic board.

Tools Used
  1. SpudgeriPad 4 CDMA Battery Replacement

Step 45

– Gently slide the flat end of a spudger under the headphone jack assembly cable to release the sticky stuff holding it to the back frame. Easy does it!

– Now, pull that headphone jack assembly cable straight out of its cozy socket on the logic board. It should come out with a little bit of finesse, no need to force it.

Tools Used
  1. SpudgeriPad 4 CDMA Battery Replacement

Step 46

– Gently peel back and remove the tape that’s keeping the SIM board cable ZIF connector under wraps.

– Flip up the little retaining flap on the SIM board cable ZIF connector to unlock it.

– Carefully use the tip of a spudger to pull the SIM board cable straight out from its socket on the logic board.

Tools Used
  1. SpudgeriPad 4 CDMA Battery Replacement

Step 47

– Alright, let’s get those connectors off the logic board. Here’s what you need to do:

– 1. Gently detach the Wi-Fi antenna cable from its socket.

– 2. Unplug the speaker connector cable with care.

– 3. Finally, disconnect the Dock/Lightning connector cable.

Tools Used
  1. TweezersiPad 4 CDMA Battery Replacement

Step 48

– Time to unscrew seven screws holding the logic board to the rear aluminum panel—let’s get these babies out!

– Six 2.1mm Phillips #00 screws

– One 2.5mm Phillips #00 screw

Step 49

– Grip the logic board by the edge closest to the dock connector, then gently slide it down towards the bottom of the iPad.

Step 50

– Gently flip the logic board over, keeping an eye out for any cables that might get tangled up.

– With the spudger’s tip, carefully detach the three antenna connectors from their cozy spots on the logic board.

Tools Used
  1. SpudgeriPad 4 CDMA Battery Replacement

Step 51

– The battery is securely glued to the aluminum frame with a generous amount of strong adhesive. It’s definitely not going anywhere, so you’ll need to apply a bit of force to separate them.

Step 52

– Gently slide the flat end of your trusty metal spudger under the battery, just near the bottom of your iPad.

– Keep that spudger gliding for about 1.5 inches to loosen up the adhesive. You’re doing great!

Tools Used
  1. SpudgeriPad 4 CDMA Battery Replacement
  2. Metal SpudgeriPad 4 CDMA Battery Replacement

Step 53

– Just like we did earlier, gently slide the spudger about 2 inches under those pesky adhesive strips. You’ve got this!

Tools Used
  1. SpudgeriPad 4 CDMA Battery Replacement

Step 54

– Gently wiggle the metal spudger under the battery connector to pop it free from the sticky adhesive holding it down.

Tools Used
  1. SpudgeriPad 4 CDMA Battery Replacement
  2. Metal SpudgeriPad 4 CDMA Battery Replacement

Step 55

– Keep gently peeling back the adhesive near the top of the battery. Almost there!

Step 56

– Pick up where you left off and slide the metal spudger another couple of inches under the battery.

– Keep at it and repeat this move for the rest of the adhesive strips.

Tools Used
  1. SpudgeriPad 4 CDMA Battery Replacement
  2. Metal SpudgeriPad 4 CDMA Battery Replacement

Step 57

– Just like you did before, keep working that adhesive loose on all the strips until you reach about 4 inches deep. You’ve got this!

Step 58

– For the final stretch, glide that metal spudger all the way over to the right edge of the iPad like you mean it!

– Keep up the momentum and tackle all those adhesive strips with the same enthusiasm!

Tools Used
  1. SpudgeriPad 4 CDMA Battery Replacement
  2. Metal SpudgeriPad 4 CDMA Battery Replacement

Step 59

– To put your device back together, simply follow these steps in reverse order and use our iPad 4 CDMA Front Panel Adhesive strips guide to stick the front panel back on. If you hit a snag, you can always schedule a repair with us!

Tools Used
  1. SpudgeriPad 4 CDMA Battery Replacement
  2. Metal SpudgeriPad 4 CDMA Battery Replacement

Success!
To put your device back together, just follow these steps in reverse order and use our iPad 4 CDMA Front Panel Adhesive strips guide to get that front panel stuck back on like a pro.

iPad 4 CDMA Adhesive Strips Replacement (New Panel)

Duration: 45 minutes
Steps: 12 Steps

This guide will help you install adhesive strips on your shiny new front panel. Just a heads up, these steps are for fresh, never-been-used front panel assemblies only. Ready to make your phone look good as new? Let’s do it!

Step 1

– Gently peel away the first trapezoidal adhesive strip using your trusty tweezers. Take your time, this part’s a breeze!

– Now, grab that adhesive strip and carefully align it with the home button mounting bracket. Make sure it’s in the right spot—this is where the magic happens!

– For the second trapezoidal adhesive strip, just repeat the process. Precision is key, but you’ve got this!

Tools Used
  1. TweezersiPad 4 CDMA Adhesive Strips Replacement (New Panel)

Step 2

– Grab a pair of tweezers and gently pinch the corner of one of the adhesive strips on the mounting bracket.

– Peel back the clear protective layer from the adhesive strip to reveal the black sticky side.

– Do the same for the second adhesive strip and you’re all set!

Tools Used
  1. TweezersiPad 4 CDMA Adhesive Strips Replacement (New Panel)

Step 3

– Carefully position the home button mounting bracket right over the home button, making sure it’s aligned just right.

Step 4

– Alright, now it’s time to add the rest of the adhesive to the front panel. Let’s get it sticking!

– Hold off on peeling off the clear backing from those strips for now. We’re not quite there yet.

– Take the bridge-shaped adhesive strip and carefully place it between the top edge of the inner frame and the camera mounting bracket. Make sure it’s in place, nice and snug.

– Gently press the strip down from the center outward. Just be sure to avoid trapping any pesky air bubbles between the strip and the front panel – smooth it out like a pro.

Step 5

– Stick the long, C-shaped adhesive strip along the right edge of the front panel—easy does it!

Step 6

– Take the straight, medium-length adhesive strip and carefully stick it on the bottom right side of the front panel, just beneath the home button ribbon cable.

Step 7

– Stick the tabbed adhesive strip on the bottom right corner of the front panel. Nice and snug, just like putting on a seatbelt—secure and ready to roll!

Step 8

– Stick that long L-shaped adhesive strip snugly onto the bottom left corner of the front panel.

Step 9

– Stick that short, rectangular adhesive strip right on the top left corner of the front panel. Easy does it!

Step 10

– Stick the final, short L-shaped adhesive strip on the top left corner of the front panel.

Step 11

– Grab your tweezers and carefully lift the clear backing off the adhesive strip right under the home button ribbon cable.

– Gently place the home button ribbon cable onto the adhesive strip and smooth it out starting from the center, pushing outward. Take your time to avoid trapping any pesky air bubbles between the strip and the front panel.

Tools Used
  1. TweezersiPad 4 CDMA Adhesive Strips Replacement (New Panel)

Step 12

– To put your device back together, just retrace your steps like a pro! You’ve got this!

Tools Used
  1. TweezersiPad 4 CDMA Adhesive Strips Replacement (New Panel)

Success!

iPad 4 CDMA Adhesive Strips Replacement (Existing Panel)

Duration: 45 minutes
Steps: 15 Steps

Got your hands on an iPad 4? Time to put those adhesive strips to work and seal it back up after your repair. Remember, this is only for iPads with the original front panel still hanging on. Need a hand? If things get tricky, don’t hesitate to schedule a repair!

Step 1

– Unscrew the two 2.1 mm Phillips #00 screws holding the home button control board onto its mounting bracket—steady hands, you got this!

Step 2

– Slide the flat edge of a plastic opening tool between the right side of the home button control board and the mounting bracket. No rush, just a gentle nudge!

– Press down on the tool and carefully pry the adhesive holding the control board in place. It’ll pop free with a little love.

– Repeat the same process on the left side of the control board. It’s all about being thorough, but take it easy.

Step 3

– Gently lift the home button control board and carefully detach it from the home button mounting bracket.

Step 4

– Gently use the flat edge of a spudger to carefully lift away the old adhesive from the bottom right corner of the front panel assembly. Take your time and let the spudger do the work—patience is key!

Tools Used
  1. TweezersiPad 4 CDMA Adhesive Strips Replacement (Existing Panel)
  2. SpudgeriPad 4 CDMA Adhesive Strips Replacement (Existing Panel)

Step 5

– Carefully set the home button control board onto the home button mounting bracket like you’re placing a cherry on top of a sundae.

Step 6

– Take those two 2.1 mm Phillips #00 screws and pop them back into the home button control board. Tighten them up to secure the board in place against the mounting bracket. Nice and easy, you’re almost there!

Step 7

– Next up, we’re adding the last adhesive pieces to the front panel—almost there!

– Hold off on peeling the clear backing off those strips just yet.

– Take the bridge-shaped adhesive strip and carefully place it between the top edge of the front panel’s inner frame and the camera mounting bracket.

– Gently smooth the strip from the center outward, making sure no sneaky air bubbles get trapped underneath.

Step 8

– Stick that long, C-shaped adhesive strip along the right edge of the front panel—think of it as giving your device a little hug on that side.

Step 9

– Get ready for some sticky magic! Place the straight, medium-length adhesive strip right on the bottom right corner of the front panel, snugly tucked under the home button ribbon cable. You’re doing great!

Step 10

– Stick that snazzy rectangular adhesive strip right on the bottom right corner of the front panel. You’ve got this!

Step 11

– Stick that long L-shaped adhesive strip right on the bottom left corner of the front panel like a pro!

Step 12

– Stick that snazzy little adhesive strip right on the upper left corner of the front panel. You’re doing great!

Step 13

– Take the final, short L-shaped adhesive strip and carefully place it in the top left corner of the front panel. Nice and steady, you’re almost there!

Step 14

– Grab your trusty tweezers and carefully peel away the clear backing from the adhesive strip under the home button ribbon cable.

– Place the home button ribbon cable gently onto the adhesive strip. Smooth it out from the center toward the edges, making sure no pesky air bubbles get trapped between the strip and the front panel.

Tools Used
  1. TweezersiPad 4 CDMA Adhesive Strips Replacement (Existing Panel)

Step 15

– To put your device back together, simply follow these steps in reverse—easy peasy! And if you hit a snag, remember you can always schedule a repair with us.

Tools Used
  1. TweezersiPad 4 CDMA Adhesive Strips Replacement (Existing Panel)

Success!
To put your device back together, just follow these steps in reverse—easy peasy!

iPad 4 Wi-Fi Teardown

Duration: 45 minutes
Steps: 13 Steps

We got our hands on the fourth generation of iPad, which we’re calling iPad 4. Think of it as the unexpected fourth book in a trilogy: it popped up out of nowhere, but it’s definitely part of the family! This version has a lot in common with its predecessor, so instead of our usual in-depth teardown, we’re going to play ‘spot the differences’ and highlight all the changes from the last generation. Want more teardowns in your life? Follow us on Twitter, like us on Facebook, or subscribe to our YouTube channel. Why not do all three?

Step 1

– Hello there, tech enthusiasts!

– Apple has wowed us all once more. Just seven months after unveiling the iPad 3, they dropped the iPad 4 on October 23, 2012.

– Check out these tech specs:

– Powerful dual-core A6X processor paired with a quad-core GPU

– Stunning 9.7-inch LCD with backlit in-plane switching LED and a jaw-dropping 2048×1536 pixel Retina display

– Available in 16, 32, or 64 GB flash memory at launch

– 5 MP rear-facing camera for capturing those precious moments

– Convenient Lightning connector for all your connectivity needs

Step 2

– Alright, let’s talk connectors! The 3rd generation iPad sports the classic 30-pin dock connector up top, while the cool new kid on the block, the 4th generation, comes with the sleek Lightning connector down below. How stylish is that?

– Oh, and here’s a fun fact: the iPad 4 has a shiny new model number, A1458. Keep that in your back pocket for when you need it!

Step 3

– Just like the trend, this iPad is sealed tight with adhesive. We’ve tackled our fair share of sticky iPads, and we’re on a quest to make this opening process a breeze.

– With our trusty heated iOpener, we can focus the warmth exactly where it’s needed, gently loosening that pesky adhesive. Once we slip in a few guitar picks along the seam, we’re almost there!

Tools Used
  1. iOpeneriPad 4 Wi-Fi Teardown

Step 4

– Now that we’ve cleared away the adhesive, let’s pop open that iPad like a pro!

– As we dive in, you’ll notice it looks just like the last version—no surprises here!

– With the tough part behind us, why not take a breather and enjoy a cozy cup of hot chocolate?

Step 5

– Unlike the Samsung screen used in the iPad 3, the iPad 4 sports an LCD made by LG.

– Apple has been trying to switch things up by moving away from Samsung as their main supplier, so seeing an LG display here makes total sense. That said, Apple likes to keep their options open, so you might find other brands of LCDs inside different iPad 4 units.

Step 6

– Take another look at the differences in those LCD cables—every little detail counts here!

– Looks like Apple decided to go with a different color Sharpie this time. Interesting choice!

Step 7

– Let’s gently lift the LCD to uncover the battery underneath. Surprise, surprise! It’s sporting the same model number (A1389) as our previous adventure, so it’s another 3.7 V, 43 Whr powerhouse.

– Just like the iPad 3, this battery is glued down tighter than a secret! It’s a bit of a bummer since batteries are like our trusty sidekicks that eventually need replacing. The trend of these glued-in batteries in iPads and other Apple gadgets can be a real head-scratcher.

Step 8

– Let’s dive into the exciting details of the iPad 4’s greatest upgrade—the A6X and its fantastic companions:

– Apple A6X Processor

– SK Hynix H2JTDG8UD2MBR 16 GB NAND Flash

– Apple 338S1116 Cirrus Logic Audio Codec

– 343S0622-A1 Dialog Semi PMIC

– Apple 338S1077 Cirrus Logic Class D Audio Amplifier

– QVP TI 261 A9P2 Boost Converter (likely)

Step 9

– On the flip side of the board, we’re not seeing any earth-shattering upgrades:

– Broadcom BCM5974 Touch Screen Controller

– Broadcom BCM5973A1 Touch Screen Controller

– Texas Instruments CD3240B0 Touch Screen Line Driver

– 2 x 4Gb Elpida LP DDR2 = 1 GB DRAM in separate packages in a 64-bit setup

– 2 x Fairchild BCHAH/FDMC Voltage Regulator / Reference

– Murata 339S0171 Broadcom BCM4334 WiFi Module

Step 10

– Apple didn’t really trim down on space when they switched to the smaller Lightning connector (lower); instead, they just made the Lightning cable fit snugly in a frame that’s the same size as the good old 30-pin dock connector (upper). Keep that in mind as you dive into your repair adventure!

Step 11

– New to our site? Here’s a little insider tip: our 54 Bit Driver Kit is a game changer! It makes removing the Lightning connector a breeze, even when those tricky screws are hiding.

– There’s a bit of adhesive keeping the connector in place, but trust us, it’s a walk in the park compared to some of the sticky situations we’ve encountered.

– Attention all repair enthusiasts, DIY wizards, and occasionally clumsy iPad users! The Lightning connector is riding solo on its own ribbon cable, so finding a replacement should be super affordable.

Step 12

– At first glance, these two generations may seem like twins, but hold up! There’s a cool difference lurking here: the front-facing camera! 🎉

– Say hello to the 1.2MP FaceTime HD camera! It can even shoot 720p HD video, which is a major upgrade from the .3MP FaceTime camera found in the iPad 3. Pretty neat, right?

– Now, this new camera is just a tad thicker—by an extra .4 mm—but don’t worry, it still snuggles right into the same spot as before.

Step 13

– iPad 4 Repairability Score: 2 out of 10 (with 10 being the easiest to fix, so it’s a bit of a challenge).

– Once the front panel’s off, the LCD is actually pretty chill to remove.

– The battery isn’t glued down to the logic board, so swapping it out isn’t as tough as it could be.

– Just like its older siblings (iPad 2 & 3), the front panel is stuck down with tons of adhesive, which means you might end up with a cracked glass if you’re not careful during removal.

– A whole lot of adhesive holds everything together, including the battery that could be a little too excited and catch fire if punctured.

– The LCD is stuck to the front panel with foam sticky tape, so be cautious — it’s easy to shatter the LCD when disassembling.

– The front panel’s connector isn’t available until you’ve removed the LCD, so you’ll have to get past that first.

Success!

iPad 4 Wi-Fi Wireless Communications Antenna Replacement

Duration: 45 minutes
Steps: 51 Steps

Follow this step-by-step guide to swap out the Wi-Fi antenna and get your device back online in no time.

Step 1

– Pop the iOpener right in the middle of the microwave. No need to overthink it, just give it a cozy spot in there.

Tools Used
  1. iOpeneriPad 4 Wi-Fi Wireless Communications Antenna Replacement

Step 2

– Pop that iOpener in the microwave for a quick thirty seconds to get it nice and toasty!

– As you work through the repair, keep an eye on that iOpener. If it’s starting to cool down, just give it another thirty-second zap in the microwave to keep the heat coming!

Tools Used
  1. iOpeneriPad 4 Wi-Fi Wireless Communications Antenna Replacement

Step 3

– Take the iOpener out of the microwave, gripping it by one of the flat ends to keep your fingers away from the hot center. It’s warm, so proceed with care!

Tools Used
  1. iOpeneriPad 4 Wi-Fi Wireless Communications Antenna Replacement

Step 4

– Grab a pot or pan and fill it with enough water to fully cover your iOpener.

– Bring the water to a rolling boil, then turn off the heat.

– Carefully dunk the iOpener into the hot water, making sure it’s completely submerged, and let it soak for 2-3 minutes.

– Use tongs to fish the warmed iOpener out of the water.

– Give it a good dry off with a towel so it’s ready to roll.

– Now your iOpener’s all set! If it cools down and needs another heat boost, just repeat the boiling and soaking steps.

Tools Used
  1. iOpeneriPad 4 Wi-Fi Wireless Communications Antenna Replacement

Step 5

– If your display glass is cracked, keep any further shattering in check and protect your fingers by taping over the glass before you get started.

– Cover the iPad’s screen with overlapping strips of clear packing tape until the entire front is sealed up.

– Follow the rest of the steps as best you can. Just a heads up: once the glass is broken, it might keep cracking as you work, so you might have to carefully use a metal prying tool to lift the glass out.

Step 6

– Place the iOpener gently on the right edge of your iPad, making sure it’s lying flat and fully touching the surface. We want that warm connection to do its magic!

– Let the iOpener chill on your iPad for about 90 seconds. This will give it just enough time to warm things up before you start working on the front panel.

Tools Used
  1. iOpeneriPad 4 Wi-Fi Wireless Communications Antenna Replacement

Step 7

– Take a look at the iPad’s adhesive ring in the upper right corner. You’ll notice a tiny gap, about 2.0 inches (~5 cm) from the top. This is your cue to get started.

– Now, line up your tool with the mute button. Carefully slide the tip of a plastic opening tool into that little gap between the front glass and the plastic bezel. Just sneak the very tip in, enough to gently widen the crack.

Step 8

– Be sure to slide that tool right into the sweet spot—nestled between the plastic display bezel and the front panel glass.

Step 9

– Gently slide the tip of the plastic opening tool into the space between the front glass and the plastic bezel. Once it’s in place, grab a plastic opening pick and slide it right next to the tool, easing it into the gap.

Step 10

– Take out that trusty plastic opening tool from your iPad and gently slide the opening pick further beneath the front glass, going about 0.5 inches deep. You’ve got this!

Step 11

– As you work on loosening the adhesive along the right side of the iPad, don’t forget to reheat the iOpener and place it along the bottom edge. That way, you’re giving both sides a little extra heat love to make things go smoothly.

Tools Used
  1. iOpeneriPad 4 Wi-Fi Wireless Communications Antenna Replacement

Step 12

– As the iOpener warms up the bottom edge, start easing the adhesive loose from the right side of your iPad.

– Gently slide your opening pick down along the edge, carefully peeling away the adhesive bit by bit.

Tools Used
  1. iOpeneriPad 4 Wi-Fi Wireless Communications Antenna Replacement

Step 13

– If the opening pick decides to stick to the adhesive, no worries—just roll it gently along the side of the iPad and keep easing that adhesive off.

Tools Used
  1. iOpeneriPad 4 Wi-Fi Wireless Communications Antenna Replacement

Step 14

– Before you whip out that first opening pick from the bottom corner of your iPad, pop a second pick snugly under the right edge of the front glass. This little buddy will keep the adhesive from playing tricks and re-sticking itself!

– Now, let’s give that iOpener another warm hug! Re-heat it and then place it at the top edge of the iPad, ready to work its magic.

Tools Used
  1. iOpeneriPad 4 Wi-Fi Wireless Communications Antenna Replacement

Step 15

– Alright, folks, it’s time to tread carefully! The next few steps are a bit tricky, so let’s keep our cool.

– You’ll need to gently detach the adhesive that holds the antenna to the front panel. Just remember, we want to avoid any mishaps with the delicate parts connected to the bottom of the iPad. So, take a deep breath and follow these steps closely!

Step 16

– Gently slide the opening pick around the bottom right corner of the iPad to loosen the adhesive holding it in place.

Step 17

– Gently slide the tip of your opening pick along the bottom edge of the iPad to carefully loosen the adhesive holding down the Wi-Fi antenna.

Step 18

– After you’ve passed the Wi-Fi antenna (about 3″ or 75 mm from the right edge, right next to the home button), slide the opening pick all the way back in.

– Gently slide the pick to the right to loosen the adhesive that’s holding the Wi-Fi antenna to the front glass.

– The antenna is screwed and connected by a cable at the bottom of the iPad. This step carefully separates the antenna from the front panel so it stays safe when you remove the panel.

Step 19

– Keep on peeling away the adhesive at the bottom of your iPad, gently pulling the opening pick out far enough to navigate around the home button. Once you’re past that little guy, pop it back in to a depth of about 1/2 inch (10 mm). You’ve got this!

Tools Used
  1. iOpeneriPad 4 Wi-Fi Wireless Communications Antenna Replacement

Step 20

– Keep sliding that adhesive release tool along the entire bottom edge of the iPad like a pro.

– Let the opening pick chill right under the front glass by the home button to hold your spot.

Step 21

– Pop the iOpener back in the microwave to heat it up, then place it along the left edge of your iPad to gently warm up that adhesive and get things loosening up.

Tools Used
  1. iOpeneriPad 4 Wi-Fi Wireless Communications Antenna Replacement

Step 22

– Gently glide the opening pick along the top edge of your iPad, giving it a little tug to navigate around the front-facing camera bracket.

– The adhesive here is quite the tough cookie, so you might need to put in some elbow grease. Take it slow and steady, ensuring you don’t slip and accidentally create new challenges for yourself or your iPad.

– If the opening pick seems to be playing hard to get in the adhesive, try giving it a little roll, just like we showed you in step 9.

Tools Used
  1. iOpeneriPad 4 Wi-Fi Wireless Communications Antenna Replacement

Step 23

– Keep peeling away the sticky stuff at the top edge of your iPad, and gently maneuver the opening pick around the top left corner like a pro.

Tools Used
  1. iOpeneriPad 4 Wi-Fi Wireless Communications Antenna Replacement

Step 24

– Gently slide your opening pick along the left edge of the iPad to loosen the adhesive bit by bit. Heads up—the adhesive here is pretty slim because of the digitizer running along the entire left side. Keep your pick shallow (no deeper than about 10 mm or half an inch) to avoid any unwanted digitizer drama.

Step 25

– Gently wiggle the opening pick tucked under the bottom edge of the iPad to free up the adhesive holding down the bottom left corner.

Step 26

– Grab one of your trusty opening picks and gently wedge it under the bottom right corner of the iPad, then lift it up and hold that corner with your fingers.

Step 27

– Grab your iPad by the top and bottom right corners and gently twist that front glass away from the device. You’re doing great!

– When it’s time to put everything back together, whip out a microfiber cloth and some compressed air to give that LCD a spotless shine, free of dust and fingerprints, before you seal it up with the glass.

Step 28

– Grab your Phillips #00 screwdriver and loosen up the four 2 mm screws that are keeping the LCD snug in place against the aluminum frame. Once those are out, you’re one step closer!

Step 29

– Grab your trusty plastic opening tool or spudger and gently lift the right edge of the LCD out of the iPad like you’re unveiling a surprise.

– Now, swing that LCD around its left edge and lay it down on the front glass panel like it’s taking a cozy rest.

Tools Used
  1. SpudgeriPad 4 Wi-Fi Wireless Communications Antenna Replacement

Step 30

– Carefully use the tip of a spudger to lift and peel back the tape that’s covering the LCD ribbon cable connector.

Tools Used
  1. SpudgeriPad 4 Wi-Fi Wireless Communications Antenna Replacement

Step 31

– Gently lift up the little flap holding the LCD ribbon cable in place on the ZIF connector.

– Carefully wiggle the LCD ribbon cable free from its socket on the logic board using your fingers or a pair of tweezers.

Tools Used
  1. TweezersiPad 4 Wi-Fi Wireless Communications Antenna Replacement

Step 32

– Gently lift the LCD away from the front panel, but be sure not to touch the front of the screen. Keep it cool and steady!

Step 33

Step 34

– Gently lift the little flap on the home button ribbon cable’s ZIF connector to unlock it.

Step 35

– Grab a pair of tweezers and gently pull the home button ribbon cable straight out of its socket on the logic board. Nice and steady!

Tools Used
  1. TweezersiPad 4 Wi-Fi Wireless Communications Antenna Replacement

Step 36

– Carefully move the home button ribbon cable out of its spot in the rear case. Give it a little gentle tug, but make sure not to yank it too hard. We want everything to stay intact, right?

Step 37

– Grab a trusty pair of tweezers and gently lift the piece of tape that’s holding the digitizer ribbon cable down to the logic board. You’ve got this!

Tools Used
  1. TweezersiPad 4 Wi-Fi Wireless Communications Antenna Replacement

Step 38

– Gently lift the retaining flap on both digitizer ribbon cable ZIF connectors to unlock them.

Step 39

– Grab your trusty spudger and gently slide the flat end underneath the adhesive holding the digitizer ribbon cable in place. Give it a little wiggle to loosen things up!

– Once you’re feeling confident, pull that digitizer ribbon cable straight out of its cozy sockets on the logic board. Nice and easy!

Tools Used
  1. SpudgeriPad 4 Wi-Fi Wireless Communications Antenna Replacement

Step 40

– Gently lift the digitizer ribbon cable and grab your trusty spudger. Use the flat end to carefully loosen the adhesive that’s keeping the cable snug against the rear aluminum case. You’re doing great!

Tools Used
  1. SpudgeriPad 4 Wi-Fi Wireless Communications Antenna Replacement

Step 41

– Gently wiggle the digitizer ribbon cable free from its snug spot in the aluminum frame using your fingers.

– Carefully lift the front panel off the iPad.

Step 42

Step 43

– Unscrew the two 2.9 mm Phillips #00 screws holding the Lightning connector to the rear case—time to get those screws out and keep the show moving!

Step 44

– Gently coax the Lightning connector cable upwards using the flat end of a spudger, freeing it from its snug home on the logic board.

Tools Used
  1. SpudgeriPad 4 Wi-Fi Wireless Communications Antenna Replacement

Step 45

– Carefully slide the flat end of your spudger under the Lightning connector cable and lift it gently away from the aluminum frame.

Tools Used
  1. SpudgeriPad 4 Wi-Fi Wireless Communications Antenna Replacement

Step 46

– Gently wiggle and pull the Lightning connector straight out from its cozy spot in the rear case.

Step 47

– Gently use the tip of a spudger to lift the speaker and Wi-Fi antenna connectors straight up from their sockets on the logic board. You’ve got this!

Tools Used
  1. SpudgeriPad 4 Wi-Fi Wireless Communications Antenna Replacement

Step 48

– Let’s get started by taking off those pesky screws holding the Wi-Fi antenna onto the back case:

– Two tiny 1.75 mm Phillips #00 screws (they’re like the little ninjas of screws)

– One slightly longer 4.15 mm Phillips #00 screw (a bit of a show-off, right?)

– And one 1.8 mm Phillips #00 screw with a wider head (the big guy in the group)

Step 49

– Gently slide the flat end of a spudger under the foam adhesive that’s keeping the Wi-Fi antenna snug against the speaker assembly. Give it a little wiggle to loosen it up and set that antenna free!

Tools Used
  1. SpudgeriPad 4 Wi-Fi Wireless Communications Antenna Replacement

Step 50

– Grab the Wi-Fi antenna and speaker cable like a pro, holding them together securely.

– Gently lift the cables away from the rear case—easy does it!

Step 51

– To put your device back together, just reverse the steps you took to take it apart, and use our iPad 4 Wi-Fi Front Panel Adhesive strips guide to stick the front panel back on. If things get tricky, remember you can always schedule a repair!

Success!
To put your device back together, just follow these steps in reverse order and use our iPad 4 Wi-Fi Front Panel Adhesive Strips guide to stick the front panel back on. Easy peasy! If things get tricky, you can always schedule a repair with us.

iPad 4 Wi-Fi Rotation Lock/Mute Switch Replacement

Duration: 45 minutes
Steps: 60 Steps

Follow this guide to swap out the rotation lock/mute switch with ease.

Step 1

– Pop the iOpener right in the center of your microwave to get things warmed up.

Tools Used
  1. iOpeneriPad 4 Wi-Fi  Rotation Lock/Mute Switch Replacement

Step 2

– Pop the iOpener in the microwave for about thirty seconds to get it nice and toasty.

– As you work, if the iOpener starts to cool down, just heat it up again in thirty-second bursts to keep things warm and ready.

Tools Used
  1. iOpeneriPad 4 Wi-Fi  Rotation Lock/Mute Switch Replacement

Step 3

– Carefully grab the iOpener by one of its two flat ends to keep your fingers safe from the hot middle, then take it out of the microwave.

Tools Used
  1. iOpeneriPad 4 Wi-Fi  Rotation Lock/Mute Switch Replacement

Step 4

– Grab a pot or pan and fill it with enough water to fully dunk your iOpener.

– Bring the water to a rolling boil, then turn off the heat—no need to keep it boiling.

– Carefully place the iOpener into the hot water, making sure it’s fully submerged, and let it soak for 2-3 minutes.

– Use tongs to fish out the warmed-up iOpener—watch those fingers!

– Dry it off thoroughly with a towel so it’s ready to go.

– Need to reheat? Just repeat: boil water, turn off heat, and dunk the iOpener for another 2-3 minutes.

Tools Used
  1. iOpeneriPad 4 Wi-Fi  Rotation Lock/Mute Switch Replacement

Step 5

– Got a cracked display glass? No worries! Keep it contained and avoid any mishaps during your repair by sticking some tape on it.

– Apply overlapping strips of clear packing tape over your device’s display until you’ve got it fully covered. It’s like giving your device a protective hug!

– Now, let’s keep it rolling! Follow the rest of the guide as best as you can. Just a heads up, once that glass is broken, it may want to keep cracking as you work. You might need to grab a metal prying tool to scoop out the glass.

Step 6

– Place the iOpener flat against the right edge of the iPad, ensuring it’s nice and snug for optimal contact between the iPad and the iOpener.

– Give it a little time – let the bag chill on the iPad for about 90 seconds before you dive in to pry open that front panel.

Tools Used
  1. iOpeneriPad 4 Wi-Fi  Rotation Lock/Mute Switch Replacement

Step 7

– Spot a tiny gap in the adhesive ring of your iPad, hanging out in the upper right corner, about 2.0 inches (~5 cm) from the top. That’s your golden opportunity!

– Now, let’s get to work! Line up your tool with the mute button and gently slide the tip of a plastic opening tool into that gap between the front glass and the plastic bezel. Just the tip—enough to give that crack a little stretch!

Step 8

– Carefully slide your tool right between the plastic display bezel and the front panel glass—getting in the perfect spot makes all the difference!

Step 9

– Place the tip of your plastic opening tool gently between the front glass and the plastic bezel, then slide in a plastic opening pick right next to it, making sure it slips into the gap. Keep it smooth and steady as you go!

Step 10

– Gently take out the plastic opening tool from your iPad, and slide the opening pick a little deeper under the front glass, about 0.5 inches deep. You’ve got this!

Step 11

– As you carefully loosen the adhesive along the right side of the iPad, pop the iOpener back in the microwave for a quick warm-up, then place it back under the bottom edge to keep things nice and toasty.

Tools Used
  1. iOpeneriPad 4 Wi-Fi  Rotation Lock/Mute Switch Replacement

Step 12

– While the iOpener is warming up the bottom edge, let’s start tackling that sticky adhesive on the right edge of your iPad.

– Grab your opening pick and glide it down the edge of the iPad, freeing up that adhesive as you go. You’ve got this!

Tools Used
  1. iOpeneriPad 4 Wi-Fi  Rotation Lock/Mute Switch Replacement

Step 13

– If your opening pick is feeling a bit stubborn and gets stuck in the adhesive, just give it a little roll along the side of the iPad. Keep it moving to help loosen that sticky stuff up!

Tools Used
  1. iOpeneriPad 4 Wi-Fi  Rotation Lock/Mute Switch Replacement

Step 14

– Before pulling out that first opening pick from the bottom corner of your iPad, slide a second pick under the right edge of the front glass to keep that adhesive from sticking back together.

– Warm up the iOpener again, then shift it over to the top edge of the iPad to keep things nice and pliable.

Tools Used
  1. iOpeneriPad 4 Wi-Fi  Rotation Lock/Mute Switch Replacement

Step 15

– Heads up: the next few steps need a steady hand and some serious care.

– You’ll be loosening the adhesive that holds the antenna to the front panel, but watch out for the fragile connections attaching it to the bottom of the iPad. Take it slow and follow along carefully.

Step 16

– Gently work the opening pick around the bottom right corner of the iPad to release the adhesive. Take your time here—patience is key.

Step 17

– Gently glide the opening pick along the bottom edge of your iPad to free up that pesky adhesive over the Wi-Fi antenna. You’ve got this!

Step 18

– After you pass the Wi-Fi antenna (about 3″ or 75 mm from the right edge, right next to the home button), slide the opening pick all the way back in.

– Gently slide the pick to the right to loosen the adhesive holding the Wi-Fi antenna to the front glass.

– The antenna is screwed and connected by a cable at the bottom of the iPad. This step carefully separates the antenna from the front panel so it stays safe when you lift the panel off.

Step 19

– Keep easing the adhesive off the bottom edge of the iPad. When you get to the home button, carefully pull the opening pick out enough to wrap around it, then slide it back in about half an inch (10 mm) to keep things moving smoothly.

Tools Used
  1. iOpeneriPad 4 Wi-Fi  Rotation Lock/Mute Switch Replacement

Step 20

– Keep gently peeling the adhesive all the way across the bottom edge of the iPad. Steady does it!

– Leave the opening pick in place, tucked under the front glass near the home button to keep things from sticking back together. A little wiggle room is always a good thing!

Step 21

– Pop the iOpener in the microwave to heat it up, then place it on the left edge of the iPad to gently warm up the adhesive in that area.

Tools Used
  1. iOpeneriPad 4 Wi-Fi  Rotation Lock/Mute Switch Replacement

Step 22

– Carefully slide the opening pick along the top edge of the iPad, gently easing it out just enough to navigate around the front-facing camera bracket.

– Heads up: the adhesive here is seriously stubborn and thick. You’ll need a bit of muscle, but take it slow and steady to avoid any slips or scratches—safety first!

– If the pick gets stuck in the glue, try giving it a little roll like in step 9 to help it slide through smoothly.

Tools Used
  1. iOpeneriPad 4 Wi-Fi  Rotation Lock/Mute Switch Replacement

Step 23

– Keep peeling away that stubborn adhesive along the top edge of your iPad, and gently slide the opening pick around that top left corner like a pro!

Tools Used
  1. iOpeneriPad 4 Wi-Fi  Rotation Lock/Mute Switch Replacement

Step 24

– Carefully slide the opening pick along the left edge of the iPad, working your way through the adhesive. It’s a bit thinner on this side due to the digitizer running along the entire left edge. Be gentle—keep the pick no deeper than 10 mm (about half an inch) to avoid any damage to the digitizer.

Step 25

– Slide the opening pick that’s hanging out from under the bottom edge of your iPad to gently loosen the adhesive at the bottom left corner.

Step 26

– Grab one of those handy opening picks and gently lift up the bottom right corner of your iPad. Once it’s popped up, just use your fingers to hold it steady!

Step 27

– Grab your iPad by the top and bottom corners, and gently rotate the front glass away from the body. Take your time, there’s no rush!

– As you put everything back together, don’t forget to grab a microfiber cloth and a can of compressed air to clean off any dust or fingerprints on the LCD before sealing the glass back in. It’ll make your device look brand new!

Step 28

– Unscrew the four tiny 2 mm Phillips #00 screws holding the LCD onto the aluminum frame—time to give those screws a little twist!

Step 29

– Grab a plastic opening tool or a spudger and gently pop up the right edge of the LCD from the iPad.

– Swing the LCD open like a door on its left side and carefully rest it on top of the front glass panel.

Tools Used
  1. SpudgeriPad 4 Wi-Fi  Rotation Lock/Mute Switch Replacement

Step 30

– Grab the tip of a spudger and gently peel back the tape that’s hiding the LCD ribbon cable connector. Easy does it!

Tools Used
  1. SpudgeriPad 4 Wi-Fi  Rotation Lock/Mute Switch Replacement

Step 31

– Lift up the little flap on the LCD ribbon cable ZIF connector. It’s like opening a tiny door!

– Now, gently pull the LCD ribbon cable out of its socket on the logic board. A simple tug with your fingers or tweezers should do the trick!

Tools Used
  1. TweezersiPad 4 Wi-Fi  Rotation Lock/Mute Switch Replacement

Step 32

– Carefully lift the LCD off the front panel, making sure to avoid touching the front of the screen.

Step 33

Step 34

– Gently lift the little flap that holds down the home button ribbon cable’s ZIF connector. Easy does it!

Step 35

– Grab your tweezers and gently pull the home button ribbon cable straight out from its socket on the logic board. Easy does it!

Tools Used
  1. TweezersiPad 4 Wi-Fi  Rotation Lock/Mute Switch Replacement

Step 36

– Gently lift the home button ribbon cable out from its snug spot in the back case.

Step 37

– Grab your trusty tweezers and gently lift the piece of tape that holds the digitizer ribbon cable snugly against the logic board. You’re doing great!

Tools Used
  1. TweezersiPad 4 Wi-Fi  Rotation Lock/Mute Switch Replacement

Step 38

– Lift the retaining flap on both of the digitizer ribbon cable ZIF connectors with a gentle touch.

Step 39

– Grab your trusty spudger and gently slide the flat end under the digitizer ribbon cable to break that pesky adhesive loose.

– Now, with a steady hand, pull the digitizer ribbon cable straight out from its cozy spot on the logic board.

Tools Used
  1. SpudgeriPad 4 Wi-Fi  Rotation Lock/Mute Switch Replacement

Step 40

– Gently lift the digitizer ribbon cable and grab your trusty spudger. With the flat end of it, carefully break free the adhesive that’s holding the cable snug against the rear aluminum case. You’re on the right track!

Tools Used
  1. SpudgeriPad 4 Wi-Fi  Rotation Lock/Mute Switch Replacement

Step 41

– Gently wiggle and pull the digitizer ribbon cable right out from its snug spot in the aluminum frame using your fingers.

– Lift the front panel off the iPad with care.

Step 42

– Grab your trusty tweezers and gently peel back that pesky electrical tape that’s hiding the headphone jack assembly cable connector. It’s time to set it free!

– Now, take the tip of your spudger and carefully flip up the retaining flap on both ZIF connectors holding the headphone jack cable to the logic board. You’ve got this!

Tools Used
  1. SpudgeriPad 4 Wi-Fi  Rotation Lock/Mute Switch Replacement
  2. TweezersiPad 4 Wi-Fi  Rotation Lock/Mute Switch Replacement

Step 43

– Carefully slide the flat end of your spudger under the headphone jack assembly cable to gently break the adhesive bond holding it to the rear aluminum frame.

– Firmly pull the headphone jack assembly cable straight out from its socket on the logic board.

Tools Used
  1. SpudgeriPad 4 Wi-Fi  Rotation Lock/Mute Switch Replacement

Step 44

– Gently nudge the front-facing camera ribbon cable aside using the flat edge of a spudger, but be careful not to completely detach it. You’ve got this!

Tools Used
  1. SpudgeriPad 4 Wi-Fi  Rotation Lock/Mute Switch Replacement

Step 45

– Carefully lift and peel away the adhesive tape that’s covering the headphone jack assembly.

Step 46

– With the spudger’s tip, gently lift the retaining flap on the microphone cable ZIF connector.

Tools Used
  1. SpudgeriPad 4 Wi-Fi  Rotation Lock/Mute Switch Replacement

Step 47

– Slide the spudger’s tip gently under the microphone ribbon cable and give it a little nudge to pop it out of its cozy ZIF connector.

– Take the flat edge of the spudger and smoothly slide the microphone ribbon cable to the side, making room for your next move.

Tools Used
  1. SpudgeriPad 4 Wi-Fi  Rotation Lock/Mute Switch Replacement

Step 48

– Gently lift the retaining flap that holds the volume/power button ribbon cable connector in place on the headphone jack assembly board. You’ve got this!

Step 49

– Carefully pop the volume button ribbon cable out of its ZIF connector.

– Gently lift the volume button ribbon cable upwards and tuck it out of the way.

Step 50

– Let’s get those screws out of the headphone jack assembly! Here’s what you need to remove:

– Five 2.6 mm Phillips #0 screws

– Two 2.2 mm Wide Head Phillips #00 screws

– Two 2.6 mm Phillips #00 screws

Step 51

– Grasp the ribbon cable attached to the headphone jack assembly and gently lift the assembly up towards the top edge of the device.

Step 52

– Hold onto the headphone jack assembly with one hand and gently pull it out of the iPad, keeping an eye out for any cables that might want to tag along.

Step 53

– Let’s loosen up by removing these screws holding down the power & volume button cable on the aluminum frame:

– Two 5.5 mm Phillips #0 screws

– One 2.6 mm Phillips #0 screw

– Two 2.6 mm Phillips #0 screws

Step 54

– Peel off the plastic shield that’s hiding the volume buttons. Let’s give them some air!

Step 55

– Unscrew the lone 2.6 mm Phillips #00 screw that secures the volume button frame to the aluminum frame. Let’s get that volume ready to roll!

Step 56

– Gently slide the edge of a plastic opening tool under the sleep/wake sensor, but watch out for that delicate cable—it’s a bit of a diva!

– Wiggle the plastic opening tool around the sensor to break the adhesive seal. You’re doing great!

Step 57

– Gently slide the spudger tip under the power and volume cables, freeing them from the adhesive’s grip.

Tools Used
  1. SpudgeriPad 4 Wi-Fi  Rotation Lock/Mute Switch Replacement

Step 58

– Use the tip of your spudger—not the wide edge—to carefully free the adhesive beneath the volume button branch of the ribbon cable.

– Slide the spudger’s tip upward toward the top of the iPad, continuing to loosen the adhesive.

– Keeping the spudger tip under the ribbon cable, gently lift the power button out of its aluminum frame socket.

Tools Used
  1. SpudgeriPad 4 Wi-Fi  Rotation Lock/Mute Switch Replacement

Step 59

– Gently lift and slide out the power and volume button cable from the iPad. You’ve got this!

Step 60

– Grab your trusty spudger and gently nudge the mute/lock switch out from its cozy little spot in the aluminum frame of your iPad.

– Now, take a pair of tweezers and carefully lift that mute/lock switch right out of the rear aluminum case. You’ve got this!

Tools Used
  1. SpudgeriPad 4 Wi-Fi  Rotation Lock/Mute Switch Replacement
  2. TweezersiPad 4 Wi-Fi  Rotation Lock/Mute Switch Replacement

Success!

iPad 4 Wi-Fi Rear Facing Camera Replacement

Duration: 45 minutes
Steps: 54 Steps

Follow this guide to swap out the rear-facing camera like a pro.

Step 1

– Pop the iOpener right in the middle of the microwave like it’s the star of the show!

Tools Used
  1. iOpeneriPad 4 Wi-Fi Rear Facing Camera Replacement

Step 2

– Warm up the iOpener in the microwave for about thirty seconds to get it ready.

– If it starts to cool down while you’re working, just pop it back in the microwave for another thirty seconds to keep the heat going.

Tools Used
  1. iOpeneriPad 4 Wi-Fi Rear Facing Camera Replacement

Step 3

– Carefully take the iOpener out of the microwave by grabbing one of the flat ends—steer clear of that hot center!

Tools Used
  1. iOpeneriPad 4 Wi-Fi Rear Facing Camera Replacement

Step 4

– Grab a pot or pan and fill it with enough water to completely dunk your iOpener.

– Turn up the heat until the water’s boiling, then switch off the stove.

– Drop the iOpener into the hot water and let it chill for about 2-3 minutes. Just make sure it’s fully submerged.

– Use some tongs to safely fish out your iOpener from the steamy water.

– Give it a good drying off with a towel.

– Boom! Your iOpener is all set to go. Need to heat it up again? Just bring the water to a boil, turn off the heat, and let it soak for another 2-3 minutes.

Tools Used
  1. iOpeneriPad 4 Wi-Fi Rear Facing Camera Replacement

Step 5

– Got a cracked display? No worries—let’s keep things safe. Tape the glass to prevent further breakage and avoid any potential injuries while you’re getting your hands dirty with the repair.

– Grab some clear packing tape and lay overlapping strips across the iPad’s display until it’s fully covered. This will keep everything in place as you proceed.

– Now, follow the rest of the guide as best as you can. Once the glass is cracked, it may keep on cracking, so you might need a metal prying tool to scoop the glass out carefully.

Step 6

– Place the iOpener gently along the right edge of your iPad. Make sure it’s sitting flat and comfortably, so it makes good contact with the surface.

– Now, let it chill there for about 90 seconds. This will give it time to work its magic before you attempt to lift the front panel.

Tools Used
  1. iOpeneriPad 4 Wi-Fi Rear Facing Camera Replacement

Step 7

– Spot a tiny gap in the iPad’s adhesive ring at the upper right corner, about 2.0 inches (~5 cm) down from the top edge. That little gap is your in!

– Line up your tool with the mute button, then gently slip the tip of a plastic opening tool into the crack between the front glass and plastic bezel. Just a quick nudge with the tip to pry the gap open a bit.

Step 8

– Ensure you position the tool just right—nestled between the plastic display bezel and the front panel glass. You’ve got this!

Step 9

– Keep the tip of your plastic opening tool snug between the front glass and plastic bezel, then slide a plastic opening pick into the gap right next to it. Easy does it!

Step 10

– Gently slide the plastic opening tool away from the iPad, then carefully nudge the opening pick a bit deeper under the front glass—about half an inch should do the trick.

Step 11

– As you work on loosening the adhesive along the right side of the iPad, go ahead and reheat the iOpener, then pop it back on the bottom edge to keep things warm and ready.

Tools Used
  1. iOpeneriPad 4 Wi-Fi Rear Facing Camera Replacement

Step 12

– As we warm up the bottom edge with the iOpener, let’s get started on loosening up that adhesive on the right edge of your iPad.

– Gently slide the opening pick down the side of your iPad, making sure to release that adhesive as you go. You’ve got this!

Tools Used
  1. iOpeneriPad 4 Wi-Fi Rear Facing Camera Replacement

Step 13

– If your opening pick gets stuck in the adhesive, just roll it gently along the edge of the iPad to keep loosening that sticky stuff.

Tools Used
  1. iOpeneriPad 4 Wi-Fi Rear Facing Camera Replacement

Step 14

– Before pulling out that first opening pick from the bottom corner of your iPad, slide a second pick under the right edge of the front glass to keep the adhesive from sticking back together.

– Heat up your iOpener again, then move it over to the top edge of the iPad to loosen things up there.

Tools Used
  1. iOpeneriPad 4 Wi-Fi Rear Facing Camera Replacement

Step 15

– Alright, time to get extra careful here.

– You’ll need to gently release the adhesive holding the antenna in place on the front panel. Make sure to avoid damaging the sensitive parts that connect the antenna to the bottom of the iPad. Take it slow and follow the steps closely!

Step 16

– Gently slide the opening pick around the bottom right corner of your iPad to break free the adhesive. You’ve got this!

Step 17

– Gently slide the tip of your opening pick along the bottom edge of the iPad to carefully break the adhesive seal around the Wi-Fi antenna. Keep it smooth and steady!

Step 18

– Alright, let’s get this party started! Once you’ve cruised past the Wi-Fi antenna (about 3 inches from the right edge, or snugly next to the home button), pop that opening pick back in all the way.

– Now, gently slide that pick to the right, and watch as the adhesive holding the Wi-Fi antenna to the front glass happily lets go.

– Remember, the antenna is secured to the bottom of the iPad with screws and a cable. This step is super important as it safely disconnects the antenna from the front panel, so when you lift that panel off, the antenna stays safe and sound. You’ve got this!

Step 19

– Keep peeling back the adhesive along the bottom edge of the iPad. Slide your opening pick out just enough to maneuver around the home button, then pop it back in about half an inch (10 mm) once you’ve cleared that spot.

Tools Used
  1. iOpeneriPad 4 Wi-Fi Rear Facing Camera Replacement

Step 20

– Keep on peeling back that adhesive all along the bottom edge of your iPad like a pro!

– Once you’ve got that going, slide the opening pick snugly under the front glass near the home button and let it hang out there.

Step 21

– Pop the iOpener back in the microwave to warm it up, then place it on the left edge of your iPad to gently soften the adhesive in that area.

Tools Used
  1. iOpeneriPad 4 Wi-Fi Rear Facing Camera Replacement

Step 22

– Gently slide the opening pick along the top edge of the iPad, easing it around the front-facing camera bracket with a slight pull.

– Heads up: the adhesive here is super stubborn, so you might need to apply some firm, steady pressure. Take it slow and steady to avoid slips or injuries.

– If the pick starts to get stuck in the adhesive, try “rolling” it as demonstrated in step 9 to keep things moving smoothly.

Tools Used
  1. iOpeneriPad 4 Wi-Fi Rear Facing Camera Replacement

Step 23

– Keep peeling that adhesive off the top edge of your iPad, and gently glide the opening pick around the top left corner like a pro.

Tools Used
  1. iOpeneriPad 4 Wi-Fi Rear Facing Camera Replacement

Step 24

– Gently slide the opening pick along the left edge of your iPad, carefully releasing the adhesive as you go. Keep in mind, the adhesive is a bit thinner here because of the digitizer running along the entire left side. Be sure to keep the pick no deeper than about 1/2 inch (10 mm) to avoid any accidental damage to the digitizer.

Step 25

– With your trusty opening pick still nestled at the bottom edge of your iPad, let’s free that adhesive in the bottom left corner. You got this!

Step 26

– Grab one of your trusty opening picks and gently wiggle it under the bottom right corner of the iPad, then grip that corner with your fingers and lift it up.

Step 27

– Grab the iPad by the top and bottom right corners, then gently swivel the front glass away from the device.

– When putting everything back together, give the LCD a quick once-over with a microfiber cloth and a puff of compressed air to shoo away any dust or fingerprints before snapping the glass back on.

Step 28

– Unscrew those four 2 mm Phillips #00 screws holding the LCD to the aluminum frame. You’ve got this!

Step 29

– Grab your plastic opening tool or spudger and gently lift the right edge of the LCD out of its cozy home in the iPad.

– Now, rotate the LCD along its left edge and carefully set it down on top of the front glass panel. Take it slow—everything is still going great!

Tools Used
  1. SpudgeriPad 4 Wi-Fi Rear Facing Camera Replacement

Step 30

– Gently slide the tip of your spudger under the tape covering the LCD ribbon cable connector and peel it back carefully. Easy does it—no need to rush!

Tools Used
  1. SpudgeriPad 4 Wi-Fi Rear Facing Camera Replacement

Step 31

– Gently lift the little flap holding the LCD ribbon cable in place on the ZIF connector.

– Use your fingers or tweezers to carefully wiggle the LCD ribbon cable out of its spot on the logic board.

Tools Used
  1. TweezersiPad 4 Wi-Fi Rear Facing Camera Replacement

Step 32

– Carefully lift the LCD away from the front panel, making sure not to touch the screen side.

Step 33

Step 34

– Gently lift the little flap holding down the home button ribbon cable’s ZIF connector.

Step 35

– Grab your trusty tweezers and gently wiggle the home button ribbon cable out of its cozy spot on the logic board. You got this!

Tools Used
  1. TweezersiPad 4 Wi-Fi Rear Facing Camera Replacement

Step 36

– Gently wiggle the home button ribbon cable out of its cozy little spot in the rear case.

Step 37

– Grab a pair of tweezers and gently peel off the tape holding the digitizer ribbon cable in place on the logic board. No rush, just take your time and keep it steady!

Tools Used
  1. TweezersiPad 4 Wi-Fi Rear Facing Camera Replacement

Step 38

– Gently flip up the little retaining flap on each of the digitizer ribbon cable ZIF connectors to unlock them. Keep it cool, you got this!

Step 39

– Gently slide the flat end of your spudger under the digitizer ribbon cable to carefully break up the adhesive holding it in place.

– Once loosened, pull the digitizer ribbon cable straight out from its connectors on the logic board with a steady hand.

Tools Used
  1. SpudgeriPad 4 Wi-Fi Rear Facing Camera Replacement

Step 40

– Gently peel back the digitizer ribbon cable, then grab your trusty spudger and use its flat end to carefully lift the adhesive holding the cable to the back of the aluminum case. Easy does it!

Tools Used
  1. SpudgeriPad 4 Wi-Fi Rear Facing Camera Replacement

Step 41

– Gently use your fingers to wiggle the digitizer ribbon cable free from its snug spot in the aluminum frame.

– Carefully lift the front panel off the iPad.

Step 42

– Grab your tweezers and gently peel off the piece of electrical tape that’s hanging out over the headphone jack assembly cable connector.

– Next, take the pointy end of your spudger and flip up the little retaining flaps on both ZIF connectors—these are what hold the headphone jack cable snugly onto the logic board.

Tools Used
  1. SpudgeriPad 4 Wi-Fi Rear Facing Camera Replacement
  2. TweezersiPad 4 Wi-Fi Rear Facing Camera Replacement

Step 43

– Gently slide the flat edge of a spudger under the headphone jack assembly cable to free it from the sticky adhesive holding it to the rear aluminum frame.

– Carefully pull the headphone jack assembly cable straight out of its socket on the logic board.

Tools Used
  1. SpudgeriPad 4 Wi-Fi Rear Facing Camera Replacement

Step 44

– Gently nudge the front-facing camera ribbon cable to the side using the flat edge of your spudger, but don’t go overboard and try to remove it. Just give it some room to breathe.

Tools Used
  1. SpudgeriPad 4 Wi-Fi Rear Facing Camera Replacement

Step 45

– Carefully peel back the adhesive tape covering the headphone jack assembly. Take your time, it’s just a simple step, but doing it gently will keep things smooth for the next steps.

Step 46

– Grab your trusty spudger and gently use the tip to flip open the little flap holding the microphone cable ZIF connector in place.

Tools Used
  1. SpudgeriPad 4 Wi-Fi Rear Facing Camera Replacement

Step 47

– Slide the spudger’s tip gently under the microphone ribbon cable and nudge it out of its snug spot on the ZIF connector.

– Use the flat side of your spudger to tuck the microphone ribbon cable safely out of the way.

Tools Used
  1. SpudgeriPad 4 Wi-Fi Rear Facing Camera Replacement

Step 48

– Gently lift the retaining flap that holds the volume/power button ribbon cable connector in place on the headphone jack assembly board.

Step 49

– Gently slide the volume button ribbon cable out of its ZIF connector.

– Carefully lift the volume button ribbon cable upwards and move it out of the way.

Step 50

– Let’s loosen up the headphone jack assembly by removing these screws:

– Five 2.6 mm Phillips #0 screws

– Two 2.2 mm Wide Head Phillips #00 screws

– Two 2.6 mm Phillips #00 screws

Step 51

– Gently grasp the ribbon cable of the headphone jack assembly and lift it upwards toward the top of the device with care. You’ve got this!

Step 52

– Grab the headphone jack assembly firmly with one hand and gently pull it out of the iPad, keeping an eye on any cables that might be hanging out and getting caught.

Step 53

– With the flat side of your trusty spudger, gently nudge the rear-facing camera out of its cozy spot on the underside of the headphone jack assembly board. You’ve got this!

Tools Used
  1. SpudgeriPad 4 Wi-Fi Rear Facing Camera Replacement

Step 54

– To put your device back together, just follow these steps in reverse and use our iPad 4 Wi-Fi Front Panel Adhesive Strips guide to get that front panel sticking like new. If you hit a snag, no worries—you can always schedule a repair with us!

Success!
To put your device back together, just reverse these steps and use our iPad 4 Wi-Fi Front Panel Adhesive strips guide to stick the front panel back in place. If you hit a snag, remember you can always schedule a repair!

iPad 4 Wi-Fi Microphone Replacement

Duration: 45 minutes
Steps: 51 Steps

Get ready to tackle microphone replacement like a pro! Follow this guide to swap out that old mic for a brand new one. It’s easier than you think!

Step 1

– Pop the iOpener right in the middle of the microwave. Make sure it’s centered for the best results.

Tools Used
  1. iOpeneriPad 4 Wi-Fi Microphone Replacement

Step 2

– Give that iOpener a cozy thirty-second microwave spa treatment! It’s like a warm hug for your device.

– As you work your magic on the repair, keep that iOpener nice and toasty by giving it a quick reheat in the microwave for another thirty seconds whenever it starts to cool down. You’re doing great!

Tools Used
  1. iOpeneriPad 4 Wi-Fi Microphone Replacement

Step 3

– Carefully take the iOpener out of the microwave by grabbing one of the flat ends—avoid the hot center, it’s toasty in there!

Tools Used
  1. iOpeneriPad 4 Wi-Fi Microphone Replacement

Step 4

– Grab a pot or pan and fill it with enough water to give your iOpener a nice, cozy bath.

– Heat that water up until it’s bubbling like a hot spring. Once it’s boiling, turn off the heat.

– Now, gently place your iOpener into the steaming water for about 2-3 minutes. Make sure it’s taking a nice dip and is fully submerged!

– Use some tongs to carefully fish out the warm iOpener from its bath.

– Give it a good towel dry to ensure it’s all set.

– And voilà! Your iOpener is all prepped and ready to go! If it needs a little more warmth, just repeat the steps—boil the water, turn off the heat, and let it soak for another 2-3 minutes.

Tools Used
  1. iOpeneriPad 4 Wi-Fi Microphone Replacement

Step 5

– If your screen is sporting a crack, let’s keep it from shattering further and ensure you stay safe during the repair by applying some tape to it.

– Cover the entire face of that iPad with overlapping strips of clear packing tape, like a protective shield against additional damage.

– Try your best to follow the rest of the guide as we go along. Just a heads up: once the glass is broken, it might keep cracking as you work, so be ready to use a metal prying tool to carefully scoop out the pieces.

Step 6

– Place the iOpener flat against the right edge of the iPad, making sure to smooth it out for a snug fit. We want that iOpener to make some good contact with the surface!

– Allow the iOpener to hang out on the iPad for about 90 seconds before you dive in and try to pry open the front panel.

Tools Used
  1. iOpeneriPad 4 Wi-Fi Microphone Replacement

Step 7

– There’s a small gap in the iPad’s adhesive ring in the upper right corner, about 2.0 inches (~5 cm) down from the top. This is where we’re going to start working our magic.

– Line up your tool with the mute button, and gently slide the tip of your plastic opening tool into that gap between the front glass and plastic bezel. You don’t need to force it—just enough to get the crack to widen a bit.

Step 8

– Carefully slide your tool right between the plastic display bezel and the front glass—right in that sweet spot to get things moving smoothly.

Step 9

– Place the tip of your plastic opening tool between the front glass and plastic bezel, then slide a plastic opening pick in right next to it, carefully working your way through the gap.

Step 10

– Gently take the plastic opening tool out of the iPad, and slide the opening pick a little deeper under the front glass, aiming for about 0.5 inches down. Keep it smooth and steady—you’re doing great!

Step 11

– While you’re working on loosening the adhesive on the right side of the iPad, go ahead and reheat your iOpener, then place it on the bottom edge of the iPad. Take your time – everything’s got its rhythm!

Tools Used
  1. iOpeneriPad 4 Wi-Fi Microphone Replacement

Step 12

– While the iOpener is working its magic on the bottom edge, start gently peeling away the adhesive along the right side of your iPad.

– Carefully slide the opening pick down the edge, as it lifts the adhesive. Take your time and let it do its job.

Tools Used
  1. iOpeneriPad 4 Wi-Fi Microphone Replacement

Step 13

– If the opening pick gets stuck in the adhesive, gently roll it along the edge of the iPad to keep loosening the glue and make progress smoother.

Tools Used
  1. iOpeneriPad 4 Wi-Fi Microphone Replacement

Step 14

– Before you dive in and pull that first opening pick from the bottom corner of your iPad, be sure to slide a second pick under the right edge of the front glass. This little move will keep the adhesive from sticking again, making your life a whole lot easier!

– Give your iOpener a quick reheat and then place it on the top edge of the iPad. You’re doing great!

Tools Used
  1. iOpeneriPad 4 Wi-Fi Microphone Replacement

Step 15

– Heads up: the next steps need you to be super careful.

– You’ll need to gently loosen the adhesive holding the antenna to the front panel without messing up the delicate connections attaching the antenna to the bottom of the iPad. Take it slow and follow each step closely.

Step 16

– Gently slide the opening pick along the bottom right corner of the iPad to loosen the adhesive hiding out there.

Step 17

– Gently glide the tip of your opening pick along the bottom edge of the iPad to free up the adhesive holding down the Wi-Fi antenna — smooth moves, you’re doing great!

Step 18

– After you pass the Wi-Fi antenna (about 3″ (75 mm) from the right edge, right next to the home button), gently slide the opening pick all the way back in.

– Carefully slide the pick to the right to loosen the adhesive holding the Wi-Fi antenna to the front glass.

– The antenna is fastened to the bottom of the iPad with screws and a cable. This step frees the antenna from the front panel so it stays safe when you lift the panel off.

Step 19

– Keep sliding that opening pick under the bottom edge of the iPad, carefully working it around the home button. Once you’re past the button, tuck the pick back in about half an inch (10 mm) to keep the adhesive coming loose without any fuss.

Tools Used
  1. iOpeneriPad 4 Wi-Fi Microphone Replacement

Step 20

– Keep peeling that adhesive all along the bottom edge of your iPad like a pro.

– Slip the opening pick under the front glass near the home button and let it hang out there.

Step 21

– Pop the iOpener back in the microwave to warm it up again, then place it on the left edge of your iPad to gently heat up the adhesive in that spot.

Tools Used
  1. iOpeneriPad 4 Wi-Fi Microphone Replacement

Step 22

– Gently glide the opening pick along the top edge of your iPad, giving it a little tug to navigate around that front-facing camera bracket. It’s like a little dance!

– The adhesive in this area is pretty tenacious, so you might need to channel your inner strength. Take your time and be cautious—no need to slip up and hurt yourself or your precious iPad.

– If your opening pick feels like it’s stuck in the gooey adhesive, just give it a little ‘roll’ move as demonstrated in step 9. You’ve got this!

Tools Used
  1. iOpeneriPad 4 Wi-Fi Microphone Replacement

Step 23

– Keep peeling away the adhesive at the top edge of the iPad, and gently maneuver the opening pick around that top left corner like a pro.

Tools Used
  1. iOpeneriPad 4 Wi-Fi Microphone Replacement

Step 24

– Gently slide the opening pick along the iPad’s left edge, letting the adhesive release as you go. Keep it light here, since the digitizer runs along the left side. Aim for a shallow depth—no more than 10mm (about 1/2 inch)—to avoid messing with the digitizer. Stay smooth, steady, and don’t push too deep.

Step 25

– Take that trusty opening pick still hanging out under the iPad’s bottom edge and gently work it to free the adhesive at the bottom left corner. You got this!

Step 26

– Take one of those handy opening picks and gently lift up the bottom right corner of your iPad. Once it’s up, grab it with your fingers and pull it free.

Step 27

– Grab your iPad by the top and bottom right corners, and give the front glass a little twist away from the device. Be gentle, it’s just a glass panel, not a boulder!

– When putting things back together, take a moment to wipe the LCD screen with a microfiber cloth and give it a quick blast of compressed air to remove any dust or fingerprints before sealing the glass back in place. A clean screen makes all the difference!

Step 28

– Unscrew the four tiny 2 mm Phillips #00 screws holding the LCD to the aluminum frame. Easy, right? Just a little twist and you’re one step closer to freeing that screen!

Step 29

– Grab a plastic opening tool or spudger, and gently work your way under the right edge of the LCD to lift it out of the iPad.

– Once you’ve got it lifted, slowly rotate the LCD along its left edge and carefully lay it down on top of the front glass panel. Easy does it!

Tools Used
  1. SpudgeriPad 4 Wi-Fi Microphone Replacement

Step 30

– With the spudger’s pointed tip in hand, gently lift up the tape that’s keeping the LCD ribbon cable connector all snug and secure.

Tools Used
  1. SpudgeriPad 4 Wi-Fi Microphone Replacement

Step 31

– Gently lift the little flap on the LCD ribbon cable ZIF connector. It’s like a tiny door waiting to be opened!

– With a bit of finesse, use your fingers or a trusty pair of tweezers to slide the LCD ribbon cable out of its snug home on the logic board. You’ve got this!

Tools Used
  1. TweezersiPad 4 Wi-Fi Microphone Replacement

Step 32

– Carefully lift the LCD off the front panel, making sure not to touch the front of the screen.

Step 33

Step 34

– Lift the retaining flap on the home button ribbon cable ZIF connector with a gentle flick.

Step 35

– Grab a pair of tweezers and gently pull the home button ribbon cable straight out from its socket on the logic board.

Tools Used
  1. TweezersiPad 4 Wi-Fi Microphone Replacement

Step 36

– Gently lift the home button ribbon cable out of its snug spot in the back case.

Step 37

– Grab a trusty pair of tweezers and gently lift the tape that’s holding the digitizer ribbon cable snugly against the logic board. You’ve got this!

Tools Used
  1. TweezersiPad 4 Wi-Fi Microphone Replacement

Step 38

– Gently flip up the little retaining flap on each of the digitizer ribbon cable ZIF connectors to get them ready for the next step.

Step 39

– Grab your trusty spudger and gently slide the flat end under the digitizer ribbon cable to break free the adhesive holding it down.

– Once you’ve done that, carefully pull the digitizer ribbon cable straight out from its cozy little home on the logic board.

Tools Used
  1. SpudgeriPad 4 Wi-Fi Microphone Replacement

Step 40

– Carefully lift the digitizer ribbon cable and grab your trusty spudger. Use the flat end to gently coax the adhesive that’s holding the cable to the back of the aluminum case. You’re doing great!

Tools Used
  1. SpudgeriPad 4 Wi-Fi Microphone Replacement

Step 41

– Gently use your fingers to wiggle the digitizer ribbon cable free from its snug spot in the aluminum frame.

– Carefully lift the front panel away from the iPad.

Step 42

– Grab your trusty tweezers and gently lift the adhesive tape that’s keeping the front-facing camera connector snug as a bug. You’ve got this!

Tools Used
  1. TweezersiPad 4 Wi-Fi Microphone Replacement

Step 43

– Gently use the flat end of your spudger to pop the front-facing camera out of its socket on the headphone jack assembly.

Tools Used
  1. SpudgeriPad 4 Wi-Fi Microphone Replacement

Step 44

– Gently slide the flat end of your spudger under the front-facing camera and pop it out from its spot in the rear case.

Tools Used
  1. SpudgeriPad 4 Wi-Fi Microphone Replacement

Step 45

– Gently lift and detach the front-facing camera from the iPad.

Step 46

– Grab a trusty pair of tweezers and gently lift the adhesive tape that’s hiding the microphone ribbon cable. You’re on your way to a smooth repair!

Tools Used
  1. TweezersiPad 4 Wi-Fi Microphone Replacement

Step 47

– With the spudger’s pointy tip, gently lift the retaining flap on the microphone cable ZIF connector.

Tools Used
  1. SpudgeriPad 4 Wi-Fi Microphone Replacement

Step 48

– Slide the spudger’s tip under the microphone ribbon cable and gently nudge it out from its cozy spot in the ZIF connector. Easy peasy!

Tools Used
  1. SpudgeriPad 4 Wi-Fi Microphone Replacement

Step 49

– Gently slide the flat edge of a spudger under the microphone ribbon cable and lift it off the sticky adhesive that’s holding it to the rear case. You’ve got this!

Tools Used
  1. SpudgeriPad 4 Wi-Fi Microphone Replacement

Step 50

Step 51

– To put your device back together, just follow the steps in reverse order and use our iPad 4 Wi-Fi Front Panel Adhesive Strips guide to secure the front panel.

– If you hit a snag or want a helping hand, you can always schedule a repair with the pros.

Tools Used
  1. SpudgeriPad 4 Wi-Fi Microphone Replacement

Success!
To put your device back together, simply retrace your steps in reverse and use our iPad 4 Wi-Fi Front Panel Adhesive strips guide to secure that front panel like a pro. Remember, if you hit a snag, you can always schedule a repair for some extra hands!

iPad 4 Wi-Fi Logic Board Replacement

Duration: 45 minutes
Steps: 46 Steps

Get ready to dive into the world of tech wizardry! In this guide, we’re going to swap out the logic board like pros. Just follow along, and soon you’ll be back to enjoying your device without a hitch. If you hit any bumps along the way, remember, we’re here to help—just schedule a repair if you need it!

Step 1

– Pop the iOpener right in the microwave, aiming for the center spot!

Tools Used
  1. iOpeneriPad 4 Wi-Fi Logic Board Replacement

Step 2

– Pop the iOpener in the microwave for about thirty seconds to get it nice and warm.

– As you go along with the repair, keep an eye on the iOpener—it’ll cool down. No worries though, just zap it again for another thirty seconds whenever it needs a little boost!

Tools Used
  1. iOpeneriPad 4 Wi-Fi Logic Board Replacement

Step 3

– Carefully take the iOpener out of the microwave, gripping it by one of the two flat ends to steer clear of that toasty center. Stay cool and safe!

Tools Used
  1. iOpeneriPad 4 Wi-Fi Logic Board Replacement

Step 4

– Grab a pot or pan and fill it up with enough water to completely dunk your iOpener. We want it to take a nice, cozy bath!

– Heat that water until it’s boiling, then turn off the heat. We don’t want to cook the iOpener, just warm it up!

– Carefully place the iOpener into the hot water for about 2-3 minutes. Make sure it’s enjoying its soak and is fully submerged.

– Using some tongs (safety first!), lift the heated iOpener out of the water.

– Give the iOpener a good towel dry. We want it to be nice and dry before using it.

– And voila! Your iOpener is all set to help you out! If it needs another heat-up, just repeat the water boiling process and let it soak again for 2-3 minutes. Easy peasy!

Tools Used
  1. iOpeneriPad 4 Wi-Fi Logic Board Replacement

Step 5

– If your screen glass is cracked, protect yourself and keep the shards from spreading by taping over it before diving in.

– Cover the iPad’s display with overlapping strips of clear packing tape until the whole front is shielded.

– Follow the rest of the steps as best you can. Just a heads-up—once the glass is cracked, it might keep chipping as you work, so a metal prying tool might be needed to gently lift pieces out.

Step 6

– Place the iOpener gently on the right edge of your iPad, making sure it’s nice and flat. Smooth it out so the iOpener is in full contact with the surface of your iPad.

– Now, give the bag about 90 seconds to work its magic before you start opening up the front panel.

Tools Used
  1. iOpeneriPad 4 Wi-Fi Logic Board Replacement

Step 7

– Spot the tiny gap in the iPad’s adhesive ring over in the upper right corner, about 2.0 inches (~5 cm) down from the top. That little opening is your secret entry point.

– Line up your tool with the mute button, then gently slip the tip of a plastic opening tool into the crack between the front glass and the plastic bezel. Just nudge the tip in enough to gently pry the gap open a bit.

Step 8

– Carefully slide your tool right between the plastic display bezel and the front panel glass to get in the perfect spot.

Step 9

– With the plastic opening tool’s tip snugly positioned between the front glass and the plastic bezel, gently slide a plastic opening pick into that little gap, right beside the trusty opening tool.

Step 10

– Take out the plastic opening tool from your iPad and gently slide the opening pick further beneath the front glass, going about 0.5 inches deep. A little patience here goes a long way!

Step 11

– As you carefully loosen the adhesive on the right side of the iPad, go ahead and reheat the iOpener, then pop it back onto the bottom edge to keep things nice and warm.

Tools Used
  1. iOpeneriPad 4 Wi-Fi Logic Board Replacement

Step 12

– As you warm up the bottom edge with the iOpener, let’s get to work on loosening that adhesive from the right edge of the iPad.

– Gently glide the opening pick down the side of the iPad, freeing up the adhesive as you make your way along.

Tools Used
  1. iOpeneriPad 4 Wi-Fi Logic Board Replacement

Step 13

– If your opening pick gets stuck in the adhesive, try ‘rolling’ it gently along the edge of the iPad to keep loosening that stubborn glue.

Tools Used
  1. iOpeneriPad 4 Wi-Fi Logic Board Replacement

Step 14

– Before you take out that first opening pick from the bottom corner of your iPad, sneak a second pick under the right edge of the front glass to stop the adhesive from sticking back together. Nice and smooth!

– Give your iOpener another heat-up, then move it over to the top edge of the iPad. That’ll make the next step even easier.

Tools Used
  1. iOpeneriPad 4 Wi-Fi Logic Board Replacement

Step 15

– Alright, time to slow down and take it easy. We’re about to get into some delicate work here.

– You need to carefully free the antenna from its adhesive hold on the front panel. But remember, the antenna’s connection to the bottom of your device is a bit fragile. Handle with care and take your time with the next steps.

Step 16

– Gently slide the opening pick around the bottom right corner of the iPad to break through the adhesive holding it in place.

Step 17

– Gently slide the opening pick along the bottom edge of your iPad. This will help release the adhesive near the Wi-Fi antenna, so it can come apart smoothly.

Step 18

– Alright, let’s get this party started! Once you’ve cruised past the Wi-Fi antenna (that’s about 3 inches or 75 mm from the right edge, right by the home button), pop that opening pick back in all the way.

– Now, gently slide the pick to the right. This will help free the adhesive that’s keeping the Wi-Fi antenna snug against the front glass.

– Just a heads up: the antenna is held down at the bottom of the iPad with screws and a cable. By doing this step, you’re making sure the antenna gets detached from the front panel, so when you lift that panel off, the antenna stays safe and sound.

Step 19

– Keep gently peeling back the adhesive at the bottom of the iPad. Make sure to pull the opening pick far enough to sneak it around the home button. Once you’ve passed the home button, poke it back in to a depth of about 1/2 inch (10 mm). You’re doing great!

Tools Used
  1. iOpeneriPad 4 Wi-Fi Logic Board Replacement

Step 20

– Keep sliding that adhesive remover tool along the entire bottom edge of the iPad until it’s all free.

– Leave the opening pick snugly tucked under the front glass right by the home button to hold your spot.

Step 21

– Warm up the iOpener in the microwave and place it on the left edge of the iPad to begin loosening up that sticky adhesive in that spot.

Tools Used
  1. iOpeneriPad 4 Wi-Fi Logic Board Replacement

Step 22

– Gently slide the opening pick along the top edge of the iPad, easing it out just enough to navigate around the front-facing camera bracket.

– Heads up: the adhesive here is super stubborn, so you might need to apply a bit of muscle. Take it slow and steady to avoid any slips or scrapes on you or your iPad.

– If your pick starts to get stuck in the adhesive, try “rolling” it as demonstrated in step 9 to keep things moving smoothly.

Tools Used
  1. iOpeneriPad 4 Wi-Fi Logic Board Replacement

Step 23

– Keep peeling back the adhesive along the top edge of the iPad, then gently slide your opening pick around the top left corner like a pro.

Tools Used
  1. iOpeneriPad 4 Wi-Fi Logic Board Replacement

Step 24

– Gently glide the opening pick along the left edge of your iPad, letting it free the adhesive as you go. This area has a thin layer of adhesive thanks to the digitizer lining the whole left side. Just be sure to keep the pick shallow (no more than 1/2 inch or 10 mm) to avoid any accidental damage to the digitizer. You’ve got this!

Step 25

– With the trusty opening pick still nestled under the bottom edge of your iPad, gently coax the adhesive away from the bottom left corner. You’ve got this!

Step 26

– Grab an opening pick and gently wedge it under the bottom right corner of the iPad, then lift it up enough to get a good grip with your fingers.

Step 27

– Grab the iPad by the top and bottom right corners and gently swivel the front glass away from the device.

– When putting everything back together, give the LCD a good once-over with a microfiber cloth and a blast of compressed air to clear off any dust or fingerprints before snapping the glass back on.

Step 28

– Start by unscrewing the four 2 mm Phillips #00 screws holding the LCD in place on the aluminum frame. They’re small, so take it easy and don’t let them roll away!

Step 29

– Grab a plastic opening tool or a spudger and gently lift the right edge of the LCD away from the iPad.

– Now, carefully rotate the LCD from the left edge and lay it down on top of the front glass panel.

Tools Used
  1. SpudgeriPad 4 Wi-Fi Logic Board Replacement

Step 30

– Grab your trusty spudger and gently lift that piece of tape off the LCD ribbon cable connector. You’ve got this!

Tools Used
  1. SpudgeriPad 4 Wi-Fi Logic Board Replacement

Step 31

– Lift up the little flap holding the LCD ribbon cable in place on the ZIF connector.

– Gently wiggle the LCD ribbon cable free from its socket on the logic board using your fingers or tweezers.

Tools Used
  1. TweezersiPad 4 Wi-Fi Logic Board Replacement

Step 32

– Carefully lift the LCD away from the front panel—just don’t touch the front side of the screen!

Step 33

Step 34

– Gently lift the retaining flap on the home button ribbon cable ZIF connector. Take it slow, you’ve got this!

Step 35

– Grab a pair of tweezers and gently pull the home button ribbon cable straight out from its socket on the logic board. No need to rush—just take your time and let it come out smoothly.

Tools Used
  1. TweezersiPad 4 Wi-Fi Logic Board Replacement

Step 36

– Gently lift the home button ribbon cable out of its snug spot in the rear case.

Step 37

– Grab a trusty pair of tweezers and gently lift the tape that’s holding the digitizer ribbon cable snugly against the logic board. You’ve got this!

Tools Used
  1. TweezersiPad 4 Wi-Fi Logic Board Replacement

Step 38

– Gently lift the little flap holding down the digitizer ribbon cable ZIF connectors on both sides. Easy does it!

Step 39

– Gently slide the flat end of a spudger under the digitizer ribbon cable to break the adhesive seal like a pro.

– Once it’s loose, carefully pull the digitizer ribbon cable straight out from its cozy sockets on the logic board.

Tools Used
  1. SpudgeriPad 4 Wi-Fi Logic Board Replacement

Step 40

– Gently lift the digitizer ribbon cable and grab a spudger to carefully break the adhesive that’s keeping the cable snug against the rear aluminum case.

Tools Used
  1. SpudgeriPad 4 Wi-Fi Logic Board Replacement

Step 41

– Give the digitizer ribbon cable a gentle tug with your fingers to lift it out of its cozy spot in the aluminum frame.

– Carefully lift off the front panel from the iPad and set it aside.

Step 42

– Grab your tweezers and carefully peel back that little strip of electrical tape hiding the headphone jack assembly cable connector.

– Next, use the tip of your spudger to gently flip up the tiny retaining flaps on both ZIF connectors that hold the headphone jack cable to the logic board.

Tools Used
  1. SpudgeriPad 4 Wi-Fi Logic Board Replacement
  2. TweezersiPad 4 Wi-Fi Logic Board Replacement

Step 43

– Gently slide the flat end of your spudger under the headphone jack assembly cable to break the adhesive bond holding it to the rear aluminum frame. Take it slow—no need to rush!

– Once it’s loose, carefully pull the headphone jack assembly cable straight out from its socket on the logic board. Keep it steady, and it’ll come right out.

Tools Used
  1. SpudgeriPad 4 Wi-Fi Logic Board Replacement

Step 44

– Alright, let’s get this party started! First up, gently disconnect the following cables from their cozy homes on the logic board:

– Wi-Fi antenna cable

– Speaker connector cable.

– Dock/Lightning connector cable.

Tools Used
  1. TweezersiPad 4 Wi-Fi Logic Board Replacement

Step 45

– Let’s loosen up these four screws holding the logic board to the rear aluminum panel—time to set them free!

– Three screws are 2.1mm Phillips #00,

– and one is a 2.5mm Phillips #00.

Step 46

– Grip the logic board by the edge opposite the Lightning connector and gently ease it away from the iPad. Go slow, be steady—this part is crucial to avoid any damage.

Success!

🍪
Have a cookie! This site uses cookies to enhance your experience. Opt-Out Options.