Samsung Galaxy S8 Plus Rear Camera Bezel Replacement

Duration: 45 minutes
Steps: 18 Steps

Ready to swap out the rear camera bezel (yep, including that glass lens cover) on your Samsung Galaxy S8 Plus? If your new part doesn’t come with adhesive, you’ll need to grab some—look for pre-cut adhesive or get creative with some skinny high-bond tape. Let’s get your camera looking fresh again!

Step 1

– Grab an iOpener and gently warm up the back of the phone along its left edge for about two minutes. This helps loosen the adhesive holding the back cover in place, making it easier to remove.

Tools Used
  1. iOpenerSamsung Galaxy S8 Plus Rear Camera Bezel Replacement

Step 2

– Alright, here comes the fun part—time to slice through the glue holding the back cover.

– From the outside, you’ll be working in the zones highlighted here:

– Thick glue? That’s where you’ll need a little more elbow grease.

– Thin glue? Easy breezy—just glide on through.

– Heads up: steer clear of this spot! There’s a fingerprint sensor cable hiding underneath, so no poking or slicing there.

Step 3

– Stick a suction cup onto the back cover, right near that freshly warmed edge.

– Give the suction cup a gentle pull to pop up the left side of the back cover, just enough to sneak a peek between the cover and the frame.

Tools Used
  1. iOpenerSamsung Galaxy S8 Plus Rear Camera Bezel Replacement

Step 4

– Slide a pick or a thin plastic opening tool into the gap to gently pry it open.

Step 5

– Glide your opening pick along the left side of the phone to cut through the sticky adhesive holding the back cover in place. Keep it smooth and steady!

Step 6

– Keep slicing through the adhesive along the bottom edge of the phone, and don’t forget—leaving your opening pick in place might make things easier. Grab another pick for the next step to keep things smooth sailing. If you need a hand at any point, you can always schedule a repair.

Step 7

– Work your way through the rest of the sticky stuff on the top edge and right side—almost there!

Step 8

– Gently pry the back cover up from the left edge and give it a little wiggle to open it up just a bit.

Step 9

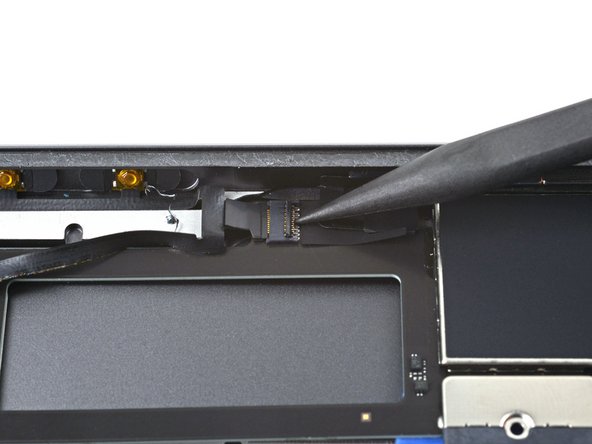
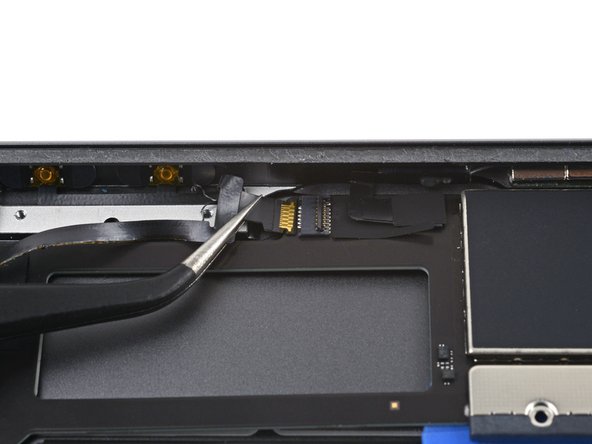
– Gently use the spudger’s point to lift and detach the fingerprint sensor flex cable. Take it easy, and remember—it’s all part of the repair journey!

Tools Used
  1. SpudgerSamsung Galaxy S8 Plus Rear Camera Bezel Replacement

Step 10

– As you put things back together, get that back cover into position so the fingerprint sensor cable is ready to line up with its socket.

– Take your trusty spudger and press the connector straight down until it clicks in place—no wild moves needed, just a gentle snap!

Tools Used
  1. SpudgerSamsung Galaxy S8 Plus Rear Camera Bezel Replacement

Step 11

– First things first, let’s get that back cover off! It’s time to reveal the inner workings of your device.

– Ready to put on a shiny new back cover? Here’s how to do it:

– If you’re reinstalling the back cover or using one without pre-installed adhesive, just follow this handy guide.

– Oh, and if you need to move the camera bezel to your new part, no worries! Just check out our camera bezel replacement guide.

– Grab some tweezers and gently peel away any leftover adhesive from the phone’s chassis. Then, give those adhesion areas a good clean with high concentration isopropyl alcohol (at least 90%) and a lint-free cloth to get them ready for the new adhesive.

– Now, peel off the adhesive backing from the new rear glass, carefully align one edge with the phone chassis, and press it down firmly. You’ve got this!

Tools Used
  1. TweezersSamsung Galaxy S8 Plus Rear Camera Bezel Replacement

Step 12

– Grab your iOpener and give that rear camera bezel at the top of the back glass a cozy two-minute session. Let it soak in the warmth.

– If your phone’s playing hard to get, just reheat and reapply the iOpener until things get toasty. Make sure you follow the iOpener instructions so you don’t end up with a hot potato situation.

Tools Used
  1. iOpenerSamsung Galaxy S8 Plus Rear Camera Bezel Replacement

Step 13

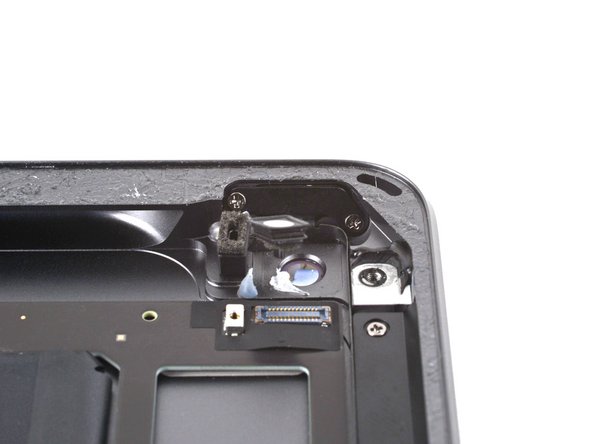
– Slide an opening pick under the top edge of the rear camera bezel—like you’re sneaking a slice of cake out of the fridge.

– Glide the pick around the bezel’s edges to loosen the sticky adhesive holding it to the rear glass. Take it slow; no need for a wrestling match.

– Hands off the side next to the fingerprint sensor—give that spot some space!

Step 14

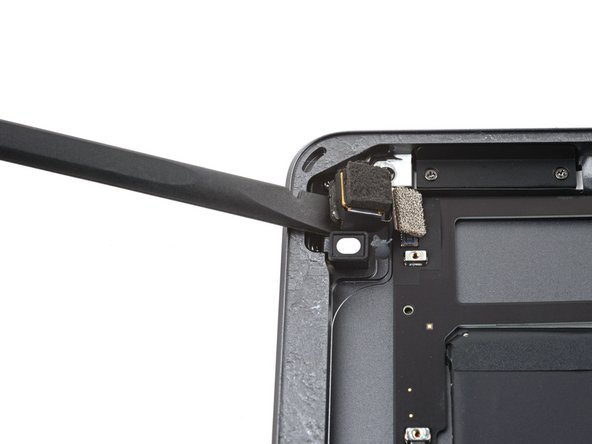
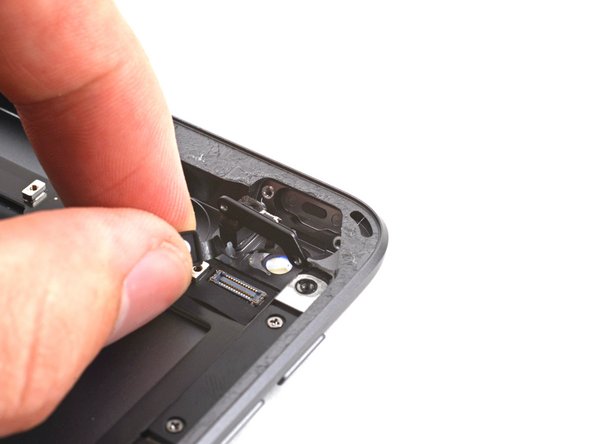
– Grab an opening pick and gently pry the camera bezel away from the rear glass—think of it as giving the phone a friendly nudge.

– Stuck on some stubborn adhesive? Use your pick to carefully cut through it, making the job smoother.

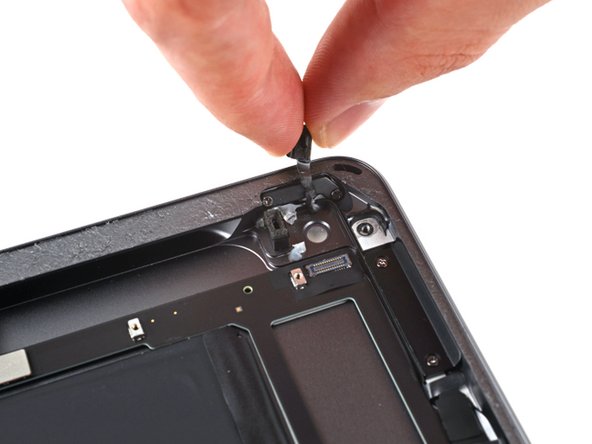
– Once the adhesive is loosened, lift off the camera bezel — easy does it.

– Watch out for the fingerprint cable — make sure you don’t catch it on the bezel as you lift it away. Nice and steady wins the race.

Step 15

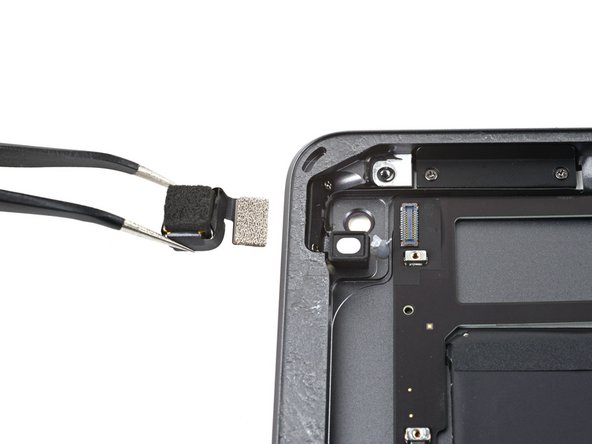
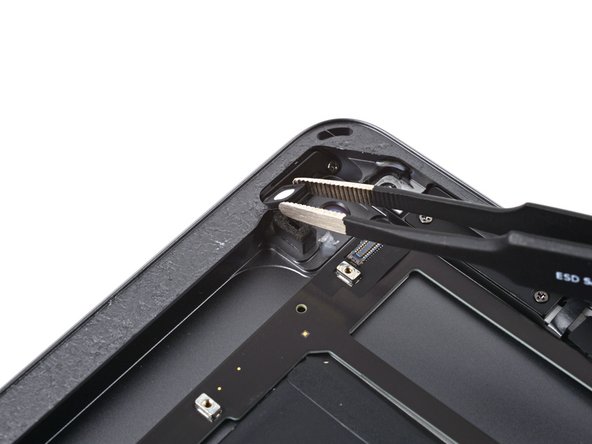
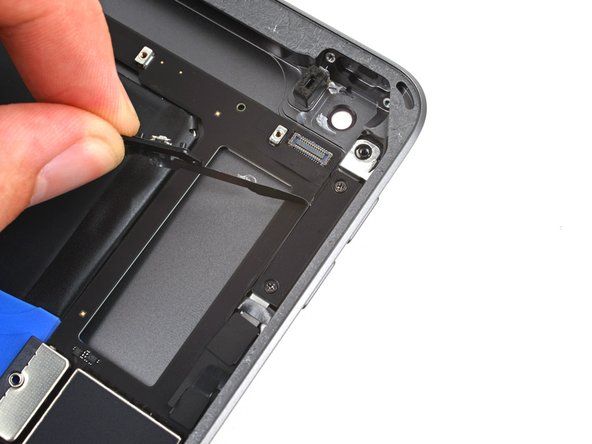
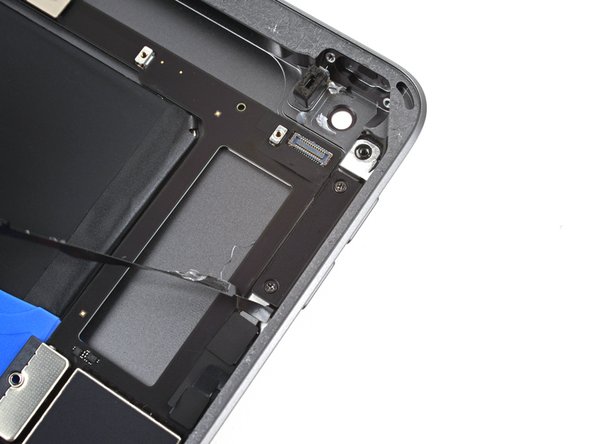
– Grab those tweezers and lift away the leftover adhesive from the rear camera bezel—think of it as tidying up before a big event.

– Take a spudger and gently scrape off any stubborn bits of adhesive clinging to the rear glass where the camera bezel sits.

– Time for a cleaning session: use high-strength isopropyl alcohol (90% or more) and a lint-free cloth to wipe the adhesion area. Always swipe in one direction—it’s like brushing your hair, not a wild dance party. This gets the surface ready for fresh adhesive.

Tools Used
  1. TweezersSamsung Galaxy S8 Plus Rear Camera Bezel Replacement
  2. SpudgerSamsung Galaxy S8 Plus Rear Camera Bezel Replacement

Step 16

– Cut some tape to the right size so it fits perfectly along the edges of the camera bezel. If you’re unsure, go with a narrower strip than you think you’ll need – better safe than sorry!

– Use your tweezers to carefully place the tape onto the metal surface of the bezel, focusing on the side where the camera lens cover sticks out.

– Try to cover as much of the metal surface as you can with the tape. Just make sure to avoid getting any on the plastic or glass areas – keep it clean!

Tools Used
  1. TweezersSamsung Galaxy S8 Plus Rear Camera Bezel Replacement

Step 17

– Grab your tweezers and carefully peel off all the adhesive backing from the rear camera bezel. Take it slow—think of it like unwrapping a tiny present for your phone.

Tools Used
  1. TweezersSamsung Galaxy S8 Plus Rear Camera Bezel Replacement

Step 18

– Put your device back together by reversing the steps above.

– Once you’re done, check out our guide to make sure everything’s working as it should.

– If you’ve got old parts, drop them off at an R2 or e-Stewards certified recycler.

– Ran into a hiccup? Swing by our Answers community for some troubleshooting tips.

– If you need a hand, you can always schedule a repair with Salvation Repair.

Success!

Samsung Galaxy S8 Plus Display Adhesive Replacement

Duration: 45 minutes
Steps: 4 Steps

Ready to swap out that stubborn display adhesive on your Galaxy S8+? This step-by-step guide will walk you through the process with clear, friendly instructions. Remember, this is just one part of the full screen replacement adventure—so keep your tools handy and take your time. If you hit a wall or need a pro touch, you can always schedule a repair to get it done right.

Step 1

– Sweep away every last bit of sticky gunk and crumbs from the frame—your phone deserves a fresh start! Grab some high-octane isopropyl alcohol (90% or above), give the adhesion area a good scrub, then wipe it down with a lint-free cloth so it’s squeaky clean.

– Lay out the adhesive strips like puzzle pieces to see where each one fits. No surprises here!

– Peel away the clear plastic backing from the big pre-cut adhesive strip, revealing the sticky side. It’s showtime for your masterpiece.

Tools Used
  1. Isopropyl AlcoholSamsung Galaxy S8 Plus Display Adhesive Replacement

Step 2

– Gently line up one edge of the adhesive with the phone frame—think of it like a puzzle piece, just waiting to fit!

– Once you’ve got that edge in place, lightly set the adhesive down on the frame, like it’s settling in for a nice nap.

– Now, with a little finesse, use your fingers to press the adhesive into place. It should feel snug, but not too tight.

– If it’s not looking quite right, don’t worry—just peel it back up slowly and try again. You’ve got this!

Step 3

– Grab one of the end adhesive strips and peel it away from the clear backing—like you’re unwrapping a secret snack.

– Hold the strip by those green tabs and match it up with the frame, like you’re lining up the perfect selfie.

– Gently lay the adhesive onto the phone. Double-check that all those little cutouts are lining up where they should.

– Once things look straight, press the adhesive down with your fingers to lock it in place.

– Repeat all that for the other adhesive strip and you’re good to go.

Step 4

– Ready to wrap things up? Just hop on over to the Galaxy S8+ screen replacement guide by following this link! If you find yourself in a pickle, don’t hesitate to schedule a repair for some expert help.

Success!
Head back to the Galaxy S8+ screen replacement guide and keep that momentum going. If things get tricky or you want a hand, you can always schedule a repair.

Samsung Galaxy S8+ Battery Replacement

Duration: 45 minutes
Steps: 18 Steps

Ready to swap out that tired battery in your Galaxy S8 Plus? With regular use, your battery might start slacking off after a year or two. If your phone won’t stay charged or keeps shutting down when you need it most, follow these steps to get things back on track. Make sure to run your battery down below 25% before you dive in—lithium-ion batteries and accidental pokes don’t mix well. Spot a swollen battery? Don’t mess around: skip the heat, wear eye protection, and handle with care! If the back cover won’t budge, a little isopropyl alcohol (90% or higher) around the edges can help loosen things up. If anything feels risky, you can always schedule a repair and let the pros handle it.

Step 1

– Grab an iOpener and gently warm up the back of your phone along the left edge for about two minutes. This helps loosen up the adhesive holding the back cover in place, making it easier to get inside.

Tools Used
  1. iOpenerSamsung Galaxy S8+ Battery Replacement

Step 2

– Time to slice through the sticky stuff holding down the back cover—grab your tool and get ready.

– From the outside, you’ll be working your way around the areas shown:

– Thick bands of adhesive—these will need a bit more elbow grease.

– Thin strips of adhesive—you’ll breeze right through these.

– Steer clear of this area so you don’t mess with the fingerprint sensor cable hiding underneath.

Step 3

– Start by attaching a suction cup to the back cover, aiming for the heated edge for the best grip.

– Gently lift the left edge of the back cover with the suction cup, creating just enough space between the cover and the frame.

Tools Used
  1. iOpenerSamsung Galaxy S8+ Battery Replacement

Step 4

– Gently slide an opening pick into the gap to get things started. Keep it steady and work your way around to loosen the parts. If you need help, you can always schedule a repair.

Step 5

– Gently slide your opening pick down the left side of the phone to loosen up that adhesive and free the back cover. Take your time—sticky stuff ahead!

Step 6

– Keep slicing along the bottom edge of the phone to cut through the adhesive. It might help to leave the opening pick in place for now and grab another one to continue with the next step.

Step 7

– Carefully slice through any leftover adhesive along the top and right sides. Steady hands win the day!

Step 8

– Gently lift the back cover from the left edge and give it a little nudge to open it up just a bit.

Step 9

– Take a spudger and gently pop up the fingerprint sensor flex cable—think of it like opening a stubborn bag of chips, but with way cooler tech.

Tools Used
  1. SpudgerSamsung Galaxy S8+ Battery Replacement

Step 10

– When you’re putting things back together, angle the back cover so the fingerprint sensor cable is ready to party right over its socket.

– Take the flat end of your spudger and press the connector straight down until it clicks into place—nice and easy!

Tools Used
  1. SpudgerSamsung Galaxy S8+ Battery Replacement

Step 11

– First things first, let’s get that back cover off! It’s time to reveal the inner workings of your device.

– Ready to put on a shiny new back cover? Here’s how to do it:

– If you’re reinstalling the back cover or using one without pre-installed adhesive, just follow this handy guide.

– Oh, and if you need to move the camera bezel to your new part, no worries! Check out our camera bezel replacement guide for that.

– Grab some tweezers and gently peel away any leftover adhesive from the phone’s chassis. Then, give those adhesion areas a good clean with high concentration isopropyl alcohol (at least 90%) and a lint-free cloth to get them ready for the new adhesive.

– Now, peel off the adhesive backing from the new rear glass, align one edge with the phone chassis, and press it down firmly. You’ve got this!

Tools Used
  1. TweezersSamsung Galaxy S8+ Battery Replacement

Step 12

– Take out the eleven 3.7 mm Phillips screws securing the wireless charging coil and antenna setup. It’s like a tiny hardware treasure hunt—just count them out as you go.

– If a screw acts stubborn even after you’ve loosened it all the way, go ahead and grab it with tweezers. Sometimes they just need a little extra nudge!

Tools Used
  1. TweezersSamsung Galaxy S8+ Battery Replacement

Step 13

– Gently lift the plastic around the edges with a spudger to release the clips. Take your time—patience pays off.

Tools Used
  1. SpudgerSamsung Galaxy S8+ Battery Replacement

Step 14

– Lift out the wireless charging coil and antenna assembly. When putting it back, slide the top edge into the frame first, then press down on the rest until it snaps in place.

Step 15

– Grab your spudger and gently pop the battery connector straight up from its socket—like you’re lifting a tiny trapdoor. Easy does it!

Tools Used
  1. SpudgerSamsung Galaxy S8+ Battery Replacement

Step 16

– Drop 1-2 drops of high-concentration (>90%) isopropyl alcohol under each corner of the battery and let it soak in for a few minutes to loosen that stubborn adhesive.

– Or, you can give your battery a warm hug with a freshly heated iOpener right behind it for two minutes to help melt the adhesive. Feel free to reheat and reapply the iOpener as needed!

Tools Used
  1. iOpenerSamsung Galaxy S8+ Battery Replacement

Step 17

– Slip a couple of opening picks or a trusty plastic card along the edge of the battery—think of it as giving the battery a polite nudge.

– With steady, gentle pressure, coax the battery up and out of its spot. Take your time and let it know it’s moving to better things!

Step 18

– Time to put everything back together—just retrace your steps in reverse order.

– Give your new battery a boost by calibrating it once you’re done. If things get tricky, you can always schedule a repair.

Success!
Pop everything back together by reversing the steps. Your device will thank you.
Give your new battery a quick calibration for peak performance. If you hit a snag, you can always schedule a repair.

Samsung Galaxy S8 Plus Back Glass Replacement

Duration: 45 minutes
Steps: 13 Steps

Gear up to replace the back glass on your Samsung Galaxy S8 Plus! If your new part doesn’t come with adhesive already attached, no worries—just grab some adhesive designed for rear glass and fingerprint readers. You can choose pre-cut strips or a thin, high-strength tape to get the job done smoothly. Need a hand? You can always schedule a repair with Salvation Repair for a professional touch.

Step 1

– Warm up your iOpener and give the left edge of your phone’s back a nice two-minute spa session. This softens up the glue holding the back cover, making your next steps way easier.

Tools Used
  1. iOpenerSamsung Galaxy S8 Plus Back Glass Replacement

Step 2

– Time to get creative with some gentle prying — we’re slicing through the adhesive that holds the back cover in place. Keep it smooth and steady!

– From the outside, you’ll be cutting along the adhesive in the zones shown here: think of it as following a map of where the glue likes to hide.

– Thick patches of adhesive are the hearty ones, the tough cookies. Take your time here to make sure you get through them without fuss.

– In those thinner, more delicate spots, gentle cuts are the way to go. We want to loosen the grip without causing any collateral damage.

– And a quick heads-up: steer clear of prying or slicing near the fingerprint sensor flex cable to keep everything working smoothly. Protect that sensitive area!

Step 3

– Grab a suction cup and stick it to the back cover, right near that warmed-up edge.

– Gently lift the left side of the back cover with your suction cup, creating a tiny gap between the cover and the frame.

Tools Used
  1. iOpenerSamsung Galaxy S8 Plus Back Glass Replacement

Step 4

– Slide an opening pick into the gap like you’re slicing into a cake—just a little wiggle to get things started.

Step 5

– Take your opening pick and cruise down the left side of the phone, slicing through that sticky adhesive holding the back cover in place.

Step 6

– Keep working your way along the bottom edge, slicing through that stubborn adhesive.

– It’s handy to leave your opening pick in place and grab a fresh one for the next move.

Step 7

– Carefully slide along the top edge and right side to break up any stubborn adhesive still hanging on.

Step 8

– Gently pry the back cover up from the left edge and swing it open just a tad.

Step 9

– Grab a spudger and gently pry up the fingerprint sensor flex cable to disconnect it. Keep it steady and work carefully—you’re almost there! If you need a hand, you can always schedule a repair.

Tools Used
  1. SpudgerSamsung Galaxy S8 Plus Back Glass Replacement

Step 10

– As you put everything back together, let’s get that fingerprint sensor cable reconnected! First, tilt the back cover into place until the cable connector is perfectly aligned with its socket.

– Next, grab your trusty spudger and gently press down on the connector to snap it into place. Easy peasy!

Tools Used
  1. SpudgerSamsung Galaxy S8 Plus Back Glass Replacement

Step 11

– Start by removing the back cover. To install a new back cover, follow these steps. If you’re reattaching the back cover or installing one without pre-applied adhesive, just follow this guide. Sometimes, you might need to transfer the camera bezel to your new part—check out our camera bezel replacement guide if that’s the case. Use tweezers to gently peel away any leftover adhesive from the phone’s chassis, then clean the area with high-percentage isopropyl alcohol (90% or higher) and a lint-free cloth to get the surface ready for fresh adhesive. Finally, peel the backing off your new rear glass, carefully align one edge with the chassis, and press firmly to set it in place. If you need help, you can always schedule a repair.

Tools Used
  1. TweezersSamsung Galaxy S8 Plus Back Glass Replacement

Step 12

– Swapping out the rear glass? Time to give your fingerprint sensor a new home! Here’s how you do it:

– Warm up your iOpener and let it work its magic on the fingerprint sensor to loosen up that sticky adhesive.

– Gently press from the outside of the glass panel until the sensor pops free from its adhesive grip.

Tools Used
  1. iOpenerSamsung Galaxy S8 Plus Back Glass Replacement

Step 13

– If your fingerprint sensor adhesive is still holding strong, feel free to give it a second chance! But if it’s seen better days, it’s time to say goodbye to the old adhesive and bring in the new.

– Once you’ve bid farewell to the old adhesive, grab some high concentration isopropyl alcohol (at least 90%) and give the edges of the fingerprint sensor a good clean. After that, it’s time to stick on the new adhesive like a pro!

Success!

Samsung Galaxy S9 Rear-Facing Camera Replacement

Duration: 45 minutes
Steps: 18 Steps

Get ready to give your Samsung Galaxy S9 a brand new rear-facing camera. If the lens is cracked or scratched, it’s time for a replacement. When installing the new camera, make sure it’s level and straight to ensure everything lines up perfectly. Keep in mind that swapping out the rear camera will affect your phone’s waterproofing, unless you also replace the adhesive seal on the back cover. Don’t worry, with these steps, you’ll be taking great photos in no time.

Step 1

– Kick things off by turning off your device so you’re ready to go. Then, grab a heated iOpener and gently press it along a long edge of the phone to loosen up the adhesive under the back glass. Keep the heat on for at least two minutes—patience pays off!

Tools Used
  1. iOpenerSamsung Galaxy S9 Rear-Facing Camera Replacement

Step 2

– In these steps, you’ll be gently slicing through the adhesive that holds the back cover in place—think of it like peeling a sticker, but with more finesse.

– Follow the lines shown here to cut through the adhesive smoothly:

– Thick patches of sticky stuff that need a little more love to loosen up.

– Lighter, thinner adhesive areas that come away more easily with a careful slice.

– Keep clear of this zone—it’s where the fingerprint sensor flex cable lives, and we want to keep it happy and unscathed.

Step 3

– Stick a suction cup onto the back cover like you mean business.

– Gently pull up on the suction cup to create a little gap between the cover and the frame—just enough to sneak in a tool.

– Slide an opening pick into that gap and cruise over to the bottom right corner.

– Grab another pick and send it over to the bottom left corner for backup.

– Pop in a third opening pick to keep that adhesive from pulling a sneak attack and sealing itself up again while you work.

Step 4

– Gently insert just the tip of your opening pick at the bottom left corner, then glide it smoothly along the side toward the top.

– Keep the pick moving around the top corner and hold it there to stop the adhesive from sealing back up.

Step 5

– Take your opening pick and cruise it from the bottom right corner straight up the side to the top.

– Keep the pick moving around the corner and slice through any leftover adhesive at the top edge of your phone.

Step 6

– Gently lift up the rear glass on the side where the volume button hangs out—no sudden moves!

– Grab a spudger and use the edge to pop up and disconnect that fingerprint sensor flex cable like a pro.

Tools Used
  1. SpudgerSamsung Galaxy S9 Rear-Facing Camera Replacement

Step 7

– Start by carefully removing the rear glass panel. Take your time and keep everything safe. When you’re ready to put it back together, follow this guide to reapply the adhesive and snap the rear glass back into place smoothly. If you’re planning to swap out the rear glass entirely, be sure to transfer the rear camera bezel, including the fingerprint sensor, following these steps. Need a hand? You can always schedule a repair for expert help.

Step 8

– Grab your trusty #000 Phillips screwdriver and unscrew the fifteen 4mm screws. A little twist here and there, and you’re on your way!

Step 9

– Take out the NFC coil assembly—just a gentle lift and you’re good to go!

Step 10

– Take off the motherboard bracket—one more step closer to victory!

Step 11

– Time to pop off that speaker cover/antenna assembly. Get a good grip and gently detach it. You’ve got this!

Step 12

– Gently pry up the battery connector with a spudger to disconnect it, making sure you’re not forcing anything. If you need a hand, you can always schedule a repair.

Tools Used
  1. SpudgerSamsung Galaxy S9 Rear-Facing Camera Replacement

Step 13

– Unscrew one 3mm screw using a #000 Phillips screwdriver. You’ve got this!

Step 14

– Gently pry apart those six cables with a spudger—think of it as giving each connection a little friendly nudge to free them up. If you hit a stubborn one, take your time and stay patient. Need a hand? You can always schedule a repair to get professional help.

Tools Used
  1. SpudgerSamsung Galaxy S9 Rear-Facing Camera Replacement

Step 15

– Grab your SIM card remover tool (or just an unbent paperclip) and give that release lever a gentle press. Your SIM card will pop right out, ready for the next step!

Step 16

– Gently coax the motherboard out using a spudger—it’s like giving it a little nudge to say, ‘Time to come out and play!’

Tools Used
  1. SpudgerSamsung Galaxy S9 Rear-Facing Camera Replacement

Step 17

– Gently pop one connector loose using your trusty spudger—think of it as giving your device a little wake-up call.

Tools Used
  1. SpudgerSamsung Galaxy S9 Rear-Facing Camera Replacement

Step 18

– Now it’s time to put your device back together! Just retrace your steps in reverse, and you’ll be back in action in no time. If you hit a snag, remember, we’re here to help! Feel free to schedule a repair if you need a hand.

Success!
Ready to put everything back together? Just walk through the steps in reverse order and you’ll have your device up and running again. If you hit a snag, you can always schedule a repair.

Samsung Galaxy S9 Rear Glass Removal

Duration: 45 minutes
Steps: 7 Steps

Follow this guide to safely remove the rear glass of your Samsung Galaxy S9. Keep in mind, cracking open your device will break its waterproof seal. If you skip replacing the adhesive seals, your phone will work just fine, but it won’t be able to handle water like before. You’ll need fresh adhesive to put everything back in place during reassembly. If you need help, you can always schedule a repair.

Step 1

– Alright, first things first—power down your phone. Safety first, right?

– Now, grab your heated iOpener and gently apply it to one of the long edges of your phone to help loosen up the sticky adhesive under that rear glass. Give it at least two minutes with the heat—patience is key here!

Tools Used
  1. iOpenerSamsung Galaxy S9 Rear Glass Removal

Step 2

– Next up, you’ll be working your way through the adhesive holding the back cover tight.

– Here’s where you’ll want to slice through the sticky stuff:

– Thicker stripes of adhesive

– Thinner stripes of adhesive

– Steer clear of this spot—it’s where the fingerprint sensor flex cable hangs out, so no poking or prying here!

Step 3

– Start by pressing a suction cup onto the back cover. You’ve got this!

– Gently lift the bottom edge of the back cover with your suction cup to create a tiny opening between the back cover and the frame. Just a little wiggle here!

– Now, slide an opening pick into that gap you just made and glide it over to the bottom right corner. Nice and smooth!

– Time for a second opening pick! Slide it over to the bottom left corner to keep things moving.

– Don’t forget to add a third opening pick to hold off that pesky adhesive from sealing back up while you finish the removal process. You’re doing great!

Step 4

– Just sneak the tip of the opening pick in at the bottom left corner, and slide it smoothly up the side to the top—think of it as tracing the edge.

– Swing the pick around the top corner and let it chill there to keep the adhesive from sticking back together.

Step 5

– Gently slide your opening pick from the bottom right corner along the side, working your way up to the top.

– Then, maneuver the pick around the corner and carefully cut through the remaining adhesive at the top of the phone.

Step 6

– Gently lift the rear glass from the side where the volume button hangs out—easy does it!

– Grab a spudger and use its edge to pop up and disconnect the fingerprint sensor flex cable. Precision is key, but you’ve got this!

Tools Used
  1. SpudgerSamsung Galaxy S9 Rear Glass Removal

Step 7

– Start by carefully removing the rear glass—patience is key here. Once it’s off, follow this guide to reapply the adhesive and put the rear glass back in place. If you’re looking to swap out the rear glass entirely, this guide will also walk you through transferring the rear camera bezel along with the fingerprint sensor. Need a hand? You can always schedule a repair for expert help.

Success!

Samsung Galaxy S9 Rear Camera Bezel With Fingerprint Sensor Replacement

Duration: 45 minutes
Steps: 11 Steps

Ready to pop out the rear camera bezel and fingerprint sensor on your Samsung Galaxy S9? Let’s do it! Just a heads up: cracking open your S9 means saying goodbye to its waterproof powers unless you swap in fresh adhesive seals. If you skip the adhesive, your phone will still work just fine—but don’t take it swimming. Grab some replacement adhesive for reassembly, and you’ll be back in business.

Step 1

– Kick things off by turning off your device. Then, grab a heated iOpener and gently place it along a long edge of the phone to soften up the adhesive behind the rear glass. Keep the iOpener in place for at least two minutes to do its magic. If you need a hand along the way, you can always schedule a repair.

Tools Used
  1. iOpenerSamsung Galaxy S9 Rear Camera Bezel With Fingerprint Sensor Replacement

Step 2

– Next up, you’ll be slicing through the adhesive that’s holding the back cover in place.

– Here’s where you’ll be cutting through the sticky stuff:

– Thicker patches of adhesive

– Thinner strips of adhesive

– Steer clear of this zone—there’s a fingerprint sensor flex cable hiding there, and you don’t want to mess with it.

Step 3

– Stick a suction cup onto the back cover to get a grip. Gently lift the bottom edge with your suction cup, creating a tiny gap between the back and the frame. Slide an opening pick into that gap and carefully work it toward the bottom right corner. Grab a second pick and do the same toward the bottom left. To prevent the adhesive from sealing back up, insert a third pick to keep the opening open as you continue the rest of the removal. If you need help, you can always schedule a repair.

Step 4

– Gently slide the opening pick in, just the tip for now, from the bottom left corner and move it along the edge to the top.

– Once you reach the top corner, leave the pick in place to keep that adhesive from making a comeback.

Step 5

– Gently slide the opening pick from the bottom right corner up along the side to the top. You’re doing great!

– Now, take that opening pick and smoothly glide it around the corner to slice through the last bit of adhesive at the top of the phone. Almost there!

Step 6

– Gently lift up the side of the rear glass where the volume button hangs out—like you’re opening a secret door.

– Take your trusty spudger and carefully pop up the fingerprint sensor flex cable. Go slow, no rush—precision beats speed here!

Tools Used
  1. SpudgerSamsung Galaxy S9 Rear Camera Bezel With Fingerprint Sensor Replacement

Step 7

– Start by carefully removing the rear glass panel to get things started. When you’re ready to put everything back together, follow this guide to reapply the adhesive and reattach the rear glass securely. If you’re planning to swap out the rear glass altogether, make sure to transfer the rear camera bezel along with the fingerprint sensor to keep everything functioning smoothly. Need a hand? You can always schedule a repair with Salvation Repair for expert help.

Step 8

– Set a warm, friendly vibe by placing a heated iOpener on the rear camera lens cover. Keep it there for at least two minutes to soften things up and make the next steps smoother. If you need a hand along the way, you can always schedule a repair.

Tools Used
  1. iOpenerSamsung Galaxy S9 Rear Camera Bezel With Fingerprint Sensor Replacement

Step 9

– Take an opening pick and gently slide it between the top edge of the bezel and the rear glass—like you’re sneaking into a secret club.

– Work the pick around to slice through the sticky adhesive holding the upper part of the bezel. Go slow and steady—no need to rush the masterpiece!

Step 10

– Slide your opening pick under the right side of the rear camera bezel—think of it as sneaking into a club, but for phone parts.

– Glide the pick around the bezel to loosen up that stubborn adhesive. Take a victory lap with your tool!

– Give the pick a little twist to lift the rear camera bezel and fingerprint sensor. It should pop off like a lid on a fresh jar of salsa.

Step 11

– Stick on the new back cover using pre-cut adhesive or some trusty double-sided tape.

– Pop everything back together by reversing these steps—like hitting rewind, but for your device.

– Once you’ve got the rear cover in place, press down firmly for a few minutes to help that adhesive set. Heavy books come in handy here.

– Fire up your device and run through a quick check to make sure everything’s working. And hey, if you ever need a hand, you can always schedule a repair.

Tools Used
  1. TweezersSamsung Galaxy S9 Rear Camera Bezel With Fingerprint Sensor Replacement

Success!
Attach the new back cover with the pre-cut adhesive or double-sided tape. Make sure it’s securely in place!
Reassemble your device by simply following the steps in reverse order. Easy, right?
Once the rear cover is on, apply firm, steady pressure for a few minutes to help the adhesive stick. A few heavy books on top should do the trick!
All done! Now, give your repair a test run to make sure everything’s working perfectly. If something feels off, don’t hesitate to schedule a repair.

Samsung Galaxy S9 NFC Antenna and Charging Coil Replacement

Duration: 45 minutes
Steps: 11 Steps

Ready to swap out the NFC antenna and charging coil on your Samsung Galaxy S9? Let’s get to it! Just a heads-up: cracking open your S9 means saying goodbye to those waterproof seals. If you skip swapping in new adhesive seals, your phone will still work—just don’t take it for a swim. Make sure you’ve got some fresh adhesive ready to stick things back together when you reassemble.

Step 1

– First things first: power down your phone. Trust me, it’s way less dramatic than letting it surprise you halfway through.

– Grab a heated iOpener and park it along one long edge of your phone. This gives the sticky glue under the rear glass a chance to chill out. Keep it there for at least two minutes to let the magic happen.

Tools Used
  1. iOpenerSamsung Galaxy S9 NFC Antenna and Charging Coil Replacement

Step 2

– In this part, we’re gently slicing through the adhesive that holds the back cover in place—think of it as peeling away a sticky sticker but with finesse.

– Follow these lines where the adhesive is thicker—it’s the hearty stuff that needs a little extra love to get through:

– Now, target the thinner, more delicate adhesive areas—they’re more like the thin layer of frosting on a cupcake, easy to slice into.

– Just a heads-up: steer clear of the zone near the fingerprint sensor flex cable—no slicing or prying there, to keep that sensitive part intact and happy.

Step 3

– Stick a suction cup onto the back cover—think of it as giving your device a little handle.

– Gently lift the bottom edge of the back cover using the suction cup, just enough to get a sneaky peek between the cover and the frame.

– Slide an opening pick into that gap and cruise over to the bottom right corner.

– Grab a second pick and glide it over to the bottom left corner—you’re basically a pick-wielding ninja now.

– Pop in a third pick to keep the adhesive from sticking things back together while you work your magic.

Step 4

– Slide just the tip of your opening pick from the bottom left corner up along the side to the top. Easy does it—no need for a deep dive!

– Swing the pick around the top corner and leave it chilling there. That way, the sticky adhesive won’t get any ideas about closing back up.

Step 5

– Gently slide the opening pick from the bottom right corner along the side, working your way up. Then, carefully maneuver the pick around the corner and cut through the remaining adhesive at the top of the device. Need a hand? You can always schedule a repair if things get tricky.

Step 6

– Gently lift the side of the rear glass where the volume button hangs out. Keep it steady, and you’re halfway there!

– Grab your spudger and carefully work its edge under the fingerprint sensor flex cable. Pry it up to disconnect—easy does it!

Tools Used
  1. SpudgerSamsung Galaxy S9 NFC Antenna and Charging Coil Replacement

Step 7

– Pop off that rear glass—gently does it!

– Putting things back together? Just follow these steps to swap in fresh adhesive and set the rear glass back in place.

– Thinking about a new rear glass? Check out this guide to transfer your rear camera bezel, fingerprint and all.

Step 8

– Unscrew those eight 4 mm Phillips #00 screws—like loosening tiny bolts on a secret hatch.

Step 9

– Gently slide an opening pick under the right edge of the plastic cover that hides the NFC antenna and charging coil. Then, give it a twist or a gentle pry to pop loose the plastic clips holding the cover in place. If you need help, you can always schedule a repair.

Step 10

– Slide an opening pick under the left edge of the plastic cover, like you’re sneaking a peek at a surprise party.

– Give it a little twist or gentle pry to pop those plastic clips loose, freeing the cover like a magician revealing their next trick.

Step 11

– Give your phone a test run before sealing it up—just to make sure everything’s working as it should.

– To put everything back together, flip through these steps in reverse. It’s like rewinding, but with more screws.

– Once you’re done, check out the guide to make sure your repair is on point. If you hit a snag, you can always schedule a repair.

Success!
If you can, power up your phone and give your repair a quick test before you go all in with the adhesive and seal it up again.
To put your device back together, just retrace your steps from earlier.
Once you’ve wrapped up the repair, don’t forget to follow this guide to check that everything’s working perfectly.

Samsung Galaxy S9 NFC Antenna and Charging Coil Replacement

Duration: 45 minutes
Steps: 11 Steps

Ready to swap out the NFC antenna and charging coil on your Samsung Galaxy S9? Let’s get to it! Just a heads-up: cracking open your S9 means saying goodbye to those waterproof seals. If you skip swapping in new adhesive seals, your phone will still work—just don’t take it for a swim. Make sure you’ve got some fresh adhesive ready to stick things back together when you reassemble.

Step 1

– First things first: power down your phone. Trust me, it’s way less dramatic than letting it surprise you halfway through.

– Grab a heated iOpener and park it along one long edge of your phone. This gives the sticky glue under the rear glass a chance to chill out. Keep it there for at least two minutes to let the magic happen.

Tools Used
  1. iOpenerSamsung Galaxy S9 NFC Antenna and Charging Coil Replacement

Step 2

– In this part, we’re gently slicing through the adhesive that holds the back cover in place—think of it as peeling away a sticky sticker but with finesse.

– Follow these lines where the adhesive is thicker—it’s the hearty stuff that needs a little extra love to get through:

– Now, target the thinner, more delicate adhesive areas—they’re more like the thin layer of frosting on a cupcake, easy to slice into.

– Just a heads-up: steer clear of the zone near the fingerprint sensor flex cable—no slicing or prying there, to keep that sensitive part intact and happy.

Step 3

– Stick a suction cup onto the back cover—think of it as giving your device a little handle.

– Gently lift the bottom edge of the back cover using the suction cup, just enough to get a sneaky peek between the cover and the frame.

– Slide an opening pick into that gap and cruise over to the bottom right corner.

– Grab a second pick and glide it over to the bottom left corner—you’re basically a pick-wielding ninja now.

– Pop in a third pick to keep the adhesive from sticking things back together while you work your magic.

Step 4

– Slide just the tip of your opening pick from the bottom left corner up along the side to the top. Easy does it—no need for a deep dive!

– Swing the pick around the top corner and leave it chilling there. That way, the sticky adhesive won’t get any ideas about closing back up.

Step 5

– Gently slide the opening pick from the bottom right corner along the side, working your way up. Then, carefully maneuver the pick around the corner and cut through the remaining adhesive at the top of the device. Need a hand? You can always schedule a repair if things get tricky.

Step 6

– Gently lift the side of the rear glass where the volume button hangs out. Keep it steady, and you’re halfway there!

– Grab your spudger and carefully work its edge under the fingerprint sensor flex cable. Pry it up to disconnect—easy does it!

Tools Used
  1. SpudgerSamsung Galaxy S9 NFC Antenna and Charging Coil Replacement

Step 7

– Pop off that rear glass—gently does it!

– Putting things back together? Just follow these steps to swap in fresh adhesive and set the rear glass back in place.

– Thinking about a new rear glass? Check out this guide to transfer your rear camera bezel, fingerprint and all.

Step 8

– Unscrew those eight 4 mm Phillips #00 screws—like loosening tiny bolts on a secret hatch.

Step 9

– Gently slide an opening pick under the right edge of the plastic cover that hides the NFC antenna and charging coil. Then, give it a twist or a gentle pry to pop loose the plastic clips holding the cover in place. If you need help, you can always schedule a repair.

Step 10

– Slide an opening pick under the left edge of the plastic cover, like you’re sneaking a peek at a surprise party.

– Give it a little twist or gentle pry to pop those plastic clips loose, freeing the cover like a magician revealing their next trick.

Step 11

– Give your phone a test run before sealing it up—just to make sure everything’s working as it should.

– To put everything back together, flip through these steps in reverse. It’s like rewinding, but with more screws.

– Once you’re done, check out the guide to make sure your repair is on point. If you hit a snag, you can always schedule a repair.

Success!
If you can, power up your phone and give your repair a quick test before you go all in with the adhesive and seal it up again.
To put your device back together, just retrace your steps from earlier.
Once you’ve wrapped up the repair, don’t forget to follow this guide to check that everything’s working perfectly.

Galaxy S9 Plus Moisture Detected Fix

Duration: 45 minutes
Steps: 3 Steps

Step 1

– So, your phone’s got a built-in bouncer for its USB-C port—it checks for any sketchy resistance between two pins when you plug in the charger. If there’s too much water hanging out in there, the phone throws a warning (or an audio beep) and slams the door shut on charging.

– The moisture check happens the moment you plug in your charger. So, if you’ve just been caught in the rain or your phone took a dip, keep this in mind.

– Salt water or anything with chlorine is basically the arch-nemesis of your connector. If your port gets hit, do NOT try to charge it. Clean and dry that thing like it’s your job before you plug it in again. That little bit of effort could totally save your connector—and your phone.

Step 2

– Let’s tackle this issue together:

– 1. Grab some compressed air and give the connector a gentle puff to clear out any pesky liquid or loose debris. If you don’t have that, a straw works wonders too—just blow directly into the connector!

– 2. Time for a little cleaning! Dampen a tiny strip of paper towel with clean water and carefully drop a bit of water into the connector. Then, use those paper towel strips to soak it up again.

– 3. Patience is key! Let the connector dry for about 6 hours before charging. Feel free to use your phone during this time, just keep it unplugged.

– If you’re in a pinch and need to charge urgently, wireless charging (S9+) is your friend!

– Keep in mind that the charge cable connector might be harboring some salt or rust. A gentle clean as mentioned above will help prevent any transfer to your phone, which could cause the same issue again.

– If you spot any fabric fibers hanging out inside the connector, you can carefully remove them with a needle by scraping the bottom. Using a magnifying glass can make this task a breeze!

Tools Used
  1. Compressed AirGalaxy S9 Plus Moisture Detected Fix

Step 3

– A wet connector means no charging, so let’s keep those electronics dry and happy! If you’re still having trouble, don’t hesitate to schedule a repair for some expert help.

Success!

🍪
Have a cookie! This site uses cookies to enhance your experience. Opt-Out Options.