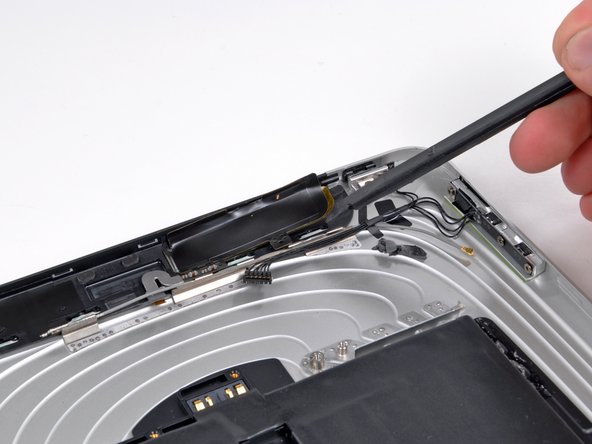
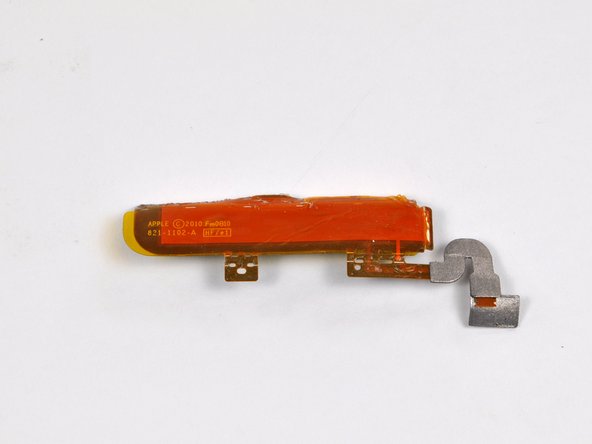
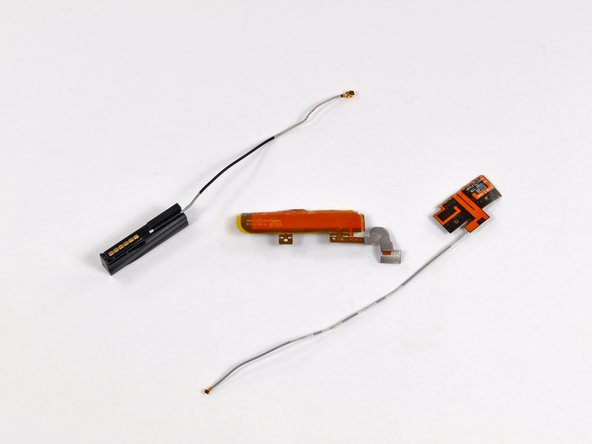
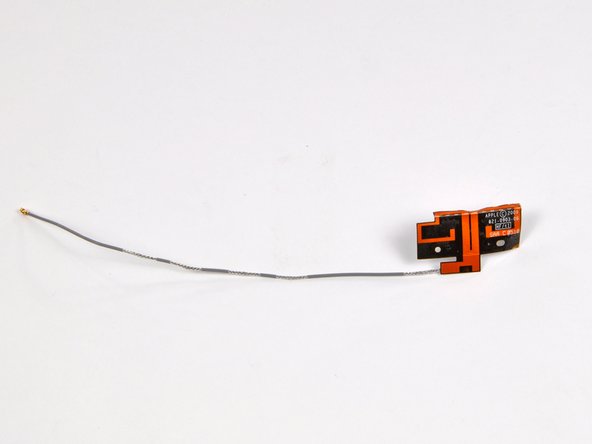
iPad 2 Wi-Fi EMC 2415 Home Button Assembly Replacement

Duration: 45 minutes
Steps: 37 Steps

Time to swap out that home button assembly! Let’s get your device back to its button-pressing glory. Remember, if you hit a snag, you can always schedule a repair!

Step 1

– Pop the iOpener right in the middle of the microwave to heat it up!

Tools Used
  1. iOpeneriPad 2 Wi-Fi EMC 2415 Home Button Assembly Replacement

Step 2

– Warm up the iOpener in the microwave for about thirty seconds to get it ready.

– As you go through the repair, if the iOpener starts to cool down, just pop it back in the microwave for another thirty seconds to keep it nice and warm.

Tools Used
  1. iOpeneriPad 2 Wi-Fi EMC 2415 Home Button Assembly Replacement

Step 3

– Grab the iOpener by one of its flat ends and take it out of the microwave—watch out for that hot center!

Tools Used
  1. iOpeneriPad 2 Wi-Fi EMC 2415 Home Button Assembly Replacement

Step 4

– Grab a pot or pan and fill it up with enough water to give that iOpener a nice, cozy bath.

– Crank up the heat until the water is bubbling away, then turn off the heat.

– Carefully drop the iOpener into the hot water and let it soak for 2-3 minutes. Make sure it’s fully submerged, giving it a warm hug!

– Using some tongs, fish out the heated iOpener from the water—caution, it’s hot stuff!

– Give the iOpener a good towel dry to get rid of any excess water.

– Voilà! Your iOpener is all set for action! If you need to warm it up again, just repeat the process: boil the water, turn off the heat, and let the iOpener chill in the water for another 2-3 minutes.

Tools Used
  1. iOpeneriPad 2 Wi-Fi EMC 2415 Home Button Assembly Replacement

Step 5

– If your display glass is cracked, keep those shards from going rogue and avoid any accidental ouchies by taping the glass securely.

– Cover the iPad’s display with overlapping strips of clear packing tape until the entire screen is wrapped up like a pro.

– Follow the rest of the guide as best as you can. Just a heads-up: once the glass is broken, it might keep cracking as you work, so you might need to carefully use a metal prying tool to scoop out the glass pieces.

Step 6

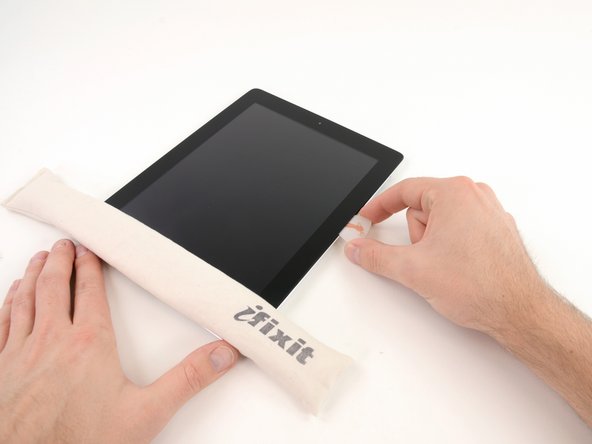
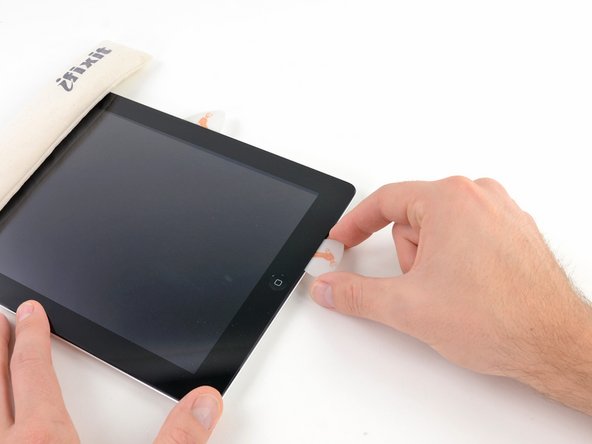
– Place the iOpener flat along the right edge of the iPad, making sure it lies smoothly so it hugs the surface nicely.

– Chill out and let it hang there for about 90 seconds before you try to pry open the front panel.

Tools Used
  1. iOpeneriPad 2 Wi-Fi EMC 2415 Home Button Assembly Replacement

Step 7

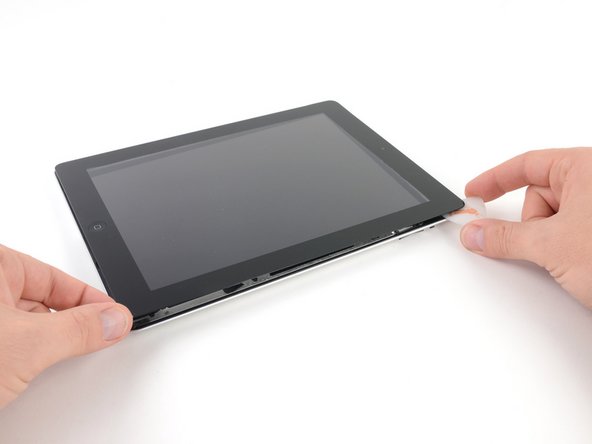
– Check out the tiny gap in the iPad’s adhesive ring up in the upper right corner, about 2.0 inches (~5 cm) down from the top. This little opening is your secret entry point.

– Line up your tool with the mute button. Gently slip the tip of a plastic opening tool into the crack between the front glass and the plastic bezel—just the tip, just enough to nudge it open a bit.

Step 8

– Ensure you position the tool just right—nestled between the plastic display bezel and the front panel glass for a smooth repair experience.

Step 9

– Keep the tip of your plastic opening tool snugly tucked between the front glass and plastic bezel, then slide a plastic opening pick right alongside it to gently pry open that gap.

Step 10

– Take that trusty plastic opening tool away from your iPad, and gently slide the opening pick a little deeper under the front glass, about half an inch should do the trick!

Step 11

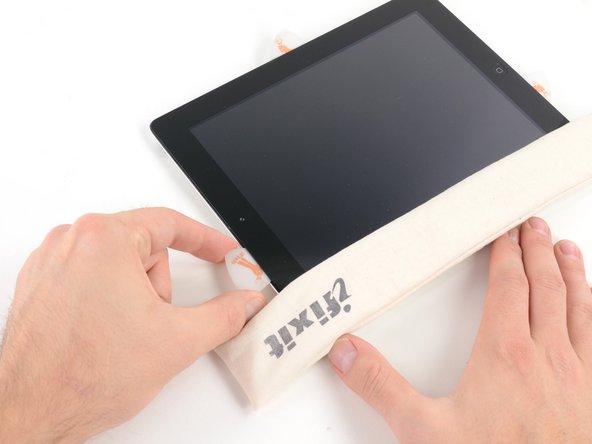
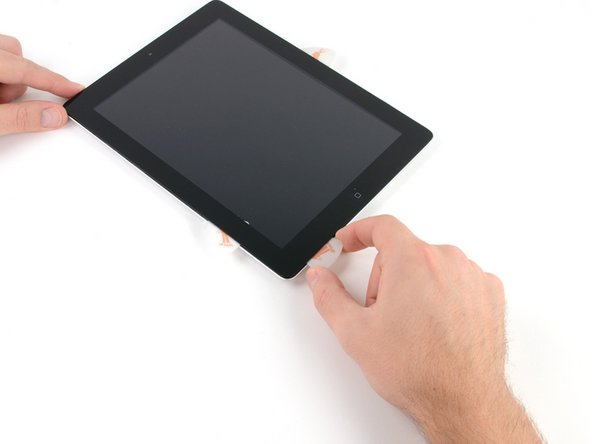
– As you tackle the adhesive on the right side of the iPad, give that iOpener a little heat love, then pop it back down on the bottom edge of the iPad. You’ve got this!

Tools Used
  1. iOpeneriPad 2 Wi-Fi EMC 2415 Home Button Assembly Replacement

Step 12

– As the iOpener warms up the bottom edge, start loosening the adhesive from the right side of the iPad.

– Gently slide the opening pick down the iPad’s edge, carefully freeing the adhesive along the way.

Tools Used
  1. iOpeneriPad 2 Wi-Fi EMC 2415 Home Button Assembly Replacement

Step 13

– If your opening pick gets stuck in the adhesive, try ‘rolling’ it gently along the edge of the iPad to keep peeling that sticky stuff away smoothly.

Tools Used
  1. iOpeneriPad 2 Wi-Fi EMC 2415 Home Button Assembly Replacement

Step 14

– Before you pull out that first opening pick from the bottom corner of the iPad, slide a second pick under the right edge of the front glass to keep the adhesive from sticking back together.

– Warm up the iOpener again, then shift it to the top edge of the iPad.

Tools Used
  1. iOpeneriPad 2 Wi-Fi EMC 2415 Home Button Assembly Replacement

Step 15

– Alright, folks! It’s time to tread carefully for the next few steps.

– You’ll need to gently peel away the adhesive securing the antenna to the front panel. Just remember, we want to avoid any damage to the delicate bits that connect the antenna to the bottom of the iPad. So, let’s take a deep breath and follow these steps with precision!

Step 16

– Gently slide the opening pick around the bottom right corner of your iPad to loosen the adhesive holding it in place.

Step 17

– Gently glide the tip of your opening pick along the bottom edge of the iPad, freeing the adhesive that’s holding onto the Wi-Fi antenna. You’re almost there!

Step 18

– Alright, you’ve made it past the Wi-Fi antenna—about 3 inches (75 mm) from the right edge, or right by the home button. Now, reinsert that opening pick all the way in! You’ve got this!

– Time to slide that pick to the right and say goodbye to the adhesive that’s been holding the Wi-Fi antenna to the front glass. Easy peasy!

– Just a heads up, the antenna is hanging on to the bottom of your iPad with screws and a cable. This step is super important because it will detach the antenna from the front panel, so when you lift off the panel, your antenna stays safe and sound. You’re doing great!

Step 19

– Keep peeling back the adhesive along the bottom edge of the iPad. Slide your opening pick around the home button, then pop it back in about 1/2 inch (10 mm) once you’ve cleared the button’s path.

Tools Used
  1. iOpeneriPad 2 Wi-Fi EMC 2415 Home Button Assembly Replacement

Step 20

– Keep peeling the adhesive carefully all along the bottom edge of your iPad.

– Leave the opening pick tucked under the front glass near the home button to keep things steady.

Step 21

– Warm up the iOpener in the microwave, then place it on the left edge of the iPad to gently soften the adhesive in that area.

Tools Used
  1. iOpeneriPad 2 Wi-Fi EMC 2415 Home Button Assembly Replacement

Step 22

– Gently slide your trusty opening pick along the top edge of the iPad, giving it a little tug to navigate around the front-facing camera bracket.

– This section has some seriously strong adhesive, so don’t hesitate to put in a bit of elbow grease! Just take your time and be careful – we wouldn’t want any accidents or to harm your iPad.

– If your opening pick feels like it’s stuck in the adhesive, try giving it a little ‘roll’ as demonstrated in step 9.

Tools Used
  1. iOpeneriPad 2 Wi-Fi EMC 2415 Home Button Assembly Replacement

Step 23

– Keep peeling back the adhesive along the top edge of the iPad, sliding your opening pick smoothly around the top left corner.

Tools Used
  1. iOpeneriPad 2 Wi-Fi EMC 2415 Home Button Assembly Replacement

Step 24

– Gently slide the opening pick along the left side of the iPad, carefully loosening the adhesive as you move. Heads up: the adhesive is pretty thin here because of the digitizer running along the entire left edge. Keep the pick shallow—no deeper than about 10 mm (half an inch)—to avoid any accidental damage to the digitizer.

Step 25

– Carefully wiggle the opening pick that’s tucked under the bottom edge of the iPad to loosen the adhesive near the bottom left corner.

Step 26

– Grab one of those nifty opening picks and gently nudge the bottom right corner of the iPad up. Once it’s lifted, use your fingers to hold it steady. You’ve got this!

Step 27

– Grab your iPad by the top and bottom right corners, and gently twist that front glass away from the device like you’re unveiling a surprise!

– When it’s time to put everything back together, whip out a microfiber cloth and some compressed air to give the LCD a little TLC—banish any dust or fingerprints before you seal the deal with the glass.

Step 28

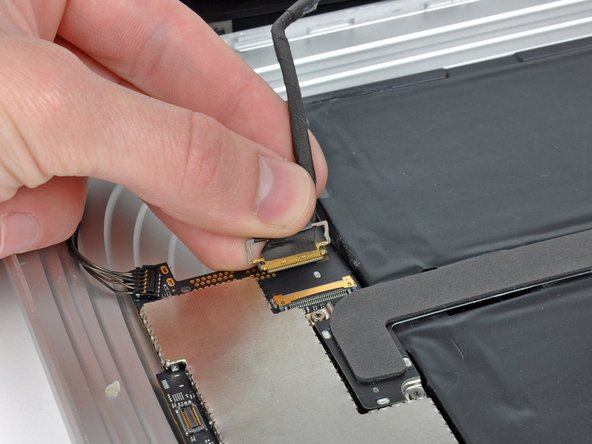
– Unscrew those four 2.0 mm Phillips screws holding the LCD to the back case. It’s a breeze, just grab your screwdriver and let’s get these screws out!

Step 29

– Carefully lift the LCD from the long side near the volume buttons and gently flip it open like you’re turning the page of a book.

– Place the LCD face down on the front panel to keep things safe and steady.

Step 30

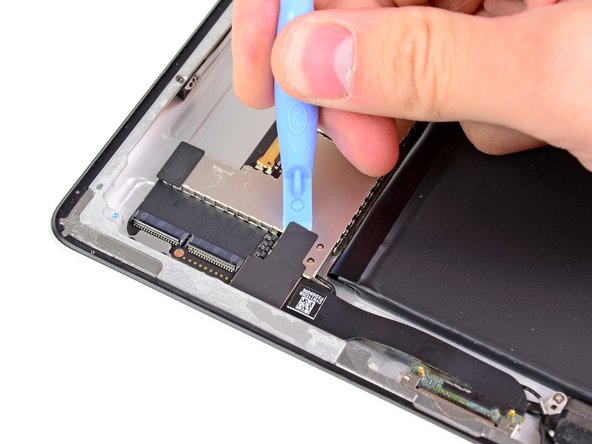
– Gently use the edge of a plastic opening tool to lift up those little retaining flaps on the two digitizer ribbon cable ZIF sockets. You’ve got this!

Step 31

– Grab your trusty plastic opening tool and gently coax the digitizer cable away from the logic board shields. You’re doing great!

– Now, with a delicate touch, peel the digitizer cable from the adhesive that’s been holding it snug against the rear case. Keep it steady!

Step 32

– Gently wiggle the digitizer ribbon cable and pull it straight out of its two cozy sockets on the logic board. You’ve got this!

Step 33

– Gently lift the LCD from the long edge opposite the digitizer cable and slowly fold it toward the rear case, like you’re closing a book.

– While holding the LCD up, carefully slide the front panel away from the iPad. Be mindful not to catch the digitizer cable on the rear case or the LCD itself.

– Once that’s done, place the LCD back into the body to keep it safe and out of harm’s way.

Step 34

– Heat up the iOpener by popping it in the microwave for about 30 seconds at full power.

– Set the warm iOpener right over the home button along the front edge of the screen.

Tools Used
  1. iOpeneriPad 2 Wi-Fi EMC 2415 Home Button Assembly Replacement

Step 35

– Gently slide the plastic opening tool under the right side of the home button assembly and give it a little nudge upwards to break free the adhesive. Take your time, and remember: slow and steady wins the repair race.

Step 36

– Carefully work your way along the left side of the home button to loosen the adhesive using the method described above.

– Gently lift the home button mount away from the front panel.

Step 37

– To put your device back together, simply retrace your steps in reverse and check out our iPad 2 Wi-Fi Front Panel Adhesive strips guide to stick that front panel back on like a pro! And remember, if you hit any snags along the way, don’t hesitate to schedule a repair for some extra help!

Success!
To put your device back together, just retrace your steps in the opposite order and grab our iPad 2 Wi-Fi Front Panel Adhesive strips guide to help you stick that front panel back on like a pro! If you hit any snags along the way, remember, you can always schedule a repair for some extra support.

iPad 2 Wi-Fi EMC 2415 Headphone Jack Replacement

Duration: 45 minutes
Steps: 38 Steps

Follow this step-by-step guide to swap out your busted headphone jack and get your tunes back in no time.

Step 1

– Pop the iOpener right in the middle of the microwave to get things heating up!

Tools Used
  1. iOpeneriPad 2 Wi-Fi EMC 2415 Headphone Jack Replacement

Step 2

– Give that iOpener a warm hug in the microwave for thirty seconds.

– As you dive into the repair, remember to pop the iOpener back in the microwave for another thirty seconds whenever it starts to cool down. Keep it nice and toasty!

Tools Used
  1. iOpeneriPad 2 Wi-Fi EMC 2415 Headphone Jack Replacement

Step 3

– Carefully take the iOpener out of the microwave by grabbing one of the two flat ends—steer clear of the hot center to keep your fingers happy.

Tools Used
  1. iOpeneriPad 2 Wi-Fi EMC 2415 Headphone Jack Replacement

Step 4

– Grab a pot or pan and fill it with enough water to completely dunk your iOpener. We want it to take a nice hot bath!

– Bring that water to a boil and then turn off the heat. Safety first, folks!

– Carefully place the iOpener into the hot water and let it soak for 2-3 minutes. Make sure it’s fully submerged so it gets nice and toasty.

– Use some trusty tongs to fish out the heated iOpener from the water. Watch out, it’s hot stuff!

– Give the iOpener a good pat down with a towel to dry it off. We want it ready to roll!

– Now your iOpener is all set to help you out! If it needs a little more warmth, just repeat the hot water soak process. Heat it up, turn off the heat, and let it chill in the water for another 2-3 minutes.

Tools Used
  1. iOpeneriPad 2 Wi-Fi EMC 2415 Headphone Jack Replacement

Step 5

– Got a cracked display glass? Keep those shards in check and stay safe by taping over the glass before you dive in.

– Cover the iPad’s screen completely with overlapping strips of clear packing tape, making sure the whole front is sealed up tight.

– Follow the rest of the guide as usual, but heads up: once the glass is broken, it might keep cracking while you work. You may need to carefully use a metal prying tool to scoop out the glass pieces.

Step 6

– Place the iOpener flat against the right edge of the iPad, making sure it’s nice and snug so it connects well with the iPad’s surface.

– Allow the bag to rest on the iPad for about 90 seconds before you dive in to open up the front panel.

Tools Used
  1. iOpeneriPad 2 Wi-Fi EMC 2415 Headphone Jack Replacement

Step 7

– Spot the tiny gap in the iPad’s adhesive ring up in the upper right corner, about 2.0 inches (~5 cm) down from the top edge. This is your secret entry point.

– Line up your tool with the mute button, then gently slip the tip of a plastic opening tool into the gap between the front glass and the plastic bezel. Just nudge the tip in a little—enough to gently pry the crack open.

Step 8

– Be sure to slide that tool right into the sweet spot—between the plastic display bezel and the front panel glass. You’ve got this!

Step 9

– With the tip of the plastic opening tool snugly tucked between the front glass and the plastic bezel, gently slide a plastic opening pick into that little gap, right alongside the tool. You’re doing great!

Step 10

– Take the plastic opening tool out and slide the opening pick gently underneath the front glass, going about 0.5 inches deep. Nice and easy, just like you’re lifting the lid on a treasure chest!

Step 11

– While you’re gently working on loosening the adhesive on the right side of the iPad, go ahead and reheat your iOpener. Once it’s nice and warm, pop it right back onto the bottom edge of the iPad to help soften that adhesive even more.

Tools Used
  1. iOpeneriPad 2 Wi-Fi EMC 2415 Headphone Jack Replacement

Step 12

– While the iOpener is warming up the bottom edge, let’s get started on loosening that stubborn adhesive on the right edge of your iPad.

– Carefully slide the opening pick down the edge of the iPad, gently releasing the adhesive as you go along.

Tools Used
  1. iOpeneriPad 2 Wi-Fi EMC 2415 Headphone Jack Replacement

Step 13

– If your opening pick gets stuck in the adhesive, don’t stress—just gently “roll” the pick along the edge of the iPad to keep loosening that stubborn glue.

Tools Used
  1. iOpeneriPad 2 Wi-Fi EMC 2415 Headphone Jack Replacement

Step 14

– Before you pop out that first pick from the bottom corner of your iPad, slide a second pick under the right edge of the front glass to stop the adhesive from sticking back down.

– Warm up the iOpener again, then shift it over to the top edge of your iPad.

Tools Used
  1. iOpeneriPad 2 Wi-Fi EMC 2415 Headphone Jack Replacement

Step 15

– Heads up! The next steps call for some serious finesse.

– You’ll need to carefully loosen the adhesive holding the antenna to the front panel without messing up the delicate bits connecting the antenna to the bottom of the iPad. Take it slow and follow these steps closely.

Step 16

– Gently slide the opening pick around the bottom right corner of the iPad to free up the adhesive. You’ve got this!

Step 17

– Gently glide the opening pick along the bottom edge of the iPad to free up the adhesive around the Wi-Fi antenna. You’re doing great!

Step 18

– After you’ve passed the Wi-Fi antenna area (about 3″ or 75 mm from the right edge, right next to the home button), slide your opening pick all the way in.

– Gently slide the pick to the right to loosen the adhesive holding the Wi-Fi antenna to the front glass.

– The antenna is secured to the bottom of the iPad with screws and a cable. This step disconnects it from the front panel so it stays safe when you remove the panel.

Step 19

– Keep on peeling that adhesive at the bottom of your iPad! Slide the opening pick around the home button, and once you’ve got it past the button, reinsert it to about 1/2 inch (10 mm) deep. You’re doing great!

Tools Used
  1. iOpeneriPad 2 Wi-Fi EMC 2415 Headphone Jack Replacement

Step 20

– Keep peeling away that adhesive along the bottom edge of the iPad until it’s all gone! You’ve got this!

– Once you’re done, tuck that opening pick snugly under the front glass near the home button. It’s like giving it a little home!

Step 21

– Pop the iOpener back in the microwave to warm it up, then place it on the left edge of the iPad to gently soften the adhesive in that area.

Tools Used
  1. iOpeneriPad 2 Wi-Fi EMC 2415 Headphone Jack Replacement

Step 22

– Gently slide that opening pick along the top edge of your iPad, giving it a little pull to navigate around the front-facing camera bracket.

– The adhesive in this area is like super glue on a mission, so don’t be surprised if you need to put in some muscle. Take it slow and steady to avoid any mishaps that might hurt you or your beloved iPad.

– If the opening pick feels like it’s caught in a sticky situation, just give it a little ‘roll’ action, like we showed you in step 9.

Tools Used
  1. iOpeneriPad 2 Wi-Fi EMC 2415 Headphone Jack Replacement

Step 23

– Keep peeling away that adhesive along the top edge of your iPad, and gently maneuver the opening pick around the top left corner. You’re doing great!

Tools Used
  1. iOpeneriPad 2 Wi-Fi EMC 2415 Headphone Jack Replacement

Step 24

– Carefully slide the opening pick along the left side of the iPad, releasing the adhesive as you go. The adhesive is a bit thinner here due to the digitizer, so be extra cautious. Keep the pick shallow (no more than 1/2 inch or 10 mm) to avoid accidentally damaging the digitizer.

Step 25

– With the trusty opening pick still tucked under the bottom edge of your iPad, let’s gently free the adhesive in that bottom left corner. You’ve got this!

Step 26

– Grab one of those trusty opening picks and gently pry up the bottom right corner of your iPad, then snag it with your fingers like a pro.

Step 27

– Grab your iPad by the top and bottom right corners, and gently twist that front glass away from the iPad like you’re unveiling a surprise!

– When putting everything back together, remember to whip out that microfiber cloth and some compressed air to make sure the LCD is dust and fingerprint-free before you lovingly reinstall the glass.

Step 28

– Unscrew the four 2.0 mm Phillips screws holding the LCD to the back case. Keep track of these little guys!

Step 29

– Start by lifting the LCD from the long side near the volume buttons, then carefully flip it out of the rear case—kind of like turning a page in a book.

– Place the LCD face down on the front panel to keep it safe while you work.

Step 30

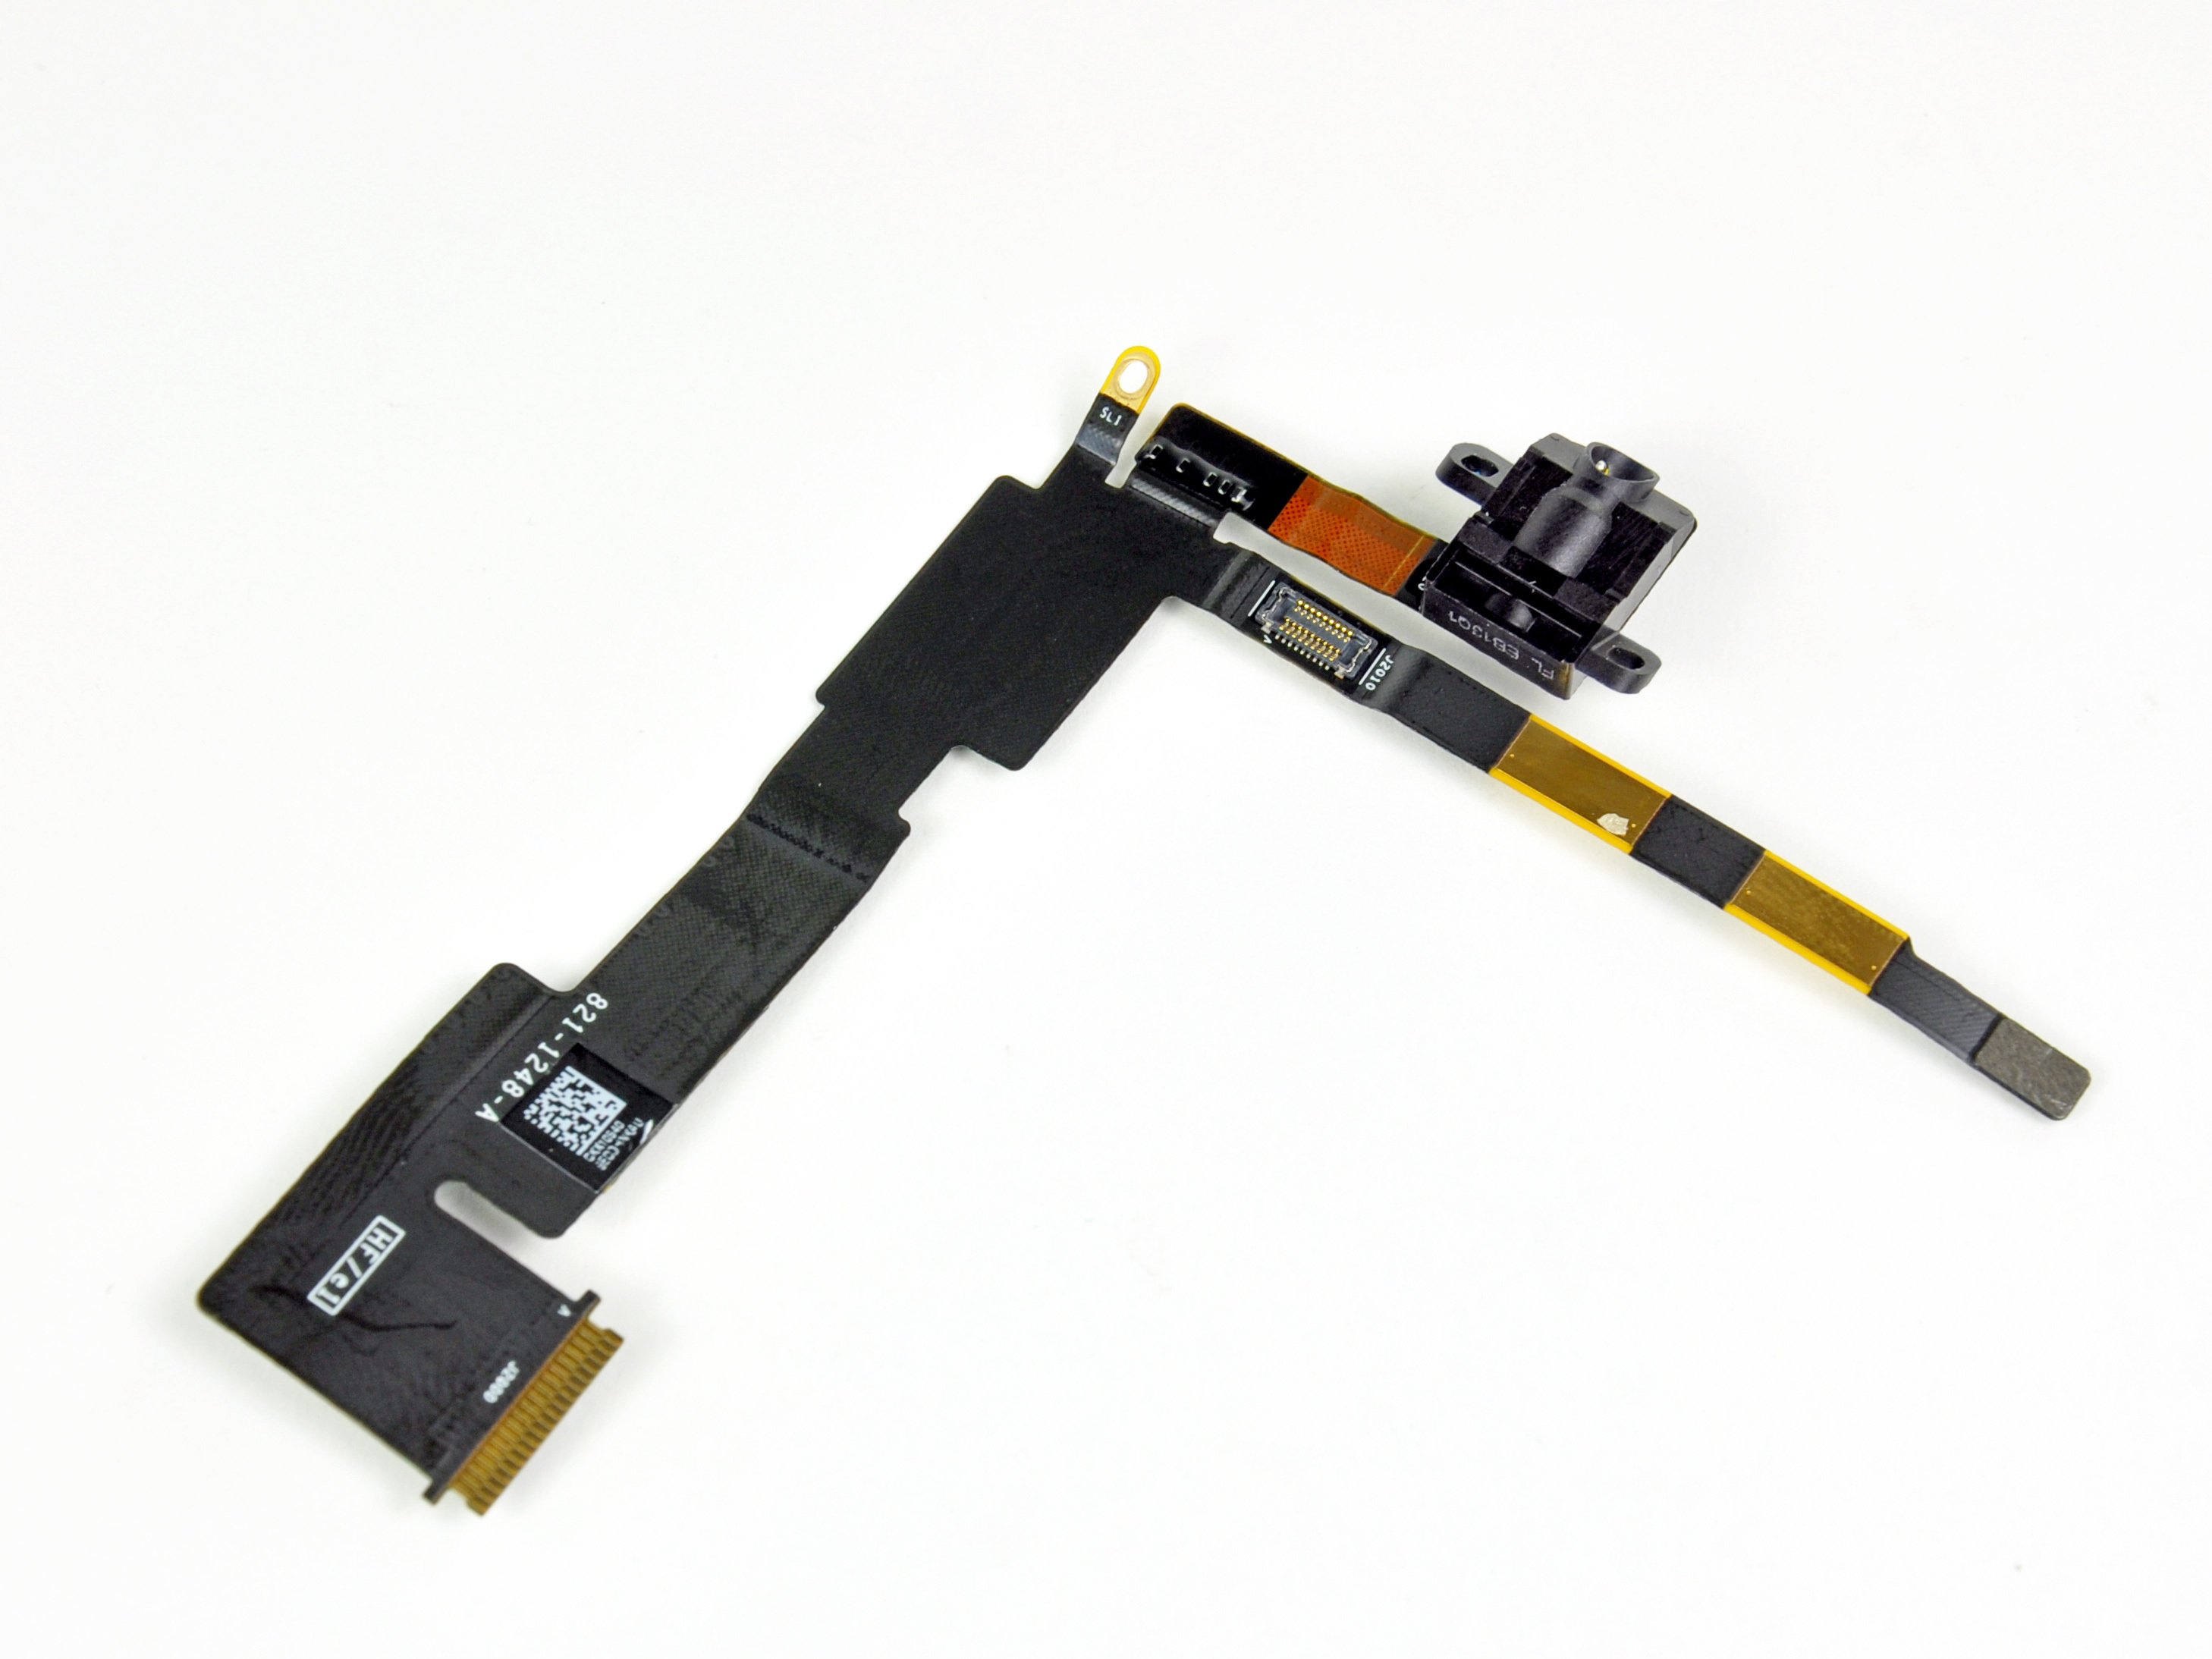
– Gently slide the flat end of a plastic opening tool underneath the retaining flap on the headphone jack and front-facing camera ribbon cable ZIF socket, and give it a little flip.

– Carefully run the plastic opening tool beneath the headphone jack and front-facing camera cable to loosen the adhesive that’s holding it to the rear panel.

– Once it’s free, pull the headphone jack and front-facing camera ribbon cable straight out of its socket on the logic board.

Step 31

– Unscrew the two 2.9 mm Phillips screws that are holding the headphone jack snugly against the rear panel. Let’s get that jack free and ready for action!

Step 32

– Grab your trusty plastic opening tool and gently work the edge underneath the tape and adhesive that’s holding the headphone jack and front camera cables snug against the rear panel. Peel it away with care—you’re doing great!

Step 33

– Gently wiggle the headphone jack away from the top edge of the iPad, like you’re giving it a little nudge to say ‘Time to go!’

Step 34

– Gently lift the headphone jack and front camera cables to reveal the microphone connector. Easy peasy!

– Take your trusty plastic opening tool and slide it along the edge to pop the microphone connector free from its cozy spot on the headphone jack and front camera cables.

Step 35

– Gently lift the front camera away from the foam adhesive that’s holding it down to the back panel.

– Carefully take out the headphone jack and front camera assembly from the iPad.

Step 36

– Gently peel away the tape that’s keeping the front camera cable connector secure. You’ve got this!

Step 37

– Gently use the edge of a plastic opening tool to unplug the front camera cable from the headphone jack cable—think of it like a little dance move for your device’s insides!

Step 38

– To put your device back together, just follow these steps in reverse order and use our iPad 2 Wi-Fi Front Panel Adhesive strips guide to stick the front panel back on. If you run into trouble, you can always schedule a repair!

Success!
To put your device back together, just follow these steps in reverse. Don’t forget to check out our guide on using the iPad 2 Wi-Fi Front Panel Adhesive strips for a smooth reattachment of the front panel. And remember, if you run into any tricky spots, feel free to schedule a repair for some expert help!

iPad 2 Wi-Fi EMC 2415 Front Panel Adhesive Strips Replacement

Duration: 45 minutes
Steps: 14 Steps

Time to swap out that sticky stuff holding your iPad 2 Wi-Fi’s front panel to its rear case. Before you start peeling and sticking new adhesive, make sure both surfaces are squeaky clean. Grab a spudger and gently scrape away any big chunks of the old adhesive, then wipe down all the bonding areas with a paper towel soaked in rubbing alcohol or Goof Off. As you go, peel up each adhesive strip carefully to keep everything neat and ready for the next step.

Step 1

– Grab the home button with your tweezers, but do it with care! You’ve got this!

– Now, gently lower that home button into the cozy round spot at the bottom of the front panel. It’s like tucking it into bed!

Tools Used
  1. TweezersiPad 2 Wi-Fi EMC 2415 Front Panel Adhesive Strips Replacement

Step 2

– Gently peel back that first trapezoidal adhesive strip like you’re unveiling a surprise gift!

Step 3

– Grab your trusty pair of tweezers and carefully position the first trapezoidal adhesive strip (making sure it’s facing the right way) onto the corresponding side of the home button mounting bracket.

– Now, do the same for the second trapezoidal adhesive strip—just like the first one, ensuring it lines up perfectly.

Tools Used
  1. TweezersiPad 2 Wi-Fi EMC 2415 Front Panel Adhesive Strips Replacement

Step 4

– Grab a pair of tweezers and gently tug at the corner of one of the adhesive strips stuck to the mounting bracket.

– Peel back the brown protective backing to reveal the clear adhesive strip underneath.

– Do the same for the second adhesive strip, making sure to take it nice and easy.

Tools Used
  1. TweezersiPad 2 Wi-Fi EMC 2415 Front Panel Adhesive Strips Replacement

Step 5

– Carefully set the home button mounting bracket onto the home button, making sure it sits just right.

Step 6

– Hold your horses! Don’t peel the brown backing off those strips just yet.

– Grab the largest L-shaped adhesive strip and pop it onto the top left corner of the front panel with confidence.

– Now, gently smooth that strip down from the center outwards, making sure to keep those pesky air bubbles at bay!

Step 7

– Take the thinnest L-shaped adhesive strip and carefully stick it on the bottom left corner of the front panel. Nice and easy, just make sure it’s aligned!

Step 8

– Stick that last thin L-shaped adhesive strip right on the top right corner of the front panel, just by the camera mounting bracket. You’re doing great!

Step 9

– Stick the straight adhesive strip along the right edge of the front panel.

– If the digitizer cable is already in place, carefully maneuver around or underneath it to get that strip on.

Step 10

– Stick the final L-shaped adhesive strip onto the bottom right corner of the front panel. Make sure it’s lined up just right – we’re almost there!

Step 11

– Place the sleek T-shaped adhesive strip snugly between the inner frame’s bottom edge of the front panel and the camera mounting bracket. Make sure the longest side lines up perfectly with the inner frame for a solid hold!

Step 12

– Slide that nifty little hook-shaped adhesive strip right under the left side of the home button mounting bracket. You got this!

Step 13

– Place the last small rectangular adhesive strip just to the left of the hook-shaped one, right next to the slim L-shaped strip, making sure it’s nicely aligned with the bottom edge of the front panel.

Step 14

– Carefully lift the brown backing off each adhesive strip.

– Some of these strips are pretty tiny and might test your patience a bit, so take your time peeling the backing off.

Success!

iPad 2 Wi-Fi EMC 2415 Front Panel Replacement

Duration: 45 minutes
Steps: 41 Steps

Hey there! This guide is your go-to for swapping out a plain front panel. Got a Front Panel Assembly replacement part? Awesome! Just hold up before you remove the home button from your old panel, and then simply follow these steps in reverse to get that shiny new panel in place. Let’s get started!

Step 1

– Pop the iOpener right smack in the middle of the microwave.

Tools Used
  1. iOpeneriPad 2 Wi-Fi EMC 2415 Front Panel Replacement

Step 2

– Pop the iOpener in the microwave for 30 seconds to get it nice and toasty.

– Keep an eye on it during your repair—if it starts to cool down, just zap it again in the microwave for another 30 seconds to keep the heat going.

Tools Used
  1. iOpeneriPad 2 Wi-Fi EMC 2415 Front Panel Replacement

Step 3

– Carefully take the iOpener out of the microwave, grabbing it by one of the two flat ends so you don’t accidentally touch the hot middle part.

Tools Used
  1. iOpeneriPad 2 Wi-Fi EMC 2415 Front Panel Replacement

Step 4

– Grab a pot or pan and fill it with enough water to completely submerge your iOpener.

– Heat the water until it boils, then turn off the heat. We’re not trying to cook anything, just warm it up!

– Carefully place the iOpener into the hot water for 2-3 minutes, making sure it’s fully dunked. Let the heat do its thing.

– Use tongs to take the iOpener out of the water—be careful, it’s hot!

– Give your iOpener a good towel dry. You don’t want it dripping when you’re using it.

– And there you have it! Your iOpener is ready to go! If you ever need to heat it again, just repeat the steps—boil the water, turn off the heat, and dunk the iOpener for 2-3 minutes.

Tools Used
  1. iOpeneriPad 2 Wi-Fi EMC 2415 Front Panel Replacement

Step 5

– Got a cracked glass display? Time to keep those shards on lockdown and protect your fingers—grab some clear packing tape!

– Cover the iPad’s screen with overlapping strips of tape until you’ve got it fully sealed up.

– Stick to the guide as best you can, but heads up: once glass is cracked, it’s gonna keep cracking as you work. You may need to carefully scoop out stubborn bits with a metal prying tool.

Step 6

– Place the iOpener flat along the right edge of the iPad, pressing it down so it hugs the surface nicely for maximum heat transfer.

– Chill out and let the iOpener work its magic for about 90 seconds before you try to lift the front panel.

Tools Used
  1. iOpeneriPad 2 Wi-Fi EMC 2415 Front Panel Replacement

Step 7

– Spot a tiny gap in the iPad’s adhesive ring up near the top right corner, about 2.0 inches (~5 cm) from the top edge. This little gap is your secret entry point.

– Line up your tool with the mute button, then gently slip the tip of a plastic opening tool into the narrow space between the front glass and the plastic bezel. Just nudge the tip in just enough to pry the crack open a bit.

Step 8

– Be sure to tuck that tool right where it needs to go—snugly between the plastic display bezel and the front panel glass.

Step 9

– Keep the tip of your plastic opening tool tucked between the front glass and plastic bezel, then slide a plastic opening pick into the gap right next to it. Easy does it!

Step 10

– Slide that handy plastic opening tool out from your iPad, and keep the momentum going by pushing the opening pick deeper under the front glass—about half an inch is perfect.

Step 11

– While you’re loosening the adhesive along the right side of the iPad, give your iOpener a quick warm-up and pop it back on the bottom edge to keep things nice and toasty.

Tools Used
  1. iOpeneriPad 2 Wi-Fi EMC 2415 Front Panel Replacement

Step 12

– While the bottom edge is warming up under the iOpener, start loosening the adhesive from the right side of your iPad.

– Carefully slide the opening pick down the edge of your iPad, releasing the adhesive as you go. Take your time, and don’t rush it!

Tools Used
  1. iOpeneriPad 2 Wi-Fi EMC 2415 Front Panel Replacement

Step 13

– If the opening pick decides to get cozy with the adhesive, just give it a little roll along the side of the iPad. Keep it moving to loosen up that stubborn adhesive.

Tools Used
  1. iOpeneriPad 2 Wi-Fi EMC 2415 Front Panel Replacement

Step 14

– Before you take out that first pick from the bottom corner of your iPad, slip a second pick under the right edge of the front glass. This little move keeps the adhesive from sticking back to the glass—trust us, it’ll make things smoother.

– Heat up the iOpener again, and give it a cozy spot at the top edge of your iPad. This should help soften things up just right for the next steps.

Tools Used
  1. iOpeneriPad 2 Wi-Fi EMC 2415 Front Panel Replacement

Step 15

– Alright, things are about to get a little tricky—time to proceed with care.

– You’re going to need to gently detach the antenna from the front panel, but be extra cautious not to damage any of the tiny components holding it in place on the bottom of the iPad. Stick to the following steps, and you’ll be good to go!

Step 16

– Gently slide the opening pick around the bottom right corner of the iPad to loosen the adhesive and get things moving.

Step 17

– Gently slide the tip of your opening pick along the bottom edge of the iPad to carefully loosen the adhesive near the Wi-Fi antenna.

Step 18

– After you’ve passed the Wi-Fi antenna (about 3″ or 75 mm from the right edge, right near the home button), slide the opening pick all the way in again.

– Gently slide the pick to the right to loosen the adhesive holding the Wi-Fi antenna to the front glass.

– The antenna is screwed and connected by a cable at the bottom of the iPad. This step carefully separates the antenna from the front panel so it stays safe when you lift the panel off.

Step 19

– Keep sliding that opening pick under the bottom edge of the iPad’s adhesive, pulling it out just enough to get around the home button, then pop it back in about half an inch (10 mm) past the button to keep things moving.

Tools Used
  1. iOpeneriPad 2 Wi-Fi EMC 2415 Front Panel Replacement

Step 20

– Keep sliding that adhesive remover tool smoothly along the entire bottom edge of your iPad.

– Leave the opening pick tucked just under the front glass near the home button to keep things steady.

Step 21

– Pop the iOpener back in the microwave for a quick warm-up, then place it on the left edge of the iPad to gently heat and loosen the adhesive in that area.

Tools Used
  1. iOpeneriPad 2 Wi-Fi EMC 2415 Front Panel Replacement

Step 22

– Gently glide the opening pick along the top edge of your iPad, giving it a little tug to navigate around the front-facing camera bracket.

– The adhesive in this area is pretty tenacious, so you might need to apply a bit of elbow grease. Take your time and be mindful to avoid any slips that could harm you or your iPad.

– If the opening pick starts to feel stuck in the adhesive, try ‘rolling’ it as demonstrated in step 9.

Tools Used
  1. iOpeneriPad 2 Wi-Fi EMC 2415 Front Panel Replacement

Step 23

– Keep peeling away the adhesive at the top edge of the iPad, and gently maneuver the opening pick around the top left corner.

Tools Used
  1. iOpeneriPad 2 Wi-Fi EMC 2415 Front Panel Replacement

Step 24

– Take your trusty opening pick and gently slide it along the left edge of your iPad. As you go, you’ll start to loosen that stubborn adhesive. Keep in mind, the adhesive is thinner near the digitizer, so be cautious. You don’t need to go too deep (just about 10mm, or half an inch) to avoid causing any damage to that delicate digitizer.

Step 25

– With the trusty opening pick still tucked under the bottom edge of your iPad, let’s gently free the adhesive in the bottom left corner. You’ve got this!

Step 26

– Grab one of those nifty opening picks and gently nudge up the bottom right corner of the iPad. Once you’ve got it pried open a bit, use your fingers to hold it steady. You’ve got this!

Step 27

– Grab the iPad by the top and bottom right corners and gently swivel the front glass away from the device.

– When putting it back together, grab a microfiber cloth and some compressed air to wipe away any dust or fingerprints from the LCD before snapping the glass back on.

Step 28

– Take out those four 2.0 mm Phillips screws holding the LCD snugly to the rear case. You’ve got this!

Step 29

– Gently lift the LCD from the long edge near the volume buttons and carefully flip it out of the rear case—like you’re flipping open a book, but way cooler.

– Now, place the LCD face down on the front panel, making sure it’s comfy and safe for the next step.

Step 30

– Gently use the edge of a plastic opening tool to lift the retaining flaps on the two ZIF sockets for the digitizer ribbon cable. You’ve got this!

Step 31

– Gently slide the edge of a plastic opening tool under the digitizer cable to lift it off the shields on the logic board.

– Carefully detach the digitizer cable from the adhesive that’s keeping it stuck to the side of the rear case.

Step 32

– Gently wiggle and pull the digitizer ribbon cable straight out from its cozy little sockets on the logic board. You’re doing great!

Step 33

– Grab the LCD by its long edge opposite the digitizer cable and carefully flip it back like closing a book.

– While holding the LCD up, gently slide the front panel away from the iPad, making sure the digitizer cable doesn’t catch on the rear case or LCD.

– Place the LCD back into the body to keep it safe and sound.

Step 34

– Heat up the iOpener by popping it in the microwave for 30 seconds on the highest setting—just enough to get it warm and ready.

– Place the warmed iOpener right over the home button at the front edge of the display and let it do its magic.

Tools Used
  1. iOpeneriPad 2 Wi-Fi EMC 2415 Front Panel Replacement

Step 35

– Slide the plastic opening tool beneath the right side of the home button assembly and gently lift it upwards to break free the adhesive holding it in place.

Step 36

– Carefully work your way along the left side of the home button to loosen the adhesive using the method described above.

– Gently lift the home button mount away from the front panel.

Step 37

– Gently slide the edge of your trusty plastic opening tool under the home button mounting bracket.

– Now, glide that tool along the retaining spring bracket to release the sticky stuff holding it in place.

– With a little finesse, pop the home button along with its mounting bracket out from the front panel.

Step 38

– Heat things up by following the iOpener warming tips laid out in the heating section at the start of this guide.

– Gently place the iOpener right over the front-facing camera at the top edge of the display to get things warmed up just right.

Tools Used
  1. iOpeneriPad 2 Wi-Fi EMC 2415 Front Panel Replacement

Step 39

– Gently slide the flat end of your spudger under the camera bracket to nudge it away from the sticky adhesive holding it to the front panel.

Tools Used
  1. SpudgeriPad 2 Wi-Fi EMC 2415 Front Panel Replacement

Step 40

– Gently lift the camera bracket off the front panel and set it aside like a pro.

Step 41

– To put your device back together, just follow these steps in reverse order and use our iPad 2 Wi-Fi Front Panel Adhesive strips guide to stick the front panel back on. If you get stuck or want a helping hand, you can always schedule a repair!

Success!
To put your device back together, simply retrace your steps in reverse order and check out our iPad 2 Wi-Fi Front Panel Adhesive strips guide to help secure that front panel like a pro! And remember, if you run into any trouble, you can always schedule a repair.

iPad 2 Wi-Fi EMC 2415 Display Data Cable Replacement

Duration: 45 minutes
Steps: 35 Steps

Ready to tackle that broken display data cable? Let’s dive in and get your device looking pristine again! Follow these steps and you’ll be on your way to a functional screen in no time. If you hit a snag, remember, you can always schedule a repair!

Step 1

– Set the iOpener right in the middle of the microwave and let it soak up the warmth.

Tools Used
  1. iOpeneriPad 2 Wi-Fi EMC 2415 Display Data Cable Replacement

Step 2

– Pop the iOpener in the microwave for about thirty seconds to get it nice and warm.

– As you work, if the iOpener starts to cool down, just give it another quick 30-second zap in the microwave to keep things toasty.

Tools Used
  1. iOpeneriPad 2 Wi-Fi EMC 2415 Display Data Cable Replacement

Step 3

– Grab the iOpener by one of its flat ends (the middle gets super hot!) and take it out of the microwave.

Tools Used
  1. iOpeneriPad 2 Wi-Fi EMC 2415 Display Data Cable Replacement

Step 4

– Grab a pot or pan and fill it with enough water to give your iOpener a cozy bath.

– Turn up the heat and bring that water to a rolling boil. Once it’s bubbling, switch off the heat.

– Carefully lower your iOpener into the hot water and let it soak for 2-3 minutes. Make sure it’s completely submerged; it loves a good dip!

– Using some tongs (safety first!), fish out your warm iOpener from the water.

– Give it a nice towel dry to make it feel fresh and ready to go.

– And voilà! Your iOpener is all set for action! If it needs a little more warmth later on, just repeat the boiling dance: heat the water, turn off the heat, and let it soak again for 2-3 minutes.

Tools Used
  1. iOpeneriPad 2 Wi-Fi EMC 2415 Display Data Cable Replacement

Step 5

– If your display glass has taken a hit and is cracked, let’s keep it from shattering further and protect those precious fingers while you work. Grab some tape and cover that glass up!

– Layer on some clear packing tape over your iPad’s display, letting the strips overlap until the entire front is securely shielded.

– Now, follow the rest of the guide as best as you can. Just a heads up, once the glass starts cracking, it might not stop, so you may need to bring out a metal prying tool to scoop out those stubborn pieces.

Step 6

– Place the iOpener along the right edge of your iPad, and give it a gentle pat to make sure it’s getting cozy with the surface.

– Let the iOpener chill on your iPad for about 90 seconds before you start working your magic on the front panel.

Tools Used
  1. iOpeneriPad 2 Wi-Fi EMC 2415 Display Data Cable Replacement

Step 7

– Spot the tiny gap in the iPad’s adhesive ring at the upper right corner, about 2.0 inches (~5 cm) down from the top. This little gap is your ticket in.

– Line up your tool with the mute button. Gently slide the tip of a plastic opening tool into the crack between the front glass and plastic bezel—just enough to nudge it open a bit.

Step 8

– Ensure you position the tool just right—nestled between the plastic display bezel and the front panel glass for a smooth repair journey.

Step 9

– Slide the plastic opening pick into the gap right next to the plastic opening tool, making sure the tip of the tool stays nestled between the front glass and plastic bezel. This will help you gently separate the two layers. Take it slow and steady, and you’re on your way!

Step 10

– Take that trusty plastic opening tool out of the iPad’s clutches, and slide the opening pick further beneath the front glass, aiming for a cozy depth of about 0.5 inches.

Step 11

– While you’re working on loosening the adhesive on the right side of the iPad, give the iOpener another quick heat-up, and place it on the bottom edge of the iPad. It’ll help keep things moving smoothly.

Tools Used
  1. iOpeneriPad 2 Wi-Fi EMC 2415 Display Data Cable Replacement

Step 12

– While the bottom edge gets a little love from the heat, start peeling the adhesive off the right edge of your iPad.

– Gently slide the opening pick down the edge of the iPad, releasing that stubborn adhesive as you go.

Tools Used
  1. iOpeneriPad 2 Wi-Fi EMC 2415 Display Data Cable Replacement

Step 13

– If your opening pick gets caught in the adhesive, just give it a little roll along the edge of the iPad to keep that sticky stuff loosening up smoothly.

Tools Used
  1. iOpeneriPad 2 Wi-Fi EMC 2415 Display Data Cable Replacement

Step 14

– Before removing your first opening pick from the bottom corner of the iPad, slip a second pick under the right edge of the front glass—this keeps that sticky adhesive from sneaking back and making things complicated.

– Give your iOpener a quick reheat, then place it along the top edge of the iPad to keep things moving smoothly.

Tools Used
  1. iOpeneriPad 2 Wi-Fi EMC 2415 Display Data Cable Replacement

Step 15

– Heads up! The next steps are a bit tricky, so keep your cool.

– You’ll need to gently separate the adhesive holding the antenna to the front panel, being careful not to harm the fragile connections at the bottom of your iPad. Take it slow and steady—precision is key!

Step 16

– Gently slide the opening pick around the bottom right corner of your iPad, carefully lifting the adhesive as you go.

Step 17

– Gently glide the tip of your opening pick along the bottom edge of the iPad to free up that pesky adhesive over the Wi-Fi antenna. You’re doing great!

Step 18

– After cruising past the Wi-Fi antenna—about 3 inches (75 mm) from the right edge, or just beside the home button—slide that opening pick all the way in like you mean it.

– Keep gliding the pick to the right to loosen up the adhesive holding the Wi-Fi antenna to the front glass. Smooth moves!

– Heads up: the antenna is hooked to the bottom of your iPad with screws and a cable. This step is all about gently separating the antenna from the front panel, so you won’t accidentally mess it up when you lift the panel off.

Step 19

– Keep sliding the opening pick along the bottom edge of your iPad, gently working your way past the home button. Once you’re clear of the button, re-insert the pick about 1/2 inch (10 mm) deep to keep the adhesive release party going!

Tools Used
  1. iOpeneriPad 2 Wi-Fi EMC 2415 Display Data Cable Replacement

Step 20

– Slide that pick along the bottom edge of your iPad, cutting through the sticky adhesive like a pro.

– Keep the pick parked under the front glass near the home button—it’s holding things in place while you work your magic.

Step 21

– Give your iOpener another round in the microwave and place it along the left edge of your iPad—let it work its magic warming up the sticky adhesive in that spot.

Tools Used
  1. iOpeneriPad 2 Wi-Fi EMC 2415 Display Data Cable Replacement

Step 22

– Glide your opening pick across the top edge of the iPad, angling it outward a bit to sneak around the front-facing camera bracket.

– The adhesive here is seriously tough stuff! Take your time, use steady force, and keep those fingers safe—no one wants a surprise slip-up.

– If your pick feels like it’s stuck in a glue trap, try rolling it gently, just like you did back in step 9.

Tools Used
  1. iOpeneriPad 2 Wi-Fi EMC 2415 Display Data Cable Replacement

Step 23

– Keep peeling away the adhesive at the top edge of the iPad, and gently work the opening pick around the top left corner.

Tools Used
  1. iOpeneriPad 2 Wi-Fi EMC 2415 Display Data Cable Replacement

Step 24

– Gently glide your opening pick along the left edge of the iPad, breaking up the adhesive as you move. Remember, the adhesive here is pretty slim because the digitizer runs the whole side. Keep the pick shallow—no deeper than 1/2 inch (10 mm)—so you don’t accidentally mess with the digitizer.

Step 25

– With the trusty opening pick still snugly tucked under the bottom edge of your iPad, let’s gently free the adhesive in the bottom left corner. You’re doing great!

Step 26

– Grab one of your opening picks and gently lift up the bottom right corner of the iPad, then hold it securely with your fingers.

Step 27

– Grab the iPad by the top and bottom right corners and gently swivel the front glass away from the device.

– When putting everything back together, give the LCD a quick once-over with a microfiber cloth and some compressed air to zap away dust and fingerprints before snapping the glass back on.

Step 28

– Unscrew those four 2.0 mm Phillips screws that are holding the LCD to the rear case. Take your time—no need to rush!

Step 29

– Gently lift the LCD from the side closest to the volume buttons, then swivel it out of the rear case like you’re opening a treasure chest.

– Rest the LCD on the front panel, just like it’s lounging in the second picture.

Step 30

– Grab your trusty plastic opening tool and gently nudge the metal retaining clip that’s holding the display data cable to its socket on the logic board. Give it a little flip-up action, and you’ll be on your way!

Step 31

– Gently unplug the display data cable from its socket on the logic board.

Step 32

– Carefully lift and take out the LCD assembly from your iPad 2.

Step 33

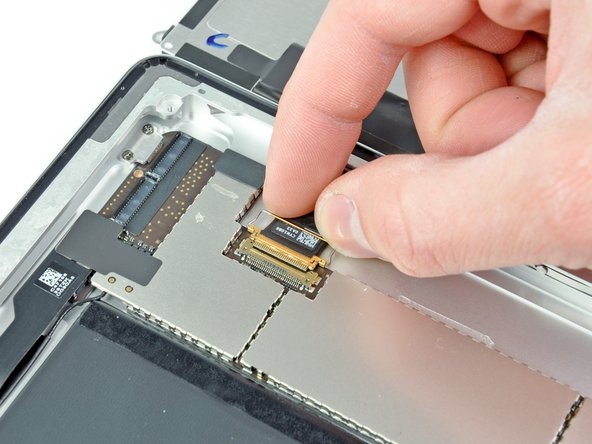
– Peel back the tiny strip of black tape that’s hiding the display data cable connector on the LCD.

Step 34

– Take your trusty plastic opening tool and gently flip up that shiny metal retaining clip on the display data cable connector—like you’re opening a tiny treasure chest!

Step 35

– To put your device back together, just flip these steps around and check out our guide on using the iPad 2 Wi-Fi Front Panel Adhesive strips to reattach that front panel. If you find yourself in a pickle, don’t hesitate to schedule a repair for some expert help!

Success!
To put your device back together, just work through these steps backward and use our iPad 2 Wi-Fi Front Panel Adhesive strips guide to stick the front panel back in place. If you hit a snag, remember you can always schedule a repair!

iPad 2 Wi-Fi EMC 2415 Bluetooth/Wi-Fi Antenna Replacement

Duration: 45 minutes
Steps: 49 Steps

Follow this guide to swap out a busted antenna and get your device back in action.

Step 1

– Pop the iOpener right in the middle of the microwave.

Tools Used
  1. iOpeneriPad 2 Wi-Fi EMC 2415 Bluetooth/Wi-Fi Antenna Replacement

Step 2

– Pop the iOpener in the microwave for 30 seconds to get it nice and toasty.

– As you work, if the iOpener starts cooling off, just give it another 30 seconds in the microwave to keep things warm and sticky.

Tools Used
  1. iOpeneriPad 2 Wi-Fi EMC 2415 Bluetooth/Wi-Fi Antenna Replacement

Step 3

– Carefully take the iOpener out of the microwave, holding it by one of the flat ends. This way, you can avoid touching the hot center. Safety first, as always!

Tools Used
  1. iOpeneriPad 2 Wi-Fi EMC 2415 Bluetooth/Wi-Fi Antenna Replacement

Step 4

– Grab a pot or pan and fill it up with enough water to give your iOpener a nice, cozy bath.

– Crank up the heat and bring that water to a rolling boil, then switch off the burner.

– Gently place your iOpener into the steamy water for about 2-3 minutes, making sure it’s getting all the love by being fully submerged.

– Using tongs (safety first, my friend!), carefully lift the warm iOpener out of the water.

– Give it a good towel-drying to make sure it’s nice and dry.

– Voila! Your iOpener is all set to rock and roll! If it needs a little more warmth, just repeat the boiling bath for another 2-3 minutes.

Tools Used
  1. iOpeneriPad 2 Wi-Fi EMC 2415 Bluetooth/Wi-Fi Antenna Replacement

Step 5

– If your display glass is cracked, tape it up to keep the shards in check and avoid any ouchies while you work.

– Cover the screen with overlapping strips of clear packing tape until the whole front is safely wrapped.

– Follow the rest of the guide as best you can. Just know that broken glass tends to keep cracking, so you might need a metal prying tool to carefully lift out the pieces. If it gets too tricky, you can always schedule a repair.

Step 6

– Place the iOpener flat along the right edge of the iPad, pressing it down so it makes solid contact with the surface.

– Let it chill there for about 90 seconds to warm things up before you try opening the front panel.

Tools Used
  1. iOpeneriPad 2 Wi-Fi EMC 2415 Bluetooth/Wi-Fi Antenna Replacement

Step 7

– Look closely, and you’ll notice a tiny gap in the adhesive ring at the upper right corner of your iPad, about 2.0 inches (~5 cm) down from the top. Let’s take advantage of this little flaw!

– Get ready to align your trusty tool with the mute button. Gently slide the tip of a plastic opening tool into the gap between the front glass and the plastic bezel. Just the very tip will do—enough to give that crack a little wiggle!

Step 8

– Ensure the tool is placed just right—sneak it in between the plastic display bezel and the front panel glass.

Step 9

– With your plastic opening tool cozily chilling between the front glass and the plastic bezel, grab a plastic pick and slide it into the gap right next to your trusty tool buddy. Smooth moves—keep it steady and work that groove!

Step 10

– Grab that plastic opening tool—gently slide the pick a bit further under the front glass until it’s about half an inch deep. Take your time and keep things chill!

Step 11

– As you’re working on loosening the adhesive on the right side of your iPad, give that iOpener another round of heat and pop it back onto the bottom edge of your device.

Tools Used
  1. iOpeneriPad 2 Wi-Fi EMC 2415 Bluetooth/Wi-Fi Antenna Replacement

Step 12

– While the iOpener is working its magic on the bottom edge, get ready to tackle the right edge of your iPad.

– Grab your opening pick and slide it smoothly along the right side, breaking up the sticky adhesive as you go. Keep it steady—you’re doing great!

Tools Used
  1. iOpeneriPad 2 Wi-Fi EMC 2415 Bluetooth/Wi-Fi Antenna Replacement

Step 13

– If your opening pick decides to play hide and seek in the adhesive, just give it a little roll along the side of the iPad to keep freeing that sticky stuff. You’ve got this!

Tools Used
  1. iOpeneriPad 2 Wi-Fi EMC 2415 Bluetooth/Wi-Fi Antenna Replacement

Step 14

– Before you dive in and remove that first opening pick from the bottom corner of your iPad, slide a second pick under the right edge of the front glass to keep the adhesive from playing tricks and re-sticking itself.

– Give your iOpener a little extra love by re-heating it, then place it at the top edge of the iPad to get things warmed up.

Tools Used
  1. iOpeneriPad 2 Wi-Fi EMC 2415 Bluetooth/Wi-Fi Antenna Replacement

Step 15

– Heads up! The steps coming up need you to be extra careful.

– You’ll need to gently loosen the adhesive holding the antenna to the front panel without messing up the fragile parts connecting the antenna to the bottom of the iPad. Take it slow and follow each step closely.

Step 16

– Gently slide the opening pick around the bottom right corner of the iPad to loosen the adhesive chillin’ there.

Step 17

– Glide your opening pick along the bottom edge of your iPad like you’re slicing through butter—this will loosen up the adhesive above the Wi-Fi antenna. Keep it smooth and steady!

Step 18

– Alright, folks! Once you’ve danced past the Wi-Fi antenna (that’s about 3 inches or 75 mm from the right edge, right by the home button), it’s time to re-insert that opening pick all the way in.

– Now, slide that pick to the right and watch as the adhesive holding the Wi-Fi antenna to the front glass gives up the fight.

– Keep in mind, the antenna is snugly attached to the bottom of the iPad with screws and a cable. This step is all about gently detaching the antenna from the front panel, making sure it stays safe and sound when you lift off the panel.

Step 19

– Keep peeling away that sticky adhesive along the bottom of your iPad! Gently tug on the opening pick, making sure it goes around the home button. Once you’re past that little button, slide the pick in about 1/2 inch (10 mm) and you’ll be all set!

Tools Used
  1. iOpeneriPad 2 Wi-Fi EMC 2415 Bluetooth/Wi-Fi Antenna Replacement

Step 20

– Keep sliding that adhesive-release magic along the entire bottom edge of your iPad.

– Let the opening pick chill underneath the front glass, right by the home button.

Step 21

– Pop that iOpener in the microwave for a quick heat-up session, then place it on the left edge of your iPad. This will help warm up the adhesive in that spot, making your repair journey just a bit smoother!

Tools Used
  1. iOpeneriPad 2 Wi-Fi EMC 2415 Bluetooth/Wi-Fi Antenna Replacement

Step 22

– Gently slide the opening pick along the top edge of the iPad, easing it out just enough to get around the front-facing camera bracket.

– Heads up: the adhesive here is super sticky, so you might need to apply some solid force. Take it slow and steady to avoid any slips or scratches on you or your iPad.

– If the pick feels like it’s stuck in the glue, try “rolling” it as demonstrated in step 9 to keep things moving smoothly.

Tools Used
  1. iOpeneriPad 2 Wi-Fi EMC 2415 Bluetooth/Wi-Fi Antenna Replacement

Step 23

– Keep on peeling away that adhesive at the top edge of your iPad, and then gently maneuver the opening pick around the top left corner. You’ve got this!

Tools Used
  1. iOpeneriPad 2 Wi-Fi EMC 2415 Bluetooth/Wi-Fi Antenna Replacement

Step 24

– Gently slide the opening pick along the iPad’s left edge to loosen the adhesive bit by bit. Heads up: the adhesive here is pretty thin because of the digitizer running the whole length. Keep the pick shallow—no deeper than about 10 mm (half an inch)—to avoid any accidental damage to the digitizer.

Step 25

– Keep your opening pick right under the iPad’s bottom edge and gently work your way across the left corner to break the adhesive seal. Easy does it!

Step 26

– Slip one of your trusty opening picks under the bottom right corner of the iPad, give it a gentle lift, and grab hold with your fingers. You’re making progress—keep it up!

Step 27

– Grab your iPad by the top and bottom right corners, and gently rotate the front glass away from the device.

– When you’re putting it all back together, take a microfiber cloth and some compressed air to wipe away any dust or fingerprints on the LCD before you pop the glass back into place.

Step 28

– Unscrew the four 2.0 mm Phillips screws that are keeping the LCD snugly attached to the rear case. You’re almost there!

Step 29

– Gently lift up the LCD from the edge closest to the volume buttons and flip it out of the rear case—like you’re turning the page of your favorite comic book.

– Lay the LCD face down on the front panel for a quick power nap before moving on.

Step 30

– Gently slide the edge of a plastic opening tool under the retaining flaps on the two digitizer ribbon cable ZIF sockets and flip them up with care.

Step 31

– Gently slide the edge of a plastic opening tool under the digitizer cable to lift it off the shields on the logic board.

– Slowly peel the digitizer cable away from the adhesive holding it to the side of the rear case.

Step 32

– Gently wiggle and pull the digitizer ribbon cable straight out of its two cozy sockets on the logic board. You’ve got this!

Step 33

– Carefully lift the LCD from its long edge opposite the digitizer cable and gently flip it back toward the rear case, kind of like closing a book.

– While holding the LCD up, slowly slide the front panel away from the iPad. Watch out to avoid catching the digitizer cable on the rear case or LCD.

– Place the LCD back into the body to keep it safe while you work.

Step 34

– Carefully lift the LCD from the long edge nearest the volume buttons and gently swing it open like you’re turning a page in a book.

– Place the LCD face down on a clean spot—pro tip: lay it on a soft cloth to keep those screen scratches at bay.

Step 35

– Grab your trusty plastic opening tool and gently flip the display data cable lock upwards.

– Carefully wiggle the display data cable free from its socket.

Step 36

– Gently separate the LCD assembly from the rear panel assembly to keep things moving smoothly.

Step 37

– If there’s a piece of tape covering the end of the dock connector cable, grab a plastic opening tool and gently lift it off. You’re doing great!

– Next, take your trusty plastic opening tool and carefully work it under the dock connector cable’s connector to pop it out from the logic board. Nice and easy!

– Now, let’s peel that dock connector ribbon cable away from the rear panel. You’re almost there!

Step 38

– Gently lift the speaker cable connector straight up from its spot on the logic board. Take your time and keep things steady—easy does it!

Step 39

– Gently slide the edge of a plastic opening tool under the retaining flap on the headphone jack and front camera cable ZIF socket to lift it up.

– Carefully peel the headphone jack and front camera cable away from the rear case.

Step 40

– Gently tug the headphone jack and front camera ribbon cable straight out from its cozy home on the logic board. You’re doing great!

Step 41

– Gently slide the edge of a plastic opening tool under the retainer to lift it up and free the control board cable connector from its spot on the logic board.

– Carefully pull the connector straight out from its socket on the logic board.

Step 42

– First things first, grab your trusty screwdriver and remove those two 2.1 mm Phillips screws holding the logic board bracket snugly against the rear case, right by the digitizer cable socket. You’ve got this!

– Now that the screws are out of the way, gently lift that logic board bracket off the rear case. You’re making excellent progress!

Step 43

– Unscrew the last three 2.6 mm Phillips screws that are keeping the logic board snug against the rear case. You’ve got this!

Step 44

– Take the edge of your trusty plastic opening tool and carefully lift the logic board away from the sticky adhesive holding it to the rear case. Go slow and steady—no need to rush this move!

Step 45

– Gently pop the logic board out from the back casing and give it a little tilt towards the battery as if you’re encouraging it to rise and shine!

Step 46

– Grab your trusty plastic opening tool and gently pry up the Wi-Fi antenna connector from its snug spot on the logic board. Be careful, it’s not a wrestling match!

– Now, carefully lift out the logic board from your iPad 2 like you’re unveiling a secret treasure. Nice and steady!

Step 47

– Gently move those dock connector and speaker cables aside, and carefully peel off the Bluetooth/Wi-Fi antenna cable from the adhesive that’s holding it to the rear case. You’ve got this—just take it slow and steady.

Step 48

– Unscrew the Bluetooth/Wi-Fi antenna from the rear case by removing these screws:

– Two 1.7 mm Phillips screws

– Two 2.0 mm Phillips screws

Step 49

– Gently peel the Bluetooth/Wi-Fi antenna away from the speaker enclosure and take it out of the iPad 2.

Success!
Ready to put everything back together? Just reverse these steps and use our guide for the iPad 2 Wi-Fi Front Panel Adhesive Strips to stick the front panel back on. If things get tricky, you can always schedule a repair.

iPad 2 Wi-Fi EMC 2415 Battery Replacement

Duration: 45 minutes
Steps: 51 Steps

Follow this guide to swap out your battery like a pro. If your battery looks puffed up, handle it with extra care and caution.

Step 1

– Pop that iOpener right in the middle of your microwave—center stage for the warm-up act!

Tools Used
  1. iOpeneriPad 2 Wi-Fi EMC 2415 Battery Replacement

Step 2

– Pop the iOpener in the microwave for a quick thirty-second warm-up.

– As you work your magic, if the iOpener starts cooling down, just give it another thirty seconds in the microwave to keep things toasty.

Tools Used
  1. iOpeneriPad 2 Wi-Fi EMC 2415 Battery Replacement

Step 3

– Carefully take the iOpener out of the microwave, holding onto one of the flat ends so you don’t accidentally grab the hot center. Safety first, my friend!

Tools Used
  1. iOpeneriPad 2 Wi-Fi EMC 2415 Battery Replacement

Step 4

– Grab a pot or pan and fill it up with enough water to cover your iOpener.

– Crank up the heat until the water is boiling, then switch off the stove.

– Drop your iOpener into the hot water for a chill 2-3 minute soak—make sure it’s totally underwater.

– Use some tongs to fish out your toasty iOpener. No bare hands!

– Give your iOpener a good towel dry so it’s not dripping all over the place.

– Boom, your iOpener is warmed up and ready for action! Need it hot again? Just repeat the boiling-water spa for another 2-3 minutes.

Tools Used
  1. iOpeneriPad 2 Wi-Fi EMC 2415 Battery Replacement

Step 5

– If your display glass is cracked, keep those shards in check and avoid any ouch moments by taping over the glass before you get started.

– Cover the entire iPad screen with overlapping strips of clear packing tape until it’s fully wrapped up.

– Follow the rest of the steps as outlined, but heads up: once the glass is cracked, it might keep cracking as you work. You may need to carefully use a metal prying tool to lift out the broken glass pieces.

Step 6

– Place the iOpener snugly on the right edge of the iPad, making sure it’s lying flat and making good contact with the surface. We want that warmth to work its magic!

– Give the bag some quality time on the iPad for about 90 seconds before you dive in and attempt to lift the front panel.

Tools Used
  1. iOpeneriPad 2 Wi-Fi EMC 2415 Battery Replacement

Step 7

– There’s a tiny gap in the iPad’s adhesive ring, located in the upper right corner about 2.0 inches (~5 cm) from the top. It’s your ticket to getting this job done.

– Line up your tool with the mute button, then gently slide the tip of a plastic opening tool into that gap between the front glass and the plastic bezel. Just nudge it in enough to widen the crack slightly.

Step 8

– Carefully slide your tool right into the sweet spot—nestled between the plastic display bezel and the front panel glass. You’ve got this!

Step 9

– Wedge the tip of your plastic opening tool between the front glass and plastic bezel, then gently slide a plastic pick into the gap right next to it. Take it slow, you’ve got this!

Step 10

– Take the plastic opening tool out of the iPad, then keep sliding your opening pick gently under the front glass until it goes about half an inch in. Steady hands, you’re doing great!

Step 11

– While you’re loosening the adhesive on the right side of the iPad, heat up your iOpener again and set it on the bottom edge of the iPad. Let it work its magic!

Tools Used
  1. iOpeneriPad 2 Wi-Fi EMC 2415 Battery Replacement

Step 12

– As the iOpener warms up the bottom edge, start peeling away the adhesive from the right side of your iPad.

– Gently glide the opening pick down the edge of the iPad, carefully releasing the adhesive as you go.

Tools Used
  1. iOpeneriPad 2 Wi-Fi EMC 2415 Battery Replacement

Step 13

– If the opening pick gets stuck in the adhesive, try gently ‘rolling’ it along the edge of the iPad to keep loosening the adhesive without any hassle.

Tools Used
  1. iOpeneriPad 2 Wi-Fi EMC 2415 Battery Replacement

Step 14

– Before you pull out the first opening pick from the bottom corner of the iPad, slide a second pick under the right edge of the front glass to keep that sticky adhesive from sticking back together.

– Warm up the iOpener again, then shift it to the top edge of the iPad to keep things nice and toasty.

Tools Used
  1. iOpeneriPad 2 Wi-Fi EMC 2415 Battery Replacement

Step 15

– Heads up! The next steps call for some serious care and attention.

– You’ll need to gently loosen the adhesive holding the antenna to the front panel, making sure not to mess with the fragile parts connecting the antenna to the bottom of the iPad. Take it slow and follow along carefully.

Step 16

– Gently slide the opening pick around the bottom right corner of the iPad to loosen the adhesive hiding out there.

Step 17

– Gently glide the tip of the opening pick along the bottom edge of the iPad, freeing the adhesive that’s holding onto the Wi-Fi antenna. You’ve got this!

Step 18

– Once you’ve scooted past the Wi-Fi antenna (that’s about 3 inches or 75 mm from the right edge, right by the home button), pop that opening pick back in all the way.

– Now, slide that pick to the right like you mean it! This will let go of the adhesive that’s holding the Wi-Fi antenna tight to the front glass.

– Remember, the antenna is fastened to the bottom of the iPad with some screws and a cable. By doing this step, you’re safely detaching the antenna from the front panel, so when it’s time to remove the panel, you won’t risk a mishap with the antenna.

Step 19

– Keep on peeling away that adhesive at the bottom of the iPad! Gently pull the opening pick out far enough to slide around the home button, and once you’ve navigated past it, pop that pick back in to a depth of about 1/2 inch (10 mm). You’re doing great!

Tools Used
  1. iOpeneriPad 2 Wi-Fi EMC 2415 Battery Replacement

Step 20

– Keep peeling back that adhesive along the bottom edge of the iPad like you’re unwrapping a present—smooth and steady!

– Once you’ve got that adhesive under control, pop an opening pick right by the home button to keep the front glass happy and secure.

Step 21

– Pop the iOpener back in the microwave to warm it up again, then place it on the left edge of your iPad to gently heat and loosen that stubborn adhesive.

Tools Used
  1. iOpeneriPad 2 Wi-Fi EMC 2415 Battery Replacement

Step 22

– Gently slide the opening pick along the top edge of your iPad, nudging it out a bit to work around the front-facing camera bracket.

– Heads up: the adhesive here is pretty stubborn, so you might need to apply some firm, steady pressure. Take it slow and steady to avoid any slips or scratches—your fingers and iPad will thank you!

– If your pick gets stuck in the adhesive, try “rolling” it as demonstrated in step 9 to keep things moving smoothly.

Tools Used
  1. iOpeneriPad 2 Wi-Fi EMC 2415 Battery Replacement

Step 23

– Keep peeling away that stubborn adhesive along the top edge of the iPad, then gently work the opening pick around the top left corner. You’ve got this!

Tools Used
  1. iOpeneriPad 2 Wi-Fi EMC 2415 Battery Replacement

Step 24

– Gently slide the opening pick along the iPad’s left edge to loosen the adhesive. Heads up: the adhesive here is pretty thin because of the digitizer running along the entire left side. Keep the pick shallow—no deeper than 10 mm (about 1/2 inch)—to avoid any accidental digitizer drama.

Step 25

– Grab that opening pick hanging out under the iPad’s bottom edge and gently work it along the bottom left corner to break free the sticky adhesive.

Step 26

– Take one of those trusty opening picks and gently lift the bottom right corner of your iPad—then snag it with your fingers like you’re picking up the last slice of pizza!

Step 27

– Grab the iPad by the top and bottom right corners and gently swivel the front glass away from the device.

– When putting it back together, give the LCD a good once-over with a microfiber cloth and some compressed air to clear away any dust or pesky fingerprints before snapping the glass back on.

Step 28

– Unscrew those four 2.0 mm Phillips screws holding the LCD in place—let’s get that screen free from the rear case!

Step 29

– Gently lift the LCD from the edge closest to the volume buttons and flip it out of the rear case, just like you would turn a page in a book.

– Now, place the LCD face down on the front panel, ready for the next step!

Step 30

– Gently use the edge of a plastic opening tool to flip up the little retaining flaps on the two digitizer ribbon cable ZIF sockets. Take it slow and steady!

Step 31

– Grab a plastic opening tool and gently wedge it along the edge of the digitizer cable, peeling it away from the shields on the logic board. Easy does it!

– Now, carefully tug at the digitizer cable, freeing it from the adhesive that’s holding it to the rear case. Keep it steady!

Step 32

– Gently slide the digitizer ribbon cable straight out from its two sockets on the logic board. No need to rush—slow and steady wins the repair race!

Step 33

– Gently lift the LCD from the edge that’s farthest from the digitizer cable and flip it back like you’re closing a book—easy peasy!

– While you’ve got the LCD up, carefully slide the front panel away from the iPad. Just a heads up—avoid snagging that digitizer cable on the rear case or LCD.

– Once you’re done, place the LCD back into the body for safekeeping. You’re doing great!

Step 34

– Carefully lift the LCD from the long edge nearest the volume buttons and gently swing it out of the rear case—kind of like flipping a page in a book.

– Place the LCD face down on a clean surface. To avoid any scratches, consider resting it on a soft cloth.

Step 35

– Gently pry up the display data cable lock using a plastic opening tool.

– Carefully pull the display data cable free from its connector.

Step 36

– Gently detach the LCD assembly from the back panel assembly, taking care not to damage any components along the way.

Step 37

– If there’s a piece of tape chilling over the end of the dock connector cable, grab your trusty plastic opening tool and gently lift it off.

– Next up—use the edge of the plastic opening tool to carefully pop the dock connector cable’s connector up and out of its socket on the logic board. Just a little finesse here!

– Now, peel that dock connector ribbon cable off the rear panel, like you’re unwrapping a techy present. Smooth moves!

Step 38

– Gently lift the speaker cable connector straight up from its socket on the logic board—no need for muscle, just a little finesse!

Step 39

– Grab your trusty plastic opening tool and gently lift up the retaining flap on the headphone jack and front camera cable ZIF socket. You’ve got this!

– Carefully peel away the headphone jack and front camera cable from the rear case. It’s all about that gentle touch!

Step 40

– Gently pull the headphone jack and front camera ribbon cable straight out from their socket on the logic board.

Step 41

– Grab a plastic opening tool and gently slide it under the retainer holding the control board cable connector in place. Give it a little nudge to pop it up.

– Once it’s free, carefully pull the connector out of its socket on the logic board. You’re doing great!

Step 42

– Unscrew those two 2.1 mm Phillips screws holding the logic board bracket in place near the digitizer cable socket. Easy does it!

– Lift out the logic board bracket from the rear case, and set it aside. You’re making great progress!

Step 43

– Time to tackle those last three 2.6 mm Phillips screws holding the logic board to the rear case. Grab your screwdriver and give them a twist—you’re almost there!

Step 44

– Gently slide the edge of a plastic opening tool underneath the logic board and carefully lift it away from the sticky adhesive that’s holding it to the rear case. Take your time, and remember, patience is key!

Step 45

– Gently lift the logic board up from the rear case and give it a little tilt toward the battery—like you’re peeking under the hood. Keep it smooth and steady!

Step 46

– Gently pop the Wi-Fi antenna connector out of its socket on the logic board with the edge of your plastic opening tool. Treat it like the delicate little snap it is!

– Lift out the logic board from your iPad 2—give it a smooth exit, no wrestling required.

Step 47

– Pop the iOpener in the microwave for a minute to get it nice and toasty.

– Lay that hot iOpener down on the back of your iPad, just right of center (opposite the rear camera). Give it a good 90 seconds to work its magic and loosen up that stubborn battery adhesive.

– Slide the iOpener over to the center of your iPad’s back and let it chill there for another 90 seconds.

– Scoot the iOpener to the left edge (where the rear camera lives) and let it hang out for one more 90-second round.

Tools Used
  1. iOpeneriPad 2 Wi-Fi EMC 2415 Battery Replacement

Step 48

– Let’s get started with the battery cell closest to the dock connector! Slide a plastic opening tool under the edge nearest the logic board void—just enough space so you can sneak in the flat end of your spudger.

– Next, gently run the flat end of your spudger along the two longer sides of each battery cell, working your way to loosen them from the sticky adhesive holding them to the rear case. Slow and steady wins the battery race!

Tools Used
  1. SpudgeriPad 2 Wi-Fi EMC 2415 Battery Replacement

Step 49

– Before you start prying up that middle battery cell, grab a plastic opening tool and gently lift the battery connector board away from the rear panel. You’ve got this!

Step 50

– Grab your spudger and gently slide it along the long edges of the middle battery cell to loosen that stubborn adhesive.

– Do the same for the last battery cell, warming up the case again if it feels a bit too snug.

Tools Used
  1. SpudgeriPad 2 Wi-Fi EMC 2415 Battery Replacement

Step 51

– To put your device back together, just retrace your steps in reverse order and check out our guide on using the iPad 2 Wi-Fi Front Panel Adhesive strips to get that front panel snugly back in place. If you hit a snag, remember, you can always schedule a repair for some extra help!

Success!
To put your device back together, just reverse these steps and check out our guide on using the iPad 2 Wi-Fi Front Panel Adhesive strips to get that front panel securely back in place. Remember, if you hit a snag, you can always schedule a repair for a little extra help!

iPad 3G Teardown

Duration: 45 minutes
Steps: 17 Steps

While the world eagerly waits to see the iPad in action, we’ve got our hands on the brand new iPad 3G. Stay ahead of the curve and keep up with the latest in tech. Need a hand with the repair? No worries, you can always schedule a repair.

Step 1

– Guess what? The iPad 3G has finally landed at Salvation Repair! Get ready to dive into the inner workings of this awesome device.

– This is the Wi-Fi + 3G model, and we had a little preview of its guts a month back by exploring the FCC’s database.

– You’ll spot the 3G iPad easily—it has a stylish black plastic RF window that sets it apart from the Wi-Fi-only version.

– This nifty device supports UMTS/HSDPA on 850, 1900, and 2100 MHz, plus GSM/EDGE on 850, 900, 1800, and 1900 MHz.

– In a surprising twist from Apple, the iPad comes unlocked, so you’re not stuck with just one carrier.

– However, in the US, AT&T is the sole carrier that offers 3G on the frequencies compatible with the iPad. T-Mobile might work too, but it’ll be on the slower EDGE network.

Step 2

– Turns out, the iPad’s model number is A1337, just as the FCC filing hinted. That’s some slick leetspeak, right?

– Alright, let’s jump in and check out what makes this device tick—no need to hang around.

– We’ll stack up the guts of this production unit against the preproduction FCC photos we showed off last month. Let’s see what’s changed!

Step 3

– With some gentle prying using a metal spudger, you can lift the display assembly away from the rear case—just take it slow, and you’ll have it off in no time!

Tools Used
  1. Metal SpudgeriPad 3G Teardown
  2. SpudgeriPad 3G Teardown

Step 4

– Here’s a peek inside: the iPad 3G is hanging out on the left, while the Wi-Fi model chills on the right.

– Spot the differences! The 3G version rocks an extra chip, a SIM card board, and a snazzy plastic antenna cover up top.

– The 3G iPad has a bit more going on under the hood compared to its Wi-Fi-only sibling, but there’s still plenty of room to breathe in there.

Step 5

– Gently pop up the antenna from the communications board using a plastic opening tool—there are two antennas hanging out here, so make sure you’re grabbing the right one!

– The communications board is held down with T4 Torx screws—time to show those screws who’s boss.

– Once you’ve evicted those screws, the communications board will smoothly slide out of its home on the logic board. The connection looks a lot like a Mini PCI Express card, so just wiggle it free and you’re good to go!

Step 6

– Pop out that tiny micro-SIM card! These little guys are seriously small.

– The iPad’s SIM card is just 12mm x 15mm, which is almost half the size of the SIM from an iPhone 3GS. Mini but mighty!

– Got a full-size SIM? If you’re feeling crafty, you can trim it down to a micro-SIM—the contacts line up perfectly.

Step 7

– Heads up, 3G iPad users! There’s a nifty antenna hanging out on the back of your display assembly. That shiny copper foil you see in the photo actually connects right to the silver metal frame of the LCD. Apple’s pulled a smart move here—using that same metal for both strength and sending signals. Double duty, double cool.

Step 8

– Grab your trusty spudger and use the flat end to gently pry open the SIM card slot from the rear case. It’s like a little surprise waiting for you!

– Looks like Apple was feeling pretty generous with space! The board here is mainly just connecting the SIM card to the logic board. Simple as that!

Tools Used
  1. SpudgeriPad 3G Teardown

Step 9

– Check out the logic boards: iPad 3G is rocking on the left, while iPad Wi-Fi is chilling on the right.

– Fun fact: The top half of the Wi-Fi version’s rear case is basically a spacious dance floor—tons of room to groove!

Step 10

– Gently use the tip of your spudger to unplug the GPS antenna’s ZIF cable connector.

– Carefully pry the GPS antenna assembly off the plastic antenna cover using the flat end of your spudger.

Tools Used
  1. SpudgeriPad 3G Teardown

Step 11

– Here’s a look at both sides of the GPS antenna assembly.

Step 12

– Gently lift the cellular antenna right out of its cozy little home.

– Look at that! The cellular antenna is still hanging out with us.

– From left to right, we have the Wi-Fi/Bluetooth, GPS, and 3G antennas, all lined up and ready for action.

Step 13

– Here’s the 3G board featuring the A4 processor.

– This shot showcases the main board from the Wi-Fi iPad.

– What’s different between them?

– The most noticeable difference is the new connector on the right side of the board, which is meant for the communications board.

– A bit more subtle, but still important, is the small IC located above the A4 chip, right next to the connector. This might be a signal processor, though we can’t be 100% sure—it’s marked as T3J 927 632567.

Step 14

– Check out the bottom of the main board—pretty chill spot. Honestly, it looks just like the Wi-Fi board, nothing wild going on here.

Step 15

– Apple decided to solder the EMI shield right onto the communications board, which makes showing off the chips a bit trickier. But hey, we love a challenge! We got out our tools and carefully unsoldered the board—just for you—to reveal the hidden treasures inside:

– Infineon 337S3754 PMB 8878 X-Gold baseband IC 5Y06115. The pre-production version sported the Infineon logo, but now Apple has white-labeled this chip to keep things mysterious. Fun fact: This is the same baseband processor found in the iPhone 3GS.

– Skyworks SKY77340 Power Amplifier Module makes an appearance.

– There are three Triquint power amplifier/filter chips tucked in here.

– Infineon U6952 is next up on our teardown tour.

– Numonyx 36MY1EE joins the lineup.

– Lined up on the right side, you’ll find three more TriQuint power amplifiers: TQM616035A, TQM666032B, and TQM676031A—the same trio Apple used in the iPhone 3G two years ago.

– Last but not least, Broadcom A-GPS BCM47501UBG F01003 P11 949871 SN rounds out the bunch.

Step 16

– Here’s a peek at the underside of the communications board.

– The second photo shows an earlier, pre-release FCC version. Ours has a few more part number markings, but otherwise, it’s pretty much its twin.

– Fun fact: The Broadcom A-GPS chip lives right here on the communications board. This is why the Wi-Fi-only iPad skips out on GPS—no chip, no signal!

Step 17

– And that’s a wrap for the iPad 3G teardown adventure!

– Want to see even more iPad shenanigans? Check out the iPad Wi-Fi Teardown for bonus geek points.

Success!

iPad 3G Speakers Replacement

Duration: 45 minutes
Steps: 23 Steps

Get ready to jazz up your audio experience by swapping out those blown speakers! It’s time to bring back the sound you love. Let’s dive in and make some noise together!

Step 1

– Got a cracked display glass? No worries! Keep things safe and sound by taping it up to avoid any further mishaps while you tackle the repair.

– Grab some clear packing tape and lay overlapping strips over the iPad’s screen until it’s fully covered. You got this!

– Now, just follow the remaining guide as best as you can. Keep in mind, once the glass starts cracking, it might get a little rebellious. You might need a metal prying tool to help scoop out those stubborn pieces.

Step 2

– Slide a metal spudger in between the right side of the display assembly and the back panel assembly. It’s like giving your device a little nudge!

– Gently twist the spudger away from you to pop those tabs loose at the top edge of the display. You’re almost there!

Tools Used
  1. Metal SpudgeriPad 3G Speakers Replacement

Step 3

– Slide a second metal spudger in between the top edge of the display assembly and the rear panel assembly to keep those pesky tabs from snapping back into place.

– Gently pry the display assembly away from the rear panel. You’ve got this!

Tools Used
  1. Metal SpudgeriPad 3G Speakers Replacement

Step 4

– Keep working your magic by gently prying the display assembly away from the rear panel along the bottom and left sides of your iPad. Take it slow and steady!

Step 5

– Gently lift the display assembly from the rear panel, starting at the bottom edge. Take it slow—no need to rush greatness!

Step 6

– Gently wedge the flat end of a spudger under the antenna connector located nearest the bottom of the iPad to lift it off its socket on the communications board.

Step 7

– Alright, let’s get down to business! In the next few steps, we’ll be disconnecting three little cables that connect the display assembly to the logic board. These cables are responsible for some pretty important stuff:

– Digitizer

– Ambient Light Sensor

– Display Data Cable

Step 8

– Grab your trusty iPod opening tool and gently lift up those little retaining flaps that are keeping the digitizer ribbon cables snug in their sockets on the logic board.

– Now, with a steady hand, pull the digitizer ribbon cables straight out of their cozy homes. Easy peasy!

Step 9

– Grab your trusty iPod opening tool and gently nudge that ambient light sensor connector upwards to pop it out of its socket. Easy peasy!

Step 10

– Gently pop up the metal retainer using its black plastic pull tab to release the display data cable from the main board. Think of it as giving your circuit a little high-five!

– Carefully slide the cable connector out of its socket—no need to rush, just a smooth move and you’re golden.

Step 11

– Carefully lift the display assembly away from the rear panel assembly to separate the two components.

Step 12

– Unscrew the two 4.56 mm T5 Torx screws holding the dock connector cable firmly to the main board. Keep these screws safe—they’re the tiny heroes of this step!

Step 13

– Take out the lone 2.84 mm T5 Torx screw that’s holding the dock connector cable to the rear case assembly. Easy does it!

Step 14

– Unscrew those two 2.84 mm T5 Torx screws holding the dock connector cable tight to the rear panel assembly. You’ve got this!

Step 15

– Gently lift off the plastic cover protecting the WiFi/Bluetooth board and dock connector cable using an iPod opening tool. You’ve got this!

Step 16

– Gently lift the Wi-Fi and Bluetooth antennas off their cozy little homes on the Wi-Fi/Bluetooth board. You’re doing great!

Step 17

– Gently unplug the dock connector cable from the back panel assembly to keep things moving smoothly.

Step 18

– Gently slide the edge of an iPod opening tool under the SIM board connector and lift it carefully off its socket on the logic board.

Step 19

– Gently fold the SIM cable out of the way to give yourself some breathing room and access to the speaker connector.

– Use the edge of an iPod opening tool to carefully detach the speaker connector from the logic board. Easy does it!

Step 20

– Take out those two 2.84 mm T5 Torx screws that are keeping the speaker assembly attached to the rear panel. Show them who’s boss!

Step 21

– Guide the Wi-Fi antenna through its designated path in the speaker assembly with care.

Step 22

– Gently lift the speaker cable connector out from beneath the black sticker on the left side of the rear panel assembly.

Step 23

– To put your device back together, just reverse these steps and you’ll be all set! If you hit a snag, remember you can always schedule a repair with us.

Success!
To put your device back together, just retrace your steps in reverse order. You’ve got this! And if things get tricky, remember you can always schedule a repair with us.

iPad 3G SIM Board Replacement

Duration: 45 minutes
Steps: 16 Steps

Ready to swap out that busted SIM board? Follow along with this guide and you’ll have your device back in action in no time. Let’s get those tiny connections sorted and your phone feeling fresh!

Step 1

– Cracked display glass? No worries—let’s keep those shards under control and your fingers safe by taping up the glass.

– Cover the entire face of your iPad using overlapping strips of clear packing tape.

– Try to follow the rest of the steps as usual. Just a heads-up: once glass starts cracking, it might keep going as you work. If needed, use a metal prying tool to gently scoop out those stubborn bits.

Step 2

– Gently slide a metal spudger between the right side of the display assembly and the rear panel. Take your time, no need to rush!

– Now, give that spudger a little twist away from you, just enough to pop those tabs free along the top edge of the display. Keep it smooth and steady!

Tools Used
  1. Metal SpudgeriPad 3G SIM Board Replacement

Step 3

– Slide a second metal spudger between the top edge of the display assembly and the rear panel assembly to keep those pesky tabs from popping back into place.

– Gently pry the display assembly away from the rear panel. You’ve got this!

Tools Used
  1. Metal SpudgeriPad 3G SIM Board Replacement

Step 4

– Keep gently prying the display assembly away from the rear panel along the bottom and left edges of the iPad. You’re making great progress!

Step 5

– Gently lift the display assembly up and away from the rear panel assembly, starting at the bottom edge. You’re doing great!

Step 6

– Grab your trusty spudger and gently use the flat end to lift the antenna connector near the bottom of the iPad. Pry it off the communications board socket with a little finesse. Don’t rush it, you’ve got this!

Step 7

– Next up, we’re unplugging the three cables that connect the display assembly to the logic board. These cables handle:

– Digitizer

– Ambient Light Sensor

– Display Data Cable

Step 8

– Grab your iPod opening tool and gently use the edge to lift up the retaining flaps that are holding the digitizer ribbon cables in place on the logic board.

– Once those flaps are up, carefully pull the digitizer ribbon cables out from their sockets. Easy does it!

Step 9

– Grab your trusty iPod opening tool and carefully pop up the ambient light sensor connector from its socket with a gentle pry. Easy does it!

Step 10

– Pop open the metal retainer using the black plastic pull tab—like unlocking the secret door to tech wizardry.

– Gently slide the cable connector out of its socket. No force needed, just a smooth getaway!

Step 11

– Gently separate the display assembly from the rear panel—take it slow, like you’re peeling the perfect sticker!

Step 12

– Gently slide the edge of your iPod opening tool under the SIM board connector and lift it carefully off its spot on the logic board.

Step 13

– Grab a trusty paperclip, line it up with the little hole in the SIM card tray, and give it a gentle push—watch the tray pop right out of your iPad like magic!

Step 14

– Pop out that SIM card and tray from your iPad—give it a gentle nudge and set it aside for later!

Step 15

– Grab your trusty iPod opening tool and gently pry the SIM board away from the sticky adhesive that’s holding it snug against the rear case. You’re doing great!

Step 16

– Put your device back together by simply following these steps in reverse—easy peasy!

Success!
To put your device back together, just work through these steps backwards — you’ve got this!

🍪
Have a cookie! This site uses cookies to enhance your experience. Opt-Out Options.