iPad 9 Home Button Assembly Replacement

Duration: 45 minutes
Steps: 51 Steps

Follow this guide to swap out the home button assembly on your iPad 9 Wi-Fi model. Heads up: this is just for the Wi-Fi version — if you have the LTE model, check out the correct guide instead. Keep in mind, the Touch ID sensor on the home button is linked to your logic board, so swapping it out will disable Touch ID. Before you get started, make sure your battery is charged below 25% to lower any fire risk if the battery gets damaged during the repair. Got a swollen battery? Take extra care! When disconnecting the battery, be super gentle — those contacts are fragile and can be permanently damaged. If you decide not to disconnect the battery, steer clear of metal tools unless you’re dealing with screws to avoid short circuits and harming delicate parts. Some photos you see might be from other iPad models and look a bit different, but don’t worry, that won’t change how you do the steps.

Step 1

– Warm up an iOpener and press it against the left edge of your iPad for two minutes. Give it a little time to work its magic and loosen things up.

Tools Used
  1. iOpeneriPad 9 Home Button Assembly Replacement

Step 2

– While the adhesive is softening, keep an eye out for these sneaky spots where prying can cause trouble:

– Front camera

– Antennas

– Display cables

– Ambient light sensors

Step 3

– Pull the blue handle back to release the Anti-Clamp’s arms.

– Set your iPad on something flat so it stays balanced between the suction cups.

– Place the suction cups near the middle of the left edge—one up top and one down low.

– Hold the bottom of the Anti-Clamp steady and press down firmly on the top cup to get a good seal.

Step 4

– Give the blue handle a little forward pull to lock those arms into place.

– Turn that handle 360 degrees clockwise (or until you see those cups stretch).

– Keep an eye on those suction cups—they should stay in sync. If they start to drift out of alignment, just loosen them a bit and nudge the arms back into line.

Step 5

– Hold tight for a minute to let the adhesive chill and create a little gap for you to work with.

– If your screen feels more like a popsicle than warm, grab a hair dryer and gently heat along the left edge of the iPad to loosen things up.

– Once the Anti-Clamp makes some room, slide an opening pick under the digitizer to start the separation.

– You can skip the next step, no worries!

Step 6

– Once the screen feels warm to the touch, grab your suction handle and place it as close to the left edge as you can. Get in there nice and snug!

– Gently lift the screen with the suction handle, just enough to create a tiny gap between the digitizer and the frame.

– Slide an opening pick into that gap between the digitizer and the frame—take your time, we’re not in a race here.

Step 7

– Slide a second pick into the gap you just made. Easy, right?

– Gently glide the pick toward the bottom-left corner of your iPad, separating that adhesive like a pro.

– Leave the pick in place at the bottom-left corner to keep the adhesive from sticking back together.

Step 8

– If the opening pick gets caught in the adhesive, just ‘roll’ it along the edge of your iPad to keep working through the sticky stuff. It’ll get smoother!

Step 9

– Slide the opening pick up towards the top-left corner of your iPad to break free the adhesive. Nice and steady!

– Leave the pick in the corner to keep the adhesive from sealing back up. You’ve got this!

Step 10

– Warm up your iOpener and place it gently on the top edge of your iPad. Let it sit there for about two minutes to work its magic.

Tools Used
  1. iOpeneriPad 9 Home Button Assembly Replacement

Step 11

– Gently spin the pick around the top-left corner of your iPad to break through the adhesive. You’ve got this!

Step 12

– Gently slide the opening pick along the top edge of your iPad, just before you hit the front camera. Take it slow—precision is key!

Step 13

– Gently pull the pick out so only its tip stays wedged between the digitizer and the frame.

– Carefully slide the pick over the front camera to loosen up that sticky adhesive.

– Rest the pick just to the right side of the front camera before moving on to the next step.

Step 14

– Slide the pick back in and gently work it toward the top-right corner to fully cut through the top adhesive.

– Keep the pick lodged in the top-right corner to stop the adhesive from sticking back together.

Step 15

– Warm up an iOpener and stick it to the right edge of the iPad for a solid two minutes to loosen things up.

Tools Used
  1. iOpeneriPad 9 Home Button Assembly Replacement

Step 16

– Gently twist the pick around the top-right corner of the iPad to loosen the adhesive and get things moving.

Step 17

– Pop in a fresh opening pick and slide it smoothly to the center of the iPad’s right edge.

Step 18

– Warm up an iOpener and stick it onto the bottom edge of the iPad for a solid two minutes to get things nice and toasty.

Tools Used
  1. iOpeneriPad 9 Home Button Assembly Replacement

Step 19

– Gently slide the bottom-left pick towards the corner to break the adhesive seal. Nice and easy, don’t rush it.

– Keep the pick in place in the corner before moving on to the next step. Patience is key!

Step 20

– Gently slide a new opening pick into the gap you just made along the bottom edge of the iPad.

– Carefully glide the pick past the antenna, stopping right before you hit the home button.

– Let the pick hang out just to the left of the home button before moving on.

Step 21

– Gently slide an opening pick into the gap you’ve created.

– Carefully work the pick underneath the home button, gliding it toward the bottom-right corner. Make sure only the tip of the pick sits between the digitizer and the frame.

Step 22

– Slide the pick back in and gently glide it toward the home button to fully release the bottom adhesive.

– Set the pick just to the right of the home button and hold tight before moving on.

Step 23

– Warm up an iOpener and place it on the right edge of the iPad for a solid two minutes to get things nicely loosened up.

Tools Used
  1. iOpeneriPad 9 Home Button Assembly Replacement

Step 24

– Gently twist the two opening picks at the left corners of the iPad to nudge the digitizer up a bit, breaking through the last stubborn spots of adhesive holding it down.

Step 25

– Gently lift the left edge of the digitizer to help peel off more of the adhesive along the right edge of your iPad.

Step 26

– Gently hold the digitizer in place and slide an opening pick between the two digitizer cables to loosen the final bits of adhesive. Keep it steady, you’ve got this!

Step 27

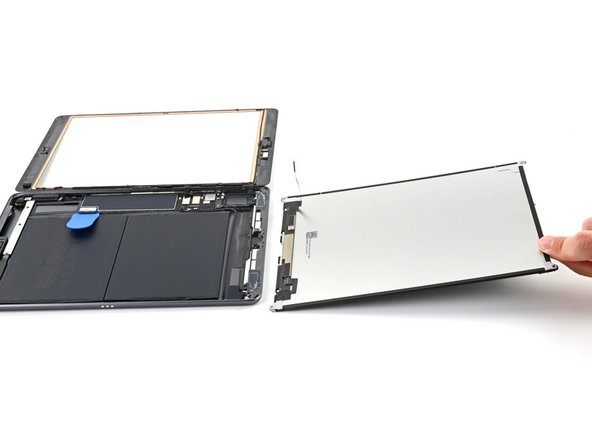
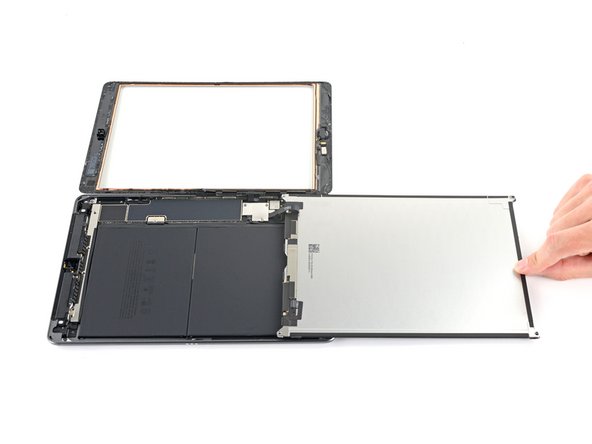
– After loosening all the adhesive, gently open the digitizer like a book and lay it flat next to your iPad.

– When putting everything back together, wipe off any leftover adhesive from both the frame and the digitizer (if you’re reusing it) using some isopropyl alcohol. Then, stick on fresh adhesive strips or pre-cut adhesive cards to keep things secure.

– Keep a close eye on the display cables during reassembly—fold them neatly under the LCD screen to avoid any accidental damage.

Step 28

– Grab your trusty Phillips screwdriver and carefully unscrew the four 4.2 mm screws holding that LCD in place. Nice and easy.

– As you go through the steps, be sure to keep track of those screws. They’re small, but they’re important! Put them back where they came from to keep everything running smoothly.

– Before you dive in, make sure to peel off any tape that might be hiding those screws. You don’t want anything blocking your path.

Step 29

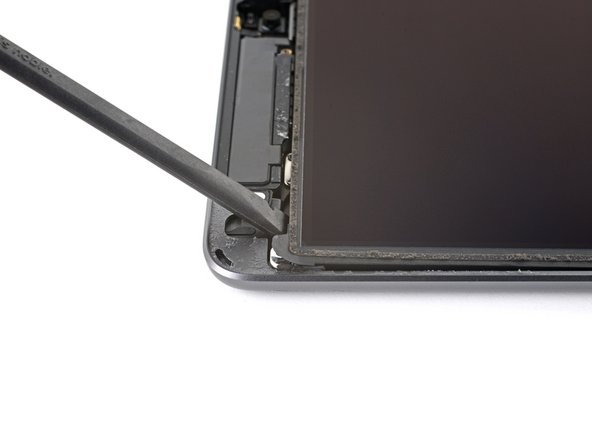
– Gently use the flat end of a spudger to lift the LCD just enough to get a good grip with your fingers.

– Flip the iPad’s LCD over like turning a page, holding near the camera and folding it back over the home button side of the frame.

– Place the LCD face down on a clean, soft, lint-free surface so you can easily access the display cables.

Tools Used
  1. SpudgeriPad 9 Home Button Assembly Replacement

Step 30

– Grab your trusty Phillips screwdriver and remove that tiny 2.3 mm screw holding the battery connector snugly to the logic board. Easy does it!

Step 31

Step 32

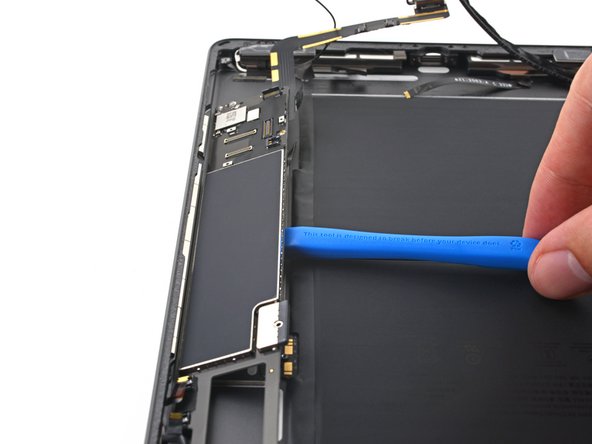
– Gently slide the battery blocker underneath the logic board’s battery connector, aiming for a smooth 35-degree angle.

– Keep that battery blocker right where it is while you continue your work. It’s got your back!

Tools Used
  1. Battery BlockeriPad 9 Home Button Assembly Replacement

Step 33

– Grab a Phillips screwdriver and remove those three tiny 1.4 mm screws holding the display cable bracket in place. You’ve got this!

Step 34

– Take off the display cable bracket, it’s time to unveil the magic underneath!

Step 35

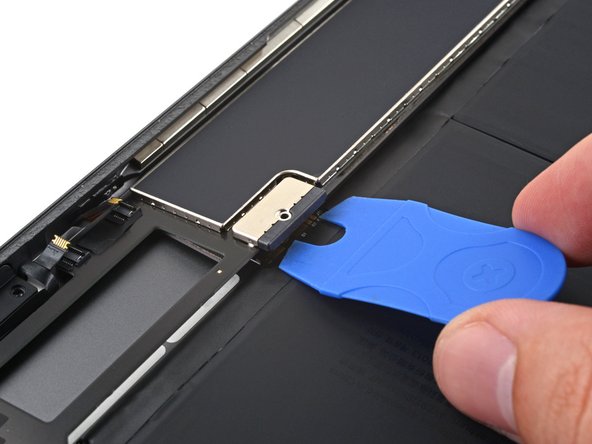
– Gently use the flat end of a spudger to lift and unplug the LCD cable press connector.

– When reconnecting press connectors like this one, line up one side carefully and press down until you hear a click, then do the same on the other side. Avoid pressing the middle—if it’s off-center, the pins might bend and cause serious damage.

Tools Used
  1. SpudgeriPad 9 Home Button Assembly Replacement

Step 36

– Carefully lift the LCD off completely and place it face down on a clean, soft, lint-free surface to keep it safe and sound.

Step 37

– Grab a pair of tweezers and carefully peel off the tape that’s covering the home button cable ZIF connector. Easy does it!

Tools Used
  1. TweezersiPad 9 Home Button Assembly Replacement

Step 38

– Grab a spudger, an opening tool, or even your fingernail to gently flip up the tiny, hinged locking flap on the home button cable ZIF connector.

Tools Used
  1. SpudgeriPad 9 Home Button Assembly Replacement

Step 39

– Grab your tweezers and gently wiggle the home button ribbon cable straight out of the ZIF connector—nice and steady, you got this!

Tools Used
  1. TweezersiPad 9 Home Button Assembly Replacement

Step 40

– Gently slide the flat end of your spudger under the two digitizer cable press connectors and pop them loose with care.

Tools Used
  1. SpudgeriPad 9 Home Button Assembly Replacement

Step 41

– Grab your trusty spudger and gently lift the buffer block from the bottom-right corner of your iPad. It’s like giving it a little nudge to get things moving.

– Now, carefully take out the buffer block. You’re one step closer!

Tools Used
  1. SpudgeriPad 9 Home Button Assembly Replacement

Step 42

– Grab a pair of tweezers and gently lift the home button cable off the frame. Take it slow, and be careful not to pull too hard!

Tools Used
  1. TweezersiPad 9 Home Button Assembly Replacement

Step 43

– Take off the front panel assembly carefully.

– If your new display starts acting up with ‘ghost’ or ‘phantom’ touches, no worries! Just slap on a thin strip of insulating tape like Kapton (polyimide) tape on the marked spots on the back of the panel to fix it. Replacement digitizers already come with the right insulation, so this step is usually not needed.

– When putting everything back together, make sure to scrape off any leftover adhesive from the iPad. Then, clean those sticky spots with some strong isopropyl alcohol (90% or higher) and a lint-free cloth. This gets the surface ready for fresh glue and guarantees a solid bond.

– Give your iPad a quick test to make sure everything’s working, then stick on the pre-cut adhesive strips to the back of the display following the display adhesive application guide before sealing it up.

Step 44

– Gently use your fingers to lift the home button cable off the back of the front panel. Take it easy, you got this!

Step 45

– Carefully slide an opening pick under the home button cable to loosen it from the front panel.

– Smoothly push it forward to slice through the adhesive holding the home button cable in place.

– Keep sliding the pick along until you arrive at the home button bracket.

Tools Used
  1. iOpeneriPad 9 Home Button Assembly Replacement

Step 46

– Carefully slide an opening pick under the top of the home button cable to gently detach the metal contact from the home button bracket. Take your time, this part is all about precision!

Step 47

– Warm up an iOpener and place it on the home button bracket for about thirty seconds to loosen things up.

Tools Used
  1. iOpeneriPad 9 Home Button Assembly Replacement

Step 48

– Grab your opening tool and carefully work your way around the home button bracket, prying it gently off the front panel. It should pop off with a little patience.

Step 49

– Take off that home button bracket carefully.

– When putting it back, grab some strong glue like E6000 to keep it stuck tight to the front panel assembly.

Step 50

– Gently press on the home button from the front of the panel to break the adhesive seal holding it in place. You got this!

Step 51

– Ready to put everything back together? Just follow the steps in reverse, and you’ll be all set.

– Got some e-waste? Don’t forget to take it to an R2 or e-Stewards certified recycler to do your part for the planet!

– Did things not go as expected? No worries, try out some simple troubleshooting tips or, if you’re still stuck, feel free to schedule a repair for expert help.

Success!
Ready to put everything back together? Just retrace your steps in reverse and you’ll be good to go!
Got some e-waste lying around? Drop it off at an R2 or e-Stewards certified recycler – let’s keep it green!
If things didn’t go as planned, no worries! A little troubleshooting can do wonders. Or, if you’re feeling stuck, feel free to schedule a repair for some professional help.

iPad 9 Headphone Jack Replacement

Duration: 45 minutes
Steps: 55 Steps

Follow this guide to swap out the headphone jack on your iPad 9 Wi-Fi. Heads up: this is for the Wi-Fi model only—if you have the LTE version, click here instead. Before you dive in, make sure your battery is drained below 25% to lower fire risks if it gets damaged during the repair. If your battery looks swollen, take extra care. When disconnecting the battery using a battery blocker, be super gentle—those contacts are fragile and easy to ruin. If you skip isolating the battery, try to avoid metal tools except when absolutely needed (like for screws) to prevent short circuits and protect the delicate circuits. Some photos might show a slightly different model, but don’t worry—they won’t affect your repair steps.

Step 1

– Warm up that iOpener and place it on the left side of your iPad. Let it do its magic for about two minutes.

Tools Used
  1. iOpeneriPad 9 Headphone Jack Replacement

Step 2

– While the adhesive is softening up, keep an eye out for these tricky spots that don’t like to be pried:

– Front camera

– Antennas

– Display cables

– Ambient light sensors

Step 3

– Pull back the blue handle to unlock the Anti-Clamp arms—this is your cue to get started!

– Place something under your iPad so it sits nice and level between the suction cups—think of it like giving it a comfy bed.

– Position the suction cups on the left edge of the device, one near the top and one near the bottom. Keep them about halfway across for a balanced hold.

– Hold the bottom of the Anti-Clamp steady and press down firmly on the top cup to create a good suction. You got this!

Step 4

– Slide the blue handle forward to lock those arms in place.

– Give the handle a full 360-degree clockwise spin, or keep turning until the suction cups start to stretch.

– Keep an eye on the suction cups to make sure they stay lined up. If they start to drift, just loosen them a bit and realign the arms.

Step 5

– Give it a minute to let the adhesive loosen up and create a gap you can work with.

– If the screen isn’t warming up enough, try warming the left edge of the iPad gently with a hair dryer.

– Once the Anti-Clamp has made a big enough gap, slide an opening pick under the digitizer.

– Skip this step and keep going.

Step 6

– Once the screen is slightly warm, grab a suction handle and stick it to the left edge, right as close to the border as you can.

– Gently lift the screen with the suction handle to create a tiny gap between the digitizer and the frame—just enough to wiggle a tool in.

– Slide an opening pick into the gap between the digitizer and frame and carefully work your way around.

Step 7

– Slide your second opening pick into the gap you just created—smooth and easy does it.

– Gently glide the pick down towards the bottom-left corner of the iPad to break the adhesive’s hold.

– Keep the pick in the bottom-left corner to stop that sticky adhesive from making a comeback.

Step 8

– If the opening pick gets stuck in the adhesive, just gently roll it along the side of the iPad to keep the adhesive separation going. Keep a steady hand and you’ll breeze through it.

Step 9

– Gently slide the first opening pick towards the top-left corner of the iPad to break the adhesive seal.

– Leave the pick in the corner to stop the adhesive from sticking back together.

Step 10

– Warm up an iOpener and press it against the top edge of the iPad for a solid two minutes to loosen things up.

Tools Used
  1. iOpeneriPad 9 Headphone Jack Replacement

Step 11

– Gently twist the pick around the top-left corner of the iPad to loosen the adhesive.

Step 12

– Gently slide the opening pick along the top edge of the iPad, making sure to stop just before reaching the front camera. Take it slow, no rush here!

Step 13

– Gently pull the pick out so that just the tip stays tucked between the digitizer and the frame.

– Carefully slide the pick over the front camera to loosen the adhesive holding it in place.

– Rest the pick near the right side of the front camera before moving on to the next step.

Step 14

– Grab the pick again and gently slide it up to the top-right corner of the iPad. This should completely separate the top adhesive.

– Leave the pick in place at the top-right corner to make sure the adhesive doesn’t re-stick.

Step 15

– Warm up an iOpener and stick it on the right side of the iPad for a solid two minutes to get things nice and toasty.

Tools Used
  1. iOpeneriPad 9 Headphone Jack Replacement

Step 16

– Swing that pick around the top-right corner of the iPad to loosen up the sticky adhesive holding things tight.

Step 17

– Grab your trusty opening pick and gently slide it to the right edge of the iPad, aiming for the middle. Take your time and get it in there just right!

Step 18

– Warm up an iOpener and gently press it to the bottom edge of the iPad for two minutes. This will help loosen things up a bit and make your repair smoother!

Tools Used
  1. iOpeneriPad 9 Headphone Jack Replacement

Step 19

– Gently slide the bottom-left pick into the corner, just enough to break that adhesive seal. You’re doing great!

– Leave the pick in place right there, and get ready for the next step—you’re almost there!

Step 20

– Grab a fresh opening pick and slide it into the gap you just made at the bottom edge of the iPad.

– Carefully glide the pick across the antenna, stopping just before you hit the home button.

– Leave the pick to the left of the home button and move on to the next step.

Step 21

– Gently slide an opening pick into the gap you’ve just made. Take your time, it’s all about precision!

– Now, carefully slide the pick under the home button and toward the bottom-right corner. Just make sure you’re only sneaking the tip between the digitizer and the frame—no need to go too deep!

Step 22

– Gently re-insert the pick and glide it toward the home button to completely break free the bottom adhesive.

– Leave the pick just to the right of the home button, and take a moment before moving on.

Step 23

– Warm up an iOpener and stick it on the right side of the iPad for a solid two minutes to get things nice and toasty.

Tools Used
  1. iOpeneriPad 9 Headphone Jack Replacement

Step 24

– Gently twist the two opening picks at the iPad’s left corners to lift the digitizer just enough to break the last of the adhesive’s grip. It’s a bit like getting the last cookie out of the jar—just a little nudge and you’re there!

Step 25

– Gently lift the left edge of the digitizer to give the adhesive along the right edge of the iPad a little extra nudge to separate. A little patience goes a long way!

Step 26

– Carefully support the digitizer while gently sliding an opening pick between the two digitizer cables to peel apart the last bit of adhesive holding them together.

Step 27

– After carefully loosening all the adhesive, open up the digitizer like a book and lay it flat next to the iPad.

– When putting things back together, make sure to clean off any leftover adhesive from the frame—and the digitizer if you’re reusing it—using some isopropyl alcohol. Then, freshen things up by applying new adhesive strips or pre-cut adhesive cards.

– Keep an eye on those display cables during reassembly. Fold them neatly underneath the LCD screen to avoid any accidental damage.

Step 28

– Grab your Phillips screwdriver and carefully remove the four 4.2 mm screws holding the LCD to the frame.

– Keep a close eye on each screw during the repair—putting them back exactly where they came from will keep your iPad happy and safe.

– Peel away any tape covering the LCD screws so you can get a good grip on them.

Step 29

– Grab your trusty spudger and gently wedge the flat end underneath the LCD. Just lift it a little—enough to get a good grip with your fingers.

– Now, treat the iPad LCD like a book and carefully flip it open. Start at the camera end and fold it over towards the home button side of the frame.

– Place the LCD down on a clean, soft surface that’s free of lint. This gives you all the space you need to work on the display cables.

Tools Used
  1. SpudgeriPad 9 Headphone Jack Replacement

Step 30

– Grab a Phillips screwdriver and carefully remove the tiny 2.3 mm-long screw that’s holding the battery connector in place on the logic board. Take your time—don’t rush it!

Step 31

Step 32

– Carefully slide the battery blocker under the logic board’s battery connector, angling it at about 35 degrees. Take your time; precision is key.

– Leave the battery blocker where it is while you continue working. It’s doing its job, so don’t worry about it.

Tools Used
  1. Battery BlockeriPad 9 Headphone Jack Replacement

Step 33

– Grab your Phillips screwdriver and carefully remove the three 1.4 mm screws holding down the display cable bracket.

Step 34

– Carefully take off the display cable bracket to keep things moving along smoothly.

Step 35

– Grab your spudger and use the flat end to gently lift up and disconnect the LCD cable press connector. Easy does it!

– To reattach connectors like this, carefully line it up and press down on one side until you hear that satisfying ‘click.’ Then do the same on the other side. Don’t press in the middle—if the connector gets misaligned, it could bend the pins, and we don’t want that kind of drama. Take it slow and steady!

Tools Used
  1. SpudgeriPad 9 Headphone Jack Replacement

Step 36

– Carefully peel off the LCD and gently lay it face down on a clean, soft, lint-free spot to keep it safe and sound.

Step 37

– Grab a pair of tweezers and carefully peel back the tape covering the home button cable ZIF connector. Take it slow and steady—you’ve got this!

Tools Used
  1. TweezersiPad 9 Headphone Jack Replacement

Step 38

– Grab a spudger, an opening tool, or even your fingernail, and gently flip up the tiny hinged locking flap on the home button cable ZIF connector.

Tools Used
  1. SpudgeriPad 9 Headphone Jack Replacement

Step 39

– Grab your tweezers and gently pull the home button ribbon cable straight out of the ZIF connector—steady hands win the day!

Tools Used
  1. TweezersiPad 9 Headphone Jack Replacement

Step 40

– Take the flat side of your spudger and gently pry up to disconnect the two digitizer cable press connectors. Keep it steady, no rush—just a smooth move!

Tools Used
  1. SpudgeriPad 9 Headphone Jack Replacement

Step 41

– Gently wedge the flat end of your spudger under the buffer block located near the bottom-right corner of the iPad.

– Lift and remove the buffer block carefully.

Tools Used
  1. SpudgeriPad 9 Headphone Jack Replacement

Step 42

– Gently grab your tweezers and carefully peel the home button cable off the frame. Take your time, no rush here!

Tools Used
  1. TweezersiPad 9 Headphone Jack Replacement

Step 43

– Start by carefully removing the front panel assembly. Take your time, no rush!

– If you’re seeing some ‘phantom’ touch issues after installing your new display, here’s a quick fix: Add a super thin layer of insulating tape, like Kapton tape, to the areas highlighted on the back of the panel. Don’t worry, most new displays come with the right insulation, so this step is usually only needed for some tricky cases.

– Before putting everything back together, make sure to clean off any leftover adhesive from the iPad. Grab a cloth and some high concentration isopropyl alcohol (90% or higher) and wipe down the glued areas. This will prep the surface for fresh adhesive and ensure it sticks perfectly!

– Finally, give your iPad a quick functionality test and add the pre-cut adhesive strips to the back of the display using our handy guide. Once everything’s in place, seal it up and you’re good to go!

Step 44

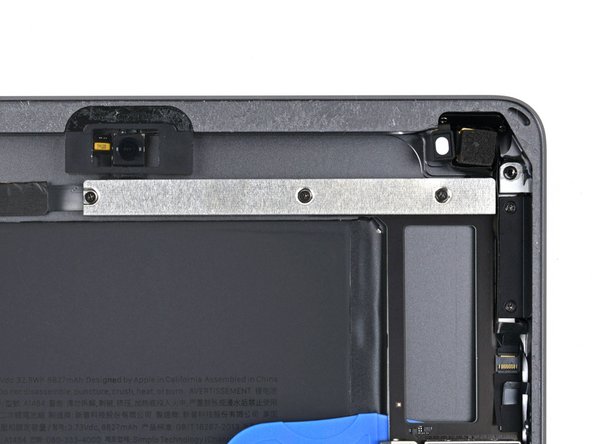
– Grab your Phillips screwdriver and carefully unscrew the three tiny 1.4 mm screws holding down the upper component bracket. Keep them safe!

Step 45

– Grab some tweezers or just your fingers and carefully lift that upper component bracket right off the frame.

Tools Used
  1. TweezersiPad 9 Headphone Jack Replacement

Step 46

– Carefully peel away any tape that’s covering the left ambient light sensor’s ZIF connector.

Step 47

– Gently use the tip of a spudger, opening tool, or even your trusty fingernail to lift up that little hinged locking flap on the left ambient light sensor’s ZIF connector. It’s a small move, but it’ll make a big difference!

Tools Used
  1. SpudgeriPad 9 Headphone Jack Replacement

Step 48

– Grab your tweezers and gently wiggle the left ambient light sensor cable straight out of the ZIF connector—no sudden moves, we want it smooth and easy!

Tools Used
  1. TweezersiPad 9 Headphone Jack Replacement

Step 49

– Gently grab the sensor with tweezers or your fingers and carefully lift it away from the frame.

Tools Used
  1. TweezersiPad 9 Headphone Jack Replacement

Step 50

– Grab those tweezers and gently pick away any leftover adhesive on the frame. You got this!

Tools Used
  1. TweezersiPad 9 Headphone Jack Replacement

Step 51

– Gently lift any tape hiding the headphone jack connector—think of it like peeling back a sticker, but for tech!

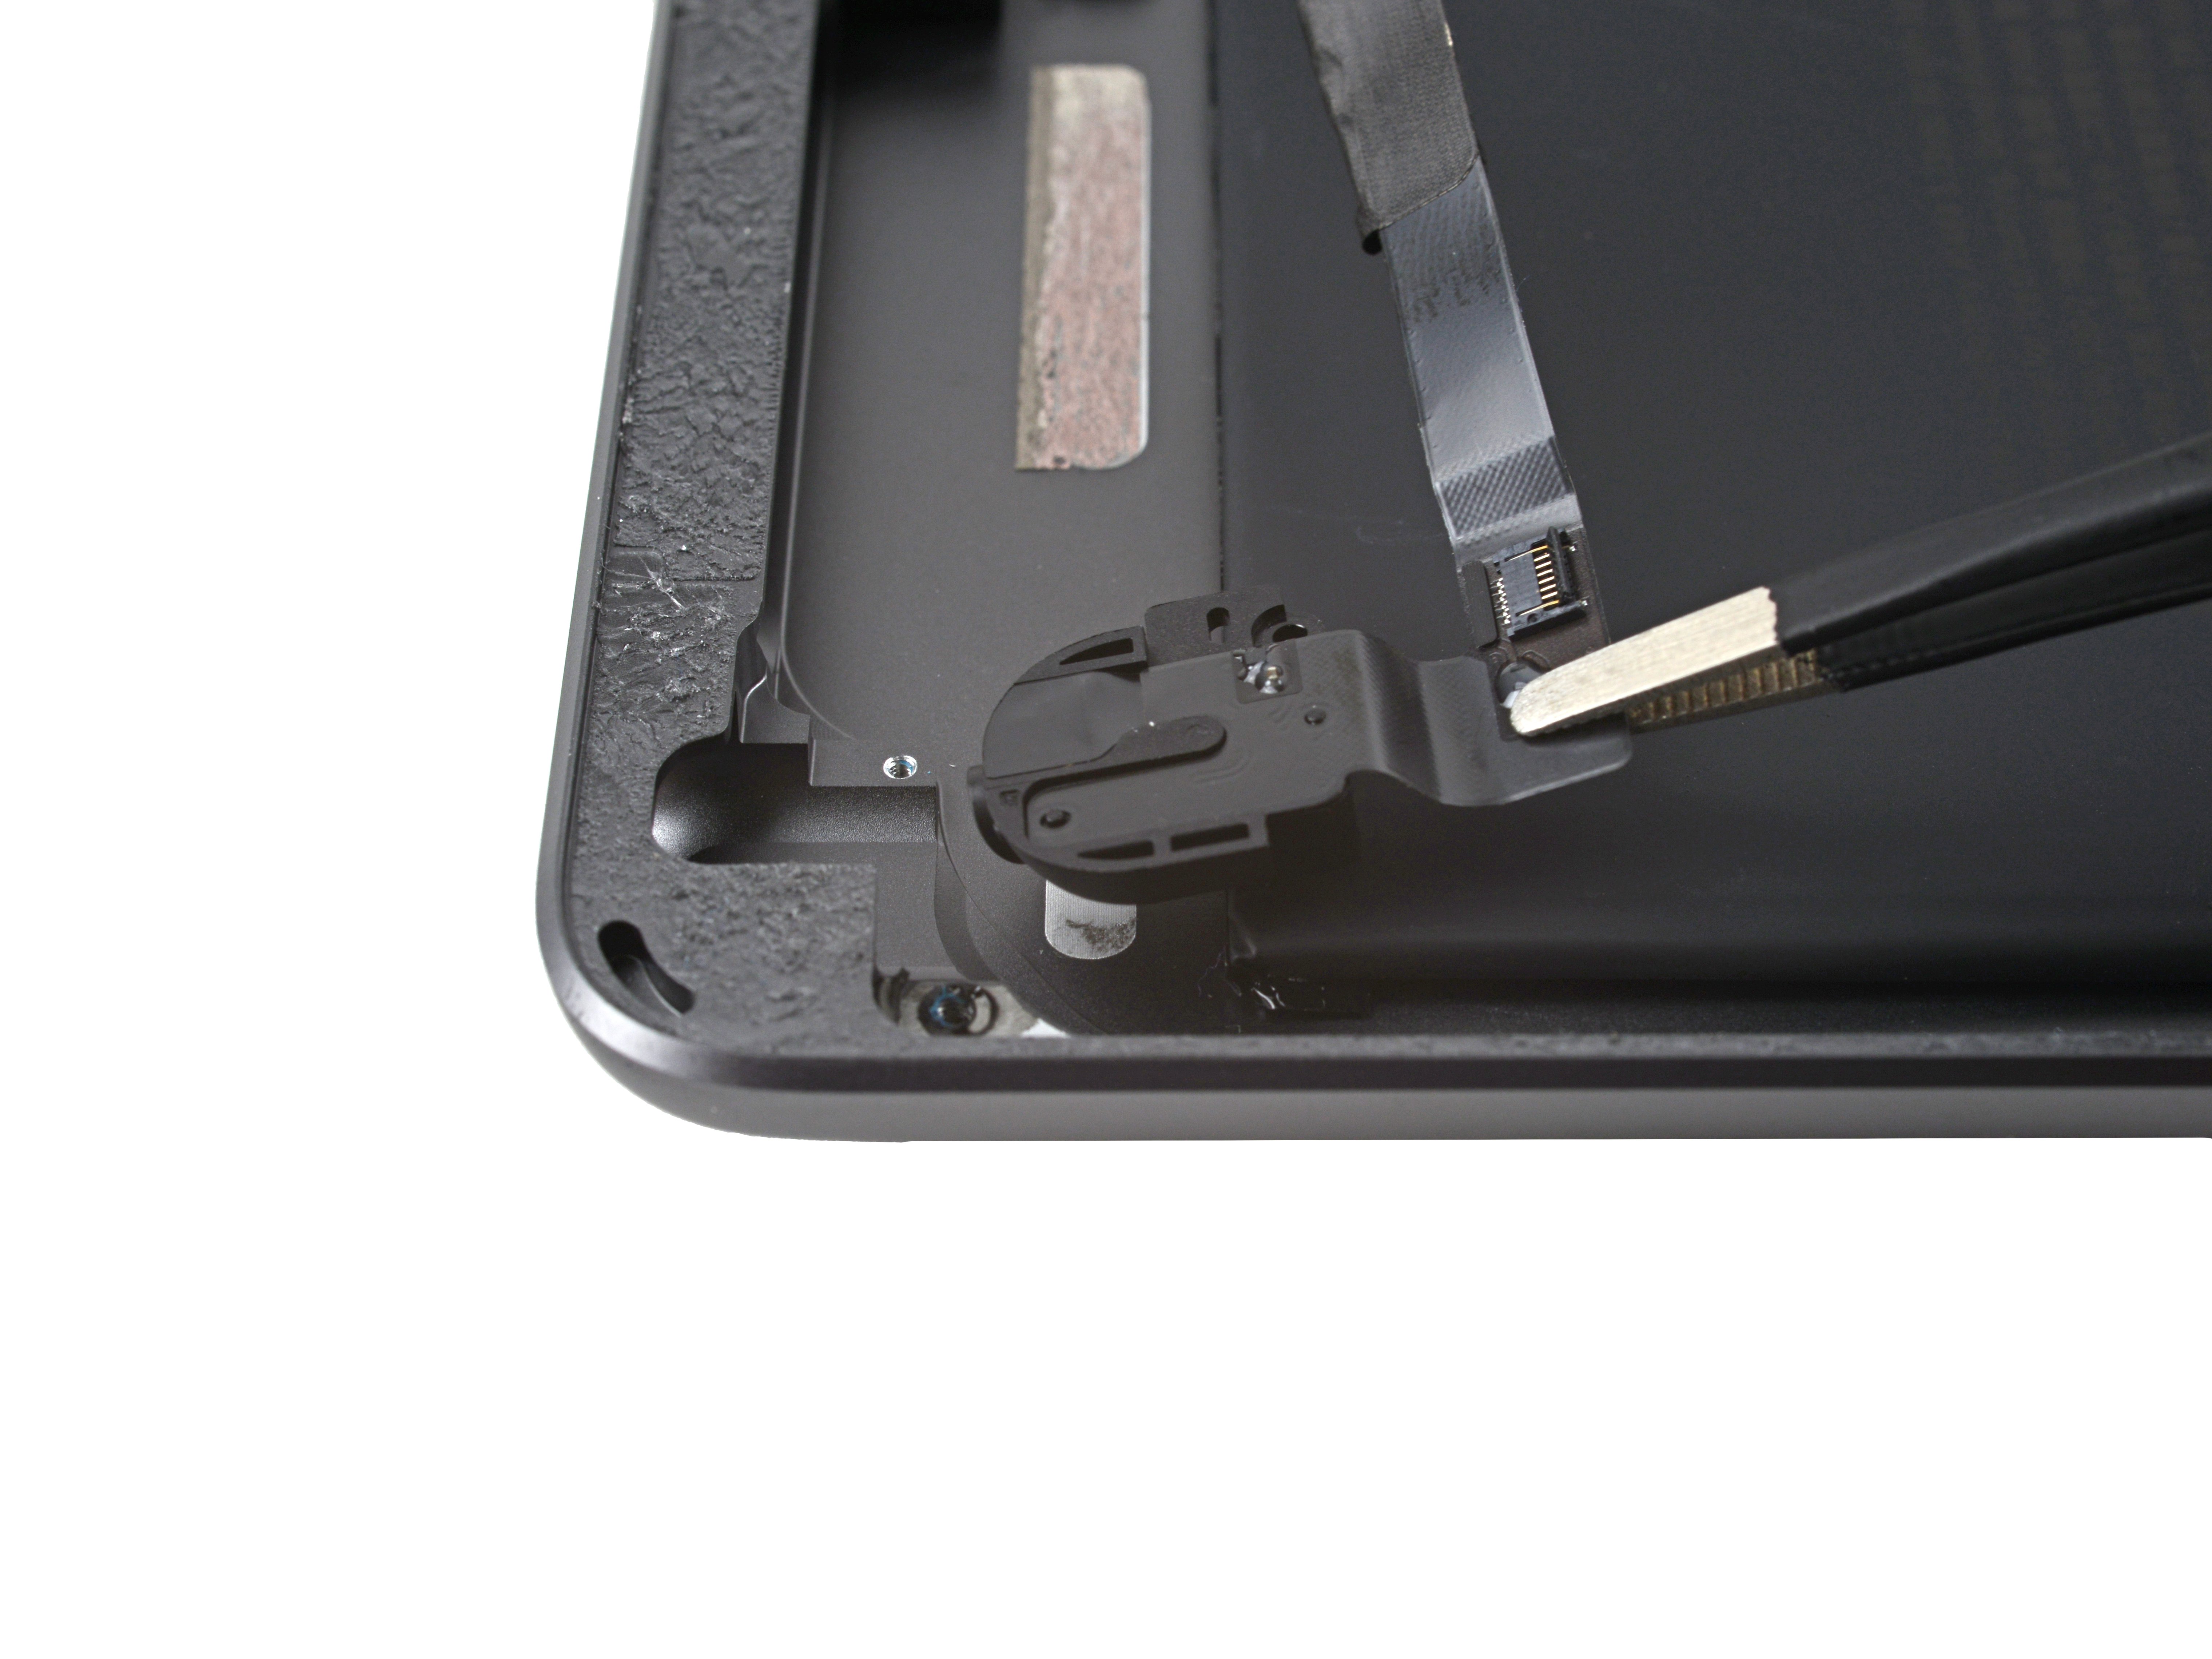
Step 52

– Gently use the flat end of your spudger to lift and unplug the headphone jack’s press connector.

Tools Used
  1. SpudgeriPad 9 Headphone Jack Replacement

Step 53

– Gently lift the headphone jack cable off the frame using tweezers or your fingers—easy does it!

Tools Used
  1. TweezersiPad 9 Headphone Jack Replacement

Step 54

– Grab your Phillips screwdriver and twist out the 3.3 mm-long screw holding the headphone jack in place on the frame. Easy does it!

Step 55

– To put your device back together, simply follow these steps in reverse order. It’s like a puzzle, but with less stress!

– Got e-waste? Make sure to drop it off at an R2 or e-Stewards certified recycler. Let’s keep things eco-friendly!

– Did things not go as planned? No worries, give some basic troubleshooting a shot or reach out to our community for some helpful tips and tricks!

Tools Used
  1. TweezersiPad 9 Headphone Jack Replacement

Success!
Put your device back together by following these steps in reverse—easy peasy!
When it’s time to part with old electronics, drop them off at an R2 or e-Stewards certified recycler to keep things green.
If the repair didn’t quite hit the mark, try some simple troubleshooting or tap into our iPad 9 Answers community for a hand.
And if you’re feeling stuck, remember you can always schedule a repair with us for expert help.

iPad 9 Front Camera Replacement

Duration: 45 minutes
Steps: 54 Steps

Follow this guide to swap out the front camera on your iPad 9 Wi-Fi model. Heads up: this is just for the Wi-Fi version—if you have the LTE one, check the specific guide linked here. Before you get started, drain your battery to under 25% to keep things safe and reduce fire risk if the battery gets nicked during the repair. Got a swollen battery? Take extra care! When disconnecting the battery with a battery blocker, be super gentle—the contacts are delicate and easy to wreck. If you skip isolating the battery, try to steer clear of metal tools unless you’re just loosening screws, to avoid short circuits and damage to the circuits. Some photos might be from a slightly different model and look a bit different, but that won’t mess with the steps. If you hit a tricky spot, remember you can always schedule a repair for professional help.

Step 1

– Warm up an iOpener and let it work its magic on the left edge of your iPad for two minutes.

Tools Used
  1. iOpeneriPad 9 Front Camera Replacement

Step 2

– As the adhesive starts to let go, keep an eye out for these tricky spots that don’t like being pried:

– Front camera

– Antennas

– Display cables

– Ambient light sensors

Step 3

– Pull the blue handle back to free the Anti-Clamp’s arms and get them ready for action.

– Place something underneath your iPad to keep it level and stable between the suction cups.

– Set the suction cups along the left edge—one on the top, the other on the bottom—just like placing the perfect toppings on a pizza.

– Grip the bottom of the Anti-Clamp steady, and with a firm press, apply some suction to the top cup to get everything locked in place.

Step 4

– Slide the blue handle forward to lock those arms in place.

– Give the handle a full 360-degree clockwise spin, or keep turning until the suction cups start to stretch.

– Keep an eye on the suction cups to make sure they stay lined up. If they start to slip out of position, just loosen them a bit and realign the arms.

Step 5

– Take a breather for a minute to let the adhesive do its thing and create a little gap for you.

– Not feeling enough heat? No worries! A hair dryer can help warm up that left edge of your iPad.

– When the Anti-Clamp has made a nice enough gap, slide in an opening pick under the digitizer.

– Feel free to skip ahead to the next step!

Step 6

– When the screen feels warm to the touch, grab your trusty suction handle and stick it on the left edge of the screen, as close to the edge as you can get.

– Gently pull up on the screen using the suction handle to make a tiny gap between the digitizer and the frame.

– Slide an opening pick into the gap between the digitizer and the frame to keep things moving.

Step 7

– Pop a second opening pick into the gap you just made.

– Gently slide that pick down to the bottom-left corner to loosen up the adhesive.

– Keep the pick wedged in there so the adhesive doesn’t sneak back together.

Step 8

– If your opening pick gets stuck in the adhesive, try ‘rolling’ it gently along the edge of the iPad to keep things moving and separate that sticky stuff.

Step 9

– Gently slide your opening pick into the top-left corner of the iPad to break the adhesive seal.

– Leave the pick in place at the top-left corner to stop the adhesive from sticking back together.

Step 10

– Warm up an iOpener and gently press it against the top edge of your iPad for two minutes. This will help loosen things up before you get into the real fun.

Tools Used
  1. iOpeneriPad 9 Front Camera Replacement

Step 11

– Gently twist the pick around the top-left corner of the iPad to loosen the adhesive.

Step 12

– Gently slide the opening pick along the top edge of your iPad, but stop just shy of the front camera. Keep it steady and take it slow!

Step 13

– Gently pull the pick out so that just the tip stays wedged between the digitizer and the frame.

– Carefully slide the pick over the top of the front camera to loosen the adhesive.

– Keep the pick resting near the right side of the front camera before moving on to the next step.

Step 14

– Pop the pick back in and slide it up to the top-right corner of your iPad to fully break through that stubborn adhesive.

– Keep the pick wedged in the top-right corner so the adhesive doesn’t sneak back together on you.

Step 15

– Warm up your iOpener and gently press it onto the right edge of your iPad for about two minutes. Give it a little time to work its magic—patience is key!

Tools Used
  1. iOpeneriPad 9 Front Camera Replacement

Step 16

– Gently work the pick around the top-right corner of the iPad, making sure to loosen the adhesive without rushing.

Step 17

– Grab a new opening pick and gently slide it right into the middle of your iPad’s right edge.

Step 18

– Warm up an iOpener and gently place it on the bottom edge of the iPad for a solid two minutes to loosen things up.

Tools Used
  1. iOpeneriPad 9 Front Camera Replacement

Step 19

– Gently slide the pick toward the bottom-left corner to loosen up that sticky adhesive.

– Keep the pick tucked in the corner while you get ready for the next step.

Step 20

– Grab a fresh opening pick and slide it into the gap you made along the bottom edge of your iPad.

– Gently glide the pick over the antenna, but stop right before reaching the home button.

– Leave the pick to the left of the home button and continue on with the next steps.

Step 21

– Slide an opening pick into the gap you’ve just made—nice and easy!

– Now, gently glide the pick under the home button, angling towards the bottom-right corner. Just make sure the tip is snugly between the digitizer and the frame.

Step 22

– Take the pick and gently slide it toward the home button to separate that stubborn bottom adhesive completely.

– Once you’ve done that, leave the pick just to the right of the home button before moving on to the next step.

Step 23

– Warm up that iOpener and stick it on the right side of your iPad for a cozy two minutes.

Tools Used
  1. iOpeneriPad 9 Front Camera Replacement

Step 24

– Gently twist the two opening picks at the left corners of the iPad to nudge the digitizer up just a bit, loosening the last stubborn bits of adhesive holding it down.

Step 25

– Gently lift the left side of the digitizer to loosen up the sticky stuff along the right edge of your iPad.

Step 26

– Keep the digitizer steady while you gently slide an opening pick between the two digitizer cables to free up the last bit of adhesive holding them together.

Step 27

– After carefully loosening all the adhesive, gently open the digitizer like a book and lay it flat next to the iPad.

– When putting everything back together, make sure to clean off any leftover adhesive from the frame—and the digitizer if you’re reusing it—using some isopropyl alcohol. Then swap in fresh adhesive strips or pre-cut adhesive cards to keep things secure.

– Keep an eye on those display cables while reassembling. Fold them neatly under the LCD screen to avoid any damage and keep your iPad happy.

Step 28

– Grab a Phillips screwdriver and unscrew those four 4.2 mm-long screws holding the LCD in place. Easy peasy!

– As you go through the steps, keep an eye on each screw—make sure to put it back exactly where it belongs so your iPad stays in top shape.

– Peel off any tape covering the LCD screws—it’s like unwrapping a gift, but for your iPad!

Step 29

– Gently use the flat end of a spudger to pop the LCD out of its spot just enough so you can grab it with your fingers.

– Flip the iPad LCD over like turning a page in a book, lifting near the camera and rotating it over the home button side of the frame.

– Place the LCD face down on a clean, soft, lint-free surface to get easy access to the display cables.

Tools Used
  1. SpudgeriPad 9 Front Camera Replacement

Step 30

– Grab your trusty Phillips screwdriver and unscrew the 2.3 mm-long screw that’s holding the battery connector in place on the logic board. Easy peasy!

Step 31

Step 32

– Gently slide the battery blocker under the logic board’s battery connector at about a 35-degree angle.

– Keep the battery blocker in place while you continue working—it’s your new best friend for this step.

Tools Used
  1. Battery BlockeriPad 9 Front Camera Replacement

Step 33

– Grab your Phillips screwdriver and carefully take out the three 1.4 mm screws holding down the display cable bracket.

Step 34

– Carefully take off the display cable bracket to keep things moving smoothly.

Step 35

– Use the flat end of a spudger to gently lift and disconnect the LCD cable press connector. No need to rush, take it slow!

– To reconnect press connectors like this, line it up carefully and press down on one side until you hear a satisfying click. Then, do the same on the other side. Avoid pressing in the middle. If it’s misaligned, the pins could bend and that’s a headache you don’t want. Take your time and you’ll be good to go!

Tools Used
  1. SpudgeriPad 9 Front Camera Replacement

Step 36

– Carefully detach the LCD and lay it down gently, screen side facing the surface, on a clean, soft, lint-free area. Let’s keep it safe and sound!

Step 37

– Grab a pair of tweezers and carefully peel back the tape that’s covering the home button cable ZIF connector. Take your time—this part is a little delicate, but you’ve got this!

Tools Used
  1. TweezersiPad 9 Front Camera Replacement

Step 38

– Gently pry up the small, hinged locking flap on the home button cable ZIF connector using a spudger, opening tool, or even your trusty fingernail. It doesn’t take much force—just a little finesse.

Tools Used
  1. SpudgeriPad 9 Front Camera Replacement

Step 39

– Grab some tweezers and gently pull the home button ribbon cable straight out of the ZIF connector—nice and steady!

Tools Used
  1. TweezersiPad 9 Front Camera Replacement

Step 40

– Gently use the flat end of a spudger to lift and unplug the two digitizer cable press connectors.

Tools Used
  1. SpudgeriPad 9 Front Camera Replacement

Step 41

– Grab the flat end of your trusty spudger and gently pop up the buffer block hanging out near the bottom-right corner of the iPad.

– Lift that buffer block away like a pro.

Tools Used
  1. SpudgeriPad 9 Front Camera Replacement

Step 42

– Grab a pair of tweezers and gently peel the home button cable off the frame. Take your time, no rush!

Tools Used
  1. TweezersiPad 9 Front Camera Replacement

Step 43

– Time to get that front panel off! Start by carefully removing the front panel assembly.

– If you notice any odd ‘ghost’ or ‘phantom’ touch issues with your shiny new display, no worries! Just add a thin layer of insulating tape—Kapton (polyimide) tape works great—on the highlighted spots on the back of the panel. Most replacement digitizers come pre-insulated, so you likely won’t need any extra tape.

– Before putting everything back together, don’t forget to clean up! Wipe off any leftover adhesive on your device, and use high-concentration isopropyl alcohol (90% or better) with a lint-free cloth to clean those areas where the display will attach. This makes sure the new adhesive sticks like a charm.

– Test your device’s functions one last time, then apply the pre-cut adhesive strips to the back of the display using the display adhesive application guide before sealing everything up. Smooth and secure—that’s the goal!

Step 44

– Grab a Phillips screwdriver and carefully unscrew the three 1.4 mm-long screws holding down the upper component bracket. A gentle twist will do the trick.

Step 45

– Grab some tweezers or just use your fingers to carefully lift that upper component bracket right off the frame.

Tools Used
  1. TweezersiPad 9 Front Camera Replacement

Step 46

– Gently lift any tape that’s hiding the headphone jack’s press connector.

Step 47

– Gently slide the flat end of your spudger under the headphone jack’s press connector and give it a little pry to disconnect it.

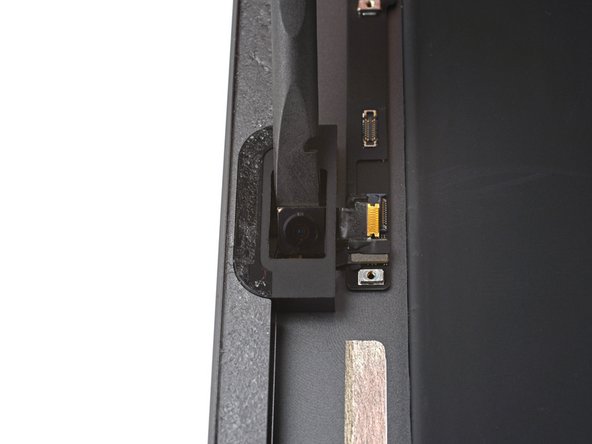
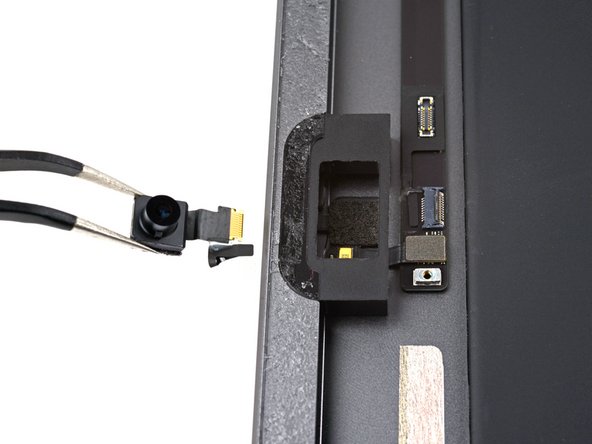
Tools Used
  1. SpudgeriPad 9 Front Camera Replacement

Step 48

– Gently lift the headphone jack cable off the frame using tweezers or just your fingers—easy does it!

Tools Used
  1. TweezersiPad 9 Front Camera Replacement

Step 49

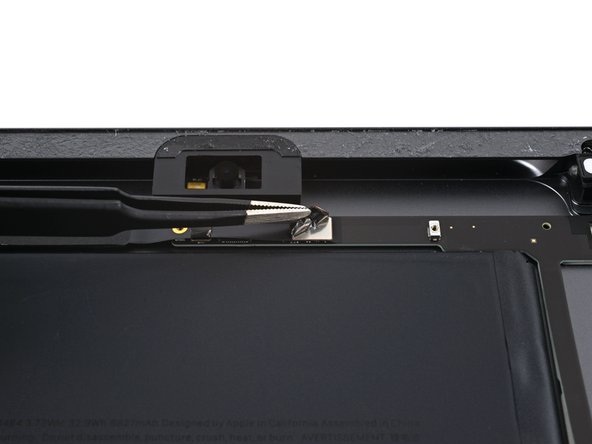
– Gently lift off any tape hiding the front camera’s ZIF connector like a pro detective uncovering a clue.

Step 50

– Gently use the tip of a spudger, an opening tool, or even your fingernail to flip up the tiny hinged locking flap on the front camera’s ZIF connector. Nice and easy!

Tools Used
  1. SpudgeriPad 9 Front Camera Replacement

Step 51

– Grab a pair of tweezers and gently pull the front camera cable straight out of the ZIF connector. No rush—just take your time and be gentle!

Tools Used
  1. TweezersiPad 9 Front Camera Replacement

Step 52

– Place a warm iOpener on the top of your device and let it chill there for 90 seconds.

Tools Used
  1. iOpeneriPad 9 Front Camera Replacement

Step 53

– Slide the flat end of your spudger right between the front camera and the frame.

– Carefully wiggle it up to loosen the adhesive without causing a fuss.

Tools Used
  1. SpudgeriPad 9 Front Camera Replacement

Step 54

– Put your device back together by retracing these steps in reverse order.

– Got some old tech? Drop it off at an R2 or e-Stewards certified recycler to keep it out of the landfill.

– If things didn’t go quite as planned, try a bit of troubleshooting or reach out to our iPad 9 Answers community for some friendly advice.

– And remember, if this repair feels like a tough nut to crack, you can always schedule a repair with us!

Tools Used
  1. TweezersiPad 9 Front Camera Replacement

Success!
Put your device back together by following these steps in reverse.
Remember to recycle your electronic waste at an R2 or e-Stewards certified facility.
If things didn’t turn out quite right, try some basic troubleshooting or reach out to our iPad 9 Answers community for tips.
And if you’re stuck, you can always schedule a repair!

iPad 9 Button Control Cable Replacement

Duration: 45 minutes
Steps: 65 Steps

Get ready to tackle the task of replacing the button control cable in your iPad 9 Wi-Fi! Just a heads-up, this guide is specifically for the Wi-Fi model, so if you’ve got the LTE version, you’ll want to check out a different guide. The button control cable is your go-to for both the lock button and volume buttons, so if any of those are acting up, it’s time for a full cable swap! Safety first: make sure to discharge that battery to below 25% before diving into the disassembly. This little precaution helps keep things cool and reduces fire risks if the battery gets a bit of a bumpy ride during the repair. And hey, if your battery is looking swollen, take the necessary precautions! Be super careful when you’re isolating the battery with a battery blocker, since the contacts are quite delicate and can lead to some serious damage if mishandled. If you decide to skip the isolation step, just remember to avoid metal tools unless absolutely necessary (like for those pesky screws) to keep everything safe and sound. Some of the photos you’ll see might be from a different model and could look a tad different, but don’t worry—the steps will still be spot on!

Step 1

– Warm up an iOpener and stick it onto the left edge of the iPad for a solid two minutes to get things nice and toasty.

Tools Used
  1. iOpeneriPad 9 Button Control Cable Replacement

Step 2

– While the adhesive is busy loosening up, keep an eye out for these delicate spots that need your gentle touch:

– Front camera

– Antennas

– Display cables

– Ambient light sensors

Step 3

– Slide the blue handle back to release the Anti-Clamp’s arms.

– Set something under your iPad so it stays balanced between the suction cups.

– Place the suction cups along the middle of the left edge—one near the top, the other near the bottom.

– Keep the bottom of the Anti-Clamp steady and press down firmly on the top cup to get a good suction seal.

Step 4

– Grab the blue handle and pull it forward to lock those arms in place.

– Give the handle a full 360-degree turn clockwise, or keep going until the suction cups start to stretch.

– Keep an eye on the suction cups to make sure they stay perfectly aligned. If they start to drift apart, just loosen them a bit and line up the arms again.

Step 5

– Hold tight for a minute to let the adhesive loosen up and create a small opening gap.

– If your screen feels chilly, try warming it up by running a hair dryer along the left edge of the iPad.

– Once the Anti-Clamp has made a big enough gap, slide an opening pick under the digitizer.

– Go ahead and skip the next step.

Step 6

– Once the screen feels pleasantly warm, grab a suction handle and stick it to the left edge of the screen, as close to the border as you can manage.

– Gently pull on the suction handle to create a small gap between the digitizer and the frame — just enough to slip something in.

– Carefully insert an opening pick into that gap you’ve made between the digitizer and frame. Take your time, no rush here!

Step 7

– Pop a second opening pick into the gap you just made.

– Gently slide that pick down to the bottom-left corner to loosen up the adhesive.

– Keep the pick wedged in the bottom-left corner so the adhesive doesn’t snap back together.

Step 8

– If the opening pick gets caught in the adhesive, just roll it along the side of the iPad to keep separating that sticky stuff like a pro.

Step 9

– Gently slide the first opening pick up towards the top-left corner of the iPad to loosen that sticky adhesive.

– Keep the pick wedged in the top-left corner so the adhesive doesn’t sneak back together.

Step 10

– Warm up your iOpener and let it work its magic on the top edge of your iPad for a solid two minutes.

Tools Used
  1. iOpeneriPad 9 Button Control Cable Replacement

Step 11

– Gently rotate the pick around the top-left corner of the iPad to break the adhesive seal. This will make the next steps a breeze!

Step 12

– Carefully slide the opening pick along the top edge of the iPad. Stop right before you hit the front camera. Take it slow and steady—you’re almost there!

Step 13

– Gently pull the pick out so that just the tip is nestled between the digitizer and the frame.

– Slide the pick above the front camera to break free the adhesive.

– Keep the pick close to the right side of the front camera as you move forward.

Step 14

– Pop that pick back in and slide it over to the top-right corner to fully break through the stubborn adhesive holding your iPad together.

– Keep the pick wedged in there to stop the adhesive from sticking back together while you work.

Step 15

– Warm up an iOpener and place it on the right edge of the iPad for a solid two minutes to loosen things up.

Tools Used
  1. iOpeneriPad 9 Button Control Cable Replacement

Step 16

– Gently twist the pick around the top-right corner of the iPad to loosen the adhesive.

Step 17

– Pop in a fresh opening pick and slide it smoothly to the center of the iPad’s right side.

Step 18

– Warm up an iOpener and stick it on the bottom edge of your iPad for a solid two minutes to get things nice and toasty.

Tools Used
  1. iOpeneriPad 9 Button Control Cable Replacement

Step 19

– Gently slide the bottom-left pick towards the corner to loosen the adhesive.

– Keep that pick in place before moving on to the next step. Patience is key!

Step 20

– Slide a fresh opening pick into the gap you just made at the bottom of your iPad.

– Gently glide the pick over the antenna, but stop just shy of the home button.

– Leave the pick resting just to the left of the home button before you move on.

Step 21

– Time to get your pick in there! Gently slide it into the gap you’ve made.

– Now, carefully work that pick under the home button and glide it towards the bottom-right corner. Just make sure only the tip of the pick is nestled between the digitizer and the frame.

Step 22

– Pick it up again and gently slide it toward the home button—this will help you fully separate that bottom adhesive.

– Keep the pick on the right side of the home button for now before moving forward.

Step 23

– Heat up an iOpener and press it against the right edge of the iPad for about two minutes. Let it work its magic—patience is key!

Tools Used
  1. iOpeneriPad 9 Button Control Cable Replacement

Step 24

– Gently twist the two opening picks at the iPad’s left corners to nudge the digitizer up just a bit, breaking through the last stubborn bit of adhesive holding it down.

Step 25

– Gently lift the left edge of the digitizer and wiggle it upwards to loosen the sticky stuff along the right side of your iPad.

Step 26

– Hold the digitizer steady and gently slide an opening pick between the two digitizer cables to carefully peel apart the last bit of adhesive.

Step 27

– After you’ve successfully separated all the adhesive, gently open the digitizer like a book and lay it down parallel to your iPad—easy peasy!

– When it’s time to put everything back together, be sure to clear any leftover adhesive from the frame—and give the digitizer a little TLC with isopropyl alcohol if you’re reusing it. Then, grab our adhesive strips or pre-cut adhesive cards to seal the deal.

– Keep an eye on those display cables while you’re reassembling the iPad! Make sure they’re tucked away neatly under the LCD screen to avoid any mishaps. Remember, a tidy workspace is a happy workspace!

Step 28

– Grab your trusty Phillips screwdriver and carefully remove the four 4.2 mm screws holding the LCD in place. Don’t rush, they’re counting on you!

– As you work through this repair, be sure to keep track of each screw and place it back where it belongs. We want your iPad to stay as good as new, right?

– Take a moment to peel away any tape that’s covering the LCD screws. It’ll give you the clear shot you need to keep going!

Step 29

– Grab the flat end of a spudger and gently nudge the LCD out of its snug home, just enough so you can get a good grip with your fingers.

– Flip the iPad LCD like you’re turning a page in a book, lifting from the camera side and carefully folding it over toward the home button end of the frame.

– Place the LCD on a clean, soft, lint-free surface to give you easy access to the display cables underneath. It’s like setting it down on a cozy bed for the cables to stretch out.

Tools Used
  1. SpudgeriPad 9 Button Control Cable Replacement

Step 30

– Grab your Phillips screwdriver and gently unscrew the tiny 2.3 mm-long screw holding the battery connector to the logic board. You’ve got this!

Step 31

Step 32

– Slide the battery blocker gently under the logic board’s battery connector at a 35-degree angle. Nice and easy.

– Once it’s in place, leave the battery blocker there while you continue with the rest of the steps. It’s got your back!

Tools Used
  1. Battery BlockeriPad 9 Button Control Cable Replacement

Step 33

– Grab a Phillips screwdriver and carefully take out the three 1.4 mm screws holding down the display cable bracket.

Step 34

– Take off the display cable bracket.

Step 35

– Gently use the flat end of a spudger to lift and unplug the LCD cable press connector.

– When reconnecting press connectors like this, line up one side carefully and press down until you hear a click, then do the same on the other side. Avoid pressing the middle—misalignment can bend pins and cause permanent damage.

Tools Used
  1. SpudgeriPad 9 Button Control Cable Replacement

Step 36

– Carefully lift the LCD off completely and set it down face down on a clean, soft, lint-free spot—treat it like the precious gadget it is!

Step 37

– Grab a pair of tweezers and gently peel away the tape covering that home button cable ZIF connector. Take your time—it’s a simple step, but one you don’t want to rush!

Tools Used
  1. TweezersiPad 9 Button Control Cable Replacement

Step 38

– Grab a spudger, opening tool, or even your trusty fingernail and gently lift the small, hinged flap on the home button cable ZIF connector. Just give it a little nudge and you’ll be on your way!

Tools Used
  1. SpudgeriPad 9 Button Control Cable Replacement

Step 39

– Grab a pair of tweezers and gently pull the home button ribbon cable straight out of the ZIF connector. Keep it steady and avoid any sudden movements—it’s a smooth operation, just like pulling a bookmark from your favorite read.

Tools Used
  1. TweezersiPad 9 Button Control Cable Replacement

Step 40

– Get your trusty spudger and gently slide the flat end underneath those two digitizer cable press connectors. Give them a little lift to disconnect them. You’ve got this!

Tools Used
  1. SpudgeriPad 9 Button Control Cable Replacement

Step 41

– Grab your trusty spudger and gently work the flat end around the buffer block near the bottom-right corner of your iPad. A little nudge, and it should pop right up.

– Now that it’s loose, go ahead and remove the buffer block with a bit of finesse.

Tools Used
  1. SpudgeriPad 9 Button Control Cable Replacement

Step 42

– Grab a pair of tweezers and gently peel the home button cable away from the frame. Take your time, no need to rush—this part’s a breeze.

Tools Used
  1. TweezersiPad 9 Button Control Cable Replacement

Step 43

– Gently take off the front panel assembly.

– If your new display starts acting like it has a mind of its own with random touch inputs, don’t worry! You can fix this by sticking a super-thin insulating tape, like Kapton (polyimide) tape, on the highlighted spots on the back of the panel. Replacement digitizers should already have this insulation, so no extra tape needed in most cases.

– When putting everything back together, make sure to scrape off any leftover adhesive from the iPad. Then, clean the sticky areas with a high concentration isopropyl alcohol (90% or above) and a lint-free cloth. This gets the surface ready for fresh adhesive and helps it stick perfectly.

– Before sealing your iPad back up, test all its functions and apply pre-cut adhesive strips to the back of the display using the display adhesive application guide to keep things secure.

Step 44

– Grab your trusty Phillips screwdriver and twist out the three tiny 1.4 mm screws holding the upper component bracket in place. Keep them safe!

Step 45

– Grab some tweezers or your trusty fingers, and gently lift the upper component bracket off the frame. It’s easier than it sounds, just take it slow and steady!

Tools Used
  1. TweezersiPad 9 Button Control Cable Replacement

Step 46

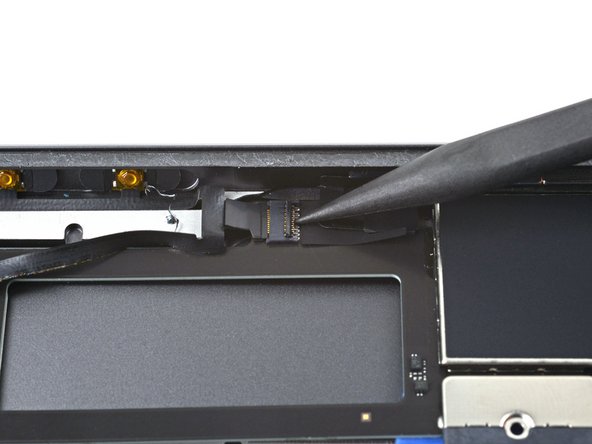
– Grab the flat end of your spudger and gently work it under the rear camera press connector to disconnect it.

Tools Used
  1. SpudgeriPad 9 Button Control Cable Replacement

Step 47

– Warm up an iOpener and gently press it to the rear camera for about thirty seconds. Give it a little time to work its magic.

Tools Used
  1. iOpeneriPad 9 Button Control Cable Replacement

Step 48

– Grab your trusty spudger and gently lift that rear camera out of its cozy little frame.

– Now, carefully grab the rear camera with tweezers, or just use your fingers to give it a gentle pull and remove it.

Tools Used
  1. TweezersiPad 9 Button Control Cable Replacement
  2. SpudgeriPad 9 Button Control Cable Replacement

Step 49

– Grab your tweezers or just use your fingers to gently lift out the sensor. It’s a simple step, but take your time and be gentle!

Tools Used
  1. TweezersiPad 9 Button Control Cable Replacement

Step 50

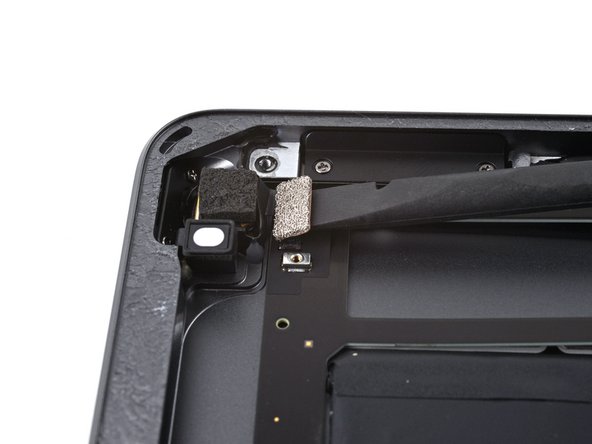
– Gently peel the right ambient light sensor toward the right edge of the device just enough to reveal the screw hiding behind it.

Step 51

– Grab your trusty Phillips screwdriver and take out the two 2.3 mm screws holding the lock button bracket in place. Easy peasy!

Step 52

– Gently use your fingers to pop the power button bracket out of its cozy spot.

Step 53

– Gently peel the button control cable off the volume button bracket—easy does it!

Step 54

– Grab your Phillips screwdriver and unscrew the two tiny 2.2 mm screws holding the volume button bracket to the back case. Keep those screws safe!

Step 55

– Grab some tweezers or just use your fingers to gently pull the volume button bracket away from the device’s edge.

– Carefully remove the volume button bracket and set it aside.

Tools Used
  1. TweezersiPad 9 Button Control Cable Replacement

Step 56

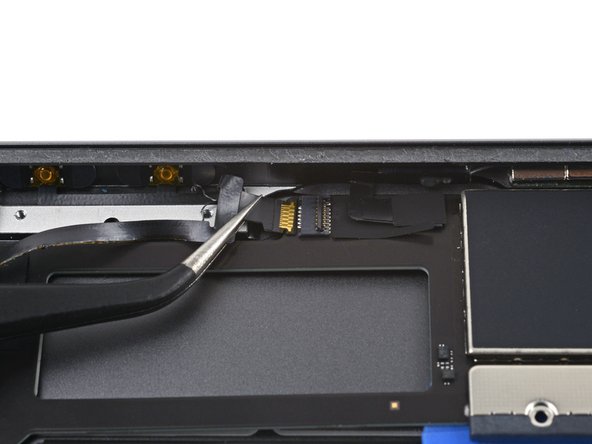
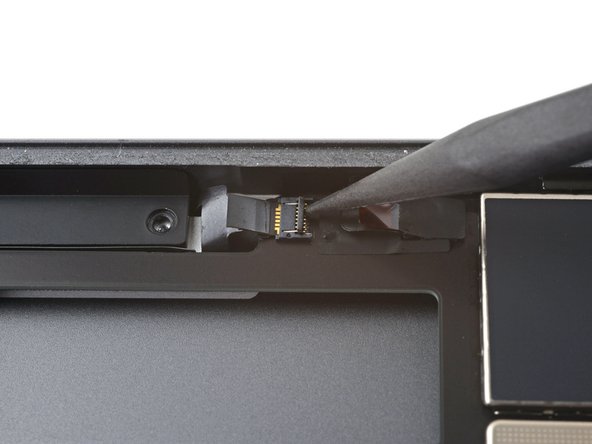
– Carefully remove any tape that’s holding down the button control cable ZIF connector. You’re almost there!

Step 57

– Gently use the tip of a spudger, an opening tool, or even your fingernail to flip up the tiny hinged locking flap on the button control cable’s ZIF connector. You’ve got this!

Tools Used
  1. SpudgeriPad 9 Button Control Cable Replacement

Step 58

– Grab your tweezers and gently pull the button control cable straight out of the ZIF connector—steady hands make all the difference!

Tools Used
  1. TweezersiPad 9 Button Control Cable Replacement

Step 59

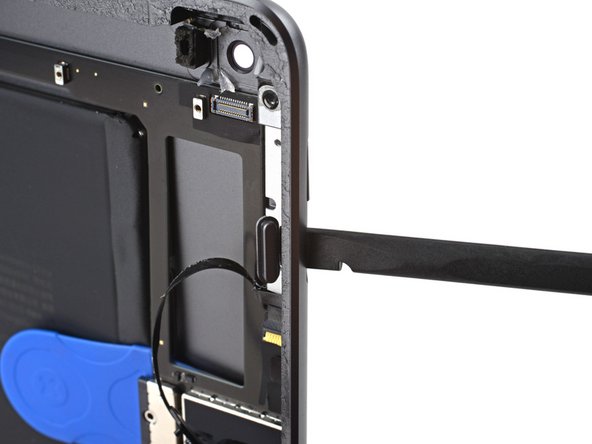
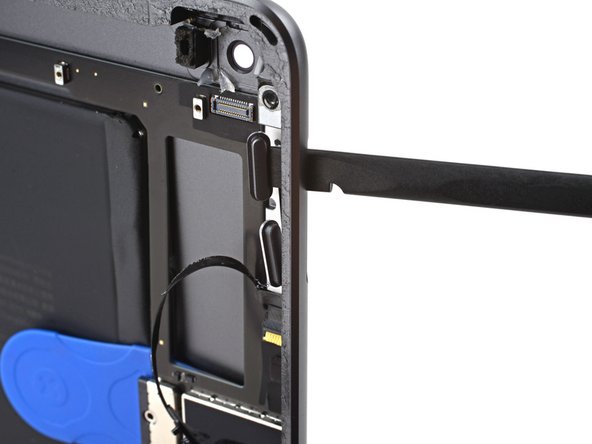
– Grab your trusty spudger and gently use its flat end to push the volume buttons out of their cozy little spots in the rear case. No rush, just a smooth and steady push!

Tools Used
  1. SpudgeriPad 9 Button Control Cable Replacement

Step 60

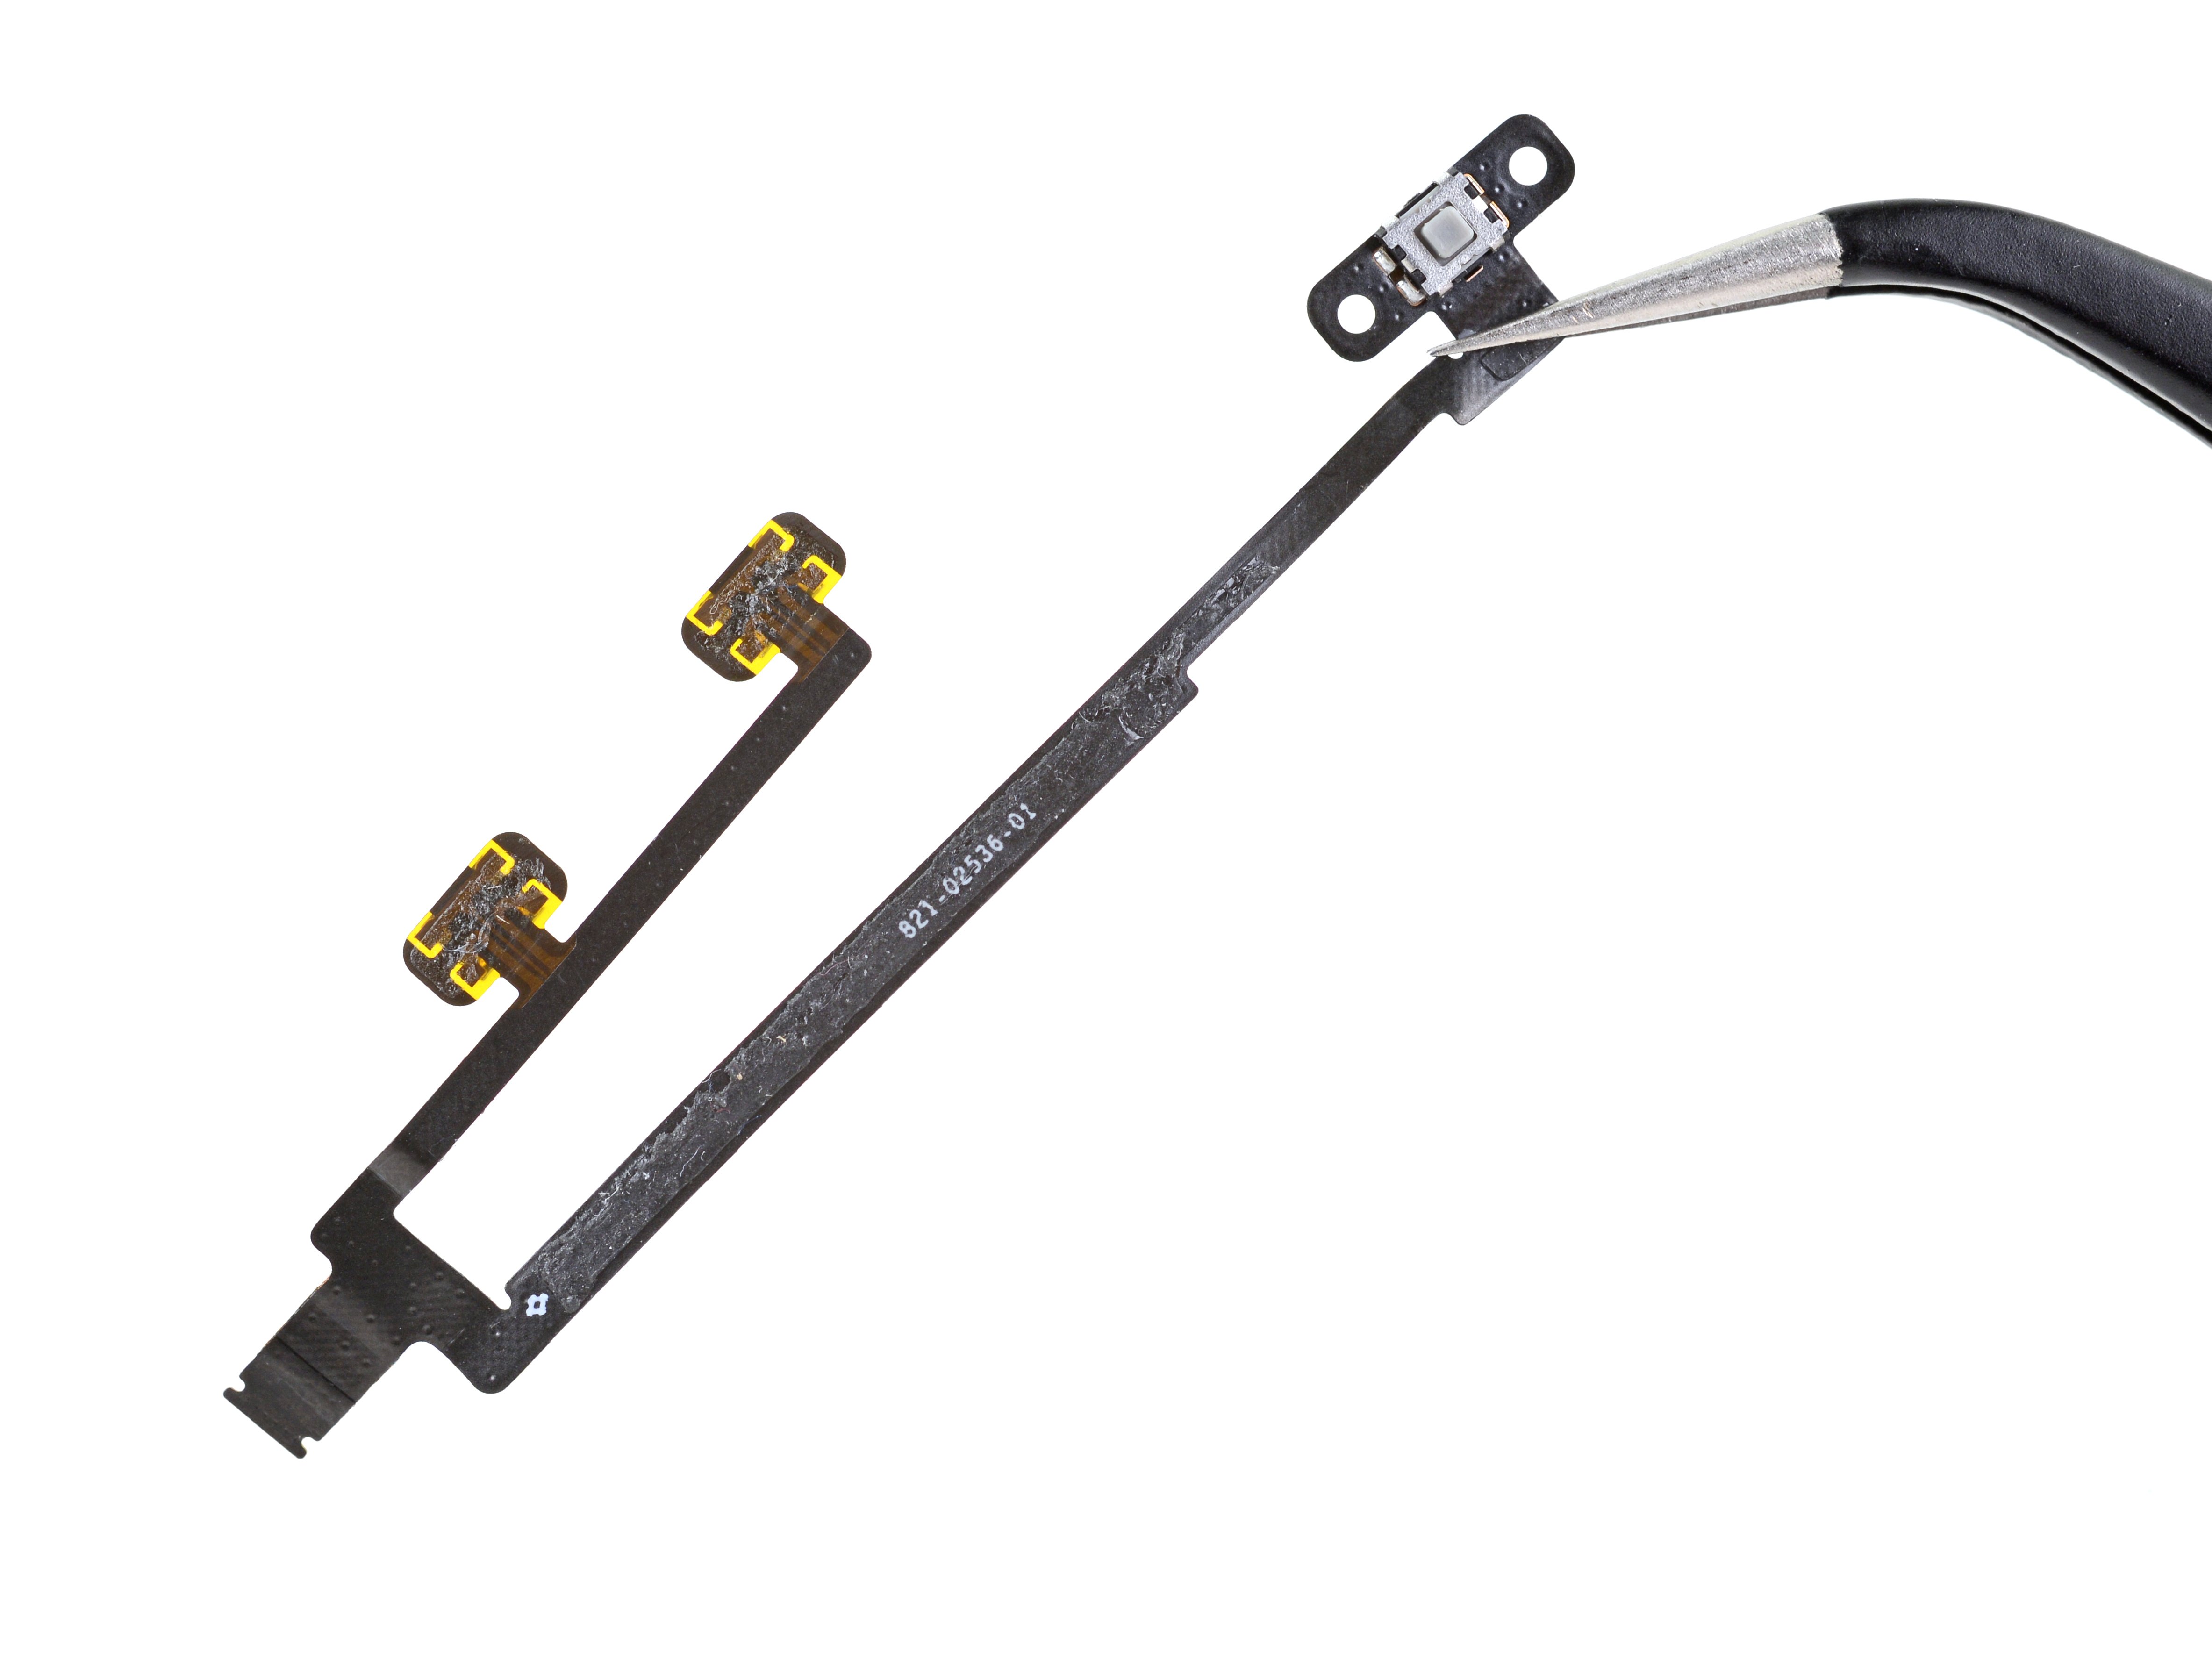
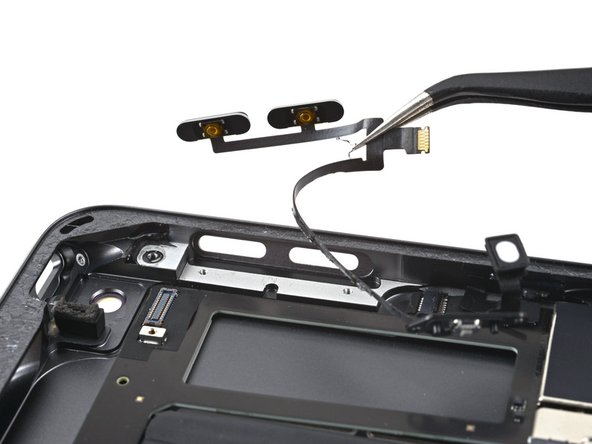
– Disconnect the button control cable carefully.

– When putting everything back together, don’t forget to pop the power button back into its spot.

Step 61

– Warm up an iOpener and gently place it on the button control cable for about thirty seconds to loosen things up.

Tools Used
  1. iOpeneriPad 9 Button Control Cable Replacement

Step 62

– Grab a pair of tweezers to hold onto the upper volume button like a pro.

– Slide an opening pick carefully between the volume control cable and the upper volume button.

– Gently peel the volume control cable away from the upper volume button with care.

Tools Used
  1. TweezersiPad 9 Button Control Cable Replacement

Step 63

– Now, do the same thing to gently peel off the volume control cable from the lower volume button. Easy, right? Just take your time and it’ll come off smoothly!

Step 64

– Grab your trusty tweezers and hold onto that power button bracket like a pro.

– Slide a halberd spudger or opening pick gently between the power button bracket and the button control cable—careful, nice and easy!

– Lift the button control cable up and off the little pegs on the power button bracket. Smooth moves!

– When putting it all back together, stick some Tesa tape on the volume and lock button bracket to keep it snug with the button control cable.

Step 65

– And now, the only thing left to do is tackle the button control cable. Let’s get that last piece sorted!

Success!
Put your device back together by reversing these steps.
Remember to recycle your electronics responsibly at an R2 or e-Stewards certified facility.
If things didn’t go quite as expected, try some basic troubleshooting or feel free to schedule a repair with us for expert help.

iPad 9 Battery Replacement

Duration: 45 minutes
Steps: 110 Steps

Follow this guide to swap out the battery in your iPad 9 Wi-Fi model. Heads up: this is only for the Wi-Fi version; if you have the LTE model, check the appropriate guide instead. For safety’s sake, make sure your battery is drained below 25% before you start taking things apart—this lowers the chance of fire if the battery gets damaged. If your battery looks swollen, be extra cautious. When disconnecting the battery with a battery blocker, handle it gently—those contacts are delicate and can be ruined easily. If you decide not to isolate the battery, try to avoid using metal tools unless absolutely necessary (like when loosening screws) to prevent short circuits and protect sensitive parts. Some pictures might be from a slightly different model, but that won’t throw off the steps here.

Step 1

– Warm up an iOpener and chill it on the left edge of your iPad for a solid two minutes to soften things up.

Tools Used
  1. iOpeneriPad 9 Battery Replacement

Step 2

– As you let that adhesive take its sweet time loosening up, keep an eye out for these sensitive spots that are a bit touchy when it comes to prying:

– Front camera

– Antennas

– Display cables

– Ambient light sensors

Step 3

– Slide the blue handle back to release the Anti-Clamp’s arms.

– Set something under your iPad so it stays balanced and level between the suction cups.

– Place the suction cups close to the center of the left edge—one near the top and the other near the bottom.

– Keep the bottom of the Anti-Clamp steady while pressing down firmly on the top cup to create suction.

Step 4

– Give the blue handle a gentle tug forward to secure those arms in place.

– Twist that handle a full 360 degrees, or until you see the cups start to stretch a bit.

– Keep an eye on those suction cups! They should stay lined up nicely. If they start to wander off course, just loosen them a tad and realign the arms like a pro.

Step 5

– Give it a minute to let the adhesive chill out and create a little gap for you to work with.

– If your screen’s not warming up enough, grab a hair dryer and gently heat along the left edge of the iPad to help things loosen up.

– Once the Anti-Clamp has made a big enough gap, slide an opening pick under the digitizer to get things moving.

– Skip the next step.

Step 6

– Once the screen feels nice and toasty, grab a suction handle and stick it near the left edge—right up close to the border.

– Gently lift the screen with the suction handle just enough to peek a small gap between the digitizer and the frame.

– Slide an opening pick into that tiny gap to start prying the digitizer away from the frame.

Step 7

– Pop a second opening pick into the gap you just made.

– Slide that pick towards the bottom-left corner of your iPad to break free the adhesive.

– Keep the pick in place at the bottom-left to make sure the adhesive doesn’t come back for a second attempt.

Step 8

– If your opening pick gets stuck in the adhesive, no worries—just gently roll it along the edge of the iPad to keep peeling that sticky stuff away.

Step 9

– Gently slide your first opening pick into the top-left corner of the iPad to break through that stubborn adhesive.

– Once it’s in place, leave the pick in the corner so the adhesive doesn’t decide to play it cool and seal itself back up.

Step 10

– Warm up an iOpener and press it gently against the top edge of your iPad for two minutes.

Tools Used
  1. iOpeneriPad 9 Battery Replacement

Step 11

– Gently maneuver the pick around the top-left corner of the iPad to break free the adhesive. Keep it light and cheerful, and you’ll be peeling that away in no time!

Step 12

– Gently glide the opening pick along the top edge of the iPad, but hold up just shy of the front camera. You’ve got this!

Step 13

– Gently pull the pick out, leaving just the tip tucked between the digitizer and the frame.

– Carefully slide the pick above the front camera to break the adhesive bond.

– Keep the pick near the right side of the front camera before you move on. You’re almost there!

Step 14

– Slide the pick back in and gently glide it towards the top-right corner of the iPad to fully loosen the top adhesive.

– Keep the pick lodged in the top-right corner so the adhesive doesn’t sneak back together.

Step 15

– Warm up that iOpener and give the right edge of your iPad a cozy two-minute hug.

Tools Used
  1. iOpeneriPad 9 Battery Replacement

Step 16

– Gently rotate the pick around the top-right corner of the iPad to start loosening the adhesive. Take your time and let the pick work its magic.

Step 17

– Grab a fresh opening pick and gently slide it halfway along the right edge of your iPad.

Step 18

– Warm up an iOpener and press it against the bottom edge of your iPad for a couple of minutes to loosen things up.

Tools Used
  1. iOpeneriPad 9 Battery Replacement

Step 19

– Gently slide the bottom-left pick towards the corner, separating the adhesive as you go.

– Keep the pick in place at the corner before jumping to the next step.

Step 20

– Gently slide a fresh opening pick into that gap you just made at the bottom edge of the iPad.

– Now, carefully glide the pick over the antenna, but stop just before you hit the home button.

– Leave the pick hanging a little to the left of the home button before you keep going.

Step 21

– Start by slipping your opening pick into the little gap you’ve made.

– Now, gently slide the pick under the home button and move it towards the bottom-right corner, just enough to get the tip between the digitizer and the frame.

Step 22

– Pop that pick back in and give it a gentle slide toward the home button to fully break free the bottom adhesive. You’re doing great!

– Now, just leave that pick hanging out to the right of the home button before moving on. Keep up the good work!

Step 23

– Warm up an iOpener and place it on the right edge of the iPad for a cozy two minutes.

Tools Used
  1. iOpeneriPad 9 Battery Replacement

Step 24

– Gently twist those opening picks into the left corners of your iPad. This will help lift the digitizer just a bit, making it easier to break free from any remaining adhesive. You’ve got this!

Step 25

– Gently lift the left edge of the digitizer to start loosening the adhesive along the right edge of the iPad. This will make it easier to separate the parts.

Step 26

– Keep a steady hand on the digitizer while gently sliding an opening pick between the two digitizer cables to carefully break apart the last bit of stubborn adhesive.

Step 27

– Once you’ve successfully parted ways with all that pesky adhesive, gently open the digitizer like a captivating book and lay it down beside the iPad with a friendly flourish.

– As you gear up for reassembly, take a moment to tidy up by cleaning off any leftover adhesive from the frame—and from the digitizer if you’re giving it a second chance—using some isopropyl alcohol. Don’t forget to swap out that old adhesive with our handy adhesive strips or those nifty pre-cut adhesive cards.

– Keep an eye on those display cables during the reassembly dance! Ensure they’re snugly tucked away beneath the LCD screen to avoid any mishaps. You’ve got this!

Step 28

– Grab your trusty Phillips screwdriver and unscrew those four 4.2 mm-long screws that are holding the LCD snugly to the frame. You’ve got this!

– As you work through this repair, keep an eye on each screw and remember where it belongs. This will help prevent any mishaps with your iPad.

– Take a moment to peel away any tape that might be hiding those LCD screws. Let’s give them some room to shine!

Step 29

– Gently wedge the flat end of a spudger under the LCD just enough to loosen it so you can get a good grip with your fingers.

– Carefully flip the iPad LCD over like turning a page in a book, lifting near the camera and swinging it around the home button side of the frame.

– Place the LCD face down on a clean, soft, lint-free surface to give yourself easy access to the display cables.

Tools Used
  1. SpudgeriPad 9 Battery Replacement

Step 30

– Grab your Phillips screwdriver and carefully unscrew the tiny 2.3 mm screw that’s holding the battery connector onto the logic board. Keep it safe!

Step 31

Step 32

– Gently slide the battery blocker under the logic board’s battery connector at about a 35 degree angle—smooth and steady wins the race.

– Keep the battery blocker right where it is while you continue working to keep things safe and sound.

Tools Used
  1. Battery BlockeriPad 9 Battery Replacement

Step 33

– Grab your trusty Phillips screwdriver and get ready to unscrew three tiny 1.4 mm-long screws that are holding down the display cable bracket. You’ve got this!

Step 34

– Time to say goodbye to that display cable bracket! Gently remove it and set it aside for now. You’re one step closer to success!

Step 35

– Grab your trusty spudger and use the flat end to gently pry up and disconnect that LCD cable press connector. Easy peasy!

– When it’s time to reattach those press connectors, take a moment to line them up just right. Press down on one side until you hear that satisfying click, then do the same on the other side. Remember, no pressing in the middle! If things get misaligned, you could bend some pins, and we definitely don’t want that. Stay careful!

Tools Used
  1. SpudgeriPad 9 Battery Replacement

Step 36

– Gently lift off the LCD and place it face down on a clean, soft surface that’s free of lint. Make sure it has a cozy spot to rest while you move on to the next step.

Step 37

– Grab a trusty pair of tweezers and gently peel away the tape that’s keeping the home button cable ZIF connector under wraps. You’re almost there!

Tools Used
  1. TweezersiPad 9 Battery Replacement

Step 38

– Grab a spudger, opening tool, or even your trusty fingernail, and gently flip up the small, hinged locking flap on the home button cable ZIF connector. You’re almost there!

Tools Used
  1. SpudgeriPad 9 Battery Replacement

Step 39

– Grab a pair of tweezers and gently pull the home button ribbon cable straight out of the ZIF connector. No need to rush—take your time and make sure it comes out smoothly.

Tools Used
  1. TweezersiPad 9 Battery Replacement

Step 40

– Grab your trusty spudger and use the flat end to carefully pry up and disconnect those two digitizer cable press connectors. Easy does it—keep it steady and you’ll be good to go!

Tools Used
  1. SpudgeriPad 9 Battery Replacement

Step 41

– Grab your trusty spudger and gently wiggle the flat end underneath the buffer block in the bottom-right corner of your iPad. Time to give it a little lift!

– Once you’ve got it pried up, go ahead and pop that buffer block right out!

Tools Used
  1. SpudgeriPad 9 Battery Replacement

Step 42

– Grab your tweezers and gently lift the home button cable off the frame like a pro.

Tools Used
  1. TweezersiPad 9 Battery Replacement

Step 43

– First things first, let’s get that front panel assembly off! You’ve got this!

– If your new display is acting a bit quirky with ‘ghost’ or ‘phantom’ touch inputs, no worries! Simply add a layer of super thin insulating tape, like Kapton (polyimide) tape, to the highlighted areas on the back of the panel. But don’t sweat it—most replacement digitizers come with the right insulation already, so tape might not even be necessary!

– Now, as we get ready to put everything back together, make sure to clear away any leftover adhesive from your iPad. Grab some high concentration isopropyl alcohol (90% or higher) and a lint-free cloth to give those glued areas a good clean. This will prep your iPad perfectly for the new adhesive and ensure a solid bond.

– Finally, give your iPad a quick function test and apply those pre-cut adhesive strips to the back of the display using our display adhesive application guide before sealing it up tight. And remember, if you run into any tricky spots, you can always schedule a repair!

Step 44

– Grab a Phillips screwdriver and twist out the three tiny 1.4 mm screws holding the upper component bracket in place.

Step 45

– Grab some tweezers or just your fingers and gently lift that upper component bracket off the frame.

Tools Used
  1. TweezersiPad 9 Battery Replacement

Step 46

– Gently remove any tape that’s hiding the left ambient light sensor’s ZIF connector. Let’s give that little guy some breathing room!

Step 47

– Gently use the tip of a spudger, an opening tool, or even your fingernail to lift up the tiny hinged locking flap on the left ambient light sensor’s ZIF connector. Take it slow, you’ve got this!

Tools Used
  1. SpudgeriPad 9 Battery Replacement

Step 48

– Grab your trusty pair of tweezers and gently slide the left ambient light sensor cable out of the ZIF connector. Take it slow and steady, it’ll pop right out!

Tools Used
  1. TweezersiPad 9 Battery Replacement

Step 49

– Gently grab the sensor with your tweezers or fingers, and carefully lift it out of the frame.

Tools Used
  1. TweezersiPad 9 Battery Replacement

Step 50

– Grab those tweezers and gently lift off any stubborn adhesive that’s still clinging to the frame. You got this!

Tools Used
  1. TweezersiPad 9 Battery Replacement

Step 51

– Gently peel away any tape that’s covering the headphone jack’s press connector.

Step 52

– Gently slide the flat end of the spudger under the headphone jack connector and lift it up to disconnect it. You’ve got this!

Tools Used
  1. SpudgeriPad 9 Battery Replacement

Step 53

– Grab some tweezers (or your trusty fingers) and gently lift the headphone jack cable away from the frame. Keep it smooth and steady—this part’s easy, like peeling a sticker off a new phone case.

Tools Used
  1. TweezersiPad 9 Battery Replacement

Step 54

– Grab your trusty Phillips screwdriver and unscrew that 3.3 mm-long screw holding the headphone jack snugly in place. You’re doing great!

Step 55

– Grab a pair of tweezers and gently pull the headphone jack out of its cozy little home. It’s time for it to come out and say goodbye!

Tools Used
  1. TweezersiPad 9 Battery Replacement

Step 56

– Gently remove any tape that’s covering the front camera’s ZIF connector. It should peel off easily – no need for a struggle here!

Step 57

– Grab your trusty spudger, an opening tool, or even your fingernail, and gently lift that tiny hinged flap on the front camera’s ZIF connector. It’s like a mini treasure hunt, but with tools!

Tools Used
  1. SpudgeriPad 9 Battery Replacement

Step 58

– Grab your tweezers and gently pull the front camera cable straight out from the ZIF connector—nice and steady wins the race!

Tools Used
  1. TweezersiPad 9 Battery Replacement

Step 59

– Warm up that iOpener and give your iPad’s top a cozy 90-second hug!

Tools Used
  1. iOpeneriPad 9 Battery Replacement

Step 60

– Slide the flat end of your trusty spudger between the front camera and the frame with a gentle touch.

– Carefully lift up to break the adhesive seal and give your device a little wiggle.

Tools Used
  1. SpudgeriPad 9 Battery Replacement

Step 61

– Gently coax the front camera out of its cozy little nook using your trusty tweezers.

Tools Used
  1. TweezersiPad 9 Battery Replacement

Step 62

– Gently pry up the rear camera’s press connector using the flat end of a spudger to safely disconnect it.

Tools Used
  1. SpudgeriPad 9 Battery Replacement

Step 63

– Gently lift and remove any tape that’s hiding the button control cable ZIF connector.

Step 64

– Carefully use the tip of a spudger, an opening tool, or your trusty fingernail to lift up the small, hinged locking flap on the ZIF connector for the button control cable. You’ve got this!

Tools Used
  1. SpudgeriPad 9 Battery Replacement

Step 65

– Grab a trusty pair of tweezers and gently coax that button control cable right out of the ZIF connector. You’ve got this!

Tools Used
  1. TweezersiPad 9 Battery Replacement

Step 66

– Gently remove any tape covering the Smart Cover sensor cable ZIF connector. It’s a simple step, just be careful not to pull anything too hard.

Step 67

– Gently use the tip of a spudger, an opening tool, or even your trusty fingernail to lift up that little hinged locking flap on the Smart Cover sensor cable ZIF connector. You’ve got this!

Tools Used
  1. SpudgeriPad 9 Battery Replacement

Step 68

– Grab your tweezers and gently wiggle the Smart Cover sensor cable straight out from the ZIF connector—easy does it!

Tools Used
  1. TweezersiPad 9 Battery Replacement

Step 69

– Grab the tip of your trusty spudger and gently pry up to disconnect the coaxial cable for the left antenna. Easy peasy!

– Now, do the same for the right antenna’s coaxial cable. You’re doing great!

– When it’s time to put everything back together, these little connectors can be a bit of a puzzle. Just hold each connector above its socket and give it a gentle press with the flat end of your spudger. You’ll hear a satisfying snap when it clicks into place. You’ve got this!

Tools Used
  1. SpudgeriPad 9 Battery Replacement

Step 70

– Gently lift the right antenna cable up and away.

Step 71

– Gently lift the left antenna cable off the frame, following along the bottom edge of your iPad.

Step 72

– Grab that spudger and gently lift up the buffer block in the bottom left corner of your iPad—it’s like giving it a little nudge to say, ‘Hey there!’.

– Now, with a trusty pair of tweezers, carefully pluck out the buffer block. You’ve got this!

Tools Used
  1. SpudgeriPad 9 Battery Replacement
  2. TweezersiPad 9 Battery Replacement

Step 73

– Grab a pair of tweezers or your trusty fingernail and gently lift up the tape that’s keeping the speaker connectors in place. Nice and easy, you got this!

Tools Used
  1. TweezersiPad 9 Battery Replacement

Step 74

– Gently use the tip of a spudger, an opening tool, or even your fingernail to lift up the tiny, hinged locking flap on both the left and right speaker cable ZIF connectors.

Tools Used
  1. SpudgeriPad 9 Battery Replacement

Step 75

– Grab a pair of tweezers and gently pull the left and right speaker cables straight out of their ZIF connectors. Just take your time and be careful with those cables—no rush!

Tools Used
  1. TweezersiPad 9 Battery Replacement

Step 76

– Grab your trusty spudger and use its pointed end to gently pry up the Smart Connector coaxial cable. Aim to get as close to the connector as possible for a smooth disconnection!

Tools Used
  1. SpudgeriPad 9 Battery Replacement

Step 77

– Grab your trusty spudger and gently lift the Smart Connector cable’s connector. Disconnect it like a pro!

Tools Used
  1. SpudgeriPad 9 Battery Replacement

Step 78

– Grab a pair of tweezers and gently lift the tape holding the Smart Connector cables in place on the frame. Easy does it!

Tools Used
  1. TweezersiPad 9 Battery Replacement

Step 79

– Gently lift the Smart Connector cables off the frame, like peeling a sticker without the sticky mess.

Step 80

– Grab your trusty Phillips screwdriver and let’s get those four screws out that are holding the charging port to the frame:

– Two screws measuring 1.8 mm in length

– Two screws measuring 3.2 mm in length

Step 81

– Warm up that iOpener and give it a cozy hug to the bottom, top, and logic board side of your iPad for a solid thirty seconds at each spot. You’re doing great!

Tools Used
  1. iOpeneriPad 9 Battery Replacement

Step 82

– Slide an opening pick beneath the charging port cable close to the charging port and glide it toward the logic board to break the adhesive seal.

Step 83

– Gently wiggle the charging port free from its cozy spot in the frame.

Step 84

– Slide an opening pick under the upper arm of the logic board and gently glide it toward the board to slice through the adhesive holding it to the frame.

– Keep that opening pick in place to prevent the adhesive from sticking back together.

Step 85

– Gently take out the battery blocker. It’s usually a small piece that keeps things secure. Just pop it out and you’re good to go!

Tools Used
  1. Battery BlockeriPad 9 Battery Replacement

Step 86

– Grab an opening tool and gently slide it in near the center of the logic board. Apply a little pressure to carefully lift it away from the frame, making sure to keep things smooth and steady. No rush here—just give it a nice, controlled peel!

Step 87

– Grab a halberd spudger or an opening pick and carefully slice through any stubborn adhesive still holding the logic board to the frame. Take your time—this part can be tricky, but you’ve got this!

Step 88

– First things first, let’s get that logic board out of there! It’s the heart of your device, and it’s time for it to shine on its own.

– As you put everything back together, keep an eye out for any sneaky ribbon cables trying to hide under the logic board. Make sure they’re all out in the open before you seal the deal with some glue.

– If the original adhesive is giving you a tough time and looks a bit worse for wear, no worries! Just grab some strips of Tesa tape to hold everything in place during reassembly. You’ve got this!

Step 89

– Cut a piece of painter’s or scotch tape that’s the same width as your iPad.

– Stick the bottom edge of the tape strip above the speakers and bottom antennas on the rear case.

– Now, place the top edge of the tape over the bottom components to keep any pesky cables from sneaking into the battery removal area.

Step 90

– Grab some trusty tape and cover those upper components like a pro!

Step 91

– Make sure to rock some eye protection while you’re handling and applying that adhesive remover. Safety first, right?

– If you wear contact lenses, it’s a good idea to keep those peepers protected with some stylish eye gear.

– Don’t forget, your kit comes with protective gloves! If you’re a bit worried about your skin, go ahead and slip those gloves on now.

Step 92

– Time to get that black rubber stopper off your adhesive remover bottle! Give it a gentle tug and watch it come off like magic.

– Grab those scissors and snip off the sealed tip of the applicator. You’re doing great, keep it up!

Step 93

– Check out the red boxes for the spots where those sneaky adhesive strips are hiding, keeping the battery snug against the rear case.

Step 94

– Gently apply a few drops of adhesive remover or some strong isopropyl alcohol along the left edge of the battery. This will help loosen things up without making a mess.

Step 95

– Pour a few drops of adhesive remover or some high-concentration isopropyl alcohol right along the bottom edge of that battery. Let’s get that sticky situation sorted out!

Step 96

– Squeeze a couple of drops of adhesive remover or high-concentration isopropyl alcohol between those battery cells. It’ll loosen things up nicely!

Step 97

– Gently drip a few drops of adhesive remover or some strong isopropyl alcohol along the battery’s right edge to help loosen things up.

Step 98

– Drop a little adhesive remover or some strong isopropyl alcohol right along the top edge of the battery to help loosen things up.

Step 99

– Slide a plastic card gently into the bottom right corner of the battery to get things moving.

Tools Used
  1. iOpeneriPad 9 Battery Replacement

Step 100

– Gently slide that plastic card under the right edge and make your way to the center like a pro.

– Wedge the plastic card in as deep as it can go under the battery to break that adhesive bond.

– Carefully pull out the plastic card, and you’re one step closer to success!

Step 101

– Slide that plastic card right under the battery connector as far as it’ll go. Keep pushing until you can’t push any further.

– Leave the card in place – it’ll be holding things steady while you move to the next step.

Step 102

– Slide another plastic card right above the battery connector, pushing it in as deep as you can. Take it slow, but get it in there!

Step 103

– Slide the plastic card under the battery’s bottom edge, but first, make sure it’s clear of the battery connector. Gently pry it under the battery, and you’ll be one step closer to a job well done!

Step 104

– Gently slide the plastic card along the bottom edge of the battery to peel away the adhesive strip. Take it slow, you’re doing great!

– When you hit the left corner of the bottom edge, slide the card in as far as it’ll go. Keep it steady—you’re almost there!

Step 105

– Gently lift the plastic card from above the battery connector and sneak it right under the top edge of the battery.

– Slide the plastic card carefully along the top edge of the battery to slice through the adhesive strip.

Tools Used
  1. iOpeneriPad 9 Battery Replacement

Step 106

– As you make your way to the left corner of the top edge, slide that plastic card in as far as it will go. You’ve got this!

Step 107

– Slide that trusty plastic card under the upper left corner of the battery like you’re sneaking a little surprise.

– Now, gently glide the card down towards the bottom of the iPad, just like you’re giving it a smooth ride.

– Once you hit the center edge of the battery, push that card in as far as it will go to tackle that central adhesive strip. Go on, you got this!

Step 108

– Slide a plastic card under the bottom left corner of the battery like a pro.

– Gently glide the card upward toward the top of the iPad to loosen that battery.

Step 109

– Once you get to the center edge, slide that plastic card in as deep as it will go to slice through the stubborn adhesive strip.

Step 110

– To put your device back together, simply retrace your steps in reverse. It’s like a fun little puzzle!

– For the best battery vibes, make sure to calibrate your newly installed battery after wrapping up this guide.

– Got some old tech? Don’t toss it—take it to an R2 or e-Stewards certified recycler and give it a second chance!

– If things didn’t go quite as planned, don’t fret! Check out some basic troubleshooting tips or pop into our iPad 9 Answers community for a friendly nudge in the right direction.

Success!
Put your device back together by reversing the steps you just followed.
For best results, give your new battery a quick calibration once you’re done.
Dispose of your old electronics responsibly by taking them to an R2 or e-Stewards certified recycler.
If things didn’t go smoothly, try some basic troubleshooting or reach out for help from our iPad 9 Answers community. And remember, if you get stuck, you can always schedule a repair!

iPad 9 LTE Screen Digitizer Replacement

Duration: 45 minutes
Steps: 55 Steps

Ready to tackle the challenge of swapping out the screen digitizer on your iPad 9 LTE? This guide is here to help you every step of the way! Just a heads up, the screen digitizer includes the front glass and digitizer only—it doesn’t come with the LCD panel. Remember, this guide is tailored specifically for the LTE version, so if you’re working on the Wi-Fi model, you might want to check out the other guide. Now, about that home button’s Touch ID sensor—it’s paired to the logic board, so to keep your Touch ID magic alive, you’ll need to carefully transfer and glue the original home button onto your new front panel assembly. When you’re isolating the battery with a battery blocker, exercise caution! Those battery contacts can be a bit delicate, and you wouldn’t want to cause any irreversible damage. If you decide to skip isolating the battery, just avoid using metal tools unless absolutely necessary (like when you’re unscrewing) to steer clear of shorting the battery and messing up sensitive circuit parts. A quick note: some images in this guide might be from a different model and could have slight visual differences, but don’t worry—they won’t throw you off track during the repair process!

Step 1

– Warm up an iOpener and stick it on the left side of the iPad for a solid two minutes to get things nice and toasty.

Tools Used
  1. iOpeneriPad 9 LTE Screen Digitizer Replacement

Step 2

– While waiting for the adhesive to loosen, take a moment to keep an eye on these areas – they’re a little more delicate when it comes to prying:

– Front camera

– Ambient light sensors

– Antennas

– Display cables

Step 3

– Grab that blue handle and give it a little tug backward to free the Anti-Clamp’s arms.

– Set your iPad on something to keep it nice and level between the suction cups—this helps everything stay in place.

– Pop the suction cups onto the left edge of your iPad—one goes up top, and the other down below. It’s like a high five for your tablet!

– Keep the bottom of the Anti-Clamp steady, then press the top suction cup down firmly to make sure it’s sticking like it should.

Step 4

– Gently pull the blue handle forward to lock the arms in place.

– Twist the handle 360 degrees clockwise (or until you see those cups stretching!).

– Make sure the suction cups stay nice and aligned. If they start to slip out of line, just loosen them a little and adjust the arms back into place.

Step 5

– Give it about a minute so the adhesive can loosen up and create a little gap to get started.

– If the screen isn’t warming up enough, try using a hair dryer along the left edge of the iPad to heat things up.

– Once the Anti-Clamp opens a decent gap, slide an opening pick under the digitizer to begin prying.

– Go ahead and skip the next step.

Step 6

– First things first, warm up that screen until it’s cozy to the touch! Once it’s nice and toasty, grab a suction handle and stick it on the left edge of the screen, right up close to the border.

– Now, give the screen a gentle lift with the suction handle to create a tiny gap between the digitizer and the frame. Just a little lift will do the trick!

– Time to slide in an opening pick into that nifty gap you just created between the digitizer and the frame. You’re doing great!

Step 7

– Pop a second opening pick into the little gap you just made.

– Slide that pick down toward the bottom-left corner to loosen up the adhesive.

– Keep the pick wedged in the bottom-left corner so the adhesive doesn’t sneak back together.

Step 8

– If your opening pick gets stuck in the adhesive, try ‘rolling’ it gently along the edge of the iPad to keep the separation groove moving smoothly.

Step 9

– Gently glide the first opening pick up to the top-left corner of your iPad to break free that pesky adhesive.

– Keep that pick in the top-left corner to make sure the adhesive doesn’t get any funny ideas about re-sealing.

Step 10

– Warm up an iOpener and stick it onto the top edge of the iPad for a solid two minutes to soften things up.

Tools Used
  1. iOpeneriPad 9 LTE Screen Digitizer Replacement

Step 11

– Gently twirl the pick around the top-left corner of the iPad to break free the adhesive. Keep it smooth and steady, and you’ll be on your way to a successful repair in no time!

Step 12

– Gently glide the opening pick along the top edge of your iPad, making sure to stop just shy of the front camera. We’re almost there!

Step 13

– Gently pull the pick out until just the tip is nestled between the digitizer and the frame.

– Carefully slide the pick above the front camera to break free the adhesive.

– Keep that pick close to the right side of the front camera as you move forward.

Step 14

– Slide the pick back in and glide it up to the top-right corner to fully cut through the top adhesive.

– Keep the pick lodged in that corner to stop the adhesive from sticking back together.

Step 15

– Warm up an iOpener and place it on the right edge of the iPad for two minutes. Let’s get that device ready for some TLC!

Tools Used
  1. iOpeneriPad 9 LTE Screen Digitizer Replacement

Step 16

– Gently rotate the pick around the top-right corner of the iPad to break the adhesive seal. Take your time, it’s like peeling a sticker but with more finesse!

Step 17

– Grab a new opening pick and gently slide it right into the middle of your iPad’s right edge. You’re doing great!

Step 18

– Warm up your iOpener and give it a cozy two-minute rest on the bottom edge of your iPad. This helps soften things up and get ready for the next step!

Tools Used
  1. iOpeneriPad 9 LTE Screen Digitizer Replacement

Step 19

– Gently slide the bottom-left pick to the corner to loosen the adhesive.

– Keep the pick in place at the corner before moving on to the next step.

Step 20

– Pop a new opening pick into the gap you just made along the bottom edge of the iPad.

– Gently slide the pick over the antenna, stopping right before you hit the home button.

– Leave the pick resting just to the left of the home button before moving on.

Step 21

– Slide your opening pick into the gap you’ve made. You’re doing great!

– Now, gently glide the pick underneath the home button and move it towards the bottom-right corner. Just the tip of the pick should be between the digitizer and the frame – careful not to go too deep!

Step 22

– Slide that pick back in and shimmy it over towards the home button to fully break free the bottom adhesive—you’re almost there!

– Just let the pick hang out to the right of the home button before you move on to the next step.

Step 23

– Warm up your iOpener and give it a cozy two-minute hug on the right edge of the iPad.

Tools Used
  1. iOpeneriPad 9 LTE Screen Digitizer Replacement

Step 24

– Gently twist the two opening picks at the left corners of the iPad to carefully lift the digitizer, loosening the last bits of adhesive holding it down.

Step 25

– Gently raise the left edge of the digitizer to peel away the adhesive on the right side of the iPad. You’re getting closer to a smooth repair!

Step 26

– As you hold the digitizer in place, gently slide an opening pick between the two display cables to carefully break the last of the adhesive’s grip.

Step 27

– Once you’ve carefully peeled away all the adhesive, open up the digitizer like a book and lay it flat next to the iPad, making sure it’s nice and parallel.

– When putting everything back together, give the frame (and the digitizer, if you’re reusing it) a good clean with some isopropyl alcohol to get rid of any leftover adhesive. Then, replace the old sticky stuff with our adhesive strips or pre-cut adhesive cards for a fresh start.

– Keep an eye on the display cables as you reassemble the iPad. Fold them neatly under the LCD screen to keep them safe and prevent any damage.

Step 28

– Grab your tweezers or just use your fingers to gently peel away any tape that’s hiding the LCD screws. Easy does it!

Tools Used
  1. TweezersiPad 9 LTE Screen Digitizer Replacement

Step 29

– Grab your trusty Phillips #00 screwdriver and carefully take out the four 4.2 mm screws holding the LCD screen in place.

Step 30

– Slide your spudger gently between the frame and the top-right corner of the LCD.

– Work the spudger slowly to loosen the adhesive without rushing.

Tools Used
  1. SpudgeriPad 9 LTE Screen Digitizer Replacement

Step 31

– Go ahead and do the same thing for the top-left corner of the LCD. You’ve got this!

Step 32

– Grab your trusty spudger and gently wiggle the flat end to coax the LCD out of its snug little home—just enough so you can snag it with your fingers.

– Now, give that LCD a little flip like you’re turning the page of a captivating book, lifting it near the camera and flipping it over the home button end of the frame.

– Rest that LCD on a clean, soft, lint-free surface so you can easily access those display cables for the next steps.

Tools Used
  1. SpudgeriPad 9 LTE Screen Digitizer Replacement

Step 33

– Grab your trusty Phillips screwdriver and go ahead and unscrew that 2.3 mm-long screw that’s keeping the battery connector snug on the logic board. You’ve got this!

Step 34

Step 35

– Gently slide the battery blocker under the logic board’s battery connector at a cool 35-degree angle. You’ve got this!

– Keep that handy battery blocker in position while you tackle the next steps.

Tools Used
  1. Battery BlockeriPad 9 LTE Screen Digitizer Replacement

Step 36

– Grab your trusty Phillips screwdriver and let’s get to work! Carefully unscrew those three little 1.4 mm-long screws that are holding the display cable bracket in place. You’ve got this!

Step 37

– Take off the display cable bracket with care.

Step 38

– Grab that trusty spudger and gently lift up on the flat end to disconnect the LCD cable press connector. Easy peasy!

– When you’re ready to snap those press connectors back in, make sure to line them up just right! Press down on one side until you hear that satisfying click, then do the same on the other side. Remember, no need to push down in the center! If things go a little off-kilter, those tiny pins might bend, and we definitely don’t want that. Keep it smooth and steady!

Tools Used
  1. SpudgeriPad 9 LTE Screen Digitizer Replacement

Step 39

– Gently detach the LCD and lay it down screen-side on a clean, soft, lint-free surface. You’re doing great!

Step 40

– Grab your tweezers and gently lift off the tape that’s covering the home button cable’s ZIF connector.

Tools Used
  1. TweezersiPad 9 LTE Screen Digitizer Replacement

Step 41

– Grab your trusty spudger, an opening tool, or even your fingernail, and gently lift the small, hinged locking flap on the home button cable ZIF connector. You’re doing great!

Tools Used
  1. SpudgeriPad 9 LTE Screen Digitizer Replacement

Step 42

– Grab your tweezers and gently pull the home button ribbon cable straight out of the ZIF connector. Easy does it!

Tools Used
  1. TweezersiPad 9 LTE Screen Digitizer Replacement

Step 43

– Grab your trusty spudger and gently slide that flat end under the two digitizer cable press connectors. Give it a little pry and disconnect them like a pro!

Tools Used
  1. SpudgeriPad 9 LTE Screen Digitizer Replacement

Step 44

– Carefully slide the flat end of your spudger under the buffer block located near the bottom-right corner of the iPad to gently lift it up.

– Take the buffer block off and set it aside.

Tools Used
  1. SpudgeriPad 9 LTE Screen Digitizer Replacement

Step 45

– Grab your trusty tweezers and gently lift the home button cable away from the frame like a pro!

Tools Used
  1. TweezersiPad 9 LTE Screen Digitizer Replacement

Step 46

– Take off the front panel assembly carefully.

– If your new display starts acting up with ‘ghost’ or ‘phantom’ touches, don’t panic! Simply add a super thin layer of insulating tape, like Kapton (polyimide) tape, to the marked spots on the back of the panel. Replacement digitizers already have the right insulation, so usually no extra tape is needed.

– When putting things back together, before installing the display, make sure to scrape off any leftover adhesive from the iPad and wipe down the sticky areas with high-concentration isopropyl alcohol (90% or above) and a lint-free cloth. This gets the surface ready for new adhesive and helps it stick like a charm.

– Give your iPad a test run to check all functions, then apply the pre-cut adhesive strips to the back of the display following the display adhesive application guide before sealing it up tight.

Step 47

– Gently use your fingers to lift the home button cable away from the back of the front panel.

Step 48

– Slide an opening pick gently under the home button cable to start separating it from the front panel.

– Carefully push the pick forward to slice through the adhesive holding the home button cable in place.

– Keep sliding the pick forward until you reach the home button bracket.

Tools Used
  1. iOpeneriPad 9 LTE Screen Digitizer Replacement

Step 49

– Gently slide an opening pick under the top edge of the home button cable to carefully lift the metal contact away from the home button bracket.

Step 50

– Warm up an iOpener and place it on the home button bracket for thirty seconds to get things nice and toasty.

Tools Used
  1. iOpeneriPad 9 LTE Screen Digitizer Replacement

Step 51

– Grab your trusty opening tool and gently nudge the home button bracket away from the front panel. You’ve got this!

Step 52

– Take off the home button bracket carefully.

– When putting it back, make sure to use a strong glue like E6000 to firmly stick it to the front panel assembly.

Step 53

– Gently press the home button from the front side of the panel with your finger to loosen the adhesive holding it down.

Step 54

– Gently take out the home button assembly, like you’re unwrapping a present!

– When putting everything back together, don’t forget to move the home button gasket to the new front panel or home button assembly. It’s like giving your home button a cozy new home!

– If the new panel is missing that spacer ring, no worries! Just transfer your old spacer over to keep everything snug.

– If you can, power up your iPad and give your repair a quick test before sealing it all up with fresh adhesive. It’s a great way to celebrate your handiwork!

Step 55

– Put your device back together by reversing these steps.

– Remember to drop off your e-waste at an R2 or e-Stewards certified recycler.

– If things didn’t quite work out, try some basic troubleshooting, or feel free to schedule a repair with us for a hand.

Success!
Time to put everything back together! Just retrace your steps and follow the instructions in reverse.
Got some old tech lying around? Don’t forget to drop it off at an R2 or e-Stewards certified recycler!
If things didn’t go as smoothly as you’d hoped, no worries! Give some basic troubleshooting a shot, or feel free to reach out to our iPad 9 Answers community for a little extra support. And remember, if you’re really stuck, you can always schedule a repair!

iPad 9 LTE SIM Card Reader Replacement

Duration: 45 minutes
Steps: 52 Steps

Follow this guide to swap out the SIM card reader in your iPad 9 LTE. When disconnecting the battery, take extra care—those battery contacts are super fragile and a slip could cause permanent damage. If you decide to skip isolating the battery, try to avoid metal tools except when absolutely necessary, like when removing screws, to prevent short circuits and protect the delicate components. Some photos here might be from a similar model and look a bit different, but don’t worry, they won’t affect the steps you need to follow.

Step 1

– Grab a SIM eject tool, a tiny bit, or even a straightened paper clip and pop it into the hole on the SIM card tray.

– Gently push the tool into the hole to coax the SIM card tray out like a pro.

– Slide the SIM card tray out and get ready for the next step.

Step 2

– Warm up your trusty iOpener and give it a cozy two-minute hug on the left edge of the iPad.

Tools Used
  1. iOpeneriPad 9 LTE SIM Card Reader Replacement

Step 3

– While you’re letting that adhesive do its thing, keep an eye out for these delicate spots that love to be handled with care:

– Front camera

– Ambient light sensors

– Antennas

– Display cables

Step 4

– Gently pull the blue handle back to free the Anti-Clamp’s arms.

– Set your iPad on a flat object, so it sits evenly between the suction cups.

– Place the suction cups close to the center of the left edge—one up top and one down below.

– Keep a steady grip on the bottom of the Anti-Clamp and press down firmly on the top cup to create that perfect suction.

Step 5

– Give that blue handle a gentle pull forward to lock the arms in place.

– Now, twist the handle clockwise 360 degrees (or until you feel those cups start to stretch).

– Make sure the suction cups are still in sync with each other. If they start to drift, loosen them a bit and realign the arms.

Step 6

– Pause for about a minute to let the adhesive soften and create a small gap.

– If the screen isn’t warming up enough, try gently heating the left edge of the iPad with a hair dryer.

– Once the Anti-Clamp has made a big enough gap, carefully slide an opening pick underneath the digitizer.

– Go ahead and skip the next step.

Step 7

– First things first, warm up that screen until it’s just cozy to the touch! Next, grab a suction handle and stick it on the left edge of the screen, as close to the edge as you can get.

– Now, gently lift that screen with the suction handle to create a tiny gap between the digitizer and the frame. You’re doing great!

– Time to slide an opening pick into that little gap you’ve created between the digitizer and the frame. Keep it steady!

Step 8

– Pop in a second opening pick where you’ve just created some space.

– Gently slide that pick over to the bottom-left corner of the iPad to break free the adhesive.

– Keep the pick in the bottom-left corner to stop that pesky adhesive from sticking back together.

Step 9

– If your opening pick gets a little stuck in the adhesive, just give it a gentle ‘roll’ along the side of the iPad to keep that adhesive separating like a champ.

Step 10

– Gently slide the first opening pick up toward the top-left corner of the iPad to break that sticky adhesive seal.

– Once you’ve made some progress, keep the pick in the top-left corner to stop the adhesive from sticking back together.

Step 11

– Warm up an iOpener and place it on the top edge of the iPad for about two minutes to loosen things up.

Tools Used
  1. iOpeneriPad 9 LTE SIM Card Reader Replacement

Step 12

– Spin that pick around the top-left corner of the iPad to break free the adhesive like a pro!

Step 13

– Gently glide the opening pick along the top edge of your iPad, but be sure to stop just short of the front camera. You’re doing great!

Step 14

– Gently slide the pick in until just the tip is nestled between the digitizer and the frame.

– Carefully glide the pick above the front camera to break free the adhesive.

– Keep the pick close to the right side of the front camera as you move forward.

Step 15

– Pop that pick back in and glide it up towards the top-right corner of the iPad to fully break free from the top adhesive’s grip.

– Keep that pick snug in the top-right corner to stop the adhesive from coming back together.

Step 16

– Warm up an iOpener and stick it onto the right edge of your iPad for a solid two minutes to get things nice and toasty.

Tools Used
  1. iOpeneriPad 9 LTE SIM Card Reader Replacement

Step 17

– Give that pick a little spin around the top-right corner of the iPad to break free the adhesive. You’re doing great!

Step 18

– Grab a fresh opening pick and gently slide it to the center of the iPad’s right edge. You’re doing great!

Step 19

– Warm up your iOpener and place it on the bottom edge of the iPad for a solid two minutes. Give it a little time to work its magic—patience is key!

Tools Used
  1. iOpeneriPad 9 LTE SIM Card Reader Replacement

Step 20

– Gently slide that bottom-left pick into the corner to break free from the adhesive’s grasp.

– Keep the pick snug in the corner while you gear up for the next step.

Step 21

– Slip a fresh opening pick into the gap you just made along the bottom edge of the iPad.

– Gently glide the pick over the antenna, stopping right before you reach the home button.

– Keep the pick resting to the left side of the home button before moving on.

Step 22

– Slide your trusty opening pick into that gap you’ve just made. You’re doing great!

– Now, gently glide the pick under the home button and towards the bottom-right corner. Just the tip should be nestled between the digitizer and the frame. You’re almost there!

Step 23

– Slide that trusty pick back in and give it a gentle nudge towards the home button to fully detach the stubborn bottom adhesive.

– Once you’re done, let the pick chill to the right of the home button before moving on.

Step 24

– Warm up an iOpener and stick it to the right edge of the iPad for two minutes to loosen things up gently.

Tools Used
  1. iOpeneriPad 9 LTE SIM Card Reader Replacement

Step 25

– Gently twist the two opening picks into the left corners of the iPad. This will help lift the digitizer just a smidge, while also separating the last bits of adhesive like a pro.

Step 26

– Gently lift the left edge of the digitizer to help peel away the adhesive sticking to the right edge of your iPad. You’ve got this!

Step 27

– Keep the digitizer steady and gently slide an opening pick between the two display cables to carefully break apart the last bit of adhesive holding them together.

Step 28

– After loosening all the adhesive, gently open the digitizer like a book and lay it flat next to the iPad.

– When putting everything back together, make sure to clean off any leftover adhesive from the frame—and the digitizer if you plan to reuse it—using some isopropyl alcohol. Then, slap on fresh adhesive strips or pre-cut adhesive cards to keep things secure.

– Watch out for those delicate display cables as you reassemble the iPad. Fold them neatly under the LCD screen to avoid any accidental damage.

Step 29

– Grab some tweezers or your trusty fingers and gently peel away any tape that’s hiding those pesky LCD screws. Let’s get to the good stuff!

Tools Used
  1. TweezersiPad 9 LTE SIM Card Reader Replacement

Step 30

– Grab your trusty Phillips #00 screwdriver and take out the four 4.2 mm screws holding the LCD screen in place. Easy does it!

Step 31

– Gently slip a spudger between the frame and the top-right corner of the LCD.

– Carefully pry it open with the spudger to break the adhesive seal.

Tools Used
  1. SpudgeriPad 9 LTE SIM Card Reader Replacement

Step 32

– Go ahead and do the same thing for the top-left corner of the LCD. You’ve got this!

Step 33

– Gently wedge the flat end of a spudger under the LCD just enough to lift it out of its spot so you can grab it with your fingers.

– Flip the LCD over like turning a page in a book—lift near the camera and swing it around the home button side of the frame.

– Place the LCD face down on a clean, soft, lint-free surface to get easy access to the display cables.

Tools Used
  1. SpudgeriPad 9 LTE SIM Card Reader Replacement

Step 34

– Grab your trusty Phillips screwdriver and remove that 2.3 mm screw holding the battery connector in place on the logic board. Easy does it, just make sure it’s nice and steady!

Step 35

Step 36

– Gently slide the battery blocker under the logic board’s battery connector at a cool 35-degree angle.

– Once it’s in place, let the blocker chill while you keep working your magic.

Tools Used
  1. Battery BlockeriPad 9 LTE SIM Card Reader Replacement

Step 37

– Grab your trusty Phillips screwdriver and unscrew the three 1.4 mm-long screws holding down the display cable bracket. Nice and easy – you’re almost there!

Step 38

– Take off the display cable bracket and let’s get this party started!

Step 39

– Gently use the flat end of a spudger to lift and unplug the LCD cable press connector.

– When putting press connectors back, line up one side carefully and press down until you hear a click, then do the same on the other side. Avoid pressing the middle to keep those pins happy and intact!

Tools Used
  1. SpudgeriPad 9 LTE SIM Card Reader Replacement

Step 40

– Carefully detach the LCD and place it face down on a clean, soft, lint-free surface. You’re doing great!

Step 41

– Grab a pair of tweezers and gently peel off the tape covering the home button cable ZIF connector. Careful, it’s a delicate step, but you’ve got this!

Tools Used
  1. TweezersiPad 9 LTE SIM Card Reader Replacement

Step 42

– Grab a spudger, an opening tool, or even your trusty fingernail, and gently lift the tiny, hinged locking flap on the home button cable ZIF connector. You’ve got this!

Tools Used
  1. SpudgeriPad 9 LTE SIM Card Reader Replacement

Step 43

– Grab your trusty tweezers and gently pull the home button ribbon cable straight out of the ZIF connector. No sudden moves—smooth and steady wins the race!

Tools Used
  1. TweezersiPad 9 LTE SIM Card Reader Replacement

Step 44

– Gently slide the flat end of your trusty spudger under the two digitizer cable press connectors to lift and unplug them—easy does it!

Tools Used
  1. SpudgeriPad 9 LTE SIM Card Reader Replacement

Step 45

– Grab your trusty spudger and gently slide the flat end under the buffer block at the bottom-right corner of the iPad. Give it a little nudge to lift it up.

– Now that you’ve got a good grip, go ahead and remove that buffer block!

Tools Used
  1. SpudgeriPad 9 LTE SIM Card Reader Replacement

Step 46

– Grab your trusty tweezers and gently lift that home button cable right off the frame. You’ve got this!

Tools Used
  1. TweezersiPad 9 LTE SIM Card Reader Replacement

Step 47

– Start by gently taking off the front panel assembly. You’ve got this!

– If you notice any sneaky ‘ghost’ or ‘phantom’ touches with your new display, don’t worry! Just add a super thin layer of insulating tape, like Kapton (polyimide) tape, to the highlighted spots on the back of the panel. But good news: if you got one of our replacement digitizers, it already comes with the right insulation, so you can skip this step!

– As you put things back together, make sure to clear away any leftover adhesive from the iPad. Then, grab some high concentration isopropyl alcohol (90% or higher) and a lint-free cloth to clean those glued areas. This little prep step is key for making sure the new adhesive sticks like it should!

– Before sealing everything up, give your iPad a quick functionality test. Once you’re happy, use our display adhesive application guide to stick those pre-cut adhesive strips to the back of the display. You’re almost there!

Step 48

– Gently use the tip of a spudger, an opening tool, or even your fingernail to lift up the tiny hinged locking flap on the SIM card reader cable ZIF connector.

Tools Used
  1. SpudgeriPad 9 LTE SIM Card Reader Replacement

Step 49

– Grab your tweezers and gently wiggle the SIM card reader cable straight out of the ZIF connector—easy does it!

Tools Used
  1. TweezersiPad 9 LTE SIM Card Reader Replacement

Step 50

– Grab your heated iOpener and place it on the bottom left corner of the rear case for a solid minute. This will help loosen up the SIM card reader’s adhesive, making it easier to work with.

Tools Used
  1. iOpeneriPad 9 LTE SIM Card Reader Replacement

Step 51

– Gently use an opening tool to lift the bottom edge of the SIM card reader, applying a slow and steady pressure. You’ve got this!

Step 52

– Put your device back together by following these steps in reverse—easy peasy!

– Remember to drop off your e-waste at an R2 or e-Stewards certified recycler to keep things green.

– If things didn’t go quite as planned, try some basic troubleshooting or reach out to our community for tips.

– And if you’re feeling stuck, you can always schedule a repair for expert help.

Success!
Reassembling your device? Just reverse these steps and you’re all set.
Got e-waste? Take it to an R2 or e-Stewards certified recycler to keep things green.
Things didn’t go quite as planned? No worries, try some basic troubleshooting or hop into our iPad 8 Answers community for some help.
Need extra support? If you’re stuck, feel free to schedule a repair with us.

iPad 9 LTE Right Speaker Replacement

Duration: 45 minutes
Steps: 63 Steps

Ready to swap out the right speaker on your iPad 9 LTE? You’re in the right place! Heads up: this guide is just for the LTE model. If you have the Wi-Fi version, check out the link instead. For safety first, make sure your battery is drained below 25% before you start taking things apart—this helps prevent any fire hazards if the battery gets nicked. If your battery looks swollen, handle it with extra care. When it’s time to disconnect the battery, be super gentle—a battery blocker is your friend here, but those contacts are fragile and can get damaged easily. If you decide to skip isolating the battery, try to avoid metal tools unless you’re just dealing with screws, to keep everything safe and avoid short circuits. Some steps here borrow from earlier models, so while there might be tiny differences, the overall process is pretty much the same.

Step 1

– Warm up your iOpener and let it hang out on the left side of your iPad for a cozy two minutes.

Tools Used
  1. iOpeneriPad 9 LTE Right Speaker Replacement

Step 2

– As you give the adhesive some time to loosen up, keep an eye out for these delicate areas that prefer a gentle touch:

– Front camera

– Ambient light sensors

– Antennas

– Display cables

Step 3

– Pull the blue handle back to release the Anti-Clamp’s arms like a pro.

– Set your iPad on something flat so it sits nicely even between the suction cups.

– Place the suction cups close to the center of the left edge—one near the top, the other near the bottom.

– Keep the bottom of the Anti-Clamp steady while pressing down hard on the top cup to get a good seal.

Step 4

– Grab the blue handle and pull it forward to lock those arms in place.

– Give the handle a full 360-degree spin clockwise, or keep turning until you see the suction cups start to stretch.

– Keep an eye on the suction cups to make sure they stay perfectly lined up. If they start to drift, just loosen them a bit and realign the arms.

Step 5

– Take a breather for a minute to let that stubborn adhesive loosen up and create a nice little gap for you.

– If your screen isn’t warming up enough, feel free to grab a hair dryer and gently warm up the left edge of the iPad.

– Once the Anti-Clamp has done its magic and created a decent gap, slip an opening pick under the digitizer.

– You can totally skip the next step!

Step 6

– First things first, let’s get that screen nice and toasty! Once it’s warm to the touch, grab a suction handle and stick it on the left edge of the screen, as close to the edge as you can manage.

– Now, gently lift the screen with the suction handle to create a little gap between the digitizer and the frame. You got this!

– Next up, slide an opening pick into that gap you just created. Easy peasy!

Step 7

– Pop in another opening pick into that little gap you’ve just made.

– Gently slide the pick towards the bottom-left corner of the iPad to break the adhesive seal.

– Keep that pick cozy in the bottom-left corner to stop the adhesive from re-sticking.

Step 8

– If your opening pick is feeling a bit clingy with the adhesive, just give it a gentle roll along the side of the iPad to keep that sticky situation moving along.

Step 9

– Gently slide your first opening pick up towards the top-left corner of the iPad to loosen the adhesive.

– Keep the pick lodged in the top-left corner so the adhesive doesn’t sneak back and reseal itself.

Step 10

– Warm up your iOpener and place it on the top edge of the iPad for a cozy two minutes.

Tools Used
  1. iOpeneriPad 9 LTE Right Speaker Replacement

Step 11

– Gently twist the pick around the top-left corner of the iPad to loosen that stubborn adhesive.

Step 12

– Gently glide the opening pick along the top edge of your iPad, making sure to stop just shy of the front camera. You’ve got this!

Step 13

– Gently pull the pick out until just the tip is snugly nestled between the digitizer and the frame.

– Slide the pick right above the front camera to break the adhesive’s grip.

– Keep that pick close to the right side of the front camera as you move forward.

Step 14

– Pop that pick back in and slide it over to the top-right corner of your iPad to fully break free from the adhesive’s grip.

– Keep that pick in place at the top-right corner to stop the adhesive from getting all cozy again.

Step 15

– Warm up that iOpener and give it a cozy hug to the right edge of your iPad for a solid two minutes. You’ve got this!

Tools Used
  1. iOpeneriPad 9 LTE Right Speaker Replacement

Step 16

– Give the pick a little spin around the top-right corner of your iPad, and let it work its magic to loosen the adhesive. You’ve got this!

Step 17

– Grab a fresh opening pick and slide it right into the heart of the iPad’s right edge. You’ve got this!

Step 18

– Grab your trusty iOpener and heat it up. Once it’s nice and warm, place it on the bottom edge of your iPad and let it sit there for a solid two minutes.

Tools Used
  1. iOpeneriPad 9 LTE Right Speaker Replacement

Step 19

– Gently slide the bottom-left pick into the corner to loosen up that adhesive. A little wiggle goes a long way!

– Once you’ve got the pick in the corner, leave it there for now. No need to rush – there’s more to come!

Step 20

– Pop a fresh opening pick into that little gap you made at the bottom edge of your iPad.

– Gently glide the pick over the antenna, but stop just shy of the home button.

– Keep the pick off to the left of the home button before you carry on.

Step 21

– Take your opening pick and gently slide it into the gap you’ve just created. Easy does it!

– Now, carefully slide the pick under the home button, angling it towards the bottom-right corner. Just let the tip sneak between the digitizer and the frame. No rush, just a steady hand!

Step 22

– Grab your pick and gently slide it toward the home button to fully detach the bottom adhesive.

– Now, leave the pick resting just to the right of the home button before moving forward.

Step 23

– Warm up your iOpener and give it a cozy two-minute hug on the right edge of the iPad.

Tools Used
  1. iOpeneriPad 9 LTE Right Speaker Replacement

Step 24

– Gently twist the two opening picks into the left corners of your iPad. This will lift the digitizer just enough to separate the last bit of adhesive. Take your time here—patience is key!

Step 25

– Gently lift the left side of the digitizer to give the adhesive on the right edge a little more space to separate. Take it slow, no rush!

Step 26

– Hold the digitizer steady while gently sliding an opening pick between the two display cables to carefully peel apart the last bit of adhesive. You’ve got this!

Step 27

– After you’ve successfully separated all that sticky adhesive, gently open the digitizer like it’s a book and lay it flat next to the iPad.

– As you put everything back together, don’t forget to tidy up! Use some isopropyl alcohol to wipe away any leftover adhesive from the frame—and if you’re reusing the digitizer, give it a little clean too. Make sure to use our adhesive strips or those handy pre-cut adhesive cards to seal the deal.

– Keep an eye on those delicate display cables when you’re reassembling your iPad. Fold them neatly under the LCD screen to ensure they stay safe and sound. You’re doing great!

Step 28

– Grab your tweezers or just use your fingers to peel away any tape hiding those LCD screws. Easy does it!

Tools Used
  1. TweezersiPad 9 LTE Right Speaker Replacement

Step 29

– Grab your trusty Phillips #00 screwdriver and carefully remove the four 4.2 mm screws holding the LCD screen in place.

Step 30

– Slide a spudger in between the frame and the upper right corner of the LCD.

– Gently pry with the spudger to break the adhesive seal.

Tools Used
  1. SpudgeriPad 9 LTE Right Speaker Replacement

Step 31

– Go ahead and do the same thing you just did, but now for the top-left corner of the LCD. You’ve got this!

Step 32

– Gently use the flat end of a spudger to pop the LCD out of its spot just enough so you can grab it with your fingers.

– Flip the LCD over like turning a page in a book, lifting near the camera and folding it back over the home button side of the frame.

– Place the LCD face down on a clean, soft, lint-free surface so you can easily get to the display cables.

Tools Used
  1. SpudgeriPad 9 LTE Right Speaker Replacement

Step 33

– Grab your Phillips screwdriver and carefully unscrew the tiny 2.3 mm screw holding the battery connector to the logic board. Steady hands win here!

Step 34

Step 35

– Gently slide the battery blocker under the logic board’s battery connector at a cool 35-degree angle – it’s like giving it a little hug!

– Keep that battery blocker snug in place while you tackle the rest of your repair. You’ve got this!

Tools Used
  1. Battery BlockeriPad 9 LTE Right Speaker Replacement

Step 36

– Grab a Phillips screwdriver and carefully take out the three 1.4 mm screws holding down the display cable bracket.

Step 37

– Take off that display cable bracket like a pro! You’ve got this!

Step 38

– Grab your trusty spudger and use the flat end to gently pry up and disconnect the LCD cable press connector. Take it slow, no rush here!

– When you’re ready to re-attach the press connector, just line it up carefully. Press down on one side until you hear that satisfying ‘click,’ then do the same on the other side. Avoid pressing the middle—this helps keep those delicate pins from bending. Misalignment can cause lasting damage, so take your time!

Tools Used
  1. SpudgeriPad 9 LTE Right Speaker Replacement

Step 39

– Carefully lift the LCD off and place it face down on a clean, soft, lint-free spot to keep it safe and sound.

Step 40

– Grab a trusty pair of tweezers and gently peel away the tape that’s keeping the home button cable ZIF connector under wraps.

Tools Used
  1. TweezersiPad 9 LTE Right Speaker Replacement

Step 41

– Grab a spudger, an opening tool, or even your fingernail, and gently flip up the tiny hinged locking flap on the home button cable’s ZIF connector. Easy does it!

Tools Used
  1. SpudgeriPad 9 LTE Right Speaker Replacement

Step 42

– Grab your tweezers and gently wiggle the home button ribbon cable straight out of the ZIF connector like a pro.

Tools Used
  1. TweezersiPad 9 LTE Right Speaker Replacement

Step 43

– Gently slide the flat end of your spudger under those two digitizer cable connectors and pop them free. It’s a smooth move – just a little prying and you’re good to go!

Tools Used
  1. SpudgeriPad 9 LTE Right Speaker Replacement

Step 44

– Grab your trusty spudger and gently slide the flat end under the buffer block in the bottom-right corner of the iPad. Give it a little pry, and don’t be shy!

– Once you’ve loosened it up, go ahead and lift that buffer block out with ease. You’re on a roll!

Tools Used
  1. SpudgeriPad 9 LTE Right Speaker Replacement

Step 45

– Grab a pair of tweezers and gently peel the home button cable away from the frame. Take it slow and steady—you’ve got this!

Tools Used
  1. TweezersiPad 9 LTE Right Speaker Replacement

Step 46

– First up, let’s get that front panel assembly off. It’s time to say goodbye to the old screen!

– If your new display starts acting a bit quirky with those pesky ‘ghost’ or ‘phantom’ touches, don’t sweat it! A quick fix is to add a super thin layer of insulating tape, like Kapton tape, on the highlighted areas at the back of the panel. Just a heads up, the replacement digitizers usually come with the right insulation, so you might not need any extra tape.

– As you gear up for reassembly, give your iPad some love by removing any leftover adhesive and cleaning the glued spots with some high-concentration isopropyl alcohol (90% or greater) and a lint-free cloth. This will make sure your fresh adhesive bonds like a champ.

– Before you seal everything up, make sure to test your iPad’s functions and stick on those pre-cut adhesive strips to the back of the display using our handy display adhesive application guide. You’re almost there!

Step 47

– Gently use the tip of a spudger, an opening tool, or even your fingernail to lift the tiny hinged locking flap on the SIM card reader cable’s ZIF connector.

Tools Used
  1. SpudgeriPad 9 LTE Right Speaker Replacement

Step 48

– Grab your tweezers and gently pull the SIM card reader cable straight out of the ZIF connector—steady hands win the day!

Tools Used
  1. TweezersiPad 9 LTE Right Speaker Replacement

Step 49

– Slide the pointed tip of a spudger under the right antenna cable and gently lift straight up to unplug it.

Tools Used
  1. SpudgeriPad 9 LTE Right Speaker Replacement

Step 50

– Gently lift the right antenna cable up and out of the way.

Step 51

– Keep on gently peeling the right antenna cable away from the back case. You’re doing great!

Step 52

– Grab your trusty Phillips screwdriver and let’s get those three screws holding down the right antenna out of there! You’ve got this!

– First up, we have one 2.3 mm-long screw, just waiting to be released.

– And don’t forget about the two 1.4 mm-long screws that are just as eager to join the party!

Step 53

– Gently slide an opening pick between the speaker enclosure and the bracket.

– Move the pick toward the charging port to carefully slice through the adhesive.

– Nudge the bracket away from the speaker until it lifts clear of the tape underneath.

Step 54

– Wedge an opening pick in between the antenna and speaker assembly.

– Gently slide the pick underneath the antenna to sever that foam adhesive.

– Carefully take out the right antenna.

Step 55

– Gently slide the pointed tip of your spudger under the left antenna cable and give it a little lift straight up to disconnect it. You’ve got this!

Tools Used
  1. SpudgeriPad 9 LTE Right Speaker Replacement

Step 56

– Gently peel the left antenna cable away from the rear case, along the bottom edge of the iPad. It’s like giving your device a little hug!

– Now, just fold that left antenna cable out of the way. Easy peasy!

Step 57

– Gently lift the tape covering the speaker connectors using tweezers or your fingernail—think of it as peeling back a secret flap!

Tools Used
  1. TweezersiPad 9 LTE Right Speaker Replacement

Step 58

– Gently use the tip of a spudger, an opening tool, or even your fingernail to lift up the tiny hinged locking flap on the right speaker cable’s ZIF connector.

Tools Used
  1. SpudgeriPad 9 LTE Right Speaker Replacement

Step 59

– Grab your tweezers and gently wiggle the right speaker cable straight out of the ZIF connector—nice and easy, no sudden moves!

Tools Used
  1. TweezersiPad 9 LTE Right Speaker Replacement

Step 60

– Grab your trusty Phillips screwdriver and twist out the 2.3 mm screw holding the right speaker in place.

Step 61

– Gently lift and peel the LCD buffer tape off the back case—take your time and keep it smooth!

Step 62

– Gently slide the flat edge of your spudger into the little groove in the speaker housing, right by the corner of the rear case.

– Give a gentle nudge to the speaker, pushing it away from the back case.

– Now, carefully work the speaker out from beneath the shelf on the rear case.

Tools Used
  1. SpudgeriPad 9 LTE Right Speaker Replacement

Step 63

– Put your device back together by following these steps in reverse.

– When disposing of e-waste, make sure to take it to an R2 or e-Stewards certified recycler.

– If things didn’t quite work out, try some basic troubleshooting or tap into our iPad 8 Answers community for a hand.

Success!
Now it’s time to put everything back together—just retrace your steps like a detective on a case!
When you’re done, don’t forget to recycle any e-waste responsibly. Check out your local R2 or e-Stewards certified recycler!
If things didn’t go quite as planned, no worries! Give some basic troubleshooting a shot, or reach out to our iPad 8 Answers community for a hand.

iPad 9 LTE Right Bluetooth and Wi-Fi Antenna Replacement

Duration: 45 minutes
Steps: 54 Steps

Ready to replace the Bluetooth and Wi-Fi antenna in your iPad 9 LTE? This guide is specifically for the LTE model. If you’re working on the Wi-Fi version, check out the Wi-Fi version guide here. Before you start, make sure your battery is under 25% to reduce the risk of fire in case of accidental damage. And if your battery is swollen, take extra care! When isolating the battery, be cautious with the battery blocker – the contacts can be fragile and prone to damage. If you skip the battery isolation step, avoid using metal tools unless absolutely necessary (like for screws) to prevent shorting the battery or damaging sensitive parts. A few steps in this guide are based on a previous model, but the process is quite similar, so don’t stress! If you hit any snags along the way, feel free to schedule a repair and we’ll help you out.

Step 1

– Grab your iOpener and give it a little heat-up session. Once it’s nice and warm, press it gently on the left edge of your iPad for about two minutes. Let the warmth work its magic!

Tools Used
  1. iOpeneriPad 9 LTE Right Bluetooth and Wi-Fi Antenna Replacement

Step 2

– As the adhesive starts to soften, keep an eye out for these delicate spots that don’t like being pried:

– Front camera

– Ambient light sensors

– Antennas

– Display cables

Step 3

– Give the blue handle a little pull to release the Anti-Clamp’s arms—easy does it!

– Place something soft under your iPad to keep it nice and level between the suction cups.

– Position the suction cups on the left edge—one near the top and one near the bottom, just like a pro.

– Now, hold the Anti-Clamp steady with one hand and press down firmly on the top suction cup to create a strong grip.

Step 4

– Gently pull the blue handle forward to lock those arms in place.

– Twist the handle 360 degrees to the right, or keep going until the suction cups start stretching. You’ve got this!

– Double-check that the suction cups are lined up just right. If they’re slipping a bit, no worries – loosen them up a tad and get those arms back in perfect alignment.

Step 5

– Hold tight for a minute to let the adhesive loosen up and create a little gap to work with.

– If the screen isn’t warming up enough, try using a hair dryer along the left edge of the iPad to give it a gentle heat boost.

– Once the Anti-Clamp has made a big enough gap, slide an opening pick under the digitizer to start the separation.

– Go ahead and skip the next step.

Step 6

– First, let’s warm things up a bit! Once the screen is comfortably warm to the touch, grab a suction handle and stick it on the left edge of the screen, as close to the edge as you can get.

– Now, give that screen a little lift with the suction handle to create a tiny gap between the digitizer and the frame.

– It’s time to get your opening pick in there! Slide it into the gap between the digitizer and the frame, and you’re on your way!

Step 7

– Pop in a second opening pick where you’ve made some room.

– Gently glide that pick towards the bottom-left corner of the iPad to break free the adhesive.

– Keep that pick snug in the bottom-left corner to stop the adhesive from getting all clingy again.

Step 8

– If the opening pick finds itself stuck in the adhesive, give it a little ‘roll’ along the side of the iPad to keep that adhesive separation going strong!

Step 9

– Gently slide that first opening pick up towards the top-left corner of the iPad to break free the adhesive that’s been holding it tight.

– Keep the pick snugly in that top-left corner to make sure the adhesive doesn’t decide to seal itself back up!

Step 10

– Warm up an iOpener and place it on the top edge of the iPad, letting it sit there for two minutes to loosen things up.

Tools Used
  1. iOpeneriPad 9 LTE Right Bluetooth and Wi-Fi Antenna Replacement

Step 11

– Gently wiggle the pick around the top-left corner of the iPad to break free that sticky adhesive. You’ve got this!

Step 12

– Gently glide the opening pick along the top edge of your iPad, but make sure to stop right before you bump into the front camera!

Step 13

– Gently pull the pick out until just the tip is cozy between the digitizer and the frame.

– Slide that pick right above the front camera to break free the adhesive.

– Keep the pick close to the right side of the front camera before moving on to the next step.

Step 14

– Pop that pick back in and give it a little slide toward the top-right corner of your iPad to fully break that top adhesive free. You’re almost there!

– Keep the pick snug in the top-right corner to stop that pesky adhesive from sealing itself back up again. You got this!

Step 15

– Warm up an iOpener and stick it to the right edge of the iPad for a solid two minutes to loosen things up.

Tools Used
  1. iOpeneriPad 9 LTE Right Bluetooth and Wi-Fi Antenna Replacement

Step 16

– Gently twist the pick around the top-right corner of the iPad to loosen the adhesive and get things moving.

Step 17

– Pop in a fresh opening pick and slide it smoothly to the center of the iPad’s right edge.

Step 18

– Warm up an iOpener and stick it to the bottom edge of the iPad, letting the heat work its magic for two minutes.

Tools Used
  1. iOpeneriPad 9 LTE Right Bluetooth and Wi-Fi Antenna Replacement

Step 19

– Gently slide the bottom-left pick into the corner to break that adhesive seal like a boss.

– Keep the pick snugly in the corner before you move on to the next step.

Step 20

– Pop a fresh opening pick into that little gap you just made at the bottom of the iPad.

– Gently slide the pick over the antenna, but stop just before you reach the home button.

– Make sure to leave the pick to the left of the home button before you move on. You’ve got this!

Step 21

– Pop an opening pick into that little gap you just made.

– Gently slide the pick under the home button and glide it toward the bottom-right corner, making sure that only the tip is nestled between the digitizer and the frame.

Step 22

– Pop that pick back in and slide it over toward the home button to fully break through the bottom adhesive.

– Then, just leave the pick chillin’ to the right of the home button before moving on.

Step 23

– Warm up your iOpener and then press it against the right edge of the iPad for a solid two minutes. Let’s get that adhesive nice and toasty!

Tools Used
  1. iOpeneriPad 9 LTE Right Bluetooth and Wi-Fi Antenna Replacement

Step 24

– Gently twist the two opening picks at the left corners of the iPad to carefully lift the digitizer just a bit, loosening the last stubborn spots of adhesive along the way.

Step 25

– Gently lift the left side of the digitizer upward to loosen the adhesive along the right edge of your iPad a bit more.

Step 26

– Keep the digitizer steady while you carefully slide an opening pick between the two display cables to gently separate the last bits of adhesive.

Step 27

– After you’ve carefully separated all the adhesive, open the digitizer like a book and lay it flat next to the iPad.

– When putting everything back together, clean off any leftover adhesive on the frame—and on the digitizer if you plan to reuse it—using some isopropyl alcohol. Then, swap in fresh adhesive strips or pre-cut adhesive cards to keep things nice and secure.

– Keep an eye on those display cables while reassembling. Make sure they’re neatly folded under the LCD screen so nothing gets squished or damaged.

Step 28

– Grab those tweezers or just use your fingers to peel away any tape that’s hiding the LCD screws. Let’s get to the good stuff!

Tools Used
  1. TweezersiPad 9 LTE Right Bluetooth and Wi-Fi Antenna Replacement

Step 29

– Grab your trusty Phillips #00 screwdriver and carefully unscrew the four 4.2 mm screws holding the LCD screen in place.

Step 30

– Slide a spudger gently between the frame and the top-right corner of the LCD.

– Carefully wiggle the spudger to loosen the adhesive without rushing.

Tools Used
  1. SpudgeriPad 9 LTE Right Bluetooth and Wi-Fi Antenna Replacement

Step 31

– Now, give that same treatment to the top-left corner of the LCD — you got this!

Step 32

– Gently wiggle the flat end of a spudger under the LCD just enough to loosen it so you can grab it with your fingers.

– Flip the LCD over like turning a page in a book—lift it near the camera and fold it over toward the home button side of the frame.

– Place the LCD on a clean, soft, lint-free surface to get clear access to the display cables without any risk of scratches.

Tools Used
  1. SpudgeriPad 9 LTE Right Bluetooth and Wi-Fi Antenna Replacement

Step 33

– Grab a Phillips screwdriver and carefully take out the 2.3 mm screw holding the battery connector to the logic board.

Step 34

Step 35

– Carefully slide the battery blocker under the logic board’s battery connector at about a 35-degree angle.

– Keep the battery blocker in place while you continue working to stay safe and sound.

Tools Used
  1. Battery BlockeriPad 9 LTE Right Bluetooth and Wi-Fi Antenna Replacement

Step 36

– Grab a Phillips screwdriver and carefully take out the three tiny 1.4 mm screws holding down the display cable bracket. Keep them safe!

Step 37

– Take off the display cable bracket like a pro! It’s time to get that gadget opened up and ready for action.

Step 38

– Grab your trusty spudger and gently pry up the LCD cable press connector—think of it as giving your device a little lift!

– When it’s time to reconnect those press connectors, take it slow and steady. Start by lining up one side and press down until you hear that satisfying click, then do the same on the other side. Remember, no need to press down in the center! If things aren’t lined up just right, you could bend those tiny pins and we definitely don’t want that. Keep it smooth and easy!

Tools Used
  1. SpudgeriPad 9 LTE Right Bluetooth and Wi-Fi Antenna Replacement

Step 39

– Carefully lift the LCD off and place it face down on a clean, soft surface that won’t leave any lint behind.

Step 40

– Grab your trusty tweezers and carefully lift the tape covering the home button cable’s ZIF connector. Easy does it!

Tools Used
  1. TweezersiPad 9 LTE Right Bluetooth and Wi-Fi Antenna Replacement

Step 41

– Grab a spudger, an opening tool, or just your trusty fingernail to gently flip up the tiny, hinged locking flap on the home button cable ZIF connector. You’ve got this!

Tools Used
  1. SpudgeriPad 9 LTE Right Bluetooth and Wi-Fi Antenna Replacement

Step 42

– Grab your tweezers and gently pull the home button ribbon cable straight out of the ZIF connector—nice and steady wins the game!

Tools Used
  1. TweezersiPad 9 LTE Right Bluetooth and Wi-Fi Antenna Replacement

Step 43

– Gently slide the flat end of a spudger underneath the connectors and give them a little nudge to disconnect those two digitizer cable press connectors. You’ve got this!

Tools Used
  1. SpudgeriPad 9 LTE Right Bluetooth and Wi-Fi Antenna Replacement

Step 44

– Gently slide the flat end of your trusty spudger under the buffer block located near the bottom-right corner of the iPad to lift it up.

– Carefully take out the buffer block and set it aside.

Tools Used
  1. SpudgeriPad 9 LTE Right Bluetooth and Wi-Fi Antenna Replacement

Step 45

– Grab those tweezers and gently coax the home button cable away from the frame. You’ve got this!

Tools Used
  1. TweezersiPad 9 LTE Right Bluetooth and Wi-Fi Antenna Replacement

Step 46

– Start by carefully taking off that front panel assembly. You’ve got this!

– If your new display is playing tricks on you with ‘ghost’ or ‘phantom’ touches, no worries! Just slap on a super thin layer of insulating tape, like Kapton (polyimide) tape, in those highlighted spots on the back of the panel. And if you’re using our replacement digitizers, you’re in luck—they come with the right insulation, so no extra tape is needed!

– As you put things back together, make sure to remove any leftover adhesive from the iPad first. Give those glued areas a good clean with high concentration isopropyl alcohol (90% or greater) and a lint-free cloth. This little prep work will help the fresh adhesive stick like a charm!

– Finally, don’t forget to test out your iPad’s functions and apply the pre-cut adhesive strips to the back of the display, following our handy display adhesive application guide, before sealing everything up tight.

Step 47

– Gently use the tip of a spudger, an opening tool, or even your trusty fingernail to lift up the little hinged locking flap on the SIM card reader cable ZIF connector.

Tools Used
  1. SpudgeriPad 9 LTE Right Bluetooth and Wi-Fi Antenna Replacement

Step 48

– Grab some tweezers and gently wiggle the SIM card reader cable straight out of the ZIF connector—take it slow and steady!

Tools Used
  1. TweezersiPad 9 LTE Right Bluetooth and Wi-Fi Antenna Replacement

Step 49

– Gently slide the sharp end of your spudger beneath the right antenna cable and give it a little lift to disconnect it. Easy peasy!

Tools Used
  1. SpudgeriPad 9 LTE Right Bluetooth and Wi-Fi Antenna Replacement

Step 50

– Gently lift up the right antenna cable.

Step 51

– Keep on gently peeling the right antenna cable away from the back case. You’ve got this!

Step 52

– Grab your trusty Phillips screwdriver and unscrew the three screws holding the right antenna in place. You’ll be all set in no time!

– One 2.3 mm screw – it’s small, but mighty!

– Two 1.4 mm screws – these little guys are essential to keeping things together.

Step 53

– Gently slide an opening pick in between the speaker enclosure and the bracket.

– Move that pick down towards the charging port to break through the sticky stuff holding it all together.

– Now, give that bracket a little nudge away from the speaker until it pops free from the tape below.

Step 54

– Now it’s time to put everything back together—just follow the steps in reverse order!

– Got some old gadgets that need recycling? Make sure to drop them off at an R2 or e-Stewards certified recycler.

– Things didn’t go quite as planned? No worries! You can try some basic troubleshooting, or feel free to ask the iPad 8 community for some tips and tricks.

Success!
Put your device back together by following these steps in reverse—easy peasy!
Got some old tech? Recycle it responsibly at an R2 or e-Stewards certified facility.
If things didn’t go perfectly, give some basic troubleshooting a shot or swing by our iPad 8 Answers community for tips.

iPad 9 LTE Rear Camera Replacement

Duration: 45 minutes
Steps: 53 Steps

Ready to swap out the rear camera on your iPad 9 LTE? Awesome! Just a quick heads up – this guide is for the LTE version only. If you have the Wi-Fi model, check out the other guide. Before you dive in, make sure the battery is below 25%. This simple step keeps things safe in case the battery gets a little too adventurous during the repair. If the battery looks swollen, take extra care and follow safety precautions. When isolating the battery, handle it gently – the contacts are super delicate, and we don’t want any accidental damage. If you’re skipping the battery isolation step (no judgment here), just remember to avoid using metal tools unless absolutely necessary – this helps keep the battery and circuit components safe from any potential harm. A quick note – some images in this guide might be from a different model, so don’t sweat the small visual differences – the steps are still spot on. Good luck, and if you hit a roadblock, you can always schedule a repair!

Step 1

– Warm up your iOpener and gently press it against the left edge of the iPad for two minutes. Give it a little time to work its magic!

Tools Used
  1. iOpeneriPad 9 LTE Rear Camera Replacement

Step 2

– As you bide your time for the adhesive to take a breather, keep an eye out for these delicate spots that prefer a gentle touch:

– Front camera

– Ambient light sensors

– Antennas

– Display cables

Step 3

– Pull the blue handle back to loosen the Anti-Clamp’s arms—think of it like opening a tiny robot hug.

– Slide something under your iPad so it sits nice and level between the suction cups, keeping it comfy.

– Set the suction cups near the center of the left edge—one chilling at the top, one hanging out at the bottom.

– Hold the bottom of the Anti-Clamp steady and press down on the top cup to get a good, solid grip.

Step 4

– Slide the blue handle forward to lock those arms in place.

– Give the handle a full 360-degree twist clockwise, or keep turning until you see the suction cups start to stretch out.

– Keep an eye on the suction cups — they should stay perfectly aligned. If they start to drift apart, just loosen them a bit and line the arms back up.

Step 5

– Take a breather for about a minute to let the adhesive loosen up and create a tiny opening for you.

– If your screen is feeling a bit chilly, grab a hair dryer and warm up the left edge of the iPad.

– Once the Anti-Clamp has opened up enough, slide an opening pick beneath the digitizer.

– Go ahead and skip the next step!

Step 6

– When the screen feels warm to the touch, stick a suction handle onto the left edge of the screen, as close to the edge as you can get.

– Gently lift the screen using the suction handle to form a tiny gap between the digitizer and the frame.

– Slide an opening pick into the gap between the digitizer and the frame to start separating them.

Step 7

– Slide your second opening pick into the gap you’ve just made.

– Gently guide the pick toward the bottom-left corner of the iPad to loosen the adhesive.

– Keep that pick in the corner to keep the adhesive from sticking back together.

Step 8

– If the opening pick decides to play hide and seek in the adhesive, just give it a little roll along the side of the iPad to keep the separation going. You’ve got this!

Step 9

– Gently slide your first opening pick up towards the top-left corner of the iPad to break the adhesive seal.

– Keep the pick nestled in the top-left corner so the adhesive doesn’t sneak back together.

Step 10

– Warm up an iOpener and place it on the top edge of the iPad for two minutes to get things nice and toasty.

Tools Used
  1. iOpeneriPad 9 LTE Rear Camera Replacement

Step 11

– Gently twist the pick around the top-left corner of the iPad to loosen the adhesive and get things moving.

Step 12

– Gently slide your opening pick along the top edge of the iPad, but pause just before you hit the front camera—let’s keep that safe!

Step 13

– Gently pull the pick out so that just the tip stays tucked between the digitizer and the frame.

– Slide the pick carefully over the front camera to loosen the adhesive holding it in place.

– Keep the pick resting near the right side of the front camera before moving on to the next step.

Step 14

– Grab your pick again and gently slide it up towards the top-right corner of your iPad, making sure the top adhesive is completely separated.

– Leave the pick right where it is in the top-right corner to stop that adhesive from sealing back up. You got this!

Step 15

– Grab your iOpener, heat it up, and give the right edge of your iPad a nice warm hug for about two minutes.

Tools Used
  1. iOpeneriPad 9 LTE Rear Camera Replacement

Step 16

– Gently maneuver the pick around the top-right corner of the iPad to break free the adhesive.

Step 17

– Grab a fresh opening pick and gently slide it to the center of the iPad’s right edge. You’re doing great!

Step 18

– Heat up an iOpener and gently press it to the bottom edge of your iPad for about two minutes. Give it some time to warm up that area, and it’ll make things a lot easier when you get to the next step!

Tools Used
  1. iOpeneriPad 9 LTE Rear Camera Replacement

Step 19

– Gently slide the pick down to the bottom-left corner to loosen the adhesive like a pro.

– Keep that pick right there in the corner before you move on to the next step.

Step 20

– Slide a fresh opening pick into the little gap you just made at the bottom edge of your iPad.

– Gently glide the pick over the antenna, stopping just shy of the home button.

– Keep that pick to the left of the home button before you move on.

Step 21

– Slide an opening pick into the little gap you’ve just made—nice work!

– Now, gently glide the pick under the home button and towards the bottom-right corner. Just let the tip sneak in between the digitizer and the frame for a smooth operation.

Step 22

– Pop that pick back in and give it a little nudge towards the home button to fully break free the bottom adhesive. You’re almost there!

– Now, just let that pick chill to the right of the home button while you gear up for the next step.

Step 23

– Warm up an iOpener and stick it to the right side of your iPad for two minutes. Give it a little time to work its magic, so the adhesive gets nice and soft.

Tools Used
  1. iOpeneriPad 9 LTE Rear Camera Replacement

Step 24

– Give those two opening picks on the left corners of the iPad a little twisty action to gently lift the digitizer. This will help you separate the last bits of adhesive like a pro!

Step 25

– Gently lift the left edge of the digitizer upward to help loosen the adhesive along the right side of the iPad.

Step 26

– While gently holding the digitizer in place, use an opening pick to carefully slide between the two display cables and break free the last bit of adhesive holding them together.

Step 27

– After carefully loosening all the adhesive, gently open the digitizer like a book and set it down parallel to the iPad.

– When putting things back together, give the frame—and the digitizer if you plan to reuse it—a good wipe with isopropyl alcohol to clear off any leftover adhesive. Then, swap in fresh adhesive strips or pre-cut adhesive cards to keep everything snug.

– Keep an eye on those display cables during reassembly! Make sure they’re neatly folded under the LCD screen so nothing gets squished or damaged.

Step 28

– Grab your tweezers or just use your fingers to carefully peel away any tape hiding those LCD screws.

Tools Used
  1. TweezersiPad 9 LTE Rear Camera Replacement

Step 29

– Grab your trusty Phillips #00 screwdriver and let’s get to work! Carefully remove the four 4.2 mm screws holding the LCD screen in place. You’ve got this!

Step 30

– Slide a spudger between the frame and the top-right corner of the LCD.

– Gently pry with the spudger to loosen up that adhesive. Take it slow!

Tools Used
  1. SpudgeriPad 9 LTE Rear Camera Replacement

Step 31

– Now, go ahead and repeat the same process for the top-left corner of the LCD. It’s a small step, but it gets you one step closer to a fully repaired screen!

Step 32

– Gently slide the flat end of your spudger under the LCD to pop it out of its snug little home—just enough so you can grab it with your fingers.

– Now, flip the LCD like you’re turning a page in a book, starting near the camera and gently bringing it over to the home button side of the frame.

– Carefully set the LCD down on a soft, clean, lint-free surface so you have easy access to the display cables without causing any chaos.

Tools Used
  1. SpudgeriPad 9 LTE Rear Camera Replacement

Step 33

– Grab your trusty Phillips screwdriver and get ready to tackle this! Unscrew the little 2.3 mm-long screw that’s holding the battery connector snugly against the logic board. You’ve got this!

Step 34

Step 35

– Gently slide the battery blocker under the logic board’s battery connector, angling it at about 35 degrees. You’ve got this!

– Keep that battery blocker right where it is while you work your magic!

Tools Used
  1. Battery BlockeriPad 9 LTE Rear Camera Replacement

Step 36

– Grab a Phillips screwdriver and carefully unscrew the three tiny 1.4 mm screws holding down that display cable bracket. Keep them safe!

Step 37

– Take off the display cable bracket. It’s just a simple step, but necessary to get to the heart of the matter. Once that’s done, you’re one step closer to fixing your device!

Step 38

– Grab your trusty spudger and gently slip the flat end underneath the LCD cable press connector to detach it. Easy peasy!

– When you’re ready to reconnect those press connectors, take your time! Line up one side and give it a gentle press until you hear that satisfying click. Then do the same for the other side. Just a friendly reminder—avoid pressing down on the middle! If things get wonky and the connector is out of alignment, you might bend the pins, and that’s a no-go. Keep it cool and steady!

Tools Used
  1. SpudgeriPad 9 LTE Rear Camera Replacement

Step 39

– Carefully lift the LCD off and lay it face down on a clean, soft, lint-free spot to keep it happy and safe.

Step 40

– Grab your trusty tweezers and carefully peel away the tape that’s keeping the home button cable ZIF connector snug and secure.

Tools Used
  1. TweezersiPad 9 LTE Rear Camera Replacement

Step 41

– Grab a spudger, an opening tool, or even your trusty fingernail to gently lift up that small, hinged locking flap on the home button cable ZIF connector. It’s a simple move, so take your time and get it just right!

Tools Used
  1. SpudgeriPad 9 LTE Rear Camera Replacement

Step 42

– Grab your tweezers and gently pull the home button ribbon cable straight out of the ZIF connector. A steady hand will make this easy—just make sure it’s a smooth and controlled move!

Tools Used
  1. TweezersiPad 9 LTE Rear Camera Replacement

Step 43

– Gently slide the flat end of your spudger under the two digitizer cable press connectors to pry them up and disconnect them.

Tools Used
  1. SpudgeriPad 9 LTE Rear Camera Replacement

Step 44

– Grab your trusty spudger and gently slide the flat end under the buffer block in the bottom-right corner of the iPad. Give it a little nudge to pop it up!

– Once it’s loose, simply lift that buffer block out and set it aside. You’re making great progress!

Tools Used
  1. SpudgeriPad 9 LTE Rear Camera Replacement

Step 45

– Grab your trusty tweezers and gently coax the home button cable away from the frame. You’ve got this!

Tools Used
  1. TweezersiPad 9 LTE Rear Camera Replacement

Step 46

– Take off the front panel assembly carefully.

– If your new display starts acting up with random or phantom touches, don’t panic! You can fix this by placing a super thin layer of insulating tape, like Kapton (polyimide) tape, on the marked spots on the back of the panel. Replacement digitizers already come with this insulation, so usually no extra tape is needed.

– When putting everything back together, make sure to scrape off any leftover adhesive from the iPad. Then, clean those glue spots with high-concentration isopropyl alcohol (90% or higher) using a lint-free cloth. This preps your iPad for fresh adhesive and helps everything stick like it should.

– Give your iPad a test run to check all functions. Next, apply pre-cut adhesive strips to the back of the display by following our display adhesive application guide, then seal it up tight.

Step 47

– Gently lift the LCD buffer tape away from the upper component bracket, taking care not to rush it.

Step 48

– Grab your Phillips #00 screwdriver and carefully take out the five screws holding down the upper component bracket:

– Three screws measuring 1.4 mm in length

– Two screws measuring 1.9 mm in length

Step 49

– Grab the spudger’s pointy end and gently pry up the upper component bracket until you can snag it with your fingers.

Tools Used
  1. SpudgeriPad 9 LTE Rear Camera Replacement

Step 50

– Gently lift the upper component bracket away from the tape using your fingers.

– Take out the upper component bracket.

Step 51

– Grab the flat end of your trusty spudger and gently wiggle it to lift up and disconnect that rear camera press connector. You’re doing great!

Tools Used
  1. SpudgeriPad 9 LTE Rear Camera Replacement

Step 52

– Warm up your iOpener and give that rear camera a cozy thirty-second hug.

Tools Used
  1. iOpeneriPad 9 LTE Rear Camera Replacement

Step 53

– Time to put your device back together! Just reverse those steps like a pro.

– Got some e-waste? Make sure to drop it off at an R2 or e-Stewards certified recycler.

– If things didn’t go as smoothly as you hoped, don’t sweat it! A little basic troubleshooting might do the trick, or feel free to reach out to our iPad 9 Answers community for some friendly advice.

Tools Used
  1. TweezersiPad 9 LTE Rear Camera Replacement
  2. SpudgeriPad 9 LTE Rear Camera Replacement

Success!
Put your device back together by following these steps in reverse.
Remember to recycle your e-waste responsibly at an R2 or e-Stewards certified facility.
If things didn’t go quite as expected, try some basic troubleshooting or reach out to our iPad 9 Answers community for advice.
And if you hit a wall, don’t hesitate to schedule a repair with us!

🍪
Have a cookie! This site uses cookies to enhance your experience. Opt-Out Options.