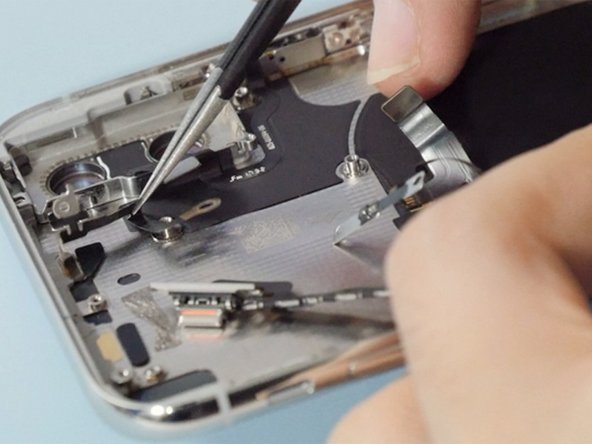
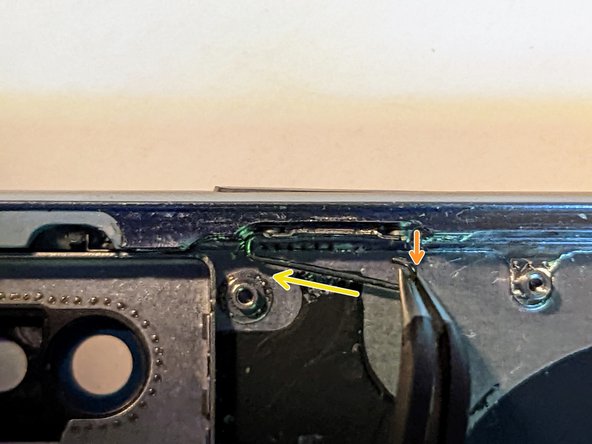
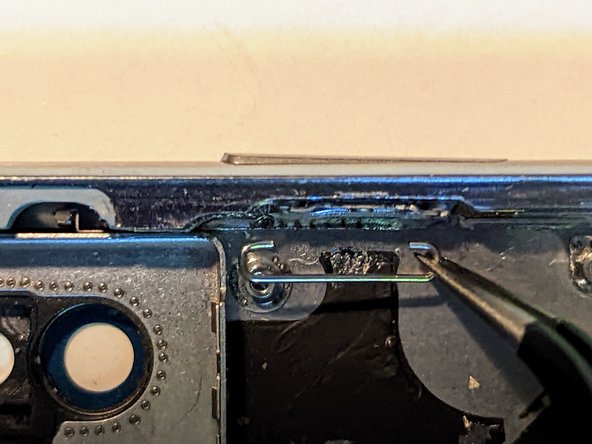
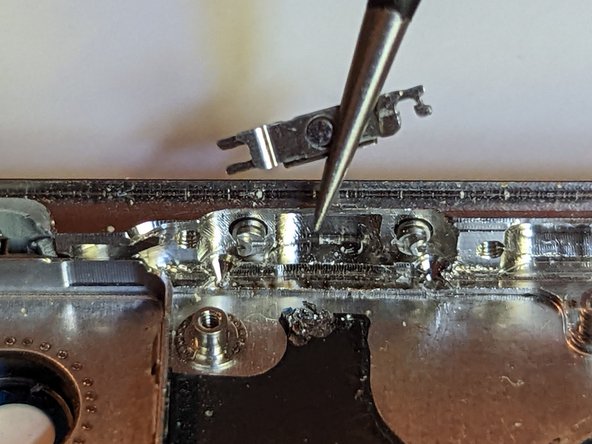
Fix iPhone X Stuck On Apple Logo/iTunes Error 4014

Duration: 45 minutes
Steps: 8 Steps

Step 1

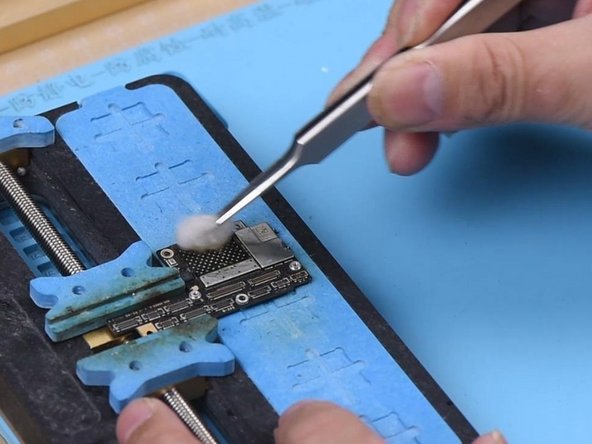
– First, let’s give that motherboard a quick once-over. Make sure it’s looking nice and straight, with no signs of water damage or warping.

– Now, let’s get that motherboard back into place and see if the phone powers up. If it’s still not turning on, we’ll need to dig a bit deeper.

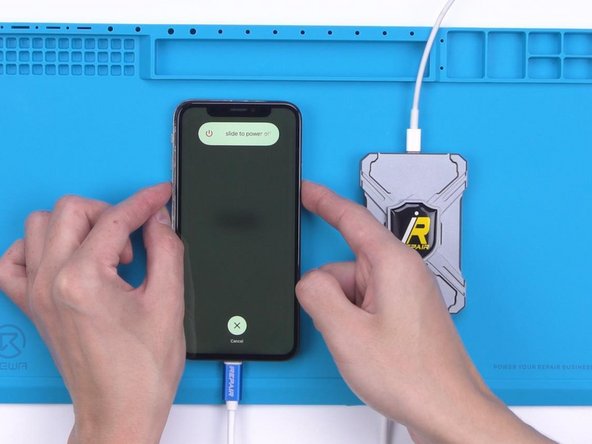
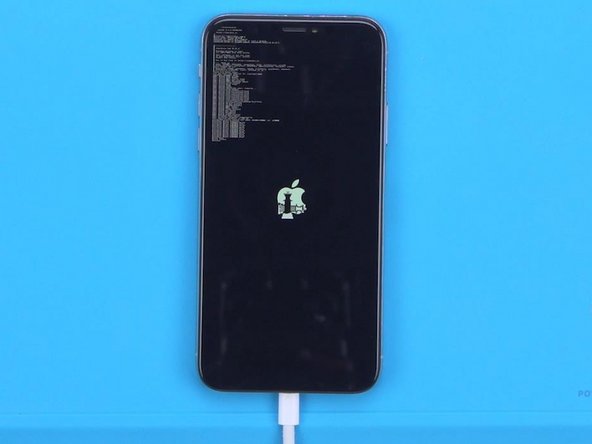
– Try connecting your phone to your computer and restore it via iTunes. If you hit error 4014, it’s time to call in the pros. If you’re stuck, don’t hesitate to schedule a repair.

Step 2

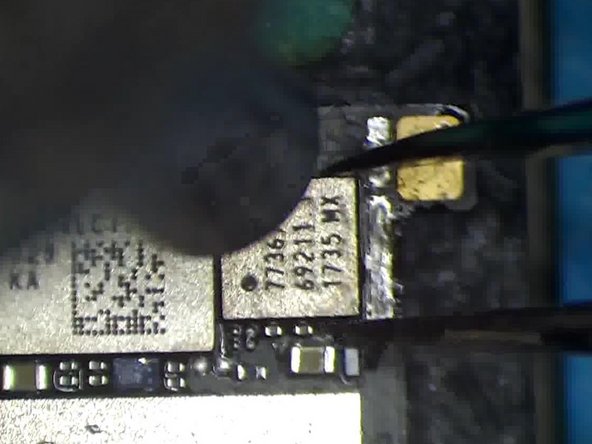
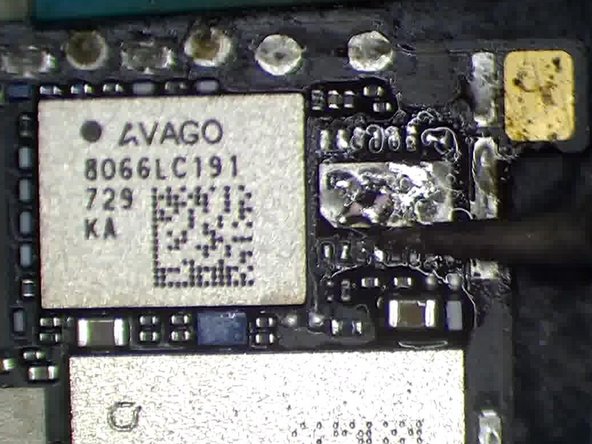
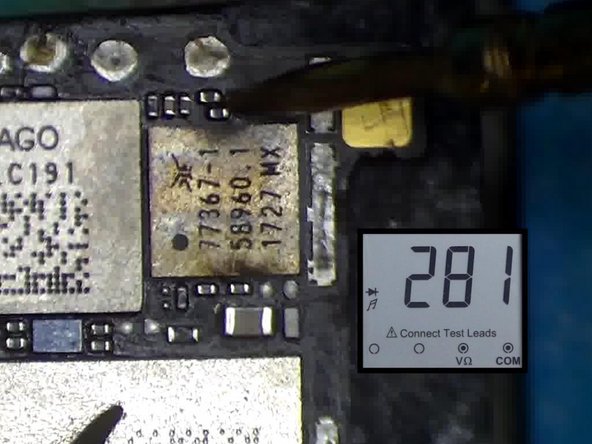
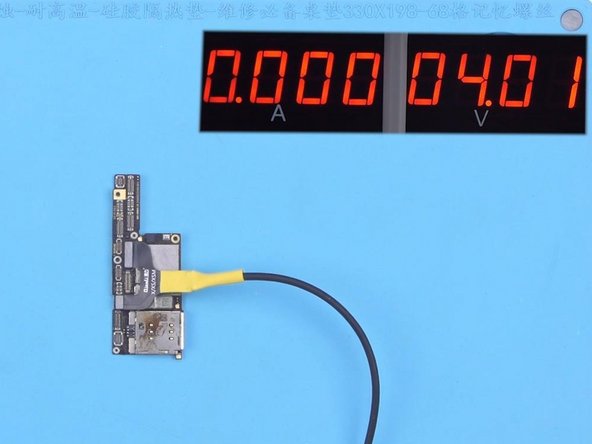
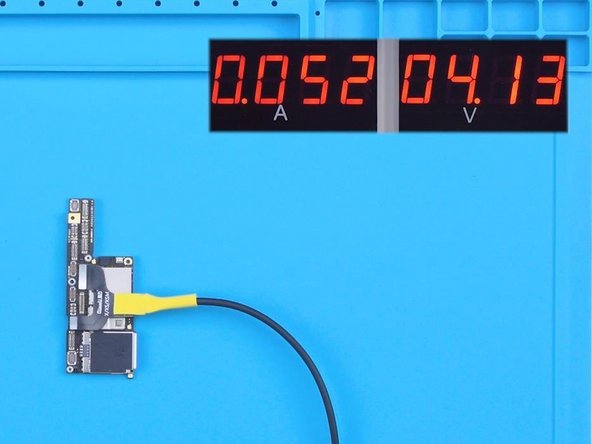
– Alright, folks! Based on those sneaky iTunes error codes, it looks like we might be dealing with a pesky NAND flash chip or some circuits that just aren’t playing nice. Let’s kick things off by checking out the power supply of that NAND chip. Grab your trusty battery connector and plug it into the DC Power Supply. Use some tweezers to power up the motherboard and get the party started!

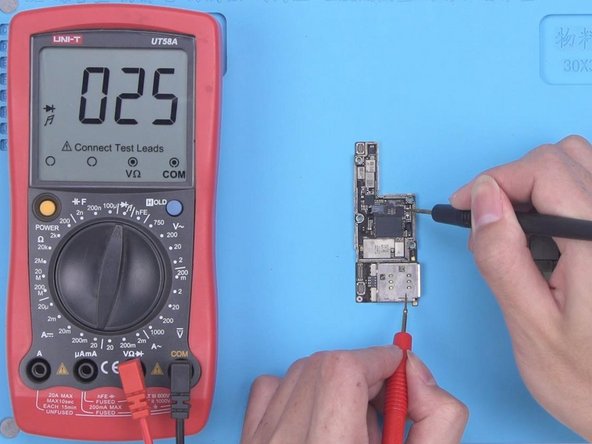
– Now, let’s get our voltage measurement game on for the NAND power supply. We’re looking for those golden numbers: 0.9V, 1.8V, and 3.0V. If you see those, you’re in the clear!

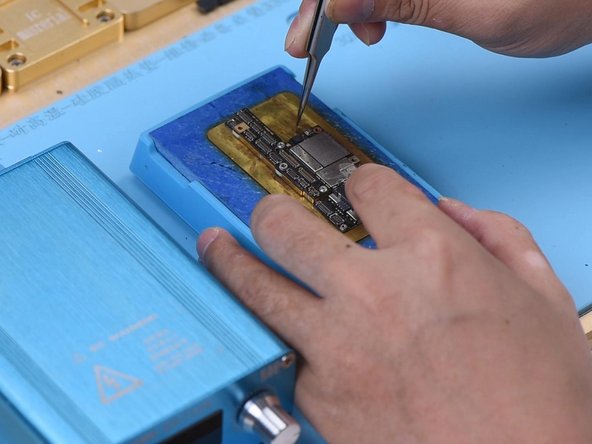
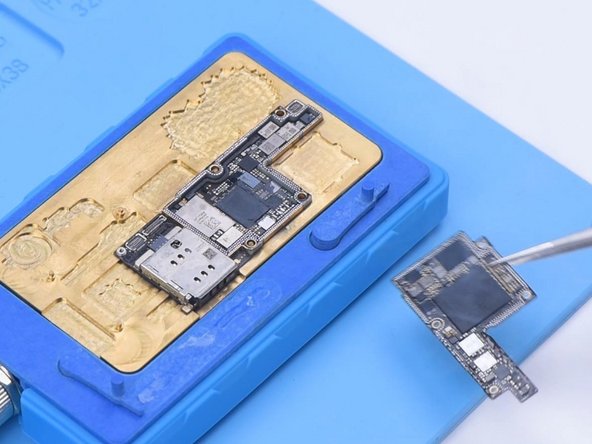
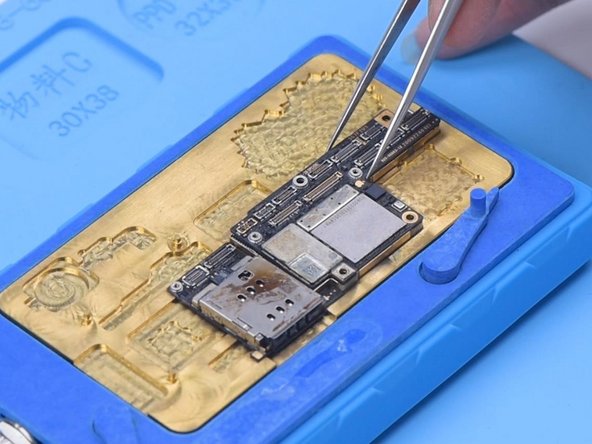
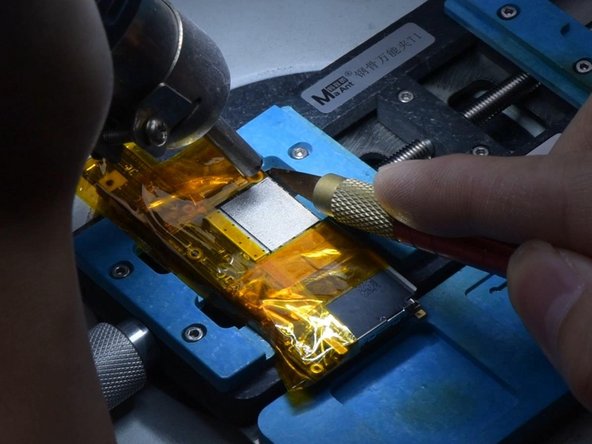
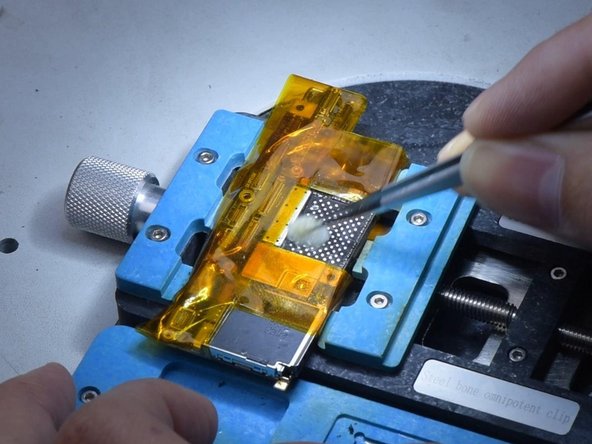
– Time for a little upgrade! Let’s swap in a shiny new NAND flash chip and see if it brings our device back to life. Place that motherboard on a specialized Heating Platform and don’t forget to remove the sponge cover first. Fire up the heating platform and dial the temperature up to a cozy 155℃.

Step 3

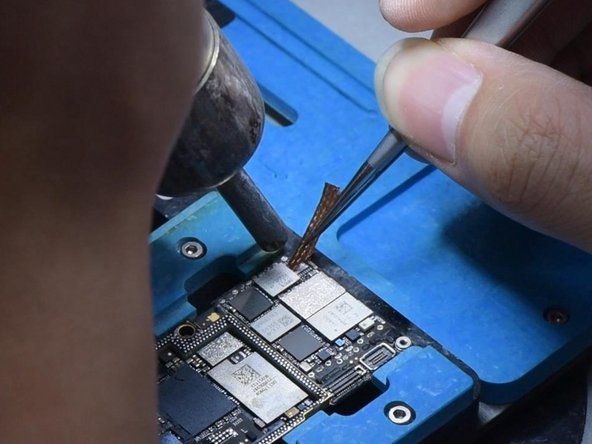
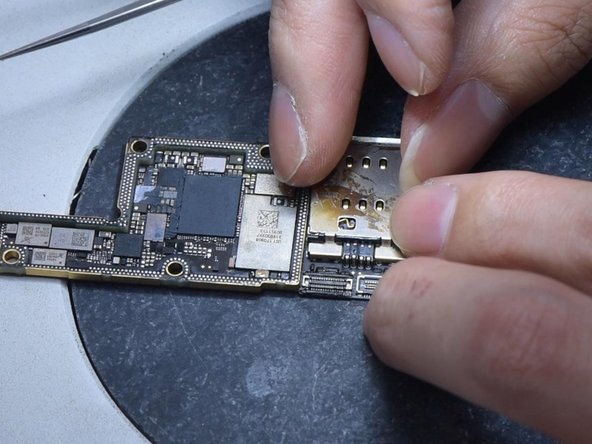
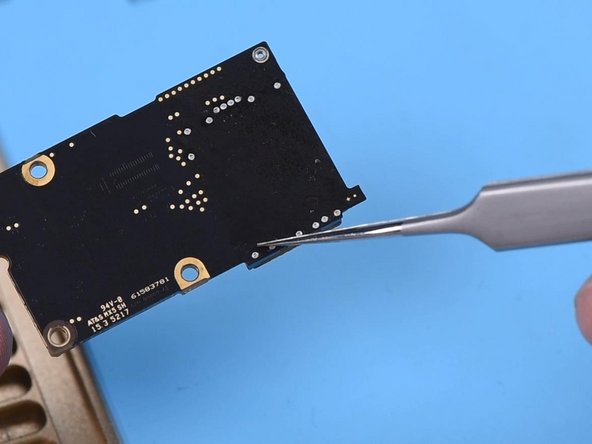
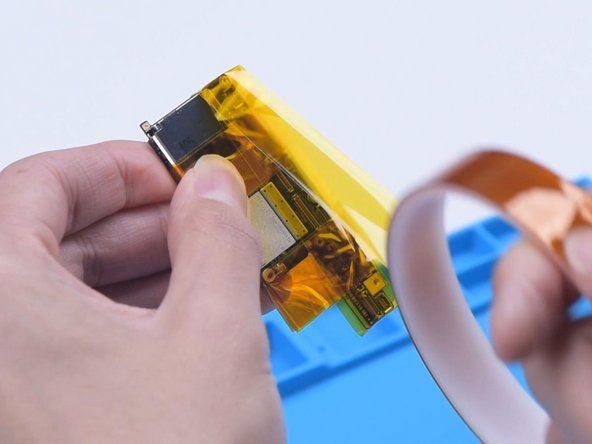
– As the platform heats up to a sizzling 155℃, take a deep breath and gently grab the upper layer with tweezers. Quick tip: be extra cautious while separating that motherboard, it’s a delicate dance!

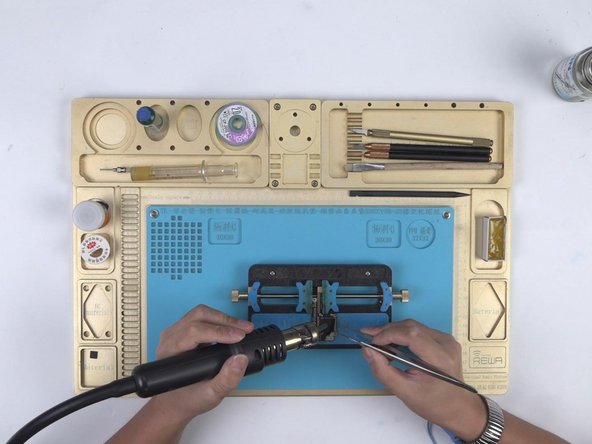
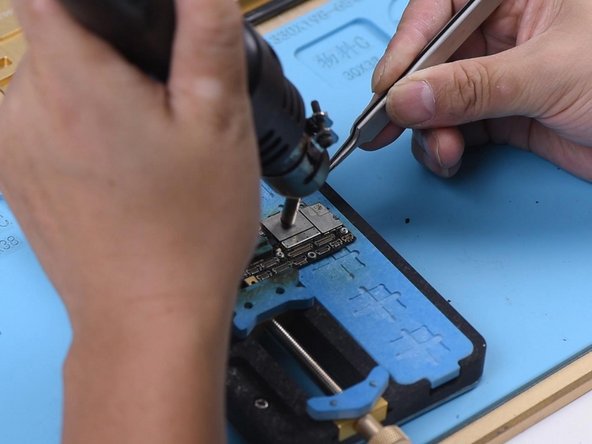
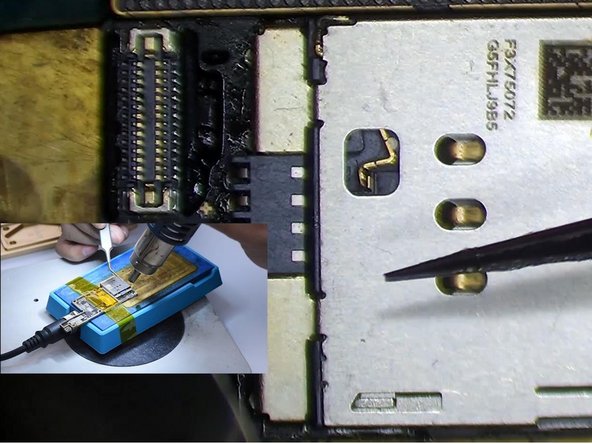
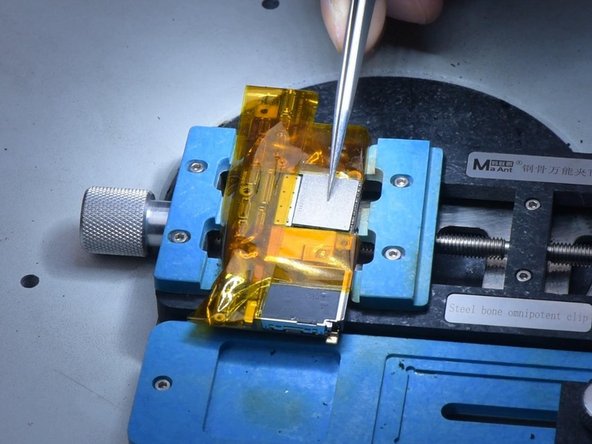
– With those solder balls on the third space PCB staying put, we’re in luck! We can skip the reballing when we put those two layers back together. Now, attach the upper layer to the PCB Holder. Time to heat things up with the Hot Air Gun at 280℃, airflow set to 3, to peel off that sticker. Keep that heat coming to loosen up the black adhesive around the NAND.

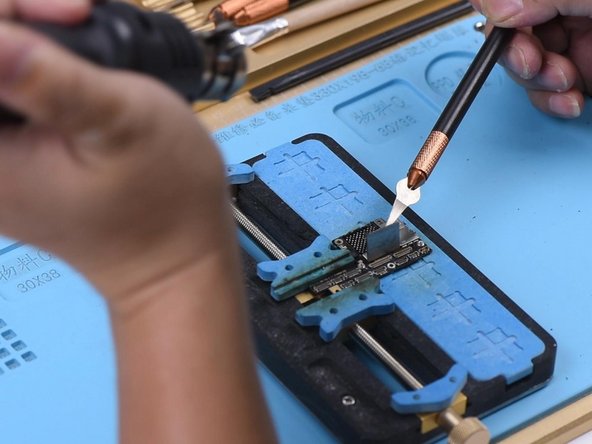
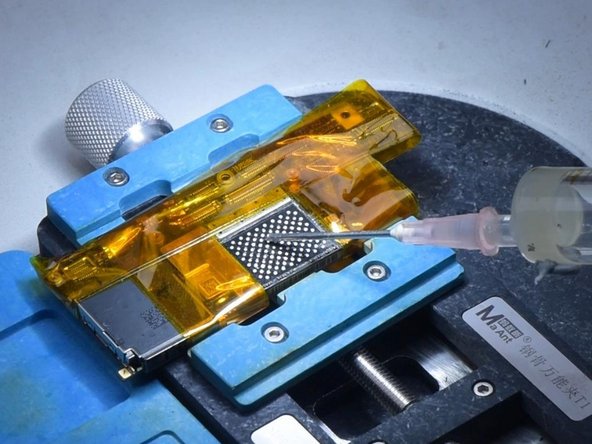
– Next up, crank that Hot Air Gun to 340℃, airflow at 5. Now, gently pry up the NAND flash chip with care. You’ve got this!

Step 4

– Set the NAND flash chip down in the cozy staging area of your PCIE repair programmer. Hit that ‘Backup Kernal Data’ button to save the chip’s data. Don’t worry, your precious backup will be snugly saved on your computer.

Step 5

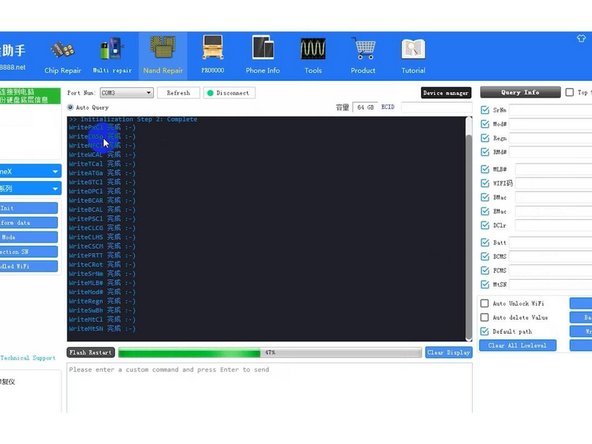
– Pop out the old NAND flash chip and get the new one ready on your workspace. Hit ‘Write Kernel Data’ in your software, then pick the data file you saved earlier. The software takes care of transferring your backup to the fresh chip—just sit back and watch the magic happen.

Step 6

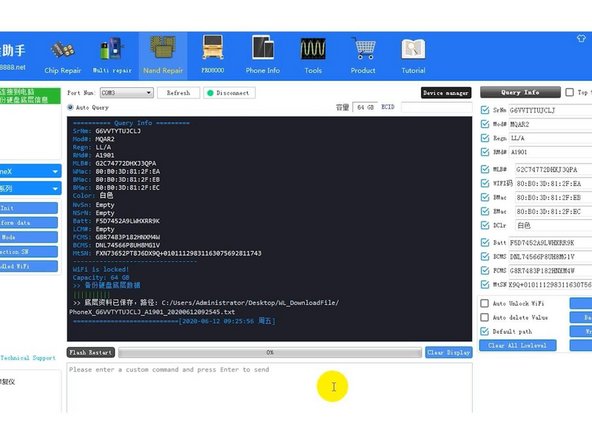
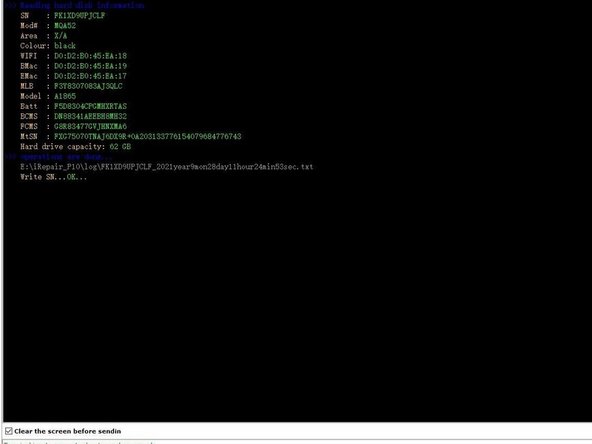
– After you’re done, hit ‘Query Info’ to see the basic details of your new chip pop up on the screen. Once that’s checked off, carefully remove the new NAND Flash chip. Next up: time to get that NAND flash chip reballed. Position the BGA Reballing Stencil just right, then spread some medium-temp solder paste evenly over it.

– Use your Hot Air Gun set to 300℃ with an airflow of 3 to heat things up so all the solder balls form perfectly. When that’s done, give it a minute to cool down and settle.

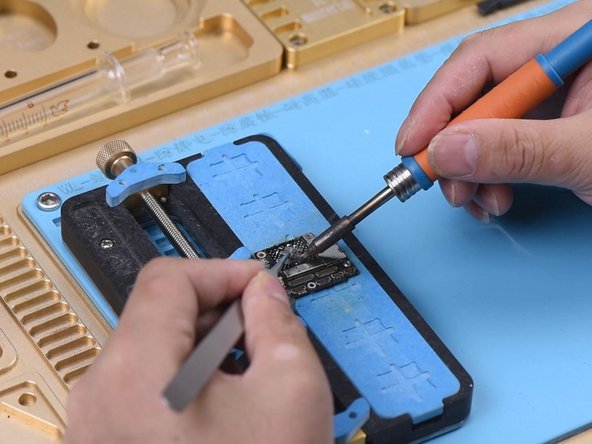
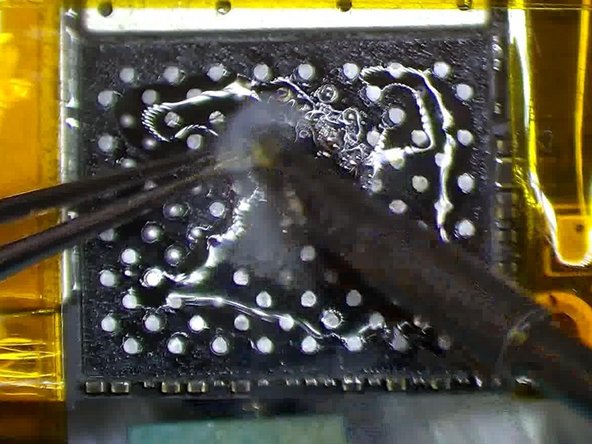
– Peel the NAND flash chip off the stencil gently. Give it another quick heat to make sure those solder balls are nicely shaped. Now, let’s get ready to solder the NAND. Before you start, apply a little medium-temp solder paste to the bonding pad using a Soldering Iron at 365℃.

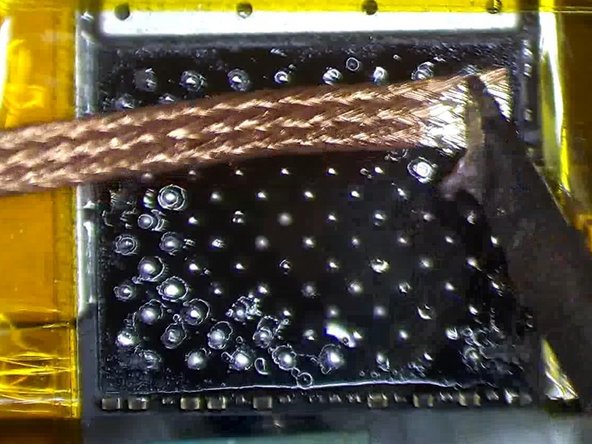
– After soldering, clean the bonding pad carefully. Use Solder Wick to remove any leftover solder, then finish up with a thorough cleanup using PCB Cleaner.

Step 7

– Keep the Hot Air Gun going at 300℃ with a flow of 3, and let it work its magic. Once that’s done, remove any leftover black adhesive on the bonding pad. Now it’s time to apply some fresh paste flux to the pad and get ready for the next step.

– Place the new NAND flash chip in position, making sure it’s snug. Use the Hot Air Gun at 330℃ with a flow of 4 to solder it in place. Nice and steady, and you’ll be all set.

Step 8

– Alright, let’s get our hands a little dirty! First up, we need to solder those two layers together like a pro. But hold your horses! Before we dive into soldering, let’s peel off the heat insulation adhesive from the lower layer. Next, grab some Paste Flux and apply it to the third space PCB. Now, let’s position the upper layer just right. Time to fire up that heating platform! Once it hits a cozy 155℃, let’s keep it cooking for a solid minute.

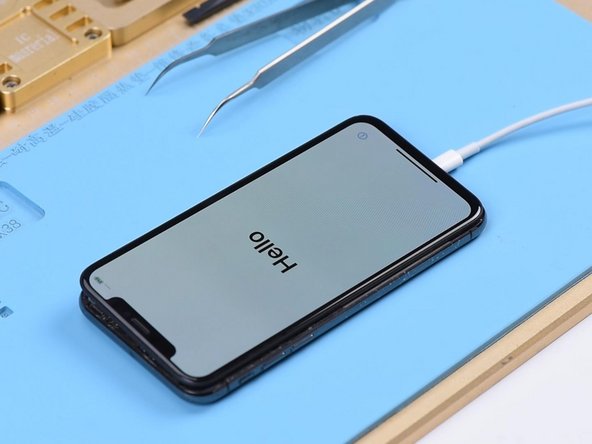
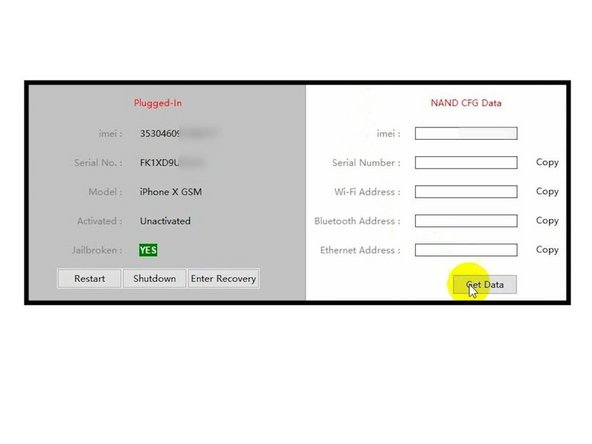
– Once that minute’s up, power down the heating platform and let the motherboard chill for about 5 minutes. Now we’re ready to put this phone back together and see what’s what! Connect the phone to the computer and let’s hit the ‘restore’ button via iTunes. If all goes well, your phone should restore like a champ! Once it’s all done, it’ll power on without a hitch, and you’ll see that SN and IMEI number pop up.

– Just a heads up, since this motherboard is iCloud locked, the activation magic can only be performed by its rightful owner. If you find yourself in a bit of a jam, remember, you can always schedule a repair.

Success!

Fix iPhone X Stuck On Apple Logo/iTunes Error 4013

Duration: 45 minutes
Steps: 9 Steps

Step 1

– First up, it says: iPhone X Error 4013. Let’s check out what’s going on.

– Start with a cosmetic inspection of the motherboard. Make sure it’s looking good – no bends, no water damage. A little TLC never hurt anyone!

Step 2

– Time to get that motherboard in and see what happens!

– Hit the power button and watch the phone boot into recovery mode all on its own. If that’s the case, it looks like the motherboard’s got a restore hiccup, which is why the phone can’t start up normally.

Step 3

– Alright, let’s get that phone back on track and see if we can kick that pesky error 4013 to the curb! First up, connect your phone to your computer. Then, give it a fresh start by restoring it with 3U Tools.

– Good news! The phone should restore just fine. Plus, once it’s restored, you should be able to activate it like a champ!

Step 4

– Head over to Settings > General > About. Here, you can check out the baseband info. At this point, we can confidently say the motherboard is all good, so the issue is likely somewhere else in the device.

– Now, grab the earpiece speaker and sensor flex cable, and the front camera flex cable, and get them installed properly.

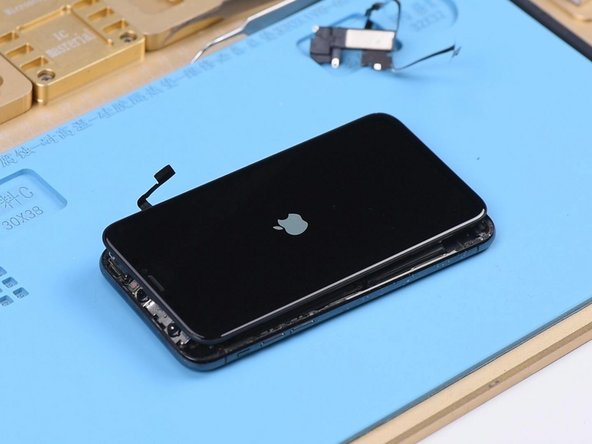
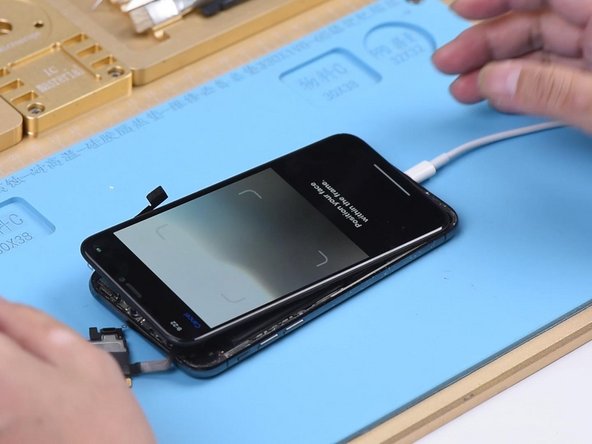
– Turn on your phone. Uh oh, it’s stuck on the Apple logo and keeps restarting, huh? Don’t worry, we’ll figure it out together.

Step 5

– Looks like the issue is probably tied to the earpiece speaker and sensor flex cable, or maybe the front camera flex cable. Let’s take it step by step and figure it out. First, disconnect the earpiece speaker and sensor flex cable.

– Now, press the power button to turn on the phone. If it powers up without any issues, then we’re pretty sure the problem is with the earpiece speaker and sensor flex cable.

Step 6

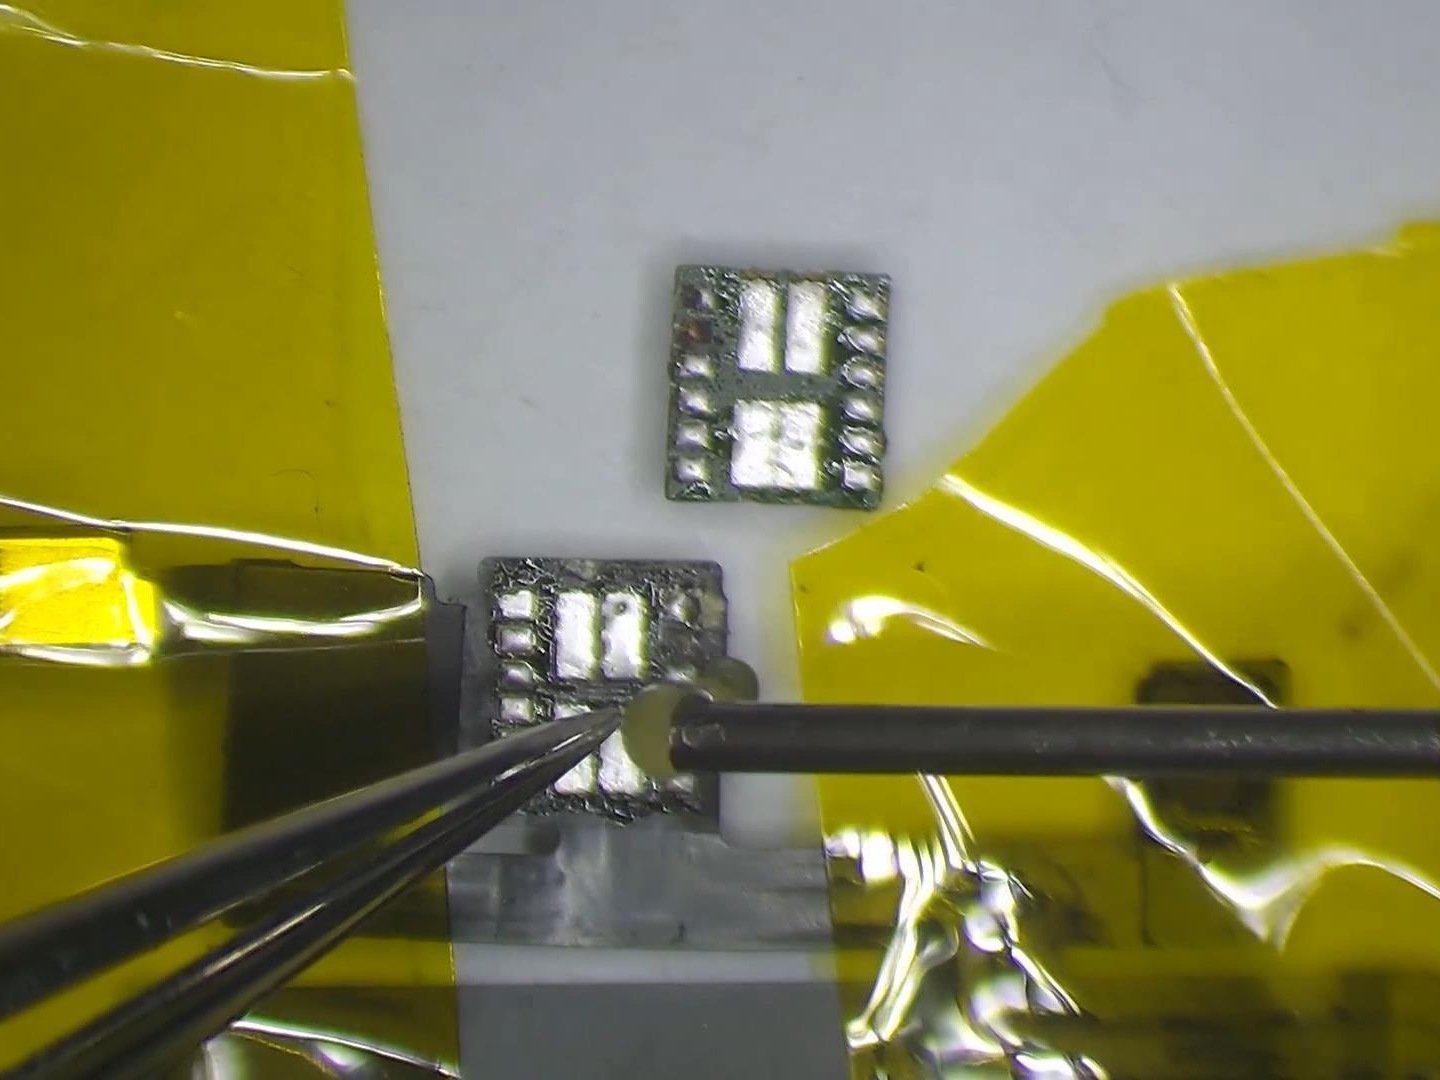
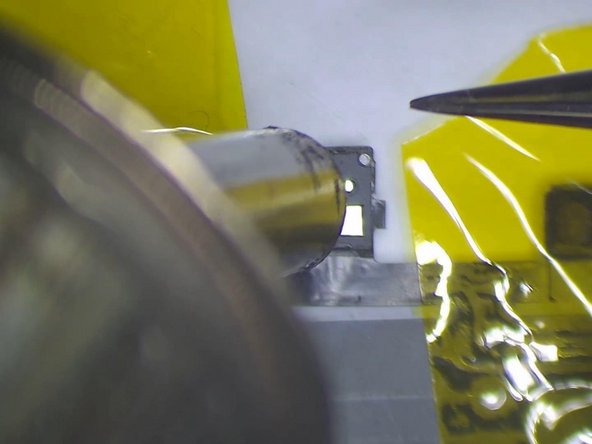
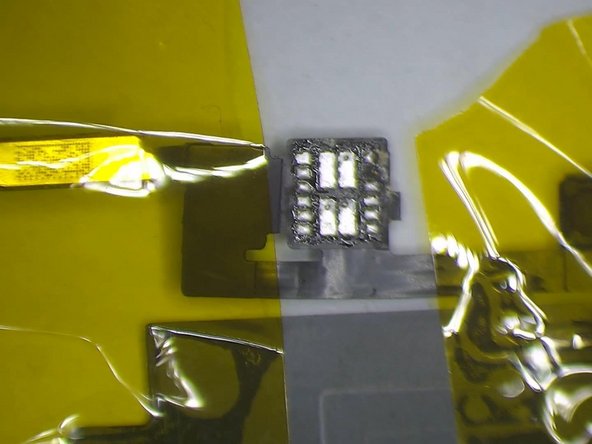
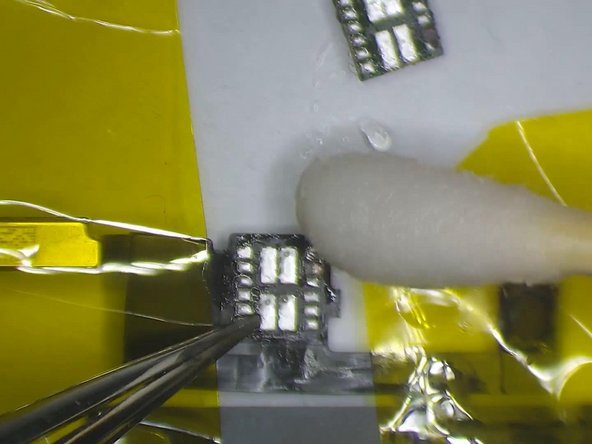
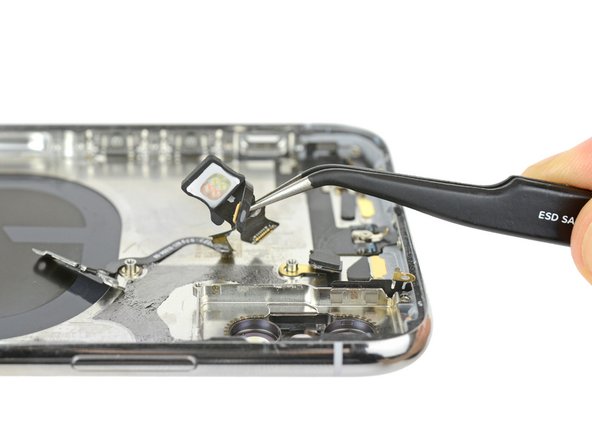
– Grab your microscope and take a peek at the earpiece speaker and sensor flex cable. Looks like the Flood illuminator module’s been partying a little too hard—it’s got some mold going on.

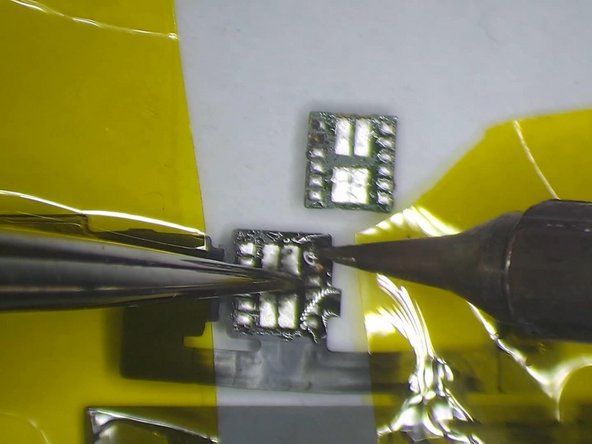
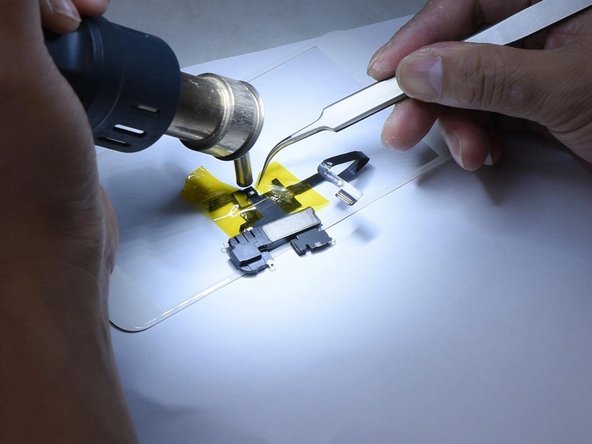
– To get things back in shape, secure the earpiece speaker and sensor flex cable with high-temperature tape. Fire up your hot air gun to 320℃ with an airflow of 35, and carefully remove that Flood illuminator module.

– Check out those bonding pads—they’ve seen better days and are seriously corroded.

Step 7

– Start by adding a bit of paste flux to the bonding pad. Grab your Soldering Iron, set it to 360℃, and clean up the pad a bit. If the pad’s looking rough, don’t worry—apply some medium-temp solder paste to give it some TLC, then clean it up with a bit of PCB Cleaner.

– Next up, apply some paste flux to the Flood illuminator module. If the pad is seriously corroded, lay down some medium-temp solder paste. Clean it up with PCB Cleaner afterward. Once you’re done with that, give the bonding pad some paste flux love.

Step 8

– Place the Flood illuminator module carefully in its spot. Use a Hot Air Gun set to 320℃ with an air flow of 35 to solder it in place. After that, let it chill for 2 minutes before moving on.

Step 9

– Now, grab the earpiece speaker and sensor flex cable and get them installed. Next, connect the battery. Hit the power button and voilà, the phone powers on as expected.

– Since those two flex cables were left unconnected during the previous restore, let’s fix that! We’ll need to restore again, but this time with both cables connected so that Face ID can work like a charm. Start by putting the phone into DFU mode, then hook it up to your computer.

– Now, use 3U Tools to restore the phone. It should go smoothly, and once it’s done, the phone will boot up like normal. Face ID will also set up without a hitch.

Success!
To put your device back together, just work through these steps in reverse—easy peasy! And if you hit a snag, no worries, you can always schedule a repair with us.

Repair iPhone X Battery that Drains Fast

Duration: 45 minutes
Steps: 16 Steps

Step 1

– So, the iPhone X battery is draining faster than usual and overheating? Not cool, right?

– This speedy battery drain usually happens because of a tired old battery or current leakage from the motherboard.

– Replaced the battery, but the drain still won’t stop? Looks like the culprit could be that pesky motherboard current leakage. Time to dig a little deeper!

Step 2

– Next up, let’s get our motherboard powered with a DC Power Supply to check the current. It looks like we have a little current leakage going on at 186 mA. Let’s keep our spirits high and tackle this together!

Step 3

– If your motherboard is leaking current after being powered up, let’s get our detective hats on! We can measure the power supply circuits to track down the culprit causing the trouble.

Step 4

– First up, let’s check out PP_BATT_VCC. Resistance looks totally normal—so far, so good.

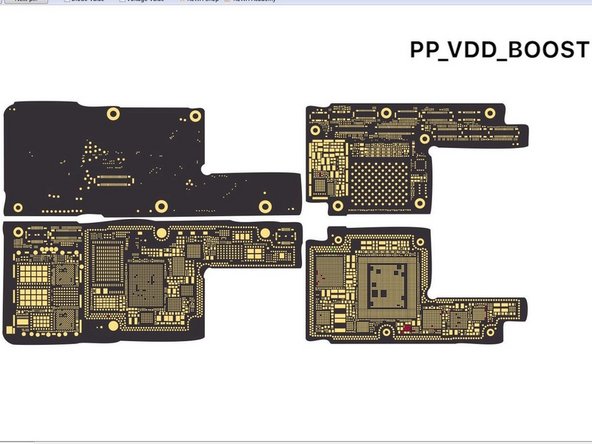
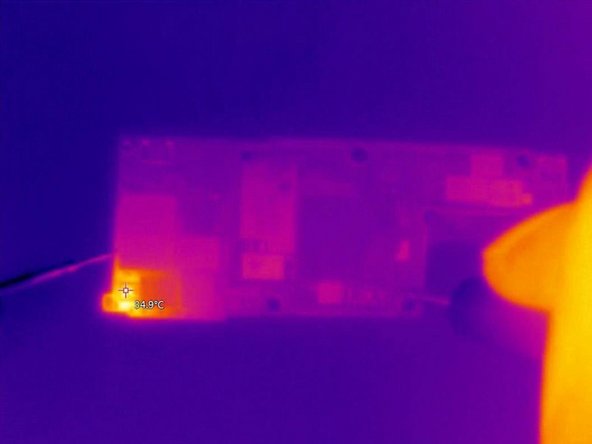
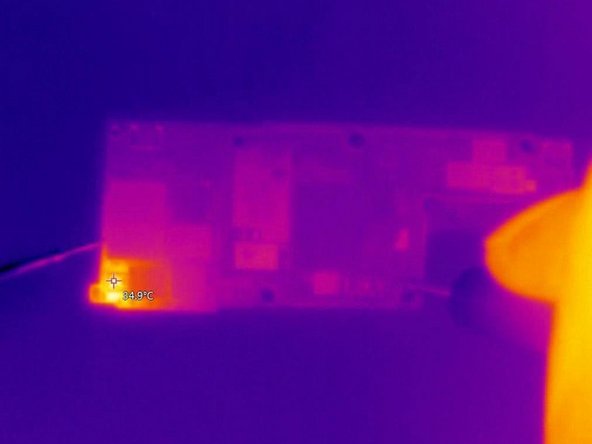
– Next, let’s take a peek at PP_VDD_Main. The resistance clocks in at 29, which is on the lower side. This hints that there’s a suspect component hanging out on PP_VDD_Main. Since the current is pretty low, rosin won’t help us spot the culprit. Time to break out the thermal imager and hunt down the troublemaker!

Step 5

– Start by powering up the PP_VDD_Main on the motherboard. You might not see an immediate temperature change, but that’s okay. It just means the issue isn’t with the surface layer of the motherboard.

– Next, carefully detach the motherboard for more in-depth testing. Place it on the Heating Platform and let it heat up. Once it hits 165 °C, it’s time to separate the logic board from the signal board.

Step 6

– Once the motherboard’s had a chance to chill out, let’s check out the PP_VDD_Main on the logic board. The resistance is right where it should be—nice!

– Now, let’s do the same on the signal board. Uh-oh, that resistance value is acting up. Looks like we’ve got our troublemaker: the signal board is the culprit.

Step 7

– Open the bitmap to spot where PP_VDD_Main is hanging out. Keep an eye on the signal board with your Thermal Imager—so far, the temperature’s playing it cool with no big changes. The bitmap reveals that PP_VDD_Main is also chilling under the card reader.

Step 8

– Alright, it looks like the culprit is probably hiding under the card reader. Let’s give the back of the signal board a check using the Thermal Imager. See that temperature spike at the top left of the card reader? That’s your sign—looks like the issue is hanging out in that area.

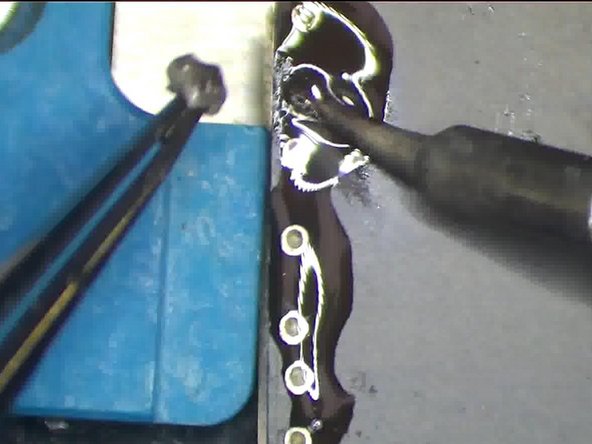
– Next up, time to remove the card reader. Don’t forget to apply a little Paste Flux to the bonding pad. To keep the plastic part safe and sound, we’ll coat it with some low-temp Solder Paste to balance out that heat from the bonding pad. Nice and easy!

Step 9

– Next up, grab your trusty Hot Air Gun and set it to 340°C. Gently heat the card reader while using your Pry Blade to carefully lift it. Once it starts to feel a bit loose, go ahead and remove it!

– Keep an eye on things with the Thermal Imager as you work. You’ll notice the card reader area heating up. From the thermal map, the hot spot is likely the GSM. Looks like it’s time to swap out the GSM!

Step 10

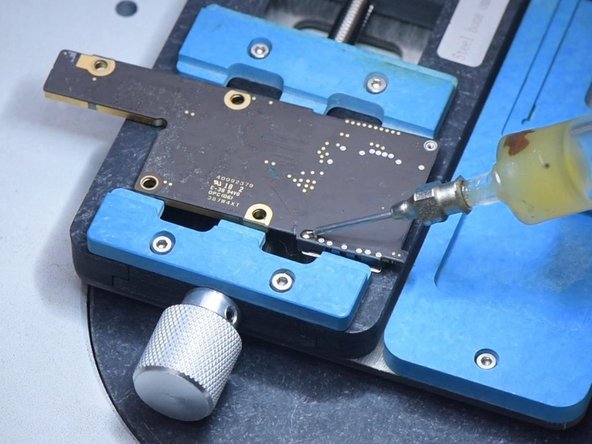
– Start by adding a little Paste Flux to get things rolling. Then, gently remove the GSM with a vertical wind Hot Air Gun set to 340°C. After that, throw some more Paste Flux on there, along with a bit of middle-temperature Solder Paste on the bonding pad. This helps to cool things down and keep the pad in check for the next steps.

Step 11

– Grab your Hot Air Gun and some Solder Wick to clean up that bonding pad. Once that’s done, give it a quick clean with some PCB Cleaner. Now, it’s time to check the resistance value of PP_VDD_Main.

– If everything looks good and the resistance value is back to normal, you’re golden!

Step 12

– Time to pop in a trusty GSM chip! Dab on some Paste Flux, set the GSM right where it belongs, then hit it with a vertical blast from your Hot Air Gun at 320 °C.

– Once everything’s soldered up, grab your multimeter and check resistance again. If the numbers look good, you nailed it!

Step 13

– Keep dabbing on that low-temperature Solder Paste to the bonding pad of your card reader like it’s the secret sauce to a tasty dish!

– Give that bonding pad a good clean-up with a Hot Air Gun and Solder Wick. Then, switch it up and tidy the back bonding pad using a Soldering Iron and Solder Wick. It’s like a spa day for your device!

Step 14

– Now, give those pins a good clean with PCB Cleaner — you’ll see them sparkling in no time.

– Next up, let’s get that card reader in place. Slide it right where it belongs.

– Time to secure the card reader! Solder the back bonding pad using your Soldering Iron. If you find any extra solder, gently flatten it with Solder Wick — just don’t drag the wick while removing solder. Finish by cleaning the bonding pad again with PCB Cleaner.

Step 15

– Now, let’s get the motherboard back together. Place the signal board on the 165°C Heating Platform to warm up. Dab a little Paste Flux on the bonding pad, then carefully line up the logic board with the signal board. Once it hits 165°C, you can safely remove the motherboard.

– To make sure everything’s snug, gently press both sides of the motherboard with tweezers. A little pressure goes a long way.

– Next, power up the motherboard for a quick test. Check that the current is normal, and you’re good to go!

Step 16

– Plug in the screen to give it a test run. Boot current looks good and steady. The sneaky current leak is gone—mission accomplished!

Success!
To put your device back together, just follow these steps in reverse—easy peasy! If things get tricky, remember you can always schedule a repair with us at Salvation Repair.

iPhone X Teardown

Duration: 45 minutes
Steps: 24 Steps

Can you believe it? A decade ago, Apple kicked off the smartphone revolution with the first iPhone. Fast forward to today, and we’re diving into the iPhone X, the 18th edition of this iconic line. With its sleek, rounded edges and that stunning edge-to-edge display, it feels like the iPhone that Steve Jobs dreamed of ages ago. But now that this vision is a reality, will it leave a mark as significant as its predecessor? Only time will tell! For now, let’s roll up our sleeves and explore what makes this device so special. A special shoutout to Circuitwise for hosting our teardown adventure in Sydney, and to Creative Electron for those cool X-ray images, plus TechInsights for the IC ID goodies. Speaking of Sydney, we’re thrilled to have an Australia store! Keep an eye on our Facebook, Instagram, and Twitter for updates as we discover more. And if you’re more into emails, don’t forget to check out our newsletter!

Step 1

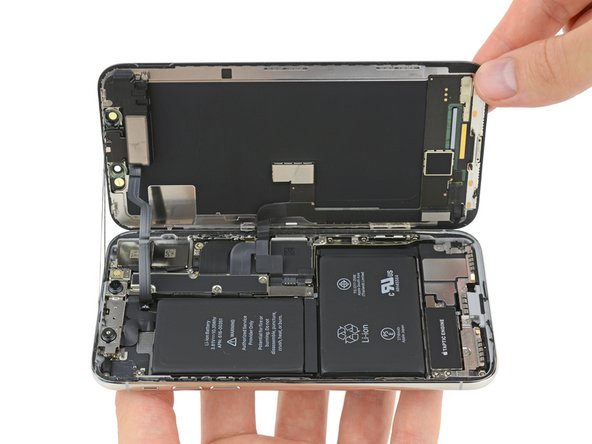
– The iPhone X has arrived! Let’s take a peek at what’s packed inside this sleek glass sandwich:

– A powerful A11 ‘Bionic’ chip complete with a neural engine and an embedded M11 motion coprocessor.

– A stunning 5.8-inch ‘all-screen’ OLED multitouch Super Retina HD display boasting a resolution of 2436 × 1125 pixels (458 ppi).

– Dual 12 MP cameras (wide-angle and telephoto) featuring ƒ/1.8 and ƒ/2.4 apertures with optical image stabilization for those picture-perfect moments.

– A 7 MP TrueDepth camera with a ƒ/2.2 aperture, 1080p HD video recording, and Face ID to keep things secure.

– Support for speedy fast charging and Qi wireless charging to keep you powered up.

– Our A1865 global unit is packed with extensive cellular band support, plus 802.11a/b/g/n/ac Wi‑Fi with MIMO, Bluetooth 5.0, and NFC for all your connectivity needs.

Step 2

– The iPhone has evolved a lot over the past decade—so much so that its design has come full circle, making this model look more like the original than we’ve seen in quite a while.

– Just like with the iPhone 8 earlier this year, Apple has removed the cluttered (and eco-friendly) regulatory markings from the back of the iPhone X.

– Jony finally got the smooth, clean back he’s always wanted. Fingers crossed these phones find their way to recyclers and don’t end up in the trash.

Step 3

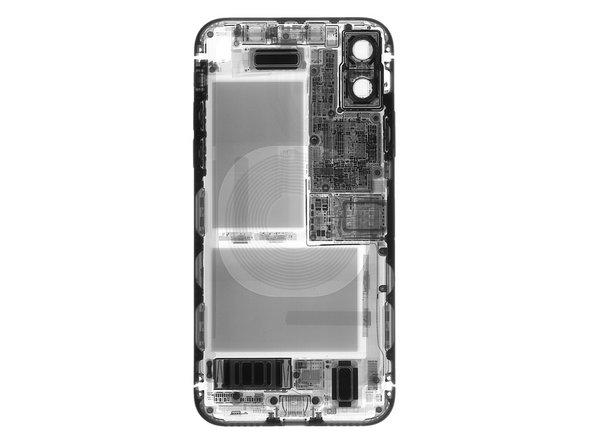
– Before jumping right in, let’s take a quick peek with some 10-ray X-ray recon courtesy of Creative Electron.

– Here’s what the scan revealed:

– Not just one, but two battery cells—definitely a first for an iPhone!

– A super-compact logic board footprint. Judging by the solder points, it seems like there are two layers stacked up.

– To fit extra front-facing sensors, the earpiece speaker has been moved down quite a bit.

– There’s a curious chip tucked between the Taptic Engine and lower speaker—we’re eager to find out what it’s all about!

Step 4

– Check out this pentalobe screw—it’s got a quirky, unfinished vibe. Those bottom screws? More like pins just hanging out.

– The good news: the rest of the scene hasn’t changed much. Our usual crew—iOpener, Sclack, and Opening Picks—still get the job done.

– This screw is a multitasker: it shifts its threads from the display to the steel frame, and the unthreaded part stretches out into a comically long pin.

– We’re guessing this gives the display some wiggle room, and lets the mounting bracket scoot further inside. That opens up space for a beefier Lightning connector.

– No big shake-ups in resistance here. The OLED display stays well-supported by the frame—unlike some other screens we could name.

Tools Used
  1. iOpeneriPhone X Teardown
  2. iSclackiPhone X Teardown

Step 5

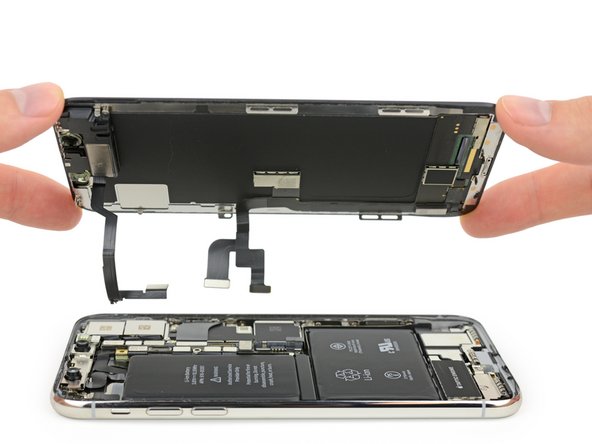
– Sideways-opening iPhones are officially a thing now. Apple first pulled this move with the 7 Plus, and it seems like it’s here to stay.

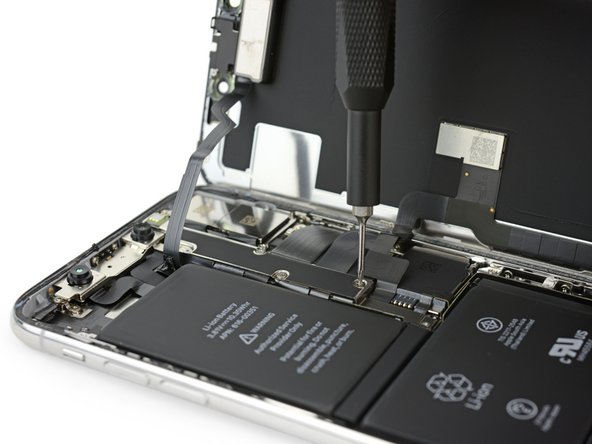
– This bracket is multitasking hard—it covers every logic board connector in sight. That’s some serious connector crowding.

– And, of course, the tri-point screws are back, guarding the next round of repairs after you’ve tackled those pentalobe screws at the entrance.

Step 6

– Once we’ve liberated that hefty unibracket from the logic board, it’s time to sneak a peek at the impressive hardware that makes Cupertino’s latest flagship tick.

– We’ll dive deeper into the display hardware later, but for now, let’s take a moment to appreciate our X-ray vision—surprise! That elusive chip is snugly attached to the display!

– This body shot backs up our X-ray findings: the spacious dual-cell battery is taking up most of the room, while the logic board has undergone a major shrink session.

– In a delightful twist, the display pops off effortlessly, leaving the front-facing camera behind like a forgotten souvenir.

Step 7

– The dual rear camera comes equipped with a sturdy bracket—think of it as a bodyguard making sure those sensitive parts don’t get bent out of shape.

– Foam adhesive acts like a snug seatbelt, keeping the cameras locked in place so Portrait Mode and all those cool features stay sharp.

– Check out the tiny spot welds around the camera bump cover glass. They’re there to keep the walls of the camera bump firmly attached to the case.

Step 8

– Let’s get this dense logic board out and take a closer look at what we’ve got.

– This little board is a master of space efficiency. The sheer number of connectors and components packed in here is mind-blowing. For reference, even an Apple Watch’s bare board weighs in at more than this one, ounce for ounce.

– The iPhone X’s compact logic board manages to cram in more tech while making the iPhone 8 Plus board next to it look like a giant by comparison.

– If you compare the size of the two boards, the iPhone X’s board is about 70% of the size of the iPhone 8 Plus board. That’s a lot more room left over for the battery.

Step 9

– Apple found a way to pack even more tech into 70% of the space—yep, they folded the board in half. Genius, right?

– The two halves are soldered together, so we needed a little extra help from our trusty BGA hot air rework station to carefully separate them.

– The iPhone X logic board is the first double-stacked one we’ve seen in an iPhone since the very first model (check out the third photo).

– Once we got the pieces apart, we measured all the separate layers and added them up to 135% of the area of the iPhone 8 Plus logic board. Apple really knows how to make more fit into less!

Step 10

– First up, let’s dive into the techy goodness: we’ve got the Apple APL1W72 A11 Bionic SoC chilling over some high-performance SK hynix H9HKNNNDBMAUUR 3 GB LPDDR4X RAM. It’s a powerhouse, no doubt.

– Next, it’s time to give the Apple 338S00341-B1 power management IC a quick look. This guy handles your device’s power flow, so keep it in check.

– Now, the Texas Instruments SN2501 battery charger steps in. It keeps your juice flowing smoothly, ensuring you stay charged up.

– You’ll also find the NXP Semiconductor CBTL1612A1 here, which is likely just an updated version of the 1610 tristar IC. Think of it as the traffic cop of your device’s connections.

– The Apple 338S00248 audio codec is next. This one’s all about sound—making sure your device sounds as crisp and clear as possible.

– Another power player: the STMicroelectronics STB600B0 power management IC. It makes sure everything stays powered up without a hitch.

– And finally, the Apple 338S00306 power management IC wraps up the first half, ensuring your device’s power is well-managed throughout.

Step 11

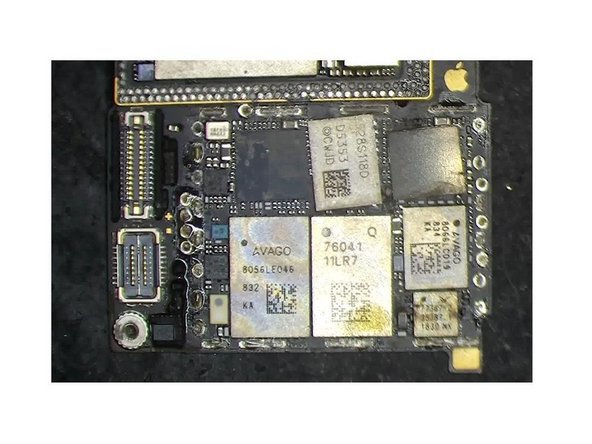
– Pop open that Apple/Murata USI 170821 339S00397 WiFi/Bluetooth module—you know, the chip responsible for all your wireless wizardry. Just don’t lose it in the couch cushions.

– Say hello to the Qualcomm WTR5975 gigabit LTE transceiver! This little guy keeps your data zooming along. It’s not much to look at, but it sure works hard.

– Time to meet the modem squad: Qualcomm MDM9655 Snapdragon X16 LTE modem and its trusty PMD9655 PMIC sidekick. But here’s the twist—Apple likes to mix it up! Some models (like the A1901) rock an Intel XMM7480 (PMB9948) instead. Even though the Qualcomm modem could hit Gigabit speeds, Apple keeps it chill. No turbo mode here.

– Get ready for some amplifier action: Skyworks SKY78140-22 and SKY77366-17 power amplifiers, plus S770 6662, 3760 5418, and 1736. These chips make sure your phone’s signal stays strong, even if you’re hiding in a pillow fort.

– Bring on the Broadcom BCM59355 wireless charging controller. This chip makes charging cable-free and easy—like magic, but with science.

– Check out the NXP 80V18 PN80V NFC controller module. It’s how your phone pays for coffee and trades playlists with a tap.

– Last but not least, the Broadcom AFEM-8072 MMMB power amplifier module—boosting your signal like it’s training for a marathon.

Step 12

– Now, let’s take a look at the fantastic components located on the exterior of our logic board sandwich:

– Toshiba TSB3234X68354TWNA1 64 GB flash memory, ready to store all your important data!

– Apple/Cirrus Logic 338S00296 audio amplifier, bringing the beats to your device!

– Bosch Sensortec BMP282 pressure sensor, keeping tabs on the atmosphere around you!

– Bosch Sensortec gyroscope/accelerometer, making sure your device stays balanced and steady!

Step 13

– IC Identification, continued:

– Cypress Semiconductor CYPD2104 USB type-C port controller – this little guy’s the brain behind your USB-C port. It’s the one making sure all your devices communicate smoothly.

– Texas Instruments SN61280E Li-ion DC-DC converter – responsible for efficiently transferring power, it’s the hero behind the scenes keeping your device’s battery running smoothly.

– Apple/Cirrus Logic 338S00296 audio amplifier – this one’s all about getting that sweet sound out of your device. If your audio’s been a little off, this might be the culprit.

– ON Semiconductor DC-DC converter – another power wizard! It ensures your device gets the power it needs, transforming it like magic to fit what’s required.

– SiTime MEMS oscillator – the rhythm keeper of your device! It keeps everything in sync so your system runs like a well-oiled machine.

Step 14

– Alright, Apple went ahead and made a PCB sandwich—sounds tasty, right? But what’s the secret sauce behind how it actually works?

– Right at the heart of the main board, you’ll find the A11 SoC snug as a bug. The X-ray images give you a cool peek at the board’s 3D setup. Around the edges, those little cylinder holes packed with solder are the connectors holding the two boards together.

Step 15

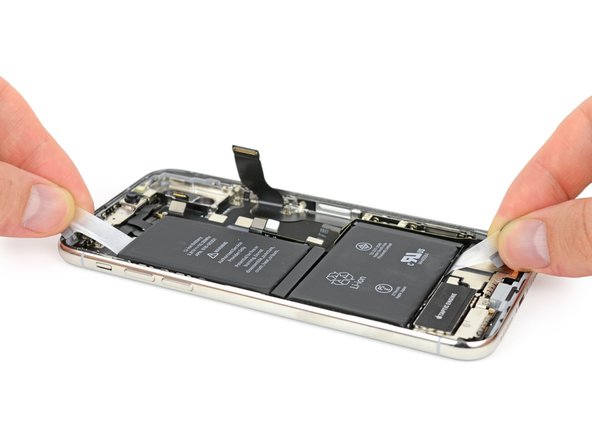
– The new dual-celled battery comes with four pull-tabs, similar to the ones we saw in the 8 series, but with a new twist in their orientation.

– This phone packs a 10.35 Wh (2716 mAh at 3.81 V) battery, slightly edging out the 8 Plus’s 10.28 Wh, but still trailing behind the hefty 12.71 Wh battery of the Galaxy Note8.

– The dual-cell design is all about making the most of the space available. With two cells, there’s more freedom to get creative with the shape and placement, maximizing every inch left by the compact logic board.

Step 16

– Remember that Face ID feature? Before diving into the teardown, we gave it a quick test. Our IR-equipped video camera isn’t quite fast enough to catch the dot pattern, but the illumination is visible and looking good!

– A little history lesson: way back, Microsoft rolled out the Kinect, which used a cool infrared dot matrix sensor developed by Israeli company PrimeSense.

– Apple snapped up PrimeSense for a neat $360 million in 2013 and has since poured hundreds of millions more into bringing this tech to life.

– Meanwhile, Microsoft had to hustle to create a new sensor system for Kinect 2. Now that the iPhone sports a depth sensor, who knows—maybe drones will get in on the action too!

Step 17

– Let’s check out the top of the phone where the mini Kinect TrueDepth camera system lives! This clever setup uses a bunch of sensors to make facial recognition happen on the X.

– First up: the flood illuminator hidden in the display shines infrared (IR) light right onto your face.

– Next, the front-facing camera (highlighted in red) makes sure there’s actually a face there.

– Then, the IR dot projector on the far right throws a pattern of dots across your face to build a 3D map.

– Finally, the IR camera on the left reads that map and sends the info to the phone.

– Behind the scenes, the X’s speedy software combines all this data to figure out if it’s really you or your sneaky twin.

Step 18

– We’re almost there! Let’s breeze through the last few components in the rear case.

– First up, we’ve got a tiny bracket, complete with spring connectors and those little EMI grounding fingers. There’s a ribbon cable glued to the back too, so be gentle.

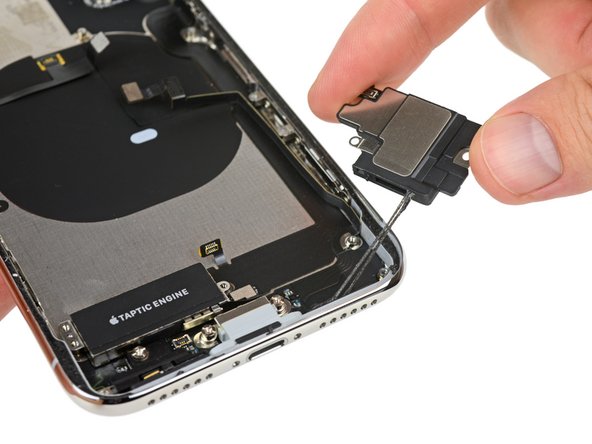
– Next, we’ll tackle the lower speaker enclosure, which is all snug with waterproof adhesive around the port. It’s a bit gooey, but don’t worry, it’s all part of the fun!

– Finally, we’ll release the Taptic Engine and that iconic barometric vent. Apple’s Taptic Engine is just a fancy term for a linear oscillator vibration motor, but it gets the job done, so no complaints here!

Step 19

– Our teardown engineer uses the dual tweezer technique to gently remove the Lightning connector—precision at its best.

– Good news for anyone tired of dealing with a loose charging cable: the Lightning connector is now sturdier, with a wider bracket that screws into the frame’s sidewall.

– Plus, it’s designed with through holes for the pentalobe screws to pass through and secure the display, just like we saw earlier.

Step 20

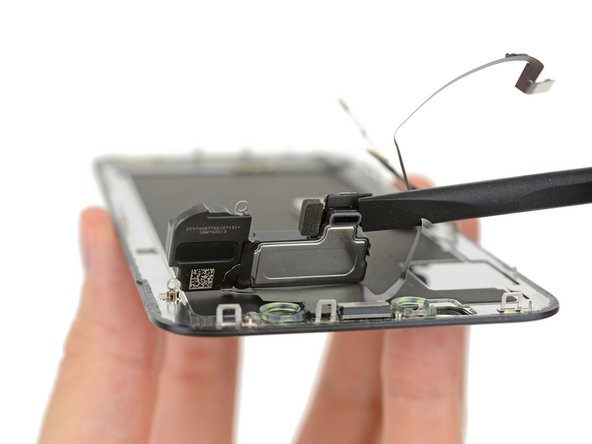
– Alright, with everything else taken apart, let’s check out the display. First up: the earpiece speaker, sporting a fresh new sound duct that channels audio right through the screen. Pretty slick.

– Next, carefully lift out the upper display module—this thing is packed! You’ve got a loudspeaker, microphone, ambient light sensor, flood illuminator, and proximity sensor all crammed together in one neat bundle.

– Once you’ve removed all the bits and pieces, what’s left is a bare-bones display, ready for whatever comes next.

Step 21

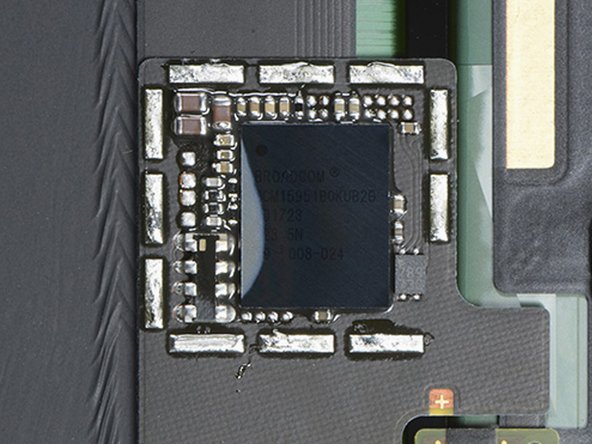
– Let’s dive into that mysterious chip! Thanks to some awesome tech insights, we’ll take a sneak peek under the shields on the back of the display and discover:

– A Broadcom touch screen controller, tagged as BCM15951B0KUB2G.

– Also making an appearance is a fresh STMicro device that’s new to us, an OLED PMIC marked 10 THADT733 X-139U.

Step 22

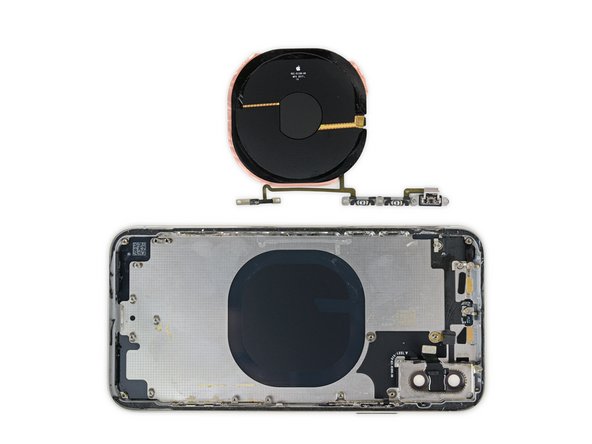
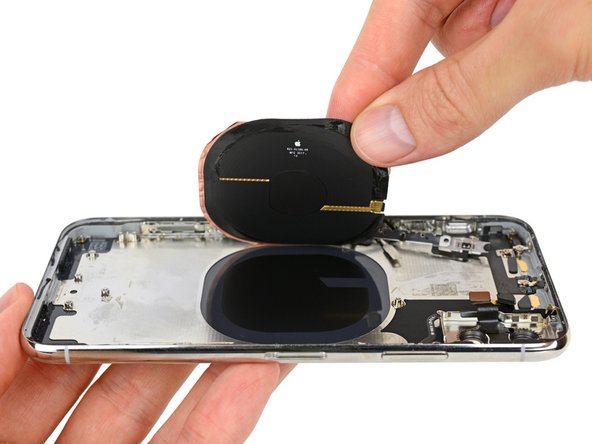
– As we dive into the heart of the device, we uncover a familiar component in this intricate masterpiece: the wireless charging coil.

– Next, we carefully remove the multi-function cable from the top of the phone. This little assembly houses the quad-LED True Tone flash and the power button, reminiscent of the good old iPhones.

– Oh, and let’s not forget everything connected to it, including the volume buttons, the ring/silent switch, and an intriguing sensor bracket.

Step 23

– Bonus round: So, you’ve gone and cracked the rear glass on your shiny new iPhone X. What now?

– After a generous dose of heat, we swapped out the spudger for the trusty Jimmy. Just like the iPhone 8 and 8 Plus, the X’s back glass is seriously glued down.

– Here’s where things get interesting: Unlike the iPhone 8’s single-piece rear, the X’s camera bump actually sits on top of the rear glass and is welded tight to the metal frame underneath.

– Basically, you’ve got two options in this classic hand-in-cookie-jar scenario: either take off the camera bump (tricky), or go for the glass (messy). Pick your adventure.

Tools Used
  1. SpudgeriPhone X Teardown
  2. JimmyiPhone X Teardown

Step 24

– Thanks for joining us on this 22-step teardown feast—it was quite the brain food!

– If you missed the iPhone 8 or iPhone 8 Plus teardowns, feel free to peek at those for some handy comparisons. You can also browse our Smartphone Repairability scores from previous devices.

– A big shoutout to our awesome contributors, Circuitwise, Creative Electron, and TechInsights!

Success!

iPhone X WiFi Antenna Replacement

Duration: 45 minutes
Steps: 71 Steps

Swapping out the WiFi antenna is a great way to tackle issues like weak or missing WiFi signals, sluggish internet speeds over WiFi, and connection hiccups.

Step 1

– Grab a SIM card eject tool or just use a paperclip, and gently insert it into the tiny hole on the SIM card tray. It’s right near the side button on your iPhone—easy to spot!

– Give it a firm push to pop the tray out. Don’t be shy—just a little pressure and you’ll be all set!

Tools Used
  1. SIM Card Eject TooliPhone X WiFi Antenna Replacement

Step 2

– Pop out the SIM card tray from your iPhone like a pro!

– When you’re putting the SIM card back, make sure it’s sitting just right in the tray—nobody likes a misaligned card.

– There’s a nifty little rubber gasket around the SIM tray that keeps water and dust at bay. If you notice it’s damaged or missing, don’t just shrug it off—swap it out or replace the whole tray to keep your iPhone’s insides safe and sound.

Step 3

– First things first: power off your iPhone before diving into the disassembly. Safety first!

– Grab your pentalobe screwdriver and carefully remove the two 6.9 mm screws at the bottom edge of your iPhone. Easy peasy.

– If the screws give you trouble and are stripped or damaged, don’t sweat it—just replace them and keep going!

Step 4

– Grab your opening pick and measure 3 mm from the tip. Use a permanent marker to make a little mark—this is your guide for the next steps!

Step 5

– Cover the iPhone’s screen by layering clear packing tape strips until it’s fully wrapped like a pro.

– If the suction cup refuses to stick in the next steps, no worries! Fold a sturdy tape strip (think duct tape) into a little handle and use that to gently lift the screen.

Step 6

– Grab that blue handle and pull it back to let the Anti-Clamp’s arms loose.

– Slide the arms over the left or right edge of your iPhone—whichever feels right.

– Line up the suction cups near the bottom of your iPhone—one on the screen side, one on the back.

– Give those cups a gentle squeeze so they stick right where you need them.

Step 7

– Slide that blue handle forward to lock those arms in place. Nice and snug!

– Give the handle a full spin clockwise—360 degrees, or until you see the cups start to stretch. Go ahead and channel your inner DJ.

– Keep the suction cups lined up like best friends at a dance party. If they start drifting apart, loosen them a bit and bring those arms back together.

Step 8

– Warm up your iOpener and slip it through the arms of the Anti-Clamp like a pro.

– Fold the iOpener so it’s chilling right on the bottom edge of your iPhone.

– Give it a solid minute—let that adhesive loosen up and wait for a gap to show up.

– Slide an opening pick under the screen and the plastic bezel (not the screen itself—let’s keep things friendly).

– Go ahead and skip the next three steps—you’re already ahead of the game!

Tools Used
  1. iOpeneriPhone X WiFi Antenna Replacement

Step 9

– Grab a hairdryer, heat gun, or whip up an iOpener, and let it work its magic on the lower edge of your iPhone for about a minute. This will help loosen that stubborn adhesive hiding underneath. You’re doing great!

Tools Used
  1. iOpeneriPhone X WiFi Antenna Replacement

Step 10

– If you’re using just one suction handle, stick it to the bottom edge of your phone, making sure to steer clear of that curved glass area. You’ve got this!

Tools Used
  1. Suction HandleiPhone X WiFi Antenna Replacement

Step 11

– Give that suction cup a good pull with steady, confident pressure to open up a little gap between the screen and its frame.

– Slide an opening pick into that gap beneath the screen’s plastic bezel, making sure to avoid the actual screen itself.

Step 12

– Gently slide the opening pick around the bottom left corner and then up the left side of the iPhone, carefully cutting through the adhesive that’s keeping the display stuck in place.

Step 13

Step 14

– Grab your pick and slide it along the bottom edge, then cruise up the right side of your iPhone to keep peeling away that sticky adhesive. Keep it smooth and steady!

Step 15

– Gently glide that opening pick around the top corner of your display, giving it a little wiggle as you pull it down toward the Lightning port. You’re doing great!

– Now, slide that pick on over to the opposite corner and cut through any leftover adhesive holding your display in place. Almost there!

Step 16

– Grab the tiny nub on the suction cup and give it a little pull to pop it off the front panel.

Step 17

– Gently lift the iPhone’s display from the left side, just like flipping open the cover of a book. It’s all about that smooth swing!

– Prop the display up against something sturdy while you work your magic on the phone. Keep it steady, my friend!

– When you’re ready to put it all back together, place the display in its rightful spot, align those clips along the top edge, and give the top edge a gentle press until it clicks into place. If it’s being a bit stubborn, take a moment to check the clips around the display’s perimeter to ensure they’re not bent out of shape.

Step 18

– Let’s get those Y000 screws off! There are five screws holding the logic board connector bracket in place. Here’s the breakdown:

– Three screws at 1.1 mm

– One screw at 3.1 mm

– One screw at 3.7 mm

Step 19

– Take off that bracket with confidence!

– Now’s a great time to power up your iPhone and give everything a test run before you seal that display back up. Just remember to turn your iPhone completely off before diving back into the work.

Step 20

– Gently use the tip of a spudger or a clean fingernail to lift the battery connector up from its spot on the logic board.

– Carefully bend the connector slightly away from the board so it doesn’t accidentally reconnect and power up your phone while you’re working.

Tools Used
  1. SpudgeriPhone X WiFi Antenna Replacement

Step 21

– Gently pry open the front panel sensor assembly connector using a spudger tip or even your fingernail. A little finesse goes a long way!

Tools Used
  1. SpudgeriPhone X WiFi Antenna Replacement

Step 22

– Poke the OLED panel cable connector free using a spudger tip or your fingernail—no need to wrestle with it, just a gentle lift.

– To reconnect, line up the connector and press down on one side till it clicks, then do the same for the other. Skip pressing the middle or you’ll risk bending pins. If it’s looking wonky, double-check the alignment to avoid a permanent oops.

Tools Used
  1. SpudgeriPhone X WiFi Antenna Replacement

Step 23

– Grab your spudger and pop up the digitizer cable connector—just a little finesse needed here.

– Plugging it back in takes some patience. Line it up, then gently press with your fingertip—side to side until you feel that satisfying click.

– Screen acting stubborn? If touch isn’t working, unplug the battery and try seating the connector again. Make sure it clicks and that the socket’s clear of any dust or debris.

Tools Used
  1. SpudgeriPhone X WiFi Antenna Replacement

Step 24

– Gently lift the cable and let the adhesive work its magic as it comes apart.

Step 25

– Take out the display assembly carefully.

– When putting it back together, take a moment here if you want to swap out the waterproof adhesive lining the edges of the display.

Step 26

– Let’s get that bracket out of the way! Remove all seven screws holding it down under the Taptic Engine and speaker:

– Two Y000 screws, 1.9 mm each

– One Y000 screw, 1.2 mm

– One Y000 screw, 1.6 mm

– One Phillips screw, 2.4 mm

– One Phillips screw, 1.7 mm

– One Phillips screw, 1.5 mm

Step 27

– Gently lift the bracket from the edge closest to the battery. Don’t go all the way just yet, as it’s still hanging on by a tiny flex cable.

Step 28

– Hold the bracket out of the way and use the pointy end of your spudger to gently pop up and disconnect the flex cable hiding underneath.

Tools Used
  1. SpudgeriPhone X WiFi Antenna Replacement

Step 29

– Time to say goodbye to that pesky bracket! Go ahead and remove it.

Step 30

– Unscrew the 2.1 mm Y000 screw holding down the speaker connector cover and set it aside gently.

Step 31

– Pop off that speaker connector cover and keep it somewhere safe—you’re on a roll!

Step 32

– Gently use the tip of your trusty spudger to lift and unplug the speaker connector, like a pro.

Tools Used
  1. SpudgeriPhone X WiFi Antenna Replacement

Step 33

– Slide a spudger under the top edge of the speaker, right near the iPhone’s case edge.

– Carefully lift and pop up the top edge of the speaker, but don’t rush it!

– When putting the speaker back, double-check the flex cable’s position—make sure it doesn’t get stuck under the speaker.

Tools Used
  1. SpudgeriPhone X WiFi Antenna Replacement

Step 34

– Grab the speaker by its side edges and give it a gentle side-to-side wiggle to break free from the adhesive that’s holding it to the bottom edge of the iPhone.

– Carefully pull the speaker away from the bottom edge of the iPhone until the adhesive gasket lets go.

Step 35

– Time to take out the speaker! Gently lift it out, making sure not to tug too hard. Just give it a little wiggle and it should come right out. Nice and easy!

Step 36

– Heads up! The speaker’s gasket is a one-time wonder, so let’s get ready to swap it out during reassembly.

– Grab those tweezers and let’s say goodbye to the old gasket—gently peel it off the frame and speaker.

– Time to clean up! Use a microfiber cloth and some isopropyl alcohol to wipe away any sticky residue left behind from the gasket.

– Before you pop in the new speaker gasket, make sure you know which way it goes—look for the big cutout that should fit snugly around the speaker grille mesh.

– Peel off the larger, clear liner from the gasket, then with your trusty tweezers, place the gasket right on the bottom of the speaker.

– Now, give that gasket a good press down with your fingers or a spudger to make sure it sticks like it means it!

– Finally, remove the last liner, and carefully position the speaker back in place, ensuring that the connector isn’t hiding underneath.

Tools Used
  1. SpudgeriPhone X WiFi Antenna Replacement
  2. TweezersiPhone X WiFi Antenna Replacement

Step 37

– Unscrew the 2.3 mm Phillips screw holding down the Taptic Engine. Time to give it some wiggle room!

Step 38

– Grab your spudger and gently lift the Taptic Engine flex cable straight up from its socket. It’s like a mini tug, but make sure you’re steady and don’t yank it out!

Tools Used
  1. SpudgeriPhone X WiFi Antenna Replacement

Step 39

– Carefully take out the Taptic Engine.

Step 40

– Each strip of adhesive comes with a black pull-tab at its end, gently stuck to the battery’s side edge to keep things neat and tidy.

Step 41

– Carefully peel away the first battery adhesive tab from the bottom edge of the battery. You’ve got this!

Step 42

– Go ahead and repeat the previous step to carefully lift off the last two sticky adhesive tabs holding the battery down at the bottom edge.

Step 43

– Boost your chances of success with these tips:

– If a strip decides to break off under the battery and plays hard to get, just move on to the other strips and keep rolling with the steps below.

– Remember, don’t squish the battery! Hold your iPhone securely by its sides.

– Gently keep those strips flat and wrinkle-free as you pull them.

– Take it slow and steady—give the strip a good 15-30 seconds to stretch and separate for each one.

– Pull at a nice low angle to avoid any snags along the bottom edge of the battery.

Step 44

– Grab one of the outer battery adhesive tabs and gently pull it towards the bottom of your iPhone. Nice and steady, we’re almost there!

– Keep the tension consistent as you pull, ensuring it slides smoothly out from between the battery and rear case. Take it slow—patience is key!

Tools Used
  1. TweezersiPhone X WiFi Antenna Replacement

Step 45

– Tackle the other side by repeating the previous step, but save that center strip for last. You’ve got this!

Step 46

– Carefully lift out the center strip—don’t let it catch on the speaker flex cable, or you’ll have a bad day!

Step 47

– Carefully peel and pull apart the tab on the last adhesive strip located at the top edge of the upper battery cell.

Step 48

– Peel off that last stubborn adhesive strip.

– If you’ve already cleared away all four adhesive strips, feel free to skip the next step.

– Give it about a minute to let the alcohol do its magic and soften the glue. Then, use the flat edge of a spudger to carefully pry up the battery.

Tools Used
  1. SpudgeriPhone X WiFi Antenna Replacement

Step 49

– If any sticky strips snapped off and the battery’s still glued to the rear case, grab an iOpener or fire up a hair dryer to heat the area right behind the battery.

– Flip your iPhone over and slide something sturdy (like dental floss or a skinny piece of guitar string) underneath the battery.

– Rock the string back and forth in a sawing motion along the battery’s length to slice through the adhesive. Hang in there—it’s stubborn, but patience wins. Just don’t squish or poke the battery.

– Wrap the ends of the string around a cloth (or throw on some gloves) to save your fingers from the struggle.

Tools Used
  1. iOpeneriPhone X WiFi Antenna Replacement

Step 50

– Grab the battery from the bottom edge and gently lift it out of your iPhone.

– If there’s any leftover alcohol solution inside, give it a careful wipe or let it air dry before popping in your new battery.

– Put the Taptic Engine and speaker back in place before installing the new battery to help keep everything lined up perfectly.

– Before sticking down the replacement battery, briefly reconnect its connector to the logic board socket to make sure it seats just right.

– If your new battery doesn’t come with adhesive strips, check out this guide for tips on swapping those out.

– After putting everything back together, do a force restart to avoid hiccups and make troubleshooting easier.

– Stick the battery down, unplug it, and keep reassembling your device.

Step 51

– Grab your trusty spudger and gently pry away those three cables connected to the front camera assembly:

– First up, we have the dot projector.

– Next is the front camera.

– And last but not least, the infrared camera.

Tools Used
  1. SpudgeriPhone X WiFi Antenna Replacement

Step 52

– Grab your trusty spudger and get to work! Start at the connector and gently slide the spudger between the IR camera cable and the case to give that cable some breathing room. You’ve got this!

– Now, let’s show that front camera cable some love too. Just repeat the same process and separate it from the case!

Tools Used
  1. SpudgeriPhone X WiFi Antenna Replacement

Step 53

– Warm things up a bit to help the adhesive on the front camera assembly relax and let go.

Step 54

– Gently remove the front camera assembly. Take your time, it’s a delicate piece, so handle it with care!

Step 55

– Carefully unplug these cable connectors to keep things moving smoothly.

– Start with the WiFi Antenna connector.

– Next, detach the Wide-Angle Camera connector.

– Then, disconnect the Power Button / Flash / Microphone connector.

– Follow up by unplugging the Telephoto Camera connector.

– Don’t forget the Dock Flex connector.

– Next, remove the Button / Wireless Charging connector.

– Finally, disconnect the Cellular Antenna connector.

Step 56

– Gently pop off that WiFi Antenna cable connector like a pro.

Step 57

– Gently unplug the Wide-Angle Camera cable connector to keep things moving smoothly.

Step 58

– Gently unplug the connector for the Power Button, Flash, and Microphone cable. Take your time—no need to rush this part.

Step 59

– Gently unplug the Telephoto Camera cable connector to keep things safe and sound.

Step 60

– Unplug the Dock Flex cable connector – easy peasy.

– Now, gently bend the cable upwards at a 90-degree angle. This will give you the space you need to gracefully remove the logic board.

Step 61

– Gently unplug the Button / Wireless Charging cable connector to keep things cool and ready for the next step.

Step 62

– Unplug that Cellular Antenna cable connector like a pro!

– Gently nudge the cable to the side, making way for the next steps.

Step 63

– Heads up: The logic board won’t budge if the SIM card tray is still hanging out. If you skipped that earlier, pop it out now.

– Take out the two Phillips screws that hold things together.

– Next up, grab the 2.0 mm Phillips screw that’s grounding everything.

– Remove the grounding tab—just slide it on out.

– Unscrew the Phillips screw that’s 2.7 mm long.

– And finally, remove the 2.1 mm Phillips screw.

Step 64

– When you pop out the SIM card, a little pin slides out from the frame and nudges the eject lever in the SIM card holder. Make sure to gently push that pin back into the frame so it doesn’t get in the way when you’re taking out the logic board.

Step 65

– Grab your fine tip tweezers and gently slide the SIM card eject lever toward the edge of the case.

– When you’re done, the eject lever should look like this—no more pesky pins blocking the logic board from coming out.

Tools Used
  1. TweezersiPhone X WiFi Antenna Replacement

Step 66

– The logic board assembly sits on two posts that pass through the lower board and are fastened to the upper board. To take it out, gently lift it straight up and evenly so it clears the stand-offs without any hiccups.

Step 67

– Unscrew the 1.4 mm Phillips screw that’s holding down the first grounding tab.

– Lift off the grounding tab carefully.

– Keep an eye on how the tab is positioned so you can snap it back just right during reassembly.

Step 68

– Unscrew four 1.5 mm Phillips screws. Easy peasy – just grab your screwdriver and go to work!

Step 69

– Take out the two 1.1 mm Y000 screws—don’t lose these tiny superheroes!

– Pop out the two grounding tabs. Easy does it!

Step 70

– Warm up the back of the case with an iOpener, or give the WiFi antenna a blast from a hot air gun or hair dryer. Think of it as a spa day for your device.

– Gently peel off the WiFi antenna from the case using a spudger. Take it slow—no need to rush the separation!

Tools Used
  1. iOpeneriPhone X WiFi Antenna Replacement
  2. SpudgeriPhone X WiFi Antenna Replacement

Step 71

– Ready to put everything back together? Just retrace your steps in reverse order and you’ll be back up and running. If things get tricky, you can always schedule a repair.

Success!

iPhone X SIM Card Reader Replacement

Duration: 45 minutes
Steps: 5 Steps

Step 1

– Heads up! The SIM card reader on the iPhone X is attached with medium-temp solder, but the motherboard’s middle layer uses low-temp stuff. To keep things smooth, go ahead and split the motherboard first before tackling the SIM card reader.

– Watch out for a few ICs hanging out on the SIM card reader—they’re not just there for decoration.

– Plus, there’s a sneaky plastic piece wedged right in the middle of the SIM card reader. Don’t let it catch you off guard!

Step 2

– Alright, it’s time to get hands-on! As you’re carefully disassembling and doing some soldering, make sure to use rotational air and keep an eye on the temperature. Pop the motherboard onto the PCB Holder. Fire up that Hot Air Gun, set it to 240℃ with airflow level 7, and get to work. Don’t forget to peel off that sticker from the back of the motherboard – it’s gotta go!

– Next up, place the motherboard on the Heating Platform. We’re just focusing on heating the SIM card reader area. Secure the motherboard in place with some high-temp adhesive. Set your Heating Platform to 200℃ and let it do its thing. Now, grab that Hot Air Gun, bump it up to 280℃, airflow 7, and heat the edge of the SIM card reader. You’re almost there!

Step 3

– Give the SIM card reader a gentle wiggle with your tweezers while applying heat. Once it loosens up, lift it straight up—no tilting or twisting.

Tools Used
  1. TweezersiPhone X SIM Card Reader Replacement

Step 4

– Time to swap out the old SIM card reader! Dab a bit of Paste Flux onto the bonding pad—think of it as a little spa moment for your PCB.

– Place the new SIM card reader exactly where it belongs. Let it chill on the 200℃ Heating Platform, then hit those edges evenly with a Hot Air Gun at 280℃ and airflow set to 7. Gently press the SIM card reader while heating, making sure it’s flush with the PCB. Nice and snug!

Step 5

– To put your device back together, just follow these steps in reverse — easy peasy!

– If you hit a snag or want a pro to handle it, you can always schedule a repair with us.

Success!
Put your device back together by following these steps in reverse order.
If you get stuck or want a hand, feel free to schedule a repair with us at Salvation Repair.

iPhone X Rear Case Replacement

Duration: 45 minutes
Steps: 108 Steps

Follow this guide to carefully remove all the parts from the back case of your iPhone X. You’ll learn how to take out the speaker, cables, taptic engine, battery, logic board, and button covers—perfect for swapping out a cracked, dented, or bent rear cover. Heads up: this is the toughest repair you can tackle on an iPhone X without diving into microsoldering, so take your time and stay patient.

Step 1

– Grab a SIM card eject tool or a paperclip, and gently insert it into the tiny hole on the SIM card tray, just next to the side button on your iPhone’s edge.

– Give it a firm press, and the tray should pop right out.

Tools Used
  1. SIM Card Eject TooliPhone X Rear Case Replacement

Step 2

– Take out the SIM card tray from your iPhone—easy does it!

– When putting the SIM card back in, double-check it’s lined up right with the tray to avoid any hiccups.

– That little rubber gasket hugging the SIM tray? It’s the unsung hero keeping water and dust out. If it’s looking worse for wear or missing, swap it out or replace the whole tray to keep your iPhone safe and sound.

Step 3

– First, power off your iPhone. We don’t want any surprises while you’re disassembling it.

– Grab your pentalobe screwdriver and remove the two 6.9 mm screws at the bottom edge. Make sure they come out nice and easy.

– If the screws give you trouble, like they’re stripped or damaged, don’t worry—just replace them and keep going.

Step 4

– Grab your opening pick and measure 3 mm from the tip, then make a little mark with a permanent marker. This will help guide your next steps with precision!

Step 5

– Cover the iPhone’s screen with overlapping strips of clear packing tape until the entire front is snugly wrapped.

– If the suction cup refuses to stick in the upcoming steps, no worries! Fold a sturdy piece of tape (like duct tape) into a little handle and use that to gently lift the screen instead.

Step 6

– Grab the blue handle and pull it back to unlock the Anti-Clamp’s arms.

– Slide those arms over either the left or right side of your iPhone.

– Place the suction cups near the bottom edge of the iPhone—one on the front, and one on the back.

– Give the cups a good squeeze together to create suction where you need it.

Step 7

– Slide the blue handle forward to lock those arms in place.

– Rotate the handle clockwise a full 360 degrees or until you feel the suction cups start to stretch.

– Keep an eye on the suction cups — make sure they stay lined up. If they start to drift, just loosen them a bit and realign the arms.

Step 8

– Warm up your iOpener and slide it through the arms of the Anti-Clamp. No rush here!

– Fold the iOpener and place it gently on the bottom edge of your iPhone.

– Give it a minute to work its magic and create that sweet little gap we need to get started.

– Carefully slide an opening pick under the screen and plastic bezel (avoid poking at the screen itself!).

– Skip the next three steps. You’re good to go!

Tools Used
  1. iOpeneriPhone X Rear Case Replacement

Step 9

– Grab your trusty hairdryer, heat gun, or iOpener, and get ready to work some magic. Apply it to the bottom edge of your iPhone for about a minute. The heat will soften up that stubborn adhesive underneath, making the next step much smoother. Patience is key, but don’t worry, you got this!

Tools Used
  1. iOpeneriPhone X Rear Case Replacement

Step 10

– Stick the suction handle on the bottom edge of your phone—keep it away from the curvy part of the glass.

Tools Used
  1. Suction HandleiPhone X Rear Case Replacement

Step 11

– Gently pull up on the suction cup with steady pressure to create just enough of a gap between the screen and the frame.

– Slip an opening pick into the gap beneath the screen’s plastic bezel—avoid the screen itself!

Step 12

– Gently slide the opening pick around the lower left corner and then up along the left edge of the iPhone, carefully cutting through the adhesive that’s keeping the display stuck in place.

Step 13

Step 14

– Slide your pick back in at the bottom edge of the iPhone, then gently move it up the right side to keep working on separating the adhesive. Smooth and steady wins the race.

Step 15

– Gently slide your opening pick around the top corner of the display while easing the display down toward the Lightning port with a little wiggle or pull.

– Next, glide the pick to the opposite corner and carefully slice through any leftover adhesive holding the display in place.

Step 16

– Grab the tiny nub on the suction cup and give it a little tug to pop it off the front panel.

Step 17

– Start by gently swinging the iPhone display up from the left side, like you’re opening a book. Smooth and easy does it.

– Prop the display up against something sturdy while you work. You want it steady, so you don’t have to worry about it toppling over.

– When putting it all back together, carefully align the clips along the top edge first, and press the top edge into place. Once that’s snug, snap the rest of the display down. If it doesn’t click into place right away, check the clips around the edges. They might be bent, so give them a little love and adjust as needed.

Step 18

– Unscrew five Y000 screws holding down the logic board connector bracket. Here’s the lineup:

– Three little 1.1 mm screws

– One slightly longer 3.1 mm screw

– And one 3.7 mm screw, the big boss of the bunch

Step 19

– Take off the bracket.

– When putting everything back together, this is a perfect moment to power on your iPhone and give all the functions a quick test before sealing the display. Remember to completely power down your iPhone again before continuing with the rest of the reassembly.

Step 20

– Take your trusty spudger or a clean fingernail and gently lift the battery connector from its socket on the logic board. No brute force needed—just a little finesse.

– Once it’s up, nudge the connector away from the logic board. That way, it won’t sneak back into place and power up your phone while you’re working your magic.

Tools Used
  1. SpudgeriPhone X Rear Case Replacement

Step 21

– Gently pop off the front panel sensor assembly connector using the tip of a spudger or your fingernail—think of it like opening a stubborn peanut butter jar lid, but way less sticky.

Tools Used
  1. SpudgeriPhone X Rear Case Replacement

Step 22

– Gently pop off the OLED panel cable connector using the tip of a spudger or your fingernail. No need to flex those muscles—just a little lift and you’re good.

– When reconnecting, line up the connector and press down one side until you hear a click, then do the same on the other side. Skip pressing the middle! Misaligned connectors can bend pins, and trust me, that’s a headache nobody wants.

Tools Used
  1. SpudgeriPhone X Rear Case Replacement

Step 23

– Grab your spudger and gently pop the digitizer cable connector up from its socket. No need for brute force—just a little nudge does the trick.

– Reconnecting? This little guy likes to play hard-to-get because it’s tucked in deep. Take a breather, line it up carefully, and use your fingertip to press down—one side, then the other. You’ll feel a satisfying click when it’s locked in.

– If your screen starts acting shy and ignores your touch, disconnect the battery and give the connector another shot. Make sure it clicks in and the socket is dust-free.

Tools Used
  1. SpudgeriPhone X Rear Case Replacement

Step 24

– Gently lift the cable to break free from the sticky adhesive.

Step 25

– Take off the display assembly. Go slow and steady—no sudden moves!

– When you’re putting things back together, this is the perfect spot to swap out the waterproof adhesive around the edges of the screen.

Step 26

– Let’s get these seven screws out from the bracket underneath the Taptic Engine and speaker:

– Two Y000 1.9 mm screws—tiny but mighty.

– One Y000 1.2 mm screw—blink and you’ll miss it.

– One Y000 1.6 mm screw—just the right size.

– One Phillips 2.4 mm screw—biggest of the bunch.

– One Phillips 1.7 mm screw—the middle child.

– One Phillips 1.5 mm screw—the little sibling.

Step 27

– Gently lift the bracket from the side closest to the battery. No need to fully detach it just yet – it’s still hanging on by a small flex cable.

Step 28

– Keep the bracket pushed aside and carefully use the tip of a spudger to gently pop up and unplug the flex cable tucked underneath.

Tools Used
  1. SpudgeriPhone X Rear Case Replacement

Step 29

– Time to take off the bracket. Gently remove it with a steady hand, and you’re one step closer to success.

Step 30

– Time to show that 2.1 mm Y000 screw who’s boss—remove it to free up the speaker connector cover.

Step 31

– Carefully lift off the speaker connector cover.

Step 32

– Gently use the spudger’s tip to lift and unplug the speaker connector. Take your time—it’s a small but important step!

Tools Used
  1. SpudgeriPhone X Rear Case Replacement

Step 33

– Slide a spudger gently under the top edge of the speaker, right near the iPhone’s case edge.

– Now, carefully lift the top edge of the speaker – it should come up with minimal effort.

– When you put the speaker back, just double-check the flex cable placement to make sure it doesn’t sneak under the speaker.

Tools Used
  1. SpudgeriPhone X Rear Case Replacement

Step 34

– Grab the speaker by its side edges and gently wiggle it side to side. This will loosen up the adhesive holding it to the bottom edge of the iPhone.

– Now, carefully pull the speaker away from the bottom edge of the iPhone. Keep going until the adhesive gasket gives way and the speaker pops free.

Step 35

– Time to take out the speaker! Give it a gentle lift and set it aside for now.

Step 36

– Heads up: the speaker’s gasket is a one-time-use part. When putting things back together, make sure to swap it out with a fresh one.

– Grab your tweezers and carefully peel off every bit of the old gasket from both the frame and the speaker.

– Next, use a microfiber cloth soaked in isopropyl alcohol to wipe away any leftover adhesive gunk on the frame and speaker.

– Before you slap on the new gasket, take a moment to line it up right—the big cutout should wrap neatly around the speaker grille mesh at the bottom.

– Peel off the larger, clear liner from the gasket, then use tweezers to gently set the gasket onto the bottom of the speaker.

– Press down firmly with your fingers or a spudger to make sure that adhesive really sticks and the gasket stays put.

– Finally, peel off the remaining liner and pop the speaker back into place, just watch that the connector doesn’t get trapped underneath.

Tools Used
  1. SpudgeriPhone X Rear Case Replacement
  2. TweezersiPhone X Rear Case Replacement

Step 37

– Unscrew the 2.3 mm Phillips screw holding down the Taptic Engine—easy does it!

Step 38

– Grab a spudger and carefully lift the Taptic Engine flex cable out of its socket. Just pry it up gently, and it’ll come free.

Tools Used
  1. SpudgeriPhone X Rear Case Replacement

Step 39

– Lift out the Taptic Engine and set it aside like a boss.

Step 40

– Each adhesive strip comes with a black pull-tab at the end, gently sticking to the battery’s side edge. Just give it a little tug and you’ll be good to go!

Step 41

– Gently peel away the first battery adhesive tab from the bottom edge of the battery.

Step 42

– Go ahead and do the same thing for the last two adhesive tabs stuck to the bottom edge of the battery—keep it smooth and steady!

Step 43

– Want to boost your chances? Here’s how:

– If a strip breaks off under the battery and won’t come out, no worries! Just move on to the next strip and keep following the steps below.

– Don’t squish the battery! Hold the iPhone carefully by its sides.

– Keep those strips nice and flat, no wrinkles allowed while you pull them out.

– Take it slow and steady—give the strip some time to stretch and separate. It should take around 15-30 seconds to remove each one.

– When pulling, aim for a low angle so the strip doesn’t get stuck on the bottom edge of the battery.

Step 44

– Find one of the outer battery adhesive tabs and gently pull it away from the battery, guiding it toward the bottom of the iPhone.

– Keep a steady pull and maintain constant tension on the strip until it slides out smoothly from between the battery and the rear case.

Tools Used
  1. TweezersiPhone X Rear Case Replacement

Step 45

– Now, repeat the process for the opposite side, but save the center strip for last. You’ll be done in no time!

Step 46

– Slide out the center strip gently, keeping an eye on that sneaky speaker flex cable so it doesn’t get caught up in the action.

Step 47

– Gently lift and separate the pull tab from the last adhesive strip at the top edge of the upper battery cell. Give it a little wiggle if it’s feeling stubborn!

Step 48

– Gently peel off the last adhesive strip – it’s almost there!

– If you’ve already removed all four adhesive strips, feel free to skip this step and move on.

– Let the alcohol solution do its magic for about a minute to loosen up the adhesive. Then, using the flat end of a spudger, carefully lift the battery out.

Tools Used
  1. SpudgeriPhone X Rear Case Replacement

Step 49

– If the adhesive strips snapped and the battery is still holding on for dear life, grab an iOpener or fire up a hair dryer to warm up the rear case right behind the battery.

– Flip your iPhone back so it’s screen-side up, and slide a sturdy piece of string (dental floss or some thin guitar string works wonders) underneath the battery.

– Work the string back and forth in a gentle sawing motion along the length of the battery. The adhesive can be stubborn, so take your time. Patience wins! Just don’t bend or poke the battery.

– Wrap the ends of the string around a cloth or pop on some gloves to save your fingers from the workout.

Tools Used
  1. iOpeneriPhone X Rear Case Replacement

Step 50

– Grab the battery by its bottom edge and lift it out of the iPhone.

– If there’s any leftover alcohol solution inside the phone, gently wipe it off or let it air dry before popping in your new battery.

– Before installing the new battery, reattach the Taptic Engine and speaker. This will help keep the battery in place during installation.

– Before sticking the new battery down, plug it back into the logic board socket just to make sure it fits snugly in place.

– If your new battery doesn’t have adhesive already, no worries! Follow our guide to swap out the adhesive strips.

– After putting everything back together, do a force restart. It can prevent common issues and save you time troubleshooting later on.

– Stick the battery in, unplug it for now, and finish putting your device back together.

Step 51

– Grab the flat end of your trusty spudger and gently unplug the trio of front camera assembly cables:

– First up, the dot projector.

– Next, the front camera.

– And finally, the infrared camera.

Tools Used
  1. SpudgeriPhone X Rear Case Replacement

Step 52

– Grab your spudger and carefully slide its tip between the IR camera cable and the case, starting at the connector. This will help you gently separate the cable from the case.

– Now, do the same for the front camera cable. A little patience goes a long way here!

Tools Used
  1. SpudgeriPhone X Rear Case Replacement

Step 53

– Warm things up a bit to loosen the adhesive around the front camera assembly. A little heat goes a long way!

Step 54

– Gently detach the front camera assembly and set it aside. We’re almost there!

Step 55

– Carefully unplug the following cable connectors to get things moving:

– The WiFi Antenna connector.

– The Wide-Angle Camera connector.

– The Power Button / Flash / Microphone connector.

– The Telephoto Camera connector.

– The Dock Flex connector.

– The Button / Wireless Charging connector.

– The Cellular Antenna connector.

Step 56

– Gently unplug the WiFi antenna cable connector to keep things cool and connected.

Step 57

– Gently unplug the Wide-Angle Camera cable connector to keep things safe and sound.

Step 58

– Unplug the cable connector for the Power Button, Flash, and Microphone—just a gentle lift and it’s out!

Step 59

– Gently unplug the Telephoto Camera cable connector to keep things moving smoothly.

Step 60

– Unplug the Dock Flex cable connector with care.

– Give that cable a little bend, about 90 degrees straight up, to create some space for removing the logic board. You’ve got this!

Step 61

– Gently unplug the Button / Wireless Charging cable connector—like you’re disconnecting from a group chat that’s gone off the rails.

Step 62

– Time to give the Cellular Antenna cable a little freedom – disconnect that connector!

– Gently bend the cable out of the way so it doesn’t get in the way of your next move.

Step 63

– You can’t take out the logic board with the SIM card tray still hanging out. If you missed it earlier, now’s the time to pop it out.

– Unscrew the two Phillips screws holding things down.

– Next, remove the 2.0 mm Phillips screw that grounds the board.

– Pull off that grounding tab.

– Take out the single 2.7 mm Phillips screw.

– Then remove the 2.1 mm Phillips screw.

Step 64

– When you pop out the SIM card, a little pin comes along for the ride, sliding out from the frame and giving the eject lever a push in the SIM card carrier. Don’t forget, that pin needs to be slid back into its frame so it doesn’t block your way when you’re ready to remove the logic board. Keep it neat and tidy!

Step 65

– Grab a pair of fine-tip tweezers and gently slide the SIM card eject lever to the side of the case.

– Once you’ve slid it over, the eject lever should look like this. The pin will no longer block the removal of the logic board.

Tools Used
  1. TweezersiPhone X Rear Case Replacement

Step 66

– The logic board assembly sits on two posts that poke through the lower board and lock into the upper board. To take it out, lift it straight up evenly so you easily clear the stand-offs without any drama.

Step 67

– First, grab your trusty screwdriver and unscrew the two Phillips screws holding the camera bracket in place. Here’s the scoop on the screw sizes you’ll need:

– One screw is 2.3 mm long

– The other one is a little smaller, 2.0 mm

Step 68

– Grab your tweezers and carefully fold that tiny metal grounding bracket out of the way. Heads up: don’t yank it up since it’s attached to a delicate flex cable—handle with care!

Tools Used
  1. TweezersiPhone X Rear Case Replacement

Step 69

– Gently lift the camera bracket from the side nearest the battery and take it out.

– When you’re ready to pop that camera bracket back in, it’s all about reversing the steps: start by aligning the outside edge and sliding the tab on the right side into the gap between the phone’s case and the camera module. Then, simply swing the bracket down over the camera like a pro.

Step 70

– Grab an opening tool or your trusty fingernail and gently pry the two camera connectors straight up to unplug them from their sockets.

Step 71

– Place the tip of a spudger into the tiny notch at the bottom right corner of the camera module.

– Carefully pry upward to pop the camera out of the iPhone without causing any harm.

Tools Used
  1. SpudgeriPhone X Rear Case Replacement

Step 72

– Carefully pop out the rear-facing camera module.

Step 73

– Take out the 1.2 mm Y000 screw holding the cellular antenna cable to the screen retainer.

– Gently bend the antenna cable away from the case side so you can reach the screws that keep the retainer attached to the case.

Step 74

– Unscrew the three 1.5 mm Phillips screws that are keeping the screen retainer in place. Don’t let them roll away—you’ll need them later.

– Lift off the retainer like you’re opening a treasure chest. Onward to the next step!

Step 75

– Unscrew the 2.3 mm stand-off screw that’s keeping the barometric vent in place.

– Lift off the barometric vent and set it aside.

Step 76

– Take out those two 2.6 mm stand-off screws that are keeping the Lightning connector anchored to the back of the case.

– Next, remove the pair of 2.9 mm Phillips screws that are locking the charging port into the bottom of the case.

Step 77

– Warm up the adhesive that’s holding the flex cable to the case. You can use a hot air gun, a hair dryer, or heat the back of the case with an iOpener – whatever works best for you!

– Use a spudger to gently lift the dock connector cable – it’s like peeling back a sticker, but way more satisfying!

Tools Used
  1. iOpeneriPhone X Rear Case Replacement
  2. SpudgeriPhone X Rear Case Replacement

Step 78

– Keep gently lifting the dock connector up – you’re doing great!

Step 79

– Carefully unplug the dock connector to set it free.

Step 80

– Warm up the adhesive holding the flex cable to the case by gently heating it with a hot air gun or a hair dryer, or try warming the back of the case using an iOpener to make removal a breeze.

Tools Used
  1. iOpeneriPhone X Rear Case Replacement

Step 81

– Gently lift the cable using a spudger to peel it away.

Tools Used
  1. SpudgeriPhone X Rear Case Replacement

Step 82

– Gently unplug the interconnect cable to keep things moving smoothly.

Step 83

– Lift up the end of the dock connector to open up space for the power button and screen holder.

– Gently fold the dock connector upward and keep it out of your way.

Step 84

– Unscrew the two screws holding down that screen clip—time to free it up!

– Gently lift off the screen retainer and set it aside.

– One screw is a 2.1 mm Phillips, the other is 1.9 mm Phillips—keep track so they don’t wander off.

– When putting the retainer back, make sure to slide it behind the black plastic piece opposite the power button—smooth moves here!

Step 85

– Unscrew the last 2.0 mm Phillips screw that’s holding the power button in place. Nice and easy, just a simple twist, and you’re on your way!

Step 86

– Gently peel the flex cable away from the frame. Take it slow, and it should come off smoothly without any issues!

Step 87

– Grab your trusty spudger and gently nudge out the flash and microphone. You’re doing great!

– Now, it’s time to remove the entire assembly. Keep up the awesome work!

Tools Used
  1. SpudgeriPhone X Rear Case Replacement

Step 88

– Take out the 1.4 mm Phillips screw that’s keeping the grounding tab in place.

– Carefully remove the grounding tab.

– Remember how the tab is positioned – it’s important to put it back the same way during reassembly. A little attention to detail goes a long way!

Step 89

– Time to remove the six screws holding the buttons in place.

– Two screws are 1.5 mm Phillips—tiny but mighty!

– Two are 1.9 mm Phillips—slightly beefier.

– One is a 2.4 mm Phillips—the heavyweight champ.

– And one is a 1.7 mm Phillips—just right.

– Keep your screws organized for a smooth reassembly!

Step 90

– Flip off the ring/silent switch located on the side of the case.

– Gently use a spudger to lift the flex cable away from the bottom of the case.

Tools Used
  1. SpudgeriPhone X Rear Case Replacement

Step 91

– Warm up the case using an iOpener or heat the cable with a hot air gun or hair dryer to loosen the adhesive, making it a breeze to remove.

– Gently peel off the button cable.

– Use tweezers to hold the cable steady while carefully sliding a spudger between the cable and the case to lift it out.

Tools Used
  1. iOpeneriPhone X Rear Case Replacement
  2. SpudgeriPhone X Rear Case Replacement
  3. TweezersiPhone X Rear Case Replacement

Step 92

– Warm up the back of your phone using an iOpener, or use a hot air gun or hair dryer to gently heat the coil. This will help soften the adhesive and make it easier to remove.

– Carefully peel off the wireless charging coil once it’s loosened up.

Tools Used
  1. iOpeneriPhone X Rear Case Replacement

Step 93

– Lift out the assembly and set it aside like a pro.

Step 94

– When swapping out the button assembly, don’t forget to move the ring/silent switch from the old one to the new. It’s a quick switcheroo that keeps your device running smoothly!

Step 95

– Let’s kick things off by unscrewing the 1.4 mm Phillips screw that’s keeping the first grounding tab in place. You got this!

– Now, gently remove that grounding tab like a pro.

– Take a quick moment to remember how that tab was oriented so you can pop it back in just right when it’s time for reassembly. You’ve got this!

Step 96

– Unscrew the four 1.5 mm Phillips screws. Take your time – they’re small but not too tricky!

Step 97

– Grab your Y000 screwdriver and remove those two 1.1 mm screws. It’s quick, don’t sweat it!

– Now, gently remove the two grounding tabs. Nothing too tricky here, just a little finesse!

Step 98

– Warm up the back cover with an iOpener, or hit the WiFi antenna with a hot air gun or hair dryer for a bit.

– Gently lift the WiFi antenna off the case using a spudger. Take it slow—no need for heroics here!

Tools Used
  1. iOpeneriPhone X Rear Case Replacement
  2. SpudgeriPhone X Rear Case Replacement

Step 99

– Gently detach the WiFi antenna from its connection. You’ve got this!

Step 100

– Take out the 2.3 mm Phillips screw that’s holding the antenna onto the rear camera frame. Just a quick twist and it’s out!

– Now, unscrew the 1.5 mm Phillips screw that’s keeping the antenna attached to the case. Another easy spin and you’re golden.

Step 101

– Gently lift the cable end off the post at the back of the case.

– Carefully peel the cable away from the rear camera housing using a spudger.

– Take out the Bluetooth antenna with a steady hand.

Tools Used
  1. SpudgeriPhone X Rear Case Replacement

Step 102

– Unscrew the four 1.5 mm Phillips screws hanging onto the two screen retainer clips on the left side. Let’s set those little guys free!

– Slide out the two retainers and give yourself a high five—one step closer to victory.

Step 103

– Give that switch a little nudge to the left.

– With your trusty fine tip tweezers, grab the upper arm of the switch and slide it down to free it from its cozy retainer.

– Now, gently lift the end and slide it out from the other side like a pro.

Tools Used
  1. TweezersiPhone X Rear Case Replacement

Step 104

– Lift that spring clip straight up—give it a solid 90-degree salute!

Step 105

– Grab one end of the spring clip with tweezers—channel your inner claw machine champ.

– Give the clip a confident tug until it pops free from the button. No hesitation!

– Swing the clip out a bit like you’re opening a tiny door.

– Now, slide the clip the other way to release the opposite end.

– Lift out the spring clip and set it aside for its well-deserved break.

– Do the same for the volume up and down buttons. You’ve got this!

Tools Used
  1. TweezersiPhone X Rear Case Replacement

Step 106

– Lift the right side of the retainer up around 20 degrees. No rush, just a nice little tilt.

– Gently pull the retainer away from the button—straight out, nice and easy.

– Repeat the process as needed. It’s like the reset button for your retainer.

– When you’re putting things back together, ensure the retainer is seated all the way down. The bottom gap should be nice and even, stretching evenly across the length of the button.

Step 107

– If you’re struggling to grab the button from the outside of the case, no worries—just push the pins out from the inside.

– Carefully remove the button.

– Repeat the process for the remaining buttons.

– Before jumping into reassembling the buttons, take a moment to watch the video again. If disassembling them was a challenge, reassembly might test your patience—but don’t worry! Take it slow, stay focused, and soon enough, they’ll fit right back in place.

Step 108

– To put your device back together, just follow these steps in reverse — you’ve got this! And if things get tricky, remember, you can always schedule a repair with us.

Success!
To put your device back together, simply retrace your steps and do the reverse of what you did before. If you hit a snag, don’t hesitate to schedule a repair for some extra support!

iPhone X Power and Audio Exterior Buttons Replacement

Duration: 45 minutes
Steps: 80 Steps

The buttons on the outside of your device include the Power/Lock Button, Volume Buttons, and the Vibrate/Ring Switch. This guide is your go-to for swapping out buttons that have seen better days. We’ve taken inspiration from a fantastic video that explains how to expertly remove and replace those power and volume buttons, so a big thanks for that insight! For a deeper dive, check out the video: iPhone X Side Button Replacement Tutorial – DIY Pro Tips – Repair With Me – YouTube.

Step 1

– Grab a SIM card eject tool or even a trusty paperclip and pop it into the tiny hole on the SIM tray, right by the side button on your iPhone’s edge.

– Give it a little push and voilà—the tray pops out!

Tools Used
  1. SIM Card Eject TooliPhone X Power and Audio Exterior Buttons Replacement

Step 2

– Pop out the SIM card tray from your iPhone, like a pro.

– When you’re putting the SIM card back, just make sure it lines up perfectly with the tray. A little attention to detail goes a long way!

– The rubber gasket around the SIM tray is there to keep dust and water at bay. If it’s damaged or missing, replace the gasket (or even the whole tray) to keep your iPhone’s insides safe and sound.

Step 3

– Make sure to power off your iPhone before you start taking it apart.

– Next, remove the two 6.9 mm-long pentalobe screws located at the bottom edge of your iPhone.

– If those screws look stripped or beat up, go ahead and swap them out with new ones.

Step 4

– From the tip, measure 3 mm and mark your opening pick with a permanent marker—precision is the name of the game!

Step 5

– Grab some clear packing tape and lay it down in overlapping strips across the iPhone’s screen. Cover the whole front, like you’re giving it a protective armor.

– If the suction cup refuses to cooperate, don’t sweat it! Take a sturdy piece of tape (duct tape works great) and fold it into a handle. Use that to lift the screen up instead.

Step 6

– Give that blue handle a little tug backward to set the Anti-Clamp’s arms free.

– Gently slide those arms over the left or right edge of your iPhone.

– Place the suction cups close to the bottom edge of the iPhone—one on the front side and the other on the back.

– Squeeze the cups together to create a solid grip on the area you want to work on.

Step 7

– Slide that snazzy blue handle forward to lock the arms in place.

– Give the handle a confident spin—clockwise until you’ve done a full circle or you see those suction cups start to stretch out.

– Keep an eye on the suction cups; they should stay lined up like best buddies. If they drift apart, just loosen them up a bit and bring those arms back together.

Step 8

– Warm up your iOpener and slip it between the arms of the Anti-Clamp—like threading a needle, but way less stressful.

– Fold that iOpener so it cozies up on the bottom edge of your iPhone.

– Give it a minute for the sticky stuff to loosen up and create a tiny gap for you—patience pays off!

– Slide an opening pick under the screen and plastic bezel (not under the actual screen, unless you like drama), and gently work your way in.

– You can skip the next three steps, so go ahead and jump ahead!

Tools Used
  1. iOpeneriPhone X Power and Audio Exterior Buttons Replacement

Step 9

– Grab a hairdryer, heat gun, or get your iOpener warmed up and give the bottom edge of your iPhone a nice minute-long spa session. This loosens up the stubborn adhesive hiding underneath and gets things ready for the next move.

Tools Used
  1. iOpeneriPhone X Power and Audio Exterior Buttons Replacement

Step 10

– When rocking a solo suction handle, slap it right on the bottom edge of your phone—just steer clear of the curvy glass parts to keep things smooth.

Tools Used
  1. Suction HandleiPhone X Power and Audio Exterior Buttons Replacement

Step 11

– Gently pull on the suction cup with steady, firm pressure to pop open a tiny gap between the screen and the frame.

– Carefully slide an opening pick into that gap below the screen’s plastic bezel (not the screen itself, we’re not trying to crack that!).

Step 12

– Take your opening pick for a spin around the lower left corner, then cruise up the left edge of your iPhone, slicing through that stubborn adhesive keeping the display glued down.

Step 13

Step 14

– Slide your pick back in at the bottom edge of the iPhone, then glide it up along the right side to keep breaking through that sticky adhesive.

Step 15

– Carefully slide the opening pick around the top corner of the display while gently pulling or wiggling the display downward toward the Lightning port.

– Next, move the pick to the opposite corner and slice through any leftover adhesive holding the display in place.

Step 16

– Gently pull on the small nub of the suction cup to detach it from the front panel.

Step 17

– Gently lift the iPhone’s display from the left side, just like opening a book. It’s simple—think of it as the first chapter of your repair adventure!

– Now, prop the display up with something stable while you work your magic on the rest of the phone. It’s all about keeping things steady!

– When it’s time to put things back together, carefully position the display, aligning the clips along the top edge. Gently press the top edge in place before snapping the rest of the display down. If it feels like it’s not clicking into place, check the clips around the edges and make sure none of them are bent or misaligned. Everything should fit together just right!

Step 18

– Take out the five Y000 screws holding down the logic board connector bracket. Here’s the lineup:

– Three screws measuring 1.1 mm

– One screw at 3.1 mm

– One screw at 3.7 mm

Step 19

– Pop that bracket off and set it aside somewhere safe.

– Before you seal up the display, it’s prime time to turn your iPhone on and make sure everything’s working like a charm. Once you’ve done your victory dance, shut it down completely before moving on.

Step 20

– Grab a spudger tip or even a trusty fingernail, and gently pop the battery connector up from its snug little socket on the logic board.

– Now give that connector a tiny bend away from the board so it doesn’t sneak back into place and power things up while you’re in the middle of the repair.

Tools Used
  1. SpudgeriPhone X Power and Audio Exterior Buttons Replacement

Step 21

– Gently pry up the front panel sensor assembly connector using the tip of a spudger or your fingernail to disconnect it.

Tools Used
  1. SpudgeriPhone X Power and Audio Exterior Buttons Replacement

Step 22

– Gently use the tip of a spudger or your fingernail to unplug the OLED panel cable connector.

– When reconnecting, line up one side of the connector and press it down until you hear a click, then do the same on the other side. Avoid pressing the middle to prevent bending the pins, which could cause permanent damage.

Tools Used
  1. SpudgeriPhone X Power and Audio Exterior Buttons Replacement

Step 23

– Grab your spudger and gently use the tip to lift the digitizer cable connector out of its socket.

– This connector has a sneaky, recessed spot, so it might take a bit of patience. Don’t rush! Line it up slowly, and then gently press it into place with your finger—first one side, then the other. You’ll hear a satisfying click when it’s locked in.

– If your screen’s still acting up and not responding to touch after you’ve done the repair, try disconnecting the battery. Then, give this connector another seat. Make sure it clicks snugly into place, and double-check there’s no dust or junk blocking the socket.

Tools Used
  1. SpudgeriPhone X Power and Audio Exterior Buttons Replacement

Step 24

– Gently lift the cable just enough to break the adhesive’s grip — no need to rush, you’ve got this!

Step 25

– Carefully detach the display assembly. Take it slow—no need to rush!

– When you’re putting everything back together, take a quick break here if you’re looking to replace the waterproof adhesive around the edges of the display. It’s a nice little touch to keep things sealed and safe!

Step 26

– Time to tackle the bracket below the Taptic Engine and speaker! Grab your tools and remove these seven screws:

– Two Y000 screws, 1.9 mm each

– One Y000 screw, 1.2 mm

– One Y000 screw, 1.6 mm

– One Phillips screw, 2.4 mm

– One Phillips screw, 1.7 mm

– One Phillips screw, 1.5 mm

Step 27

– Gently lift the bracket from the side closest to the battery. No need to fully detach it yet, since it’s still tethered by a small flex cable.

Step 28

– Gently pull the bracket aside and use the spudger tip to lift and disconnect the flex cable hiding underneath.

Tools Used
  1. SpudgeriPhone X Power and Audio Exterior Buttons Replacement

Step 29

– Let’s get that bracket off!

Step 30

– Take out the 2.1 mm Y000 screw holding down the speaker connector cover.

Step 31

– Gently lift off the speaker connector cover to get things moving.

Step 32

– Gently use the tip of a spudger to lift and disconnect the speaker connector. A little nudge and it should come right off!

Tools Used
  1. SpudgeriPhone X Power and Audio Exterior Buttons Replacement

Step 33

– Slip a spudger under the top edge of the speaker—right by the edge of the iPhone’s case. It’s like sneaking a cookie from the jar, but for tech.

– Carefully lift and pry up the top edge of the speaker. No need for superhero strength—just a gentle touch does the trick.

– When putting the speaker back, double-check that the flex cable isn’t hiding underneath. Give it a little room to breathe.

Tools Used
  1. SpudgeriPhone X Power and Audio Exterior Buttons Replacement

Step 34

– Grab the speaker by the edges and gently wiggle it back and forth. This will loosen the adhesive that’s holding it to the iPhone’s bottom edge.

– Once it’s loose, carefully pull the speaker away from the iPhone’s bottom until the adhesive comes off.

Step 35

– Take out the speaker—nice and easy, like pulling the last slice of pizza from the box.

Step 36

– That speaker gasket is a one-way ticket—once it’s off, it’s gone for good! So, let’s get prepped for a fresh install.

– Grab your tweezers and gently peel away every bit of the old gasket from both the frame and the speaker. No turning back now!

– Wipe down all that sticky leftover goo with a microfiber cloth and a splash of isopropyl alcohol. The cleaner, the better.

– Before tossing on the new gasket, check its orientation: look for the big cutout—it goes right around the speaker grille mesh at the bottom.

– Peel off the bigger, clear liner from the gasket. Use tweezers for some precision placement and set the new gasket onto the bottom of the speaker.

– Give it a good press with your fingers or a spudger to make sure the adhesive sticks. Secure and snug!

– Take off the last liner, pop the speaker into place, and double-check that the speaker connector isn’t hiding underneath.

Tools Used
  1. SpudgeriPhone X Power and Audio Exterior Buttons Replacement
  2. TweezersiPhone X Power and Audio Exterior Buttons Replacement

Step 37

– Unscrew that 2.3 mm Phillips screw holding down the Taptic Engine. It’s not going anywhere with that screw in place!

Step 38

– Grab a spudger and gently work it under the Taptic Engine flex cable. Once you’ve got it, lift it up carefully from its socket. No rush, just a smooth move!

Tools Used
  1. SpudgeriPhone X Power and Audio Exterior Buttons Replacement

Step 39

– Take out the Taptic Engine—give it a gentle lift and set it aside like the VIP it is.

Step 40

– Each strip of adhesive has a black pull-tab sticking out, gently attached to the battery’s side edge for easy grip.

Step 41

– Gently peel up the first battery adhesive tab from the bottom edge of the battery.

Step 42

– Go ahead and repeat the last move to gently peel off the other two sticky tabs holding the battery’s bottom edge in place.

Step 43

– To boost your chances of a smooth repair:

– If a strip breaks off under the battery and you can’t get it back, don’t sweat it. Just move on to the other strips and follow the next steps below.

– Make sure you’re not pressing on the battery. Grip the iPhone firmly by its sides for a secure hold.

– Keep the strips nice and flat as you pull. Wrinkles are not your friend here.

– Take it slow and steady while pulling the strip. Stretch it out gently, it should take about 15-30 seconds to remove each strip.

– Pull at a gentle angle so the strip doesn’t catch on the bottom edge of the battery.

Step 44

– Grab one of those outer battery adhesive tabs and give it a gentle, slow pull—aim toward the bottom of your iPhone.

– Keep a steady grip and consistent tension on the strip, letting it wiggle free from between the battery and the rear case.

Tools Used
  1. TweezersiPhone X Power and Audio Exterior Buttons Replacement

Step 45

– Do the same thing on the other side—peel off the strip over there too. Save the center strip for last; it’s the grand finale.

Step 46

– Gently pull out the center strip, and keep an eye out for the sneaky speaker flex cable so it doesn’t get caught.

Step 47

– Gently pull up and split the tab on the last sticky strip, right at the top edge of the upper battery cell. You’re almost there—keep it steady!

Step 48

– Peel off that last adhesive strip and toss it aside. You’re almost there!

– If you’ve already removed all four strips, feel free to skip ahead. You’re on track!

– Let the alcohol solution do its thing for about a minute to loosen up that adhesive. Once it’s good and soft, gently use the flat end of a spudger to lift the battery free. Nice and easy!

Tools Used
  1. SpudgeriPhone X Power and Audio Exterior Buttons Replacement

Step 49

– If any of the adhesive strips snap off and the battery is still stuck to the rear case, grab an iOpener or a hair dryer and gently heat the back of the phone right behind the battery.

– Flip the iPhone back over and carefully slide a sturdy piece of string—dental floss or thin guitar string works great—underneath the battery.

– Use a smooth sawing motion, pulling the string side to side along the entire battery to break up the adhesive. It might take a bit of patience since the glue doesn’t give up easily, but keep at it and the battery will come free. Just be sure not to bend or damage the battery.

– Wrap the string ends around a cloth or wear gloves to keep your fingers safe while you work.

Tools Used
  1. iOpeneriPhone X Power and Audio Exterior Buttons Replacement

Step 50

– Grab the battery from its bottom edge and gently pull it out of the iPhone.

– If there’s any leftover alcohol solution inside the phone, give it a careful wipe or let it air dry before popping in your new battery.

– Put the Taptic Engine and speaker back in place before installing the new battery to help keep everything lined up just right.

– Before sticking down the replacement battery, temporarily reconnect its connector to the logic board socket to make sure it fits perfectly in its spot.

– If your new battery didn’t come with adhesive strips already attached, check out this guide for tips on swapping in new adhesive.

– After putting everything back together, do a force restart to help dodge any hiccups and make troubleshooting easier.

– Stick the battery down, disconnect it, and then finish reassembling your device.

Step 51

– Grab your trusty spudger and gently use the flat end to disconnect the three front camera assembly cables:

– First up, the dot projector.

– Next, the front camera.

– Finally, the infrared camera.

Tools Used
  1. SpudgeriPhone X Power and Audio Exterior Buttons Replacement

Step 52

– Take the tip of your trusty spudger and gently wiggle it under the IR camera cable right at the connector to loosen it from the case.

– Do the same smooth move for the front camera cable to separate it from the case.

Tools Used
  1. SpudgeriPhone X Power and Audio Exterior Buttons Replacement

Step 53

– Warm things up a bit to get that adhesive holding the front camera assembly to loosen its grip.

Step 54

– Carefully detach the front camera assembly and set it aside. Take it easy, it’s just one step closer to bringing your device back to life!

Step 55

– Carefully unplug each of these cable connectors:

– The WiFi Antenna connector.

– The Wide-Angle Camera connector.

– The Power Button / Flash / Microphone connector.

– The Telephoto Camera connector.

– The Dock Flex connector.

– The Button / Wireless Charging connector.

– The Cellular Antenna connector.

Step 56

– Gently detach the WiFi Antenna cable connector. Just give it a little pull, no need for brute force.

Step 57

– Unplug the Wide-Angle Camera cable connector—give it a gentle lift and set it free!

Step 58

– Unplug the connector for the Power Button, Flash, and Microphone cable. Easy does it—just a little wiggle and it’ll pop right out!

Step 59

– Gently unplug the Telephoto Camera cable connector—no wrestling moves needed, just a smooth disconnect!

Step 60

– Unplug that Dock Flex cable connector like a pro!

– Now, give that cable a little bend at a 90-degree angle straight up to create some space for the logic board to make its grand exit.

Step 61

– Gently unplug the Button / Wireless Charging cable connector to keep things powered down and ready for the next step.

Step 62

– Unplug the Cellular Antenna cable connector.

– Gently move the cable aside, making some room for the next steps.

Step 63

– Heads up! The logic board won’t budge if the SIM card tray is still hanging out. If you missed it earlier, go ahead and pop it out now.

– Grab your trusty Phillips screwdriver and take out those two mounting screws.

– Next up, remove the 2.0 mm Phillips grounding screw.

– Lift out the grounding tab—easy does it.

– Unscrew the 2.7 mm Phillips screw.

– Finish off with the 2.1 mm Phillips screw.

Step 64

– When you pop the SIM card out, a pin will slide out from the frame and give a little push to the eject lever in the SIM card carrier. To keep things smooth, just push that pin back into the frame so it doesn’t get in the way of removing the logic board.

Step 65

– Grab your fine tip tweezers and gently nudge the SIM card eject lever toward the side of the case. No need to wrestle with it—just a smooth slide does the trick.

– When you’re done, the eject lever should look just like this: the pin will be out of the way, making the logic board removal a breeze.

Tools Used
  1. TweezersiPhone X Power and Audio Exterior Buttons Replacement

Step 66

– The logic board assembly likes to hang out on two posts that go through the lower board and hold tight to the upper board. To set it free, lift it straight up—nice and even—to clear those stand-offs.

Step 67

– Start by unscrewing the 1.4 mm Phillips screw that’s holding the grounding tab in place.

– Once that’s done, carefully remove the grounding tab.

– Take a quick mental note of how the tab is oriented – you’ll want to make sure it goes back in the same way when you’re reassembling everything.

Step 68

– Let’s get those buttons free! Start by unscrewing the six screws holding them in place.

– You’ll need two 1.5 mm Phillips screws, so grab those.

– Next up, grab two 1.9 mm Phillips screws.

– Don’t forget about the one 2.4 mm Phillips screw; it’s the big one in the bunch.

– And last but definitely not least, let’s not overlook the one 1.7 mm Phillips screw.

Step 69

– Flip the ring/silent switch off from the side of the case with a smooth move.

– Grab your spudger and gently lift the flex cable away from the bottom of the case.

Tools Used
  1. SpudgeriPhone X Power and Audio Exterior Buttons Replacement

Step 70

– Gently warming the case with an iOpener or warming the cable using a hot air gun or hair dryer helps loosen the adhesive, making the removal process smoother.

– Carefully peel off the button cable.

– Use tweezers to hold the cable steady while you slide a spudger between the cable and the case to lift it out.

Tools Used
  1. iOpeneriPhone X Power and Audio Exterior Buttons Replacement
  2. SpudgeriPhone X Power and Audio Exterior Buttons Replacement
  3. TweezersiPhone X Power and Audio Exterior Buttons Replacement

Step 71

– Gently lift the end of the dock connector to clear the way for the power button and screen retainer.

– Carefully bend the dock connector out of the way, making sure it stays clear of other components.

Step 72

– Unscrew the two screws that are holding the screen retainer clip in place.

– Gently remove the screen retainer.

– Grab that trusty 2.1 mm Phillips screwdriver and unscrew one screw.

– Then, use your 1.9 mm Phillips screwdriver for the next screw.

– When you’re putting the retainer back, just remember to slide it behind the black plastic piece on the opposite side of the power button. Nice and smooth!

Step 73

– Unscrew that last 2.0 mm Phillips screw holding down the power button. Just one more to go!

Step 74

– Gently lift the flex cable away from the frame. Take your time—this part is all about being smooth and careful!

Step 75

– Gently work your spudger around the edges to pop out the flash and microphone.

– Carefully lift and remove the assembly.

Tools Used
  1. SpudgeriPhone X Power and Audio Exterior Buttons Replacement

Step 76

– Slide the switch left like it’s got somewhere to be.

– Grab the top part of the switch with your fine tip tweezers and nudge it downward so it clears the retainer.

– Pop up the end and smoothly slide it out from the other side.

Tools Used
  1. TweezersiPhone X Power and Audio Exterior Buttons Replacement

Step 77

– Pop that spring clip straight up to a cool 90 degrees—like giving it a high five!

Step 78

– Grab one side of the spring clip using a pair of tweezers.

– Give it a steady tug to detach it from the button.

– Gently swing the clip away from the button for some extra space.

– Slide the clip in the opposite direction to release the other end.

– Carefully take the spring clip out.

– Repeat the same process for the volume up and down buttons.

Tools Used
  1. TweezersiPhone X Power and Audio Exterior Buttons Replacement

Step 79

– Gently lift the right side of the retainer up about 20 degrees—no need to get acrobatic.

– Slide the retainer straight out, away from the button. Smooth moves, easy does it.

– Repeat the process as needed. You’re basically a pro now.

– When putting the retainers back, make sure they sit flush—the gap at the bottom should be even all the way across the button.

Step 80

– Time to put everything back together! Just go through the steps in reverse, and your device should be good to go. If you hit a snag, you can always schedule a repair.

Success!
Ready to put everything back together? Just follow these steps in reverse. If you get stuck or want a pro to handle it, you can always schedule a repair.

iPhone X Power Button and Flash Cable Replacement

Duration: 45 minutes
Steps: 77 Steps

This part houses the power button, the rear microphone, and the camera flash. Swapping it out can solve problems like your phone refusing to turn on or off, Siri being a no-show, audio issues while recording videos, or the flash going on strike. Easy fix, right?

Step 1

– Grab a SIM card eject tool or just a trusty paperclip, and poke it into the tiny hole on the SIM card tray—look for it hanging out by the side button.

– Give it a good press, and watch the tray pop out like magic.

Tools Used
  1. SIM Card Eject TooliPhone X Power Button and Flash Cable Replacement

Step 2

– Pop out the SIM card tray from your iPhone like a pro.

– When putting the SIM card back in, double-check it’s facing the right way so it fits snugly in the tray.

– There’s a slim rubber gasket around the SIM tray that keeps water and dust out. If it’s torn or missing, swap it out or replace the whole tray to keep your iPhone’s insides safe and sound.

Step 3

– First things first, let’s power down that iPhone before we dive into the adventure of disassembly!

– Next up, grab your trusty screwdriver and remove the two pentalobe screws that are 6.9 mm long at the bottom edge of your iPhone.

– If you encounter any pesky stripped or damaged screws, don’t fret—just swap them out for some new ones!

Step 4

– Take your opening pick and make a mark 3 mm from the tip with a permanent marker—think of it as giving your pick a cool little tattoo. This will help you keep your moves precise!

Step 5

– Cover the iPhone’s screen with layers of clear packing tape, making sure every inch of glass is protected.

– If the suction cup keeps sliding off, grab some strong tape like duct tape, fold it into a makeshift handle, and use that to lift the screen instead.

Step 6

– Grab the blue handle and pull it back to release the Anti-Clamp’s arms.

– Slide those arms carefully over either the left or right edge of your iPhone.

– Place the suction cups near the bottom edge—one on the front, one on the back.

– Press the cups together to stick them firmly to the spot you need.

Step 7

– Grab the blue handle and pull it forward to lock those arms in place.

– Give the handle a full 360-degree twist clockwise, or keep turning until the suction cups start to stretch.

– Keep an eye on the suction cups—they should stay perfectly aligned. If they start to slip, just loosen them a bit, realign the arms, and you’re back on track.

Step 8

– Warm up an iOpener and slide it through the arms of the Anti-Clamp.

– Bend the iOpener so it rests snugly along the bottom edge of the iPhone.

– Hold tight for a minute to let the adhesive soften and create a small opening gap.

– Gently slip an opening pick under the screen and plastic bezel—avoid going under the screen itself.

– Skip the next three steps.

Tools Used
  1. iOpeneriPhone X Power Button and Flash Cable Replacement

Step 9

– Grab your hairdryer, heat gun, or iOpener, and give the lower edge of the iPhone a little warmth party for about a minute. This will soften up the adhesive underneath, making it easier to peel things apart. Nice and gentle, no need to rush!

Tools Used
  1. iOpeneriPhone X Power Button and Flash Cable Replacement

Step 10

– When using a single suction handle, stick it to the bottom edge of your phone. Just make sure you avoid the curved glass area—no need for any drama with that part!

Tools Used
  1. Suction HandleiPhone X Power Button and Flash Cable Replacement

Step 11

– Give that suction cup a nice, firm pull to gently create a tiny gap between the screen and the frame. You’ve got this!

– Now, grab an opening pick and carefully slide it into the gap beneath the screen’s plastic bezel (not the screen itself). Take your time; it’s easier than it sounds!

Step 12

– Gently slide the opening pick around the lower left corner and up the left side of the iPhone to carefully cut through the adhesive holding the display in place.

Step 13

Step 14

– Slide your pick back in at the bottom edge of the iPhone, then glide it up along the right side to keep loosening that stubborn adhesive.

Step 15

– Start by sliding the opening pick around the top corner of the display. While doing that, gently pull or wiggle the display downward toward the Lightning port.

– Move the pick to the other corner and carefully cut through any remaining adhesive holding the display in place.

Step 16

– Give that little nub on the suction cup a gentle tug to free it from the front panel. You’re doing great!

Step 17

– Start by gently opening the iPhone, swinging the display up from the left side just like flipping open the back cover of a book. Easy peasy!

– Once you’ve got that display propped up, lean it against something sturdy so it stays put while you work your magic on the phone.

– When it’s time to put everything back together, lay the display back in position. Align those clips along the top edge, and with a little care, press the top edge down into place. Snap the rest of the display in, and if it doesn’t click in smoothly, take a moment to check the clips around the edge—make sure they’re not bent out of shape!

Step 18

– Loosen and take out five Y000 screws holding down the logic board connector bracket. Here’s the lineup:

– Three screws that are 1.1 mm long

– One screw that’s 3.1 mm

– One screw coming in at 3.7 mm

Step 19

– Take off the bracket.

– Before sealing the display back on, now’s a prime moment to power on your iPhone and make sure everything’s working smoothly. Once you’re done testing, power it down completely before moving forward.

Step 20

– Gently pop the battery connector up from its spot on the logic board using the pointy end of a spudger or your clean fingernail—no Hulk moves needed, just a bit of finesse.

– Tilt the connector away from the logic board, giving it a little space so it doesn’t sneak back and power up the phone while you’re working your repair magic.

Tools Used
  1. SpudgeriPhone X Power Button and Flash Cable Replacement

Step 21

– Gently pop off the front panel sensor assembly connector with the tip of a spudger or your fingernail—just a little wiggle and it’ll come free.

Tools Used
  1. SpudgeriPhone X Power Button and Flash Cable Replacement

Step 22

– Gently use the tip of a spudger or even your fingernail to unplug the OLED panel cable connector—easy does it!

– When reconnecting these press-fit connectors, line up one side carefully and press down until you hear a click, then do the same on the other side. Avoid pushing in the middle to keep those pins happy and safe from bending.

Tools Used
  1. SpudgeriPhone X Power Button and Flash Cable Replacement

Step 23

– Grab your spudger and use the pointy end to gently lift the digitizer cable connector from its snug little home.

– This connector likes to hide away in a tricky spot, so take your time. Align it carefully, then give it a gentle press with your fingertip—start with one side and then the other. You should feel it pop into place with a satisfying click.

– If your screen starts acting up and doesn’t respond to touch, no worries! Just disconnect the battery, re-seat the connector, and make sure it clicks in nice and snug. Double-check for any dust or debris in the socket while you’re at it.

Tools Used
  1. SpudgeriPhone X Power Button and Flash Cable Replacement

Step 24

– Gently peel up the cable until the sticky stuff lets go.

Step 25

– Lift off the display assembly with care—no sudden moves, you’re not defusing a bomb!

– Thinking of keeping things waterproof? When you’re putting it back together, this is your chance to swap out that edge adhesive and keep the splashes at bay.

Step 26

– Time to loosen up the seven screws holding down the bracket beneath the Taptic Engine and speaker:

– Two Y000 screws, 1.9 mm each

– One Y000 screw, 1.2 mm

– One Y000 screw, 1.6 mm

– One Phillips screw, 2.4 mm

– One Phillips screw, 1.7 mm

– One Phillips screw, 1.5 mm

Step 27

– Gently lift the bracket starting from the edge closest to the battery. Don’t yank it off completely just yet—it’s still hanging on by a tiny flex cable.

Step 28

– Gently move the bracket aside and use the pointy end of a spudger to carefully lift and disconnect the flex cable hiding underneath.

Tools Used
  1. SpudgeriPhone X Power Button and Flash Cable Replacement

Step 29

– Take off the bracket.

Step 30

– Unscrew that 2.1 mm Y000 screw holding down the speaker connector cover. You’ve got this!

Step 31

– Gently lift off the speaker connector cover. Take it slow, and don’t force anything.

Step 32

– Gently pop up the speaker connector using the tip of your spudger. It’s like giving it a little nudge to say, ‘Hey, time for a break!’

Tools Used
  1. SpudgeriPhone X Power Button and Flash Cable Replacement

Step 33

– Slide a spudger gently under the top edge of the speaker, right near the edge of the iPhone case.

– Carefully lift the top edge of the speaker, just enough to free it from its position.

– When you’re putting the speaker back in place, double-check the flex cable’s position so it doesn’t get stuck underneath the speaker.

Tools Used
  1. SpudgeriPhone X Power Button and Flash Cable Replacement

Step 34

– Grip the speaker by its sides and give it a little wiggle, gently loosening the adhesive that’s keeping it stuck to the bottom edge of your iPhone.

– Carefully pull the speaker away from the bottom edge until the adhesive seal pops free.

Step 35

– Gently take out the speaker. It’s time to give that little guy some space to breathe!

Step 36

– Heads up: The speaker’s gasket is a one-way ticket—no going back. So, let’s swap it out during reassembly.

– Grab your tweezers and evict all the old gasket bits from the frame and speaker.

– Buff away any leftover sticky stuff with a microfiber cloth and a splash of isopropyl alcohol—leave it squeaky clean.

– Line up the new gasket on the bottom of the speaker. The big cutout should circle around the speaker grille mesh (it only fits one way, promise).

– Peel off the bigger, clear liner from the gasket, then use tweezers to land the gasket in the right spot.

– Press the gasket down with your fingers or a spudger—give it a little love so it sticks tight.

– Peel off the last liner, pop the speaker into place, and double-check the connector isn’t trapped underneath. If you run into trouble, you can always schedule a repair.

Tools Used
  1. SpudgeriPhone X Power Button and Flash Cable Replacement
  2. TweezersiPhone X Power Button and Flash Cable Replacement

Step 37

– Unscrew that 2.3 mm Phillips screw holding down the Taptic Engine—it’s ready to take a break!

Step 38

– Grab your spudger and gently pop the Taptic Engine flex cable straight up out of its socket like a pro.

Tools Used
  1. SpudgeriPhone X Power Button and Flash Cable Replacement

Step 39

– Gently pop out the Taptic Engine.

Step 40

– Each adhesive strip comes with a handy black pull-tab at the end, gently stuck to the side edge of the battery. Just pull it with care, and it’ll come off like a charm.

Step 41

– Peel back the first battery adhesive tab from the bottom edge of the battery—like starting a sticker party, but with a battery instead of confetti.

Step 42

– Give it another go! Just like before, detach those last two adhesive tabs from the bottom edge of the battery. You’re almost there!

Step 43

– Here’s how to boost your chances of a smooth peel:

– If one of the strips snaps under the battery and you can’t fish it out, no worries — just skip to the other strips and keep going with the steps below.

– Avoid pressing down on the battery. Instead, grip your iPhone securely by its sides.

– Keep those strips nice and flat without any wrinkles as you pull.

– Take it slow — pull gently and steadily. Each strip needs about 15-30 seconds of stretch to come free.

– Pull at a shallow angle so the strip slides out smoothly without catching on the battery’s bottom edge.

Step 44

– Alright, let’s make some magic happen! Grab one of those snazzy outer battery adhesive tabs and gently tug it away from the battery, heading down towards the bottom of your iPhone.

– Keep that steady pull going and maintain a nice, even tension on the strip until it gives way and slides right out from between the battery and the rear case. You got this!

Tools Used
  1. TweezersiPhone X Power Button and Flash Cable Replacement

Step 45

– Do the same thing on the other side—peel off that strip—but hold off on the center strip until the very end.

Step 46

– Lift out the center strip, but watch out for that sneaky speaker flex cable hiding underneath—don’t let it get caught!

Step 47

– Carefully peel back the pull tab on the final adhesive strip, located along the top edge of the upper battery cell. Take your time and be gentle, it’ll make the next steps smoother!

Step 48

– Go ahead and peel off that last adhesive strip like a pro!

– If you’ve managed to tackle all four adhesive strips, feel free to breeze past the next step.

– Give the alcohol solution about a minute to work its magic on the adhesive. Then, with the flat end of a spudger, gently coax the battery up and out.

Tools Used
  1. SpudgeriPhone X Power Button and Flash Cable Replacement

Step 49

– If some of the adhesive strips came off and the battery is still stuck to the back case, grab an iOpener or a hair dryer and warm up the rear case right behind the battery.

– Flip the iPhone over and carefully slide a strong piece of string (dental floss or a thin guitar string works great) underneath the battery.

– Gently saw the string back and forth along the length of the battery to break the adhesive seal. It might take a little time, since the adhesive can be stubborn, but with some patience, it will give way. Just be careful not to damage or squish the battery.

– For added safety, wrap the ends of the string around a cloth or wear gloves to keep your fingers safe from any sharp edges.

Tools Used
  1. iOpeneriPhone X Power Button and Flash Cable Replacement

Step 50

– Grab the battery from the bottom edge and gently pull it out of the iPhone. No need to rush, just a smooth move.

– If there’s any alcohol solution left in the phone, give it a quick wipe or just let it air dry before popping in the new battery. We want everything nice and dry!

– Before you slap in the new battery, make sure to reinstall the Taptic Engine and speaker. This will help keep things in place while you get everything lined up.

– Temporarily reconnect the battery connector to the logic board before sticking down the new battery. This ensures it’s sitting just right in its cozy little spot.

– If your new battery didn’t come with adhesive strips, no worries. Check out our guide for a step-by-step on how to replace them.

– After putting everything back together, give your device a force restart. It’s like a little refresh that can help avoid headaches later on.

– Now, it’s time to adhere the battery, disconnect it, and continue reassembling. You’re almost there!

Step 51

– Grab the flat end of your spudger and gently unplug the trio of front camera cables:

– Start with the dot projector.

– Next, the front camera.

– Finally, the infrared camera.

Tools Used
  1. SpudgeriPhone X Power Button and Flash Cable Replacement

Step 52

– Grab your trusty spudger and carefully slide the tip between the IR camera cable and the case. Start at the connector and gently separate the cable from the case.

– Do the same for the front camera cable, taking your time to ensure a clean separation.

Tools Used
  1. SpudgeriPhone X Power Button and Flash Cable Replacement

Step 53

– Warm things up to help loosen the sticky stuff holding the front camera assembly in place.

Step 54

– Time to say goodbye to that front camera assembly. Gently remove it, and you’re one step closer to getting your device back in action.

Step 55

– Time to unplug! Carefully disconnect these cable connectors:

– First up, the WiFi Antenna connector.

– Next, the Wide-Angle Camera connector.

– Now, detach the Power Button / Flash / Microphone connector.

– Don’t forget the Telephoto Camera connector.

– The Dock Flex connector is next on the list.

– Unplug the Button / Wireless Charging connector.

– Finally, disconnect the Cellular Antenna connector.

Step 56

– Gently unplug the WiFi antenna cable connector—like giving your device a little breathing room.

Step 57

– Gently unplug that Wide-Angle Camera cable connector—give it a little wiggle if it’s feeling stubborn.

Step 58

– Gently unplug the connector for the Power Button, Flash, and Microphone cable. Treat it like it’s fragile – because it is!

Step 59

– Gently unplug the Telephoto Camera cable connector and give it some space to breathe.

Step 60

– Gently unplug the Dock Flex cable connector.

– Carefully fold the cable upward at a 90-degree angle to give yourself room to slide out the logic board.

Step 61

– Unplug the Button / Wireless Charging cable connector gently to keep things running smoothly.

Step 62

– Time to unplug the Cellular Antenna cable connector. Just give it a little pull, no need to rush!

– Now, gently bend the cable out of the way. Think of it as moving it to its new comfy spot for a bit.

Step 63

– You won’t be able to take out the logic board with the SIM card tray still hanging around. If you missed it earlier, now’s the time to pop it out.

– Unscrew the two Phillips screws holding things down.

– Next, remove the 2.0 mm Phillips screw that grounds the board.

– Gently take off the grounding tab.

– Remove the 2.7 mm Phillips screw.

– Then, take out the 2.1 mm Phillips screw.

Step 64

– When you pop out the SIM card, a little pin slides out from the frame and nudges the eject lever in the SIM card carrier. You’ll want to gently push that pin back into the frame so it doesn’t get in the way when you’re removing the logic board.

Step 65

– Grab a trusty pair of fine tip tweezers and gently slide that SIM card eject lever toward the edge of the case. You’ve got this!

– Once you’re done, the eject lever should look just like this! The pin will be out of the way, making it super easy to pop out the logic board.

Tools Used
  1. TweezersiPhone X Power Button and Flash Cable Replacement

Step 66

– The logic board assembly sits snugly on two posts that poke through the lower board and latch onto the upper board. To get it out, just lift it straight up and steady so it clears the stand-offs without any drama.

Step 67

– Unscrew the two Phillips screws holding down the camera bracket. Here’s the drill on their sizes:

– One 2.3 mm screw

– One 2.0 mm screw

Step 68

– Grab your tweezers and carefully nudge that tiny metal grounding bracket out of the way. Be gentle—don’t yank it up since it’s hooked to a delicate flex cable that deserves some TLC.

Tools Used
  1. TweezersiPhone X Power Button and Flash Cable Replacement

Step 69

– Start by gently lifting the camera bracket from the edge near the battery. Easy does it! Once it’s loose, remove it.

– When you’re ready to put the camera bracket back, just follow the steps in reverse: Lower the outer edge first and make sure the tab on the right side clicks into place between the phone’s case and the camera module. Then, gently lower the bracket down over the camera module and you’re all set.

Step 70

– Grab an opening tool or your trusty fingernail, and gently pry the two camera connectors upward to disconnect them from their sockets. Take it slow, and you’ll be cruising through this step in no time!

Step 71

– Take your spudger and find the little notch at the bottom right corner of the camera module—like a secret handshake for phone parts.

– Carefully pop the camera up by prying at that spot. It should come out with a gentle nudge, no wrestling required.

Tools Used
  1. SpudgeriPhone X Power Button and Flash Cable Replacement

Step 72

– Gently lift out the rear camera module—it’s time for a little separation!

Step 73

– Lift up the edge of the dock connector to open up access to the power button and screen retainer. You’ve got this!

– Carefully bend the dock connector out of the way, like you’re setting it aside for the next step.

Step 74

– Let’s kick things off by unscrewing those two screws that keep the screen retaining clip snug as a bug.

– Next up, gently remove the screen retainer. It’s time for it to take a little break.

– You’ll want to grab a 2.1 mm Phillips screw for this adventure.

– And don’t forget about that sneaky 1.9 mm Phillips screw waiting to be freed.

– When you’re putting the retainer back in its cozy spot, remember to slide it behind that black plastic piece on the end furthest from the power button. It’s like tucking in a blanket!

Step 75

– Unscrew that last 2.0 mm Phillips screw holding the power button in place. Almost there!

Step 76

– Gently peel the flex cable away from the frame, taking your time to avoid any unnecessary tugs.

Step 77

– Grab a spudger and gently pop out the flash and microphone. They’re just begging to come out!

– Now, carefully remove the whole assembly. You’ve got this!

Tools Used
  1. SpudgeriPhone X Power Button and Flash Cable Replacement

Success!
To put your device back together, just run through these steps backwards. Easy peasy!

Unlock NAND Data for NAND Repair – Fix iPhone X Stuck in Recovery Mode

Duration: 45 minutes
Steps: 8 Steps

Ready to tackle the challenge of replacing the NAND storage chip in your iPhone X? It’s a tricky process, and you’ll definitely need the right tools to pull it off smoothly. It’s definitely not a walk in the park, and there’s a risk of damaging the motherboard or the chip itself if you’re not careful. But don’t worry—take your time, stay focused, and if you feel unsure at any point, you can always schedule a repair.

Step 1

– Start by pressing the power button, but wait—your phone seems to be stuck in recovery mode, huh? Don’t worry, it happens! Next up, let’s try flashing it. Open 3uTools and get ready to flash the phone. The progress bar should pop up, but when it gets stuck at 20%, don’t freak out! An error might pop up too, but we’re not out of options yet!

Step 2

– Getting stuck at various progress bars can give us a clue about the repair solution ahead. For instance, if you’re hanging out at 11%, it might be a sign that the CPU is throwing a tantrum. If you hit 13% with an error, it’s likely the connecting port is acting up. And when you reach 20% with an error, it’s often due to a NAND fault. So, it looks like we could be dealing with a NAND issue here!

Step 3

– First up, let’s dive into the fun part—disassembling the phone! Carefully peel away the foam from the motherboard and give it a cozy wrap with some high-temperature tape.

– Next, it’s time to attach that motherboard to its holder like a VIP guest! Grab your Hot Air Gun and heat things up to 260 °C to melt away the adhesive hugging the NAND. Once that’s good to go, crank it up to 380 °C and evenly warm that NAND. Finally, with your trusty Pry Blade, gently coax the NAND out of its home.

Step 4

– Give those bonding pads a little spa day with some Paste Flux. Next, treat them to a cool layer of middle-temp Solder Paste and bring in your Soldering Iron set to 360 °C. The goal? Getting those pads feeling just right.

– Time to tidy up: use Solder Wick to clean the pads. Then, blast away any leftover black adhesive with your Hot Air Gun at 280 °C.

Step 5

– Give those bonding pads a good scrub with some PCB Cleaner to get them squeaky clean.

– Slap on a bit of Paste Flux, then gently place a reliable NAND chip right where it needs to be.

Step 6

– Warm up the area with a hot air gun set to 340 °C. Gently nudge the NAND chip using tweezers. Once the NAND resets on its own, the soldering job is done.

– Peel off the heat-resistant tape carefully. Hook up the motherboard to a power cable and check the current. Seeing 52 mA? Perfect, that means everything’s normal.

– Plug the phone into your computer and start flashing. Success! The phone boots up fine now, confirming the NAND was the troublemaker all along.
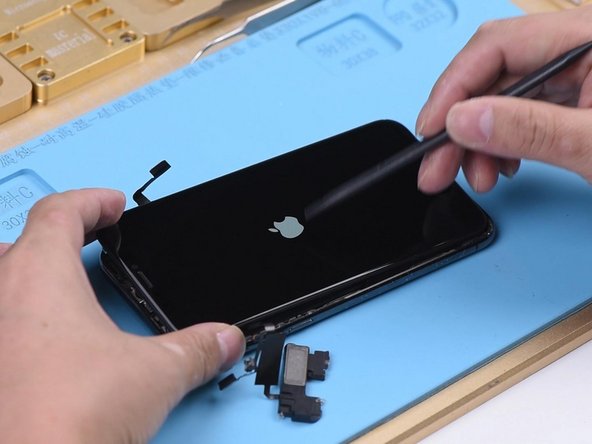
Step 7

– Let’s kick things off by powering up that phone for a little test run! Since the WiFi and Bluetooth addresses are cozy in the NAND, and our shiny new NAND doesn’t recognize the addresses on the motherboard, we’re going to need to grab the original NAND’s data. First up, let’s jailbreak that phone!

– Once you’ve jailbroken it, plug the phone into your computer and fire up 3uTools. This nifty software will help us read the original data in no time.

– Next, we’ll be using P10 to write that data back in. Connect your phone to P10 and let’s get it into DFU mode!

Step 8

– To put your device back together, just follow these steps in reverse—and if you hit a snag, no worries! You can always schedule a repair with us.

Success!
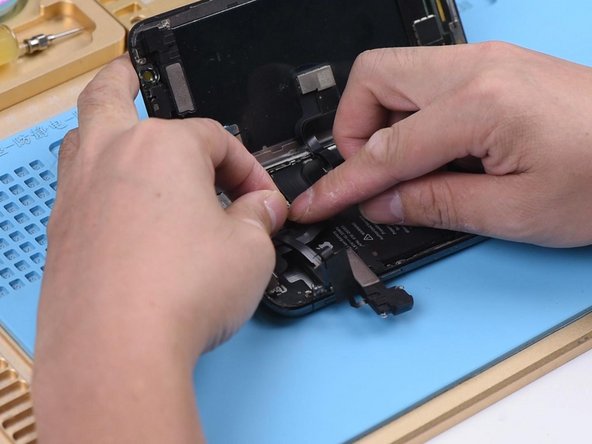
🍪
Have a cookie! This site uses cookies to enhance your experience. Opt-Out Options.