iPad 8 Screen Digitizer Replacement

Duration: 45 minutes
Steps: 52 Steps

Follow this guide to swap out the screen digitizer on an iPad 8 Wi-Fi. The digitizer here is just the front glass and touch sensor—it doesn’t include the LCD underneath. Heads up: this is for the Wi-Fi model only; if you have the LTE version, check out the link above. Since the home button’s Touch ID sensor is tied to the logic board, keep it safe by transferring and gluing the original home button onto your new front panel to keep Touch ID working. When disconnecting the battery, proceed with care—battery contacts are fragile and bending or breaking them can cause permanent damage. If you decide to skip isolating the battery, stick to non-metal tools unless absolutely necessary (like removing screws) to avoid short circuits and damage to sensitive components. Some photos might be from similar models and look a bit different, but these won’t change the steps you need to follow.

Step 1

– Warm up your trusty iOpener and let it cozy up to the left edge of your device for a solid two minutes.

Tools Used
  1. iOpeneriPad 8 Screen Digitizer Replacement

Step 2

– While the adhesive is doing its thing, keep an eye out for these delicate spots that are a bit sensitive when prying:

– Front camera

– Antennas

– Display cables

Step 3

– Give that blue handle a little tug backwards to free the Anti-Clamp’s arms!

– Set your iPad on a sturdy object so it sits nice and level between the suction cups.

– Place the suction cups close to the middle of the left edge—one at the top and the other at the bottom.

– Keep the bottom of the Anti-Clamp steady and press down firmly on the top cup to create a solid suction.

Step 4

– Slide the blue handle forward to lock the arms in place.

– Rotate the handle clockwise a full 360 degrees, or until the suction cups begin to stretch.

– Keep an eye on those suction cups—make sure they stay lined up. If they start to drift out of sync, just loosen them a bit and realign the arms before moving on.

Step 5

– Give it a minute to let that adhesive loosen up and create a nice little gap for you to work with.

– Not feeling enough heat? A blow dryer along the left edge of your iPad should do the trick.

– Once that Anti-Clamp has worked its magic and made a gap, gently slide your opening pick under the digitizer.

– You can skip the next step. Keep going!

Step 6

– Once the screen feels warm, grab your suction handle and gently place it near the left edge—right by the frame. You’re aiming to make the magic happen as close to the edge as possible.

– Lift the screen using the suction handle, just enough to create a tiny gap between the digitizer and the frame. It’s like a little stretch, just a little room for action.

– Slide an opening pick into that gap you just created. Take it slow, work your way around, and the rest will follow.

Step 7

– Pop a second opening pick into that lovely gap you just made.

– Gently glide the pick towards the bottom-left corner of your device to free up that pesky adhesive.

– Keep the pick snugly in the bottom-left corner to stop the adhesive from getting all clingy again.

Step 8

– If the opening pick gets stuck in the adhesive, just give it a little roll along the side of the iPad to keep the adhesive separating smoothly.

Step 9

– Gently slide your first opening pick toward the top-left corner to loosen up that stubborn adhesive.

– Keep the pick wedged in the top-left corner so the adhesive doesn’t sneak back together.

Step 10

– Heat up your iOpener and gently press it against the top edge of your device for about two minutes. It’ll help loosen things up, making the next steps smoother. Patience is key here!

Tools Used
  1. iOpeneriPad 8 Screen Digitizer Replacement

Step 11

– Give that pick a little spin around the top-left corner of your device to break free from the adhesive’s grip!

Step 12

– Gently slide the opening pick along the top edge of the device, stopping right before you hit the front camera—easy does it!

Step 13

– Gently pull the pick out so that just the tip stays tucked between the digitizer and the frame.

– Carefully slide the pick over the front camera area to loosen up that stubborn adhesive.

– Keep the pick resting near the right side of the front camera before moving on to the next step.

Step 14

– Pop that pick back in, and give it a little slide up towards the top-right corner of your device to fully break free the top adhesive. You got this!

– Once you’re there, leave the pick hanging out in the top-right corner to keep that pesky adhesive from sticking back together. Nice work!

Step 15

– Warm up that iOpener and give a cozy hug to the right edge of your device for a solid two minutes.

Tools Used
  1. iOpeneriPad 8 Screen Digitizer Replacement

Step 16

– Gently twist the pick around the top-right corner to loosen up that stubborn adhesive.

Step 17

– Pop in a new opening pick and slide it gently to the middle of the iPad’s right edge.

Step 18

– Warm up an iOpener and place it on the bottom edge of your device, letting it do its thing for two minutes.

Tools Used
  1. iOpeneriPad 8 Screen Digitizer Replacement

Step 19

– Gently slide the pick down to the bottom-left corner to loosen that sticky adhesive.

– Keep the pick resting in the bottom-left corner while you get ready for the next step.

Step 20

– Slide a fresh opening pick into the little gap you just made along the bottom edge of the iPad.

– Gently glide the pick over the antenna, stopping right before you hit the home button.

– Leave the pick hanging out just to the left of the home button before moving on to the next step.

Step 21

– Pop an opening pick into that little gap you just made.

– Gently slide the pick under the home button, angling it toward the bottom-right corner, making sure only the tip is sneaking between the digitizer and the frame.

Step 22

– Slide the pick back in and gently work it toward the home button to fully break through the stubborn adhesive at the bottom.

– Rest the pick just to the right of the home button before moving on to the next step.

Step 23

– Warm up an iOpener and stick it to the right edge of your device for a solid two minutes to loosen things up.

Tools Used
  1. iOpeneriPad 8 Screen Digitizer Replacement

Step 24

– Give those two opening picks a little twist at the left corners of the iPad to gently nudge the digitizer upwards, helping to break free the last bits of adhesive along the way. You’ve got this!

Step 25

– Gently lift the left edge of the digitizer upward to help loosen the adhesive along the right side of the iPad.

Step 26

– While gently holding the digitizer in place, carefully slide an opening pick between the two display cables to break the last bit of adhesive free. You’re doing great!

Step 27

– After you’ve successfully separated all that sticky adhesive, gently swing the digitizer open like it’s a book and lay it flat next to the iPad.

– As you put everything back together, don’t forget to give the leftover adhesive a good clean-up using some isopropyl alcohol—oh, and if you’re reusing the digitizer, give it some love too! When it’s time to seal the deal, use our adhesive strips or those handy pre-cut adhesive cards.

– Keep an eye on those delicate display cables while you’re reassembling your device. Make sure they’re tucked away nicely beneath the LCD screen to keep them safe from any accidents.

Step 28

– Grab your trusty Phillips screwdriver and carefully take out the four screws holding the LCD to the frame—these little guys are 4.3 mm long, so keep an eye on them!

– As you tackle this repair, be sure to keep a close watch on each screw. It’s important to put them back in their original spots to keep your device happy and healthy.

– Don’t forget to peel away any tape that’s hiding those LCD screws. We want everything to be nice and visible for this repair adventure!

Step 29

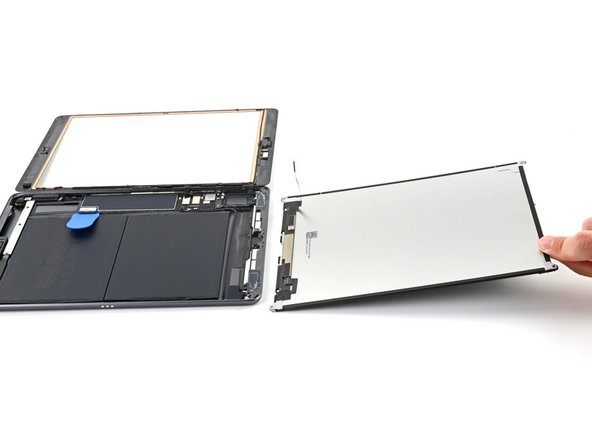
– Grab your trusty spudger and gently pry the LCD away from its snug little home just enough to get a good grip with your fingers.

– Now, think of the LCD as a page in a book! Flip it over near the camera and let it gracefully rest over the home button end of the frame.

– Place the LCD on a clean, soft, lint-free surface, giving those display cables some room to breathe.

Tools Used
  1. SpudgeriPad 8 Screen Digitizer Replacement

Step 30

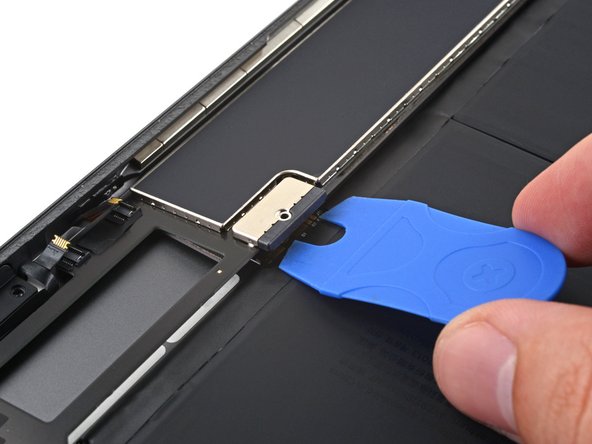
– Grab your trusty Phillips screwdriver and get ready to tackle that pesky little 2.3 mm-long screw that’s holding the battery connector snugly to the logic board. With a bit of finesse, you’ll have it out in no time!

Step 31

Step 32

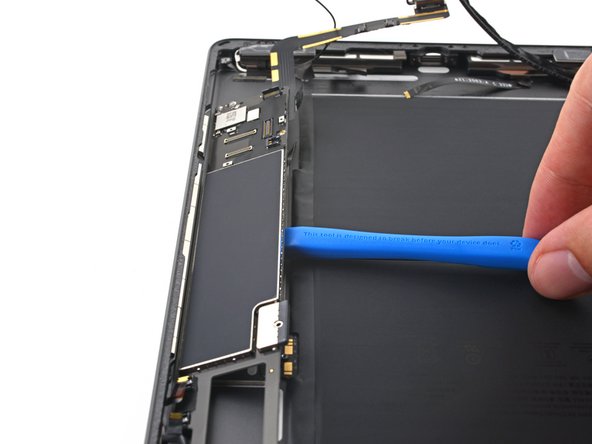
– Carefully slide the battery blocker under the logic board’s battery connector at about a 35-degree angle—smooth and steady wins the race.

– Keep that battery blocker right where it is while you continue working to keep things safe and sound.

Tools Used
  1. Battery BlockeriPad 8 Screen Digitizer Replacement

Step 33

– Grab your trusty Phillips screwdriver and go ahead and unscrew the three 1.4 mm-long screws holding the display cable bracket in place. You’ve got this!

Step 34

– Grab those tweezers or use your fingers to gently lift off the display cable bracket. You’re doing great!

Tools Used
  1. TweezersiPad 8 Screen Digitizer Replacement

Step 35

– Gently use the flat end of a spudger to lift and unplug the LCD cable press connector.

– When reconnecting press connectors like this one, line up one side carefully and press down until you hear a click, then do the same on the other side.

– Avoid pressing in the middle—if the connector is off-center, those pins might bend and cause permanent damage.

Tools Used
  1. SpudgeriPad 8 Screen Digitizer Replacement

Step 36

– Carefully lift the LCD off completely and lay it face down on a clean, soft, lint-free surface to keep it safe and sound.

Step 37

– Grab a pair of tweezers and gently peel away the tape that’s holding down the home button cable ZIF connector. You’re doing great!

Tools Used
  1. TweezersiPad 8 Screen Digitizer Replacement

Step 38

– Grab a spudger, an opening tool, or even your trusty fingernail to gently lift the little hinged locking flap on the home button cable ZIF connector. You’ve got this!

Tools Used
  1. SpudgeriPad 8 Screen Digitizer Replacement

Step 39

– Grab a pair of tweezers and gently pull the home button ribbon cable straight out of the ZIF connector. Take your time, no need to rush!

Tools Used
  1. TweezersiPad 8 Screen Digitizer Replacement

Step 40

– Grab your trusty spudger and use its flat end to gently lift and disconnect the two digitizer cable press connectors. A little wiggle, and you’re on your way!

Tools Used
  1. SpudgeriPad 8 Screen Digitizer Replacement

Step 41

– Grab your trusty spudger and use the flat end to gently lift the vibration isolator from the bottom-right corner of the device.

– Now, go ahead and remove the vibration isolator. Nice job, you’re one step closer!

Tools Used
  1. SpudgeriPad 8 Screen Digitizer Replacement

Step 42

– Grab your trusty tweezers and gently lift the home button cable away from the frame with a steady hand.

Tools Used
  1. TweezersiPad 8 Screen Digitizer Replacement

Step 43

– First up, it’s time to remove the front panel assembly. Get that out of the way, and you’re one step closer to your goal.

– Now, if you’re noticing any weird ‘ghost’ or ‘phantom’ touch issues with your new display, don’t sweat it! Just add a very thin layer of insulating tape (Kapton or polyimide tape works great) to the areas highlighted on the back of the panel. But, if you’re using a new digitizer, it probably comes with the right insulation, so no tape needed in that case!

– Before you reassemble everything, make sure to clear away any leftover adhesive from your device. Give those glued areas a good cleaning with some high concentration isopropyl alcohol (90% or higher) and a lint-free cloth. This ensures that the new adhesive will stick just right!

– Last step: Test your iPad to make sure everything is working as it should. Then, using our adhesive application guide, add the pre-cut adhesive strips to the back of the display. Once that’s done, seal it up and you’re good to go!

Step 44

– Gently lift the home button cable off the back of the front panel using your fingers.

Step 45

– Gently slide an opening pick under the home button cable to free it from the front panel.

– Keep that pick gliding along until you hit the home button bracket.

Tools Used
  1. iOpeneriPad 8 Screen Digitizer Replacement

Step 46

– Gently slide an opening pick beneath the top of the home button cable. This will help you free the metal contact from the home button bracket. A little patience goes a long way here!

Step 47

– Warm up an iOpener and press it onto the home button bracket for about thirty seconds.

Tools Used
  1. iOpeneriPad 8 Screen Digitizer Replacement

Step 48

– Grab your trusty opening tool and carefully pop off the home button bracket from the front panel. Nice and easy, no rush!

Step 49

– First, take off the home button bracket. It’s a quick move, so just give it a gentle nudge and it’ll come right off!

– When you’re putting that bracket back on, make sure to use a strong adhesive like E6000 to keep it snug on the front panel. You want it to stay in place, so don’t skip this step!

Step 50

– Gently press the home button from the front panel, giving a little nudge to break free the adhesive that’s keeping it cozy in its spot.

Step 51

– Carefully remove the home button assembly.

– When putting things back together, make sure to move the home button gasket onto the new front panel or home button assembly.

– If your new panel is missing a spacer ring, don’t forget to swap over the one from your old setup.

– If you can, power on your iPad and check that everything’s working before applying new adhesive and sealing it up.

Step 52

– Now that you’ve got everything back together, just retrace your steps in reverse to make sure it’s all snug and in place.

– Got e-waste? Don’t let it sit around—find a certified recycler like anR2 or e-Stewards to give it a proper send-off.

– If things didn’t quite go as planned, don’t stress! A little troubleshooting might do the trick, or feel free to ask for some backup from our iPad 8 Answers community!

Success!
Now that you’ve tackled the reassembly, just retrace your steps like a pro!
Got some e-waste? Give it a new home with an R2 or e-Stewards certified recycler.
If things didn’t quite work out, don’t sweat it! A little troubleshooting might do the trick, or you can always reach out to our iPad 8 Answers community for some extra support.

iPad 8 Right Speaker Replacement

Duration: 45 minutes
Steps: 57 Steps

Follow this guide to swap out the right speaker in your iPad 8 Wi-Fi model. Heads up: this walkthrough is just for the Wi-Fi version—if you have the LTE one, check the appropriate guide instead. Before you get started, make sure to drain your battery below 25% to lower the chance of fire if the battery gets damaged during the repair. If your battery looks swollen, take extra care. When disconnecting the battery using a battery blocker, be super gentle—the contacts are fragile and can bend or break, causing permanent damage. If you decide not to isolate the battery, try to avoid metal tools unless really necessary (like when unscrewing) to prevent short circuits and protect sensitive components. Some images in this guide come from a different model and might look a bit different, but that won’t mess with the repair steps.

Step 1

– Warm up an iOpener and stick it to the left edge of your device for a solid two minutes.

Tools Used
  1. iOpeneriPad 8 Right Speaker Replacement

Step 2

– While the adhesive is doing its slow dance and loosening up, keep an eye out for these parts that really don’t like being poked:

– Front camera

– Antennas

– Display cables

Step 3

– Give the blue handle a little tug backward to set the Anti-Clamp’s arms free.

– Nestle your iPad on something sturdy so it’s snugly balanced between the suction cups.

– Set the suction cups right around the middle of the left edge—one up top and one down low.

– Keep the bottom of the Anti-Clamp steady while you give the top cup a firm press to create that satisfying suction.

Step 4

– Slide the blue handle forward to lock those arms in place.

– Rotate the handle a full 360 degrees clockwise, or until you see the suction cups start to stretch.

– Keep an eye on the suction cups to make sure they stay lined up. If they start to drift, loosen them a bit and realign the arms before continuing.

Step 5

– Take a breather for a minute to let that adhesive loosen up and give you a cozy little gap to work with.

– If your screen’s not warming up sufficiently, grab a hair dryer and give the left edge of the iPad a gentle heat-up.

– Slide an opening pick under the digitizer when the Anti-Clamp has created a nice enough opening for you.

– Feel free to hop over the next step!

Step 6

– First things first! Warm up that screen until it’s cozy to the touch. Then, grab a suction handle and stick it on the left edge of the screen, as close to the edge as you can get.

– Next, gently lift the screen using the suction handle to create a tiny gap between the digitizer and the frame. You’ve got this!

– Now, slide an opening pick into that little gap you’ve created between the digitizer and the frame. Easy peasy!

Step 7

– Pop in a second opening pick right where you made that gap. You’ve got this!

– Gently slide that pick over to the bottom-left corner of your device to break free the adhesive holding it hostage.

– Keep that pick in the bottom-left corner to keep the adhesive from trying to reattach itself. You’re almost there!

Step 8

– If your opening pick gets caught in the sticky stuff, just give it a little roll along the edge of the iPad to keep that adhesive separation moving smoothly.

Step 9

– Gently slide your first opening pick toward the top-left corner to start loosening that stubborn adhesive.

– Keep the pick wedged in the top-left corner so the adhesive doesn’t sneak back and seal itself.

Step 10

– Warm up an iOpener and stick it on the top edge of your device for a solid two minutes to get things nice and toasty.

Tools Used
  1. iOpeneriPad 8 Right Speaker Replacement

Step 11

– Gently twist the pick around the top-left corner to loosen up that stubborn adhesive and get things moving.

Step 12

– Gently glide the opening pick along the top edge of your device, but make sure to stop just shy of that front camera—it’s a little shy!

Step 13

– Gently pull the pick out until just the tip is nestled between the digitizer and the frame.

– Carefully slide the pick above the front camera to break that pesky adhesive seal.

– Keep the pick close to the right side of the front camera before moving on to the next step.

Step 14

– Slide the pick back in and gently glide it toward the top-right corner to fully loosen the top adhesive.

– Keep the pick wedged in that top-right spot to stop the adhesive from sticking back together.

Step 15

– Warm up an iOpener and stick it on the right edge of your device for a solid two minutes to get things nice and toasty.

Tools Used
  1. iOpeneriPad 8 Right Speaker Replacement

Step 16

– Gently glide the pick around the top-right corner of your device to break free that stubborn adhesive.

Step 17

– Pop in a fresh opening pick and glide it smoothly to the center of the iPad’s right side.

Step 18

– Warm up your iOpener and give it a cozy two-minute hug on the bottom edge of your device.

Tools Used
  1. iOpeneriPad 8 Right Speaker Replacement

Step 19

– Gently slide the bottom-left pick into the corner to break that adhesive bond – it’s like giving it a little nudge!

– Keep that pick snug in the bottom-left corner as you prep for the next step. You’ve got this!

Step 20

– Gently slide a new opening pick into the little gap you just made at the bottom edge of the iPad.

– Carefully glide the pick over the antenna, but hold up just shy of the home button.

– Make sure to leave the pick to the side of the home button before moving on.

Step 21

– Gently slide an opening pick into that little gap you’ve just made. You’re doing great!

– Now, deftly maneuver the pick under the home button and glide it toward the bottom-right corner. Just the tip should be nestled between the digitizer and the frame – nice and easy!

Step 22

– Slide the pick back in and gently nudge it toward the home button to fully loosen that stubborn bottom adhesive.

– Park the pick just to the right of the home button and get ready for the next move.

Step 23

– Warm up an iOpener and stick it on the right edge of your device for a solid two minutes to loosen things up.

Tools Used
  1. iOpeneriPad 8 Right Speaker Replacement

Step 24

– Give those two opening picks a little twist at the left corners of your iPad! This will gently lift the digitizer just enough to break free the last bits of adhesive. You’re doing great!

Step 25

– Gently lift the left edge of the digitizer upwards to loosen the adhesive along the right edge of the iPad a bit more.

Step 26

– Keep a steady hand on the digitizer while gently sliding an opening pick between the two display cables to carefully loosen the last bit of adhesive.

Step 27

– Once the adhesive is all separated, gently open the digitizer like you’re flipping through a book and lay it flat next to your iPad.

– When you’re putting things back together, grab some isopropyl alcohol to clean off any leftover adhesive on the frame and the digitizer (if you’re reusing it). Then, just stick on some fresh adhesive with our adhesive strips or pre-cut cards.

– Keep an eye on those display cables when you’re reassembling. Fold them neatly under the LCD screen to keep everything safe and sound.

Step 28

– Grab your Phillips screwdriver and carefully unscrew the four 4.3 mm-long screws holding the LCD in place.

– Keep a sharp eye on each screw as you go—making sure every one gets back to its original spot will save your device from any surprises.

– Peel away any tape that might be hiding those LCD screws so you can get a clear shot at them.

Step 29

– Gently wedge the flat end of a spudger under the LCD just enough to lift it out of its slot so you can get a good grip with your fingers.

– Carefully flip the LCD over like turning a page in a book, lifting near the camera and folding it back over the home button side of the frame.

– Place the LCD face down on a clean, soft, lint-free surface so you can easily access the display cables without any scratches.

Tools Used
  1. SpudgeriPad 8 Right Speaker Replacement

Step 30

– Grab your Phillips screwdriver and carefully remove the 2.3 mm screw holding the battery connector to the logic board. Keep it safe!

Step 31

Step 32

– Gently slide the battery blocker under the logic board’s battery connector at a cool 35-degree angle.

– Keep that battery blocker in place while you tackle the rest of the steps.

Tools Used
  1. Battery BlockeriPad 8 Right Speaker Replacement

Step 33

– Grab your Phillips screwdriver and unscrew the three tiny 1.4 mm screws holding that display cable bracket in place. Nice and steady, you got this!

Step 34

– Grab your trusty tweezers or just your fingers, and gently lift off the display cable bracket.

Tools Used
  1. TweezersiPad 8 Right Speaker Replacement

Step 35

– Grab the flat end of your spudger and gently pry up to unplug the LCD cable press connector.

– When it’s time to reconnect, line up one side of the press connector and press down until you hear a satisfying click, then do the same for the other side.

– Avoid pressing down the middle — if the connector is off-center, the pins might bend and cause some serious damage.

Tools Used
  1. SpudgeriPad 8 Right Speaker Replacement

Step 36

– Gently lift the LCD off your device and lay it face down on a soft, clean, lint-free spot—think of it as giving your screen a little comfy nap while you work.

Step 37

– Grab a pair of tweezers and gently peel off the tape that’s protecting the home button cable ZIF connector. Easy does it!

Tools Used
  1. TweezersiPad 8 Right Speaker Replacement

Step 38

– Grab a spudger, an opening tool, or even your fingernail, and gently flip up the tiny hinged locking flap on the home button cable’s ZIF connector. Easy does it!

Tools Used
  1. SpudgeriPad 8 Right Speaker Replacement

Step 39

– Grab a trusty pair of tweezers and gently pull the home button ribbon cable straight out of the ZIF connector. You’ve got this!

Tools Used
  1. TweezersiPad 8 Right Speaker Replacement

Step 40

– Gently use the flat end of your spudger to lift and disconnect the two digitizer cable press connectors. Take your time, they’re stubborn but nothing you can’t handle!

Tools Used
  1. SpudgeriPad 8 Right Speaker Replacement

Step 41

– Grab the flat end of your spudger and gently pop up the vibration isolator chilling near the bottom-right corner of your device.

– Carefully take out the vibration isolator and set it aside.

Tools Used
  1. SpudgeriPad 8 Right Speaker Replacement

Step 42

– Grab your tweezers and gently lift the home button cable away from the frame like you’re peeling a sticker—easy does it!

Tools Used
  1. TweezersiPad 8 Right Speaker Replacement

Step 43

– Start by gently removing the front panel assembly.

– If you’re noticing any ‘phantom’ touch issues after installing the new display, don’t worry—it’s an easy fix! Simply add a thin layer of insulating tape (like Kapton tape) to the back of the panel in the highlighted areas. Pro tip: most replacement digitizers already come with insulation, so no need for extra tape unless you encounter this problem.

– Before putting everything back together, take a moment to clean up. Remove any old adhesive from the iPad and wipe down the glued areas with a cloth soaked in high-concentration isopropyl alcohol (90% or more). This ensures the fresh adhesive will stick like a charm!

– Once everything’s looking clean and prepped, give your iPad a quick test to make sure it’s functioning smoothly. Then, apply the pre-cut adhesive strips to the back of the display. When you’re ready, follow the adhesive application guide, seal everything up, and you’re all set!

Step 44

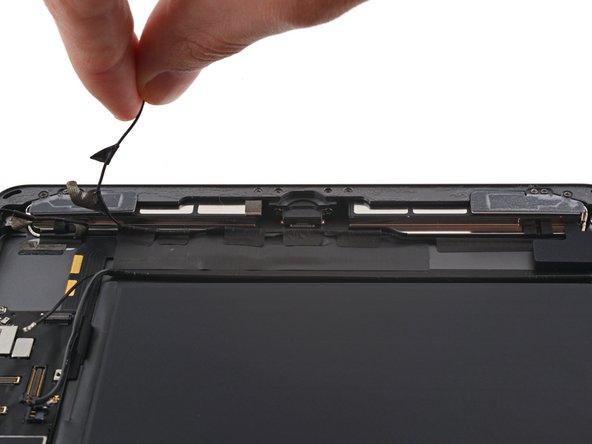
– Take the pointed end of your spudger and gently slide it under the right antenna cable. Lift it up straight to disconnect it. Nice and easy—no need to rush!

– When you’re putting it back together, those connectors can be a bit tricky. Just hold each one over its socket and press down gently with the flat end of your spudger. You’ll feel it snap into place. Patience is key, and you’ve got this!

Tools Used
  1. SpudgeriPad 8 Right Speaker Replacement

Step 45

– Gently lift the right antenna cable like you’re giving it a little stretch.

Step 46

– Grab a Phillips screwdriver and gently unscrew the three screws holding the right antenna in place. Take your time!

– One screw, measuring 2.3 mm in length, is ready to come out.

– Two screws, each 1.4 mm long, are next—don’t lose track of them!

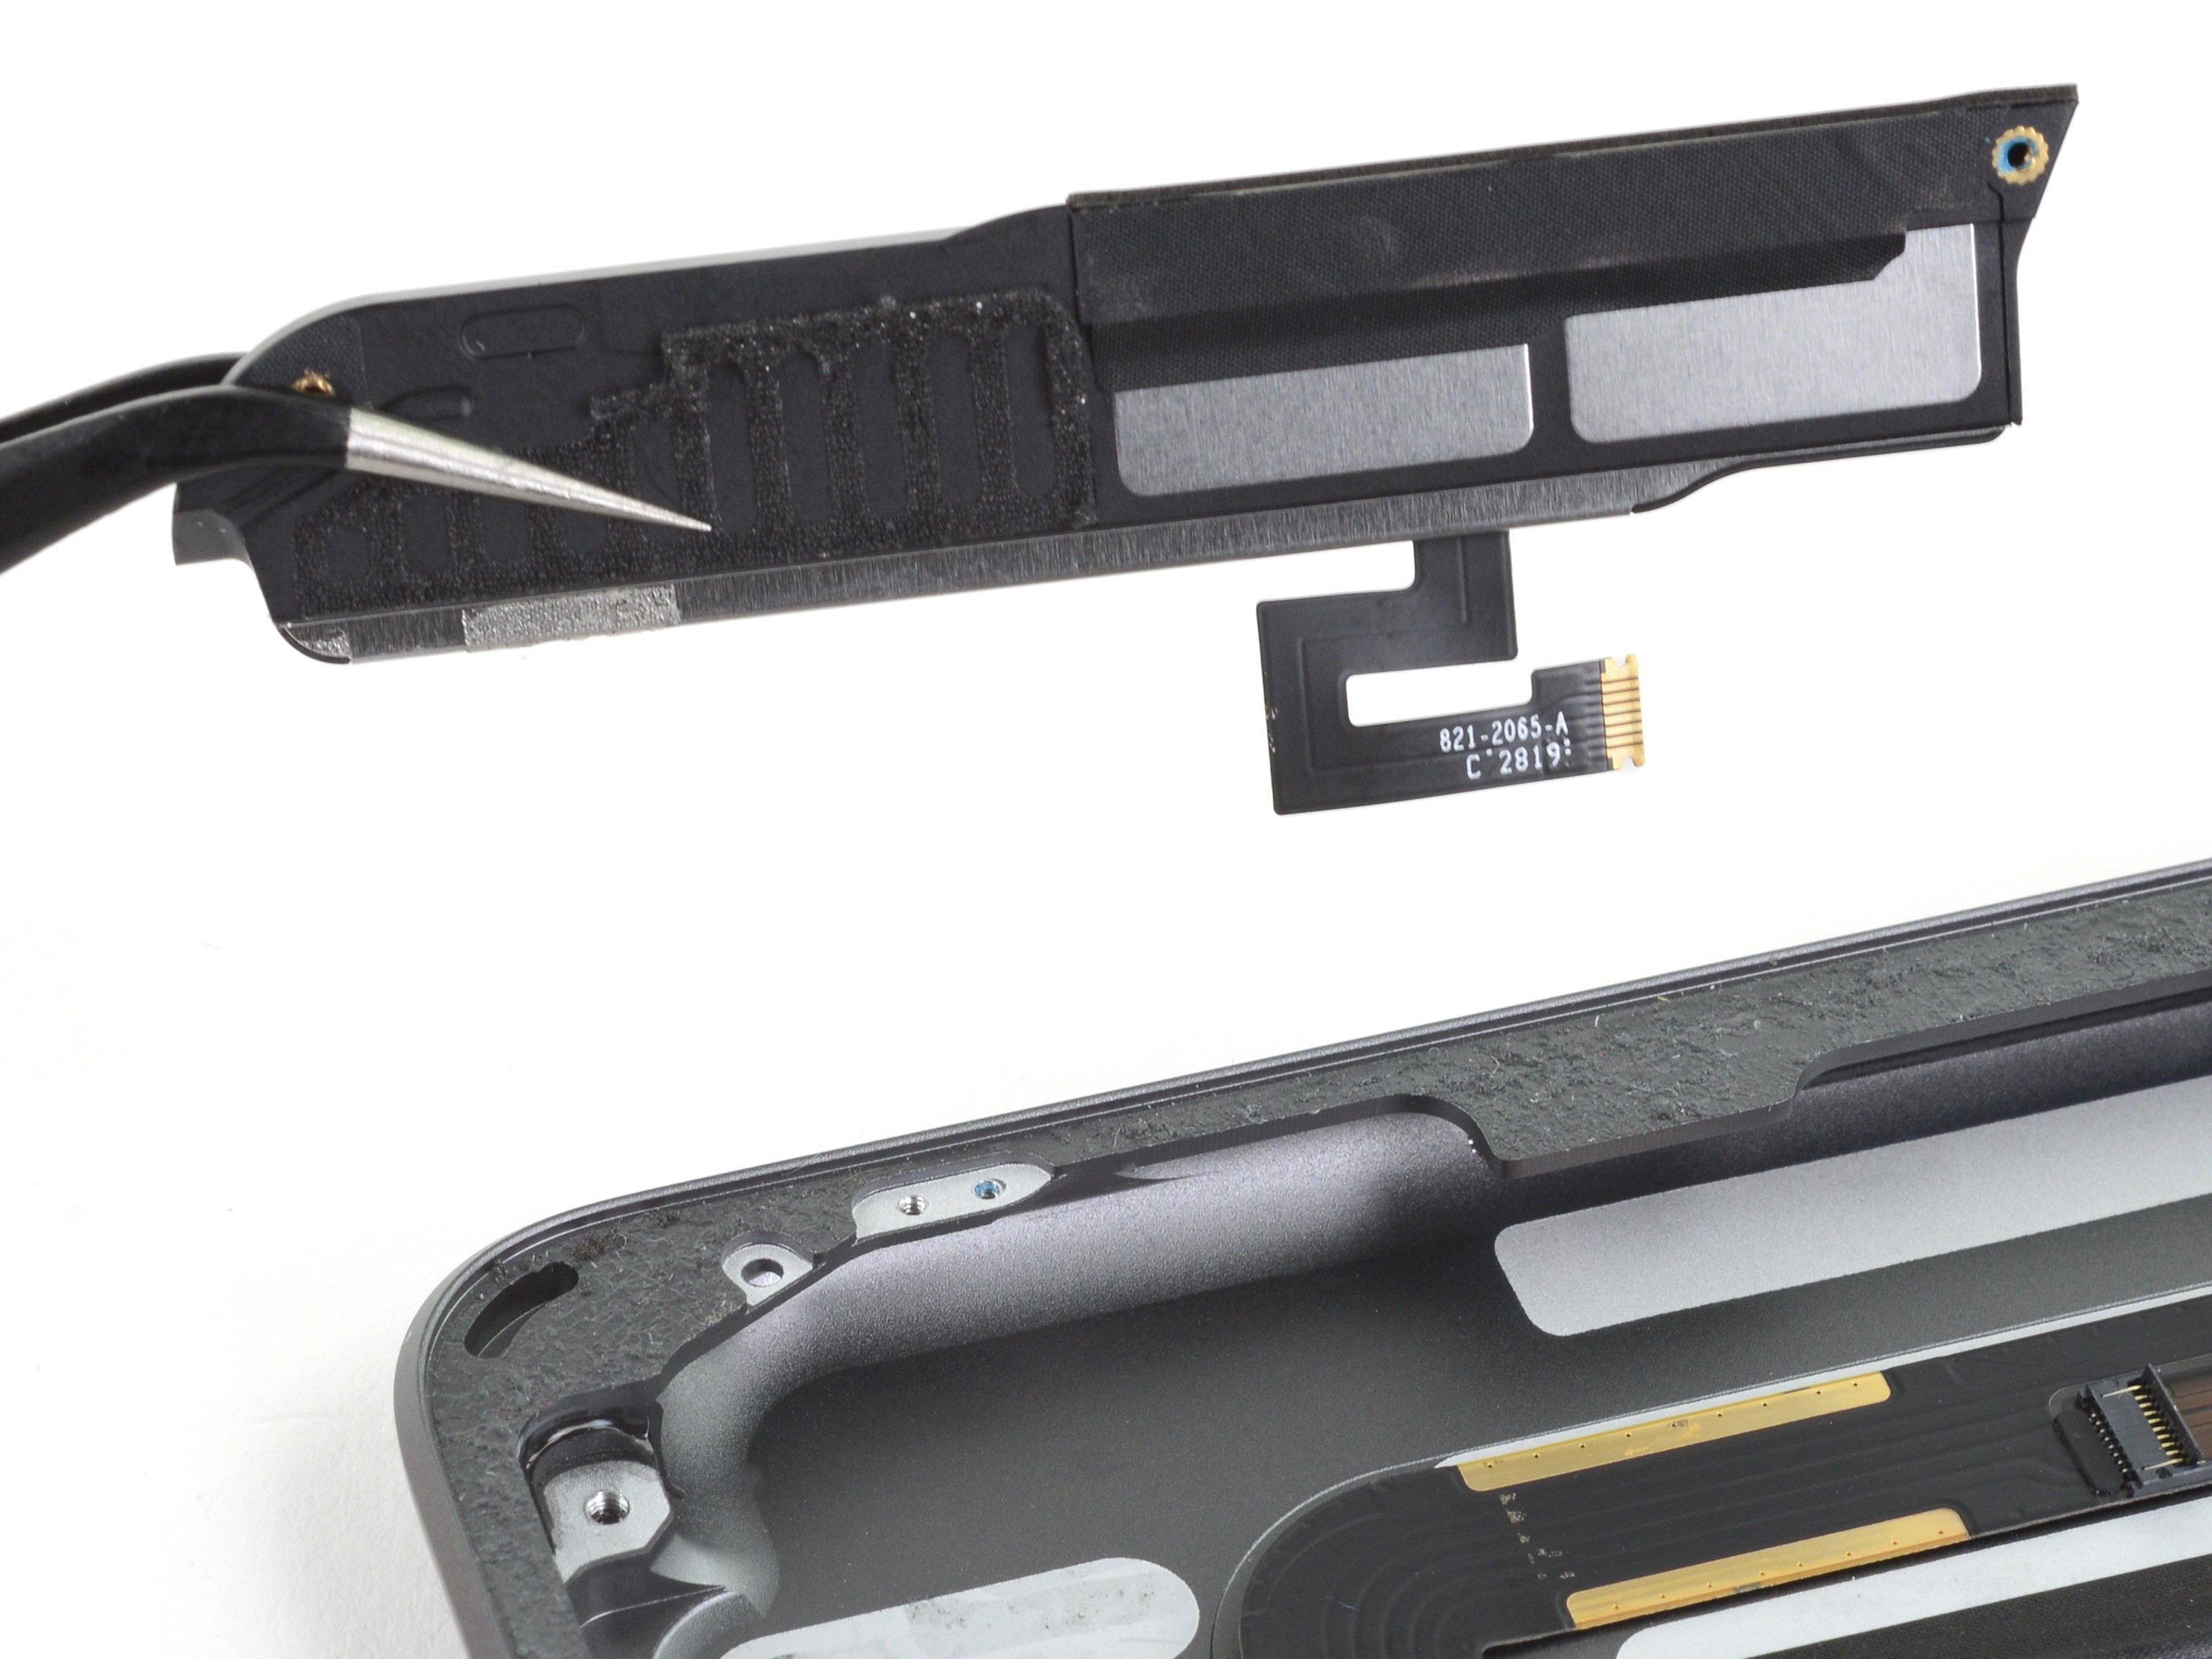
Step 47

– Gently slide an opening pick between the speaker enclosure and the bracket—think of it like sneaking into a VIP section.

– Glide the pick toward the charging port to slice through the adhesive like a pro.

– Nudge the bracket away from the speaker until it’s free from the tape holding it down.

Step 48

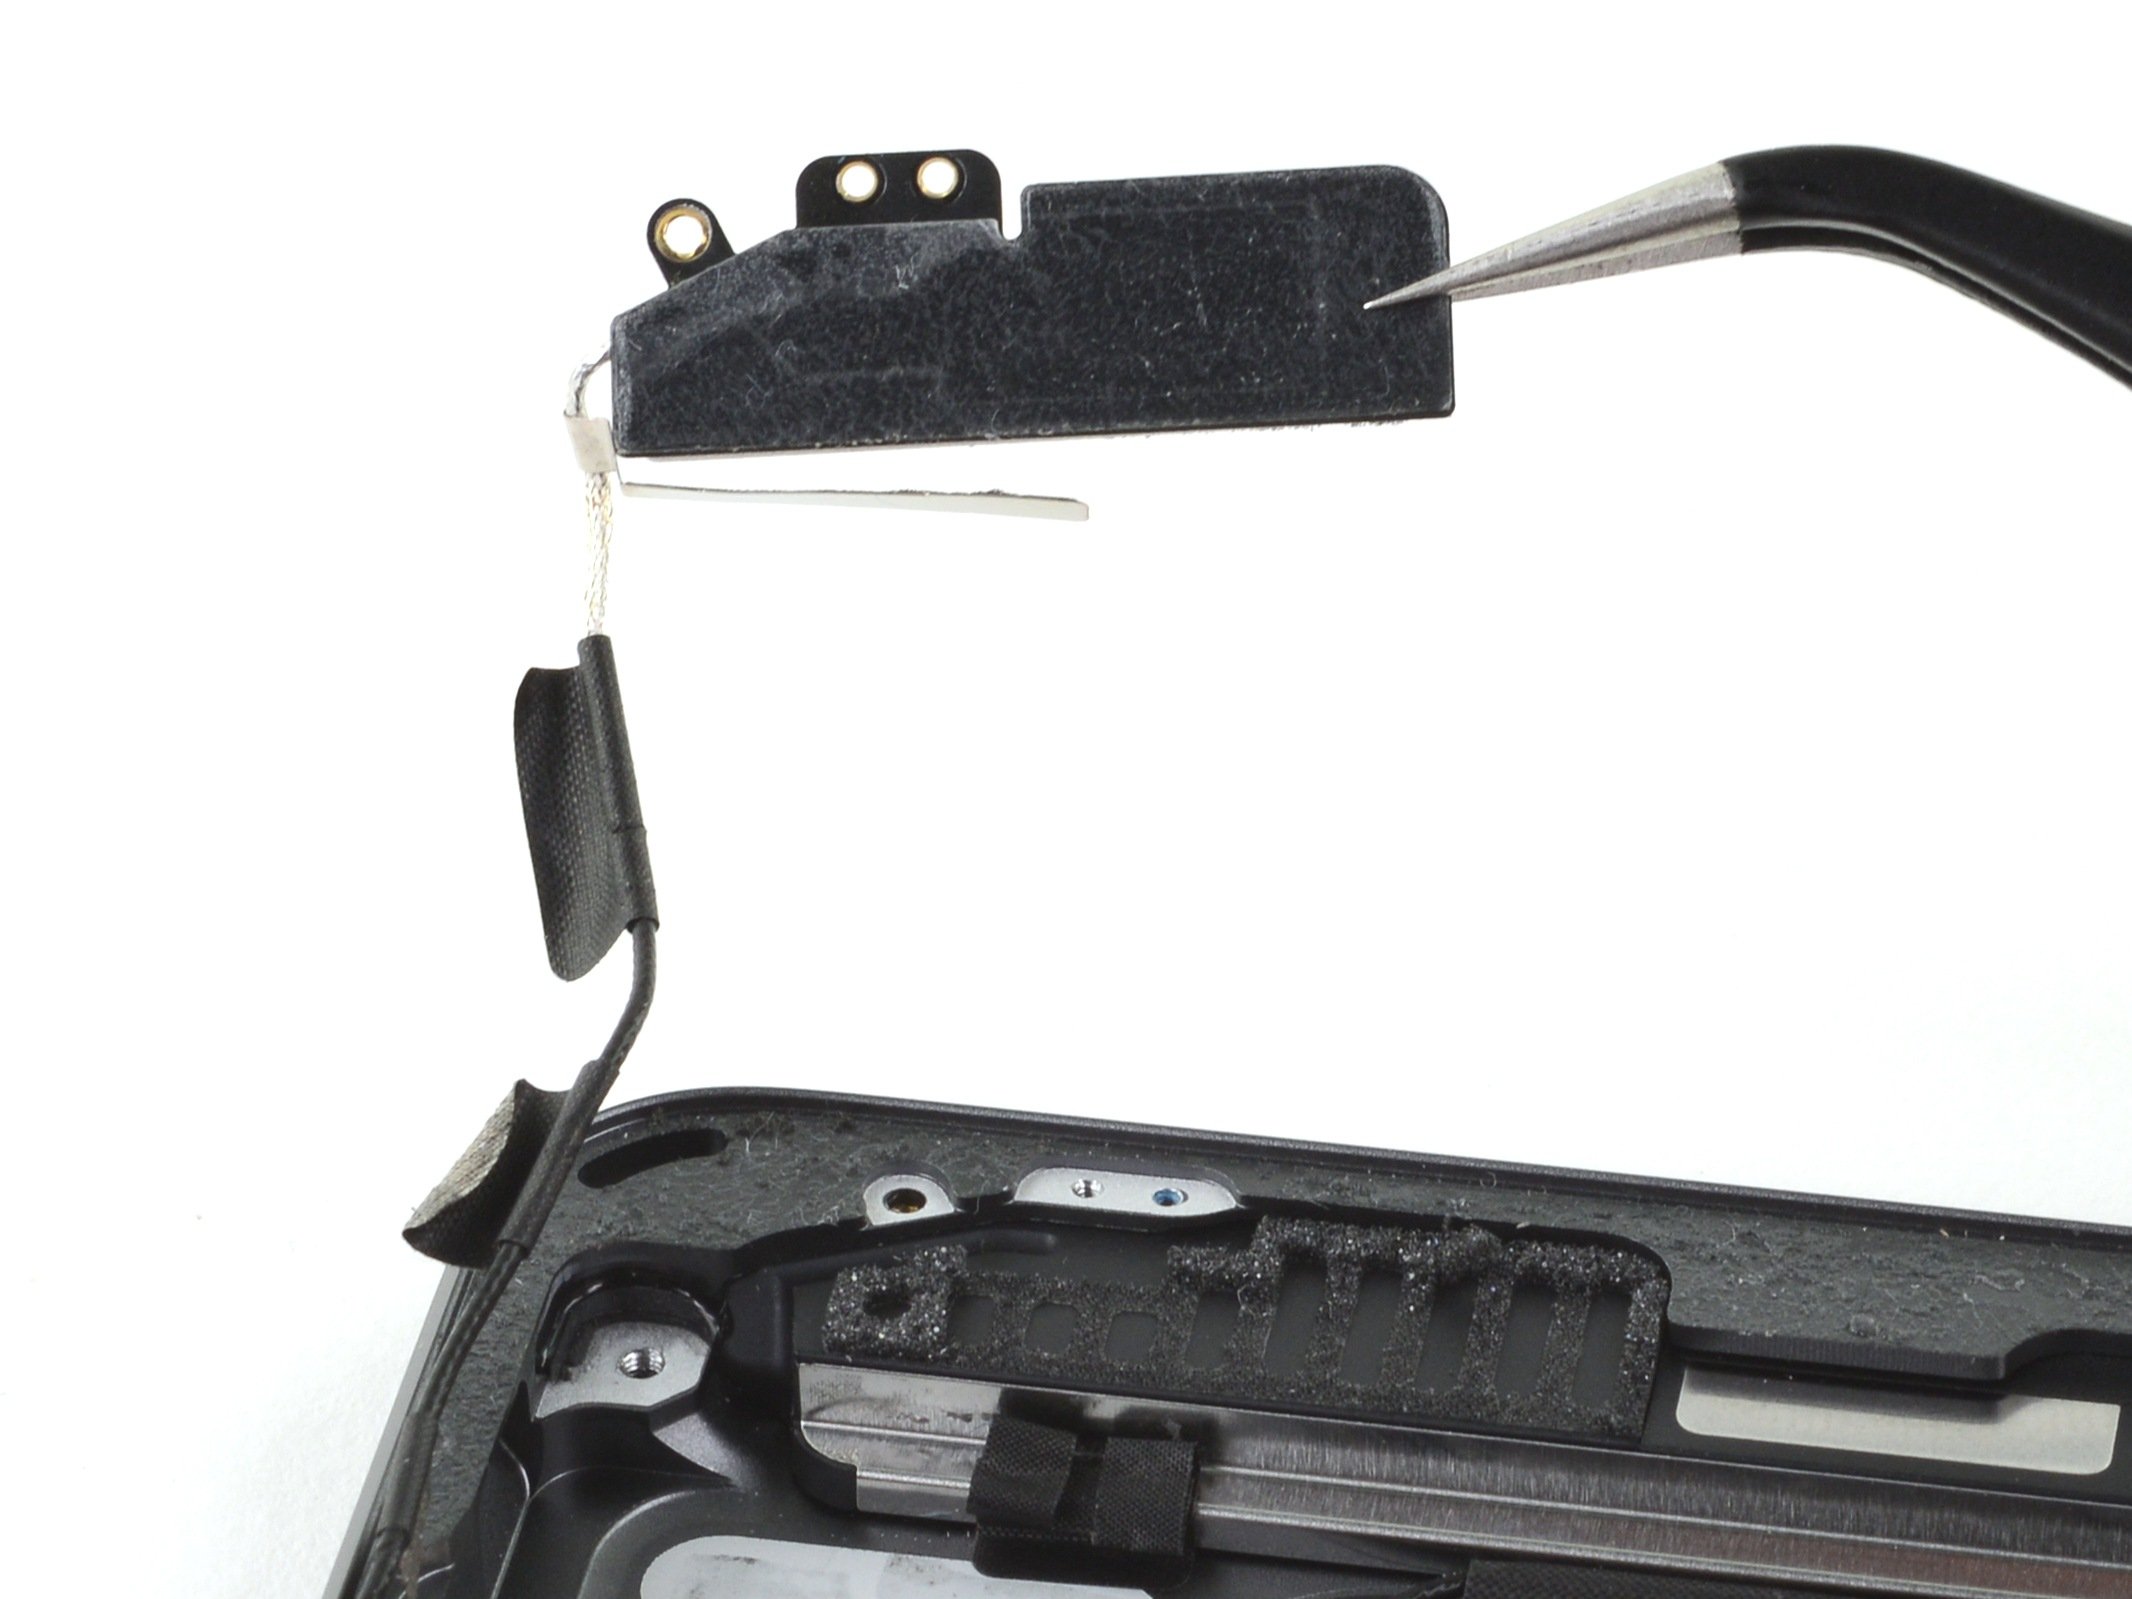
– Gently slide an opening pick between the antenna and speaker assembly to get things started.

– Carefully work the pick under the antenna to slice through that sticky foam adhesive.

– Lift out the right antenna and set it aside.

Step 49

– Gently slide the pointed end of your spudger under the left antenna cable, then lift it up with a steady hand to disconnect it.

Tools Used
  1. SpudgeriPad 8 Right Speaker Replacement

Step 50

– Gently peel the left antenna cable away from the rear case, following along the bottom edge of the iPad.

– Carefully move the left antenna cable out of your way to keep things neat and tidy.

Step 51

– Grab a pair of tweezers or your trusty fingernail and gently lift the tape that’s hiding the speaker connectors. You’re almost there!

Tools Used
  1. TweezersiPad 8 Right Speaker Replacement

Step 52

– Gently use the tip of a spudger, an opening tool, or even your fingernail to lift up the tiny hinged locking flap on the right speaker cable’s ZIF connector.

Tools Used
  1. SpudgeriPad 8 Right Speaker Replacement

Step 53

– Grab your tweezers and gently wiggle the right speaker cable straight out of the ZIF connector like a pro.

Tools Used
  1. TweezersiPad 8 Right Speaker Replacement

Step 54

– Grab a Phillips screwdriver and carefully unscrew the 2.3 mm screw holding the right speaker in place.

Step 55

– Gently peel back the LCD buffer tape from the rear case, taking your time to ensure everything stays in one piece.

Step 56

– Slide the flat end of your trusty spudger into the groove of the speaker housing, right by the corner of the rear case.

– Gently nudge the speaker away from the rear case—easy does it.

– Carefully pop the speaker out from under the little shelf on the rear case.

Tools Used
  1. SpudgeriPad 8 Right Speaker Replacement

Step 57

– Now, just reverse the steps you followed to take everything apart, and your device will be good to go.

– Got e-waste? Don’t just toss it—take it to an R2 or e-Stewards certified recycler.

– Did things not go as planned? No worries! Try some quick troubleshooting or check out our iPad 8 Answers community for advice.

Success!
Time to put your device back together! Just follow the steps in reverse and you’ll be good to go.
Got some old tech lying around? Don’t forget to take it to an R2 or e-Stewards certified recycler and give it a second life.
Things didn’t go as planned? Don’t stress! Try a little basic troubleshooting, or if you need more help, you can always schedule a repair.

iPad 8 Right Bluetooth and Wi-Fi Antenna Replacement

Duration: 45 minutes
Steps: 48 Steps

Ready to swap out the Bluetooth and Wi-Fi antenna on your iPad 8 Wi-Fi? This guide is for the Wi-Fi version only (sorry LTE folks, you’re gonna need to check out a different guide). First things first: for safety, make sure your battery’s charge is below 25% before diving in. This helps reduce the risk of fire if the battery gets damaged during the repair. And hey, if your battery’s swollen, be extra cautious! When isolating the battery with a blocker, remember the contacts are delicate—bend or break them, and you’re in for a world of hurt. If you decide to skip the battery isolation (your call), just steer clear of using metal tools, unless it’s absolutely necessary (like removing screws). We don’t want to short the battery or mess with sensitive components. Oh, and some of the photos in this guide might be from a different model, so don’t panic if you spot tiny differences—they won’t mess with your repair journey. If you hit any roadblocks, feel free to schedule a repair and we’ll take it from there!

Step 1

– Warm up an iOpener and stick it onto the left edge of your device for a solid two minutes to get things nice and toasty.

Tools Used
  1. iOpeneriPad 8 Right Bluetooth and Wi-Fi Antenna Replacement

Step 2

– As the adhesive takes a little time to soften up, keep in mind these spots that really don’t like being poked:

– Front camera

– Antennas

– Display cables

Step 3

– Slide the blue handle back to unlock the arms of the Anti-Clamp.

– Set your iPad on something so it stays level between the suction cups.

– Place the suction cups close to the center of the left edge—one near the top, the other near the bottom.

– Keep the bottom of the Anti-Clamp steady, then press down firmly on the top suction cup to create suction.

Step 4

– Give that blue handle a gentle tug forward to lock those arms in place.

– Now, twist that handle like you’re turning a big wheel—360 degrees or until you see those cups start to stretch out.

– Keep an eye on those suction cups; they should be best buddies, perfectly aligned. If they start to wander off, just loosen them a tad and guide them back together.

Step 5

– Take a breather for about a minute to let that adhesive relax and create a nice little gap for you.

– If the screen’s playing hard to get and isn’t warming up, feel free to grab a hair dryer and gently warm up the left edge of the iPad.

– Slide an opening pick under the digitizer once the Anti-Clamp has done its magic and made a big enough gap.

– Feel free to skip the next step!

Step 6

– When the screen feels warm to the touch, grab your suction handle and stick it right on the left edge of the screen, as close to the edge as you can get.

– Gently lift the screen using the suction handle to create a tiny gap between the digitizer and the frame.

– Slide an opening pick into the gap between the digitizer and the frame to start loosening things up.

Step 7

– Pop in a second opening pick right where you made that first gap.

– Gently slide the pick down toward the bottom-left corner of your device to break the adhesive’s grip.

– Keep that pick in the bottom-left corner to ensure the adhesive doesn’t get a chance to reattach!

Step 8

– If the opening pick gets caught in the adhesive, try gently rolling it along the edge of the iPad to keep peeling away that stubborn sticky stuff.

Step 9

– Gently slide the first opening pick towards the top-left corner of your device to break free the adhesive.

– Leave the pick where it is in the top-left corner to keep that adhesive from sticking back together.

Step 10

– Warm up an iOpener and press it gently against the top edge of your device for two minutes. Let it work its magic—this will help loosen things up a bit.

Tools Used
  1. iOpeneriPad 8 Right Bluetooth and Wi-Fi Antenna Replacement

Step 11

– Gently twist the pick around the top-left corner to sneakily loosen that adhesive.

Step 12

– Gently glide the opening pick along the top edge of your device, but make sure to stop just shy of the front camera. We want to keep that little eye safe and sound!

Step 13

– Gently pull the pick out until just the tip is nestled between the digitizer and the frame. You’re doing great!

– Slide that trusty pick right above the front camera to break free the adhesive holding things together.

– Now, keep the pick close to the right side of the front camera before you move on. Almost there!

Step 14

– Slide the pick back in and glide it up to the top-right corner to fully loosen that stubborn adhesive.

– Keep the pick wedged in the top-right corner so the adhesive doesn’t sneak back together on you.

Step 15

– Warm up that iOpener and give it a cozy spot on the right edge of your device for a solid two minutes!

Tools Used
  1. iOpeneriPad 8 Right Bluetooth and Wi-Fi Antenna Replacement

Step 16

– Gently glide the pick around the top-right corner of your device to loosen the adhesive. Take your time, it’ll pop right off!

Step 17

– Grab your trusty opening pick and gently slide it along the right edge of the iPad, aiming for the sweet spot in the middle. Easy does it!

Step 18

– Warm up an iOpener and place it on the bottom edge of your device for a cozy two minutes.

Tools Used
  1. iOpeneriPad 8 Right Bluetooth and Wi-Fi Antenna Replacement

Step 19

– Gently slide the bottom-left pick into the corner to break free that stubborn adhesive.

– Keep the pick snugly in the bottom-left corner before you jump to the next step.

Step 20

– Pop a fresh opening pick into the gap you’ve just created at the bottom edge of the iPad.

– Slide it gently over the antenna, but stop right before you reach the home button.

– Leave the pick just to the left of the home button before you move on.

Step 21

– Gently slide an opening pick into the gap you’ve made so far.

– Carefully guide the pick under the home button and move it toward the bottom-right corner. Just make sure that only the tip of the pick is wedged between the digitizer and the frame.

Step 22

– Slide the pick back in and glide it toward the home button to fully separate that stubborn bottom adhesive.

– Park the pick just to the right of the home button before moving on to the next step.

Step 23

– Warm up an iOpener and stick it onto the right edge of your device for a solid two minutes to get things ready.

Tools Used
  1. iOpeneriPad 8 Right Bluetooth and Wi-Fi Antenna Replacement

Step 24

– Gently twist the two opening picks at the left corners of your iPad. This will lift the digitizer just a bit, and while you’re at it, you’ll also be peeling away the last bit of adhesive. Take it slow and steady!

Step 25

– Gently lift the left side of the digitizer to loosen the adhesive along the right edge of your iPad. Take your time, we’re almost there!

Step 26

– Keep the digitizer steady and gently slide an opening pick between the two display cables to carefully loosen the last bit of adhesive holding them together.

Step 27

– Once you’ve carefully separated all that stubborn adhesive, gently open the digitizer like you’re flipping through a book, and lay it flat next to the iPad.

– When you’re putting everything back together, don’t forget to give the frame (and the digitizer, if you’re reusing it) a good clean with some isopropyl alcohol to get rid of any leftover sticky stuff. Then, pop on some fresh adhesive strips or pre-cut adhesive cards.

– Pay extra attention to the display cables while reassembling. Make sure they’re neatly folded under the LCD screen to avoid any accidental damage!

Step 28

– Grab your trusty Phillips screwdriver and get ready to tackle those four 4.3 mm-long screws that are holding the LCD in place. You’ve got this!

– As you dive into this repair adventure, keep a close eye on those screws! They like to play hide and seek, so make sure to return each one to its original home to keep your device safe and sound.

– Don’t forget to peel away any tape that might be blocking the view of those LCD screws. Clear the way for your repair heroics!

Step 29

– Grab your trusty spudger and gently pry the LCD out of its cozy spot just enough so you can get a good grip with your fingers.

– Now, flip that LCD like you’re turning a page in a book, lifting it up near the camera and swinging it over to the home button side of the frame.

– Carefully place the LCD on a clean, soft, lint-free surface to give those display cables the room they need to breathe.

Tools Used
  1. SpudgeriPad 8 Right Bluetooth and Wi-Fi Antenna Replacement

Step 30

– Grab your Phillips screwdriver and unscrew the 2.3mm-long screw holding the battery connector in place on the logic board. It’s a small one, but you’ve got this!

Step 31

Step 32

– Gently slide that battery blocker right under the logic board’s battery connector at a cool 35-degree angle.

– Keep the battery blocker snugly in place while you tackle the rest of the repair!

Tools Used
  1. Battery BlockeriPad 8 Right Bluetooth and Wi-Fi Antenna Replacement

Step 33

– Grab your trusty Phillips screwdriver and tackle those three 1.4 mm-long screws that are holding down the display cable bracket. You’ve got this!

Step 34

– Grab those tweezers or use your fingers to gently lift off the display cable bracket. You’ve got this!

Tools Used
  1. TweezersiPad 8 Right Bluetooth and Wi-Fi Antenna Replacement

Step 35

– Gently use the flat end of a spudger to lift and unplug the LCD cable press connector.

– When reconnecting press connectors like this, line it up carefully and press down on one side until you hear a click, then do the same for the other side.

– Avoid pressing in the middle—if the connector is off-center, those tiny pins could bend and cause serious damage.

Tools Used
  1. SpudgeriPad 8 Right Bluetooth and Wi-Fi Antenna Replacement

Step 36

– Gently take out the LCD, then carefully place it face down on a clean, soft surface that’s free of lint. We want that screen to stay safe and scratch-free while you work your magic.

Step 37

– Grab a trusty pair of tweezers and gently peel away the tape that’s holding down the home button cable ZIF connector. You’ve got this!

Tools Used
  1. TweezersiPad 8 Right Bluetooth and Wi-Fi Antenna Replacement

Step 38

– Grab a spudger, an opening tool, or even your trusty fingernail to gently lift the small, hinged locking flap on the home button cable ZIF connector. You’ve got this!

Tools Used
  1. SpudgeriPad 8 Right Bluetooth and Wi-Fi Antenna Replacement

Step 39

– Grab your tweezers and gently pull the home button ribbon cable straight out of the ZIF connector—nice and steady!

Tools Used
  1. TweezersiPad 8 Right Bluetooth and Wi-Fi Antenna Replacement

Step 40

– Grab your trusty spudger and gently lift up to disconnect the two digitizer cable press connectors. Take your time, no rush!

Tools Used
  1. SpudgeriPad 8 Right Bluetooth and Wi-Fi Antenna Replacement

Step 41

– Grab your trusty spudger and gently slide the flat end under the vibration isolator located in the bottom-right corner of your device. Give it a little pry and watch that isolator pop up with ease.

– Once it’s free, go ahead and lift that vibration isolator out. You’re on the right track!

Tools Used
  1. SpudgeriPad 8 Right Bluetooth and Wi-Fi Antenna Replacement

Step 42

– Grab your trusty tweezers and gently lift the home button cable away from the frame—easy does it!

Tools Used
  1. TweezersiPad 8 Right Bluetooth and Wi-Fi Antenna Replacement

Step 43

– Carefully remove the front panel assembly.

– If you notice any ‘ghost’ or ‘phantom’ touch inputs on your new display, a thin layer of insulating tape like Kapton (polyimide) tape applied to the marked spots on the back of the panel usually does the trick. The replacement digitizers already come with this insulation, so you probably won’t need extra tape.

– When putting everything back together, make sure to scrape off any leftover adhesive from the iPad. Clean the areas where you’ll apply new glue using high-concentration isopropyl alcohol (90% or more) and a lint-free cloth. This step is key to getting a strong bond with the fresh adhesive.

– Before sealing up your iPad, test all its functions and apply pre-cut adhesive strips to the back of the display following our display adhesive guide.

Step 44

– Gently slide the pointy end of a spudger under the right antenna cable and lift straight up to pop it off. Easy does it!

– When putting things back together, these connectors can be a bit fussy. Position each connector over its socket and press down using the flat side of your spudger until you hear a satisfying little click. You’ve got this!

Tools Used
  1. SpudgeriPad 8 Right Bluetooth and Wi-Fi Antenna Replacement

Step 45

– Gently lift the right antenna cable up and away. Nice and easy—no need to rush.

Step 46

– Grab your Phillips screwdriver and gently take out the three screws holding down the right antenna.

– One screw measuring 2.3 mm in length

– Two screws measuring 1.4 mm in length each

Step 47

– Gently slide an opening pick between the speaker enclosure and the bracket—easy does it!

– Now, glide that pick down towards the charging port to slice through the adhesive like a pro.

– With a little push, nudge the bracket away from the speaker until it’s free from the tape below. You’re doing great!

Step 48

– Carefully slip an opening pick between the antenna and speaker assembly.

– Gently slide the pick under the antenna to slice through the foam adhesive.

– Lift out the right antenna with care.

Success!
Put your device back together by following these steps in reverse.
Remember to recycle your electronic waste responsibly at an R2 or e-Stewards certified facility.
If things didn’t work out this time, try some basic troubleshooting or check out our iPad 8 Answers community for tips.
And if you’re stuck, don’t hesitate to schedule a repair — we’ve got your back!

iPad 8 Rear Camera Replacement

Duration: 45 minutes
Steps: 48 Steps

Follow this guide to swap out the rear camera on your iPad 8 Wi-Fi model. Heads up: this is for the Wi-Fi version only; if you’re working on the LTE model, click here. Before diving in, make sure your battery is charged below 25%—this helps lower the chance of fire if the battery gets damaged during the repair. If your battery looks swollen, take extra care. When using a battery blocker to disconnect the battery, be super gentle—the contacts can bend or break easily, which is a one-way ticket to device trouble. If you decide to skip disconnecting the battery, avoid metal tools unless absolutely necessary (like for screws) to prevent short circuits and damage to delicate parts. Some pictures might be from a slightly different model, but don’t worry—they won’t throw off the steps. If you hit a tough spot, you can always schedule a repair!

Step 1

– Warm up your iOpener and place it on the left side of your device for a solid two minutes. Let that heat do its magic!

Tools Used
  1. iOpeneriPad 8 Rear Camera Replacement

Step 2

– While the adhesive is working its magic and loosening up, take a moment to remember the following spots that might be a little extra touchy when prying:

– Front camera

– Antennas

– Display cables

Step 3

– Pull the blue handle back to release the Anti-Clamp’s arms—this is your moment to shine!

– Place something under your iPad so it sits comfortably, resting perfectly between the suction cups. Just make sure it’s level.

– Position the suction cups near the center of the left edge—one at the top and the other at the bottom. They should be cozy but not too tight!

– Now, hold the bottom of the Anti-Clamp in place and give the top cup a firm press to seal the deal and apply suction.

Step 4

– Grab the blue handle and pull it forward to lock those arms in place.

– Give the handle a full 360-degree spin clockwise, or keep turning until the suction cups start to stretch a bit.

– Keep an eye on the suction cups to make sure they stay perfectly lined up. If they start to slip, just loosen them a little and realign the arms before continuing.

Step 5

– Take a breather for about a minute to let the adhesive loosen up and create a nice little opening for you.

– If your screen isn’t warming up as much as you’d like, give it a gentle boost with a hair dryer along the left edge of the iPad.

– Slide an opening pick under the digitizer when the Anti-Clamp has made a cozy enough gap.

– Feel free to skip the next step.

Step 6

– Wait until the screen feels pleasantly warm to the touch, then stick a suction handle on the left edge of the screen, as close to the border as you can manage.

– Gently lift the screen with the suction handle, creating a small gap between the digitizer and the frame. Easy does it!

– Slide an opening pick into that gap you’ve just made, and you’re one step closer to cracking this repair!

Step 7

– Slip a second opening pick into the gap you just made. It’s like giving your device a little breather!

– Gently slide that pick towards the bottom-left corner. You’re aiming to loosen that adhesive without breaking a sweat.

– Once you’re at the bottom-left, leave the pick in place to keep the adhesive from trying to seal up again. You’re almost there!

Step 8

– If your opening pick gets glued down, try giving it a little roll along the edge of the iPad to keep peeling that adhesive away.

Step 9

– Gently slide your first opening pick up towards the top-left corner to loosen that sticky adhesive.

– Keep the pick wedged in the top-left corner so the adhesive doesn’t sneak back together on you.

Step 10

– Warm up an iOpener and stick it on the top edge of your device for a solid two minutes to loosen things up.

Tools Used
  1. iOpeneriPad 8 Rear Camera Replacement

Step 11

– Gently twist the pick around the top-left corner to loosen that stubborn adhesive like a pro.

Step 12

– Gently slide the opening pick along the top edge of your device, but stop just before you hit the front camera—no need to mess with that little guy!

Step 13

– Gently pull the pick out so that just the tip stays wedged between the digitizer and the frame.

– Slide the pick just above the front camera to loosen the adhesive.

– Keep the pick near the right side of the front camera before moving on to the next step.

Step 14

– Slide that pick back in and shimmy it toward the top-right corner of your device to fully break free the top adhesive. You’re doing great!

– Keep the pick snugly in the top-right corner to keep that pesky adhesive from sticking again. Nice work!

Step 15

– Warm up your iOpener and let it snuggle on the right edge of your device for a cozy two minutes.

Tools Used
  1. iOpeneriPad 8 Rear Camera Replacement

Step 16

– Gently twist the pick around the top-right corner to loosen that stubborn adhesive and get things moving.

Step 17

– Grab a fresh opening pick and gently slide it down to the center of the iPad’s right edge. You’re doing great!

Step 18

– Warm up an iOpener and stick it on the bottom edge of your device for a solid two minutes to get things nice and toasty.

Tools Used
  1. iOpeneriPad 8 Rear Camera Replacement

Step 19

– Gently slide that bottom-left pick into the corner like a pro to peel away the adhesive.

– Keep the pick snug in that bottom-left corner before moving on to the next step.

Step 20

– Slide a fresh opening pick into the gap you just made at the bottom edge of your iPad.

– Gently glide the pick over the antenna, but halt just shy of the home button.

– Keep that pick to the left of the home button before you proceed.

Step 21

– Time to break open the seal! Slide your opening pick into the gap you just made.

– Now, gently work the pick under the home button and slide it towards the bottom-right corner. Be careful and make sure only the tip is sneaking between the digitizer and the frame.

Step 22

– Slide the pick back in and gently nudge it toward the home button to fully loosen that bottom adhesive.

– Let the pick hang out just to the right of the home button before moving on.

Step 23

– Warm up your iOpener and press it against the right edge of your device for a solid two minutes.

Tools Used
  1. iOpeneriPad 8 Rear Camera Replacement

Step 24

– Gently twist the two opening picks into the left corners of your iPad to lift the digitizer just enough. This will separate the last bits of adhesive without breaking a sweat.

Step 25

– Gently lift the left side of the digitizer to loosen the adhesive along the right edge of your iPad. This should make it easier to separate.

Step 26

– As you hold the digitizer steady, gently slide an opening pick between the two display cables to break free the last bit of adhesive. You’ve got this!

Step 27

– Once you’ve carefully separated all the adhesive, gently open the digitizer like a book and lay it down flat next to your iPad.

– As you put things back together, take a moment to clean off any leftover adhesive from the frame (and the digitizer if you’re reusing it) using some isopropyl alcohol. Then, stick it back together with fresh adhesive strips or pre-cut adhesive cards.

– When you’re reassembling, keep an eye on those display cables. Make sure they’re tucked neatly beneath the LCD screen to avoid any unnecessary damage.

Step 28

– Grab your trusty Phillips screwdriver and loosen up the four 4.3 mm-long screws holding the LCD in place on the frame.

– Keep those screws organized! Trust us, it’ll save you a headache later when everything needs to go back just where it came from.

– Peel away any tape covering the LCD screws so they don’t get lost in the shuffle.

Step 29

– Grab your trusty spudger and use the flat end to gently lift the LCD just enough to get a good grip with your fingers.

– Now, carefully flip the LCD like you’re turning a page in a book—start near the camera and let it roll over towards the home button end.

– Place the LCD on a soft, clean surface that’s free of lint, so you can easily access those display cables without any hassle.

Tools Used
  1. SpudgeriPad 8 Rear Camera Replacement

Step 30

– Grab your Phillips screwdriver and carefully unscrew the 2.3 mm-long screw holding the battery connector to the logic board. Keep it safe!

Step 31

Step 32

– Gently slide that battery blocker under the logic board’s battery connector, angling it at a cool 35 degrees. You’ve got this!

– Now, let that battery blocker chill in place while you tackle the next steps. Keep up the good work!

Tools Used
  1. Battery BlockeriPad 8 Rear Camera Replacement

Step 33

– Grab your Phillips screwdriver and carefully unscrew the three tiny 1.4 mm screws holding down that display cable bracket. Steady hands for the win!

Step 34

– Grab some tweezers or just use your fingers to carefully lift off the display cable bracket. Simple as that!

Tools Used
  1. TweezersiPad 8 Rear Camera Replacement

Step 35

– Gently use the flat end of a spudger to lift and unplug the LCD cable press connector.

– When putting press connectors back together, line up one side carefully and press down until you hear a click, then do the same for the other side.

– Avoid pressing in the middle—if the connector is off-center, those tiny pins might bend and cause serious trouble.

Tools Used
  1. SpudgeriPad 8 Rear Camera Replacement

Step 36

– Carefully detach the LCD and lay it face down on a clean, soft, lint-free surface. Give it some space and treat it like the delicate piece of tech that it is!

Step 37

– Grab your trusty tweezers and gently peel away the tape that’s keeping the home button cable ZIF connector under wraps. You’ve got this!

Tools Used
  1. TweezersiPad 8 Rear Camera Replacement

Step 38

– Grab a spudger, an opening tool, or even your fingernail to gently flip up the tiny hinged locking flap on the home button cable ZIF connector. Easy does it!

Tools Used
  1. SpudgeriPad 8 Rear Camera Replacement

Step 39

– Grab a trusty pair of tweezers and gently tug on that home button ribbon cable, pulling it straight out of the ZIF connector. You’re doing great!

Tools Used
  1. TweezersiPad 8 Rear Camera Replacement

Step 40

– Gently slide the flat end of your spudger under the two digitizer cable press connectors to pop them loose and disconnect them with care.

Tools Used
  1. SpudgeriPad 8 Rear Camera Replacement

Step 41

– Grab the flat end of your spudger and gently lift the vibration isolator hanging out near the bottom-right corner of the device.

– Go ahead and take that vibration isolator off.

Tools Used
  1. SpudgeriPad 8 Rear Camera Replacement

Step 42

– Grab your trusty tweezers and gently lift the home button cable away from the frame like a pro.

Tools Used
  1. TweezersiPad 8 Rear Camera Replacement

Step 43

– Take off the front panel assembly carefully.

– If your new display starts acting up with those weird “ghost” or “phantom” touch inputs, don’t panic! You can fix this by sticking a super thin layer of insulating tape, like Kapton (polyimide) tape, on the highlighted spots on the back of the panel. Replacement digitizers already come with the right insulation, so usually no extra tape is needed.

– When putting everything back together, make sure to scrape off any leftover adhesive from the iPad. Give those glued areas a good clean with high concentration isopropyl alcohol (90% or more) and a lint-free cloth. This preps your iPad for fresh adhesive and helps it stick like a champ.

– Finally, test out all your iPad’s functions. Then, use pre-cut adhesive strips on the back of the display following the display adhesive application guide before sealing it up tight.

Step 44

– Grab your trusty Phillips screwdriver and let’s tackle those three 1.4 mm screws that are holding the upper component bracket in place. You’ve got this!

Step 45

– Grab your tweezers or just your trusty fingers to gently lift the upper component bracket off the frame.

Tools Used
  1. TweezersiPad 8 Rear Camera Replacement

Step 46

– Gently slide the flat end of your spudger under the rear camera press connector and carefully lift it to disconnect. Keep it cool and steady!

Tools Used
  1. SpudgeriPad 8 Rear Camera Replacement

Step 47

– Warm up an iOpener and place it on the top-left corner of the iPad’s back for thirty seconds. This will help loosen up that pesky rear camera adhesive like a charm!

Tools Used
  1. iOpeneriPad 8 Rear Camera Replacement

Step 48

– Time to wrap things up! Just retrace your steps and put everything back together in the reverse order.

– Got some old tech lying around? Don’t forget to take it to an R2 or e-Stewards certified recycler!

– Things didn’t go exactly as planned? No worries! Try some basic troubleshooting, or swing by the iPad 8 Answers community for a hand.

Tools Used
  1. TweezersiPad 8 Rear Camera Replacement
  2. SpudgeriPad 8 Rear Camera Replacement

Success!
Now that you’ve tackled the reassembly, just retrace your steps like a pro! If your device still isn’t cooperating, don’t fret—check out some basic troubleshooting tips or reach out to our community for support. And if things get a bit too tricky, remember, you can always schedule a repair with us. You’ve got this!

iPad 8 Microphone Assembly Replacement

Duration: 45 minutes
Steps: 55 Steps

Ready to replace the microphone assembly in your iPad 8 Wi-Fi? Awesome! But before you dive in, just a quick reminder: this guide is specifically for the Wi-Fi version of the iPad 8. If you’ve got the LTE version, you’ll want to check out the LTE guide instead. For your safety, make sure to discharge your battery to below 25% before getting started. It’s a simple step that helps reduce the risk of a fire in case the battery gets accidentally damaged during the repair. If your battery is looking a little puffy, be extra cautious! And when isolating the battery with a battery blocker, remember to be super gentle—the battery contacts are delicate and could cause permanent damage if mishandled. If you’re skipping the battery isolation step, try to avoid using metal tools, unless absolutely necessary (like for removing screws), to prevent shorting the battery or messing up any sensitive circuits. Some of the photos in this guide are from a different model, so they may look a tiny bit different, but don’t worry—they won’t affect your repair journey. If you ever feel stuck, you can always schedule a repair for extra support. Happy repairing!

Step 1

– Warm up that iOpener and give it a cozy two-minute hug on the left edge of your device!

Tools Used
  1. iOpeneriPad 8 Microphone Assembly Replacement

Step 2

– While you’re letting the adhesive do its thing and loosen up, keep an eye on these delicate spots that don’t love a good pry:

– Front camera

– Antennas

– Display cables

Step 3

– Give that blue handle a gentle tug backward to free the Anti-Clamp’s arms.

– Nestle your iPad on a solid surface, ensuring it sits comfortably between the suction cups.

– Place the suction cups near the center of the left edge—one up top and one below.

– Keep the bottom of the Anti-Clamp steady while you press down firmly on the top cup to create a strong suction.

Step 4

– Push the blue handle forward to lock those arms in place. You got this!

– Twist the handle clockwise for a full 360 degrees, or until you feel those cups starting to stretch. Keep going, you’re almost there!

– Double-check that the suction cups stay aligned with each other. If they slip out of line, just loosen them a bit and realign the arms. Easy fix!

Step 5

– Give the adhesive a minute to relax and let that gap start to form. Patience is key!

– If the screen’s not warming up enough, a quick blast from a hair dryer along the left edge of your iPad should do the trick.

– Once the Anti-Clamp opens a nice gap, slide an opening pick underneath the digitizer and you’re good to go.

– Feel free to skip the next step, you’re on track!

Step 6

– When the screen feels warm to the touch, grab your suction handle and stick it right on the left edge, as close to the edge as you can get.

– Gently lift the screen using the suction handle to pop open a tiny gap between the digitizer and the frame.

– Slide an opening pick into that gap between the digitizer and the frame to keep things moving.

Step 7

– Pop a second opening pick into the little gap you just made.

– Gently slide that pick down to the bottom-left corner to loosen up the adhesive.

– Keep the pick in place at the bottom-left so the adhesive doesn’t sneak back together.

Step 8

– If your opening pick gets stuck in the adhesive, try gently ‘rolling’ it along the edge of the iPad to keep peeling the adhesive away.

Step 9

– Gently glide the first opening pick towards the top-left corner of your device to break free from the adhesive’s grip.

– Keep that pick in place at the top-left corner to ensure the adhesive doesn’t decide to stick around again.

Step 10

– Warm up your iOpener and give it a cozy hug to the top edge of your device for two minutes.

Tools Used
  1. iOpeneriPad 8 Microphone Assembly Replacement

Step 11

– Gently wiggle the pick around the top-left corner of your device to free up the adhesive. You’ve got this!

Step 12

– Gently glide the opening pick along the top edge of your device, pausing just shy of the front camera. You’re doing great!

Step 13

– Gently pull the pick out until just the tip stays sandwiched between the digitizer and the frame.

– Carefully slide the pick over the front camera to loosen up that stubborn adhesive.

– Keep the pick resting near the right side of the front camera before moving on to the next step.

Step 14

– Slide the pick back in and glide it toward the top-right corner of your device to fully break free the stubborn top adhesive.

– Keep that pick snug in the top-right corner to stop the adhesive from getting all clingy again!

Step 15

– Warm up your trusty iOpener and give it a cozy spot on the right edge of your device for a delightful two-minute spa session.

Tools Used
  1. iOpeneriPad 8 Microphone Assembly Replacement

Step 16

– Gently twist the pick around the top-right corner to loosen up that sticky adhesive.

Step 17

– Pop in a fresh opening pick and slide it smoothly to the center of the iPad’s right edge.

Step 18

– Warm up an iOpener and stick it on the bottom edge of your device for a solid two minutes to get things loosened up.

Tools Used
  1. iOpeneriPad 8 Microphone Assembly Replacement

Step 19

– Gently slide the bottom-left pick into the corner to break that adhesive seal.

– Keep the pick in that bottom-left corner before you jump to the next step.

Step 20

– Pop a new opening pick into the gap you just made along the bottom edge of the iPad.

– Gently slide the pick past the antenna, stopping right before you hit the home button.

– Pause with the pick resting to the left of the home button before moving on.

Step 21

– Gently slide an opening pick into the tiny gap you’ve just made.

– Now, shimmy that pick underneath the home button and glide it toward the bottom-right corner, ensuring that only the tip is nestled between the digitizer and the frame.

Step 22

– Slide that pick back in and gently nudge it toward the home button to fully loosen the bottom adhesive.

– Rest the pick just to the right of the home button before moving on to the next step.

Step 23

– Warm up your iOpener and gently press it against the right edge of your device for a solid two minutes. You’ve got this!

Tools Used
  1. iOpeneriPad 8 Microphone Assembly Replacement

Step 24

– Gently twist those two opening picks into the left corners of your iPad. This will give the digitizer a little lift while also nudging away the last bits of adhesive. Easy peasy!

Step 25

– Gently lift the left side of the digitizer to help break the adhesive seal along the right edge of your iPad. You’re doing great!

Step 26

– As you hold the digitizer steady, gently slide an opening pick between the two display cables to break free the last bit of adhesive. You’re almost there!

Step 27

– After you’ve carefully loosened all the adhesive, open up the digitizer like a book and lay it flat next to the iPad.

– When putting everything back together, wipe off any leftover adhesive from the frame—and the digitizer if you’re reusing it—using some isopropyl alcohol. Then swap in fresh adhesive strips or pre-cut adhesive cards to keep things snug.

– Keep an eye on those display cables while reassembling. Tuck them neatly under the LCD screen so they don’t get squished or damaged.

Step 28

– Grab your trusty Phillips screwdriver and tackle those four 4.3 mm-long screws that are keeping the LCD snug in the frame. You’ve got this!

– As you work your magic, make sure to keep an eye on those screws! They each have their special spot, so return them to their homes to keep your device happy and healthy.

– Don’t forget to peel away any tape that’s hiding the LCD screws. We want those screws to shine and be accessible!

Step 29

– Grab your trusty spudger and gently slide the flat end under the LCD to lift it just enough so you can get a good grip with your fingers.

– Now, flip that LCD over like you’re turning a page in a thrilling novel, lifting it near the camera and swinging it over to the home button end of the frame.

– Place the LCD down on a clean, soft, lint-free surface to give those display cables some room to breathe.

Tools Used
  1. SpudgeriPad 8 Microphone Assembly Replacement

Step 30

– Grab your trusty Phillips screwdriver and get ready to work some magic! Carefully unscrew the 2.3 mm-long screw that keeps the battery connector snug against the logic board. You’ve got this!

Step 31

Step 32

– Slide the battery blocker under the logic board’s battery connector at a cool 35-degree angle.

– Keep that battery blocker in place while you get your hands dirty with the rest of the repair!

Tools Used
  1. Battery BlockeriPad 8 Microphone Assembly Replacement

Step 33

– Grab a Phillips screwdriver and carefully unscrew the three tiny 1.4 mm screws holding down the display cable bracket.

Step 34

– Grab your trusty tweezers or just use your fingers to gently lift off the display cable bracket. You’ve got this!

Tools Used
  1. TweezersiPad 8 Microphone Assembly Replacement

Step 35

– Grab the flat end of your spudger and gently pry up to disconnect the LCD cable press connector.

– To snap these press connectors back in, line up one side carefully and press down until you hear a click, then do the same on the other side.

– Avoid pressing in the middle! If the connector is off-center, those pins might bend and cause some serious damage.

Tools Used
  1. SpudgeriPad 8 Microphone Assembly Replacement

Step 36

– Carefully detach the LCD and place it face down on a clean, soft, lint-free surface. You’ve got this!

Step 37

– Grab your tweezers and carefully lift the tape that’s keeping the home button cable’s ZIF connector under wraps.

Tools Used
  1. TweezersiPad 8 Microphone Assembly Replacement

Step 38

– Grab a spudger, an opening tool, or even your trusty fingernail and gently lift that little hinged locking flap on the home button cable ZIF connector. It’s a simple move, so no stress—you’re doing great!

Tools Used
  1. SpudgeriPad 8 Microphone Assembly Replacement

Step 39

– Grab your tweezers and gently pull the home button ribbon cable straight out of the ZIF connector like a pro.

Tools Used
  1. TweezersiPad 8 Microphone Assembly Replacement

Step 40

– Gently use the flat end of your spudger to wiggle and pop off those two digitizer cable press connectors. You’ve got this!

Tools Used
  1. SpudgeriPad 8 Microphone Assembly Replacement

Step 41

– Grab your trusty spudger and gently lift up the vibration isolator located at the bottom-right corner of your device. It’s like giving your device a little nudge!

– Once it’s up, go ahead and remove that vibration isolator. You’re making great progress!

Tools Used
  1. SpudgeriPad 8 Microphone Assembly Replacement

Step 42

– Gently use tweezers to lift the home button cable away from the frame — easy does it!

Tools Used
  1. TweezersiPad 8 Microphone Assembly Replacement

Step 43

– First things first, let’s get that front panel assembly out of the way!

– If you’re dealing with pesky ‘ghost’ or ‘phantom’ touches on your brand-new display, don’t fret! A simple solution is to apply a super thin layer of insulating tape, like Kapton (polyimide) tape, to the highlighted spots on the back of the panel. Good news – our replacement digitizers come with the right insulation, so you shouldn’t need to add any tape!

– When you’re putting everything back together, make sure to clear away any leftover adhesive from your iPad. Grab some high concentration isopropyl alcohol (90% or higher) and a lint-free cloth to clean the glued areas. This little prep will help the new adhesive stick like a champ!

– Before you seal everything up, give your iPad a quick test to check all functions, and use our display adhesive application guide to put those pre-cut adhesive strips on the back of the display. You’re almost there!

Step 44

– Grab your trusty Phillips screwdriver and get ready to tackle those three tiny screws holding the upper component bracket in place. They’re 1.4 mm long, so be sure to stay focused as you unscrew them with care!

Step 45

– Grab your trusty tweezers or just your fingers and gently lift the upper component bracket off the frame. It’s like a little dance—just be careful and let it slide right off!

Tools Used
  1. TweezersiPad 8 Microphone Assembly Replacement

Step 46

– Gently slide the flat end of your spudger under the front camera cable press connector to pop it loose.

Tools Used
  1. SpudgeriPad 8 Microphone Assembly Replacement

Step 47

– Slide an opening pick snugly between the front camera shell and the frame. Let’s get that device open!

Step 48

– Gently glide the pick around the edge of the camera shell to break that sticky bond.

Step 49

– Gently wedge the opening pick between the front camera shell and the frame to start loosening it up.

– Carefully lift and take out the front camera shell.

Step 50

– Slide a spudger gently between the front camera and microphone assembly.

– Carefully pry to loosen the front camera’s adhesive without rushing.

– Lift out the front camera and set it aside.

Tools Used
  1. SpudgeriPad 8 Microphone Assembly Replacement

Step 51

– Grab your spudger and use the flat end to gently lift up and disconnect the microphone cable’s press connector. A little nudge, and it should come right off!

Tools Used
  1. SpudgeriPad 8 Microphone Assembly Replacement

Step 52

– Gently slide an opening pick in between the frame and the bottom edge of the microphone, right by the press connector.

– Carefully work the pick under the microphone, prying upwards to loosen the adhesive and free it.

Step 53

– Gently wiggle a halberd spudger into the gap between the frame and the top edge of the microphone, right along the frame’s wall.

– Carefully slide the spudger under the microphone and nudge it sideways to loosen the adhesive holding it in place.

Step 54

– Gently wedge a halberd spudger between the frame and the right edge of the microphone.

– Carefully slide the spudger while lifting to loosen the adhesive.

Step 55

– Time to put your device back together! Just reverse those steps and you’ll be golden.

– Got some old gadgets lying around? Make sure to drop them off at an R2 or e-Stewards certified recycler.

– Things didn’t go quite as planned? No worries! Give some basic troubleshooting a shot, or swing by our iPad 8 Answers community for a helping hand.

Tools Used
  1. TweezersiPad 8 Microphone Assembly Replacement

Success!
Ready to put your device back together? Just work your way backwards through the steps you followed earlier. It’s like the magic of reverse engineering.
Got e-waste? Don’t let it sit there! Find a certified recycler like an R2 or e-Stewards pro to dispose of it responsibly.
Something went wrong? Don’t sweat it! Try some quick troubleshooting, or head over to our iPad 8 Answers community for a hand.

iPad 8 Logic Board Replacement

Duration: 45 minutes
Steps: 79 Steps

Get ready to tackle the logic board swap in your iPad 8 Wi-Fi! Just a heads up, this guide is specifically for the Wi-Fi version—if you’ve got the LTE version, you’ll want to check out a different guide. Before diving in, make sure your battery is below 25% to keep things safe and sound. This helps prevent any fiery surprises if the battery gets a little too adventurous during the repair. If you notice your battery is swollen, handle with care! When you’re isolating the battery with a blocker, be gentle—those battery contacts are delicate and can get easily damaged. If you decide to skip isolating the battery, stick to non-metal tools unless you absolutely need them (like for screw removal) to avoid any short circuits or damage to your precious components. A few photos here might show a different model, but don’t fret—those little visual differences won’t mess with your repair journey. Happy fixing!

Step 1

– Warm up that iOpener and give it a cozy two-minute hangout on the left edge of your device.

Tools Used
  1. iOpeneriPad 8 Logic Board Replacement

Step 2

– While the adhesive is doing its thing and loosening up, keep an eye out for these tricky spots that really don’t like being poked:

– Front camera

– Antennas

– Display cables

Step 3

– Grab the blue handle and pull it back to release the Anti-Clamp’s arms.

– Place your iPad on something flat so it sits comfortably between the suction cups.

– Position the suction cups right in the middle of the left edge – one on top, one on the bottom.

– Keep the bottom of the Anti-Clamp steady and press down firmly on the top cup to apply the suction.

Step 4

– Give that blue handle a gentle tug forward to secure those arms in place.

– Now, let’s get moving! Rotate the handle a full 360 degrees, or until those suction cups start to stretch like they’re ready for a workout.

– Keep an eye on those suction cups to ensure they’re staying in sync. If they start to wander off course, just loosen them a bit and guide those arms back into alignment.

Step 5

– Give the adhesive a minute to relax and open up a little gap. Patience is key here.

– If the screen isn’t warming up enough, grab a hair dryer and gently heat along the left edge of the iPad. It’ll help loosen things up.

– Once there’s a nice gap created by the Anti-Clamp, carefully slip in an opening pick under the digitizer.

– Skip ahead to the next step.

Step 6

– Once the screen feels warm to the touch, stick a suction handle onto the left edge of the screen, making sure it’s as close to the edge as you can get.

– Gently lift the screen using the suction handle to create a small gap between the digitizer and the frame.

– Slide an opening pick into the gap between the digitizer and the frame to help separate them.

Step 7

– Pop a second opening pick into the little gap you just made.

– Gently slide that pick down toward the bottom-left corner to loosen the adhesive.

– Keep the pick wedged in the bottom-left corner so the adhesive doesn’t sneak back together.

Step 8

– If the opening pick gets stuck in the adhesive, gently roll the pick along the edge of the iPad to keep loosening the adhesive. Patience is key here, just keep at it!

Step 9

– Slide your opening pick gently towards the top-left corner of your device. This will break the adhesive seal, so be careful and smooth.

– Once the pick is in place at the top-left corner, leave it there for now. This will keep the adhesive from sealing back up on you. No rush, just let it chill for a bit.

Step 10

– Heat up that iOpener and gently place it on the top edge of your device for about two minutes. Give it some time to work its magic!

Tools Used
  1. iOpeneriPad 8 Logic Board Replacement

Step 11

– Gently twist the pick around the top-left corner to loosen up that sticky adhesive.

Step 12

– Gently slide the opening pick along the top edge of your device. Stop just shy of the front camera—it’s like a tiny little treasure you’re avoiding. Easy does it!

Step 13

– Gently pull the pick out until just the tip is nestled between the digitizer and the frame.

– Slide that pick above the front camera to break through the adhesive.

– Keep the pick hanging out near the right side of the front camera before you move on.

Step 14

– Pop that pick back in and glide it toward the top-right corner to fully free up the top adhesive.

– Keep the pick wedged in the top-right corner so the adhesive doesn’t sneak back and seal itself.

Step 15

– Warm up an iOpener and gently press it to the right edge of your device for a solid two minutes.

Tools Used
  1. iOpeneriPad 8 Logic Board Replacement

Step 16

– Give that pick a little spin around the top-right corner of your device to gently peel away the adhesive. You’ve got this!

Step 17

– Grab a fresh opening pick and slide it in halfway along the right edge of the iPad. Easy does it!

Step 18

– Warm up an iOpener and place it on the bottom edge of your device for a cozy two minutes.

Tools Used
  1. iOpeneriPad 8 Logic Board Replacement

Step 19

– Gently slide the pick down to the bottom-left corner to loosen that adhesive like a pro.

– Keep the pick wedged in the bottom-left corner before you move on to the next step.

Step 20

– Gently slide a fresh opening pick into the little gap you’ve just opened at the bottom of your iPad.

– Carefully glide the pick over the antenna, stopping just shy of the home button.

– Make sure to leave the pick on the left side of the home button before you move on.

Step 21

– Gently slide an opening pick into that little gap you just made. You’re doing great!

– Now, carefully glide the pick under the home button and toward the bottom-right corner. Just the tip should be nestled between the digitizer and the frame. Keep it steady!

Step 22

– Slide the pick back in and gently nudge it toward the home button to fully loosen that stubborn bottom adhesive.

– Once it’s in place, leave the pick resting just to the right of the home button before moving on.

Step 23

– Warm up an iOpener and stick it on the right side of your device for about two minutes to get things nice and heated.

Tools Used
  1. iOpeneriPad 8 Logic Board Replacement

Step 24

– Gently twist the two opening picks at the left corners of your iPad to give the digitizer a little lift, helping to break the last of that pesky adhesive free!

Step 25

– Gently lift the left edge of the digitizer upward to loosen the sticky stuff along the right edge of the iPad.

Step 26

– While gently holding the digitizer, slip an opening pick between the two display cables to break free the last bit of adhesive. You got this!

Step 27

– Now that you’ve successfully separated all that sticky adhesive, it’s time to open up the digitizer like a book and lay it next to the iPad, just chilling.

– As you get ready to put everything back together, give the leftover adhesive a little scrub with some isopropyl alcohol—you want a clean slate! If you’re reusing the digitizer, make sure it sparkles too. Don’t forget to replace that adhesive with our handy adhesive strips or pre-cut adhesive cards.

– When you’re reassembling, keep an eye on those delicate display cables! Tuck them neatly under the LCD screen to keep them safe from harm. You’re almost there!

Step 28

– Grab your Phillips screwdriver and carefully remove the four 4.3 mm screws holding the LCD in place.

– Keep an eye on every screw you take out—making sure each one goes back to its original spot will save you from any headaches later on.

– If there’s any tape covering the LCD screws, peel it away gently so you can get to them.

Step 29

– Gently wedge the flat end of a spudger under the LCD just enough to loosen it so you can get a grip with your fingers.

– Carefully flip the LCD over like turning a page in a book, lifting near the camera and folding it back over the home button side of the frame.

– Place the LCD face down on a clean, soft, lint-free surface to give yourself easy access to the display cables.

Tools Used
  1. SpudgeriPad 8 Logic Board Replacement

Step 30

– Grab your trusty Phillips screwdriver and gently remove the 2.3mm-long screw holding the battery connector to the logic board. Easy does it!

Step 31

Step 32

– Gently slide the battery blocker under the logic board’s battery connector at about a 35 degree angle—smooth and steady wins the race.

– Keep that battery blocker right where it is while you continue working; it’s doing important safety work for you.

Tools Used
  1. Battery BlockeriPad 8 Logic Board Replacement

Step 33

– Grab your trusty Phillips screwdriver and get ready for some fun! It’s time to unscrew those three little screws that are 1.4 mm long, keeping the display cable bracket nice and secure. Let’s do this!

Step 34

– Gently grab some tweezers or your trusty fingers, and carefully lift the display cable bracket out of the way. No rush, just take your time and let it pop off smoothly!

Tools Used
  1. TweezersiPad 8 Logic Board Replacement

Step 35

– Grab the flat end of your spudger and gently pry up to disconnect the LCD cable press connector. Nice and easy—no need to rush!

– When you’re re-attaching the connector, just line it up carefully, then press one side down until you hear that satisfying click. Repeat for the other side to lock it in place.

– Avoid pressing down in the center! If the connector’s off-center, you might bend the pins, which can lead to permanent damage. Stay focused and gentle.

Tools Used
  1. SpudgeriPad 8 Logic Board Replacement

Step 36

– Carefully lift the LCD off and set it down face down on a clean, soft, lint-free surface to keep it safe and sound.

Step 37

– Grab your trusty tweezers and gently lift the tape shielding the home button cable’s ZIF connector. Easy does it!

Tools Used
  1. TweezersiPad 8 Logic Board Replacement

Step 38

– Grab your trusty spudger, an opening tool, or even your fingernail, and gently flip up the small, hinged locking flap on the home button cable ZIF connector. You’ve got this!

Tools Used
  1. SpudgeriPad 8 Logic Board Replacement

Step 39

– Grab a pair of tweezers and gently pull the home button ribbon cable out of the ZIF connector. Be sure to keep it nice and straight – no need for any twists or turns here.

Tools Used
  1. TweezersiPad 8 Logic Board Replacement

Step 40

– Grab that trusty spudger and gently wiggle the flat end under those two digitizer cable press connectors. With a little finesse, pry them up and disconnect them like a pro!

Tools Used
  1. SpudgeriPad 8 Logic Board Replacement

Step 41

– Grab your trusty spudger and gently lift the vibration isolator from its cozy spot near the bottom-right corner of your device.

– Now, go ahead and take out that vibration isolator!

Tools Used
  1. SpudgeriPad 8 Logic Board Replacement

Step 42

– Grab a pair of tweezers and carefully peel the home button cable away from the frame. Take your time—gentle is the key to avoiding any hiccups.

Tools Used
  1. TweezersiPad 8 Logic Board Replacement

Step 43

– Start by removing the front panel assembly. It’s easier than it sounds, just take your time.

– If you run into any ‘ghost’ or ‘phantom’ touch issues with your new display, don’t worry! A simple fix is to add a thin layer of insulating tape (like Kapton tape) to the highlighted areas on the back of the panel. No tape? No problem! Most replacement displays already come with the necessary insulation, so you might not need to add any extra.

– Before putting everything back together, make sure to clean off any leftover adhesive from the iPad. A little high-concentration isopropyl alcohol (90% or higher) and a lint-free cloth will do wonders here. This ensures a clean surface for fresh adhesive to stick properly.

– Now, test the functions of your iPad to make sure everything’s working just right. After that, grab those pre-cut adhesive strips and follow our display adhesive application guide to securely attach the display. Then, seal it up tight and you’re good to go!

Step 44

– Grab your Phillips screwdriver and unscrew the three 1.4 mm screws holding down the upper component bracket. Easy does it!

Step 45

– Grab your tweezers or just use your fingers and gently lift the upper component bracket off the frame. Take it easy—no need to rush, just a smooth move will do!

Tools Used
  1. TweezersiPad 8 Logic Board Replacement

Step 46

– Gently slide the flat end of your spudger under the front camera cable connector and lift it up to unplug it. Easy does it!

Tools Used
  1. SpudgeriPad 8 Logic Board Replacement

Step 47

– Slide an opening pick between the front camera shell and the frame to get things rolling!

Step 48

– Gently slide the pick along the edges of the camera shell to break free the adhesive. Take your time, no rush!

Step 49

– Grab your trusty opening pick and gently pry up to pop the front camera shell away from the frame.

– Once it’s loose, go ahead and remove the front camera shell with care!

Step 50

– Slide a spudger in between the front camera and the microphone assembly.

– Gently pry upwards to break free the front camera’s adhesive.

– Now it’s time to bid farewell to the front camera and remove it!

Tools Used
  1. SpudgeriPad 8 Logic Board Replacement

Step 51

– Grab your trusty spudger and gently slide the flat end under the headphone jack’s press connector to pry it up and disconnect it.

– Do the same with the microphone assembly’s press connector, a smooth and easy move!

Tools Used
  1. SpudgeriPad 8 Logic Board Replacement

Step 52

– Gently lift the headphone jack away from the frame with your fingers and carefully tuck the cable to the side.

Step 53

– Gently pry up the rear camera by sliding the flat end of your spudger under the press connector and lifting it straight up.

Tools Used
  1. SpudgeriPad 8 Logic Board Replacement

Step 54

– Gently remove any tape that’s hanging out around the button control cable ZIF connector.

Step 55

– Gently use the tip of a spudger, an opening tool, or even your fingernail to flip up the tiny, hinged locking flap on the button control cable’s ZIF connector. Easy does it!

Tools Used
  1. SpudgeriPad 8 Logic Board Replacement

Step 56

– Grab a pair of tweezers and gently slide the button control cable out of the ZIF connector. Take it slow and steady!

Tools Used
  1. TweezersiPad 8 Logic Board Replacement

Step 57

– Carefully peel away any tape covering the Smart Cover sensor cable ZIF connector.

Step 58

– Gently use the tip of a spudger, an opening tool, or even your fingernail to lift up the tiny, hinged locking flap on the Smart Cover sensor cable’s ZIF connector. Easy does it!

Tools Used
  1. SpudgeriPad 8 Logic Board Replacement

Step 59

– Grab a pair of tweezers and gently pull the Smart Cover sensor cable straight out of the ZIF connector. Take it slow, and you’ll be done in no time!

Tools Used
  1. TweezersiPad 8 Logic Board Replacement

Step 60

– Grab your trusty spudger and gently pry up the left antenna’s coaxial cable to disconnect it. You’ve got this!

– Now, let’s do the same for the right antenna’s coaxial cable. Easy peasy!

– When it’s time to put everything back together, these connectors might play hard to get. Just hold each one over its socket and give it a little press with the flat end of your spudger. You’ll hear a satisfying snap when it clicks into place!

Tools Used
  1. SpudgeriPad 8 Logic Board Replacement

Step 61

– Gently lift the right antenna cable upwards.

Step 62

– Gently peel the left antenna cable off the frame, sliding along the bottom edge of the iPad like it’s no big deal.

Step 63

– Gently slide the flat end of your spudger under the vibration isolator located at the bottom left corner of the iPad to lift it up.

– Grab your tweezers and carefully pull out the vibration isolator.

Tools Used
  1. TweezersiPad 8 Logic Board Replacement
  2. SpudgeriPad 8 Logic Board Replacement

Step 64

– Carefully lift the tape covering the speaker connectors using tweezers or your trusty fingernail.

Tools Used
  1. TweezersiPad 8 Logic Board Replacement

Step 65

– Grab the tip of a spudger, an opening tool, or even your trusty fingernail, and gently flip up the little hinged locking flap on both the left and right speaker cable ZIF connectors. You’ve got this!

Tools Used
  1. SpudgeriPad 8 Logic Board Replacement

Step 66

– Grab a trusty pair of tweezers and gently pull the left and right speaker cables straight out of their ZIF connectors. You’ve got this!

Tools Used
  1. TweezersiPad 8 Logic Board Replacement

Step 67

– Grab your trusty spudger and use its pointed end to gently disconnect the Smart Connector coaxial cable. Aim to pry it up as close to the connector as you can for the best results!

Tools Used
  1. SpudgeriPad 8 Logic Board Replacement

Step 68

– Gently use a spudger to lift up and disconnect the Smart Connector cable’s connector. You’ve got this!

Tools Used
  1. SpudgeriPad 8 Logic Board Replacement

Step 69

– Grab a trusty pair of tweezers and gently peel back the tape that’s keeping the Smart Connector cables snug against the frame. You’ve got this!

Tools Used
  1. TweezersiPad 8 Logic Board Replacement

Step 70

– Gently lift the Smart Connector cables away from the frame like you’re freeing a tiny, delicate superhero.

Step 71

– Grab your trusty Phillips screwdriver and remove those four screws holding the charging port to the frame. Here’s the scoop:

– Two screws, each 2.2 mm long

– Two screws, each 3.2 mm long

Step 72

– Warm up an iOpener and place it on the bottom, top, and logic board side of the iPad, holding it there for about thirty seconds each spot to get things nice and toasty.

Tools Used
  1. iOpeneriPad 8 Logic Board Replacement

Step 73

– Slide an opening pick under the charging port cable right by the charging port, then gently nudge it toward the logic board to slice through that stubborn adhesive.

Step 74

– Gently wiggle the charging port free from its cozy spot in the frame.

Step 75

– Slide an opening pick underneath the upper edge of the logic board and gently move it toward the board to break the adhesive holding it in place.

– Leave the pick in place to prevent the adhesive from sticking back together.

Step 76

– Take out the battery blocker to keep things moving.

Tools Used
  1. Battery BlockeriPad 8 Logic Board Replacement

Step 77

– Gently slide your opening tool into the center of the logic board and carefully lift it up with a smooth, steady motion to detach it from the frame. Take your time and enjoy the process!

Step 78

– Grab your halberd spudger or an opening pick and carefully slide it under any stubborn adhesive still holding the logic board to the frame. Keep it smooth and steady!

Step 79

– To put your device back together, just follow these steps in reverse. Easy, right?

– Got e-waste? Take it to an R2 or e-Stewards certified recycler and do your part for the planet.

– Things not going as smoothly as expected? No worries! Check out some quick troubleshooting tips or head to our iPad 8 Answers community for some friendly advice.

– Need a hand? If you’re stuck, feel free to schedule a repair. We’re here to help.

Success!
Put your device back together by following these steps in reverse.
Remember to recycle your electronic waste at an R2 or e-Stewards certified facility.
If things didn’t quite work out, try some basic troubleshooting or schedule a repair with us for expert help.

iPad 8 Left Speaker Replacement

Duration: 45 minutes
Steps: 56 Steps

Get ready to tackle the replacement of the left speaker in your iPad 8 Wi-Fi! Just a heads up, this guide is specifically for the Wi-Fi version, so if you’re rocking the LTE model, you might want to check out the other guide. Before you dive in, make sure your battery is below 25% charged – this helps keep things safe and sound, reducing the chances of a fire if something goes awry during the repair. And if your battery is looking a bit puffy, be sure to take the right precautions. When you’re isolating the battery with a blocker, be gentle; those battery contacts are fragile and can bend or break, leading to some serious woes. If you decide to skip isolating the battery, try to avoid metal tools unless absolutely necessary (like when you’re removing screws) to keep everything running smoothly and avoid damaging sensitive components. Keep in mind that some photos in this guide might be from a different model, so they may look a tad different, but don’t worry – they won’t mess with the repair steps. Happy repairing!

Step 1

– Warm up an iOpener and stick it on the left side of your device for a solid two minutes. Time to soften things up!

Tools Used
  1. iOpeneriPad 8 Left Speaker Replacement

Step 2

– While the adhesive is doing its thing and loosening up, keep an eye out for these tricky spots that really don’t like being pried:

– Front camera

– Antennas

– Display cables

Step 3

– Give that blue handle a gentle tug back to set the Anti-Clamp’s arms free!

– Slide something under your iPad so it’s chilling nice and level between the suction cups.

– Set those suction cups right around the midpoint of the left edge—one perched on top and the other below.

– Keep a steady grip on the bottom of the Anti-Clamp and give that top cup a firm press to get the suction going.

Step 4

– Give that blue handle a gentle tug forward to lock those arms in place!

– Now, twist that handle a full 360 degrees or until those suction cups start to stretch. You’re doing great!

– Keep an eye on those suction cups and make sure they’re dancing in sync. If they start to wobble out of line, just loosen them up a bit and get those arms back in harmony.

Step 5

– Give it a minute to let the adhesive loosen up and create a small opening gap.

– If the screen isn’t warming up enough, try using a hair dryer along the left edge of the iPad to gently heat it.

– Once the Anti-Clamp has made a big enough gap, slide an opening pick under the digitizer.

– Skip the next step.

Step 6

– First things first, let’s warm up that screen until it’s cozy to the touch! Then, grab a suction handle and stick it to the left edge of the screen, getting as close to the edge as you can.

– Now, gently lift the screen with the suction handle to create a little gap between the digitizer and the frame. We’re making progress!

– Time to slide in an opening pick into that gap you just created. Let’s keep this momentum going!

Step 7

– Slide a second opening pick into that nifty little gap you just made.

– Gently glide the pick towards the bottom-left corner of your device to free that stubborn adhesive.

– Keep the pick in the bottom-left corner so that adhesive doesn’t decide to play hide and seek again!

Step 8

– If the opening pick seems to be having a tough time with the adhesive, just give it a little roll along the side of the iPad to keep that adhesive separating like a champ!

Step 9

– Gently glide the first opening pick towards the top-left corner of your device to break that stubborn adhesive free.

– Keep that pick in the top-left corner like a trusty sidekick to stop the adhesive from re-sticking.

Step 10

– Warm up an iOpener and stick it on the top edge of your device for a solid two minutes to loosen things up.

Tools Used
  1. iOpeneriPad 8 Left Speaker Replacement

Step 11

– Gently twirl the pick around the top-left corner of your device to break free that stubborn adhesive.

Step 12

– Gently slide the opening pick along the top edge of the device, easing up until just before the front camera—smooth moves here!

Step 13

– Gently pull the pick out until just the tip is nestled between the digitizer and the frame.

– Slide that pick right above the front camera to break up the adhesive.

– Keep the pick close to the right side of the front camera as you move forward.

Step 14

– Pop that pick back in and slide it over to the top-right corner of your device to fully break free from the adhesive’s grip.

– Keep that pick in place at the top-right corner to make sure the adhesive doesn’t decide to stick again.

Step 15

– Warm up an iOpener and stick it on the right edge of your device for a solid two minutes to get things nice and toasty.

Tools Used
  1. iOpeneriPad 8 Left Speaker Replacement

Step 16

– Gently twist the pick around the device’s top-right corner to loosen that stubborn adhesive.

Step 17

– Pop in a fresh opening pick and gently slide it right down the iPad’s right edge to the middle. Keep it steady, and you’ll be cruising through this repair in no time!

Step 18

– Warm up your iOpener and give it a cozy hug to the bottom edge of your device for a solid two minutes.

Tools Used
  1. iOpeneriPad 8 Left Speaker Replacement

Step 19

– Gently slide the pick down to the bottom-left corner to loosen that stubborn adhesive.

– Keep the pick resting in the bottom-left corner before moving on to the next step.

Step 20

– Pop a new opening pick into that little gap you made at the bottom edge of the iPad. You got this!

– Gently slide the pick over the antenna, but stop just shy of the home button. Easy does it!

– Keep that pick hanging out to the left of the home button before moving on to the next step. You’re doing great!

Step 21

– Start by sliding your opening pick into the gap you’ve just made. Nice and easy, no rush!

– Now, gently slide the pick under the home button, angling it towards the bottom-right corner. Just the tip should go between the digitizer and the frame—be sure it stays neat and tidy!

Step 22

– Carefully reinsert the pick and glide it toward the home button, making sure to fully detach that pesky bottom adhesive.

– Now, leave that pick hanging out to the right of the home button as you move on to the next step.

Step 23

– Warm up that iOpener and let it chill on the right edge of your device for about two minutes. It’s gonna make things a whole lot easier for you!

Tools Used
  1. iOpeneriPad 8 Left Speaker Replacement

Step 24

– Gently twist the opening picks at the top left corners of your iPad. This should lift the digitizer just enough to peel away the last bit of adhesive. Easy does it, no need to rush!

Step 25

– Gently lift the left side of the digitizer and give the adhesive on the right side of the iPad a little extra nudge to separate it further.

Step 26

– Keep a steady hand on the digitizer while gently sliding an opening pick between the two display cables to carefully peel apart the last bit of adhesive holding them together.

Step 27

– After carefully loosening all the adhesive, gently open the digitizer like a book and lay it flat next to the iPad.

– When putting everything back together, take a moment to clean off any leftover adhesive from both the frame and the digitizer (if reusing it) using some isopropyl alcohol. Then, swap out the old adhesive with fresh adhesive strips or pre-cut adhesive cards.

– Pay close attention to the display cables as you reassemble—make sure they’re neatly folded under the LCD screen to avoid any accidental damage.

Step 28

– Grab your Phillips screwdriver and carefully unscrew the four 4.3mm-long screws holding the LCD in place. Take your time—no rush!

– As you go along, keep track of each screw and make sure they go right back where they came from. This will help prevent any unwanted damage to your device.

– Peel back any tape covering the LCD screws. We don’t need any obstacles in our way!

Step 29

– Grab your trusty spudger and gently pry the LCD out of its cozy little spot, just enough for your fingers to take over the job.

– Now, flip that LCD like you’re turning a page in your favorite book—lift it near the camera and swing it over to the home button end of the frame.

– Place the LCD down on a clean, soft, lint-free surface to give those display cables some room to breathe.

Tools Used
  1. SpudgeriPad 8 Left Speaker Replacement

Step 30

– Grab your trusty Phillips screwdriver and carefully take out the 2.3mm-long screw holding the battery connector in place on the logic board.

Step 31

Step 32

– Gently slide the battery blocker under the logic board’s battery connector at about a 35 degree angle.

– Keep the battery blocker in place while you continue working to stay safe and sound.

Tools Used
  1. Battery BlockeriPad 8 Left Speaker Replacement

Step 33

– Grab your trusty Phillips screwdriver and get ready for some action! Time to tackle those three little screws that are holding the display cable bracket in place. Each one is 1.4 mm long, so make sure to remove them with care. You’ve got this!

Step 34

– Gently use tweezers or your fingers to pop off the display cable bracket—easy does it!

Tools Used
  1. TweezersiPad 8 Left Speaker Replacement

Step 35

– Gently use the flat end of a spudger to lift and unplug the LCD cable press connector.

– When reconnecting press connectors like this one, line up one side carefully and press down until you hear a click, then do the same on the other side.

– Avoid pressing in the center—if the connector isn’t lined up right, the pins might bend and cause permanent damage.

Tools Used
  1. SpudgeriPad 8 Left Speaker Replacement

Step 36

– Carefully detach the LCD and place it face down on a clean, soft surface that won’t leave any lint behind. You’ve got this!

Step 37

– Grab a trusty pair of tweezers and gently peel away the tape that’s keeping the home button cable ZIF connector cozy. You’ve got this!

Tools Used
  1. TweezersiPad 8 Left Speaker Replacement

Step 38

– Gently pop up the tiny, hinged locking flap on the home button cable ZIF connector using a spudger, an opening tool, or even your trusty fingernail.

Tools Used
  1. SpudgeriPad 8 Left Speaker Replacement

Step 39

– Grab your trusty tweezers and gently tug on that home button ribbon cable to pull it straight out from the ZIF connector. You’ve got this!

Tools Used
  1. TweezersiPad 8 Left Speaker Replacement

Step 40

– Gently use the flat side of your spudger to pop up and disconnect the two digitizer cable connectors. Take your time, there’s no rush!

Tools Used
  1. SpudgeriPad 8 Left Speaker Replacement

Step 41

– Grab your spudger and gently use the flat end to lift the vibration isolator from the bottom-right corner of your device.

– Once it’s loose, go ahead and remove the vibration isolator.

Tools Used
  1. SpudgeriPad 8 Left Speaker Replacement

Step 42

– Grab your tweezers and gently lift the home button cable off the frame like a pro.

Tools Used
  1. TweezersiPad 8 Left Speaker Replacement

Step 43

– Start by removing the front panel assembly. Easy, right? Just take your time and stay gentle.

– If you’re dealing with any pesky ‘ghost’ or ‘phantom’ touches on your shiny new display, no worries! Simply add a thin layer of insulating tape—Kapton (polyimide) tape works like a charm—around the highlighted areas on the back of the panel. Good news: replacement digitizers usually come with the right insulation, so no extra tape needed if you’re using one of those.

– Before you dive into reassembly, make sure to give your iPad a good clean. Any leftover adhesive needs to go! Grab some high-concentration isopropyl alcohol (90% or higher) and a lint-free cloth to clean the glued areas. This step preps the iPad for fresh adhesive and makes sure it sticks like it should.

– Now, it’s time to test things out. Power up your iPad and make sure everything is working smoothly. Once you’re all set, apply the pre-cut adhesive strips to the back of the display (check out the display adhesive guide for help). After that, you’re good to seal it all up!

Step 44

– Gently slide the pointed end of a spudger underneath the left antenna cable and lift it straight up to disconnect it. Easy peasy!

– When it’s time to put everything back together, those connectors can be a bit stubborn. Just hold each one over its socket and give it a little press down with the flat end of that trusty spudger. You’ll hear a satisfying snap when it locks into place!

Tools Used
  1. SpudgeriPad 8 Left Speaker Replacement

Step 45

– Gently lift the left antenna cable away from the back case.

Step 46

– Gently wedge the flat end of your spudger under the vibration isolator located at the bottom left corner of the iPad.

– Grab your tweezers and carefully lift out the vibration isolator.

Tools Used
  1. TweezersiPad 8 Left Speaker Replacement
  2. SpudgeriPad 8 Left Speaker Replacement

Step 47

– Grab your Phillips screwdriver and unscrew the three screws holding down the right antenna.

– One screw that’s 2.3 mm long

– Two screws that are 1.4 mm long each

Step 48

– Slip an opening pick between the speaker enclosure and the bracket like a sneaky little ninja.

– Gently slide the pick toward the charging port to slice through that stubborn adhesive.

– Nudge the bracket away from the speaker so it’s free and clear of the tape hiding underneath.

Step 49

– Gently slide an opening pick between the antenna and speaker assembly to get things started.

– Carefully work the pick underneath the antenna to slice through the foam adhesive holding it down.

– Grab some tweezers or just use your fingers to lift out that left antenna with ease.

Tools Used
  1. TweezersiPad 8 Left Speaker Replacement

Step 50

– Grab a pair of tweezers (or even just your nails) and gently peel back the tape that’s holding the speaker connectors in place. Nice and easy—no need to rush!

Tools Used
  1. TweezersiPad 8 Left Speaker Replacement

Step 51

– Grab the tip of a spudger, an opening tool, or even your trusty fingernail, and gently lift the small, hinged locking flap on the left speaker cable ZIF connector. You’ve got this!

Tools Used
  1. SpudgeriPad 8 Left Speaker Replacement

Step 52

– Grab a trusty pair of tweezers and gently pull the left speaker cable straight out of the ZIF connector. You’ve got this!

Tools Used
  1. TweezersiPad 8 Left Speaker Replacement

Step 53

– Grab your trusty Phillips screwdriver and carefully unscrew the 2.3 mm screw holding the left speaker in place.

Step 54

– Peel away the tape that’s keeping the speaker snug against the rear case. Let’s set it free!

Step 55

– Slide the flat end of your trusty spudger into the groove in the speaker housing, right by the corner of the rear case.

– Gently nudge the speaker away from the rear case—easy does it!

– Carefully push the speaker out from under the shelf on the rear case and watch it come free.

Tools Used
  1. SpudgeriPad 8 Left Speaker Replacement

Step 56

– Time to put everything back together! Just follow these steps in reverse order, and you’ll be good to go.

– Got e-waste? Don’t let it pile up. Take it to a certified recycler like R2 or e-Stewards to make sure it gets handled properly.

– Something went wrong? No worries! Try some basic troubleshooting, or reach out to our iPad 8 Answers community for some guidance.

Success!
Put your device back together by reversing the steps you just followed.
Remember to recycle your electronic waste responsibly at an R2 or e-Stewards certified facility.
If things didn’t go quite as planned, give some basic troubleshooting a shot or tap into the iPad 8 Answers community for advice.
And if you’re stuck, you can always schedule a repair.

iPad 8 Left Bluetooth and Wi-Fi Antenna Replacement

Duration: 45 minutes
Steps: 49 Steps

Dive into this guide to swap out the left Bluetooth and Wi-Fi antenna in your iPad 8 Wi-Fi! Just a heads up: this guide is specifically for the Wi-Fi version. If you’re rocking the LTE version, check out the alternative guide. For safety’s sake, make sure to drain your battery below 25% before you start disassembling your iPad. This little step helps minimize the risk of a fiery situation if the battery gets accidentally harmed during the repair. If your battery is looking a bit puffed up, take the necessary precautions. When it comes to isolating the battery with a battery blocker, tread carefully! The battery contacts are delicate and can easily get damaged, leading to unwanted problems. If you decide to tackle the guide without isolating the battery, stick to non-metal tools wherever possible (except for those pesky screws) to prevent any battery shorts and protect those sensitive circuit components. Don’t forget, you’ll need some replacement adhesive to wrap up this repair. Some images in this guide might come from a different model, so they may not match up perfectly, but no worries—they won’t mess with the repair steps!

Step 1

– Warm up your iOpener and give it a cozy two-minute hug on the left edge of your device.

Tools Used
  1. iOpeneriPad 8 Left Bluetooth and  Wi-Fi Antenna Replacement

Step 2

– While the adhesive is softening up, keep a sharp eye out for these parts that really don’t like being poked around:

– Front camera

– Antennas

– Display cables

Step 3

– Slide the blue handle back to release the Anti-Clamp’s arms.

– Prop up your iPad with something so it sits level between the suction cups.

– Set the suction cups close to the center of the left edge—one near the top, the other near the bottom.

– Keep the bottom of the Anti-Clamp steady while pressing down firmly on the top cup to create suction.

Step 4

– Give the blue handle a gentle tug forward to secure those arms in place.

– Twist the handle a full 360 degrees or until you see those cups start to stretch—you’re almost there!

– Keep an eye on those suction cups; they should be in perfect harmony. If they start to drift apart, just loosen them a tad and nudge those arms back into alignment.

Step 5

– Give it a minute to let the adhesive loosen up and create a little gap.

– If the screen isn’t warming up enough, try using a hair dryer along the left edge of the iPad to heat things up.

– Once the Anti-Clamp has opened a good-sized gap, slide an opening pick under the digitizer.

– Skip the next step.

Step 6

– Once the screen feels nice and toasty, grab a suction handle and pop it onto the left edge of the screen, as close to the edge as you can get.

– Give the screen a gentle lift with the suction handle to open up a tiny gap between the digitizer and the frame.

– Slide in an opening pick right into that gap you just created between the digitizer and the frame.

Step 7

– Pop in a second opening pick right where you made that gap. You’re doing great!

– Slide that pick down toward the bottom-left corner of your device to break free from that sticky adhesive. You’re almost there!

– Keep the pick snug in the bottom-left corner to stop that adhesive from sealing up again. You’ve got this!

Step 8

– If your opening pick decides to get a little clingy with the adhesive, just roll it gently along the edge of the iPad to keep that adhesive separation party going.

Step 9

– Gently slide your trusty opening pick towards the top-left corner of your device to break that adhesive seal. You’ve got this!

– Once you’ve made some progress, leave the pick right where it is in the top-left corner to keep that adhesive from getting cozy again.

Step 10

– Warm up that iOpener and place it on the top edge of your device for two minutes. Let the magic happen!

Tools Used
  1. iOpeneriPad 8 Left Bluetooth and  Wi-Fi Antenna Replacement

Step 11

– Gently swivel the pick around the top-left corner to loosen that stubborn adhesive and keep things moving!

Step 12

– Gently glide the opening pick along the top edge of your device, but hold up just short of the front camera to keep things safe and sound!

Step 13

– Gently pull the pick out so only its tip stays between the digitizer and frame — nice and easy!

– Slide the pick over the front camera area to carefully loosen the adhesive holding things together.

– Keep the pick resting just to the right side of the front camera before moving on to the next step.

Step 14

– Pop that pick back in and shimmy it up to the top-right corner of your device to fully break free from that pesky adhesive.

– Keep the pick snug in the top-right corner to stop that adhesive from getting all clingy again.

Step 15

– Warm up an iOpener and give it a cozy 2-minute rest on the right edge of your device.

Tools Used
  1. iOpeneriPad 8 Left Bluetooth and  Wi-Fi Antenna Replacement

Step 16

– Gently twist the pick around the top-right corner to loosen that stubborn adhesive like a pro.

Step 17

– Grab a new opening pick and gently slide it along the right edge of the iPad until you hit the middle. Keep it steady and easy—no need to rush here!

Step 18

– Warm up an iOpener and stick it to the bottom edge of your device for a solid two minutes to loosen things up.

Tools Used
  1. iOpeneriPad 8 Left Bluetooth and  Wi-Fi Antenna Replacement

Step 19

– Gently slide the pick into the bottom-left corner to break that adhesive seal like a pro.

– Once you’ve got it in there, leave the pick in the corner and get ready for the next step.

Step 20

– Pop in a fresh opening pick right into that gap you just made at the bottom edge of your iPad.

– Gently glide the pick over the antenna, but stop just shy of the home button.

– Keep the pick to the left of the home button before you move on.

Step 21

– Time to bring in the opening pick! Slide it gently into the gap you’ve just made.

– Now, carefully slide that pick under the home button and aim for the bottom-right corner. Just make sure the tip of the pick stays between the digitizer and the frame. You’re almost there!

Step 22

– Slide the pick towards the home button, making sure to break the bottom adhesive free.

– Now, leave the pick just to the right of the home button and get ready to move on.

Step 23

– Warm up an iOpener and place it on the right edge of your device for a cozy two minutes.

Tools Used
  1. iOpeneriPad 8 Left Bluetooth and  Wi-Fi Antenna Replacement

Step 24

– Gently twist the two opening picks at the left corners of your iPad. This will lift the digitizer just enough to break the final bits of adhesive loose. Take it slow and steady—you’ve got this!

Step 25

– Gently lift the left edge of the digitizer to start peeling away the adhesive along the right side of the iPad. Take it slow and steady—you’ve got this!

Step 26

– While gently holding the digitizer, slide an opening pick between the display cables to gently break free the last bit of adhesive. Take your time, no rush – it’s all about precision here!

Step 27

– Once the adhesive has been fully loosened, gently open the digitizer like a book and lay it flat, parallel to your device.

– As you put everything back together, give the frame and digitizer a good cleaning with some isopropyl alcohol to get rid of any leftover adhesive. If you’re reusing the digitizer, make sure to replace the old adhesive with fresh strips or pre-cut adhesive cards.

– Be extra careful with those display cables during reassembly. Make sure they’re neatly tucked under the LCD screen to avoid any damage when you close it all up.

Step 28

– Grab your trusty Phillips screwdriver and let’s get those four 4.3 mm-long screws out of the way to free the LCD from the frame. You’ve got this!

– As you tackle this repair, keep an eye on those screws! Treat them like precious gems and remember where they belong to keep your device safe and sound.

– If there’s any tape hiding those LCD screws, gently peel it away so we can see what we’re working with.

Step 29

– Gently wedge the flat end of your spudger under the LCD just enough to lift it out of its spot so you can grab it with your fingers.

– Flip the LCD over like turning a page in a book—lift near the camera and rotate it over the home button side of the frame.

– Set the LCD down on a clean, soft, lint-free surface so you can easily access the display cables without any worries.

Tools Used
  1. SpudgeriPad 8 Left Bluetooth and  Wi-Fi Antenna Replacement

Step 30

– Grab your trusty Phillips screwdriver and unscrew the 2.3mm-long screw that’s holding the battery connector in place on the logic board. Nice and easy!

Step 31

Step 32

– Slide the battery blocker under the logic board’s battery connector, but give it a little 35-degree tilt. It’s like a gentle nudge—nothing too crazy!

– Once it’s in place, just let it chill there while you continue with the rest of the steps.

Tools Used
  1. Battery BlockeriPad 8 Left Bluetooth and  Wi-Fi Antenna Replacement

Step 33

– Grab a Phillips screwdriver and take out the three 1.4 mm screws holding down the display cable bracket.

Step 34

– Gently grab your tweezers (or just your fingers, if you’re feeling bold!) and lift off the display cable bracket. Easy peasy!

Tools Used
  1. TweezersiPad 8 Left Bluetooth and  Wi-Fi Antenna Replacement

Step 35

– Grab the flat end of a spudger and gently lift the LCD cable connector up and off. No need to rush here, take your time!

– When you’re ready to re-attach that press connector, carefully line up one side and give it a gentle press until it clicks into place. Then repeat the process on the other side. Easy does it!

– Remember, avoid pressing on the middle. If the connector’s not quite aligned, you could bend the pins, and that’s a whole new level of trouble!

Tools Used
  1. SpudgeriPad 8 Left Bluetooth and  Wi-Fi Antenna Replacement

Step 36

– Carefully lift off the LCD and lay it down face-down on a clean, soft, lint-free spot—treat it like the VIP it is!

Step 37

– Grab a pair of tweezers and carefully peel off the tape that’s covering the home button cable ZIF connector. Take it slow and steady!

Tools Used
  1. TweezersiPad 8 Left Bluetooth and  Wi-Fi Antenna Replacement

Step 38

– Grab your trusty spudger, an opening tool, or even your fingernail, and gently lift that little hinged locking flap on the home button cable ZIF connector. You’ve got this!

Tools Used
  1. SpudgeriPad 8 Left Bluetooth and  Wi-Fi Antenna Replacement

Step 39

– Grab your tweezers and gently pull the home button ribbon cable straight out of the ZIF connector—nice and easy does it!

Tools Used
  1. TweezersiPad 8 Left Bluetooth and  Wi-Fi Antenna Replacement

Step 40

– Gently wedge the flat end of your trusty spudger under the two digitizer cable press connectors to pop them loose.

Tools Used
  1. SpudgeriPad 8 Left Bluetooth and  Wi-Fi Antenna Replacement

Step 41

– Gently slide the flat end of your spudger under the vibration isolator located at the bottom-right corner to lift it up.

– Take out the vibration isolator carefully.

Tools Used
  1. SpudgeriPad 8 Left Bluetooth and  Wi-Fi Antenna Replacement

Step 42

– Grab some tweezers and gently lift the home button cable away from the frame. You’ve got this!

Tools Used
  1. TweezersiPad 8 Left Bluetooth and  Wi-Fi Antenna Replacement

Step 43

– Carefully remove the front panel assembly.

– If your new display starts acting like it’s haunted with ‘ghost’ or ‘phantom’ touches, don’t panic! Simply apply a thin layer of insulating tape, like Kapton (polyimide) tape, to the highlighted spots on the back of the panel. Replacement digitizers usually come with the right insulation, so you probably won’t need to add any tape.

– When putting everything back together, make sure to scrape off any leftover adhesive from the iPad. Then, clean those glued areas with high-concentration isopropyl alcohol (90% or higher) and a lint-free cloth. This preps the surface for fresh adhesive and helps it stick like a champ.

– Give your iPad a quick test to make sure everything works, then use pre-cut adhesive strips on the back of the display following the display adhesive guide before sealing it up tight.

Step 44

– Slide the pointed tip of your spudger gently under the left antenna cable and lift it up to disconnect it. Keep it steady, and it’ll come off with ease.

– Reconnecting these can be a bit tricky, but no worries! Just hold each connector over its socket and press down with the flat end of your spudger. It should click right into place.

Tools Used
  1. SpudgeriPad 8 Left Bluetooth and  Wi-Fi Antenna Replacement

Step 45

– Gently lift the left antenna cable off the rear case. Just a little nudge, and it’ll come right up!

Step 46

– Grab that trusty spudger and gently wiggle the flat end under the vibration isolator in the bottom left corner of your iPad. It’s like a little dance move, but for your device!

– Once you’ve got it lifted, use a pair of tweezers to carefully pluck the vibration isolator out. You’re doing great!

Tools Used
  1. SpudgeriPad 8 Left Bluetooth and  Wi-Fi Antenna Replacement
  2. TweezersiPad 8 Left Bluetooth and  Wi-Fi Antenna Replacement

Step 47

– Grab your trusty Phillips screwdriver and take out the three screws holding down the right antenna.

– One screw is 2.3 mm long,

– and the other two are 1.4 mm long each.

Step 48

– Slip an opening pick right between the speaker enclosure and the bracket. You’re doing great!

– Gently glide that pick towards the charging port to break the adhesive seal. Keep it up!

– Carefully push the bracket away from the speaker to free it from the tape beneath. Almost there!

Step 49

– Put your device back together by following these steps in reverse order.

– Remember to recycle your electronic waste responsibly at an R2 or e-Stewards certified recycler.

– If things didn’t turn out quite right, try some basic troubleshooting or reach out to our iPad 8 Answers community for a hand.

– And if all else fails, you can always schedule a repair with us!

Tools Used
  1. TweezersiPad 8 Left Bluetooth and  Wi-Fi Antenna Replacement

Success!
Now that you’ve tackled the repair, it’s time to put everything back together—just retrace your steps from earlier!
Got some e-waste? Be a hero and take it to an R2 or e-Stewards certified recycler!
Things didn’t go quite as planned? No worries! Give some basic troubleshooting a shot, or swing by our iPad 8 Answers community for a little extra help.

iPad 8 LCD Replacement

Duration: 45 minutes
Steps: 36 Steps

Ready to give your iPad 8 a new lease on life? This guide will help you replace the liquid crystal display (LCD) with ease. Unlike newer iPads and most phones, the iPad 8 keeps its glass digitizer and LCD separate—pretty cool, right? Just a heads-up: this guide is for the Wi-Fi version only, so if you’re dealing with the LTE version, you’ll need to check out the other guide. For safety, make sure to drain your battery below 25% before diving in to avoid any potential fire hazards if the battery gets damaged. And hey, if your battery is looking a little puffy, handle it with care. When it comes to isolating the battery with a blocker, take it slow—those contacts can be delicate. If you decide not to isolate the battery, just steer clear of metal tools unless absolutely necessary (like when you need to remove screws). That will help avoid any damage to the battery or sensitive components. Some of the photos here might show a different model, but don’t stress—they’re close enough to not mess with the procedure. Good luck!

Step 1

– Warm up an iOpener and stick it on the left side of your device for a solid two minutes to get things nice and toasty.

Tools Used
  1. iOpeneriPad 8 LCD Replacement

Step 2

– As you give the adhesive some time to chill and loosen up, keep in mind these delicate spots that need a gentle touch while prying:

– Front camera

– Antennas

– Display cables

Step 3

– Slide the blue handle back to release the Anti-Clamp’s arms.

– Set something underneath your iPad so it stays balanced between the suction cups.

– Place the suction cups close to the center of the left edge—one near the top, the other near the bottom.

– Keep the bottom of the Anti-Clamp steady and press down firmly on the top cup to create suction.

Step 4

– Slide the blue handle forward to lock those arms in place.

– Give the handle a full 360-degree clockwise twist, or keep turning until the suction cups start to stretch a bit.

– Keep an eye on the suction cups to make sure they stay perfectly lined up. If they start to drift, just loosen them a little and realign the arms.

Step 5

– Give it about a minute to let the adhesive loosen up and create a little gap to work with.

– If the screen isn’t warming up enough, try using a hair dryer along the left edge of the iPad to heat things up.

– Once the Anti-Clamp has made a nice opening, slide an opening pick under the digitizer carefully.

– Go ahead and skip the next step.

Step 6

– Once the screen has warmed up and feels comfortably warm to the touch, grab your suction handle and attach it to the left edge of the screen, as close to the edge as you can get.

– Gently lift the screen with the suction handle to open up a small gap between the digitizer and the frame—just enough for the next step.

– Slip an opening pick into that little gap you just made between the digitizer and the frame, and you’re on your way!

Step 7

– Pop a second opening pick into the gap you’ve just made.

– Gently slide that pick toward the bottom-left corner to break the adhesive’s grip.

– Keep the pick tucked into that bottom-left corner to keep the adhesive from getting cozy again.

Step 8

– If your opening pick gets caught in the adhesive, just give it a little roll along the edge of the iPad to keep things moving and gently separate that sticky stuff.

Step 9

– Gently slide your first opening pick up towards the top-left corner to start loosening that stubborn adhesive.

– Keep the pick wedged in the top-left corner so the adhesive doesn’t sneak back and seal itself.

Step 10

– Warm up your iOpener and give it a cozy two-minute stay on the top edge of your device.

Tools Used
  1. iOpeneriPad 8 LCD Replacement

Step 11

– Give that pick a spin around the top-left corner of your device to gently break free the adhesive. You’ve got this!

Step 12

– Gently glide the opening pick along the upper edge of your device, making sure to pause right before you hit the front camera. You’re doing great!

Step 13

– Gently pull the pick out so that just the tip stays tucked between the digitizer and the frame.

– Carefully slide the pick over the front camera to loosen the adhesive.

– Rest the pick near the right side of the front camera and get ready for the next step.

Step 14

– Pop the pick back in and gently slide it up towards the top-right corner to fully loosen that stubborn top adhesive.

– Keep the pick lodged in the top-right corner so the adhesive doesn’t sneak back together on you.

Step 15

– Warm up an iOpener and stick it on the right edge of your device for a solid two minutes to loosen things up.

Tools Used
  1. iOpeneriPad 8 LCD Replacement

Step 16

– Gently glide the pick around the top-right corner of your device to carefully break that adhesive seal. You’re doing great!

Step 17

– Pop in a fresh opening pick and slide it right to the middle of the iPad’s right edge. Easy does it!

Step 18

– Warm up an iOpener and stick it on the bottom edge of your device for a solid two minutes to loosen things up.

Tools Used
  1. iOpeneriPad 8 LCD Replacement

Step 19

– Gently slide the pick into the bottom-left corner and work it along to loosen the adhesive.

– Once the pick is in place, leave it there before moving on to the next step.

Step 20

– Slide a fresh opening pick into the gap you’ve just made on the bottom edge of the iPad.

– Gently glide the pick over the antenna, but stop just shy of the home button.

– Leave the pick hanging out just to the left of the home button before you move on.

Step 21

– Pop an opening pick into the gap you just made like a pro.

– Gently slide the pick under the home button, gliding it toward the bottom-right corner, making sure only the tip sneaks between the digitizer and the frame.

Step 22

– Slide that pick back in and shimmy it towards the home button to fully break free that stubborn bottom adhesive.

– Once you’re done, leave the pick hanging out to the right of the home button before moving on.

Step 23

– Heat up your iOpener and stick it on the right edge of your device for two minutes. It’s like giving your device a nice, cozy warm-up before the magic happens.

Tools Used
  1. iOpeneriPad 8 LCD Replacement

Step 24

– Gently twist the two opening picks at the left corners of the iPad. This will lift the digitizer just a bit, helping to separate the last bits of adhesive along the way. No rush, just a little twist to get it moving!

Step 25

– Gently lift the left edge of the digitizer to help loosen the adhesive along the right edge of the iPad. Take your time, and let it come off slowly for a smooth separation.

Step 26

– Keep the digitizer steady while gently sliding an opening pick between the two display cables to carefully loosen the last bit of adhesive holding them together.

Step 27

– Now that you’ve separated all the adhesive, open the digitizer like you’re flipping through a book, and set it down flat, parallel to your iPad.

– When putting everything back together, don’t forget to clean off any leftover adhesive from the frame (and the digitizer if you’re reusing it) with some good old isopropyl alcohol. For a smooth reattachment, replace the adhesive with our adhesive strips or pre-cut adhesive cards.

– Watch out for those display cables when reassembling! Make sure they’re tucked neatly under the LCD screen, so they don’t get pinched or damaged.

Step 28

– Grab your trusty Phillips screwdriver and tackle those four 4.3 mm screws holding the LCD in place. You’ve got this!

– As you dive into this repair, remember to keep an eye on each screw and put them right back where they belong. It’s all about keeping your device happy and healthy!

– Don’t forget to peel away any tape hiding those LCD screws. Let’s clear the way for some serious repair action!

Step 29

– Grab your trusty spudger and gently pry the LCD out of its snug little home just enough so you can snag it with your fingers.

– Now, give the LCD a little flip like a book page, lifting it near the camera while you turn it over towards the home button end of the frame.

– Place the LCD down on a clean, soft, lint-free surface so you can easily access those display cables.

Tools Used
  1. SpudgeriPad 8 LCD Replacement

Step 30

– Grab your Phillips screwdriver and carefully unscrew the 2.3 mm-long screw that’s holding the battery connector to the logic board in place.

Step 31

Step 32

– Gently slide the battery blocker under the logic board’s battery connector at about a 35-degree angle—nice and smooth!

– Keep that battery blocker in place while you continue working to keep things safe and sound.

Tools Used
  1. Battery BlockeriPad 8 LCD Replacement

Step 33

– Grab your trusty Phillips screwdriver and get ready for some action! Time to tackle those three 1.4 mm-long screws that are holding the display cable bracket in place. Unscrew them with confidence, and let’s keep this repair party going!

Step 34

– Grab your tweezers or just your fingers and gently lift off the display cable bracket with confidence.

Tools Used
  1. TweezersiPad 8 LCD Replacement

Step 35

– Grab your trusty spudger and gently pry up the LCD cable press connector. You’ve got this!

– To reconnect those press connectors, take a moment to align one side perfectly, then press down until you hear that satisfying click! Repeat the process on the other side for a snug fit.

– Just a heads up: steer clear of pressing down in the middle! If things get misaligned, those pins might bend, and we definitely don’t want that kind of drama.

Tools Used
  1. SpudgeriPad 8 LCD Replacement

Step 36

– Now it’s time to put everything back together—just reverse the steps we took earlier and you’ll be golden!

– Got some old tech lying around? Don’t toss it! Take it to an R2 or e-Stewards certified recycler.

– If things didn’t go quite as planned, don’t sweat it! A little troubleshooting might do the trick, or feel free to reach out to our iPad 8 Answers community for some extra support.

Success!
Put your device back together by reversing these steps—easy as pie!
Remember to recycle your e-waste responsibly at an R2 or e-Stewards certified facility.
If things didn’t go quite right, try some basic troubleshooting or reach out to our community for support. And if you’re feeling stuck, you can always schedule a repair!

iPad 8 Home Button Assembly Replacement

Duration: 45 minutes
Steps: 51 Steps

Ready to give your iPad 8 Wi-Fi a little TLC? This guide will help you swap out the home button assembly. Just a heads up: this one’s for the Wi-Fi model only! If you’ve got the LTE version, check out the link. Keep in mind that the home button’s Touch ID sensor is best buddies with the logic board, so replacing it means you’ll lose that Touch ID magic. Safety first! Make sure to drop your battery charge below 25% before diving in to avoid any fire hazards if the battery gets a little too excited during the process. Oh, and if your battery is looking swollen, take the necessary precautions. When you’re isolating the battery with a blocker, be super careful—those battery contacts are fragile and can get bent or broken easily, leading to some serious damage. If you decide to skip isolating the battery, stick to non-metal tools unless it’s absolutely necessary (like for screws) to keep things safe and sound for your sensitive circuitry. Some images in this guide might be from a different model, so don’t worry if they look a bit different; it won’t change how you get the job done!

Step 1

– Warm up an iOpener and stick it on the left side of your device for a solid two minutes to get things nice and toasty.

Tools Used
  1. iOpeneriPad 8 Home Button Assembly Replacement

Step 2

– While the adhesive is taking its sweet time to loosen up, keep an eye on these sensitive spots that you’ll want to avoid prying too hard:

– Front camera

– Antennas

– Display cables

Step 3

– Give that blue handle a little tug backward to free the Anti-Clamp’s arms.

– Set your iPad on a stable object so it sits nice and level between those suction cups.

– Place the suction cups about halfway up the left edge—one at the top and the other at the bottom.

– Keep a steady grip on the bottom of the Anti-Clamp and give a solid push down on the top cup to create some suction magic.

Step 4

– Give that blue handle a gentle tug forward to lock the arms in place. You’ve got this!

– Now, twist the handle clockwise a full 360 degrees, or until those suction cups start to stretch. Keep going, you’re doing great!

– Just a friendly reminder to keep those suction cups aligned. If they start to wander off course, simply loosen them a tad and realign the arms. You’re almost there!

Step 5

– Take a breather for a minute to let that adhesive loosen up and create a nice little opening for you.

– If your screen isn’t warming up enough, feel free to grab a hair dryer and gently warm up the left edge of the iPad.

– Slide an opening pick under the digitizer when the Anti-Clamp has opened up a big enough gap for you.

– You can skip the next step—easy peasy!

Step 6

– After the screen feels warm to the touch, place a suction handle on the left edge of the screen, as close to the edge as you can get.

– Gently lift the screen using the suction handle to create a small gap between the digitizer and the frame.

– Slide an opening pick into the gap between the digitizer and the frame to start separating them.

Step 7

– Pop in a second opening pick right where you just made a gap.

– Gently slide that pick down toward the bottom-left corner to loosen up the adhesive.

– Keep the pick wedged in the bottom-left corner so the adhesive doesn’t sneak back together.

Step 8

– If your opening pick gets a little too cozy with the adhesive, just give it a smooth ‘roll’ along the edge of the iPad to keep that adhesive separation going like a pro.

Step 9

– Gently slide the first opening pick to the top-left corner of your device to break the adhesive seal. You’re doing great!

– Keep that pick right there in the corner to stop the adhesive from sticking back together. Nice job!

Step 10

– Warm up an iOpener and stick it on the top edge of your device for a solid two minutes to loosen things up.

Tools Used
  1. iOpeneriPad 8 Home Button Assembly Replacement

Step 11

– Gently twist the pick around the top-left corner to loosen that stubborn adhesive and get things moving.

Step 12

– Gently slide the opening pick along the top edge of your device, making sure to stop right before you hit the front camera. You’re doing great—keep it steady!

Step 13

– Gently pull the pick out until just the tip is nestled between the digitizer and the frame. You’re almost there!

– Slide that pick above the front camera to break free the adhesive. You’re doing great!

– Keep the pick close to the right side of the front camera as you move forward. You’re on the right track!

Step 14

– Slide the pick back in and gently nudge it up towards the top-right corner to fully cut through the top adhesive.

– Keep the pick wedged in that corner so the adhesive doesn’t sneak back together.

Step 15

– Warm up an iOpener and stick it to the right side of your device for a solid two minutes to loosen things up.

Tools Used
  1. iOpeneriPad 8 Home Button Assembly Replacement

Step 16

– Swing that pick around the top-right corner of your device to gracefully break free the adhesive.

Step 17

– Slide a fresh opening pick into the iPad’s right edge and glide it smoothly to the middle.

Step 18

– Warm up that iOpener and give it a cozy spot on the bottom edge of your device for a solid two minutes.

Tools Used
  1. iOpeneriPad 8 Home Button Assembly Replacement

Step 19

– Gently slide the bottom-left pick down to the bottom-left corner to loosen up that stubborn adhesive.

– Keep the pick snug in the bottom-left corner before moving on to the next step.

Step 20

– Gently slide a new opening pick into the little gap you just made at the bottom edge of your iPad.

– Carefully glide the pick over the antenna, stopping just shy of the home button.

– Keep the pick to the left of the home button and carry on with the next steps.

Step 21

– Pop that opening pick right into the little gap you’ve just made, nice and easy.

– Gently slide the pick under the home button, gliding it towards the bottom-right corner. Just let the tip sneak in between the digitizer and the frame—no need to rush!

Step 22

– Slide the pick back in and gently wiggle it towards the home button to fully loosen that stubborn bottom adhesive.

– Rest the pick just to the right of the home button before moving on to the next step.

Step 23

– Warm up an iOpener and stick it onto the right edge of your device for a solid two minutes to get things nice and toasty.

Tools Used
  1. iOpeneriPad 8 Home Button Assembly Replacement

Step 24

– Gently twist the two opening picks at the left corners of your iPad to give the digitizer a little lift, while also helping to break free the last bits of that stubborn adhesive.

Step 25

– Gently lift the left edge of the digitizer to help loosen that stubborn adhesive along the right edge of your iPad. You’ve got this!

Step 26

– While holding the digitizer steady, gently slide an opening pick between the two display cables. This will help you break through the last bit of adhesive and free the screen. Take it slow, no rush!

Step 27

– After you’ve carefully loosened all the adhesive, open up the digitizer like a book and lay it flat next to the iPad.

– When putting things back together, wipe off any leftover adhesive from both the frame and the digitizer (if you’re reusing it) using some isopropyl alcohol. Then, swap in fresh adhesive strips or pre-cut adhesive cards to keep everything snug.

– Keep an eye on those display cables during reassembly—fold them neatly under the LCD to avoid any accidental damage.

Step 28

– Grab your trusty Phillips screwdriver and tackle those four 4.3 mm screws that are holding the LCD snugly against the frame. You’ve got this!

– As you dive into this repair adventure, keep an eye on each screw and remember where they belong. This way, your device will stay happy and healthy!

– Don’t forget to peel away any tape that’s hiding those LCD screws. We want them to shine bright and ready for action!

Step 29

– Grab your trusty spudger and gently nudge the LCD out of its cozy spot, just enough so you can get a good grip with your fingers.

– Now, let’s flip that LCD like you’re turning the page of a favorite book—lift it near the camera and roll it over towards the home button end of the frame.

– Place the LCD on a clean, soft, lint-free surface to give those display cables some room to breathe.

Tools Used
  1. SpudgeriPad 8 Home Button Assembly Replacement

Step 30

– Grab your Phillips screwdriver and gently unscrew the 2.3 mm screw holding the battery connector in place on the logic board. Take your time—it’s a tiny guy!

Step 31

Step 32

– Gently slide the battery blocker under the logic board’s battery connector at a cool 35 degree angle.

– Keep that battery blocker in position while you tackle the rest of the repair!

Tools Used
  1. Battery BlockeriPad 8 Home Button Assembly Replacement

Step 33

– Grab your trusty Phillips screwdriver and let’s get to work! Unscrew those three screws, each a petite 1.4 mm in length, that are holding the display cable bracket in place. You’ve got this!

Step 34

– Gently grab your tweezers or just use your fingers to lift off the display cable bracket. It’s a simple step, just a little careful finesse to make sure everything stays in place.

Tools Used
  1. TweezersiPad 8 Home Button Assembly Replacement

Step 35

– Grab your trusty spudger and gently use the flat end to lift up and disconnect that LCD cable press connector like a pro!

– When you’re ready to re-attach those press connectors, just make sure to align it carefully and give one side a little press down until you hear that satisfying click, then do the same for the other side.

– Just a friendly reminder: steer clear of pressing down in the middle! If the connector is out of alignment, those pins can bend and nobody wants that kind of headache.

Tools Used
  1. SpudgeriPad 8 Home Button Assembly Replacement

Step 36

– Gently remove the LCD and place it face down on a clean, soft surface that’s free of lint. This way, it stays safe and sound while you work your magic!

Step 37

– Grab your trusty tweezers and gently peel away the tape that’s keeping the home button cable ZIF connector under wraps. You’ve got this!

Tools Used
  1. TweezersiPad 8 Home Button Assembly Replacement

Step 38

– Grab a spudger, opening tool, or even your fingernail, and gently flip up the tiny hinged locking flap on the home button cable ZIF connector.

Tools Used
  1. SpudgeriPad 8 Home Button Assembly Replacement

Step 39

– Grab a trusty pair of tweezers and gently pull the home button ribbon cable straight out of the ZIF connector. You’ve got this!

Tools Used
  1. TweezersiPad 8 Home Button Assembly Replacement

Step 40

– Grab that trusty spudger and use the flat end to gently pry up and disconnect those two digitizer cable press connectors. You’ve got this!

Tools Used
  1. SpudgeriPad 8 Home Button Assembly Replacement

Step 41

– Gently slide the flat end of a spudger under the vibration isolator located in the bottom-right corner of your device and give it a little nudge to lift it up.

– Once it’s loose, go ahead and pull out the vibration isolator.

Tools Used
  1. SpudgeriPad 8 Home Button Assembly Replacement

Step 42

– Grab a pair of tweezers and gently lift that home button cable off the frame. Nice and steady – you’ve got this!

Tools Used
  1. TweezersiPad 8 Home Button Assembly Replacement

Step 43

– Kick things off by gently detaching the front panel assembly.

– If your new display is playing tricks with ‘ghost’ or ‘phantom’ touches, don’t sweat it! Just stick a layer of super thin insulating tape, like Kapton (polyimide) tape, on the highlighted spots at the back of the panel. But hey, if you grabbed one of our replacement digitizers, you’re in luck—it’s already got the right insulation, so no extra tape needed!

– As you get ready to put everything back together, make sure to clear away any leftover adhesive from the iPad. Give those glued spots a good clean with high concentration isopropyl alcohol (90% or greater) and a lint-free cloth. This little prep will make sure your new adhesive sticks like a champ!

– Before sealing everything up, take a moment to test out your iPad’s functions and apply those pre-cut adhesive strips to the back of the display using our handy display adhesive application guide. You’re almost there!

Step 44

– Gently peel the home button cable off the back of the front panel with your fingers. Take your time, and it should come off smoothly.

Step 45

– Gently slide an opening pick under the home button cable to carefully lift it away from the front panel.

– Keep sliding the pick along until you reach the home button bracket, staying smooth and steady.

Tools Used
  1. iOpeneriPad 8 Home Button Assembly Replacement

Step 46

– Gently slide an opening pick under the top part of the home button cable to carefully lift the metal contact away from the home button bracket.

Step 47

– Warm up an iOpener and place it on the home button bracket for about thirty seconds to loosen things up.

Tools Used
  1. iOpeneriPad 8 Home Button Assembly Replacement

Step 48

– Grab your trusty opening tool and gently pry off that home button bracket from the front panel. You’re doing great!

Step 49

– Take off the home button bracket carefully.

– When putting the bracket back, grab some strong glue like E6000 to firmly stick it to the front panel assembly.

Step 50

– Gently press on the home button from the front panel to break the adhesive that’s holding it down. A little pressure goes a long way!

Step 51

– Alright, it’s time to put your device back together—just retrace your steps like a pro!

– Got some e-waste? Make sure to drop it off at an R2 or e-Stewards certified recycler—let’s keep our planet happy!

– Things didn’t go as smoothly as you hoped? No worries! Give some basic troubleshooting a shot, or feel free to reach out to our iPad 8 Answers community for a helping hand.

– Remember, you’re not alone in this adventure!

Success!
Time to put everything back together! Just follow the steps in reverse and you’ll be good to go.
Got some old e-waste lying around? Make sure to drop it off at an R2 or e-Stewards certified recycler.
Things not going as planned? No worries! Try some basic troubleshooting, or head over to our iPad 8 Answers community for some extra tips and tricks.
If you’re stuck, don’t hesitate to schedule a repair.

🍪
Have a cookie! This site uses cookies to enhance your experience. Opt-Out Options.