iPad 7 LCD Replacement

Duration: 45 minutes
Steps: 36 Steps

Get ready to tackle the adventure of replacing the liquid crystal display (LCD) in your iPad 7! Unlike the latest iPads and most smartphones, the glass digitizer and LCD on this model are separate, making your job a bit easier. Just a heads up: this guide is specifically for the LTE version. If you’ve got the Wi-Fi version, be sure to check out the other guide. When it comes to isolating the battery with a battery blocker, proceed with caution! Those battery contacts are delicate and can easily be damaged, leading to some serious issues. If you decide to skip isolating the battery, steer clear of metal tools unless absolutely necessary (like when you’re removing screws) to avoid shorting the battery and causing trouble for the sensitive circuit components. Some of the photos you’ll see are from a different model, so they might look a tad different, but don’t worry—they won’t mess with the steps you need to follow!

Step 1

– Warm up your iOpener and gently press it onto the left edge of your device for about two minutes. Give it a moment to work its magic and soften things up!

Tools Used
  1. iOpeneriPad 7 LCD Replacement

Step 2

– While you wait for the adhesive to loosen up, keep an eye out for these tricky spots that don’t like being pried:

– Front camera

– Antennas

– Display cables

Step 3

– Slide the blue handle back to release the Anti-Clamp’s arms—easy does it!

– Set something underneath your iPad so it sits nice and balanced between the suction cups.

– Place the suction cups close to the center of the left edge—one near the top, the other near the bottom.

– Keep the bottom of the Anti-Clamp steady while pressing down firmly on the top cup to get a good seal.

Step 4

– Gently pull the blue handle forward to secure those arms in place.

– Give that handle a good twist clockwise, going all the way around 360 degrees or until you see those suction cups starting to stretch.

– Keep an eye on those suction cups to make sure they’re lined up just right. If they start to drift out of sync, loosen them up a tad and realign those arms like a pro.

Step 5

– Give it a minute to let that adhesive chill out and create a little opening for you.

– If your screen isn’t warming up enough, a hair dryer can be your best buddy for heating up the left edge of the iPad.

– Slide an opening pick under the digitizer once the Anti-Clamp has made a nice gap for you.

– Feel free to skip the next step!

Step 6

– Get that screen feeling warm and cozy! Once it’s nice and toasty, grab a suction handle and stick it on the left edge of the screen, as close to the edge as you can get.

– Now, gently lift the screen using the suction handle to create a little gap between the digitizer and the frame. Just a small opening is all you need!

– Slide an opening pick into that gap you’ve made between the digitizer and the frame. You’re doing great!

Step 7

– Pop in a second opening pick into that gap you just made. You’re doing great!

– Gently slide the pick over to the bottom-left corner of your device to help loosen the adhesive. Keep it steady!

– Now, leave that pick in the bottom-left corner to keep the adhesive from sticking back together. You’re on the right track!

Step 8

– If your opening pick gets a bit stuck in the adhesive, just gently ‘roll’ it along the edge of the iPad to keep things moving and separate the adhesive smoothly.

Step 9

– Gently slide the first opening pick towards the top-left corner of your device to break that sticky adhesive seal. You’ve got this!

– Keep that pick in place at the top-left corner to stop the adhesive from getting all clingy again. Nice work!

Step 10

– Warm up your iOpener and place it on the top edge of your device for two minutes. Let the heat work its magic!

Tools Used
  1. iOpeneriPad 7 LCD Replacement

Step 11

– Take your pick and gently slide it around the top-left corner of the device, making sure to break through the adhesive without rushing.

Step 12

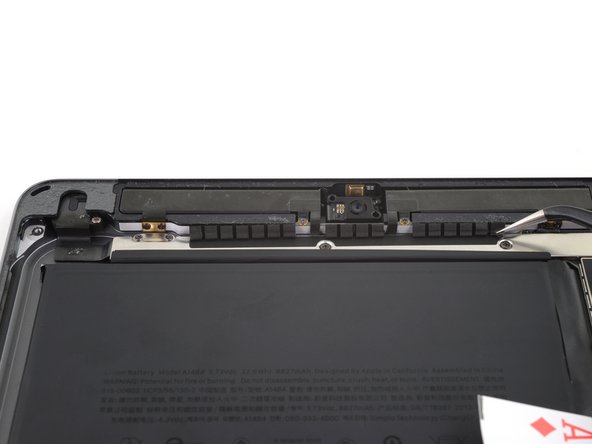
– Gently slide the opening pick along the top edge of your device. Stop just shy of the front camera—no need to get too close, you don’t want to disturb it!

Step 13

– Gently pull the pick out so that just the tip stays wedged between the digitizer and the frame.

– Slide the pick over the front camera to carefully loosen the adhesive.

– Keep the pick resting near the right side of the front camera before moving on to the next step.

Step 14

– Pop the pick back in and slide it up to the top-right corner to fully loosen that stubborn top adhesive.

– Keep the pick lodged in the top-right corner so the adhesive doesn’t sneak back and seal itself.

Step 15

– Warm up your iOpener and give it a two-minute rest on the right edge of your device. Let it work its magic and soften things up.

Tools Used
  1. iOpeneriPad 7 LCD Replacement

Step 16

– Gently glide the pick around the top-right corner of your device to break that adhesive seal. You’ve got this!

Step 17

– Place a fresh opening pick into the edge of your iPad, then gently slide it along to the middle of the right side. Take your time – you’re almost there!

Step 18

– Warm up an iOpener and give it a nice cozy spot on the bottom edge of your device for about two minutes.

Tools Used
  1. iOpeneriPad 7 LCD Replacement

Step 19

– Gently slide the pick down to the bottom-left corner to loosen up that adhesive.

– Keep the pick wedged there before moving on to the next step.

Step 20

– Gently slide a new opening pick into the gap you just made along the bottom edge of the iPad.

– Carefully move the pick past the antenna, stopping right before you reach the home button.

– Let the pick rest just to the left of the home button before moving on to the next step.

Step 21

– Gently slide an opening pick into the gap you’ve made—no need to rush, take your time.

– Carefully maneuver the pick under the home button and slide it towards the bottom-right corner. Just the tip of the pick should be between the digitizer and the frame, so make sure it’s a smooth, easy ride!

Step 22

– Slide the pick back in and gently work it toward the home button to fully release that stubborn bottom adhesive.

– Once it’s free, rest the pick just to the right of the home button before moving on.

Step 23

– Warm up an iOpener and gently press it against the right side of your device for about two minutes. Give it a moment to work its magic before moving on.

Tools Used
  1. iOpeneriPad 7 LCD Replacement

Step 24

– Gently twist those opening picks at the left corners of your iPad to lift the digitizer just a tad, which will help you break free the last bits of that pesky adhesive. You’ve got this!

Step 25

– Gently lift the left side of the digitizer to help loosen the adhesive along the right edge of your iPad. You’ve got this!

Step 26

– As you gently hold the digitizer in place, take an opening pick and slide it between the two display cables to break free the last bits of adhesive. You’re doing great!

Step 27

– Once all the sticky stuff is out of the way, flip the digitizer open like a book and lay it down next to the iPad. Nice and easy!

– When putting everything back together, don’t forget to tidy up! Use some isopropyl alcohol to wipe away any leftover adhesive from the frame—and give the digitizer a little love if you’re reusing it. Then, stick on some new adhesive strips or pre-cut adhesive cards to keep things secure.

– Watch out for those display cables during reassembly! Make sure they’re neatly tucked away under the LCD screen to avoid any mishaps.

Step 28

– Grab your Phillips screwdriver and take out the four 4.3 mm screws holding the LCD to the frame.

– Keep a close eye on every screw throughout this process — each one needs to go back exactly where it came from to keep your device happy and safe.

– Peel away any tape that might be hiding the LCD screws before you get started.

Step 29

– Use the flat end of a spudger to gently lift the LCD out of its snug spot, just enough to get a good grip with your fingers.

– Carefully flip the LCD like you’re turning a page in a book, lifting from the camera side and gently turning it over towards the home button end of the case.

– Place the LCD down on a clean, soft, lint-free surface so you can get to the display cables without any hassle.

Tools Used
  1. SpudgeriPad 7 LCD Replacement

Step 30

– Grab your trusty Phillips screwdriver and go ahead and remove the single 2.3 mm screw that’s holding the battery connector to the logic board. Nice and easy, no need to rush!

Step 31

Step 32

– Gently slide the battery blocker under the logic board’s battery connector at about a 35-degree angle.

– Keep that battery blocker right where it is while you continue working.

Tools Used
  1. Battery BlockeriPad 7 LCD Replacement

Step 33

– Grab your trusty Phillips screwdriver and unscrew those three tiny 1.4 mm screws holding the display cable bracket in place. Once they’re out, you’re one step closer to victory!

Step 34

– Take off that display cable bracket like a pro!

Step 35

– Take the flat end of your trusty spudger and gently lift the LCD cable straight up from the press connector. Easy peasy!

– When it’s time to reattach those press connectors, just line it up carefully and press down on one side until you hear that satisfying click! Then do the same on the other side. Remember, no pressing down in the middle! If it gets misaligned, those little pins can bend, and we definitely don’t want that. Keep it precise for a smooth ride!

Tools Used
  1. SpudgeriPad 7 LCD Replacement

Step 36

– Put your device back together by retracing these steps in reverse.

– Remember to bring your e-waste to an R2 or e-Stewards certified recycler.

– If things didn’t quite work out, try some basic troubleshooting or reach out to our community for support. And if you’re still stuck, you can always schedule a repair with us.

Success!
Now that you’ve got everything back in place, simply reverse the steps to reassemble your device.
When it’s time to say goodbye to that old gadget, remember to drop it off at an R2 or e-Stewards certified recycler.
If things didn’t go as planned, don’t sweat it! Take a quick look at some troubleshooting tips, or head over to our iPad 7 Answers community for extra support.

iPad 7 Home Button Assembly Replacement

Duration: 45 minutes
Steps: 51 Steps

This guide walks you through removing or swapping out the home button assembly on an iPad 7 LTE model. Heads up: this is only for the LTE version; if you have the Wi-Fi model, check the link provided. Keep in mind, the home button’s Touch ID sensor is linked to the logic board, so replacing it means losing Touch ID functionality. When disconnecting the battery with a battery blocker, handle with care—the battery contacts are fragile and easy to damage, which could cause permanent issues. If you decide to skip isolating the battery, try to avoid metal tools unless absolutely necessary (like unscrewing) to prevent short circuits and protect delicate components. Some images might be from a slightly different model and look a bit off, but don’t worry—they won’t affect the steps you need to follow.

Step 1

– Warm up an iOpener and stick it on the left edge of your device for a solid two minutes to get things nice and toasty.

Tools Used
  1. iOpeneriPad 7 Home Button Assembly Replacement

Step 2

– While you let that adhesive chill for a bit, keep an eye out for these delicate spots that don’t appreciate a rough touch:

– Front camera

– Antennas

– Display cables

Step 3

– Give that blue handle a little tug backwards to set those Anti-Clamp arms free!

– Slide something under your iPad to keep it nice and level between those suction cups.

– Nestle the suction cups right around the center of the left edge—one on the top and another on the bottom.

– Stabilize the bottom of the Anti-Clamp and press down firmly on the top cup to create a good seal.

Step 4

– Slide the blue handle forward to lock those arms in place.

– Rotate the handle clockwise a full 360 degrees, or until you notice the suction cups starting to stretch out.

– Keep an eye on the suction cups to make sure they stay perfectly aligned. If they start to shift, just loosen them a bit and realign the arms before moving on.

Step 5

– Hang tight for a minute to let that adhesive chill out and create a little opening for you.

– If your screen isn’t warming up enough, grab a hair dryer and give the left edge of your iPad a little warm-up session.

– Slide an opening pick under the digitizer when the Anti-Clamp has made a big enough gap for you.

– Feel free to skip the next step!

Step 6

– First things first, let’s warm up that screen a bit! Once it’s cozy to the touch, grab a suction handle and stick it onto the left edge of the screen, keeping it nice and close to the edge.

– Gently lift the screen with your suction handle to open up a tiny gap between the digitizer and the frame. You got this!

– Now, let’s slide an opening pick into that little gap you just created. It’s like giving your device a friendly nudge!

Step 7

– Slip a second opening pick into the gap you just made.

– Gently slide the pick toward the bottom-left corner of the device, breaking that adhesive seal.

– Keep the pick in place at the bottom-left corner to stop that adhesive from sealing back up again.

Step 8

– If your opening pick gets stuck in the adhesive, gently ‘roll’ it along the edge of the iPad to keep peeling that sticky stuff away.

Step 9

– Gently slide the first opening pick towards the top-left corner of your device to break the adhesive seal.

– Keep the pick in place at the top-left corner to make sure the adhesive doesn’t seal back up.

Step 10

– Grab an iOpener, heat it up, and gently press it against the top edge of your device for a solid two minutes. Just enough time for it to work its magic and soften things up.

Tools Used
  1. iOpeneriPad 7 Home Button Assembly Replacement

Step 11

– Gently twist the pick around the top-left corner of your device to break the adhesive seal. You’re doing great!

Step 12

– Gently glide the opening pick along the top edge of your device, but be sure to stop just shy of the front camera. You’ve got this!

Step 13

– Gently pull the pick out so just the tip stays wedged between the digitizer and the frame.

– Carefully slide the pick over the top of the front camera to loosen the adhesive.

– Keep the pick resting near the right side of the front camera before moving on to the next step.

Step 14

– Pop the pick back in and gently slide it towards the top-right corner of the device, making sure the adhesive comes loose completely.

– Keep the pick in the top-right corner so the adhesive doesn’t decide to get all clingy again.

Step 15

– Warm up your iOpener and let it sit on the right edge of your device for two minutes. Trust us, it’ll make things so much easier!

Tools Used
  1. iOpeneriPad 7 Home Button Assembly Replacement

Step 16

– Gently twist the pick around the top-right corner to loosen up that sticky adhesive. Keep it smooth and steady!

Step 17

– Grab a fresh opening pick and slide it in halfway along the right edge of your iPad. Keep it steady!

Step 18

– Warm up that iOpener and give it a cozy hug to the bottom edge of your device for a solid two minutes.

Tools Used
  1. iOpeneriPad 7 Home Button Assembly Replacement

Step 19

– Gently slide the pick down to the bottom-left corner to loosen that adhesive like a pro.

– Keep the pick right there in the corner before moving on to the next step.

Step 20

– Slip a fresh opening pick into the little gap you just made at the bottom edge of your iPad.

– Gently glide the pick across the antenna, but stop just shy of the home button.

– Position the pick to the left of the home button before you carry on.

Step 21

– Pop an opening pick into the little gap you just made.

– Gently slide that pick under the home button, gliding it down toward the bottom-right corner—just the tip should sneak between the digitizer and the frame.

Step 22

– Slide the pick back in and gently work it toward the home button to fully loosen that stubborn bottom adhesive.

– Let the pick rest just to the right of the home button before moving on to the next step.

Step 23

– Grab your trusty iOpener and give it a good heat-up! Once it’s nice and toasty, place it on the right edge of your device for a solid two minutes. This will help loosen things up for the next steps!

Tools Used
  1. iOpeneriPad 7 Home Button Assembly Replacement

Step 24

– Give those opening picks a little twist at the iPad’s left corners. This will gently lift the digitizer, slowly peeling away the last of the adhesive. Take it easy, no need to rush—patience is key!

Step 25

– Gently lift the left edge of the digitizer upwards to loosen the adhesive along the right side of the iPad a bit more.

Step 26

– Keep a steady hand on the digitizer while gently sliding an opening pick between the two display cables to carefully separate the last bit of stubborn adhesive.

Step 27

– Once you’ve successfully separated all that sticky adhesive, gently swing open the digitizer like a book and lay it down parallel to your iPad. You’ve got this!

– When it’s time to put everything back together, make sure to wipe away any leftover adhesive from the frame—and if you’re reusing the digitizer, give it a clean too—with some isopropyl alcohol. For a secure fit, swap in our adhesive strips or those handy pre-cut adhesive cards.

– Keep an eye on those delicate display cables while you’re reassembling everything. Tuck them away neatly beneath the LCD screen to keep them safe and sound. You’re doing great!

Step 28

– Grab your Phillips screwdriver and carefully remove the four 4.3 mm screws holding the LCD to the frame.

– Keep a close eye on each screw during this repair—making sure every one goes back exactly where it came from will save your device from any mishaps.

– If any tape is hiding those LCD screws, peel it away so you can get to work.

Step 29

– Gently use the flat end of a spudger to nudge the LCD out of its cozy little spot just enough so you can grab it with your fingers.

– Now, flip that iPad LCD like you’re turning the pages of your favorite book, lifting it near the camera and swinging it over to the home button side of the rear case.

– Place the LCD down on a clean, soft, lint-free surface to give yourself easy access to those display cables.

Tools Used
  1. SpudgeriPad 7 Home Button Assembly Replacement

Step 30

– Grab your trusty Phillips screwdriver and remove the lone 2.3 mm screw that’s holding the battery connector in place on the logic board. Easy peasy!

Step 31

Step 32

– Gently slide the battery blocker under the logic board’s battery connector, angling it at about 35 degrees. You’ve got this!

– Keep that battery blocker right where it is while you tackle the rest of the repair. You’re doing great!

Tools Used
  1. Battery BlockeriPad 7 Home Button Assembly Replacement

Step 33

– Grab your trusty Phillips screwdriver and unscrew those three little 1.4 mm screws holding the display cable bracket in place. Nice and easy—no rush!

Step 34

– Gently remove the display cable bracket and set it aside. It’s a simple step, but don’t rush—take your time and make sure everything is safe and sound.

Step 35

– Grab your trusty spudger and gently lift the LCD cable out of its press connector like you’re peeling a sticker off a fresh notebook. Just be sure to lift straight up!

– When it’s time to reconnect those press connectors, take a moment to align it just right. Press down on one side until you hear that satisfying click, then do the same on the other side. Avoid the middle to keep those pins safe and sound; a little misalignment can lead to some serious damage.

Tools Used
  1. SpudgeriPad 7 Home Button Assembly Replacement

Step 36

– Carefully detach the LCD and set it down gently, screen side facing the surface, on a clean, soft, lint-free area.

Step 37

– Grab a pair of tweezers and gently peel back the tape that’s keeping the home button cable ZIF connector under wraps. Easy does it!

Tools Used
  1. TweezersiPad 7 Home Button Assembly Replacement

Step 38

– Gently lift the small, hinged locking flap on the home button cable ZIF connector using the tip of a spudger, an opening tool, or even your fingernail. Take it slow, no rush!

Tools Used
  1. SpudgeriPad 7 Home Button Assembly Replacement

Step 39

– Grab a pair of tweezers and gently wiggle the home button ribbon cable out of the ZIF connector. Take your time—patience is key here!

Tools Used
  1. TweezersiPad 7 Home Button Assembly Replacement

Step 40

– Grab the flat end of your trusty spudger and gently lift straight up on those press connectors to unplug the two digitizer cables. Easy does it!

Tools Used
  1. SpudgeriPad 7 Home Button Assembly Replacement

Step 41

– Grab the flat end of your trusty spudger and gently work it under the vibration isolator below the SIM card reader.

– Once you’ve got it lifted, remove the vibration isolator with care.

Tools Used
  1. SpudgeriPad 7 Home Button Assembly Replacement

Step 42

– Grab a trusty pair of tweezers and gently coax that home button cable away from the rear case. You’ve got this!

Tools Used
  1. TweezersiPad 7 Home Button Assembly Replacement

Step 43

– Kick things off by taking off the front panel assembly!

– If you’re dealing with pesky ‘ghost’ or ‘phantom’ touch issues on your shiny new display, fear not! A quick fix is to add a super thin layer of insulating tape, like Kapton (polyimide) tape, to the highlighted spots on the back of the panel. No need to stress—Salvation Repair replacement digitizers come prepped with the right insulation, so you shouldn’t need to add any extra tape.

– As you put everything back together, make sure to clear away any leftover adhesive from your iPad and give those glued areas a good clean with high concentration isopropyl alcohol (90% or more) and a lint-free cloth. This little step is crucial for getting your iPad ready for some fresh adhesive, ensuring a solid bond.

– Before sealing everything up, give your iPad a test run to check all functions and apply those pre-cut adhesive strips to the back of the display using our handy display adhesive application guide. You’re almost there!

Step 44

– Gently peel the home button cable away from the back of the front panel using just your fingers.

Step 45

– Slide an opening pick under the home button cable to gently disconnect it from the front panel.

– Carefully glide it forward to slice through the adhesive holding the home button cable in place.

– Keep sliding that pick until you reach the home button bracket – you’re almost there!

Tools Used
  1. iOpeneriPad 7 Home Button Assembly Replacement

Step 46

– Gently slide an opening pick under the top edge of the home button cable to carefully lift the metal contact away from the home button bracket.

Step 47

– Warm up an iOpener and place it on the home button bracket for about thirty seconds.

Tools Used
  1. iOpeneriPad 7 Home Button Assembly Replacement

Step 48

– Grab your trusty opening tool and gently nudge the home button bracket away from the front panel. You’ve got this!

Step 49

– First up, carefully take off that home button bracket. It’s like a mini treasure hunt, so make sure you’re gentle with it!

– When you’re putting it back on, grab some high bond glue like E6000 to stick it onto the front panel. Just a little dab will do the trick to make sure it stays in place and you’re good to go!

Step 50

– Give that home button a gentle nudge with your finger from the front side of the panel to break free the adhesive that’s keeping it snug. You’ve got this!

Step 51

– Time to put your device back together! Just retrace your steps and follow the instructions in reverse.

– Got some old electronics lying around? Make sure to drop them off at an R2 or e-Stewards certified recycler.

– If things didn’t go as smoothly as you hoped, no worries! A little basic troubleshooting might do the trick, or feel free to reach out to our iPad 7 Answers community for some friendly advice. And remember, if you’re feeling stuck, you can always schedule a repair!

Success!
Now that you’ve tackled the reassembly, just reverse those steps like a pro!
Got some e-waste? Make sure to drop it off at an R2 or e-Stewards certified recycler—let’s keep the planet happy!
If things didn’t go as smoothly as you’d hoped, no worries! Check out some basic troubleshooting or reach out to our iPad 7 Answers community for a little extra guidance. And remember, if you need help, you can always schedule a repair.

iPad 7 Headphone Jack Replacement

Duration: 45 minutes
Steps: 54 Steps

Get ready to tackle the adventure of swapping out the headphone jack in your iPad 7! Just a heads up, this guide is tailored for the LTE version only. If you’re working on the Wi-Fi version, just click here. As you dive in, take it easy when isolating the battery with a battery blocker. Those battery contacts are delicate and can easily get damaged, leading to some serious trouble. If you decide to skip the battery isolation, be cautious with metal tools—only use them when absolutely necessary (like when tackling those pesky screws) to avoid any accidental battery shorts or circuit damage. Some of the photos you’ll see here might be from a different model and could look a bit different, but don’t worry, they won’t throw you off track! Happy repairing!

Step 1

– Warm up an iOpener and stick it onto the left side of your device for a solid two minutes to loosen things up.

Tools Used
  1. iOpeneriPad 7 Headphone Jack Replacement

Step 2

– While waiting for the adhesive to loosen up, be mindful of these sensitive spots that might need some extra care when prying:

– Front camera

– Antennas

– Display cables

Step 3

– Give that blue handle a gentle tug towards you to let the Anti-Clamp’s arms stretch out and get ready.

– Slide something underneath your iPad so it sits nice and flat between the suction cups.

– Set those suction cups right around the midpoint of the left edge—one at the top and the other at the bottom.

– Keep a steady grip on the bottom of the Anti-Clamp and give a solid push down on the top cup to get that suction going.

Step 4

– Slide that blue handle forward to lock the arms in place. Easy peasy!

– Twist the handle 360 degrees clockwise (or until the cups start to stretch) – give it a good turn to get things moving.

– Keep an eye on the suction cups to make sure they stay in line. If they start to wander, just loosen them a little and get them back where they need to be. No big deal!

Step 5

– Take a breather for a minute to let that adhesive loosen up and create a little gap for you.

– If your screen isn’t warming up as it should, feel free to grab a hair dryer and give the left edge of your iPad a gentle warm-up.

– When the Anti-Clamp has done its magic and there’s a nice gap, slide an opening pick under the digitizer.

– Go ahead and skip the next step.

Step 6

– First things first! Once the screen is nice and toasty, grab a suction handle and stick it on the left edge of the screen, as close to the edge as you can get.

– Now, gently lift the screen with that suction handle to make a tiny gap between the digitizer and the frame. You’ve got this!

– Next up, slide an opening pick into that sweet little gap between the digitizer and the frame. Easy peasy!

Step 7

– Grab a second opening pick and gently slide it into the gap you just made. You’re doing great!

– Move the pick towards the bottom-left corner of your device to start separating that stubborn adhesive. Take your time!

– Leave the pick in the bottom-left corner for now to stop that adhesive from getting all cozy again. Keep it steady!

Step 8

– If the opening pick gets caught in the adhesive, gently ‘roll’ it along the side of the device to keep working your way through the sticky stuff.

Step 9

– Gently slide your first opening pick toward the top-left corner to loosen that stubborn adhesive.

– Keep the pick wedged there to stop the adhesive from sticking back together on you.

Step 10

– Warm up an iOpener and stick it to the top edge of your device for a solid two minutes to loosen things up.

Tools Used
  1. iOpeneriPad 7 Headphone Jack Replacement

Step 11

– Give that pick a twirl around the top-left corner of your device to break free from the adhesive. You’ve got this!

Step 12

– Gently slide your opening pick along the top edge of the device, but stop just before you get to the front camera. Keep it smooth and steady—you’ve got this!

Step 13

– Gently pull the pick out so that just the tip remains tucked between the digitizer and the frame.

– Slide the pick above the front camera to break free the adhesive holding it down.

– Now, keep that pick close to the right side of the front camera before you move on.

Step 14

– Slide the pick back in and carefully glide it toward the top-right corner to fully loosen that stubborn top adhesive.

– Keep the pick wedged in the top-right corner so the adhesive doesn’t sneak back and seal itself.

Step 15

– Warm up an iOpener and press it gently onto the right edge of the device for two minutes. Let the heat work its magic!

Tools Used
  1. iOpeneriPad 7 Headphone Jack Replacement

Step 16

– Gently twist the pick around the top-right corner to loosen that stubborn adhesive and get things moving.

Step 17

– Grab a fresh opening pick and gently slide it into the midpoint of the iPad’s right edge.

Step 18

– Warm up that iOpener and give it a cozy spot on the bottom edge of your device for a solid two minutes.

Tools Used
  1. iOpeneriPad 7 Headphone Jack Replacement

Step 19

– Gently slide the pick down to the bottom-left corner to loosen up that adhesive.

– Keep the pick right there in the bottom-left corner before you move on to the next step.

Step 20

– Slide a fresh opening pick into the gap you just made along the bottom edge of the iPad.

– Gently glide the pick past the antenna, stopping right before you reach the home button.

– Keep the pick resting to the left side of the home button before moving on to the next step.

Step 21

– Now, gently slide an opening pick into that gap you’ve just made. You’re doing great!

– Carefully slide the pick underneath the home button, aiming towards the bottom-right corner. Just make sure the tip of the pick is snugly wedged between the digitizer and the frame. Nice and easy—you’re on the right track!

Step 22

– Pop that pick back in and shimmy it over to the home button to fully free up the bottom adhesive. You’re almost there!

– Leave that trusty pick hanging out to the right of the home button while you move on to the next step!

Step 23

– Warm up that iOpener and give it a cozy hug on the right edge of your device for a solid two minutes. You’re doing great!

Tools Used
  1. iOpeneriPad 7 Headphone Jack Replacement

Step 24

– Gently twist the two opening picks at the iPad’s left corners, just enough to lift the digitizer slightly. This will help separate the last of the sticky adhesive holding things together.

Step 25

– Gently lift the left side of the digitizer to loosen the adhesive on the right edge of your iPad. You’re doing great!

Step 26

– Hold the digitizer steady while you gently slide an opening pick between the two display cables to carefully loosen the last bit of adhesive.

Step 27

– Now that all the adhesive is separated, gently open the digitizer like a book and lay it flat, parallel to the iPad. Take it easy, it’s like flipping through a good read!

– When you’re putting things back together, make sure to clean up any leftover adhesive on the frame (and the digitizer if you’re reusing it) with some isopropyl alcohol. Then, swap out the old adhesive with our fresh adhesive strips or pre-cut adhesive cards. It’s like giving your device a clean, fresh start!

– As you reassemble, keep an eye on those display cables. Make sure they’re neatly tucked underneath the LCD screen to avoid any accidental damage. A little care here goes a long way!

Step 28

– Grab a Phillips screwdriver and carefully remove the four screws, each 4.3 mm long, that are holding the LCD to the frame. Be gentle, they’re doing an important job!

– As you work through this, keep a close eye on each screw. You want to make sure every one goes back to its original spot to keep everything running smoothly.

– Check for any tape that might be covering those LCD screws and peel it away before you go any further. We don’t want any surprises!

Step 29

– Gently wedge the flat end of a spudger under the LCD just enough to lift it out of its slot so you can grab it with your fingers.

– Carefully flip the iPad LCD like turning a page in a book—lift near the camera and rotate it over the home button end of the rear case.

– Place the LCD face down on a clean, soft, lint-free surface to get easy access to the display cables.

Tools Used
  1. SpudgeriPad 7 Headphone Jack Replacement

Step 30

– Grab your Phillips screwdriver and gently unscrew the single 2.3 mm screw that’s holding the battery connector in place on the logic board. A little twist, and you’re one step closer!

Step 31

Step 32

– Gently slide the battery blocker under the logic board’s battery connector at a 35-degree angle, like you’re tucking in a cozy blanket.

– Leave the battery blocker there while you continue working. It’s your trusty sidekick through this repair journey.

Tools Used
  1. Battery BlockeriPad 7 Headphone Jack Replacement

Step 33

– Grab your trusty Phillips screwdriver and unscrew the three 1.4 mm-long screws holding that display cable bracket in place. Simple, right?

Step 34

– Carefully take off the display cable bracket to keep things moving.

Step 35

– Gently use the flat end of a spudger to lift the LCD cable connector straight up and disconnect it.

– When reconnecting press connectors like this, line up one side carefully and press down until you hear a click, then do the same on the other side. Avoid pressing the middle, or you might bend the pins and cause damage.

Tools Used
  1. SpudgeriPad 7 Headphone Jack Replacement

Step 36

– Gently take out the LCD and place it face down on a nice, clean, soft surface that won’t leave any lint behind. You’re doing great!

Step 37

– Grab your trusty tweezers and gently lift the tape that’s keeping the home button cable’s ZIF connector under wraps.

Tools Used
  1. TweezersiPad 7 Headphone Jack Replacement

Step 38

– Gently pry open the small hinged locking flap on the home button cable ZIF connector using the tip of a spudger, an opening tool, or your fingernail. A little finesse goes a long way here!

Tools Used
  1. SpudgeriPad 7 Headphone Jack Replacement

Step 39

– Grab a pair of tweezers and gently pull the home button ribbon cable straight out of the ZIF connector. Take it slow, and it’ll come right out without a hitch.

Tools Used
  1. TweezersiPad 7 Headphone Jack Replacement

Step 40

– Gently use the flat end of a spudger to lift straight up and unplug the two digitizer cables from their press connectors.

Tools Used
  1. SpudgeriPad 7 Headphone Jack Replacement

Step 41

– Gently use the flat end of a spudger to lift the vibration isolator sitting right under the SIM card reader.

– Carefully take out the vibration isolator.

Tools Used
  1. SpudgeriPad 7 Headphone Jack Replacement

Step 42

– Grab your tweezers and gently lift the home button cable away from the rear case like a pro.

Tools Used
  1. TweezersiPad 7 Headphone Jack Replacement

Step 43

– Take off the front panel assembly carefully.

– If your new display starts acting up with “ghost” or “phantom” touches, no worries! You can fix this by placing a super thin insulating tape like Kapton (polyimide) tape on the highlighted spots at the back of the panel. Replacement digitizers already come with this insulation, so you usually won’t need to add tape.

– When putting things back together, make sure to scrape off any leftover adhesive from the iPad. Then, clean the sticky areas with high-concentration isopropyl alcohol (90% or higher) using a lint-free cloth. This step gets your iPad ready for fresh adhesive and helps everything stick perfectly.

– Give your iPad a quick function test and apply pre-cut adhesive strips to the back of the display following our display adhesive application guide before sealing it up tight.

Step 44

– Gently lift the LCD buffer tape off the upper component bracket, taking your time to make sure it’s coming off cleanly.

Step 45

– Grab your Phillips screwdriver and unscrew the five screws holding the upper component bracket in place.

– You’ll need three screws, each 1.4 mm long.

– There are also two screws that are 1.9 mm long.

Step 46

– Grab the pointy end of your trusty spudger and gently pry up the upper component bracket just enough so you can pinch it between your fingers.

– Once it’s loose, go ahead and remove the upper component bracket.

Tools Used
  1. SpudgeriPad 7 Headphone Jack Replacement

Step 47

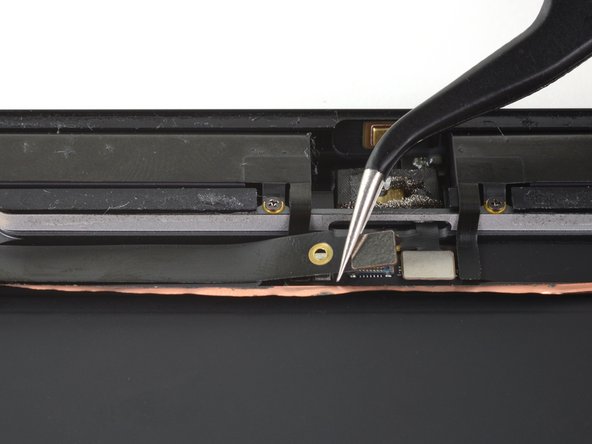
– Gently use the flat end of a spudger to pop off the front camera cable by lifting straight up on the press connector. You’ve got this!

Tools Used
  1. SpudgeriPad 7 Headphone Jack Replacement

Step 48

– Grab your trusty spudger and gently lift the front camera out of its cozy little home until you can snatch it up with your fingers.

– Next, use that same spudger to carefully peel away the adhesive foam pad that’s sticking to the front camera.

Tools Used
  1. SpudgeriPad 7 Headphone Jack Replacement

Step 49

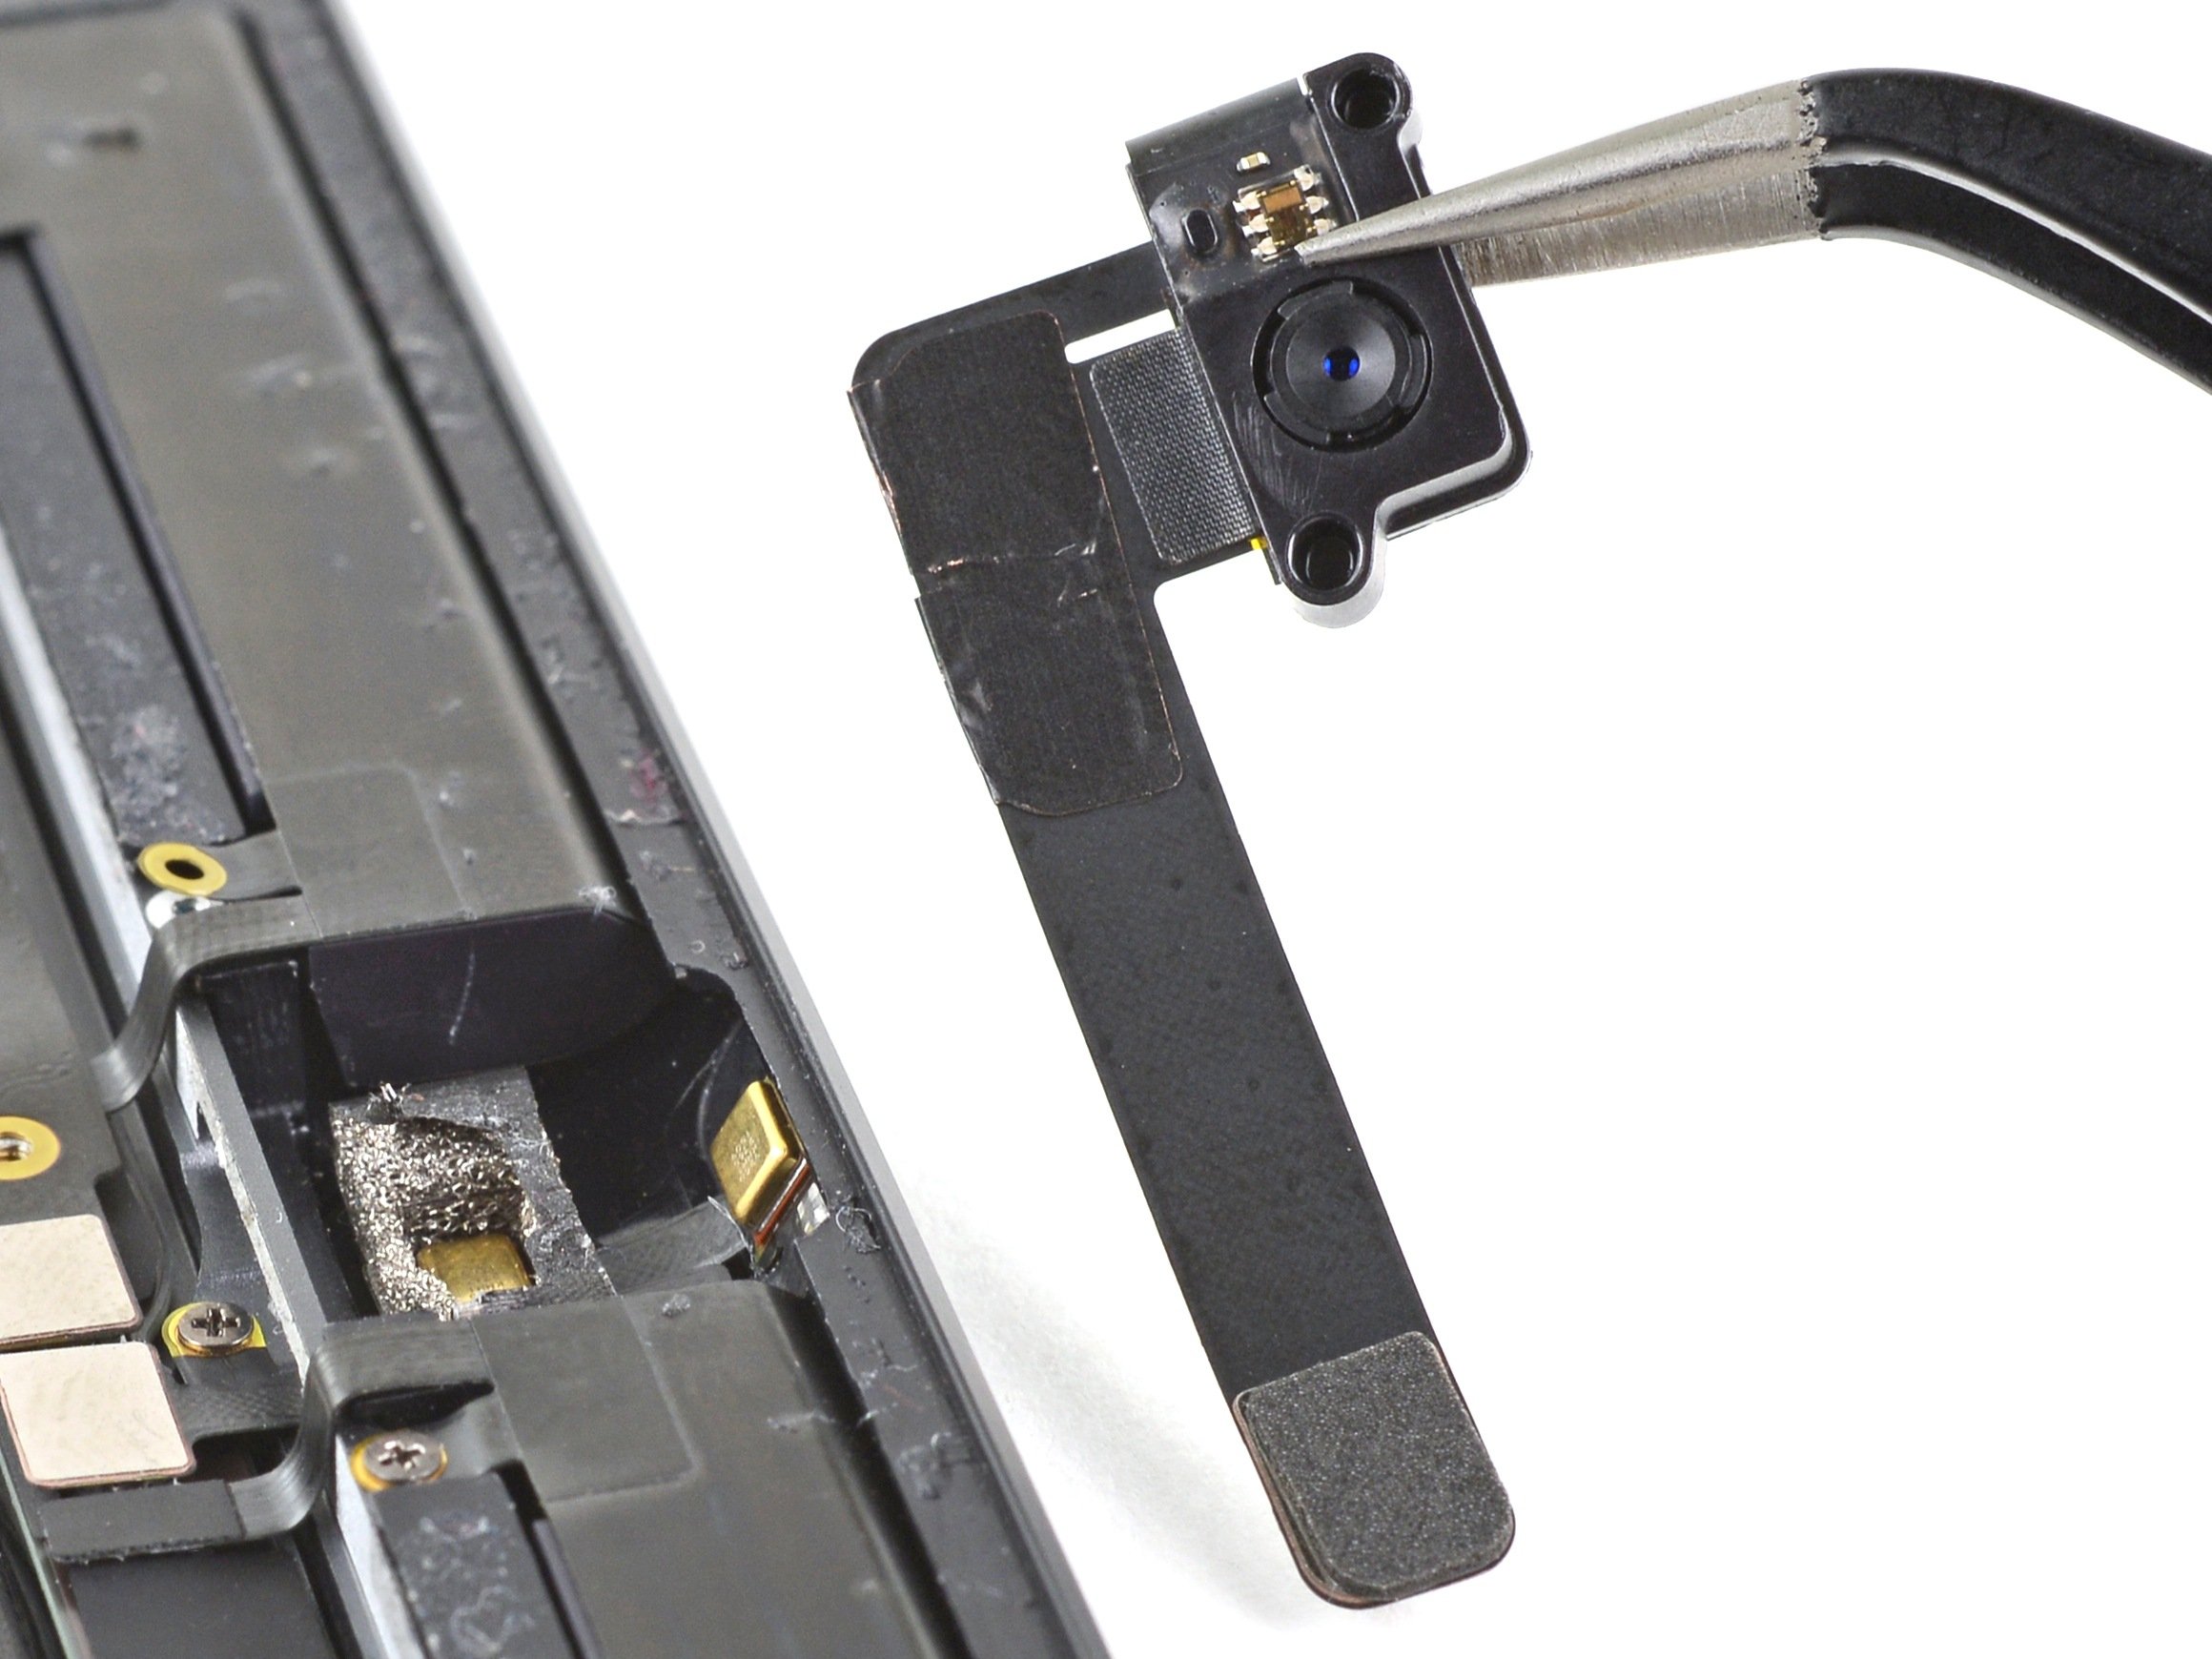
– Grab a pair of tweezers and gently grab the front camera. Now, twist it carefully so you can guide the cable through its slot in the rear case.

– Once that’s done, just pop out the front camera and set it aside.

Tools Used
  1. TweezersiPad 7 Headphone Jack Replacement

Step 50

– Gently use the flat end of the spudger to lift the headphone jack straight up from the press connector. You’ve got this!

Tools Used
  1. SpudgeriPad 7 Headphone Jack Replacement

Step 51

– Grab a pair of tweezers and gently lift the headphone jack cable off the logic board. Easy does it!

Tools Used
  1. TweezersiPad 7 Headphone Jack Replacement

Step 52

– Grab your trusty Phillips screwdriver and twist out the 4.3 mm screw holding the headphone jack to the back case. Easy does it!

Step 53

– Gently use the flat end of your spudger to lift the headphone jack away from the rear case. It’s a quick move, just be careful not to force it!

Tools Used
  1. SpudgeriPad 7 Headphone Jack Replacement

Step 54

– Now, let’s put your device back together by retracing your steps, just like a fun puzzle!

– Got some old electronics lying around? Don’t forget to give them a second chance by dropping them off at an R2 or e-Stewards certified recycler.

– If things didn’t go as smoothly as you hoped, no worries! A little troubleshooting might just do the trick, or feel free to reach out to our iPad 7 Answers community for some extra support.

Tools Used
  1. TweezersiPad 7 Headphone Jack Replacement

Success!
Time to put your device back together! Just follow these steps in reverse and you’ll be golden.
Got some e-waste? Don’t just toss it! Give it a new life by taking it to an R2 or e-Stewards certified recycler.
Things not going as smoothly as you’d hoped? No worries! Check out some basic troubleshooting tips, or swing by our iPad 7 Answers community for some friendly advice.

iPad 7 Front Camera Replacement

Duration: 45 minutes
Steps: 49 Steps

This guide walks you through removing or replacing the front camera on an iPad 7 LTE model. Heads up: if you have the Wi-Fi version, check out the alternate instructions here. When disconnecting the battery with a battery blocker, take it slow and steady—those battery contacts are delicate and can get damaged for good. If you decide to skip isolating the battery, be extra careful with metal tools and only use them when absolutely necessary (like unscrewing) to avoid short circuits and harming sensitive parts. Some photos might show a slightly different model, but don’t worry, the steps still apply perfectly.

Step 1

– Warm up an iOpener and stick it onto the left side of your device for a solid two minutes to loosen things up.

Tools Used
  1. iOpeneriPad 7 Front Camera Replacement

Step 2

– As you let that adhesive take its sweet time loosening up, keep an eye out for these delicate spots that prefer a gentle touch:

– Front camera

– Antennas

– Display cables

Step 3

– Slide the blue handle backward to release the Anti-Clamp’s arms.

– Set your iPad on something to keep it balanced and level between the suction cups.

– Place the suction cups close to the center of the left edge—one near the top, the other near the bottom.

– Keep the bottom part of the Anti-Clamp steady while pressing down firmly on the top cup to create suction.

Step 4

– Slide the blue handle forward to lock those arms in place.

– Rotate the handle a full 360 degrees clockwise, or until you see the suction cups start to stretch.

– Keep an eye on the suction cups—they should stay perfectly lined up. If they start to drift out of sync, loosen them a bit and realign the arms before continuing.

Step 5

– Take a breather for a minute to let that adhesive loosen up and create a little opening for you.

– Not feeling the warmth? Grab a hair dryer and give the left edge of your iPad a gentle heat-up.

– Slide an opening pick under the digitizer once the Anti-Clamp has made a nice gap for you.

– Feel free to skip the next step!

Step 6

– When the screen feels warm to the touch, stick a suction handle on the left edge, as close to the edge as you can get.

– Gently pull up on the screen with the suction handle to make a tiny gap between the digitizer and the frame.

– Slide an opening pick into that gap between the digitizer and the frame.

Step 7

– Slide a second opening pick into the gap you just made.

– Gently glide the pick toward the bottom-left corner of your device to break free that pesky adhesive.

– Keep that pick in the bottom-left corner to stop the adhesive from sticking back together!

Step 8

– If your opening pick is feeling a bit stuck in the adhesive, just give it a little ‘roll’ along the side of the iPad to keep that adhesive separation going smoothly.

Step 9

– Gently slide that first opening pick up towards the top-left corner of your device to break free from the adhesive’s grip.

– Keep that pick snug in the top-left corner to prevent the adhesive from getting cozy again.

Step 10

– Grab your iOpener, heat it up, and place it gently on the top edge of your device. Let it work its magic for about two minutes to soften things up.

Tools Used
  1. iOpeneriPad 7 Front Camera Replacement

Step 11

– Gently slide the pick around the top-left corner of your device to break free that pesky adhesive.

Step 12

– Gently slide the opening pick along the top edge of your device, but stop just before you hit the front camera. You’ve got this!

Step 13

– Gently pull the pick out so that just the tip stays sandwiched between the digitizer and the frame.

– Carefully slide the pick over the front camera to loosen the adhesive hiding there.

– Rest the pick by the right side of the front camera before moving on to the next step.

Step 14

– Pop that pick back in and slide it up to the top-right corner to fully free the top adhesive.

– Leave the pick chilling in the top-right corner so the adhesive doesn’t sneak back together.

Step 15

– Warm up your iOpener and press it against the right edge of your device for a solid two minutes. You’re doing great!

Tools Used
  1. iOpeneriPad 7 Front Camera Replacement

Step 16

– Gently twist the pick around the top-right corner to loosen up that stubborn adhesive.

Step 17

– Grab a fresh opening pick and slide it right into the heart of the iPad’s right edge like a pro.

Step 18

– Warm up that iOpener and give it a cozy two-minute hug on the bottom edge of your device.

Tools Used
  1. iOpeneriPad 7 Front Camera Replacement

Step 19

– Gently slide the pick down to the bottom-left corner to loosen the adhesive.

– Keep the pick in place at the bottom-left corner before moving on to the next step.

Step 20

– Pop a new opening pick into that gap you just made at the bottom edge of the iPad.

– Gently slide the pick over the antenna, but hold up just shy of the home button.

– Keep that pick snug to the left of the home button before you move on.

Step 21

– Gently slide an opening pick into the little gap you’ve made. You’re doing great!

– Now, carefully guide that pick under the home button and towards the bottom-right corner. Just the tip should be nestled between the digitizer and the frame. Keep it steady!

Step 22

– Slide the pick back in and gently nudge it toward the home button to fully loosen that bottom adhesive.

– Set the pick just to the right of the home button and hold tight before moving on.

Step 23

– Warm up your iOpener and press it gently onto the right edge of your device for a solid two minutes. Give it a little time to work its magic!

Tools Used
  1. iOpeneriPad 7 Front Camera Replacement

Step 24

– Gently twist the two opening picks positioned at the left corners of the iPad to carefully lift the digitizer just a bit, helping to peel away the last stubborn bits of adhesive.

Step 25

– Gently lift the left side of the digitizer to separate the adhesive along the right edge of the iPad. Take your time and don’t rush—it’s all about that smooth separation!

Step 26

– As you gently hold the digitizer in place, slip an opening pick between the two display cables to break free the last bit of adhesive. You’ve got this!

Step 27

– After you’ve carefully loosened all the adhesive, open the digitizer like a book and lay it down flat next to the iPad.

– When putting everything back together, make sure to clean off any leftover adhesive from both the frame and the digitizer (if you’re reusing it) using isopropyl alcohol. Then, stick on fresh adhesive strips or pre-cut adhesive cards to keep things secure.

– Keep an eye on those delicate display cables as you reassemble. Fold them neatly under the LCD screen to avoid any accidental damage.

Step 28

– Grab your trusty Phillips screwdriver and remove the four screws that are holding the LCD in place. These screws are 4.3 mm long – don’t lose them!

– While you’re working, make sure to keep track of every screw you remove. Getting them back in the right spot is key to keeping your device happy and safe.

– Before you go any further, check for any tape that’s hiding the LCD screws and peel it away.

Step 29

– Grab your trusty spudger and gently ease the LCD out of its snug little spot—just enough so you can give it a friendly tug with your fingers.

– Now, flip that iPad LCD like you’re turning the page of a captivating book, lifting near the camera and swinging it over to the home button side of the rear case.

– Carefully place the LCD down on a clean, soft, lint-free surface so you can easily access those display cables. You’re doing great!

Tools Used
  1. SpudgeriPad 7 Front Camera Replacement

Step 30

– Grab your trusty Phillips screwdriver and get ready to tackle this step! Carefully unscrew the lone 2.3 mm screw that’s holding the battery connector snugly to the logic board. You’ve got this!

Step 31

Step 32

– Gently slide the battery blocker under the logic board’s battery connector at about a 35-degree angle.

– Keep the battery blocker in place while you continue working to keep things safe and sound.

Tools Used
  1. Battery BlockeriPad 7 Front Camera Replacement

Step 33

– Grab your Phillips screwdriver and carefully unscrew the three tiny 1.4 mm-long screws holding down the display cable bracket. You’ve got this!

Step 34

– Carefully take off the display cable bracket to free up some space.

Step 35

– Gently use the flat end of a spudger to pop the LCD cable connector straight up and unplug it. Easy does it!

– When reconnecting these press connectors, line them up carefully and press down on one side until you hear a little click, then do the same on the other side. Avoid pressing in the middle—misaligned pins can bend and cause permanent damage. Take your time and keep it smooth.

Tools Used
  1. SpudgeriPad 7 Front Camera Replacement

Step 36

– Carefully take the LCD off and place it face down on a clean, soft, lint-free spot to keep it safe and sound.

Step 37

– Grab a trusty pair of tweezers and gently lift off the tape that’s keeping the home button cable ZIF connector under wraps.

Tools Used
  1. TweezersiPad 7 Front Camera Replacement

Step 38

– Grab your trusty spudger, an opening tool, or even your own fingernail, and gently lift that small, hinged locking flap on the home button cable ZIF connector. You’ve got this!

Tools Used
  1. SpudgeriPad 7 Front Camera Replacement

Step 39

– Gently grab your trusty tweezers and give that home button ribbon cable a careful tug straight out of the ZIF connector. You’ve got this!

Tools Used
  1. TweezersiPad 7 Front Camera Replacement

Step 40

– Grab the flat end of your spudger and gently lift straight up on the press connectors to unplug those two digitizer cables. Easy does it!

Tools Used
  1. SpudgeriPad 7 Front Camera Replacement

Step 41

– Gently use the flat end of your spudger to lift the vibration isolator sitting just below the SIM card reader.

– Carefully take out the vibration isolator.

Tools Used
  1. SpudgeriPad 7 Front Camera Replacement

Step 42

– Grab a trusty pair of tweezers and gently coax the home button cable away from the rear case. You’ve got this!

Tools Used
  1. TweezersiPad 7 Front Camera Replacement

Step 43

– Carefully take off the front panel assembly.

– If you notice any weird ‘ghost’ or ‘phantom’ touches on your new display, don’t panic! Simply add a super thin layer of insulating tape, like Kapton (polyimide) tape, to the highlighted spots on the back of the panel to fix it. The replacement digitizers already come with the right insulation, so you probably won’t need to add tape yourself.

– When putting everything back together, make sure to remove any leftover adhesive from the iPad. Clean the glued areas with high concentration isopropyl alcohol (90% or higher) and a lint-free cloth to prep the surface for fresh adhesive and ensure a solid bond.

– Give your iPad a quick test to make sure everything works, then apply pre-cut adhesive strips to the back of the display following the display adhesive application guide before sealing it up.

Step 44

– Gently lift the LCD buffer tape off of the upper component bracket with care. You’ve got this!

Step 45

– Grab your Phillips screwdriver and carefully remove the five screws holding down the upper component bracket.

– There are three screws that are 1.4 mm long.

– Plus, two screws that measure 1.9 mm long.

Step 46

– Gently pry up the upper component bracket using the pointy end of your spudger until it’s loose enough to grab with your fingers.

– Take off the upper component bracket.

Tools Used
  1. SpudgeriPad 7 Front Camera Replacement

Step 47

– Gently pry up the front camera cable’s press connector using the flat end of a spudger to disconnect it cleanly.

Tools Used
  1. SpudgeriPad 7 Front Camera Replacement

Step 48

– Gently grab a spudger and lift the front camera out of its cozy home, just enough so you can get a good grip with your fingers.

– Now, use that trusty spudger to carefully peel away the adhesive foam pad from the front camera—no rush, just a steady pull.

Tools Used
  1. SpudgeriPad 7 Front Camera Replacement

Step 49

– To put your device back together, just reverse these steps and you’ll be good to go!

– Got some e-waste? Don’t just toss it! Take it to an R2 or e-Stewards certified recycler.

– Things not going as smoothly as planned? No worries! Give some basic troubleshooting a shot, or swing by our iPad 7 Answers community for a helping hand.

Tools Used
  1. TweezersiPad 7 Front Camera Replacement

Success!
Put your device back together by retracing these steps in reverse.
Dispose of your e-waste responsibly by taking it to an R2 or e-Stewards certified recycler.
If things didn’t go quite as planned, try some simple troubleshooting or check out our iPad 7 Answers community for tips.
Need a hand? You can always schedule a repair with us.

iPad 7 Cellular Antennas Replacement

Duration: 45 minutes
Steps: 58 Steps

Ready to swap out or fix the cellular antennas in your iPad 7? Just a heads-up, this guide is for the LTE model only. If you’re working on the Wi-Fi version, click here. When you’re isolating the battery with a battery blocker, be extra careful – the contacts are super delicate, and one wrong move could lead to some serious damage. If you decide to skip isolating the battery, remember to avoid using metal tools unless absolutely necessary (like for unscrewing). This will help you avoid shorting the battery or causing harm to other sensitive parts. Some of the photos in this guide may come from a different iPad model, so don’t be alarmed by any slight differences – they won’t mess with the steps at all!

Step 1

– Warm up an iOpener and stick it onto the device’s left edge for a solid two minutes to loosen things up.

Tools Used
  1. iOpeneriPad 7 Cellular Antennas Replacement

Step 2

– While the adhesive is loosening up, keep an eye out for these tricky spots where prying can cause trouble:

– Front camera

– Antennas

– Display cables

Step 3

– Give that blue handle a gentle tug backward to set the Anti-Clamp’s arms free!

– Slide something under your iPad to keep it nice and level between those suction cups.

– Place the suction cups snugly near the center of the left edge—one up top, and one down below.

– Stabilize the bottom of the Anti-Clamp, then confidently press down on the top cup to create a strong seal.

Step 4

– Grab the blue handle and slide it forward to lock the arms into place.

– Give the handle a nice, smooth 360-degree turn (or keep turning until the cups start to stretch).

– Keep an eye on the suction cups to make sure they stay aligned. If they start drifting apart, loosen them a bit and gently realign the arms. Simple fix!

Step 5

– Give the adhesive a moment—about a minute should do the trick—to loosen up and make room for an opening gap.

– If your screen isn’t warming up as quickly as you’d like, a hair dryer can help out—just give the left edge of your iPad a gentle heat boost.

– Once you’ve got a decent gap thanks to the Anti-Clamp, gently slide an opening pick under the digitizer to move forward.

– Skip ahead to the next step; you’re good to go!

Step 6

– When your screen is feeling nice and toasty, grab a suction handle and stick it to the left edge of the screen, getting as close to the edge as you can.

– Gently pull up on the suction handle to create a tiny gap between the digitizer and the frame – just enough to get things moving.

– Slide an opening pick into that little gap you’ve made between the digitizer and the frame to keep it open.

Step 7

– Pop a second opening pick into the gap you just made.

– Gently slide that pick toward the bottom-left corner to loosen up the adhesive.

– Keep the pick tucked in the bottom-left corner so the adhesive doesn’t sneak back together.

Step 8

– If your opening pick is feeling a bit stuck in the adhesive, just give it a little roll along the side of the iPad to keep that adhesive separating like a champ!

Step 9

– Gently glide that first opening pick towards the top-left corner of your device to break free from the adhesive’s grip.

– Keep the pick snug in the top-left corner to make sure the adhesive doesn’t decide to play hide and seek again.

Step 10

– Warm up an iOpener and stick it to the top edge of your device for a solid two minutes. You’ve got this!

Tools Used
  1. iOpeneriPad 7 Cellular Antennas Replacement

Step 11

– Take your pick and gently work it around the top-left corner of your device to peel away the sticky stuff. Go slow, we don’t want to rush this part!

Step 12

– Gently slide the opening pick along the top edge of the device, making sure to stop just before you reach the front camera. Take your time—no rush!

Step 13

– Gently pull the pick until just the tip is nestled between the digitizer and the frame.

– Slide the pick smoothly above the front camera to break the adhesive seal.

– Keep the pick close to the right side of the front camera for the next steps.

Step 14

– Slide that pick back in and shimmy it over to the top-right corner of your device to fully break free the top adhesive. You’re almost there!

– Keep that pick snug in the top-right corner to stop the adhesive from getting all clingy again.

Step 15

– Warm up your iOpener and let it hang out on the right edge of your device for a solid two minutes. It’s like giving your device a mini spa treatment before diving into the repair.

Tools Used
  1. iOpeneriPad 7 Cellular Antennas Replacement

Step 16

– Twist that pick around the top-right corner of your device to break free the adhesive, and let’s get this party started!

Step 17

– Pop in a fresh opening pick and slide it smoothly to the center of the iPad’s right side.

Step 18

– Warm up that iOpener and let it work its magic on the bottom edge of your device for about two minutes. Give it a little time to soften things up before you dive into the next step!

Tools Used
  1. iOpeneriPad 7 Cellular Antennas Replacement

Step 19

– Gently slide the pick into the bottom-left corner to start separating that adhesive. It should come apart without too much trouble.

– Keep the pick in place in the bottom-left corner as you get ready to move on to the next step. We’re almost there!

Step 20

– Pop a fresh opening pick into that little gap you just made along the bottom edge of your iPad.

– Gently glide the pick over the antenna, but hold up just shy of the home button.

– Keep that pick hanging out to the left of the home button before you move on.

Step 21

– Slide an opening pick into the tiny gap you’ve just made. You’re doing great!

– Gently maneuver the pick underneath the home button and aim it toward the bottom-right corner. Just let the tip sneak in between the digitizer and the frame—you’re almost there!

Step 22

– Slide the pick back in and gently ease it toward the home button to fully loosen the bottom adhesive.

– Rest the pick just to the right of the home button before moving on.

Step 23

– Warm up your iOpener and give some love to the right edge of your device for a solid two minutes.

Tools Used
  1. iOpeneriPad 7 Cellular Antennas Replacement

Step 24

– Gently twist the two opening picks at the left corners of the iPad to carefully lift the digitizer just enough to break the last bits of adhesive holding it down.

Step 25

– Gently lift the left edge of the digitizer and give it a little nudge upwards. This will help loosen the adhesive on the right edge of your iPad. Keep it smooth and steady!

Step 26

– Keep the digitizer steady and gently slide an opening pick between the two display cables to carefully break through the last bit of adhesive holding them together.

Step 27

– Once you’ve peeled away all the sticky stuff, carefully open the digitizer like you’re flipping a page of your favorite book, and lay it down flat, parallel to your iPad.

– When you’re putting everything back together, grab some isopropyl alcohol and give the remaining adhesive a good wipe-down—don’t forget to clean the digitizer if you’re planning to reuse it. Then, add fresh adhesive strips or pre-cut adhesive cards for that nice, clean seal.

– As you reassemble, take extra care with those display cables. Make sure they’re tucked neatly under the LCD screen to avoid any accidental damage.

Step 28

– Grab your trusty Phillips screwdriver and get ready to tackle those four 4.3 mm screws holding the LCD in place. You’ve got this!

– As you dive into this repair adventure, keep an eye on each screw and make sure it finds its way back home. We don’t want any rogue screws causing mischief!

– Don’t forget to peel away any tape that’s hiding those sneaky LCD screws. Let’s make sure we can see what we’re working with!

Step 29

– Gently use the flat end of a spudger to loosen the LCD just enough to grab it with your fingers. A little nudge goes a long way!

– Flip the LCD like you’re turning a page in a book, lifting it near the camera, and flipping it over towards the home button side of the rear case.

– Now, place the LCD on a clean, soft, lint-free surface. This will give you easy access to the display cables without any distractions.

Tools Used
  1. SpudgeriPad 7 Cellular Antennas Replacement

Step 30

– Grab a Phillips screwdriver and carefully remove the single 2.3 mm screw holding the battery connector to the logic board in place.

Step 31

Step 32

– Gently slide the battery blocker under the logic board’s battery connector at a cool 35-degree angle. You’ve got this!

– Keep that battery blocker snugly in place while you tackle the next steps. You’re making great progress!

Tools Used
  1. Battery BlockeriPad 7 Cellular Antennas Replacement

Step 33

– Grab your Phillips screwdriver and carefully take out the three 1.4 mm screws holding down the display cable bracket.

Step 34

– Take off the display cable bracket.

Step 35

– Grab your trusty spudger and gently lift the LCD cable by the press connector. Just straight up, like you’re giving it a friendly high five!

– When it’s time to reconnect those press connectors, take a deep breath and align one side just right. Press down until you hear that satisfying click, and then do the same on the other side. Remember, no poking the middle! If things get a little wonky and the connector isn’t aligned, you might bend the pins, and that’s a no-go for keeping your device happy.

Tools Used
  1. SpudgeriPad 7 Cellular Antennas Replacement

Step 36

– Take off the LCD with care and lay it face down on a clean, soft, lint-free surface to keep it safe and sound.

Step 37

– Grab your tweezers and gently lift the tape that’s covering the home button cable’s ZIF connector.

Tools Used
  1. TweezersiPad 7 Cellular Antennas Replacement

Step 38

– Gently use the tip of a spudger, an opening tool, or even your fingernail to flip up the tiny, hinged locking flap on the home button cable’s ZIF connector. Easy does it!

Tools Used
  1. SpudgeriPad 7 Cellular Antennas Replacement

Step 39

– Grab your tweezers and gently wiggle the home button ribbon cable straight out of the ZIF connector. Easy does it!

Tools Used
  1. TweezersiPad 7 Cellular Antennas Replacement

Step 40

– Grab the flat end of your trusty spudger and gently lift those two digitizer cables straight up from their press connectors to disconnect them without any drama.

Tools Used
  1. SpudgeriPad 7 Cellular Antennas Replacement

Step 41

– Grab your trusty spudger and gently wiggle the flat end underneath the vibration isolator lurking just below the SIM card reader.

– Once it’s pried up, go ahead and remove that vibration isolator like a pro.

Tools Used
  1. SpudgeriPad 7 Cellular Antennas Replacement

Step 42

– Grab a pair of tweezers and gently peel the home button cable away from the back case. Take your time—no rush, just a smooth and steady move.

Tools Used
  1. TweezersiPad 7 Cellular Antennas Replacement

Step 43

– Take off the front panel assembly. Easy does it!

– Got some ‘ghost’ or ‘phantom’ touch issues with your new display? No worries! Simply add a thin layer of insulating tape, like Kapton (polyimide) tape, to the highlighted spots on the back of the panel. If you’re using a replacement display from us, no tape is needed – it comes pre-insulated!

– Before putting everything back together, make sure to wipe away any leftover adhesive on your device. Use some high-concentration isopropyl alcohol (90% or higher) and a lint-free cloth to clean the areas where the adhesive will stick. This ensures the new adhesive will bond just right.

– Give your device a quick test to make sure everything’s working smoothly. Then, apply those pre-cut adhesive strips to the back of your display, following our guide, before sealing it up.

Step 44

– Gently lift the LCD buffer tape off the upper component bracket, taking care to keep it steady and smooth.

Step 45

– Grab your trusty Phillips screwdriver and take out the five screws holding down the upper component bracket.

– There are three screws that are 1.4 mm long.

– And two screws that are 1.9 mm long.

Step 46

– Gently pry up the upper component bracket using the pointed tip of your spudger until it’s loose enough to grab with your fingers.

– Take off the upper component bracket.

Tools Used
  1. SpudgeriPad 7 Cellular Antennas Replacement

Step 47

– Gently use the flat end of a spudger to pop off the front camera cable by lifting straight up on the press connector. You’ve got this!

Tools Used
  1. SpudgeriPad 7 Cellular Antennas Replacement

Step 48

– Time to get that front camera out of hiding! Grab your trusty spudger and gently lift it out of its snug little spot until you can easily hold it with your fingers.

– Now, use that spudger magic to peel away the adhesive foam pad that’s keeping the front camera in place. You’re doing great!

Tools Used
  1. SpudgeriPad 7 Cellular Antennas Replacement

Step 49

– Grab your trusty tweezers and gently hold onto that front camera. Give it a little twist and guide the cable through its cozy slot in the rear case.

– Now it’s time to say goodbye to the front camera. Go ahead and remove it!

Tools Used
  1. TweezersiPad 7 Cellular Antennas Replacement

Step 50

– Gently pry up the headphone jack connector using the flat end of a spudger, lifting it straight up to disconnect it without any drama.

Tools Used
  1. SpudgeriPad 7 Cellular Antennas Replacement

Step 51

– Grab a trusty pair of tweezers and gently lift that headphone jack off the logic board, then sweep the cable to the side like you’re clearing a path for something cool to happen!

Tools Used
  1. TweezersiPad 7 Cellular Antennas Replacement

Step 52

– Grab your Phillips screwdriver and carefully remove the three tiny 1.4 mm screws holding the cellular antennas in place on the rear case. They’re small, but you’ve got this!

Step 53

– Grab your Phillips screwdriver and unscrew the four tiny 1.4 mm screws that are holding the cellular antennas in place on the rear case. Easy peasy, right?

Step 54

– Grab your trusty spudger and use the pointed end to gently pry up the right cellular antenna coaxial cable. Aim close to the connector for a smooth disconnection!

– Now, let’s move on and disconnect the left antenna cable.

Tools Used
  1. SpudgeriPad 7 Cellular Antennas Replacement

Step 55

– Grab the flat end of your trusty spudger and gently pry up both cellular antennas right at their press connectors. Easy does it!

Tools Used
  1. SpudgeriPad 7 Cellular Antennas Replacement

Step 56

– Slide the sharp end of your spudger behind the right cellular antenna bracket and give it a gentle nudge to pop it loose.

– Carefully lift the right cellular antenna away from the rear case.

Tools Used
  1. SpudgeriPad 7 Cellular Antennas Replacement

Step 57

– Gently lift the left cellular antenna coaxial cable away from the back case.

Step 58

– Put your device back together by reversing these steps—easy peasy!

– Remember to drop off your e-waste at an R2 or e-Stewards certified recycler to keep things green.

– If things didn’t quite go as planned, give some basic troubleshooting a shot or reach out to the iPad 7 Answers community for a hand.

– And hey, if you ever get stuck, you can always schedule a repair with us!

Tools Used
  1. SpudgeriPad 7 Cellular Antennas Replacement

Success!
Time to put everything back together? Just follow the steps in reverse, and you’ll be golden.
Got some old electronics lying around? Don’t just toss them! Take them to an R2 or e-Stewards certified recycler.
Uh-oh, things didn’t go as planned? No worries! Try some basic troubleshooting, or if you’re stuck, our iPad 7 Answers community is here to help.

iPad 7 Button Control Cable Replacement

Duration: 45 minutes
Steps: 64 Steps

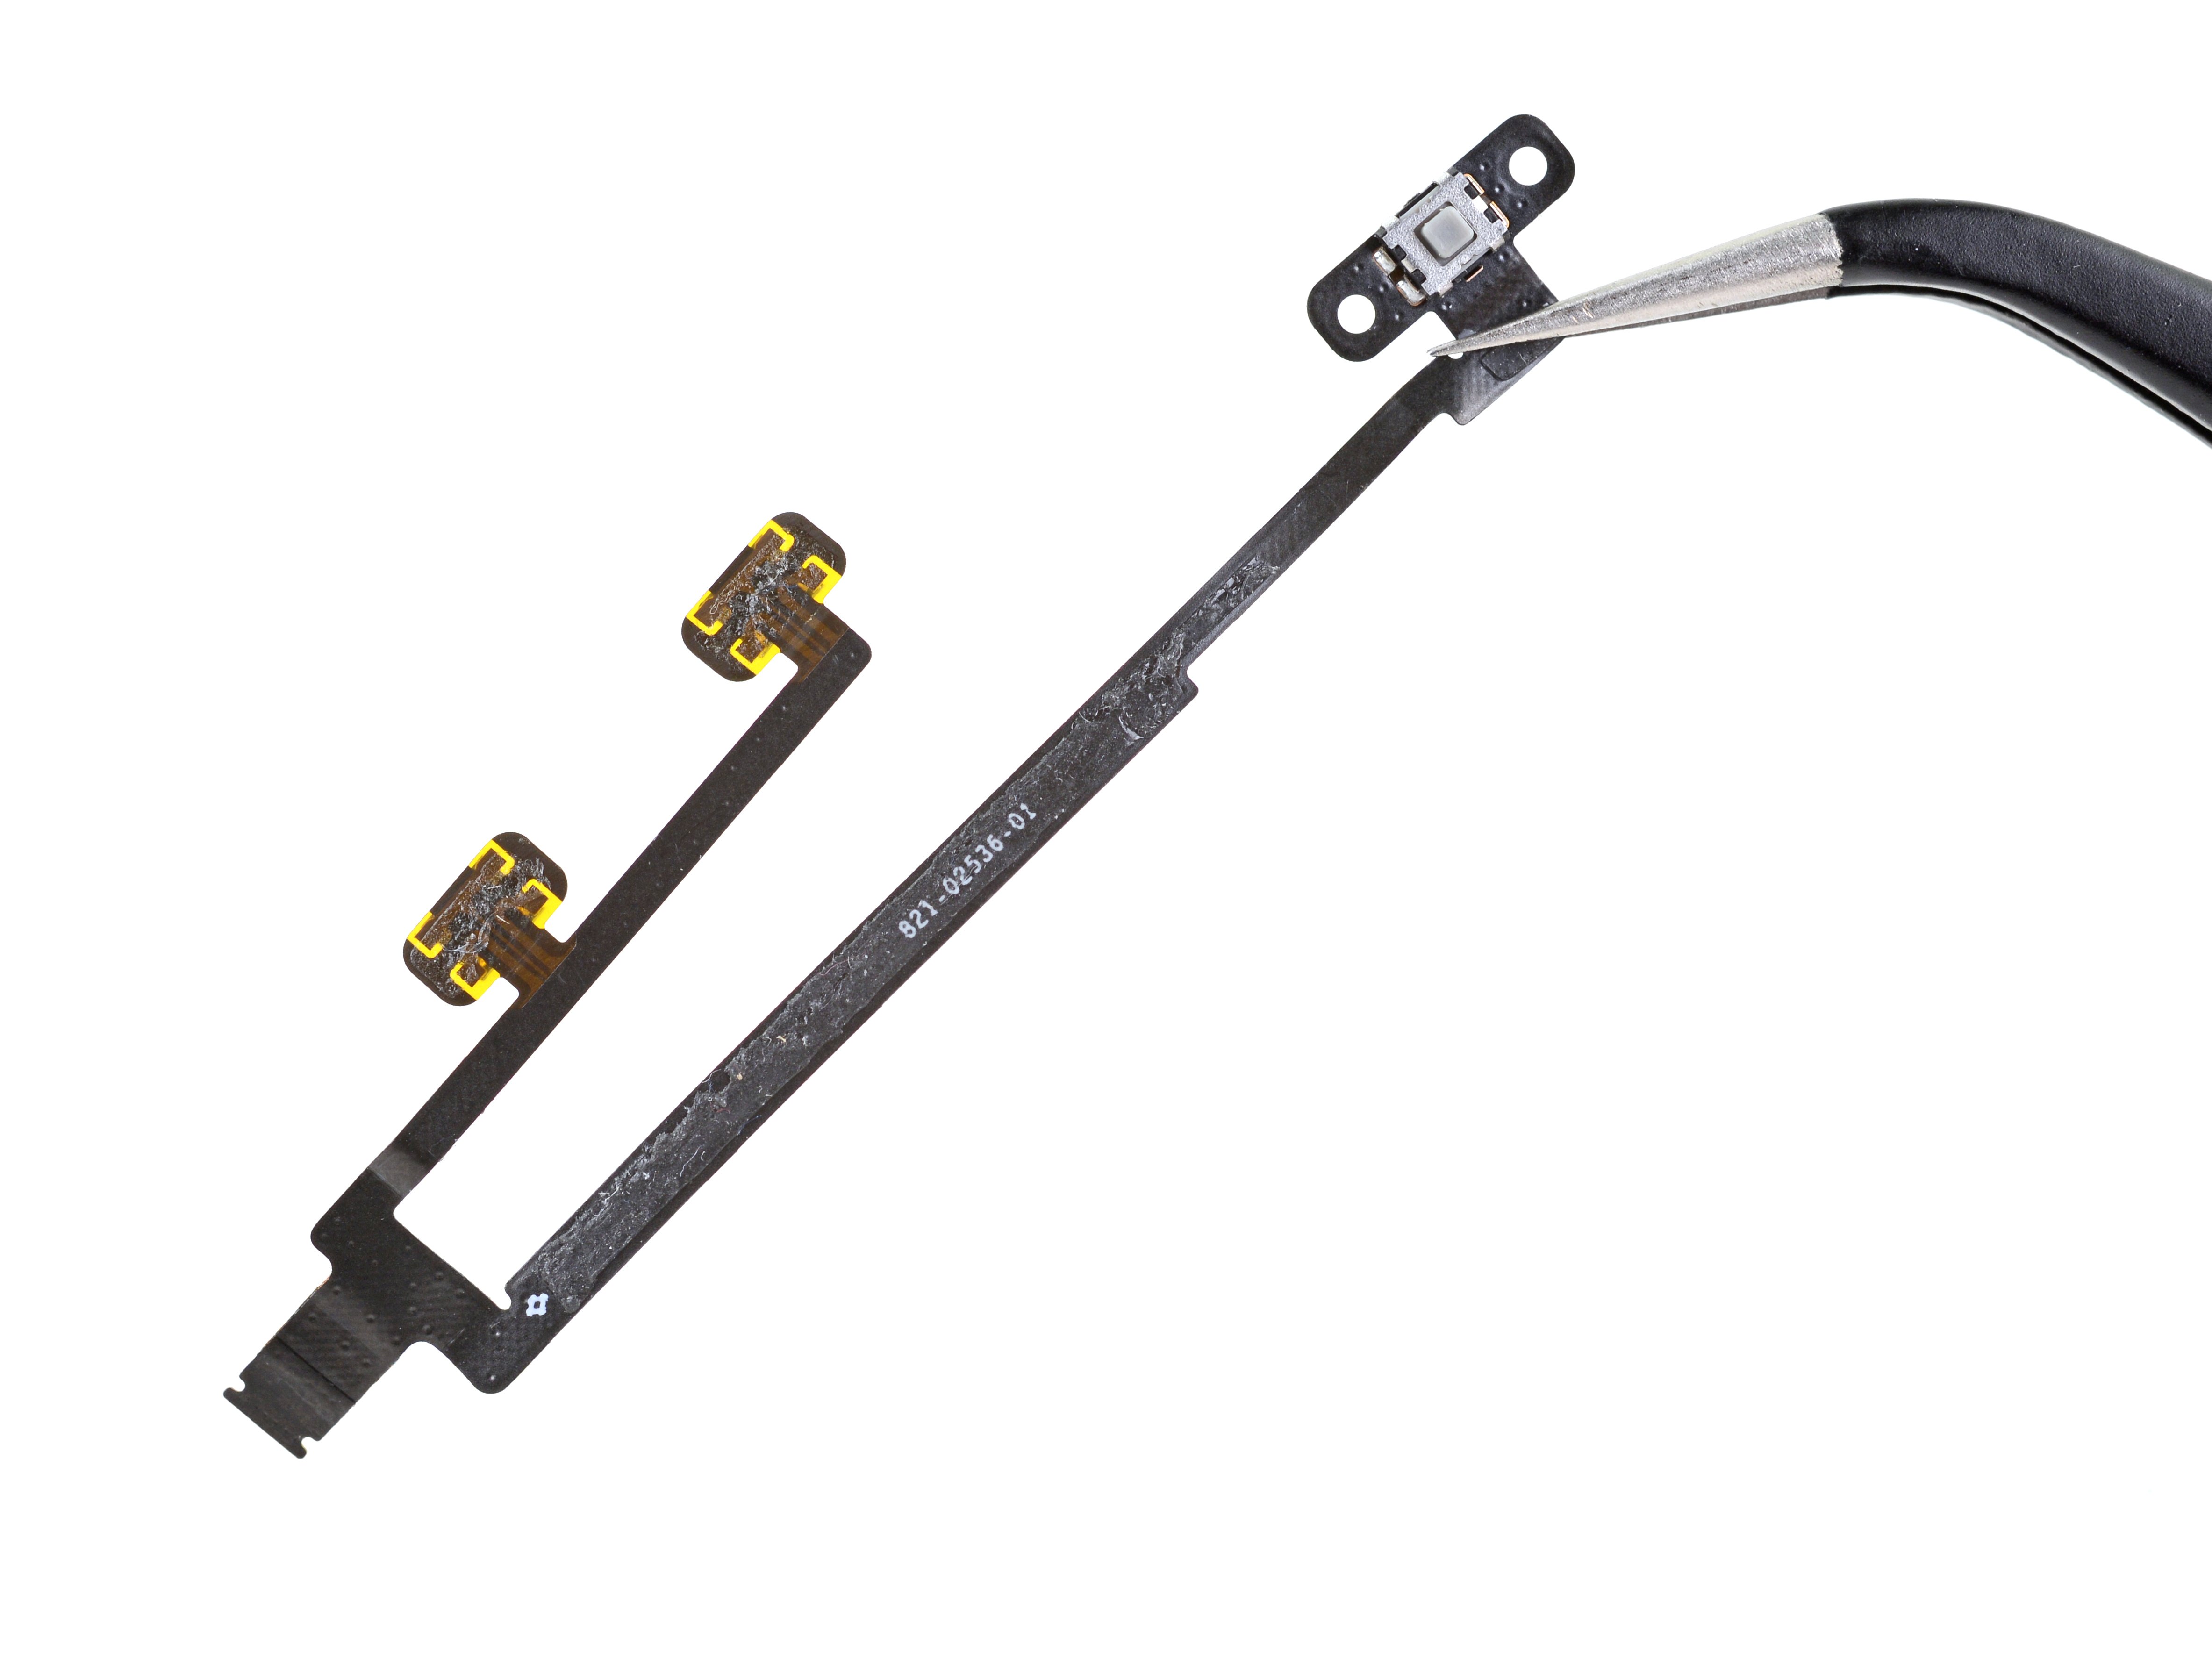
Get ready to tackle the button control cable replacement in your iPad 7! Just a heads up, this guide is specifically for the LTE version, so if you have the Wi-Fi version, check out the other guide. The button control cable is your go-to for both the lock and volume buttons, so if they’re acting up, you’ll need to swap out the whole cable. When you’re isolating the battery, be super gentle with the battery blocker—those battery contacts are delicate and can get damaged pretty easily. If you’re feeling brave and decide to skip isolating the battery, steer clear of metal tools unless absolutely necessary (like when you’re unscrewing) to keep the battery safe and the circuit components intact. A few of the photos might be from a different model, so they could look a tad different, but don’t worry, they won’t mess with the steps. Happy repairing!

Step 1

– Warm up an iOpener and stick it on the left side of your device for a solid two minutes to get things nice and toasty.

Tools Used
  1. iOpeneriPad 7 Button Control Cable Replacement

Step 2

– While you’re letting the adhesive do its thing, keep an eye out for these delicate spots that need some extra TLC when prying:

– Front camera

– Antennas

– Display cables

Step 3

– Slide the blue handle back to release the Anti-Clamp’s arms.

– Set something under your iPad so it stays balanced between the suction cups.

– Place the suction cups near the center of the left side—one up top and one down low.

– Keep the bottom of the Anti-Clamp steady, then press down firmly on the top cup to get a solid suction grip.

Step 4

– Give that blue handle a little nudge forward to secure those arms in place.

– Now, twist that handle a full 360 degrees or until you see the suction cups starting to stretch—you’re doing great!

– Keep an eye on those suction cups to make sure they’re still in sync. If they start to drift apart, just loosen them a tad and realign the arms. You’ve got this!

Step 5

– Give it a minute to let the adhesive chill out and create a small gap to work with.

– If your screen is playing it cool and not heating up enough, try warming the left edge of the iPad with a hair dryer.

– Once the Anti-Clamp opens up a nice gap, slide an opening pick under the digitizer to start the lift.

– Just skip this step and keep rolling.

Step 6

– First, let’s warm up that screen a bit! Once it’s nice and cozy to the touch, grab a suction handle and stick it right on the left edge of the screen, as close to the edge as you can get.

– Now, gently lift that screen with the suction handle to create a tiny gap between the digitizer and the frame. You got this!

– Next up, slide an opening pick into that gap you just made between the digitizer and the frame. Easy peasy!

Step 7

– Pop in a second opening pick where you just made some space.

– Gently slide that pick towards the bottom-left corner of your device to break free from the adhesive’s grip.

– Keep that pick snug in the bottom-left corner to ensure the adhesive doesn’t play tricks and re-seal.

Step 8

– If your opening pick gets caught in the sticky glue, just give it a little roll along the edge of the iPad to keep that adhesive separation moving smoothly.

Step 9

– Gently slide your first opening pick up toward the top-left corner to loosen that sticky adhesive.

– Keep the pick lodged in the top-left corner so the adhesive doesn’t sneak back together.

Step 10

– Warm up an iOpener and stick it on the top edge of your device for a solid two minutes to get things nice and toasty.

Tools Used
  1. iOpeneriPad 7 Button Control Cable Replacement

Step 11

– Gently glide the pick around the top-left corner of your device to break that adhesive seal. You’ve got this!

Step 12

– Gently glide that opening pick along the top edge of your device, but hold up just shy of the front camera. You’re doing great!

Step 13

– Gently pull the pick out so that just the tip stays tucked between the digitizer and the frame.

– Slide the pick over the front camera area to carefully loosen the adhesive.

– Set the pick down near the right side of the front camera before moving on to the next step.

Step 14

– Slide the pick back in and move it gently towards the top-right corner to fully break free the top adhesive.

– Keep the pick in the top-right corner to stop that adhesive from making a sneaky comeback.

Step 15

– Warm up your iOpener and stick it to the right edge of your device for a solid two minutes of heating action.

Tools Used
  1. iOpeneriPad 7 Button Control Cable Replacement

Step 16

– Twist that pick around the top-right corner of your device to break free the adhesive. You’ve got this!

Step 17

– Slide a fresh opening pick right into the iPad’s right edge and glide it smoothly to the center.

Step 18

– Warm up an iOpener and place it on the bottom edge of your device for a solid two minutes to loosen things up.

Tools Used
  1. iOpeneriPad 7 Button Control Cable Replacement

Step 19

– Gently slide the bottom-left pick down to the bottom-left corner to loosen that adhesive grip.

– Keep the pick tucked in the bottom-left corner before moving on to the next step.

Step 20

– Pop a new opening pick into the gap you just made along the bottom edge of the iPad.

– Gently slide the pick along the antenna, stopping just before you reach the home button.

– Let the pick rest to the left of the home button before moving on to the next step.

Step 21

– Pop an opening pick into the little gap you just made.

– Gently slide the pick under the home button, aiming for the bottom-right corner. Keep just the tip sneaky between the digitizer and the frame—no full-on wedging!

Step 22

– Slide the pick back in and gently work it toward the home button to fully loosen that stubborn bottom adhesive.

– Once it’s loosened, leave the pick resting just to the right of the home button before moving on.

Step 23

– Warm up an iOpener and stick it to the right edge of your device for a solid two minutes to loosen things up.

Tools Used
  1. iOpeneriPad 7 Button Control Cable Replacement

Step 24

– Gently twist the two opening picks at the left corners of the iPad to carefully lift the digitizer just enough to break through the last bits of adhesive holding it down.

Step 25

– Gently lift the left edge of the digitizer upward to loosen the adhesive along the right side of your iPad a bit more.

Step 26

– Carefully support the digitizer while sliding an opening pick between the two display cables to gently break apart the last bit of adhesive holding them together.

Step 27

– Once the adhesive is all peeled away, open up the digitizer like you’re flipping a book and set it next to the iPad, keeping them nice and parallel.

– When you’re putting it all back together, grab some isopropyl alcohol to clean off any leftover adhesive on both the frame and the digitizer (if you’re reusing it). Then, stick on some fresh adhesive strips or those nifty pre-cut adhesive cards.

– Keep an eye on those display cables when you’re putting everything back in place. Make sure they’re tucked neatly under the LCD screen to avoid any unwanted damage.

Step 28

– Grab your Phillips screwdriver and take out the four 4.3 mm screws holding the LCD in place. Easy peasy!

– As you go along, keep those screws safe and sound. They each have a specific spot to go back to, and mixing them up could cause some trouble later on.

– If there’s any tape covering the screws, peel it off so you can access them. Nothing should get in the way of your progress!

Step 29

– Gently wedge the flat end of a spudger under the LCD just enough to loosen it so you can grab hold with your fingers.

– Carefully flip the iPad’s LCD like turning a page in a book, lifting near the camera and folding it over the home button end of the back case.

– Set the LCD down on a clean, soft, lint-free surface to easily reach the display cables without any hassle.

Tools Used
  1. SpudgeriPad 7 Button Control Cable Replacement

Step 30

– Grab your trusty Phillips screwdriver and gently unscrew that lone 2.3 mm-long screw holding the battery connector snugly to the logic board. You’ve got this!

Step 31

Step 32

– Gently glide the battery blocker under the logic board’s battery connector at a cool 35-degree angle. You’re doing great!

– Keep that battery blocker snug in place as you continue with your fantastic repair journey.

Tools Used
  1. Battery BlockeriPad 7 Button Control Cable Replacement

Step 33

– Grab your Phillips screwdriver and carefully remove the three 1.4 mm-long screws holding down the display cable bracket. You got this!

Step 34

– Take off the display cable bracket with a smile! It’s time to get that screen ready for action.

Step 35

– Grab the flat end of your spudger and gently lift the LCD cable connector straight up to disconnect it. No need to yank—just a smooth pull.

– When you’re ready to reattach those press connectors, take your time! Align one side first and press gently until it clicks into place. Then do the same on the other side. Avoid pressing the middle to keep things neat. If it’s not aligned properly, you might bend the pins—and that’s no good. Keep it cool and steady.

Tools Used
  1. SpudgeriPad 7 Button Control Cable Replacement

Step 36

– Gently detach the LCD and lay it down screen-side facing the soft, clean surface. You’ve got this!

Step 37

– Grab your trusty tweezers and gently peel away the tape that’s keeping the home button cable ZIF connector under wraps. You’re doing great!

Tools Used
  1. TweezersiPad 7 Button Control Cable Replacement

Step 38

– Gently use the tip of a spudger, an opening tool, or even your fingernail to flip up the tiny, hinged locking flap on the home button cable ZIF connector. Easy does it!

Tools Used
  1. SpudgeriPad 7 Button Control Cable Replacement

Step 39

– Grab a pair of tweezers and gently tug the home button ribbon cable straight out of the ZIF connector. Keep it smooth, no rush!

Tools Used
  1. TweezersiPad 7 Button Control Cable Replacement

Step 40

– Grab the flat end of your trusty spudger and gently lift the two digitizer cables straight up to pop those press connectors loose.

Tools Used
  1. SpudgeriPad 7 Button Control Cable Replacement

Step 41

– Grab the flat end of a spudger and gently nudge the vibration isolator right beneath the SIM card reader.

– Carefully lift and remove the vibration isolator. Easy peasy!

Tools Used
  1. SpudgeriPad 7 Button Control Cable Replacement

Step 42

– Grab your trusty tweezers and gently lift the home button cable away from the rear case like a pro!

Tools Used
  1. TweezersiPad 7 Button Control Cable Replacement

Step 43

– Start by carefully removing the front panel assembly.

– If you’re noticing any odd ‘ghost’ or ‘phantom’ touch issues with your new display, don’t stress! Simply add a thin layer of insulating tape (think Kapton tape) to the highlighted areas on the back of the panel. Most replacement displays come pre-insulated, so you shouldn’t need to add tape, but if you do, it’s an easy fix.

– When putting everything back together, be sure to clean up any leftover adhesive from your iPad. Grab some high-concentration isopropyl alcohol (90% or higher) and a lint-free cloth to scrub those glued areas clean. This will ensure the fresh adhesive sticks just right!

– Now, give your iPad a quick functionality test, and use our display adhesive guide to apply the pre-cut adhesive strips to the back of the display. Once you’re done, seal everything up and you’re good to go!

Step 44

– Gently peel back the LCD buffer tape from the top component bracket, like you’re unveiling a surprise gift!

Step 45

– Grab your Phillips screwdriver and carefully unscrew the five screws holding down the upper component bracket.

– There are three screws that are 1.4 mm long.

– And two screws that measure 1.9 mm long.

Step 46

– Gently pry up the upper component bracket using the pointed tip of your spudger until you can grab it with your fingers.

– Take out the upper component bracket.

Tools Used
  1. SpudgeriPad 7 Button Control Cable Replacement

Step 47

– Grab your trusty spudger and gently lift the rear camera connector straight up. It’s like giving it a little hug to let it know it’s time to disconnect!

Tools Used
  1. SpudgeriPad 7 Button Control Cable Replacement

Step 48

– Warm up that iOpener and give it a cozy 30-second hug on the rear camera.

Tools Used
  1. iOpeneriPad 7 Button Control Cable Replacement

Step 49

– Grab your opening tool and gently pop the rear camera out of the back case. Easy does it!

Step 50

– Carefully detach and take out the rear camera.

Step 51

– Gently peel off any tape that’s covering the button control cable ZIF connector. Take it slow, we don’t want to damage anything!

Step 52

– Gently use the tip of a spudger, an opening tool, or even your fingernail to lift up the tiny hinged locking flap on the button control cable’s ZIF connector.

Tools Used
  1. SpudgeriPad 7 Button Control Cable Replacement

Step 53

– Gently grab your trusty tweezers and with a delicate touch, pull that button control cable straight out of the ZIF connector. You’ve got this!

Tools Used
  1. TweezersiPad 7 Button Control Cable Replacement

Step 54

– Grab your trusty Phillips screwdriver and get ready to tackle this! Unscrew those two 2.3 mm-long screws that are holding the volume button bracket snugly to the rear case. You’ve got this!

Step 55

– Grab your trusty Phillips screwdriver and let’s get those two little 2.3 mm screws out of the way that are holding the lock button bracket in place. You got this!

Step 56

– Gently slide the pointy end of a spudger between the back case and the bottom of the volume button bracket to pop it loose.

– Take off the volume button bracket.

Tools Used
  1. SpudgeriPad 7 Button Control Cable Replacement

Step 57

– Grab your spudger and use the flat end to gently nudge the volume buttons out of their cozy spots in the rear case. No need to rush, just a gentle push and you’ll be on your way!

Tools Used
  1. SpudgeriPad 7 Button Control Cable Replacement

Step 58

– Slide an opening pick between the button control cable and the rear case, like you’re gently sliding into a cozy spot on the couch.

– Now, glide that pick up towards the lock button to break the adhesive that’s been holding the button control cable to the rear case. You’ve got this!

Step 59

– Carefully unplug the button control cable.

– When putting everything back together, make sure to pop the lock button neatly back into its spot.

Step 60

– Heat up your iOpener and let it sit on the button control cable for about 30 seconds. This’ll loosen things up just right!

Tools Used
  1. iOpeneriPad 7 Button Control Cable Replacement

Step 61

– Grab your trusty tweezers and give that upper volume button a gentle squeeze.

– Slide an opening pick right between the volume control cable and the upper volume button—like you’re sneaking a peek at a surprise!

– Carefully peel away the volume control cable from the upper volume button, just like unwrapping a gift!

Tools Used
  1. TweezersiPad 7 Button Control Cable Replacement

Step 62

– Now, let’s keep that momentum going! Just like before, carefully peel off the volume control cable from the lower volume button. You’ve got this!

Step 63

– Grab your trusty tweezers and gently grip the lock button bracket.

– Now, slide a halberd spudger or opening pick between the lock button bracket and the button control cable.

– Carefully peel the button control cable away from the pegs holding it onto the lock button bracket.

– When it’s time to put everything back together, use some Tesa tape to securely reattach the volume buttons and lock button bracket to the button control cable.

Step 64

– Now, let’s put your gadget back together by retracing your steps like a pro!

– Got some e-waste? Don’t just toss it—bring it to an R2 or e-Stewards certified recycler for a responsible goodbye.

– If things didn’t go exactly as you hoped, no worries! Try some basic troubleshooting or swing by our iPad 7 Answers community for a little extra support.

Success!
Now, let’s put this device back together by retracing your steps! Easy peasy.
Got some e-waste? Don’t toss it! Instead, take it to an R2 or e-Stewards certified recycler. It’s the responsible thing to do!
Things not going as smoothly as you hoped? No worries! Give some basic troubleshooting a shot, or swing by our iPad 7 Answers community for a little extra support.

iPad 7 Battery Replacement

Duration: 45 minutes
Steps: 117 Steps

Use this guide to safely remove or replace the battery in your iPad 7 LTE model. If you’re working on the Wi-Fi version, head over to the appropriate guide. Before diving in, make sure your battery is discharged below 25% to minimize the chance of a thermal mishap if the battery gets damaged during the repair. If your battery looks swollen, take extra care. When disconnecting the battery with a battery blocker, go slow and steady—those contacts are delicate and can be ruined easily. If you decide to skip isolating the battery, avoid metal tools unless absolutely necessary (like when unscrewing) to prevent any shorts or damage to sensitive parts. Some photos might be from a slightly different model and look a bit different, but don’t worry—they won’t affect the repair steps.

Step 1

– Warm up your iOpener and give it a gentle press on the left edge of your device for two minutes. Let the heat do its magic and get that adhesive loosened up just right.

Tools Used
  1. iOpeneriPad 7 Battery Replacement

Step 2

– While you’re waiting for that adhesive to let go, keep in mind the following areas that need some extra care when you’re prying around:

– Front camera

– Antennas

– Display cables

Step 3

– Give the blue handle a gentle pull backward to release the Anti-Clamp’s arms and get things moving.

– Set your iPad on a soft object to keep it level between the suction cups. It’s all about balance!

– Place the suction cups along the middle of the left edge—one at the top, the other at the bottom. They’re like your iPad’s personal bodyguards.

– Hold the Anti-Clamp steady at the bottom, then give a firm press down on the top suction cup to make sure it grips like a pro.

Step 4

– Gently pull the blue handle forward to secure those arms in place.

– Give that handle a good spin, turning it clockwise for a full 360 degrees or until you see those suction cups starting to stretch.

– Keep an eye on those suction cups to make sure they’re aligned just right. If they start to wander off course, loosen them a tad and guide the arms back into perfect alignment.

Step 5

– Give it about a minute so the adhesive can loosen up and create a little gap to work with.

– If the screen isn’t warming up enough on its own, try using a hair dryer along the left edge of the iPad to get things moving.

– Once the Anti-Clamp has made a nice opening, slide an opening pick under the digitizer to gently pry it open.

– Go ahead and skip the next step.

Step 6

– Once the screen feels warm to the touch, place a suction handle near the left edge, as close to the edge as you can manage.

– Gently lift the screen with the suction handle to create just enough of a gap between the digitizer and the frame.

– Now, carefully insert an opening pick into that gap you’ve made between the digitizer and the frame.

Step 7

– Pop in a second opening pick where you’ve made that first gap.

– Gently slide it down toward the bottom-left corner to work the adhesive loose.

– Once you’re there, leave the pick in place to keep that adhesive from sticking back together.

Step 8

– If your opening pick is feeling a little too cozy with the adhesive, just give it a little ‘roll’ along the edge of the iPad to keep that adhesive separating like a pro!

Step 9

– Gently slide your first opening pick up toward the top-left corner to gently loosen that stubborn adhesive.

– Keep the pick wedged in the top-left corner so the adhesive doesn’t sneak back together on you.

Step 10

– Warm up an iOpener and place it on the top edge of your device for a solid two minutes to loosen things up.

Tools Used
  1. iOpeneriPad 7 Battery Replacement

Step 11

– Gently spin the pick around the top-left corner to break the adhesive seal. Take it slow and steady—you’ve got this!

Step 12

– Gently slide your opening pick along the top edge of the device, just shy of the front camera. Take your time, no rush – you’re almost there!

Step 13

– Gently pull the pick out so only its tip stays nestled between the digitizer and the frame.

– Carefully slide the pick over the front camera to loosen up that sticky adhesive.

– Keep the pick resting just to the right of the front camera before moving on to the next step.

Step 14

– Slide the pick back in and glide it toward the top-right corner of your device to fully break free that top adhesive.

– Keep the pick snug in the top-right corner to stop the adhesive from getting cozy again.

Step 15

– Warm up an iOpener and stick it onto the right edge of your device for a solid two minutes to get things nice and toasty.

Tools Used
  1. iOpeneriPad 7 Battery Replacement

Step 16

– Twist the pick around the top-right corner of your gadget to break free that sticky adhesive. Let’s get that thing opened up!

Step 17

– Grab a fresh opening pick and gently slide it along the iPad’s right edge until you reach the middle. Take your time, you’ve got this!

Step 18

– Grab an iOpener and give it a nice warm-up. Press it gently to the bottom edge of your device for about two minutes. Let the magic happen!

Tools Used
  1. iOpeneriPad 7 Battery Replacement

Step 19

– Gently slide the pick into the bottom-left corner to break the adhesive’s grip.

– Once you’ve slid it into the corner, leave the pick there as you move on to the next step.

Step 20

– Slip a fresh opening pick into the gap you just made along the bottom edge of the iPad.

– Gently glide the pick past the antenna, stopping right before you reach the home button.

– Let the pick chill to the left side of the home button before moving on.

Step 21

– Slide an opening pick into that little gap you’ve just made.

– Gently maneuver the pick under the home button and towards the bottom-right corner, ensuring that only the tip is nestled between the digitizer and the frame.

Step 22

– Slide that pick back in and give it a little nudge toward the home button to fully break free from the bottom adhesive. You got this!

– Once you’ve made some progress, leave the pick chillin’ to the right of the home button before you move on.

Step 23

– Warm up that iOpener and give it a cozy hug to the right edge of your device for a solid two minutes.

Tools Used
  1. iOpeneriPad 7 Battery Replacement

Step 24

– Gently twist those two opening picks at the left corners of your iPad to give the digitizer a little lift, helping to break free the last bits of adhesive along the way. You’re doing great!

Step 25

– Gently lift the left edge of the digitizer to help loosen the adhesive along the right edge of your iPad. You’ve got this!

Step 26

– With the digitizer gently supported, carefully slide an opening pick between the display cables to loosen up the last bit of stubborn adhesive. Take it slow and steady, this part’s almost done!

Step 27

– After you’ve successfully separated all the adhesive, gently open the digitizer like a book and lay it flat alongside the iPad.

– When it’s time to put everything back together, don’t forget to tidy up any leftover adhesive on the frame and the digitizer (if you’re reusing it) using some isopropyl alcohol. For a snug fit, use our adhesive strips or pre-cut adhesive cards.

– Keep an eye on those display cables while you’re reassembling your device. Make sure they’re neatly tucked under the LCD screen to avoid any accidental damage. You’ve got this!

Step 28

– Grab your trusty Phillips screwdriver and get ready to unscrew those four 4.3 mm-long screws holding the LCD snug against the frame.

– As you work through this repair, keep an eye on those screws – they’re sneaky! Make sure they find their way back to their original homes to keep your device safe and sound.

– Don’t forget to peel away any tape that might be hiding those LCD screws. We want them to shine and be ready for action!

Step 29

– Grab a spudger and gently nudge the LCD out of its snug little home, just enough to get a good grip with your fingers.

– Now, flip that iPad LCD like you’re turning a page in a book. Lift it near the camera end and flip it over the home button side of the rear case.

– Place the LCD on a clean, soft, lint-free surface so you can access the display cables without a hitch.

Tools Used
  1. SpudgeriPad 7 Battery Replacement

Step 30

– Grab your trusty Phillips screwdriver and carefully unscrew the 2.3 mm screw that’s keeping the battery connector snug on the logic board. Easy peasy!

Step 31

Step 32

– Gently slide the battery blocker under the logic board’s battery connector at a cool 35-degree angle.

– Keep that battery blocker in place while you work your magic!

Tools Used
  1. Battery BlockeriPad 7 Battery Replacement

Step 33

– Grab your Phillips screwdriver and unscrew the three tiny 1.4 mm screws holding down the display cable bracket. Keep them safe!

Step 34

– Pop off that display cable bracket like it’s a lid on a soda!

Step 35

– Grab your trusty spudger and gently use the flat end to disconnect the LCD cable by lifting straight up on the press connector. Easy peasy!

– When it’s time to reattach those press connectors, just take your time. Start by aligning one side and give it a gentle press until you hear that satisfying click. Then do the same for the other side. Remember, no need to go pressing down in the middle; that could lead to trouble with bent pins. Stay cool and keep it aligned!

Tools Used
  1. SpudgeriPad 7 Battery Replacement

Step 36

– Carefully take out the LCD and place it face down on a clean, soft surface that won’t leave any lint behind. You’re doing great!

Step 37

– Grab a trusty pair of tweezers and carefully peel back the tape that’s guarding the home button cable ZIF connector. You’re doing great!

Tools Used
  1. TweezersiPad 7 Battery Replacement

Step 38

– Gently use the tip of a spudger, an opening tool, or even your fingernail to lift up the tiny, hinged locking flap on the home button cable ZIF connector.

Tools Used
  1. SpudgeriPad 7 Battery Replacement

Step 39

– Grab a pair of tweezers and gently wiggle the home button ribbon cable straight out of the ZIF connector like a pro.

Tools Used
  1. TweezersiPad 7 Battery Replacement

Step 40

– Grab that trusty spudger and gently pry up the two digitizer cables by lifting straight from the press connectors. You’ve got this!

Tools Used
  1. SpudgeriPad 7 Battery Replacement

Step 41

– Gently slide the flat end of your spudger under the vibration isolator located beneath the SIM card reader to lift it up.

– Carefully take out the vibration isolator.

Tools Used
  1. SpudgeriPad 7 Battery Replacement

Step 42

– Grab your trusty tweezers and gently lift the home button cable off the back of the rear case.

Tools Used
  1. TweezersiPad 7 Battery Replacement

Step 43

– Let’s kick things off by removing the front panel assembly!

– If your new display is feeling a bit quirky with ‘ghost’ or ‘phantom’ touches, don’t fret! Just add a super slim layer of insulating tape, like Kapton (polyimide) tape, to those highlighted spots on the back of the panel. Good news: replacement digitizers usually come with the right insulation, so you might not even need to add any tape!

– When you’re ready to put everything back together, make sure to clear away any leftover adhesive from the iPad. Grab some high concentration isopropyl alcohol (90% or higher) and a lint-free cloth to clean those glued areas up. This little prep work will get your iPad ready for some fresh adhesive and ensure it sticks like a champ!

– Before sealing everything up, test out your iPad’s functions and apply those pre-cut adhesive strips to the back of the display using our handy display adhesive application guide. You’re almost there!

Step 44

– Grab a SIM eject tool, a tiny screwdriver bit, or even a straightened paper clip and pop it into the little hole on the SIM card tray.

– Give it a firm press to make that tray pop out like magic.

Step 45

– Pop out the SIM card tray from your iPad like a pro!

Step 46

– Gently lift the LCD buffer tape off the upper component bracket—think of it as peeling a sticker, but with a bit more care!

Step 47

– Grab your Phillips screwdriver and carefully unscrew the five screws holding down the upper component bracket.

– There are three screws that are 1.4 mm long.

– And two screws that measure 1.9 mm long.

Step 48

– Grab your trusty spudger and use the sharp end to gently nudge the upper component bracket upwards until it’s ready for a friendly handshake with your fingers.

– Now, go ahead and remove that upper component bracket like a pro!

Tools Used
  1. SpudgeriPad 7 Battery Replacement

Step 49

– Grab your spudger and use the flat end to gently lift the front camera cable’s press connector. Just a little upward motion, and it should come right off. Easy peasy!

Tools Used
  1. SpudgeriPad 7 Battery Replacement

Step 50

– Grab your trusty spudger and gently lift the front camera out from its cozy spot until you can comfortably hold it with your fingers.

– Now, use that same spudger to carefully peel away the adhesive foam pad from the front camera. Easy peasy!

Tools Used
  1. SpudgeriPad 7 Battery Replacement

Step 51

– Grab your tweezers and gently take hold of the front camera. Give it a little twist to thread the cable through its slot in the rear case.

– Now, carefully remove the front camera. You’re almost there!

Tools Used
  1. TweezersiPad 7 Battery Replacement

Step 52

– Grab the flat end of your trusty spudger and gently pry up the headphone jack connector by lifting it straight up—easy does it!

Tools Used
  1. SpudgeriPad 7 Battery Replacement

Step 53

– Grab your tweezers and gently lift the headphone jack off the logic board, then carefully fold the cable out of the way.

Tools Used
  1. TweezersiPad 7 Battery Replacement

Step 54

– Grab a Phillips screwdriver and unscrew the three tiny 1.4 mm screws holding the cellular antennas to the back case. Keep them safe!

Step 55

– Grab your trusty spudger and use the pointy end to gently pry up the right cellular antenna coaxial cable. Aim to go as close to the connector as you can—it’s like giving it a little nudge to say, ‘Hey, it’s time to disconnect!’

– Next up, let’s tackle the left antenna cable. Just disconnect it like a pro!

Tools Used
  1. SpudgeriPad 7 Battery Replacement

Step 56

– Gently lift the left cellular antenna coaxial cable away from the back case, like peeling off a sticker but way cooler.

Step 57

– Grab the flat end of your trusty spudger and gently lift straight up on each cellular antenna’s press connector to unplug them – easy does it!

Tools Used
  1. SpudgeriPad 7 Battery Replacement

Step 58

– Grab your trusty spudger and gently lift up the rear camera’s press connector using the flat end. Easy does it—no need to force anything!

Tools Used
  1. SpudgeriPad 7 Battery Replacement

Step 59

– Grab the flat end of your spudger and gently lift the microphone assembly connector straight up to unplug it. Easy does it!

Tools Used
  1. SpudgeriPad 7 Battery Replacement

Step 60

– Gently remove any tape that’s covering the ZIF connector for the button control cable. It’s a simple step, just make sure you’re careful not to rip it. Nice and easy!

Step 61

– Take your spudger, opening tool, or just your fingernail and gently lift up the tiny, hinged locking flap on the button control cable ZIF connector. Be careful—it’s a small move, but crucial for the next step.

Tools Used
  1. SpudgeriPad 7 Battery Replacement

Step 62

– Grab those trusty tweezers and gently tug that button control cable straight out of the ZIF connector. You’ve got this!

Tools Used
  1. TweezersiPad 7 Battery Replacement

Step 63

– Gently peel away any tape that’s holding down the Smart Cover sensor cable ZIF connector. You’ve got this!

Step 64

– Grab your trusty spudger, an opening tool, or even your fingernail, and gently lift that little hinged locking flap on the Smart Cover sensor cable ZIF connector. You’ve got this!

Tools Used
  1. SpudgeriPad 7 Battery Replacement

Step 65

– Gently grab those tweezers and coax the Smart Cover sensor cable out of the ZIF connector with care, making sure to pull it straight out. You’ve got this!

Tools Used
  1. TweezersiPad 7 Battery Replacement

Step 66

– Gently lift the small, hinged locking flap on the SIM card reader cable ZIF connector using the tip of a spudger, an opening tool, or your fingernail. Just a little nudge and you’ll be good to go!

Tools Used
  1. SpudgeriPad 7 Battery Replacement

Step 67

– Grab your trusty tweezers and gently pull the SIM card reader cable straight out of that ZIF connector. You’ve got this!

Tools Used
  1. TweezersiPad 7 Battery Replacement

Step 68

– Take your spudger and gently slide the pointed end beneath the right antenna cable. Then, lift it straight up to disconnect it with ease.

Tools Used
  1. SpudgeriPad 7 Battery Replacement

Step 69

– Gently lift the right antenna cable upward.

Step 70

– Gently slide the pointed end of your spudger under the left antenna cable, then lift it straight up to disconnect it. Nice and easy!

Tools Used
  1. SpudgeriPad 7 Battery Replacement

Step 71

– Gently lift the left antenna cable off the rear case, following the bottom edge of the iPad.

Step 72

– Gently use the flat side of a spudger to lift the vibration isolator from the bottom left corner of the iPad.

– Carefully grab the vibration isolator with a pair of tweezers and remove it.

Tools Used
  1. SpudgeriPad 7 Battery Replacement
  2. TweezersiPad 7 Battery Replacement

Step 73

– Grab some tweezers or use your fingers to lift away the tape that’s keeping the speaker connectors under wraps.

Tools Used
  1. TweezersiPad 7 Battery Replacement

Step 74

– Gently nudge the small, hinged locking flap upward on both the left and right speaker cable ZIF connectors using the tip of a spudger, an opening tool, or even your trusty fingernail. You’ve got this!

Tools Used
  1. SpudgeriPad 7 Battery Replacement

Step 75

– Grab a pair of tweezers and gently pull the left and right speaker cables straight out from their ZIF connectors—nice and easy, no sudden moves!

Tools Used
  1. TweezersiPad 7 Battery Replacement

Step 76

– Grab your trusty spudger and use its pointed end to gently pry up the Smart Connector coaxial cable. Aim to get in close to the connector for the best leverage. You’ve got this!

Tools Used
  1. SpudgeriPad 7 Battery Replacement

Step 77

– Grab your tweezers and gently lift the Smart Connector cable connector straight up to unplug it—nice and easy does it!

Tools Used
  1. TweezersiPad 7 Battery Replacement

Step 78

– Grab a trusty pair of tweezers and gently lift the tape that’s holding those Smart Connector cables snug against the rear case. Easy peasy!

Tools Used
  1. TweezersiPad 7 Battery Replacement

Step 79

– Gently detach the Smart Connector cables from the back of the case.

Step 80

– Grab that iOpener and give it a warm-up! Place it on the bottom left corner of the back case for about thirty seconds to melt that sticky adhesive holding the SIM card reader in place.

Tools Used
  1. iOpeneriPad 7 Battery Replacement

Step 81

– Gently use an opening tool to lift the bottom edge of the SIM card reader with a nice, steady motion. You’ve got this!

Step 82

– Pop out the SIM card reader like a pro!

Step 83

– Grab your trusty Phillips screwdriver and take out the four 2.2 mm screws holding the charging port to the back case.

– Two screws measuring 2.2 mm long

– Two screws measuring 3.2 mm long

Step 84

– Warm up an iOpener and place it on the bottom, top, and logic board side of the iPad, holding each spot for about thirty seconds to get things nice and toasty.

Tools Used
  1. iOpeneriPad 7 Battery Replacement

Step 85

– Slide an opening pick under the charging port cable close to the logic board, then gently glide it toward the charging port to cut through the adhesive.

Step 86

– Slide an opening pick under the charging port cable right by the charging port, then gently glide it toward the logic board to slice through that stubborn adhesive.

Step 87

– Gently wiggle the charging port free from its cozy spot in the back case.

Step 88

– Slide an opening pick under the upper arm of the logic board and carefully glide it toward the logic board to slice through the adhesive holding it to the rear case.

– Keep that opening pick in place to stop the adhesive from sticking back together.

Step 89

– Take off the battery blocker to get things moving.

Tools Used
  1. Battery BlockeriPad 7 Battery Replacement

Step 90

– Gently slide an opening tool down near the bottom of the logic board and carefully lift it up with a steady hand to separate it from the rear case. You’re doing great, keep it steady!

Step 91

– Gently slide an opening tool near the center of the logic board and carefully pry upward with a slow, steady motion to lift it away from the rear case.

Step 92

– Carefully slide an opening tool near the top edge of the logic board, then gently pry upward with a slow and steady motion to lift it away from the rear case.

Step 93

– Slide an opening tool under the center of the logic board and gently pry upward until you can grab it with your fingers.

Step 94

– Grab your halberd spudger or opening pick and carefully slice through any stubborn adhesive that’s still holding the logic board in place. It’s like cutting through a sticky spiderweb – just take your time and be gentle!

Step 95

– Take out the logic board with care.

– When putting everything back together, double-check that no ribbon cables are trapped under the logic board before you stick it down.

– If the original adhesive is too messed up to reuse, add some strips of Tesa tape to keep things snug during reassembly.

Step 96

– Grab a strip of painter’s tape or scotch tape, and cut it to fit the width of your iPad.

– Place the bottom edge of the tape strip onto the rear case, just above the speakers and bottom antennas.

– Now, press the top edge of the tape strip across the bottom components to make sure no cables get in the way of the battery removal.

Step 97

– Stick a strip of tape over the top components to keep everything secure.

Step 98

– Put on your trusty eye protection before diving in with that adhesive remover! Safety first, right?

– Leave those contact lenses out of the equation until you have your eye gear on—better safe than sorry!

– Your kit comes with protective gloves—so if the thought of skin irritation gives you pause, slip those gloves on now and feel worry-free!

Step 99

– Pop off the black rubber cap from your bottle of adhesive remover.

– Grab some scissors and snip off the sealed tip of the applicator.

Step 100

– Check out those red boxes! They highlight where the adhesive strips are, holding the battery snugly against the rear case. Time to get peeling!

Step 101

– Squeeze a couple of drops of adhesive remover or some strong isopropyl alcohol right along the left edge of the battery. Let’s get that sticky situation sorted out!

Step 102

– Drop a few squirts of adhesive remover or some high-strength isopropyl alcohol along the bottom edge of the battery. Give it a moment to work its magic.

Step 103

– Gently drip a few drops of adhesive remover or some strong isopropyl alcohol right between the two battery cells to loosen things up.

Step 104

– Squeeze a few drops of adhesive remover or some high-octane isopropyl alcohol along the right edge of the battery. Let’s get that stubborn adhesive to loosen up and say goodbye!

Step 105

– Gently drip a few drops of adhesive remover or some strong isopropyl alcohol along the top edge of the battery to loosen things up.

Step 106

– Slide a plastic card gently into the bottom right corner of the battery to get things moving.

Tools Used
  1. iOpeneriPad 7 Battery Replacement

Step 107

– Gently slide that plastic card under the right edge, aiming for the center like you’re giving your device a cozy little hug.

– Now, push the card as deep as it can go under the battery. You’re cutting through the adhesive, like a smooth ninja move.

– Carefully remove the plastic card and give yourself a little high five – you’ve got this!

Step 108

– Slide that plastic card gently underneath the battery connector and push it in as far as it will go.

– Keep that plastic card in place. It’s doing its job!

Step 109

– Gently slide another plastic card above the battery connector, pushing it in as far as you comfortably can. This is a delicate step, so take your time!

Step 110

– Gently slide the plastic card underneath the battery connector, then wiggle it under the bottom edge of the battery. No rush, take your time and let the card do its magic!

Step 111

– Gently slide the plastic card along the bottom edge of the battery to slice through the adhesive strip.

– When you get to the left corner of the bottom edge, push the plastic card in as far as it will go.

Step 112

– Gently lift the plastic card from above the battery connector and slide it under the top edge of the battery.

– Carefully glide the plastic card along the battery’s top edge to slice through the adhesive strip.

Tools Used
  1. iOpeneriPad 7 Battery Replacement

Step 113

– When you hit the left corner of the top edge, slide that plastic card in as far as it will go. You’ve got this!

Step 114

– Slide your plastic card under the upper left corner of the battery like a pro.

– Gently glide the card down towards the bottom edge of the iPad.

– When you hit the middle edge of the battery, push the card in as far as it goes to slice through that stubborn central adhesive strip.

Step 115

– Slide a plastic card under the bottom left corner of the battery like a smooth ninja move.

– Gently glide the plastic card upwards toward the top of the iPad to loosen things up.

Step 116

– As you approach the middle edge, slide that trusty plastic card in as deep as it will go to slice through the adhesive strip like a pro.

Step 117

– Put your device back together by going through these steps backwards.

– To keep things running smoothly, don’t forget to calibrate your new battery once you’re done.

– When it’s time to say goodbye to old parts, recycle them at an R2 or e-Stewards certified facility.

– If things didn’t quite go as expected, try some basic troubleshooting or swing by our iPad 7 Answers community for tips. And remember, if you hit a wall, you can always schedule a repair.

Success!
Put your device back together by following these steps in reverse.
For the best results, make sure to calibrate your new battery once you’re done.
Remember to recycle your old electronics responsibly at an R2 or e-Stewards certified facility.
If things didn’t go quite as planned, try some simple troubleshooting or reach out to our iPad 7 Answers community for support.

Kindle Touch Speaker Replacement

Duration: 45 minutes
Steps: 10 Steps

Get ready to rock your device with brand new speakers! This guide will walk you through the steps to swap them out like a pro. Let’s dive in and make some sweet sounds happen!

Step 1

– Grab your trusty plastic opening tool and gently pop loose the six plastic clips holding the bottom edge of the Kindle’s back panel in place.

Step 2

– Slide the back panel down toward the charging port to pop loose the clips at the top.

– Once those top clips give way, carefully lift the back panel off.

Step 3

– Grab your Phillips #00 screwdriver and take out those five screws like a pro.

Step 4

– With a gentle nudge from the flat end of your trusty spudger, lift the battery out with care and set it aside. You’re doing great!

Tools Used
  1. SpudgerKindle Touch Speaker Replacement

Step 5

– Grab your trusty Phillips #00 screwdriver and carefully take out the six 4 mm screws holding the front plate in place.

Step 6

– Gently wedge the plastic opening tool under the bezel along the top and sides to pop it loose.

Step 7

– Grab your trusty Phillips #00 screwdriver and let’s tackle those screws like pros!

– We’ve got three different pairs of screws to keep things interesting! The screws in the top corners are 4 mm #00 Phillips screws, the ones in the bottom corners are 2 mm #00 Phillips screws, and the black screws at the bottom center? They’re 6 mm #00 Phillips screws. Keep them sorted and we’re golden!

Step 8

– Now that the screws are out of the way, carefully lift the case off the internals like a pro!

Step 9

– Grab your trusty Spudger and use the sharp end to gently pry the Speaker’s connector away from the motherboard on both sides. It’s like giving it a little nudge to say, ‘Hey there, let’s get you disconnected!’

Tools Used
  1. SpudgerKindle Touch Speaker Replacement

Step 10

– The speakers are stuck down with just some contact adhesive, so gently slide your Spudger under them to pop them off the support board.

Tools Used
  1. SpudgerKindle Touch Speaker Replacement

Success!
Time to put your device back together! Just retrace your steps and follow these instructions in reverse. Easy peasy! If you find yourself in a pickle, don’t hesitate to schedule a repair for some expert help.

Kindle 3 Screen Replacement

Duration: 45 minutes
Steps: 8 Steps

Ready to give your Kindle 3 a makeover? This guide will help you swap out that cracked, scratched, or underperforming display (screen) with a shiny new one. Let’s get started on this fun repair journey together!

Step 1

– Flip the device over and gently wedge a pry tool between the two halves of the case.

– Carefully run the pry tool along the case edge to pop loose all 18 clips. Don’t go too deep with your tool—there’s sensitive stuff near the edges you don’t want to mess with. FYI, the clip above the power button is a bit of a heavyweight compared to the others.

– Lift off the back cover. The last two clips near the center are pretty stubborn, but since they all face the same way, don’t just yank upwards. Instead, slide the cover slightly toward the top of the device to free them.

– When putting the back cover back on, start by sliding the bottom edge into place, then press up the sides and along the top until you hear all those clips click back in.

Step 2

– Remove the two 4 mm Phillips screws holding the battery connector in place.

– Keep those screws safe! They’re tiny and can easily get lost, plus there are sensitive parts nearby that could cause a short circuit if they get in the wrong spot.

Step 3

– Start by gently lifting the battery out of its housing, beginning from the end where the screws are holding it in place.

– Be cautious of the oddly shaped silver washers hiding under the battery connector (check out the second photo for a closer look). They’re essential for the electrical contacts to line up correctly when you tighten the screws again.

– When you’re putting the battery back in, make sure those washers are back in place. Hold the battery at an angle (as shown in the first photo) and slide the bottom retaining tabs into their slots. Once it’s in, rotate the battery into position and secure the connector with the screws.

Step 4

– Unscrew those six shiny Phillips screws from the indicated spots and let’s get this repair party started!

Step 5

– Gently lift the display connector straight up from its socket on the motherboard to unplug it. You’re doing great!

Step 6

– Let’s tackle this together! First up, grab your trusty Phillips screwdriver and remove those eleven smaller, gray screws from the specified locations. You’ve got this!

Step 7

– With a gentle touch, grab the top edge and slide the whole motherboard and midframe assembly gracefully away from the bottom edge of the Kindle. Take your time and remove it with care, like you’re unveiling a surprise gift!

Step 8

– Carefully remove the cracked screen from its housing. Take it slow and steady!

– The old adhesive should work just fine for sticking the new screen in place.

– This model actually has a couple of screen versions: TED060SCE(LF)T1-0I and ED060SC7(LF)C1. Peek at the sticker on your current screen to ensure the replacement is a match.

– Now, gently press the new screen from the edges toward the center. Go easy on the frame—it’s delicate!

Success!
To put your device back together, simply retrace your steps but in reverse. You’ve got this! If you hit a snag along the way, feel free to schedule a repair for some expert assistance.

iPad 6 Teardown

Duration: 45 minutes
Steps: 11 Steps

Revealed at Apple’s latest education event, the new iPad seems less like a “hot new sequel” and more like a “revised edition paperback with snazzier illustrations.” With its upgraded processor and Pencil support, we can’t help but wonder—has Apple made any other sneaky changes? Let’s dive in and take a closer look with a teardown! Want to be the first to peek inside the latest gadgets? Follow us on Facebook, Instagram, or Twitter for all the juicy repair news. And for those who love to stay updated, don’t forget to check out our newsletter!

Step 1

– Hey everyone, meet the new kid on the block: iPad 6! Let’s hear what it’s all about:

– Powered by Apple’s A10 Fusion chip with a built-in M10 motion coprocessor for smooth performance

– Features a 9.7-inch Retina display with a sharp 2048 × 1536 resolution (264 ppi) and a non-laminated screen assembly

– Comes with either 32 GB or 128 GB of storage options

– Equipped with an 8-megapixel rear iSight camera shooting 1080p video, plus a 1.2-megapixel front FaceTime HD camera at 720p

– Supports dual-band 802.11a/b/g/n/ac Wi-Fi with MIMO and Bluetooth 4.2 connectivity

– Includes Touch ID fingerprint sensor, 3-axis gyroscope, accelerometer, barometer, and ambient light sensor

– Compatible with Apple Pencil for creative and precise input

Step 2

– In the realm of education, Apple faces tough rivals with budget-friendly laptops. So, how does this iPad hold up against those Chromebooks from HP or Asus?

– Considering that kids can be a bit tough on their gadgets, here’s our take on the situation:

– New iPad, new model number! This year’s superstar is A1893.

– The iPad’s glued-glass display is a bit more prone to accidents. But hey, this iPad comes with an air-gapped digitizer panel—it’s not as dazzling as some of the newer iPads, but it makes replacing cracked glass a breeze since it isn’t LOCA-bonded to the display panel beneath.

– Additional accessories like the keyboard and Pencil can add to the expense and are easier to misplace—but the silver lining is they are also simpler to replace if they go missing (like that missing key on our HP’s keyboard!).

Step 3

– Once again, Creative Electron does their magic with X-rays, giving us a chance to take a peek inside the iPad—no magic wands required.

– As anticipated, there are only a few minor tweaks compared to the previous model.

Step 4

– We’ve done this dance before, so here’s the play: heat things up with the iOpener, then use the suction cup and opening tool to gently pry things apart—easy does it!

– Like clockwork, the digitizer panel lifts right off from the display, which is always a good sign when you’re diving into repairs.

Tools Used
  1. iOpeneriPad 6 Teardown

Step 5

– We’re all about giving you extra bang for your buck, so this teardown doubles up: a look inside the new iPad, plus a sneak peek at what Salvation Repair has coming next!

– Once we’ve loosened a few Phillips screws, it’s time to lift the LCD panel and unplug it from the logic board.

– Safety first! Before moving on, we slide a battery blocker between the battery and logic board to prevent any electrical mischief during the teardown.

Tools Used
  1. Battery BlockeriPad 6 Teardown

Step 6

– Now that the display is out of the way, it’s time to carefully unplug the digitizer.

– The digitizer has two cables just like before, but they have a slightly different look compared to last year’s model.

– Check out what we uncovered under a protective shield! It’s the same NXP 8461A1 Touch ID chip we spotted in the previous version.

– Maybe they’ve tweaked it a bit to work with Pencil compatibility?

Step 7

– The logic board is stuck tight to the case with some seriously strong adhesive, so let’s bring in some liquid muscle to loosen things up!

– Boom! The stubborn adhesive lets go quickly, and the board comes out in one clean piece.

– Heads up: the Lightning connector is part of that board, and it’s a high-traffic component that tends to fail before the rest. Replacing this port requires some solid microsoldering skills.

– If this step feels overwhelming, you can always schedule a repair.

Step 8

– While we haven’t spotted any groundbreaking updates just yet, Apple might have hidden a few surprises on the logic board:

– We’ve got the Apple A10 Fusion APL1W24 SoC (also rocking the iPhone 7) paired with 2 GB of Micron MT53B256M64D2TP-062 L XT:C LPDDR4 SDRAM tucked away below.

– Check out the Apple 343500203-A0, which is probably a PMIC and might even be a new version of the iPad 5’s 343S001441-A0.

– You’ll find 2x Broadcom BCM15900B0 touch screen controllers hanging out in the 10.5″ and 12.9″ iPad Pro.

– Oh, and there’s likely an NXP Semiconductor display port multiplexer in the mix.

– Don’t forget the Bosch Sensortec pressure sensor keeping an eye on things.

– And last but not least, an Invensense accelerometer to ensure all your movements are tracked accurately!

Step 9

– Alright, folks! Here’s part two of our open-book, open-notes chip ID test:

– Did we find any sneaky extra credit chips on the backside? Nope, we took a good look!

– Check out this Toshiba TSB3236LX3536TWNB1 with 32 GB of flash memory.

– We’ve got the USI 339S00448 Wi-Fi/Bluetooth module making sure you’re connected.

– Say hello to the NXP 80V18 PN80V NFC controller—it’s here to help with your contactless needs.

– Next up is the Cirrus Logic CS42L83A low power audio codec, bringing your sound to life.

– And there’s a Cirrus Logic audio amplifier (most likely) adding some extra oomph.

– Last but not least, we have a Maxim Integrated MAX98357B class AB audio amplifier x4, because why not have a little extra power?

Step 10

– Apple sticks with the same trusty battery from the iPad 5—model number A1484 with a solid 32.9 Wh capacity.

– Unfortunately, they also brought along the same repair-hindering adhesive from the iPad 5. Not ideal, but here we are.

– On the bright side, replacement batteries are already available. And if you’re managing a fleet of iPads, you’ll only need to stock one part that works across multiple models. (That’s if you can manage to get the original batteries out, of course.)

– Apple once teased us with a glimpse of easy iPad battery removal, but we haven’t seen anything like that since. Here’s hoping!

Step 11

– That’s a wrap! Thanks for following along with this teardown. Time to kick back and enjoy a well-earned break!

– Want to keep a piece of this teardown with you? Check out our cool internals wallpaper and the X-ray wallpaper!

– All content here is shared under the Creative Commons BY-NC-SA 3.0 license.

Success!

🍪
Have a cookie! This site uses cookies to enhance your experience. Opt-Out Options.