Azpen A909 Microphone Replacement
Duration: 45 minutes
Steps: 6 Steps
Step 1

– First, grab a Phillips #00 screwdriver and unscrew the two 1.4 mm screws holding the top of the device—you’re off to a great start!
Step 2

– Next, use a plastic opening tool or a similar instrument to carefully loosen all the anchoring points and gently pry the cover off. Be sure to check out the image, where two of these points are circled for your reference. Remember to be gentle and avoid bending or pivoting too much, as this could cause the anchoring points to break. Take your time and work your way around the cover until it comes off smoothly.
Step 3

– Once you’ve popped open all the anchor points, the cover will come right off the tablet—easy peasy!
– When you’re ready to put the cover back on, just snap it into place and screw in those two screws. Oh, and don’t forget—since the speaker isn’t fully secured inside the tablet, make sure it’s lined up to fit perfectly into the speaker mount on the cover. You’ve got this!
Step 4

Alright, it’s time to dive into the world of soldering! Grab your trusty soldering iron, some solder, and a desoldering wick, and let’s get to work!
– Never soldered before? No worries! There are plenty of online guides to help you get the hang of it. We recommend brushing up on your soldering skills before diving in.
– Give your soldering iron some TLC! Melt a little solder on the tip and then wipe it clean on a damp sponge to keep it in top shape.
Tools Used

Step 5

Just getting into soldering? No worries! Check out our handy guide on soldering and desoldering for some useful tips and tricks.
– Lay the desoldering wick gently over the solder ball, like you’re giving it a cozy blanket.
– Press the soldering iron against the wick until the solder melts into it—watch the magic happen!
– Follow the same routine for any other connectors that need a makeover.
– Carefully tug the desoldered wires off the circuit board. They should slide off effortlessly. If they play hard to get, just remove more solder from the contact points with the wick!
Tools Used
Step 6
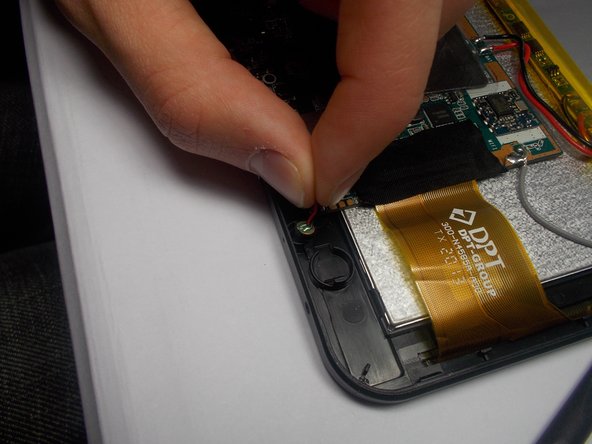
– Grab those wires and gently tug the microphone out of its mounting point. It might take a bit of elbow grease, but don’t worry, you got this!
Success!