Beats Studio First Generation Headphone Jack Replacement
Duration: 45 minutes
Steps: 12 Steps
Dive into this guide to uncover the headphone jack and check those soldered connections. If you’re planning to tackle this repair, you’ve likely spotted the headphone jack as the culprit behind the problem (or maybe you’re just itching to peek inside your Beats Studios and see what makes them tick).
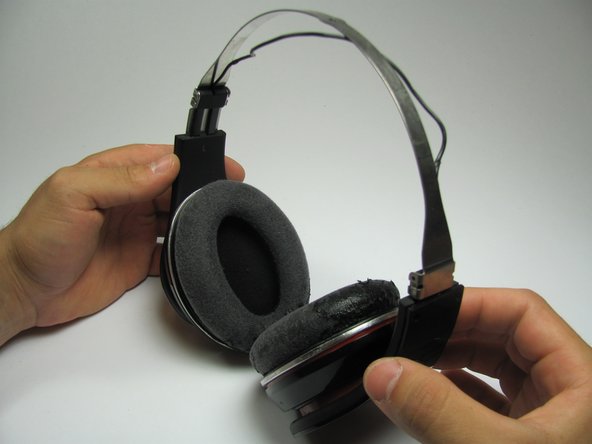
Step 1

– Grab your trusty T5 Torx screwdriver and unscrew those sleek black screws from both sides of the headband. Easy-peasy!
– There are 4 screws total (2 per side), Torx type T5, each 3.5mm long. Keep ’em handy!
Tools Used

Step 2


– Grab your trusty plastic opening tool and gently nudge the black plastic hinge piece away from the headband. Just a little wiggle should do the trick!
Step 3

Heads up! The hinge pins might make a break for it when you remove the black hinge piece from the last step. Keep an eye out and don’t let them escape!
– Start by popping off those small metal hinges from their snug homes. You’ll find 4 in total, with two on each side of the headphones. Easy peasy, just be gentle and they’ll come right off.
Step 4

– Grab your trusty T5 Torx screwdriver and let’s tackle those shiny silver screws on the silver part of the headband. It’s time to show them who’s boss!
– You’ll need 4 Torx type T5 screws, each 4.0mm long (that’s 2 for each side).
Tools Used
Step 5


– Grab that trusty plastic opening tool and gently ease the headband cushion away from the plastic part of the headband—nice and easy, just like peeling a sticker. Once you’ve got a little bit of wiggle room, slide the tool sideways along the headband to loosen things up. Repeat this smooth move on both sides until the cushion pops free from the top plastic section of the headband. Boom, you’re all set!
Step 6


The black wire linking the two speakers can be a bit delicate—handle it with care! If it looks worn or frayed, no worries—grab some electrical tape, splice it, or replace it to keep things sounding sweet.
– Gently pop off the metal band from each of the hinge housings on both sides. These should come off without much fuss, as long as you’ve already taken care of those hinges back in step 3. Smooth moves!
– Alright, you’ve done it! The headband is now history! This opens up access to the speakers in case you’re feeling adventurous and want to dive deeper into your headphone’s inner workings.
Step 7


Take it easy when you’re peeling off the ear cushion—it’s held on by some delicate material that can tear if you’re not gentle!
Inside the cushion, there’s a slim piece of foam that might just pop out when you remove it. Hang on to that for reassembly!
– Grab that ear cushion gently between your thumb and forefinger, like you’re about to pinch a tiny cloud.
– With care, tug the cushion straight off the earpiece—no twisting needed!
– Do the same thing for the other ear cushion, and you’re golden!
Step 8


Now it’s time to put everything back together! When reassembling, the black ring won’t snap back into the speaker the same way it came out. Instead, it needs to tuck inside the black lip on the back of the ear cushion. Take a peek at the last two pictures in this step to get a visual – it’s a bit tricky, but you’ve got this!
– Pop off that black ring from the speaker using the trusty plastic opening tool. Once that’s out, you’re all set to tackle those screws holding the metal ring in place!
– Way to go! You’ve unlocked access to the rest of the speaker—nice work!
– Flip over the ear cushion to find the black lip chilling on the backside. Easy-peasy!
Step 9

– Grab your trusty 00 Phillips head screwdriver and carefully remove the screws holding down the metal ring – you’ll need to take out 7 of them, each 3.9mm long.
– Set the metal ring aside safely, you’re making great progress!
– Take a moment to double-check you’ve removed all the screws, and then you’re ready to move on to the next step.
Step 10

– Grab your trusty 0 Phillips head screwdriver and let’s tackle those 3 screws that are keeping the red speaker assembly in place. You’re almost there!
– You’ll need 3 of those Phillips type 0 screws, each measuring 8.0mm long.
Step 11

– Time to get started! Use a trusty 00 screwdriver to carefully remove the screw that’s holding down the headphone jack PCB board. Easy does it!
– You’ll need a 1 Phillips type 00 screw that’s 5.0mm long – just the right size for the job. Let’s get that screw out and move on to the next step!
Step 12


– Grab your trusty plastic opening tool and gently nudge the headphone jack and board up and out like a pro. Take your time—no rush here!
– Give those wires a once-over and make sure they’re all snugly connected. Keep an eye out for any frays or shorts trying to ruin the party.
– If the situation calls for it, you can de-solder the board and swap it out with a fresh jack and board assembly. No sweat—you’re doing great!
Success!