
BlackBerry 7510 Back Face of Phone Replacement
Duration: 45 minutes
Steps: 5 Steps
Step 1

Start by removing the battery cover and taking out the battery. This step is important to safely proceed with the repair and avoid any electrical mishaps. Once that’s done, you’re ready to move on to the next step. If you need assistance at any point, remember you can always schedule a repair.
– Start by unscrewing the six T6 Torx screws on the back of your phone. Keep these screws safe—you’ll need them later, so make sure they don’t go missing.
Step 2

– Gently lift the back cover using your fingernail or a spudger, taking care not to damage anything.
– Start at one edge and slowly work your way around the device, prying up the back cover bit by bit until it’s free.
Step 3

– Carefully lift off the back cover to access the internal components. If you need assistance along the way, you can always schedule a repair.
Step 4

– Grab your T6 screwdriver and take out those two screws. Easy does it!
Step 5

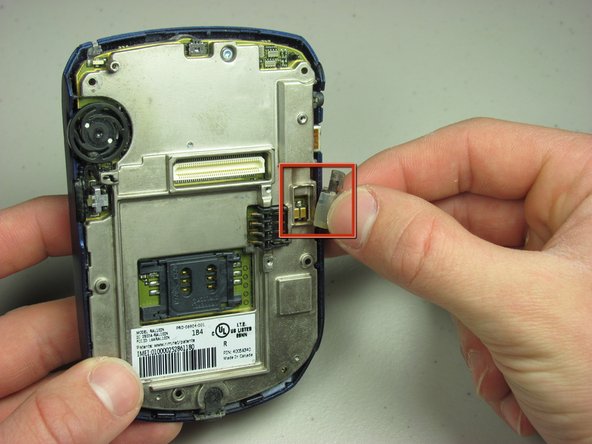
– Let’s get that daughterboard out of there!
– Time to say goodbye to the exposed vibration motor!
Success!