
BlackBerry Curve 8900 Microphone Replacement
Duration: 45 minutes
Steps: 10 Steps
Got microphone troubles with your BlackBerry Curve 8900? No worries! This guide is here to walk you through swapping out that tiny mic and bringing back crystal-clear calls and voice recordings. The microphone is key for smooth communication, and when it acts up, it can be super frustrating. Luckily, replacing it is pretty straightforward and doesn’t require any fancy soldering skills. We’ve got step-by-step instructions and visuals to help you nail the job. Just follow the steps carefully, work in an ESD-safe zone, and you’ll have your device sounding great again in no time. If you hit a really tricky part, remember, you can always schedule a repair to get professional help. Let’s get your BlackBerry back to its best audio performance!
Step 1

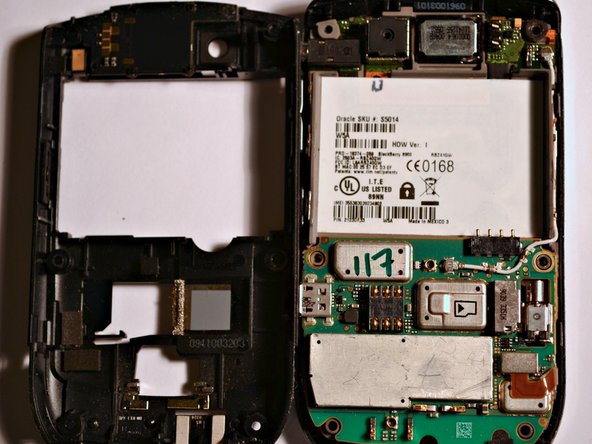
Take a look at the battery hanging out on the right side of the image – it’s the ‘BlackBerry D-X18’.
– Grip the back cover with your fingers and slide it off like you’re opening a secret snack compartment.
– Lift the battery out with a gentle tug—no wrestling required.
Step 2

– Grab your trusty opening tool and gently pop off that lower rear cover like a pro!
Tools Used

Step 3

– Grab your trusty T6 Torx screwdriver and let’s tackle those six screws!
Tools Used

Step 4

– Grab the iFixit Opening Tool or your fingers and gently pry off the midframe of the phone. Take your time and be careful not to force anything. If you need help, you can always schedule a repair.
Tools Used
Step 5

– Gently make your way around the case, easing the back off those plastic tabs until the motherboard is ready to come out. Take your time and stay chill—slow and steady wins this race!
Step 6

– Gently lift the screen with your fingers, taking care to avoid any accidental damage.
Step 7
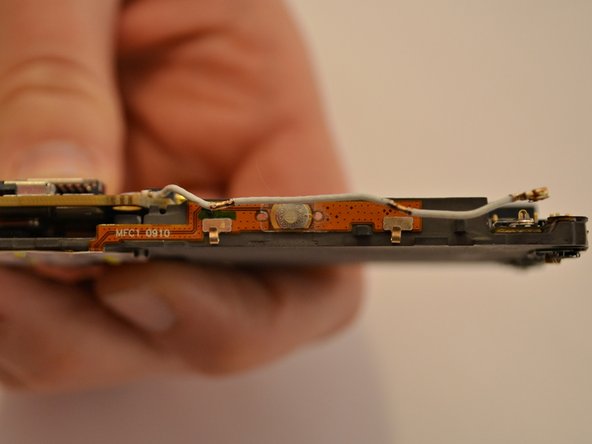

– Gently lift the antenna cable with your fingers, making sure to unhook it carefully from all three spots. Take your time—patience is key! If you need help, you can always schedule a repair.
Step 8

– Gently lift the ribbon cable on the front of the motherboard using the Spudger tool. If you need help, you can always schedule a repair.
Step 9

– Gently remove the motherboard by disconnecting both ribbon connections.
– Look for the ribbon connections highlighted by red circles in the photo.
– Check out the orange rectangles in the photo to find the other ribbon connections.
Step 10


– To get that microphone back in action, you’ll need to swap out the whole motherboard. It’s a bit of a task, but you’ve got this!
Success!