BlackBerry Z10 Teardown
Duration: 45 minutes
Steps: 14 Steps
Spring is here, and things are blooming—including BlackBerrys! The BlackBerry Z10 is the latest from the company, and we’re ready to take a look inside to see what makes it tick. Let’s dig in and explore the guts of this fresh smartphone together, step by step. If you find yourself stuck at any point, you can always schedule a repair.
Step 1


– The BlackBerry Z10 has officially landed! As BlackBerry’s first dual-core smartphone, let’s dive into the specs and see how it measures up.
– Tech Specs:
– 4.2-inch display, with a sharp 1280×768 resolution (~356 ppi pixel density). You’ll get a crisp view no matter what you’re doing.
– Dual-band Wi-Fi (2.4 GHz / 5 GHz) 802.11 a/b/g/n plus Bluetooth 4.0 Low Energy (LE). Stay connected without the lag.
– 8 MP rear camera with autofocus, a 5-element f/2.2 lens (1080p HD Video) + LED flash, plus a 2 MP front camera (720p HD Video) for crystal clear selfies and video calls.
– Removable 1800 mAh battery that lasts up to 10 hours of talk time. Stay powered through the day without worrying about running out of juice.
– 2 GB of RAM, 16 GB of internal storage, and microSD card support for up to 32 GB of extra space. Plenty of room for your apps, photos, and music!
Step 2


– It’s nice to see a smartphone these days still rocking a removable battery. Gotta love the convenience!
– That said, BlackBerry does have a heads-up: they recommend not disassembling your phone, as you might come across some tiny parts that could be a choking hazard. Definitely something to keep in mind!
You can charge your phone and a spare battery simultaneously—double the power, double the fun. And about those food-themed device names—don’t worry, we’ve got a handy graphic to help you spot the edible ones and keep things straightforward on your tech journey. If you need a hand along the way, remember you can always schedule a repair.
Step 3


Having the headphone jack on the top of the phone is pretty handy. Kudos to the BlackBerry hardware design team for that smart placement. If you need help, you can always schedule a repair.
– On the left side of the BlackBerry Z10, you’ll notice two nifty ports:
– Up at the top, you’ll find the power button and the headphone jack, all ready for action.
– And that’s pretty much it for ports, folks!
– Micro USB 2.0 port (for charging up your device and syncing your data)
– Micro HDMI port (for connecting to any display with an HDMI input)
Step 4


To keep things neat and avoid a cable mess between the body and rear panel, the NFC antenna has two contact points that line up perfectly with spring contacts on the motherboard. Easy peasy! If you need help, you can always schedule a repair.
– To remove the rear case, just gently pry around the edges to pop out a few clips—it’s pretty straightforward. Keep at it, and you’ll be there in no time.
– Inside the rear panel, you’ll find the NFC antenna, similar to what’s used in the Samsung Nexus S. It’s integrated right into the case, so handle with care.
Step 5


We couldn’t just let the battery stay put, right? It felt a bit off. So we popped the battery in and took it back out again. What a satisfying moment!
– The 3.8 V, 1800 mAh Lithium-ion battery gives you up to 10 hours of talk time on 3G and up to 13 days on standby. Not bad, right?
– Curious how the BlackBerry Z10 holds up against the competition? Let’s dive in:
– Nexus 4: 3.8 V, 2100 mAh battery, with more than 10 hours of talk time.
– iPhone 5: 3.8 V, 1440 mAh with up to 8 hours of talk time on 3G. Pretty solid, but could do with a little more juice!
Step 6


– A bunch of screws hold the plastic midframe snugly to the outer plastic frame.
– Oh, nice try, BlackBerry! You got us once, but not again! If we have to, we’re ready to whip out our trusty spudger to peel back a sneaky sticker hiding a secret screw.
– Once those screws are out, the plastic midframe is ready to pop right off!
Tools Used

Step 7


– Surprise! It turns out the screws holding the plastic midframe to the outer case also serve as fasteners for the motherboard. With those screws out, the motherboard is only connected by a few cables. And the best part? There’s absolutely no adhesive sticking this motherboard down. That’s right—it’s completely free to move. If you need help, you can always schedule a repair.
Step 8

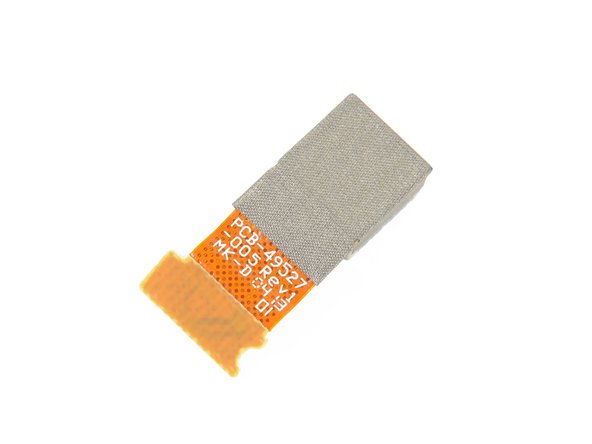
On the back of the rear camera, you’ll find the label PCB-49527-005. It’s your little identifier for this specific part. Keep an eye out for it while working!
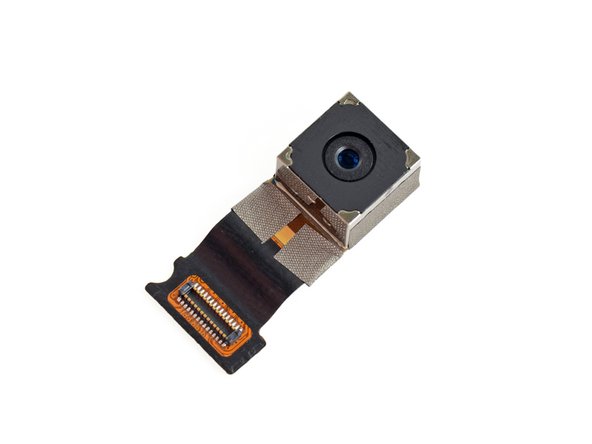
– The rear camera pops right off the motherboard—no fuss, no muss.
– Rocking an 8 megapixel sensor with auto-focus, a 5-element f/2.2 lens, a dedicated image signal processor, and a snappy 64 MB frame buffer, this camera’s ready for action.
– Thanks to its Backside Illumination sensor, low-light shots come out brighter and clearer, so your night photos don’t look like a shadowy mystery.
Step 9

– Let’s take a look at some of the key ICs hanging out on the backside of the motherboard:
– Samsung KLMAG2GE4A 16 GB MLC NAND Flash + Controller – the speedy storage superstar!
– Avago ACPM-7051 Quad-Band GSM/EDGE and Dual-Band UMTS (B1/B5) Power Amplifier – powering up your connectivity.
– Inside Secure SecuRead 972-DC-C6 NFC Solution Module – for those quick, tap-and-go moments.
– Qualcomm WCD9310 Audio Codec – bringing the tunes to life in your device.
– ST Microelectronics LIS3DH 3-axis MEMS Accelerometer – keeping track of all the motion.
– STMicroelectronics LSM330DLC 3D Accelerometer & 3D Gyroscope – ensuring your device knows its orientation.
Step 10

– Front side of the motherboard:
– Samsung K3PE0E000A XG 2 GB Mobile DDR2 SDRAM – it’s the muscle behind the memory. Fast and efficient, it gets the job done.
– Qualcomm MSM8960 Snapdragon S4 Baseband/Applications Processor – your multitasking sidekick, handling everything from calls to apps seamlessly.
– Qualcomm PM8921 Power Management IC – keeping the power in check so your device runs smoothly without a hiccup.
– Qualcomm RTR8600 Multi-band/mode RF transceiver – like the trusty postman, it ensures your signals get delivered across different bands, just like the one you’ll find in the Samsung Galaxy S III or iPhone 5.
– Texas Instruments WL1273L Wireless Module (802.11a/b/g/n, WLAN, Bluetooth, and FM) – all your wireless needs wrapped up in one neat package. Wi-Fi, Bluetooth, and FM radio? Check!
– TriQuint TQP6M9017 Dual-Band WLAN Module – ensuring your connection is fast and stable on both frequency bands.
– RF Micro Devices RF7252 Linear Power Amplifier Module – giving your device that extra boost to make sure your signal strength stays strong.
– Avago ACPM-5017 LTE Band XVII Power Amplifier – ensuring that your LTE signal is as powerful as it gets when you’re in Band XVII coverage.
Step 11

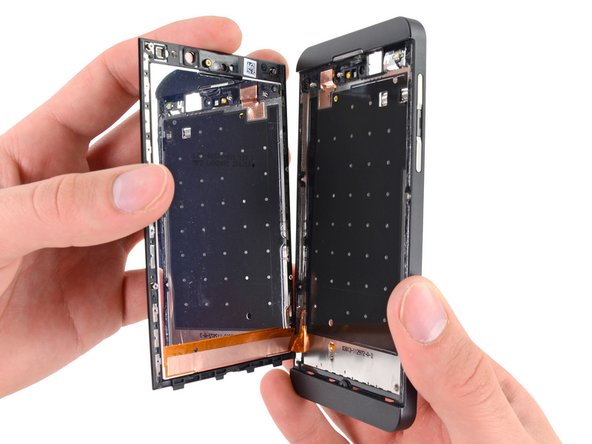

– Now that the motherboard is out of the way, it’s time to get to the display assembly. You’ll find it secured with a few small T2 Torx screws and some light adhesive strips—nothing our prying tools can’t handle. Carefully peel the display off the outer plastic frame to reveal a handy little pocket-mirror on the back of the LCD. Perfect for anyone who loves a quick reflection break while working on their device. If you need help at any point, you can always schedule a repair.
Step 12
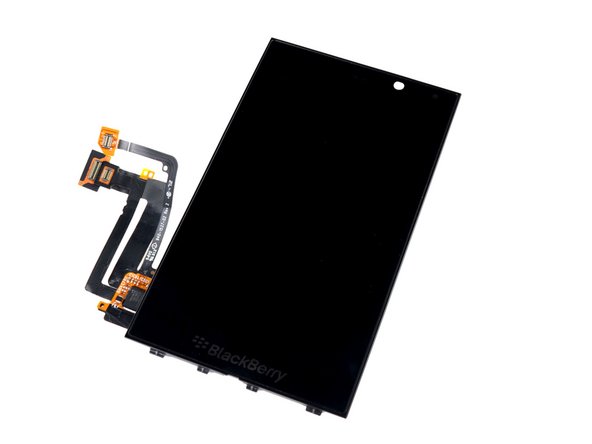


The display is super slim, thanks to some serious fusing skills. The digitizer gets glued directly onto the glass and then fused to the LCD, making for a sleek and sturdy screen assembly. If you need help, you can always schedule a repair.
– A quick heads-up: smashing the glass means losing all touchscreen functions. Dropping your device from ear-height onto concrete is a one-way ticket to disaster. The glass isn’t Gorilla Glass but a new, tougher kind of hardened display. The screen connects via three cables—probably for the LCD, digitizer, and backlight. The digitizer cable contains the Synaptics Clearpad 3203 Capacitive Touchscreen Controller, which handles all those fancy Z10 gestures. Proceed carefully, and if you need a hand, you can always schedule a repair.
Step 13


– Getting the big parts out of the BlackBerry Z10 is a breeze, but when you dive into those tiny case peripherals, things can get a bit tricky.
– The headphone jack, power switch, ambient light sensor, and earpiece speaker housing are all part of one sturdy assembly, stuck down with some tough adhesive.
– Time to employ our trusty spudger to battle against more adhesive, this time keeping that rotary vibrator motor firmly in its place.
Tools Used
Step 14


– BlackBerry Z10 Repairability Score: 8 out of 10 (10 means super easy)
– Swapping out the battery? No tools needed—just pop it out.
– Motherboard and screen slide right out with minimal fuss and barely any sticky stuff holding them in.
– All screws are the regular kind, nothing weird or hard to find.
– Heads up: The screen and glass are one piece, so swapping the display costs a bit more.
– Little things like the headphone jack and camera come off on their own, but they’re held down with some stubborn adhesive.
Success!