Bosch 36618 Drill Driver Teardown
Duration: 45 minutes
Steps: 10 Steps
Overview of how to take apart a Bosch 36618 cordless drill driver. I will be taking apart the drill and cleaning bits and pieces as I go. I am not fixing or repairing any particular part of the drill. I hope you find this guide helpful!
Step 1

– First things first—pop out the battery before diving into the disassembly. Safety first!
– Set up your workspace with a clean, flat surface, and make sure all the tools you’ll need are easy to grab. A little prep goes a long way!
Step 2

– Unscrew the 11 T10 Torx screws from the outer casing of the drill driver.
– The screw marked in orange is a bit tucked away, so it might be tricky to reach with certain T10 screwdrivers.
Step 3


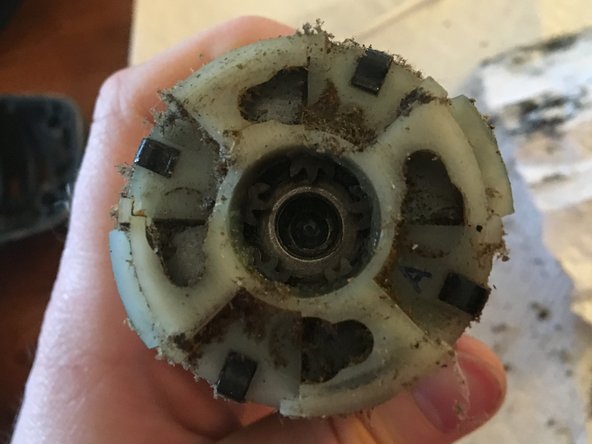
– Once you’ve unscrewed those 11 exterior screws, gently pull the plastic housing pieces apart.
– Whoa, check out all that dust near the motor! That’s definitely not helping anything run smoothly!
– The second picture gives you a close-up glimpse of the side packed with all those electronic goodies.
– No tabs or plastic flaps are holding these pieces together, so just pull straight up, and they should come apart without any hassle.
Step 4


– Lift the motor and chuck assembly right out, it’s as easy as pie!
– Time to disconnect those electrical connections! Don’t worry, they’re color-coded on the motor, so you won’t mix them up.
– All that’s left is the motor and chuck assembly (check out the third picture for a visual).
– To take off the chuck, grab a hex key. I didn’t go all the way with the disassembly, but you can if you want!
– Keep an eye out for the speed selector (first picture) as you pull the motor and chuck assembly away—it’s got a little slot that fits right in.
– The electrical connections are spade terminals with a sneaky locking piece on the non-flat side. Just push the lock back and gently pull the connector straight out.
Step 5


– Give the motor a clockwise twist to pop it out of the chuck assembly—like opening a tricky jar, but with more wires.
– Check out picture two: that’s the connection hanging out on the chuck assembly side.
– Picture three zooms in on the connection spot for the motor side.
– The two red boxes in the first picture? That’s exactly where the split magic happens.
Step 6

– Pop off the black plate covering the motor by unscrewing the two T15 Torx screws. Easy does it!
– Putting the gear (you’ll spot it on the left) back into the chuck assembly can be a bit of a dance—don’t rush it, and keep it chill.
Step 7

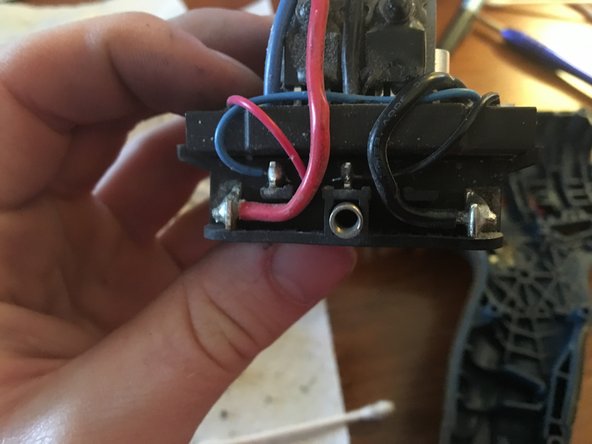
– Here are some closeups of a few electrical connections.
– Picture 1: connections to the trigger assembly.
– Picture 2: connections on the rear of the battery receptacle.
Step 8


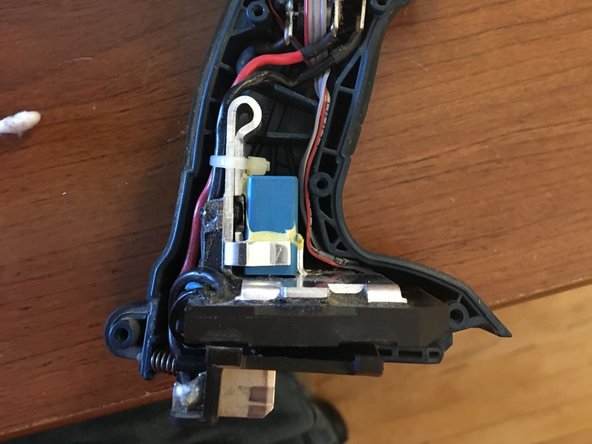
– Picture 1: A close-up shot of the forward, reverse, and lockout assembly. Take a good look, it’s the star of the show!
– Picture 2: Watch out for that sneaky spring hiding behind the battery receptacle – it has a habit of jumping out when you least expect it!
Step 9

– Got a little hiccup with your device? No worries, you’re about to become a pro at fixing it! Follow these easy steps, stay calm, and you’ll have it back in action in no time. And hey, if you run into any trouble, feel free to schedule a repair and let the experts lend a hand!
Step 10


– You’re all set to tackle that repair like a pro! If you find yourself needing a helping hand, don’t hesitate to schedule a repair.
Success!