Campbell Hausfeld FP204800 Manifold Assembly Replacement
Duration: 45 minutes
Steps: 12 Steps
To get the manifold assembly out, you’re going to be taking apart most of the compressor—but don’t stress! There are just a handful of main parts between you and the manifold. This step-by-step guide keeps things clear and simple, so you’ll be on track the whole way.
Step 1


– Grab your 6mm Allen Wrench and remove the four shroud screws—each one’s about 1cm long.
Step 2


Go easy when moving the shroud away from the compressor—yanking it can mess up the on/off switch wiring.
– Time to take off the plastic shroud from the compressor! A simple pull will do the trick – no need for any extra muscle here.
Step 3

Make sure you’re grabbing the right wire. The pressure switch on your compressor might be set up a little differently than what you see in the picture, so double-check before you pull anything!
– Carefully unplug the wire that’s connecting the pressure switch to the on/off switch.
– It should slide right off the pressure switch without any trouble.
Step 4

This wire is the last thing keeping the shroud from being lifted off the compressor. So, take care of it before you move on!
– Carefully detach the wire connecting the on/off switch to the compressor motor. Take it slow and steady—no need to rush!
Step 5
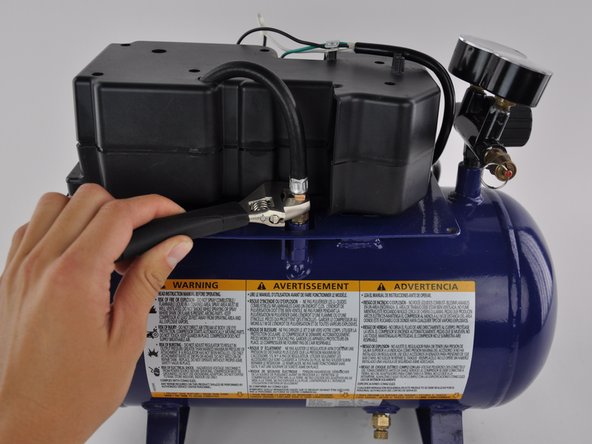
No need to worry about removing the check valve! Just focus on detaching the exhaust tube.
– Grab your trusty smart wrench and twist off that exhaust tube from the check valve. You’ve got this!
Step 6

– Grab your Phillips #2 screwdriver and loosen those six 1.75cm screws holding the Pump/Motor Assembly Shroud—easy peasy!
– Next, unscrew the 1cm screw that’s keeping the wires snug against the pump/motor assembly shroud—just a quick twist and you’re good to go.
Tools Used

Step 7

Gently lift off the pump/motor shroud so you don’t accidentally smack the exhaust tube—treat it like a fragile breadstick!
– Lift off the pump/motor assembly shroud from the compressor—just pick it up and set it aside.
Step 8
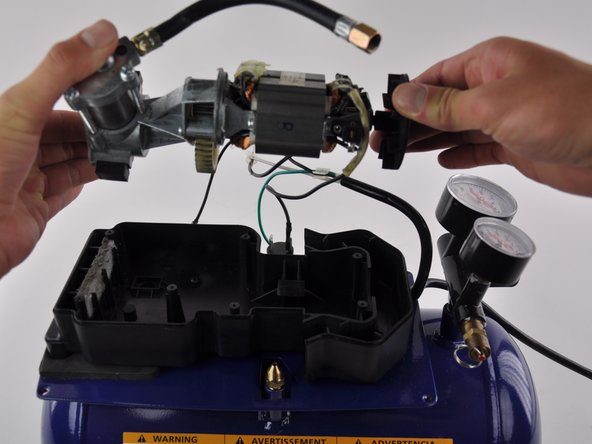

Be careful not to yank any wires while working on the motor, as they could get damaged during the repair process. Take it slow, and if anything feels tricky, don’t hesitate to schedule a repair.
– Carefully lift the pump and motor assembly out of the shroud—nice and easy does it.
– Disconnect the wire linking the motor to the pressure switch by giving it a gentle wiggle and pull from the pressure switch terminal.
– Place the pump and motor assembly on your work surface next to the compressor, like you’re parking it in its favorite spot.
Step 9

– Grab your Phillips #2 screwdriver and carefully unscrew the four 1.5cm screws. Take your time, no rush here!
Tools Used
Step 10

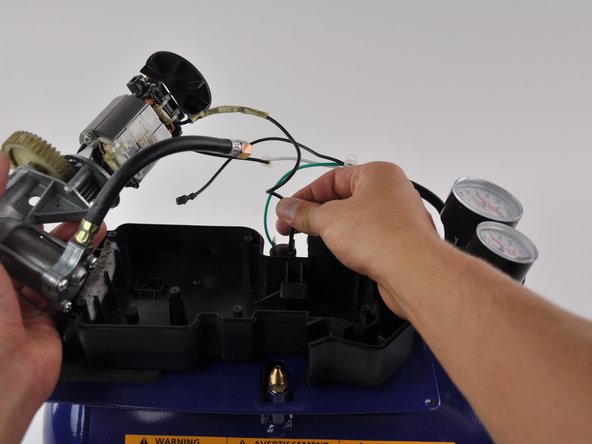
– Gently lift the bottom of the Pump/Motor Assembly Shroud away from the compressor, and voilà! You’re on your way.
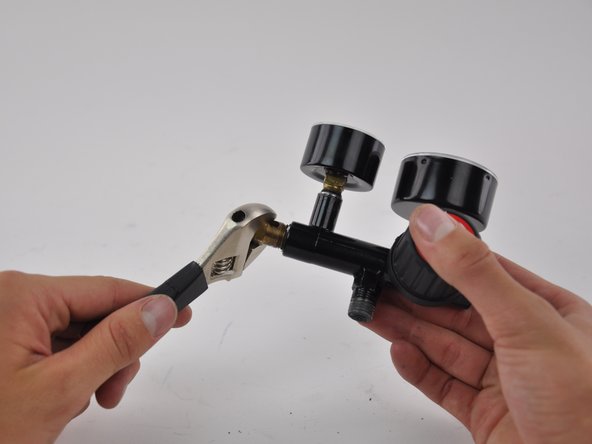
Step 11
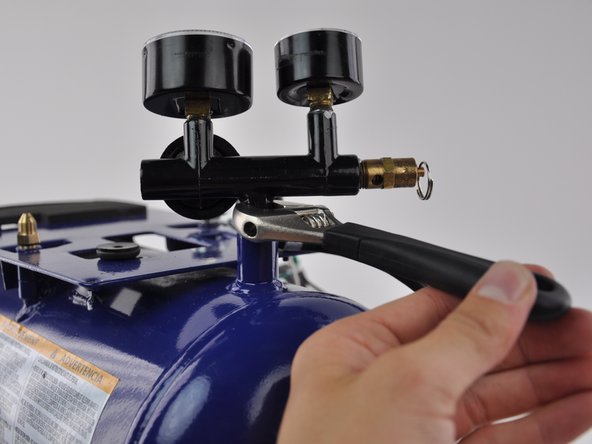

– Grab that manifold stem with your trusty smart wrench and give it a twist to the left—counter-clockwise, that is! Off comes the manifold assembly, and you’re one step closer to your repair goal!
Step 12

– Grab your Smart Wrench and twist both the Pressure Gauges and the Safety Valve to the left (that’s counter-clockwise) until they come off. Nice and easy does it!
Success!