Contixo V8 Headphone Jack Replacement
Duration: 45 minutes
Steps: 4 Steps
If your headphones are giving you trouble with your Contixo V8 (model number V8X), let’s troubleshoot before jumping to replace the headphone jack. If you’ve zeroed in on the jack as the culprit, you’re in the right place for replacing it! Gather your tools: you’ll need two plastic opening tools, a Phillips size #000 screwdriver, and a soldering iron or gun with a small tip for the job. For guidance on soldering and desoldering those tiny connections, check out our handy guide. A plastic spudger can come in handy, too, but no pressure; those iFixit tools can serve in its place. Also, consider getting yourself an anti-static wrist strap and mat to keep those pesky accidental electric charges at bay while you work on your gadget. For more about using these nifty items, be sure to check the guide. And, hey, if you get stuck at any point, don’t hesitate to schedule a repair!
Step 1


– Let’s get started by finding the edge of your tablet where the front panel meets the sides. Use your trusty plastic opening tools to carefully pry the panels apart – it’s like opening a little door!
– Now it’s time to put everything back together. Line up the back and front of your device and gently push around the edges until they click into place. You’ll know it’s working when you hear that satisfying popping sound – it’s like a little ‘click’ of success! Make sure to do this all around the perimeter of your device to get everything securely connected.
– Gently lift the face of your tablet – you’re making great progress!
Step 2

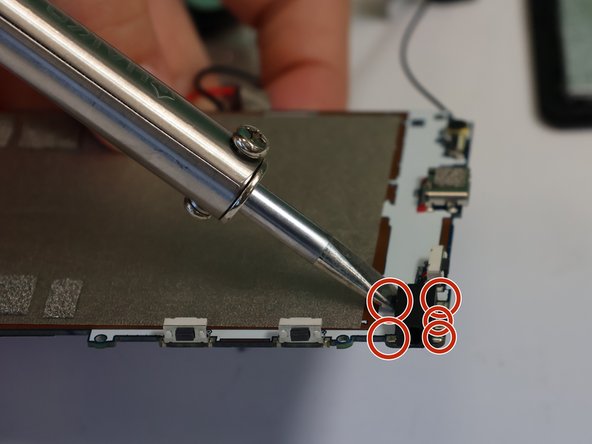
– Time to take off those three tiny 1.4 mm screws from the motherboard! Grab your Phillips size #000 screwdriver and let’s make it happen.
Step 3
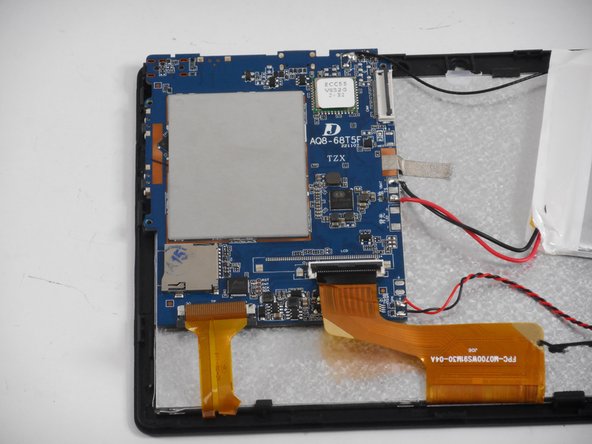
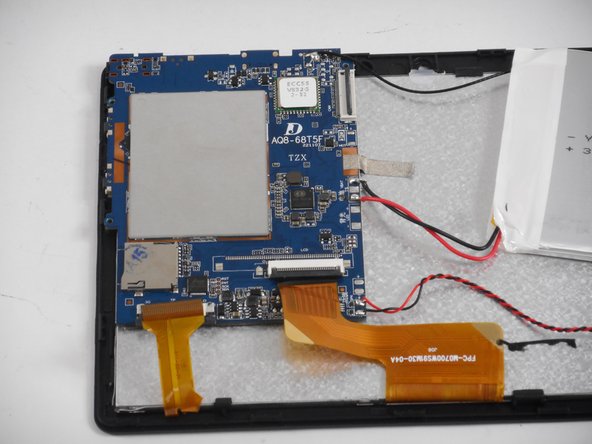

– To release the cable marked in red, simply pull those two sneaky dark tabs away from the cream connection port and towards the edge of the tablet. Once they’re out of the way, you can gently wiggle the cable free.
– When it’s time to reattach this cable, just slide its end into the port with a firm yet friendly push to ensure it connects snugly. Then, slide those dark locking tabs back into place against the cream port – easy peasy!
– The orange-marked cables are your zero-insert force buddies. To disconnect them, just flip up the dark tab and gently pull the ribbon away – no wrestling required!
– Reattaching ZIF ribbon cables is a breeze! Simply slide the cable into position (remember, no need to force it) and flip that dark locking tab back down to secure it. If you’re having trouble getting those ZIF cables back, don’t hesitate to schedule a repair.
Step 4

– When it’s time to put your device back together, just retrace these steps in reverse—you’re on the home stretch!
–
Success!