Damaged Wire Replacement
Duration: 45 minutes
Steps: 8 Steps
Hey there! Just a friendly reminder: tackling repairs can be a bit tricky, so take your time and don’t rush it. If you ever feel stuck or need a helping hand, you can always schedule a repair. You’ve got this!
Got a wire that’s causing your device to play hard to get? No worries! This guide is here to help you swap out that troublesome wire section. Wires are like the lifelines of our gadgets, bringing electrical power to make them tick. But like all good things, they can wear out over time. A cut wire? That’s a total power outage for that section! And let’s be real, exposed wires can lead to some serious hazards like shocks or fires, and nobody wants that! So first things first, make sure that pesky wire is indeed the culprit. Unplug it and give it a good inspection for any signs of wear or damage. In step 3, we’ll tackle the art of stripping wires, and in steps 4-7, we’ll be working with heat shrink tubing, so be sure to get comfy with those techniques ahead of time. And remember, before diving in, double-check that the wire is unplugged so you can work safely without any electrical surprises. If you need help, you can always schedule a repair.
Step 1


– Grab those pliers and snip away the frayed bits of the wire. You’re doing great!
– Now, you should have two tidy wire ends ready for action.
Step 2


The length of this new section can change depending on the repair at hand. Feel free to choose the length that works best for your particular fix!
– Snip off a fresh piece of wire that will bridge the gap between the two wires you worked with earlier. You’ve got this!
Step 3


– Grab those wire strippers and peel back about 1-2cm of insulation from both ends of the wire. You’ve got this!
– When you’re done, it should match the look shown in the third picture. Easy peasy!
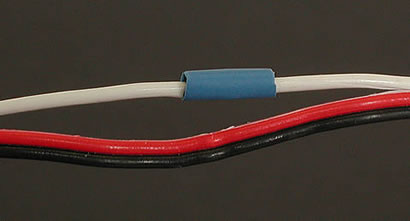
Step 4


– Slide a piece of heat shrink tubing onto both ends of the main wires. Let’s get those connections snug and secure!
Step 5


Watch out for those little exposed wires! They’re sharper than they look and could give your hands a surprising poke. Stay safe while you repair!
– Grab those pliers and give the ends of each exposed wire a little fray action – just a tiny bit to get them ready for the next step!
Step 6


– Grab those pliers and let’s get those wire segments cozy! Twist and intertwine them together like a couple of best buddies.
– Once you’ve got them all snuggled up, give each connection a gentle crimp with the pliers to secure the friendship.
Step 7


Heat guns warm up super fast but take their sweet time to cool down. So, when you set it down, be careful! Wait until it’s nice and cool before picking it back up after you’re done.
Depending on how hot you set that trusty heat gun, your shrink wraps will snugly hug the wire in about 10 to 25 seconds. Keep an eye on it and watch the magic happen!
– Gently slide that heat shrink tubing right over those exposed wires, giving them a cozy little hug.
– Now, grab your heat gun and dance it back and forth over the shrink wrap. Take your time to make sure the heat spreads evenly and watch the wrap snug up perfectly.
Tools Used

Step 8

– Give those exposed wires a good look-over and make sure the heat shrink tubing is snug as a bug around the wire.