Dell Inspiron One 2020 Hard Drive Replacement
Duration: 45 minutes
Steps: 6 Steps
Step 1
Gently flip your all-in-one computer so it’s face down on a soft, clean surface. This will keep that shiny front from getting any scratches!
– Give that tab on the stand cover a little nudge and lift it up with confidence!
Step 2
– Unscrew the four Phillips screws holding the stand to your device. You’ve got this!
– Gently tilt the stand up and out. Easy peasy!
Step 3
The cover is secured by some delicate plastic clips. Just a heads-up: be gentle with them to avoid any breakage.
– Begin your adventure at the optical drive! Use a trusty plastic spudger to gently lift the back cover up. You’ve got this!
Tools Used
Step 4
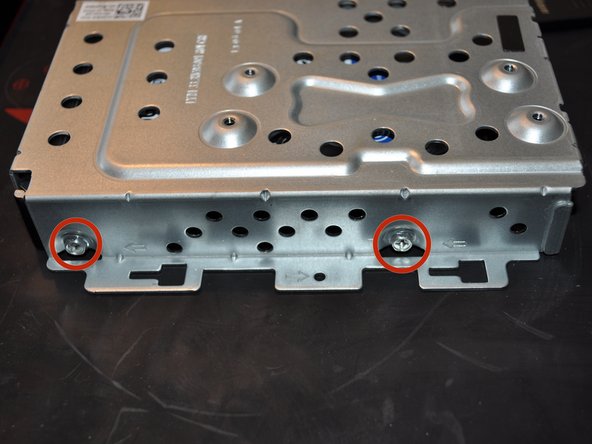
– Unscrew those three little screws that are keeping the hard drive cage snugly in place. You’ve got this!
Step 5
Be careful with those cables! There isn’t much wiggle room, so make sure not to slide the hard drive cage too far.
The power and SATA cables are joined together like best buddies. Most other computers like to keep these connectors separate, but not here!
– Give the hard drive cage a gentle nudge outward so you can unplug the power and SATA cables like a pro.
– Carefully lift the hard drive cage out—it’s like taking out a treasure chest!
Step 6
– Ready to put it all back together? Simply follow the steps in reverse, and you’ll be good to go.
– If you run into trouble, you can always schedule a repair.
Success!


