Dell Streak 10 Pro Rear Camera Replacement
Duration: 45 minutes
Steps: 7 Steps
Ready to swap out that rear camera? No problem! Just follow this guide to get into the guts of your device and access the motherboard and camera with ease. Grab your trusty plastic opening tool, a Phillips #0 screwdriver, and some tweezers, and let’s get started!
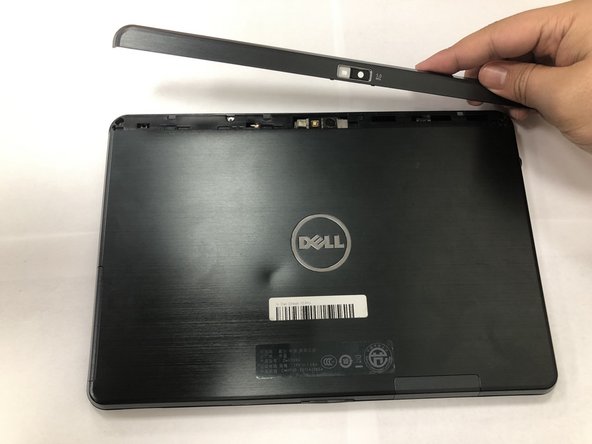
Step 1


– Lay your device flat on its screen – don’t worry, it’s going to be okay.
– Now, use those handy plastic opening tools to carefully pry open the top segment of your tablet, where the camera lives. Take your time, you got this.
– Great job. Remove the segment and set it aside for now. You’re making progress.
Step 2


– Take out those four 4mm Phillips #0 screws. You’ve got this!
Step 3


– Grab that trusty plastic opening tool and gently pry off the whole back screen of the tablet. You’ve got this!
Step 4


Alright, time to free that connector! The safest approach is to gently pull it straight out of the socket—no yanking, no twisting, just a smooth exit. Grab your trusty tweezers and carefully lift out the white connector that’s holding onto the red, green, blue, and black cords. Precision is key, but don’t overthink it—you got this!
– Unplug that no-fuss ribbon cable connector like a pro.
– Gently pop out the battery, lifting it from your device with care.
Tools Used

Step 5

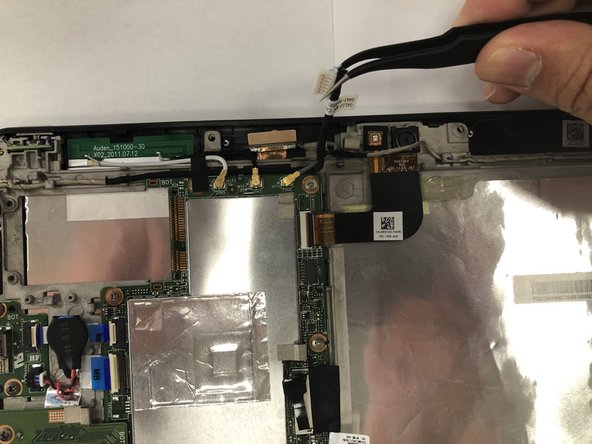
The white connector is hooked up to a black wire – pretty straightforward, right?
– Let’s get started by disconnecting the ribbon cable connector – nice and easy. Use your trusty tweezers to carefully pull the connector straight out of its socket.
Tools Used
Step 6
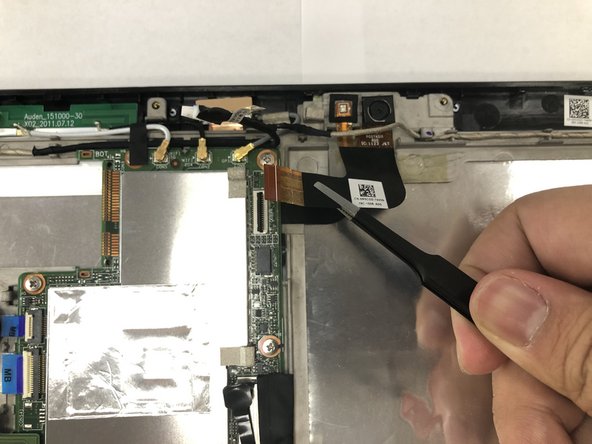

Time to set this cable free! Grab a spudger or just use your trusty fingernail to gently flip up that small black locking flap. Once it’s open, the cable slides out like a smooth exit—no force needed!
– Carefully release the super-delicate ribbon cable from the Zero Insertion Force (ZIF) Connector. It’s like freeing a tiny, high-tech bird from its cozy little nest – be gentle!
Step 7

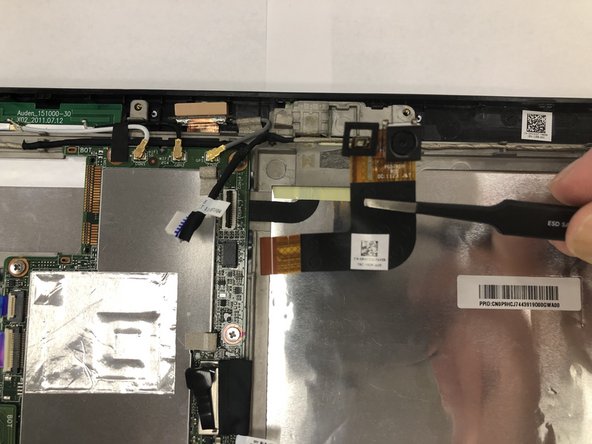
Take a deep breath and be patient—this process might take a few minutes. Apply pressure gently, like you’re giving it a little hug.
– When you’re ready to put your device back together, just go through the steps in reverse—easy-peasy!
– If you need help, you can always schedule a repair
Success!