Dell Streak 10 Pro Speakers Replacement
Duration: 45 minutes
Steps: 19 Steps
Got speakers that sound like they’re auditioning for a horror movie? Or maybe they’re just flat-out silent? Follow this step-by-step guide to swap them out and bring the beats back. Grab a Phillips #0 screwdriver, a trusty plastic opening tool, and your favorite tweezers. Let’s do this!
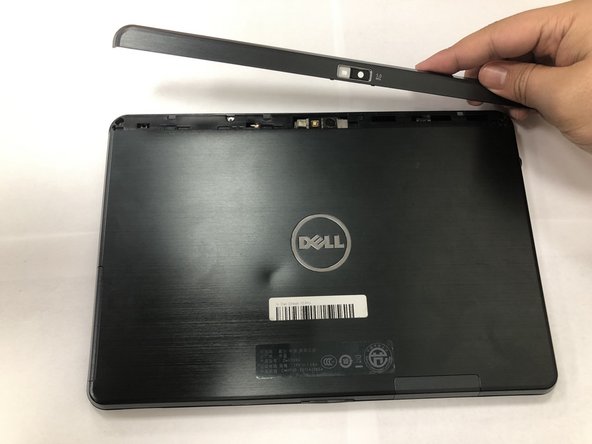
Step 1


– Lay the device down gently with the screen facing up.
– Grab your plastic opening tools and carefully work your way around the top section where the camera is located.
– Once you’ve got the top off, set it aside – you’re making great progress!
Step 2


– Unscrew those four 4mm Phillips #0 screws like a pro!
Step 3


– Grab your trusty plastic opening tool and gently pry off the entire back screen of the tablet. You’ve got this!
Step 4


The best approach is to gently wiggle the white connector straight out of the socket. Grab those tweezers and carefully pull out the white connector, which has the red, green, blue, and black wires attached. You’ve got this!
– Unplug that no-fuss ribbon cable connector like you mean it!
– Gently lift out the battery as if you’re raising the lid of a treasure chest. Easy does it!
Tools Used

Step 5


– Unscrew those three 4mm Phillips #0 screws like a pro.
Step 6


– Carefully pick up that black covered wire and set it aside for now, so it’s out of the way and won’t get in the mix as you work through this step.
Step 7

– Time to tackle that zero insertion force connector! Use tweezers to carefully flip up the white locking flap that’s holding the blue-tipped ribbon cable in place. Easy does it!
– Now that the connector is unlocked, gently use your trusty tweezers to pull out the blue-tipped ribbon cable. Take your time, and it’ll be out in no time!
Tools Used
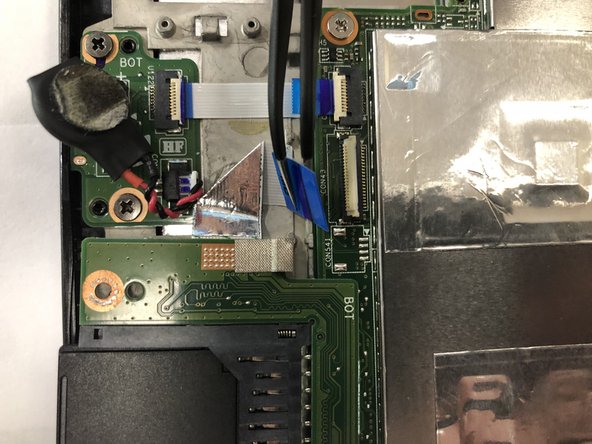
Step 8

– With two fingers, give the SD card breakout board a gentle tug and ease it out of its spot.
Step 9


– You’ve got five ribbon cables lined up, and it’s time to disconnect them! Let’s get to it.
– Grab those tweezers and gently pull the first cable straight out of its cozy ribbon cable connector. Easy peasy!
Tools Used
Step 10


– With your trusty tweezers in hand, gently tug on that cable and pull it straight out of the no-fuss ribbon cable connector. You’ve got this!
Tools Used
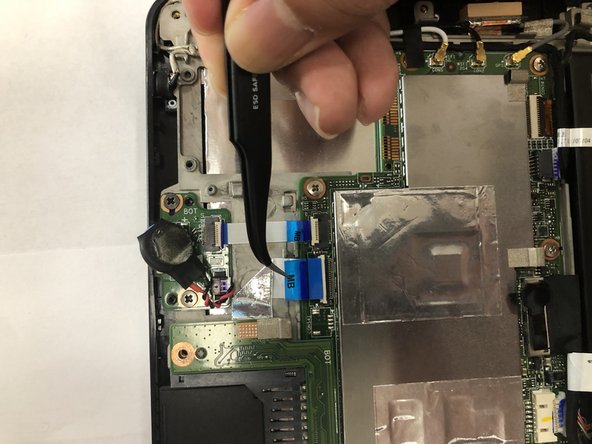
Step 11


– Alright, here’s the deal with a zero insertion force connector: grab a pair of tweezers and gently flip up that little white locking flap securing the blue-tipped ribbon cable.
– Once it’s free, ease the ribbon cable out of the socket with care. Nice and easy does it!
Step 12


– Time to tackle that zero insertion force connector! Use a trusty tweezers to carefully flip up the tiny white locking flap that’s holding the blue tip wire in place.
– Next, gently coax the wire out of its socket – it’s like persuading a shy friend to come out and play!
Step 13


– Gently and skillfully peel away those adhesive tapes with your trusty tweezers. You’re doing great!
Tools Used


Step 15

– Peel away all those pesky adhesive strips, then carefully lift up the sensor board—just be sure to keep it straight so it doesn’t flex or bend. Easy does it!
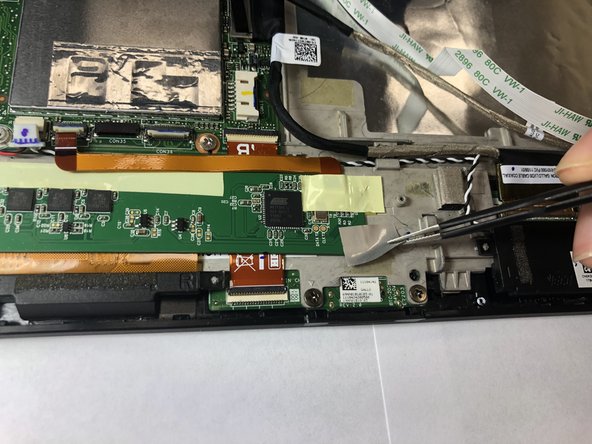
Step 16


– To tackle that zero insertion force connector, grab your trusty tweezer and carefully flip up the white locking flap that’s holding the orange ribbon cable in place.
– With the white tab lifted, use your tweezer to gently pull out the orange ribbon cable – you’re making great progress!
Step 17


– Give that speaker a little wiggle with your fingers until it decides to join the party and come free from the device. Gently lift it out of the tablet and you’re one step closer to victory!
Step 18


– Give the speaker a little wiggle with your fingers until it loosens up. Once it’s free, gently lift it out of the tablet.
Step 19

– Pop all the pieces back together by following these steps in reverse—easy as pie!
– If you need help, you can always schedule a repair.
Success!