Dell Streak LCD display Replacement
Duration: 45 minutes
Steps: 14 Steps
Get ready to breathe new life into your Dell Streak 5 with this step-by-step LCD replacement guide. We’ll walk you through the process, and before you know it, your device will be shining like new. Take a deep breath, grab your tools, and let’s get started. If you need help along the way, you can always schedule a repair with the pros at Salvation Repair.
Step 1

– Disassembling the device was fairly simple, though we did stumble upon a little surprise inside—turns out the internal memory wasn’t quite what we expected. The edge of these devices tends to be the weakest spot, so be cautious. The Ebay seller who sold this screen had moved around 700 units for this particular model, so it’s a popular one. The LCD screen was priced at just £25, which felt like a total bargain, especially since it’s supposed to be a genuine Corning ‘Gorilla Glass.’ Upon closer inspection, both the original and replacement screens seemed to be from Dell’s OEM line—those serial numbers are pretty close!
Step 2

Before you dive in, remember to ground yourself to avoid any pesky static buildup that could mess with your device. Ideally, we’d all have Anti-Static wrist straps and mats, but if you’re like most of us, just touch a radiator or the metal frame of a PC to zap away any static. When you’re prying up the bottom cover, be gentle! There’s a ribbon cable on the right side, so don’t overdo it. A little patience here will go a long way.
Step 3

– Unscrew those five T5 Torx screws and let’s get this party started!
Step 4

– Grab a trusty plastic pry tool and team it up with your fingernails to shimmy around the edges and pop it loose. You’ve got this!
Step 5


Heads up! Those side buttons like to play hide and seek—they’ll drop right into the case if you’re not careful. Keep an eye on their orientation too! A handy trick: use some masking tape to keep them in place so they don’t wander off.
Step 6


Carefully work your way along the back edge until the cover pops off—it’s easier than it sounds, promise!
Step 7

Alright, here’s the deal—there are four ribbon cables that need to be disconnected. Stay chill, take it slow, and handle them with care! No rush, no stress—just a steady hand and a focused mind.
– In the image, ‘Flip and slide’ means giving the top of the plastic ribbon cable connector a light flick to release it before sliding the ribbon cable out. If it just says ‘slide,’ then simply pull the cable straight out. Easy peasy!
Step 8


– Grab your trusty small flat screwdriver and start by gently popping this side. Easy peasy! Once you’ve done that, lift the plastic towards the opposite side, and voilà!
Step 9


– First, grab a marker and give those top sides of the “U” clips a little love tap with some marks. Next, take your trusty flat screwdriver and gently slide those five clips outwards along both edges. If you’re finding it a bit tricky, no worries! A little pin can help kickstart the process.
– Here are the metal “U” Clips (circle towards the top)
Step 10


– Once you’ve got the logic board in sight, it should lift out like a charm! There are some sneaky sticky pads hanging out underneath, so don’t be shy—give it a gentle nudge if it’s feeling stubborn.
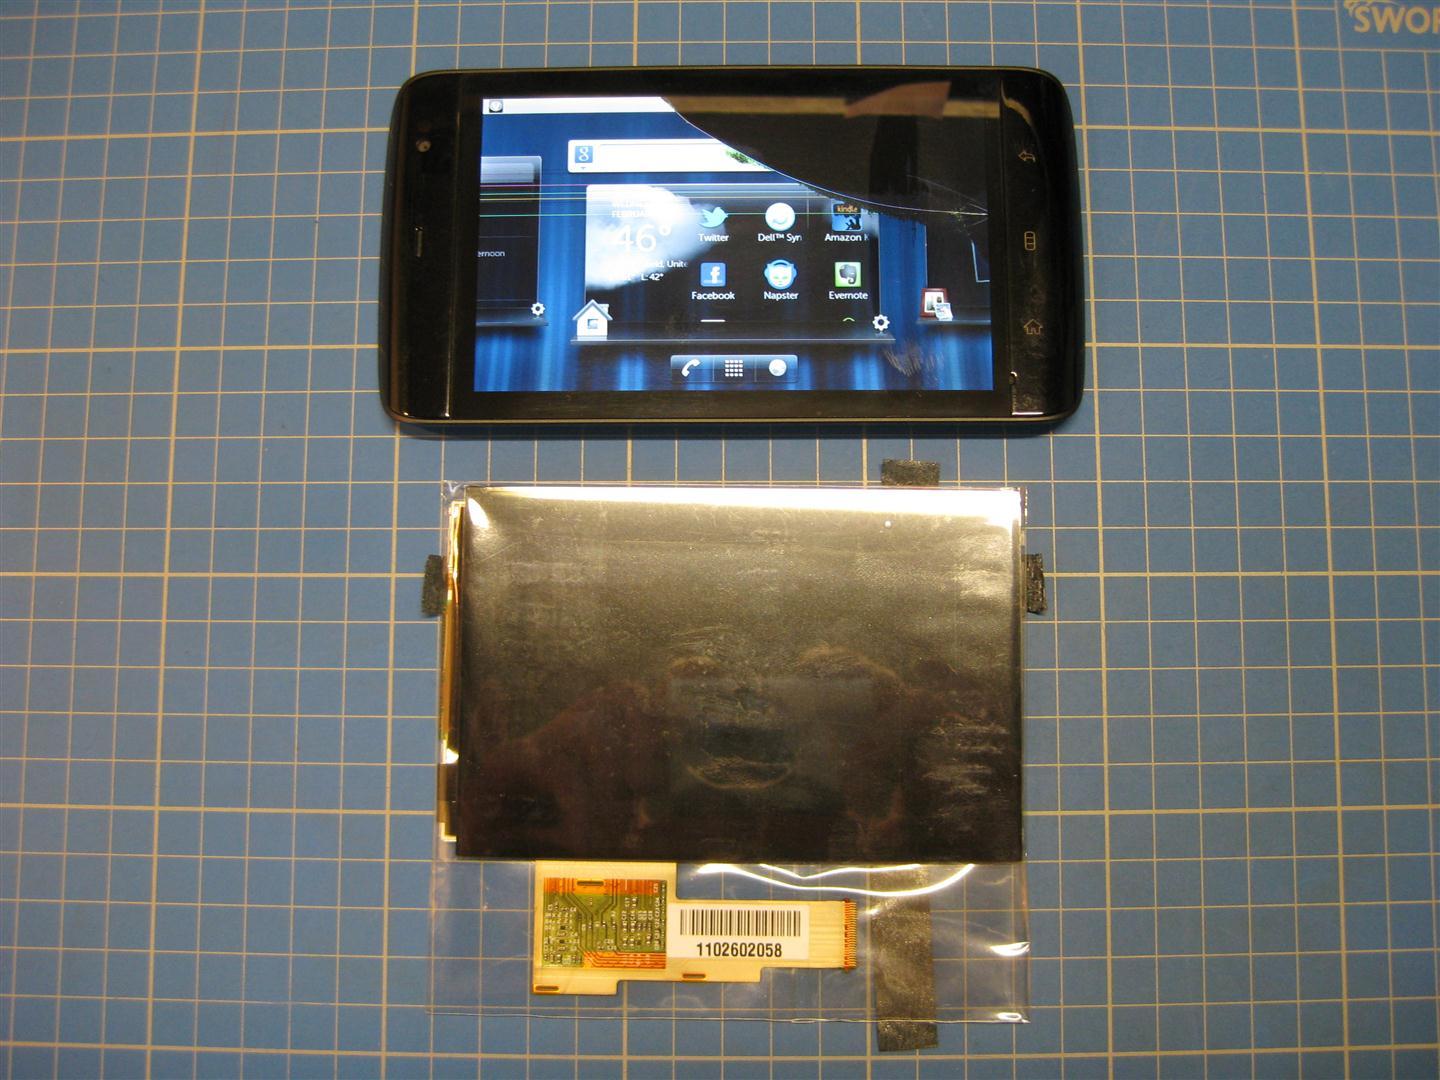
Step 11

– To start, gently pry the LCD out from the frame of your Streak. It’s held in place by a strip of adhesive on each side. A helpful tip: Begin at the top edge of the LCD, as the bottom has a couple of lugs that lock the panel in place. The Gorilla glass will likely come off with the LCD, and it’s totally fine if the digitizer comes along for the ride too.
Step 12

Check out these lugs—they’re the nifty little hooks locking into the bottom of the chassis to keep your screen firmly in place.
Step 13


– Sneaky hidden internal SD memory slot alert! The Streak comes in two flavors: 2GB and 4GB. Here’s the scoop—it looks like you could swap in a 4GB without needing any custom ROMs or other tech wizardry.
Step 14

– Put your device back together by retracing the steps in reverse—you’ve got this!
– If you need help, you can always schedule a repair.
Success!

