Dell Venue 8 Display Replacement
Duration: 45 minutes
Steps: 8 Steps
Got a screen that’s looking more like a modern art masterpiece of cracks and broken pixels? Touch not responding like it’s giving you the silent treatment? Sounds like it’s time for a fresh start. This step-by-step guide will walk you through replacing the screen on your Dell Venue 8—so you can get back to tapping, swiping, and binge-watching in no time!
Step 1

You’ll hear a satisfying click as those clips let go!
– Grab your device and place it screen-side up like it’s ready for a selfie. Now, take your trusty plastic opening tool and gently slide it into the crease. Carefully glide it around the edges like you’re giving it a little spa treatment.
– Time to give that back panel the boot! Remove it and reveal the inner workings of your device.
Step 2


The silver screws are tagged with an ‘S’ or have a sticker —check out the updated image for clarity.
– Grab your trusty T-5 Torx screwdriver and unscrew those 14 little troublemakers! You’ve got 11 black screws (3.6mm) and 3 shiny silver ones (4.45mm) to tackle.
– Once you’ve got those screws out, it’s time to work some magic on those perimeter clips! Gently snap them open, and voilà, the internal plastic case comes right off!
Step 3

– Gently pop the power clip off the motherboard by pulling it downward toward the base of the tablet. No need to wrestle with it—just a little finesse does the trick!
Step 4

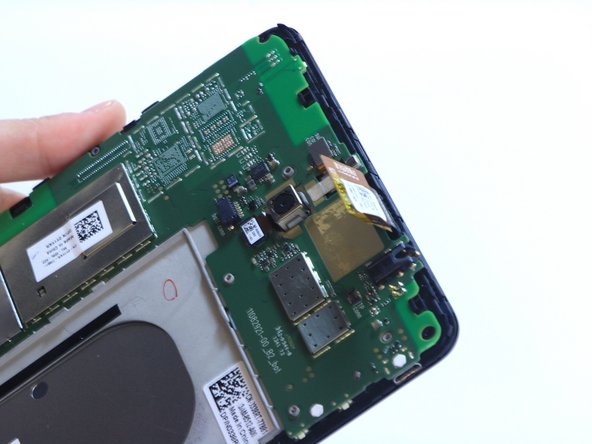
The battery is gently stuck to the tablet with a light adhesive. A little wiggle and some patience should do the trick!
– Use a plastic opening tool to carefully pop the battery out of the device—it’s a delicate operation, so take your time and be gentle!
Step 5

Heads up: Lift straight up, don’t yank it out, on the connection!
– Time to get this repair started. Use your trusty plastic opening tool to carefully unclip the speaker connection from the logic board.
Step 6

The speaker is secured with a gentle adhesive—just enough to hold it, but not enough to keep it from joining the party elsewhere.
– Gently coax the speaker out by sliding your trusty plastic opening tool into the tiny space at the top of the speaker and giving it a little nudge upward. It’s like giving it a lift-off!
Step 7

– Unplug the display clip located next to the speaker. You’ve got this!
– Disconnect the Display connection situated at the top of the tablet. Keep it up!
Step 8

– Gently pop the logic board loose from the display. It’s like giving it a little nudge to set it free!
Success!