Dell XPS 13 Fan Replacement
Duration: 45 minutes
Steps: 10 Steps
Ready to swap out the fan in your Dell XPS 13? Let’s make it happen! Follow these steps to bring your laptop back to its cool, calm, and collected self. It’s straightforward, so roll up your sleeves and dive in!
Step 1


– Unscrew the eight 4 mm T5 Torx screws holding the bottom cover in place.
Step 2


– Grab a trusty plastic opening tool and gently pop open the ‘XPS’ flap smack dab in the middle—it’s like a little treasure hunt for tech enthusiasts!
Step 3

– Time to flex! Unscrew the lone Phillips screw hiding under the flap.
Step 4

– Grab yourself some opening picks or a plastic pry tool and gently pop those case clips open, starting at the back edge. It’s easy-peasy with a bit of patience!
Step 5

– Let’s kick things off by popping off the bottom cover!
Step 6


Keep it chill—no need to yank upwards!
– Gently tug the battery cable connector towards the battery to free it from its cozy socket.
– Pop open the display and give that power button a good press for five seconds to help drain any leftover juice from the system.
– If the connector is feeling stubborn, try nudging one side a bit, then the other, to help it ‘walk’ right out.
– For those tricky connectors that just won’t budge, grab a spudger and gently poke at the connector indent to coax it out.
Tools Used

Step 7


– Grab your trusty tweezers and gently wiggle that tiny white connector out of its socket—pull it out and away, nice and easy!
Tools Used

Step 8


– Gently lift the tab to pop out the black flat connector—it’s as easy as giving it a little nudge with your hand!
Step 9


– Unscrew and free the 4 mm Phillips #0 screw that’s holding the fan to the motherboard. Let that little guy breathe!
– Next up, carefully remove the 4 mm Phillips #0 screw that’s anchoring the fan to the base of the computer. Easy does it!
Step 10


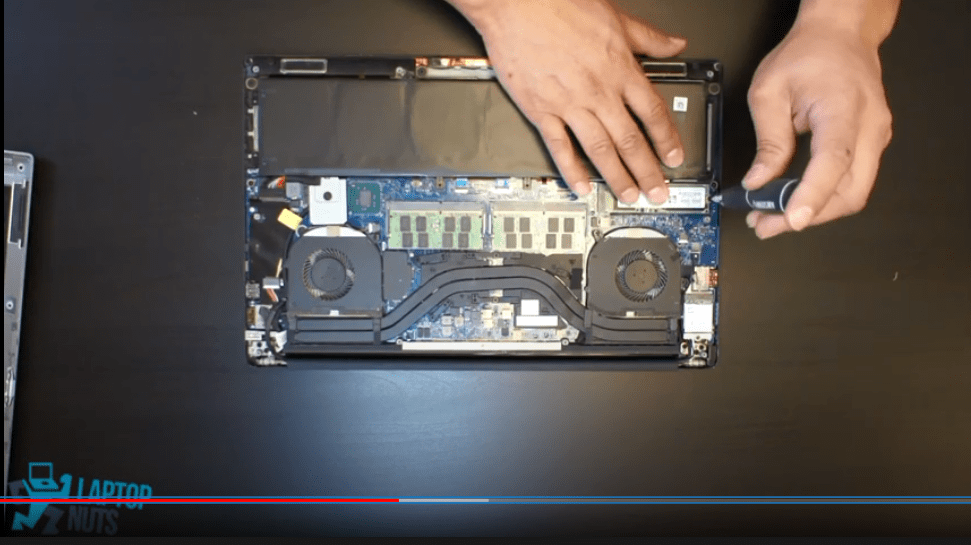
– With your right hand, gently lift the larger part of the motherboard that’s nearest to the fan. You’ve got this!
– Now, with your left hand, carefully pull the fan out at a cool 30-degree angle from underneath the motherboard. Easy peasy!
Success!