Dell XPS 13 Track Pad Replacement
Duration: 45 minutes
Steps: 12 Steps
Ready to give your Dell XPS 13 a fresh touch? Let’s swap out that trackpad. Follow the steps below, and you’ll have it back in action in no time. If you get stuck, don’t worry – you can always schedule a repair and we’ll take care of the tricky bits for you.
Step 1


– Pop out the eight little 4 mm T5 Torx screws from the bottom cover like a pro.
Step 2


– Grab a trusty plastic opening tool and gently pop open the ‘XPS’ flap smack dab in the middle—it’s like a little treasure hunt for tech enthusiasts!
Step 3

– Unscrew the sneaky Phillips screw that’s hiding under the flap.
Step 4

– Grab an opening pick or a nifty plastic pry tool, and gently sneak it into the case clips starting from the back edge. Take your time, no need to rush—steady hands win the day!
Step 5

– Let’s get started by taking off the bottom cover.
Step 6


Keep your cool and resist the urge to yank it up!
– Gently tug the battery cable connector toward the battery to unplug it from its socket—nice and easy, no rush!
– Flip open the display and press that power button for a solid five seconds to zap any leftover charge hanging around in the system.
– If the connector’s playing hard to get, try nudging one side, then the other, like a little dance, to ease it out of its socket.
– Still stuck? Grab a spudger and use the pointed end to give the connector indent a gentle push—just enough to slide it free. No need to wrestle with it!
Tools Used

Step 7


– Let’s kick things off by unscrewing those four 3 mm Phillips #0 screws hanging out at each corner of the battery. You’ve got this!
Step 8


Don’t yank it up! Give it a gentle lift instead. Patience is key here!
– Gently tug that battery cable connector right towards the battery itself to pop it free from its cozy little socket.
Step 9

No need to kick the speakers out—just peel off the tape and slide that battery right out from under the speaker cables. You’ve got this!
– Gently lift off any tape holding the speaker wires snugly against the battery.
Step 10

– Pop that battery out! It’s time to unplug your device’s power source. Just give it a gentle lift and remove it carefully.
Step 11
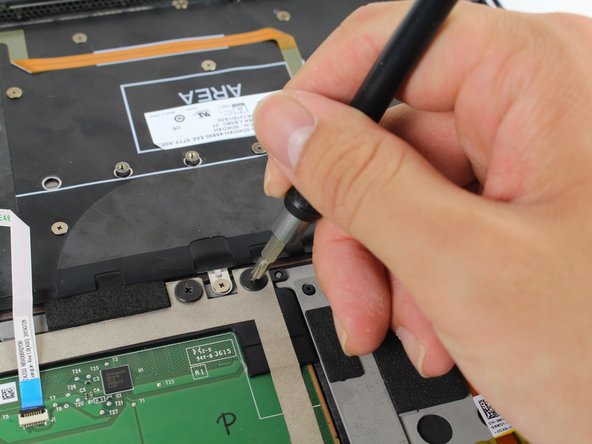

– Take out those four 3 mm Phillips #1 screws from the trackpad—you’re doing great!
Step 12

– Grab those tweezers and lift the upper-right corner of the trackpad like you’re peeling off a sticker—gently does it!
– Now, pull the trackpad upwards and away from you with some slow and steady moves. Take your time—you’re doing great!
Tools Used

Success!