
Dewalt Air Compressor DWFP55126 2016 Manifold Replacement
Duration: 45 minutes
Steps: 19 Steps
Ready to tackle the manifold assembly replacement in your Dewalt Air Compressor DWFP55126 (2016)? Awesome! But first, let’s make sure the air compressor tank is fully depressurized before you dive in. Safety first, right? If things get tricky, don’t hesitate to schedule a repair and we’ll take care of the tough spots for you.
Step 1


Before you jump in, unplug the power cord, let the compressor tank chill out and lose the pressure, and disconnect any hoses. Safety first, then the real fun begins!
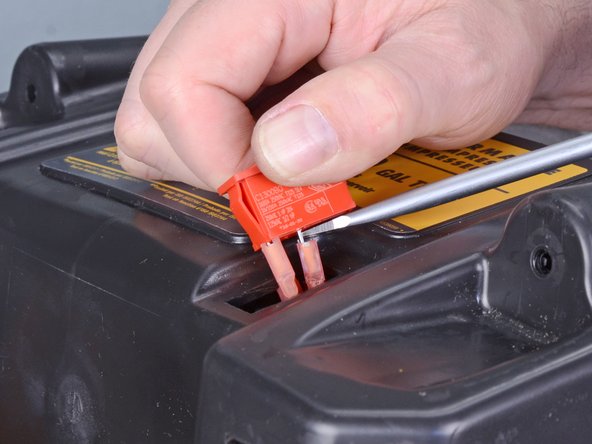
– Grab a T10 driver with a long shank to loosen up that manifold cover screw.
– Carefully lift the cover straight up off the gauges to remove it.
Step 2


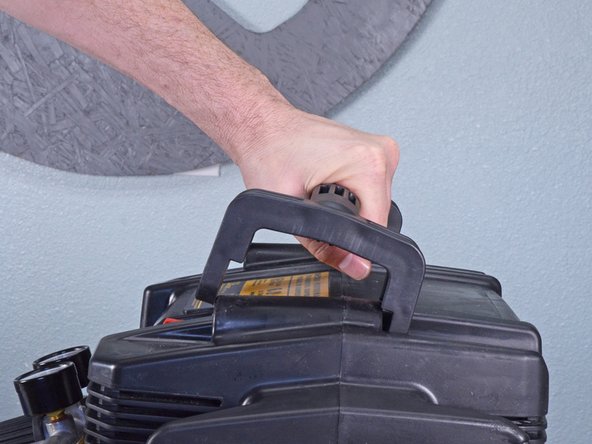
– Grab a T20 driver and twist out the two handle screws—one on each side—to get started with the disassembly. If you hit any snags, remember you can always schedule a repair for extra help.
Step 3
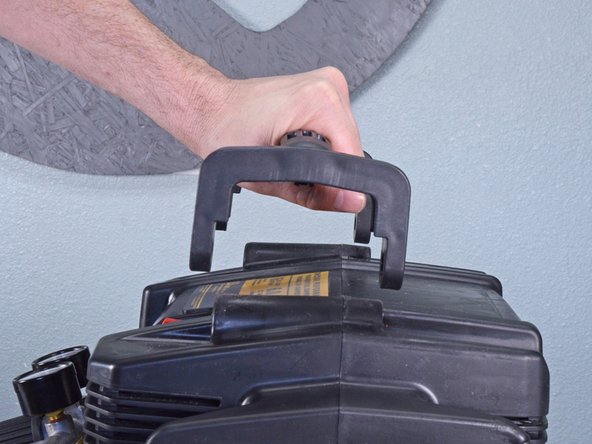

– Grab that handle like you’re about to lift the compressor! Give it a little pull upwards while simultaneously pushing it forward, away from the gauges. This will help you rotate the handle up and off the case effortlessly.
– Now, simply lift the handle off to complete the removal.
Step 4


– Let’s get those screws out of the way! Here’s what you need to do:
– First up, grab three 20 mm-long T20 screws.
– And don’t forget the one 20 mm-long Phillips #1 screw. You’ve got this!
Step 5


There are four metal tabs on the tank that fit perfectly into four slots on the top plastic case. These tabs help lock the case in place, keeping everything nice and secure. Simple, right?
– Gently nudge the top case off those four little tabs to free it.
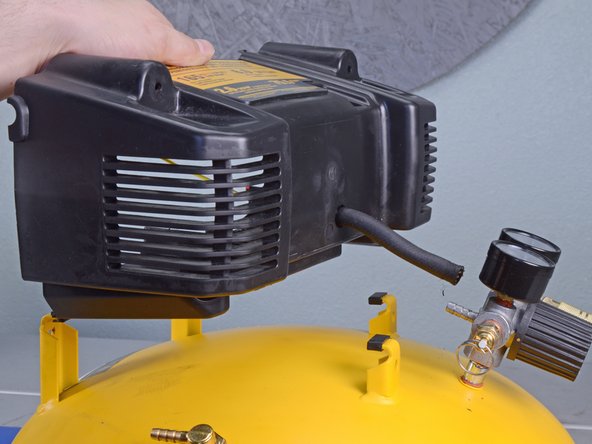
Step 6
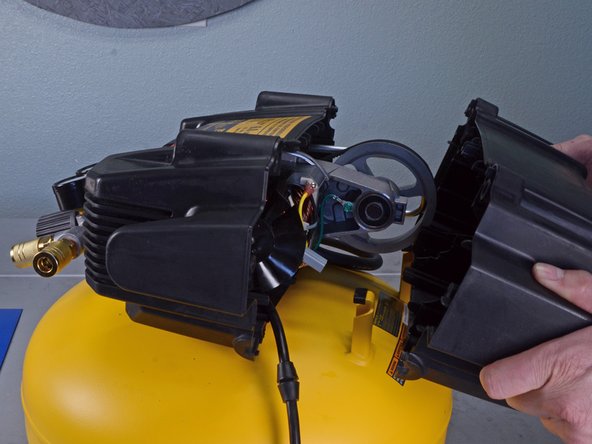


When you take off the case, the motor might shift a little, but don’t worry – it’s not going anywhere.
– Gently peel back the half of the case opposite the manifold from the tank – no need to rush, just a careful tug. Tip: When putting everything back together, make sure that the power cord lines up with the cutout so it doesn’t get squished or pinched. If you need a hand with the repair, you can always schedule a repair.
Step 7


Don’t yank the switch out just yet—there are some wires still hanging on underneath.
– Grab a big flathead screwdriver and press down on the plastic tab of the red power switch, right next to the open side of the case.
– Keep the tab pressed down, then hold the top of the switch and pull it straight up off the case.
– Slide the switch out a bit more to free it from the case.
Step 8

– Grab a flathead screwdriver and gently pry the wire connectors loose from the plugs on the bottom of the switch. Take your time and work carefully—you’re almost there! If you need help, you can always schedule a repair.
Step 9


– With the wires loosened from the switch plugs, go ahead and pull both wires out completely.
– Take out the power switch and set it aside—you’re making great progress!
Step 10


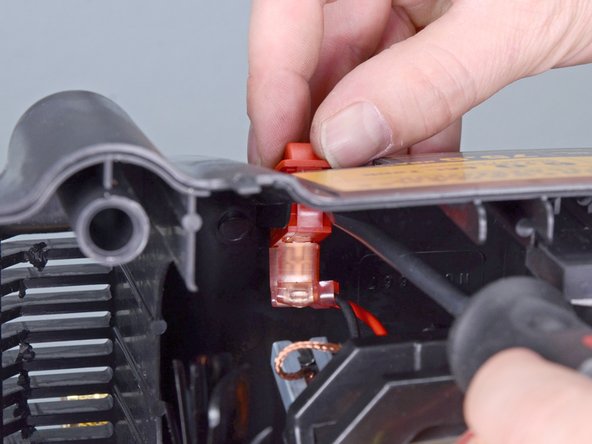
– Gently pull to disconnect the ground wire connector tucked inside the case.
Step 11


– Grab some needle nose pliers and gently bend the check valve hose clamp upward, away from the hose to free it.
– Once there’s enough clearance, lift the hose clamp up and remove it from the hose.
– Pro tip: it’s a good idea to replace this hose clamp during reassembly to keep everything sealed tight and prevent leaks.
Step 12


– Gently wiggle the hose off the fitting—just like unplugging your phone after a full charge.
Step 13


– Grip the plastic housing firmly and gently pull out the pump assembly, being careful not to snag any hoses or wires along the way.
Step 14

– Grab those needle nose pliers and give the hose clamp a gentle bend before popping it off the manifold hose. You’ve got this!
Step 15


– Gently wiggle the hose off the manifold fitting and set it aside.
Step 16

– Lift off the top casing and set it aside—easy does it!
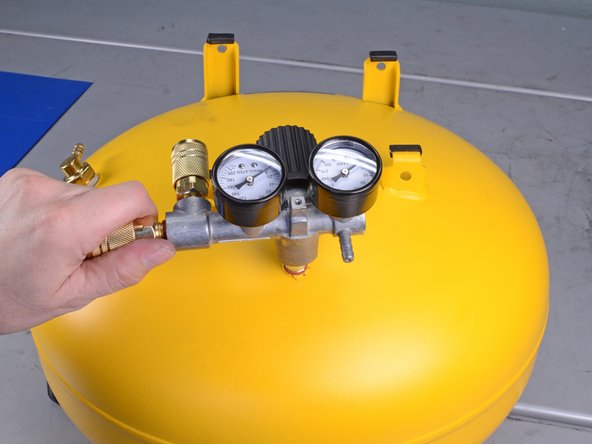
Step 17

– Grab a 9/16 inch wrench and loosen that spring-loaded air release valve from the manifold. You’ve got this!
Step 18
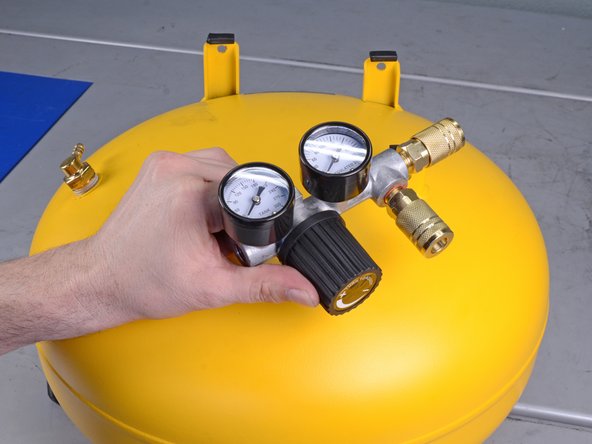

– Carefully twist the manifold assembly counterclockwise to release it from the tank. You got this!
Step 19

– Ready to put your device back together? Just walk through these steps in reverse and you’ll be all set. If anything gets tricky along the way, you can always schedule a repair for some expert backup.
–
Success!