Dewalt Impact driver DCF840 Teardown
Duration: 45 minutes
Steps: 10 Steps
Time to dive into the guts of your Dewalt 1/4″ Impact driver and battery! Let’s take it apart and see what’s inside. Don’t worry, we’ve got your back every step of the way. If you need help along the way, you can always schedule a repair.
Step 1


– This guide walks you through everything you need to know, from the tools to the battery. We’ve got you covered every step of the way!
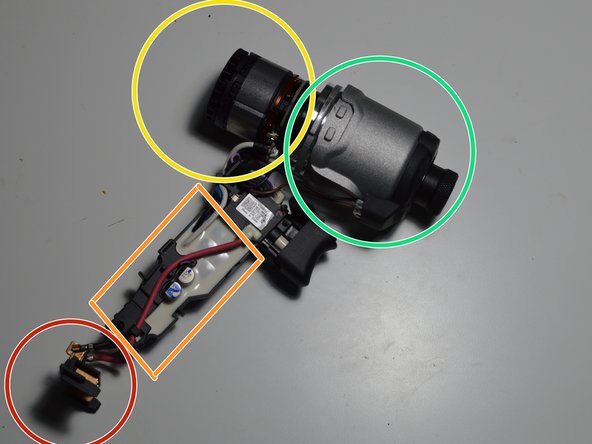
Step 2

– Take out the 8 screws that are keeping the two halves locked in place. You’ve got this!
Step 3

– Battery Contacts – Time to get these little guys reconnected! Check the battery contacts for any signs of corrosion or dirt. Give them a quick clean and ensure they’re lined up perfectly. You don’t want to leave anything to chance when it comes to powering up your device.
– Potted Circuit – This one’s a bit of a tricky spot. The potted circuit might be hidden behind a layer of resin, but don’t worry! Gently scrape off any excess or use a small amount of heat if needed. Once that’s clear, you’ll be able to access the magic happening inside.
– Brushless Motor – Ah, the quiet hero of your device. If the motor isn’t doing its job, you’ll need to inspect it for any damage. Make sure it’s securely attached and properly aligned. If it’s time for a swap, it’s a pretty straightforward task, but remember, don’t rush it!
– Impact Gearbox – This is where things get a bit noisy, but that’s what makes it so effective! Ensure that the gearbox is intact and free from any debris. If you notice any grinding sounds or misalignment, it could be time for a replacement. No stress, though, just take your time and do it right.
Step 4

– Once the Gearbox is out of the way, you’ll see the motor hanging out on one side and the light ring chilling on the other.
Step 5
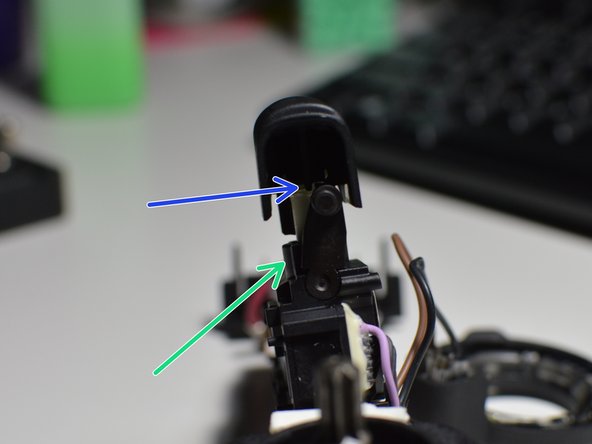
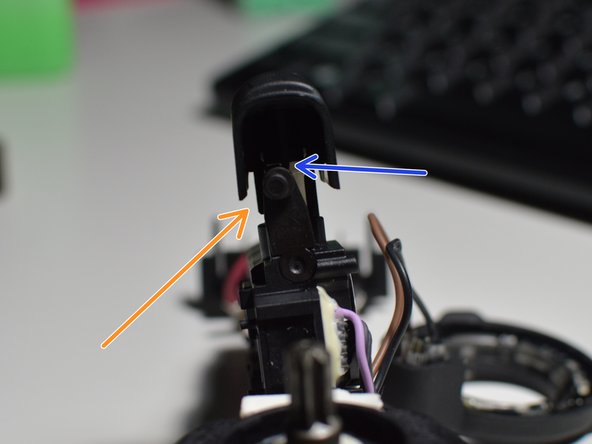

– Neutral: Trigger Locked
– Forward
– Reverse
– When the selector is in neutral, this tab prevents the trigger from being pressed.
Step 6

– The gear box snugly fits into the housing with the help of two clips. Just give those clips a gentle push to release them, and voilà! The gear box is all set to be freed from its cozy little home.
Step 7


– Planetary gear set slows things down and boosts torque—think muscle, not speed.
– Splines connect firmly to the gearbox case for a secure fit.
– Check out those internal teeth—they keep the planetary gears spinning smoothly.
– A spring (it’s a bit sneaky—hard to spot) gives the tool its punchy impact function: the base spins and then whacks the output drive, which is marked with a blue arrow in the last picture.
Step 8

– Make sure your battery is fully charged to 20V. A healthy, charged battery is key to getting the job done!
– Ideally, your battery should be sitting at around 18.5V. Anything close to this is good to go!
Step 9

– Unscrew the four screws to release the battery cover.
– Use the spring latch to keep the battery securely in place while working.
Step 10

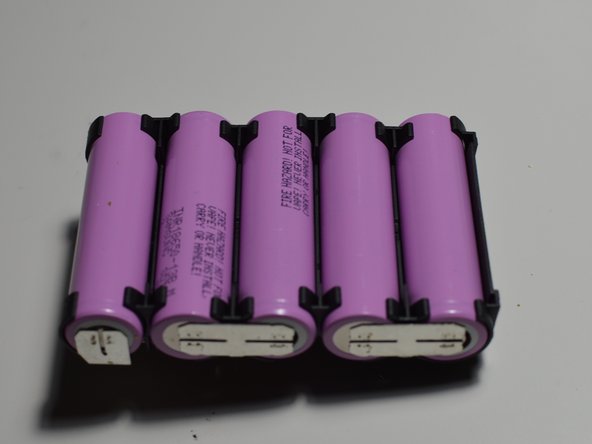
– Stacked up: 5 cells, each rocking a 3.7V vibe, all wired in series.
– Ground level: 0V (GND)—the chill zone.
– Feeling bright? 12V powers up the LED ring.
– 3.7V here, but it’s just hanging out—not hooked to the tool.
– All together now: 18.5V for the big moves.
– Main attraction: 18.5V, your main power output.
Success!