DigiLand DL8006 LCD Screen Replacement
Duration: 45 minutes
Steps: 8 Steps
Ready to give your DigiLand DL8006 a fresh new look? This guide will walk you through the process of replacing its screen. If your device is playing hard to get—like not lighting up, ignoring your touch, or showing lines, black spots, flickering, or weird colors—you might need to swap out that LCD display. We'll be diving into some serious tech stuff, including removing the battery and the motherboard. If you're feeling a bit unsure about any of this, check out our other guides for some extra help. You've got this!
Step 1


- Lay your device down on its front with the back side facing up, just like it's taking a little nap.
- Grab your trusty opening tool and carefully work your way around the edges of the back cover. Gently pry it off as you go until that panel is ready to pop off.
- Once the panel is off, say goodbye to the silver/metallic tape at the lower end of the tablet and remove it with ease.
Step 2


- Let's kick things off by disconnecting the red and black cord that links the motherboard to the bottom of the tablet. It's like giving your device a little breathing room!
- Next up, we've got the ribbon cable that's hanging out over the battery. Time to gently pry up that locking tab on the ZIF connector and slide the cable out like a pro. You've got this!
Step 3


- Gently unplug the red and black cable that links the motherboard to the camera—it's hanging out at the top of the device.
- Next, disconnect the red and blue cable connecting the battery to the motherboard. Keep it cool and steady!
- Carefully peel off the tape that joins the back of the LED screen to the motherboard. Almost there!
Step 4


- Gently detach the cable that connects the motherboard to the left side of the device. It's a quick move, no sweat!
- Unplug both cables that link the camera to the motherboard. Easy peasy, just a little wiggle and they're free!
Step 5
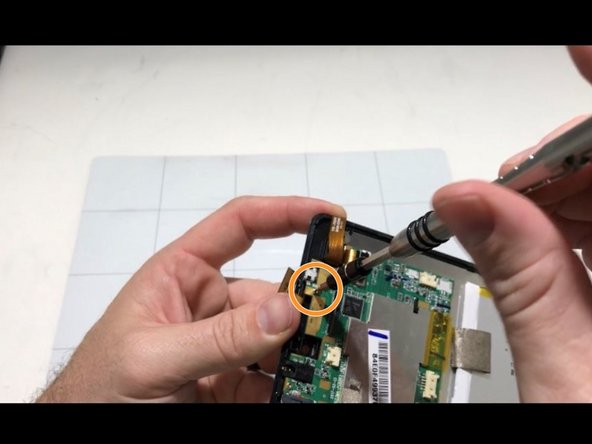


- Unscrew the little fella hiding in the left corner of the motherboard using your trusty Phillips #0 screwdriver.
- Next up, there's another sneaky screw tucked away beneath the ribbon cable, just waiting for your Phillips #0 screwdriver to show it who's boss.
- Finally, let's tackle the screw located at the top of the motherboard, again with your reliable Phillips #0 screwdriver.
Tools Used

Step 6

- Carefully lift the motherboard out of the device and set it aside, giving it a little room to breathe. No rush—just a gentle move.
Step 7


- Grab your trusty Phillips #0 screwdriver and let's tackle those screws holding the LED screen in place! You'll find three sneaky little screws hiding out—one in the top right, one in the bottom right, and the last one in the bottom left of your device. Time to set them free!
Tools Used
Step 8

- Put your device back together by following these steps in reverse—easy peasy! If you hit a snag, remember you can always schedule a repair for a helping hand.
-