DirectPower DE157 Cordless drill-screwdriver Teardown
Duration: 45 minutes
Steps: 5 Steps
Curious about the buzz of a cordless drill or driver? It’s all about understanding what makes it whirr. Dive in to discover the sounds and signs that tell you how your tool is doing—and what might need a little TLC. If things get tricky along the way, remember you can always schedule a repair for expert help.
Step 1


– Meet your trusty driver kit!
– This is a typical cordless screwdriver/drill set—no fancy name, but it gets the job done like most of its kind.
Step 2


– You’ve got yourself a charger that features a standard wall wart, pumping out a cool 14.4V at 350mA. Plus, there’s this tiny block (seriously, it weighs next to nothing) that connects to one of the battery packs.
– Ready to dive in? To access the charger block, simply unscrew those three #1 Phillips screws. Easy peasy!
Step 3
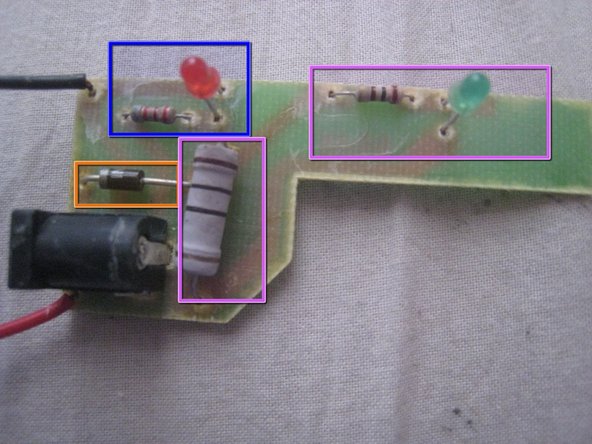

– Once you’ve lifted the bottom off, the PCB is now fully exposed, and you can gently lift it out of the charger block along with the battery contacts. On the PCB, you’ll spot a few cool components:
– A diode that keeps things safe by protecting against reverse current. No surprise there, it’s all about safety first!
– An LED and a resistor that stay on as long as the box is powered up. The light’s on, so the power’s on!
– A hefty 10 Ohm resistor that gently limits the current for charging. Right across this, you’ll see the green LED and the resistor hanging out. This will light up when the battery’s getting a good flow of current.
Step 4

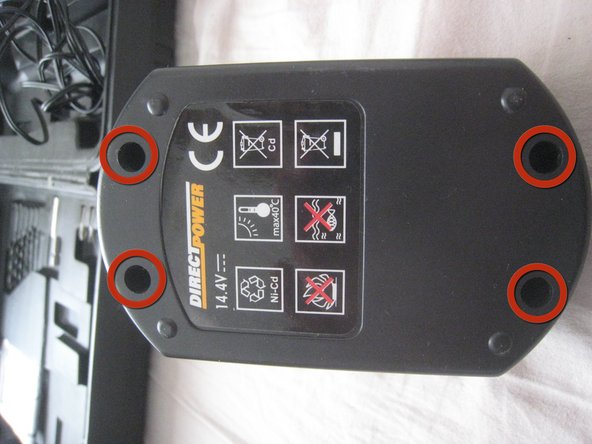
– Here’s one of the two battery packs. To get inside, take out
– Four Phillips screws, size #1.
Step 5
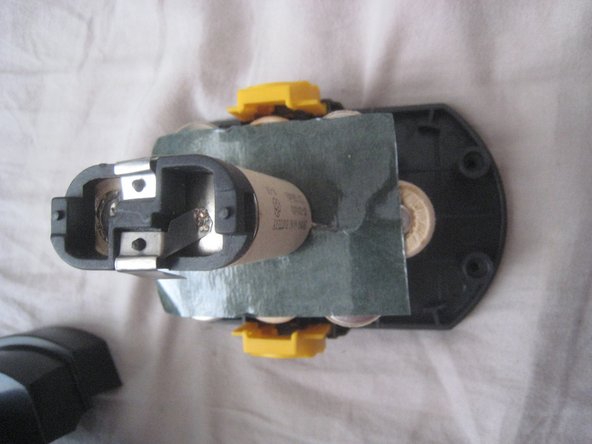
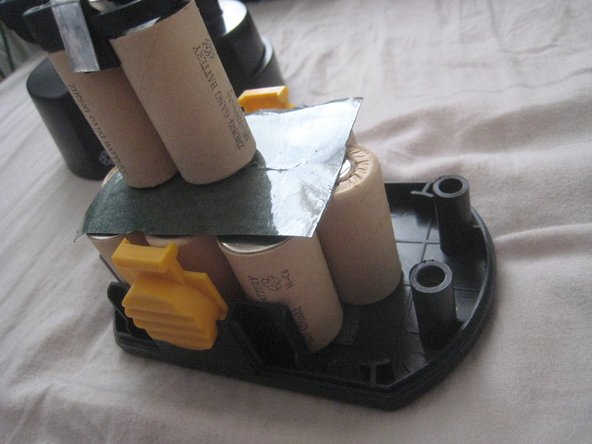

– After removing the screws, flip the device right-side up and gently lift off the plastic cover. You’ll see a string of 12 NiCd cells—nothing more, nothing less. Keep in mind, the space on the right side can fit three additional cells, which would bump the pack up to 18V. Many budget-friendly brands use the same plastic casing for 7.2V, 9.6V, 12V, 14.4V, and 18V versions—just with more or fewer cells and a different motor inside. If you need help, you can always schedule a repair.
Success!