DIY Apex Tablet 7 Back Panel Replacement Guide – Step-by-Step
Duration: 45 minutes
Steps: 5 Steps
Ready to dive in? This guide will help you pop open the back panel of your Apex Tablet 7. Once you’re in, you’ll have access to all the inner workings of your device, which is essential for most repairs and replacements. Let’s get started!
Step 1
– Grab your trusty Phillips #00 screwdriver and unscrew those two 2.70 mm screws on the side of the tablet where the buttons and headphone jack hang out (that’s the bottom side when you’re holding it upright).
Step 2
Heads up! When you’re taking off the back panel of the tablet, be extra careful around the speaker. It’s hanging out in the lower right corner on the back. There are two delicate wires connecting the back panel to the device, and if you’re not gentle, you might accidentally disconnect them. So, take your time and be cautious!
– Look for this connection highlighted in red in the pictures. It’s your visual guide to where things need to connect.
Step 3
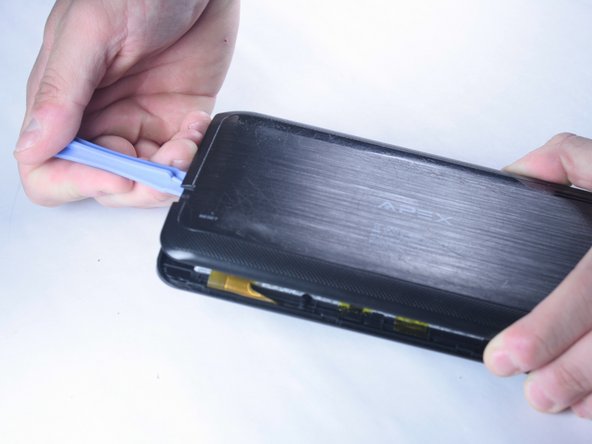
– Gently slide a plastic opening tool between the edge of the back panel and the top edge of your device. It’s like giving your gadget a little nudge!
– Carefully run that plastic opening tool along the sides of the tablet, keeping it snug in the gap between the tablet and the back panel. This will help you create a nice little opening.
Step 4
– Gently press down with your hand to ease the back panel off—take it slow and steady, especially around the speaker connection. Patience wins the day!
Step 5
– Woohoo! You made it! To put everything back together, just follow these steps in reverse.
– If you got stuck or need a hand, don’t worry! You can always schedule a repair.
– You’re done! Pat yourself on the back, you’ve completed this repair guide.
Success!


