DIY Galaxy S21 5G Screen Replacement Guide: Step-by-Step Tutorial
Duration: 60 min.
Steps: 45 Steps
Hey there! Just a heads up: once you pop open your device, the IP certification (that nifty protection against dust and water) will be waving goodbye. So, keep that in mind as you dive into the repair!
Ready to tackle that display replacement? You’ve come to the right place! In this easy-to-follow photo guide, we’ll walk you through each step to get it done like a pro. Let’s get started!
Step 1

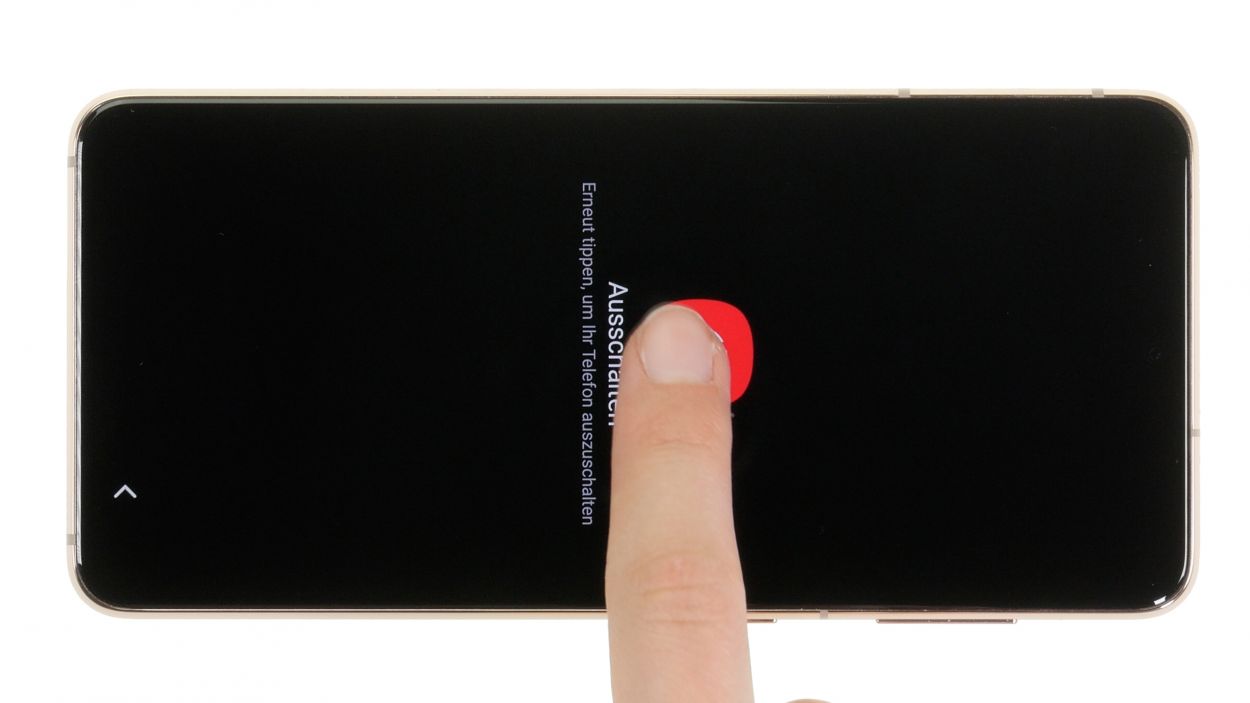
Before diving into the repair of your Galaxy S21 5G, give our checklist a whirl to test the essential functions. This way, you can celebrate your success after the repair!
– Give that side and volume down button a good press and hold at the same time for a few seconds. You got this!
– Once the menu pops up, go ahead and tap on ‘Power off’, then confirm with your unlock code. Easy peasy!
Step 2

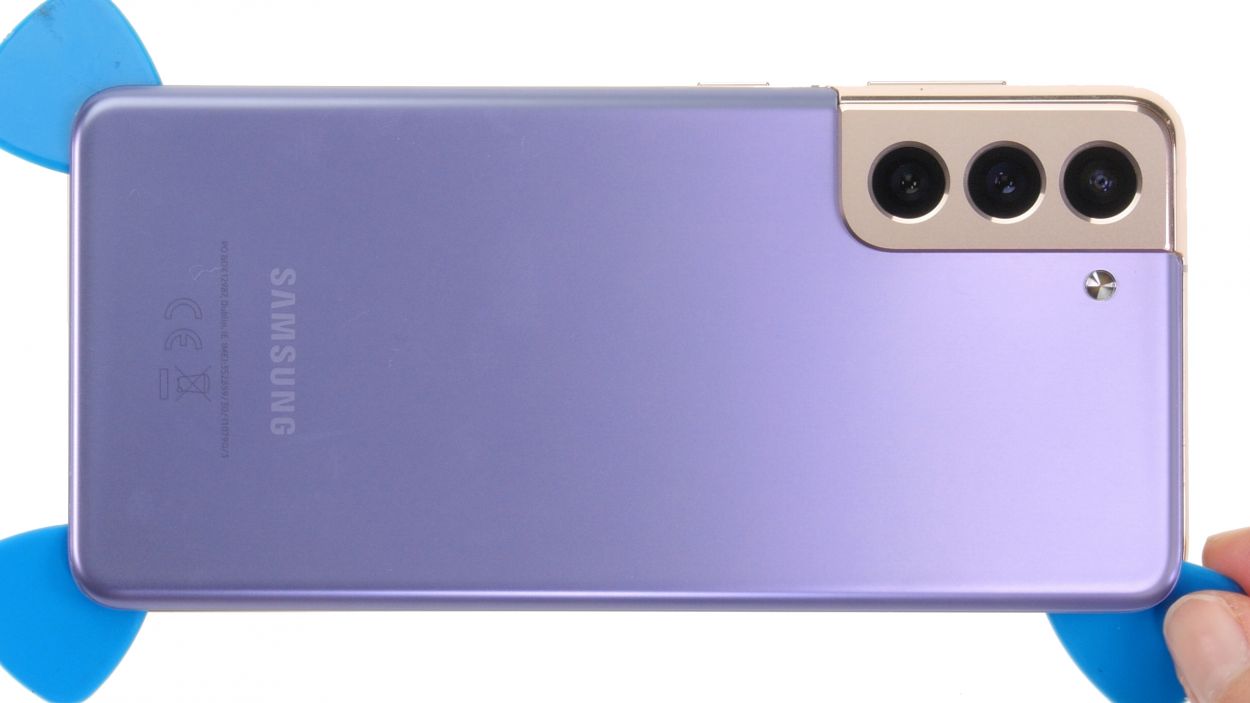
– Warm up the edge of the back cover by gliding your hot air tool evenly along it. Let’s get that cover ready to come off!
Watch those fingers! After heating, it’s easy to forget that the back cover might still be a bit toasty. Heat it just enough so you can comfortably touch it—no finger burns allowed!
The back cover is really stuck on there, so let’s give it a little warmth to help it out! Grab a heat gun or even a trusty hair dryer and warm up that edge. It’s the perfect way to get things moving smoothly!
Tools Used
- heat gun to heat parts that are glued on so they’re easier to remove.
In most cases, you can also use a hairdryer.” rel=”noopener nofollow”>Heat gun
Step 3
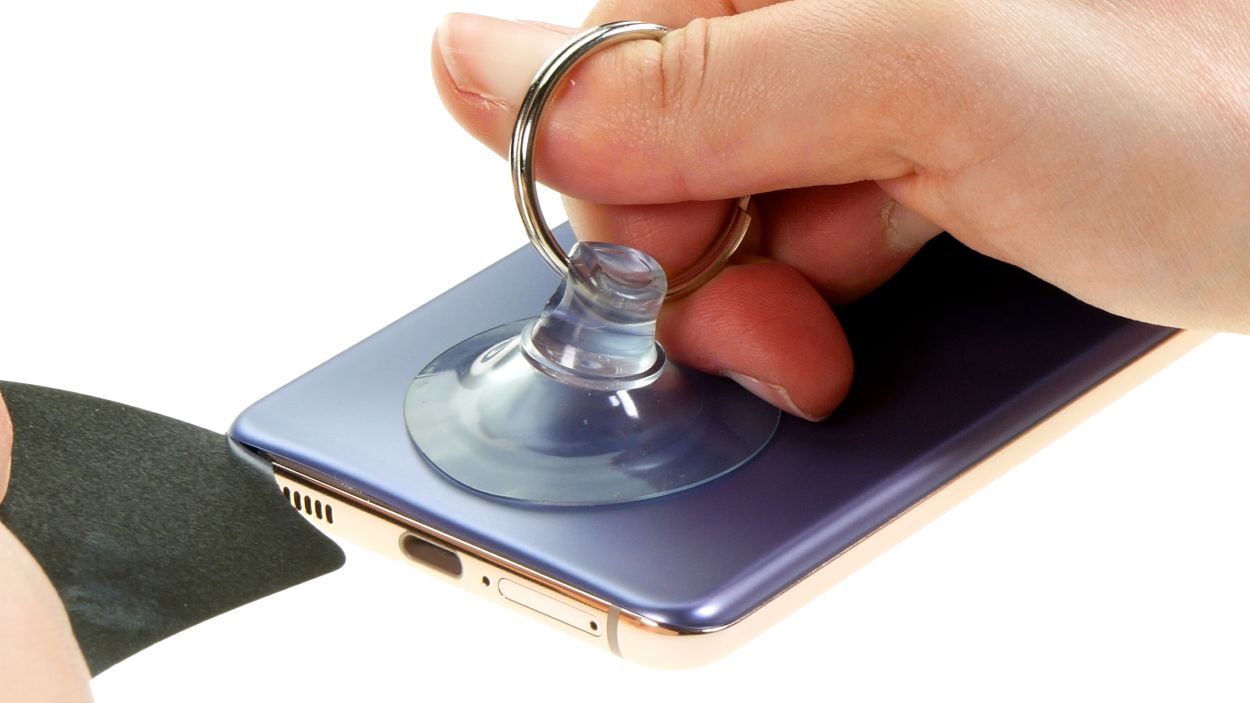
To create a snug little space between the back cover and the display unit, grab a flat and stable tool. We suggest the iFlex for this job because its sharp edges slide in like a breeze!
– Grab a suction cup and stick it to the lower edge of the back cover, then gently pull it upwards. While you’re at it, slide the iFlex tool between the display unit and the back cover to help ease it apart.
Tools Used
- screen and the frame. The practical iFlex is made of stainless steel and sits comfortably in the hand. This makes it the perfect assistant for every smartphone repair.” rel=”noopener nofollow”>iFlex Opening Tool
- VAKUPLASTIC Suction Cup
Step 4


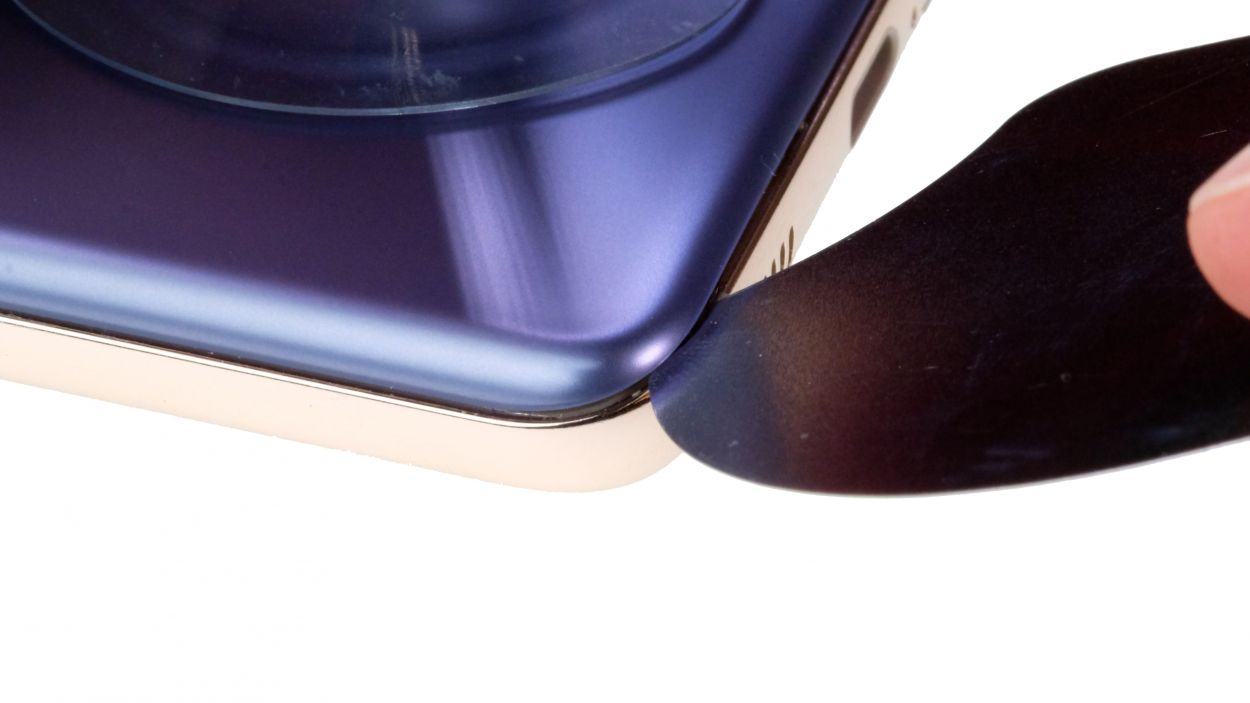
– Gently run your tool all the way around the edge of the back cover to carefully loosen it, piece by piece. Take your time, it’s like peeling a banana!
– Slide those flat picks underneath the back cover at regular intervals to keep the glue from getting too cozy again. Think of it as creating little breathing spaces!
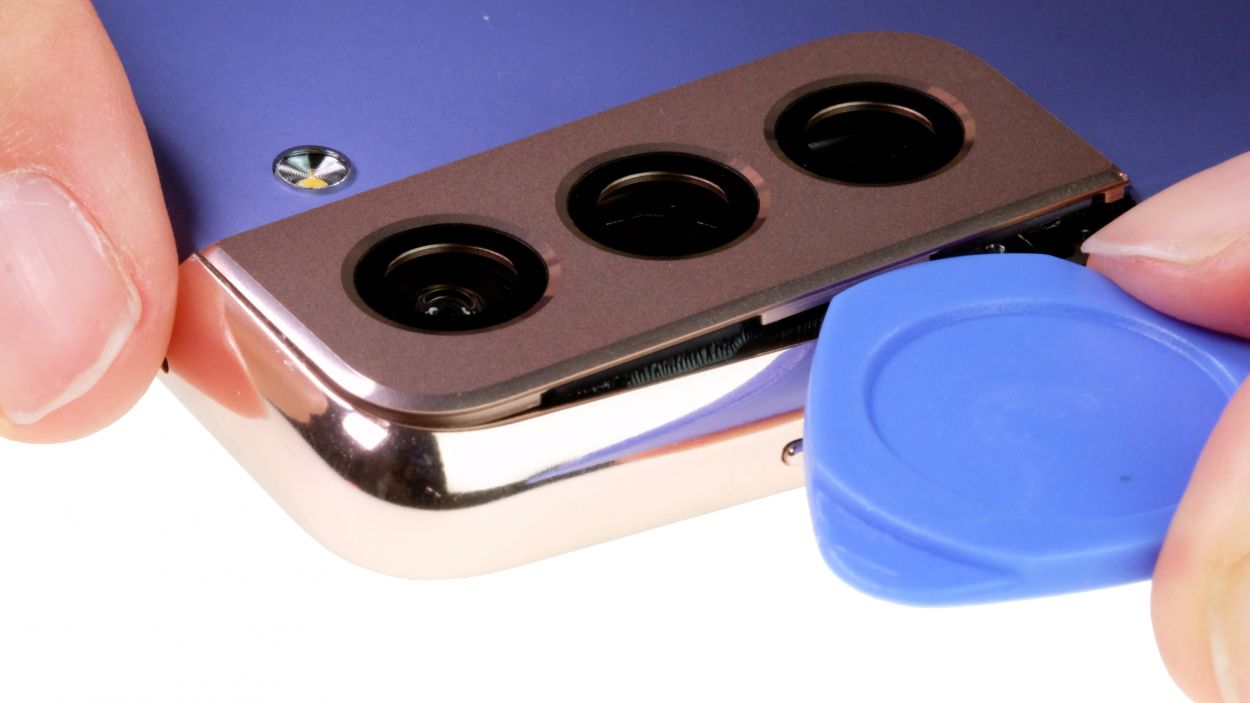
Hey there! Just a friendly reminder: when you’re working on the camera module, be careful not to push your tool in too deep. We suggest using a hard plastic pick here – its design keeps it from going too far in, so you can keep things safe and sound!
To keep the edge of your case safe from the iFlex’s sharp edges, make the switch to a plastic buddy like the iPlastix as soon as you can. Your device will thank you!
Tools Used
- heat gun to heat parts that are glued on so they’re easier to remove.
In most cases, you can also use a hairdryer.” rel=”noopener nofollow”>Heat gun - Pick Set
- Flat Picks
- iPlastix Opening Tool
- VAKUPLASTIC Suction Cup
Step 5
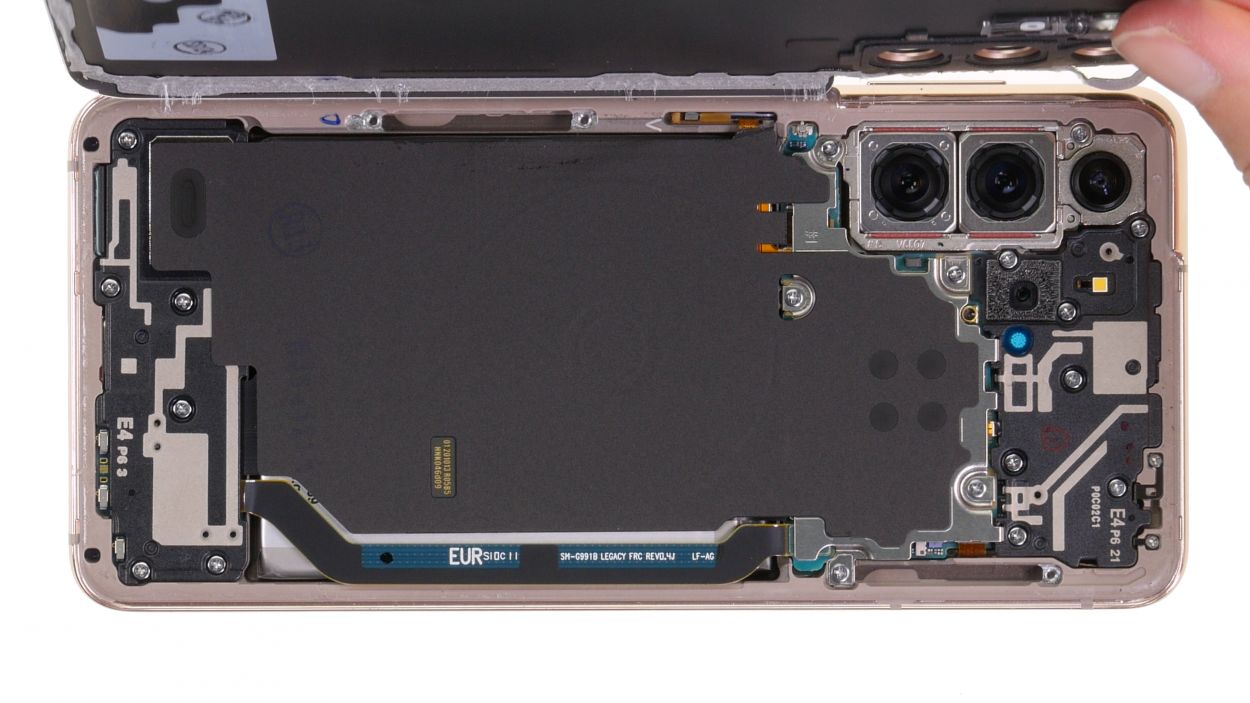
– After you’ve successfully popped off the back cover, it’s time to say goodbye to those plastic picks – remove them all!
– Next, unfold the picks and set them aside, ready for their next adventure.
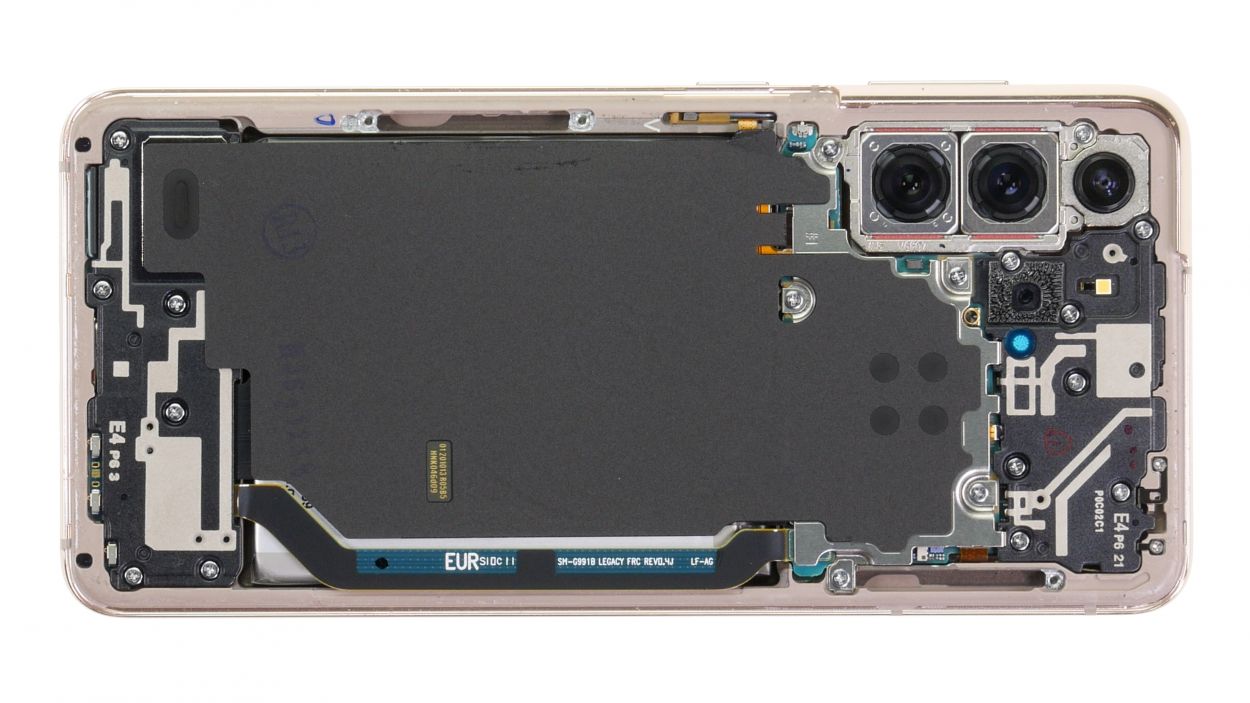
Step 6
5 × 4.9 mm Phillips
Keep your repair space organized and avoid losing tiny parts by using a screw storage solution. An old sewing box works wonders! Plus, with our nifty magnetic pad, you can rest easy knowing that everything stays put. Let’s get to it!
– Gently loosen those five Phillips screws holding the charging coil cover in place. You’ve got this!
– Once they’re free, place them on your magnetic pad so they don’t wander off.
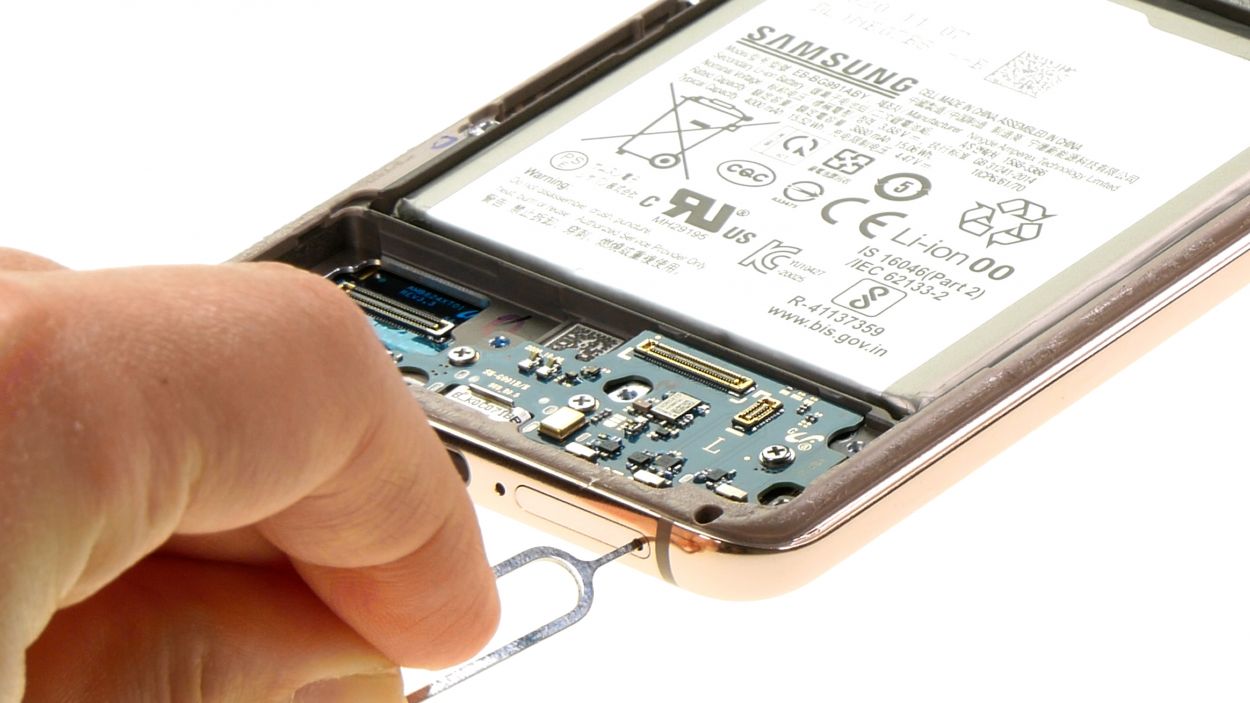
Step 7
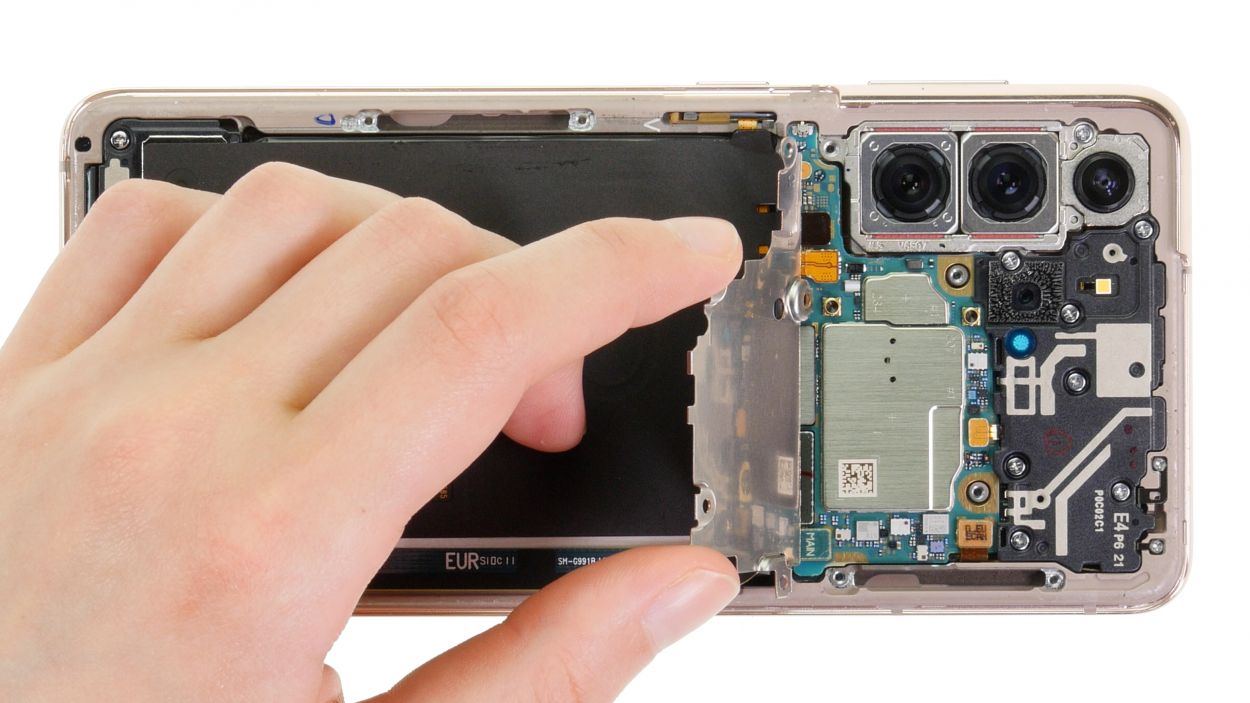

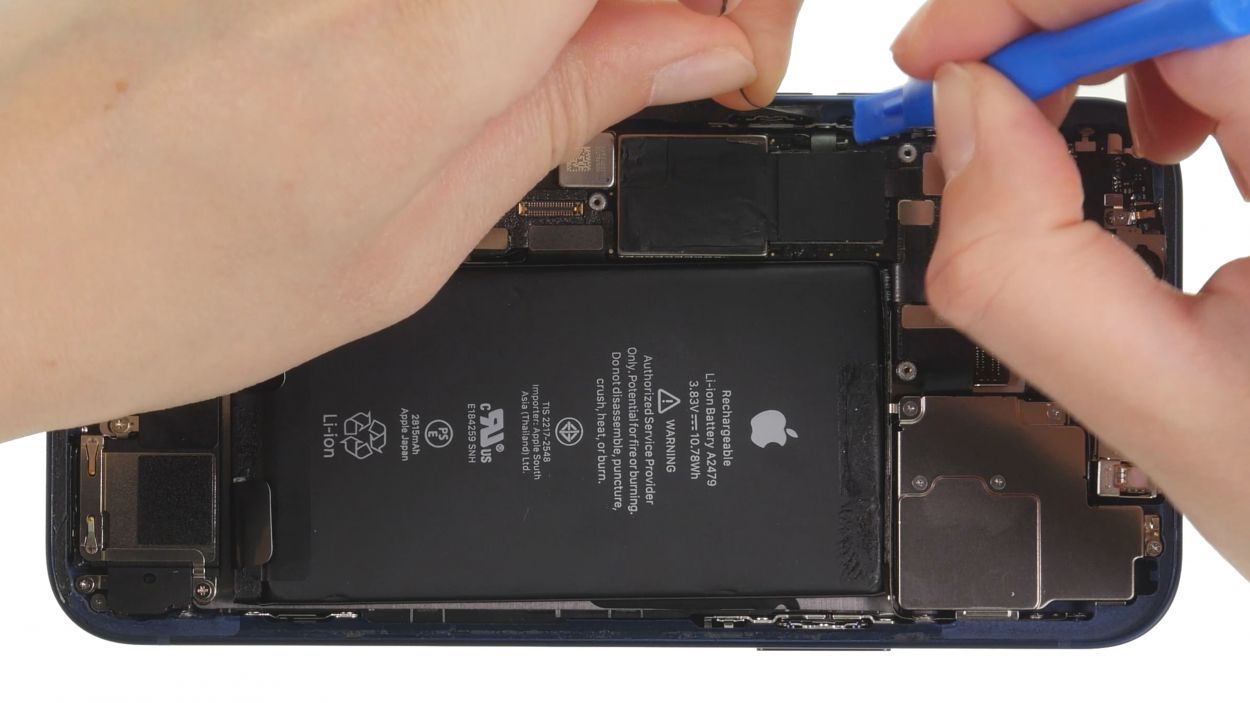
Make sure to unplug that battery connector as soon as you can! It’s the best way to keep things from getting a little too shocking.
– Gently lift the metal cover of the NFC antenna like you’re unveiling a hidden treasure.
– With a little finesse, use a plastic lever tool to pop the orange battery connector off the motherboard. A plastic spudger works like a charm for this!
Tools Used
Step 8

– Next up, gently pry off the black connector of the charging coil from the circuit board using a spudger. Take your time, and you’ll have it off in no time!
Tools Used
Step 9

The lower part of the charging coil has a bit of adhesive holding it in place. Just a heads up!
– After you’ve successfully separated the connectors, gently wiggle and lift off the charging coil. You’ve got this!
Step 10

7 × 4.9 mm Phillips
– Gently loosen the seven Phillips screws holding the earpiece in place. They’re just waiting to be freed!
– Once you’ve got them loose, be sure to place them on your trusty magnetic pad. They’ll appreciate the cozy spot!
Step 11
– Gently pry the earpiece connector away from the motherboard using a spudger. Take your time and be careful – you’ve got this!
Tools Used
Step 12
– Gently lift out the earpiece that’s been hanging out in your device and set it aside for now. You’ve got this!
Tools Used
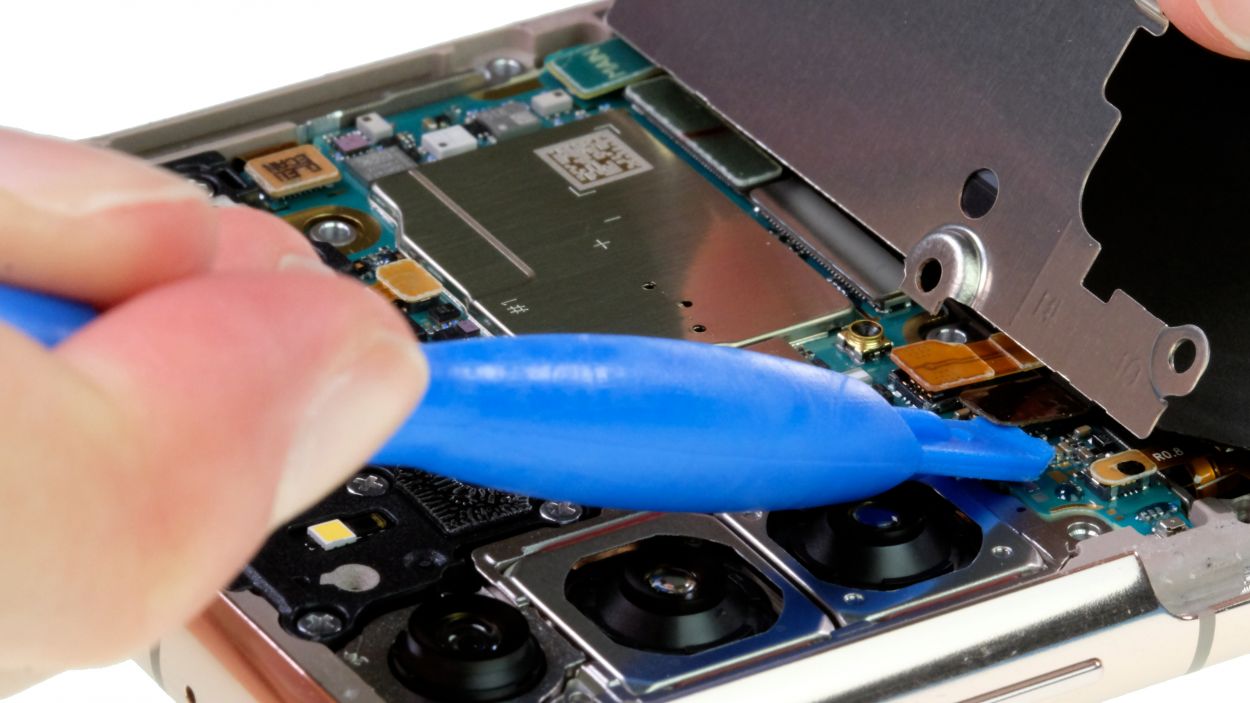
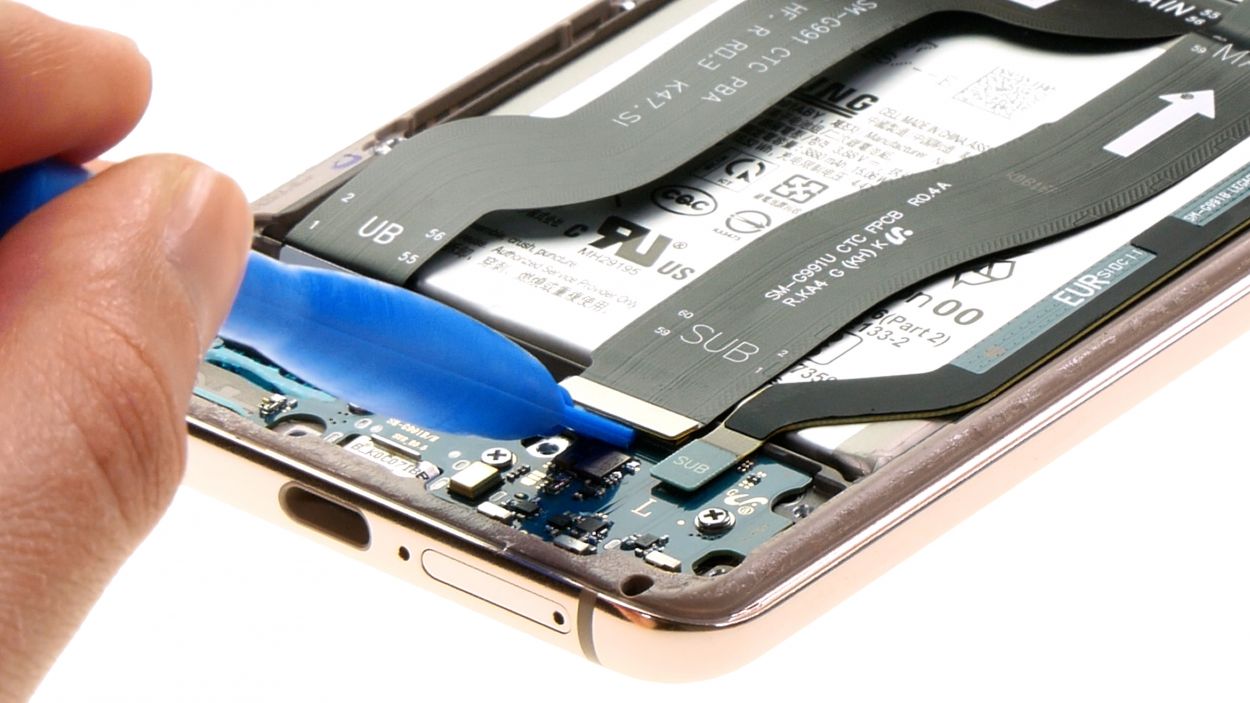
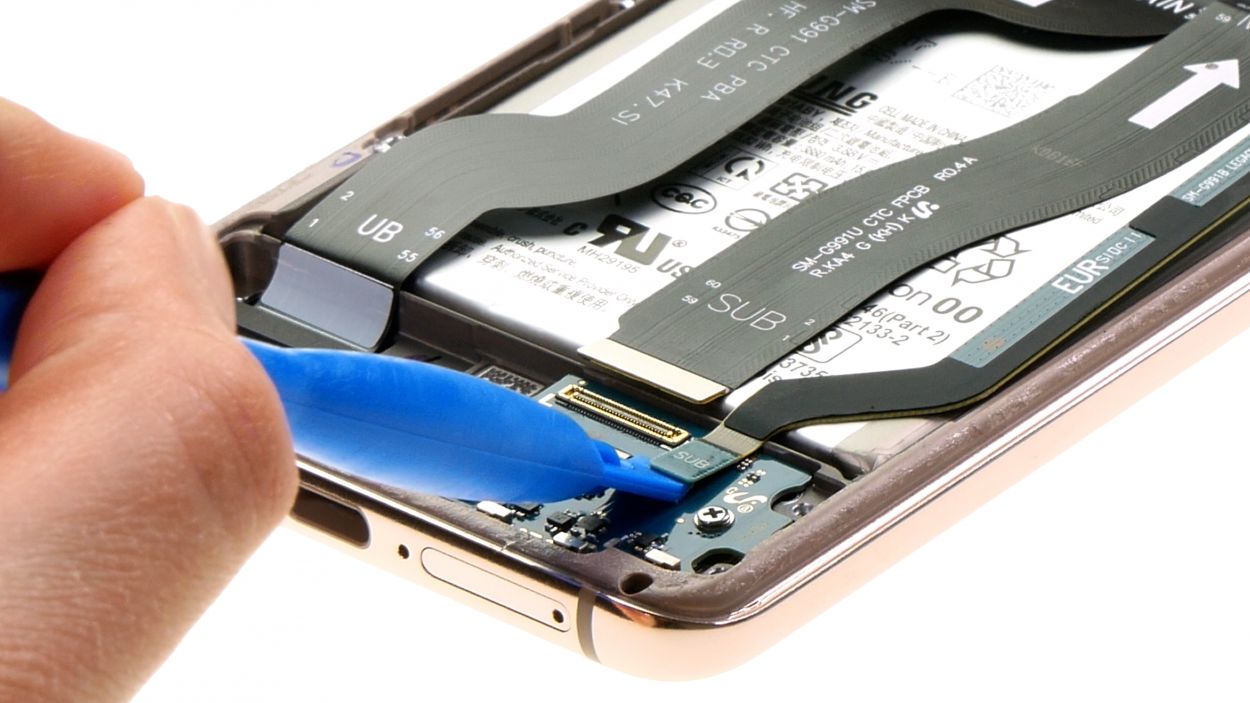
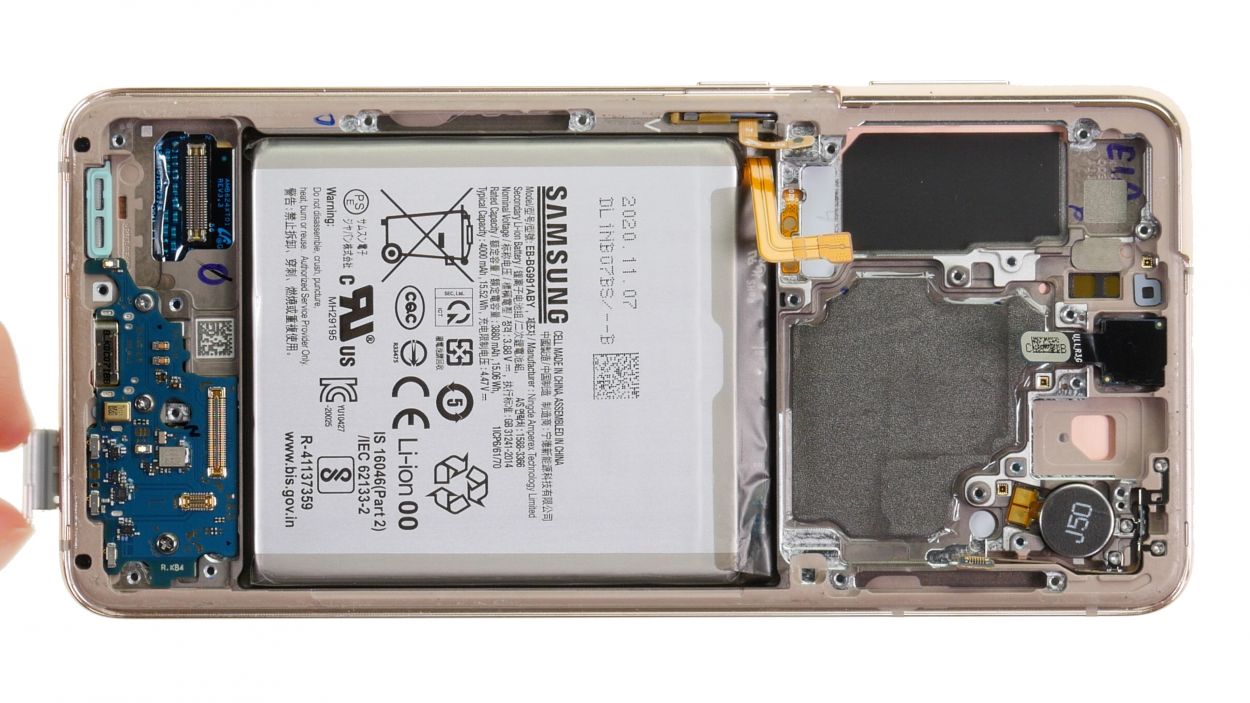
Step 13

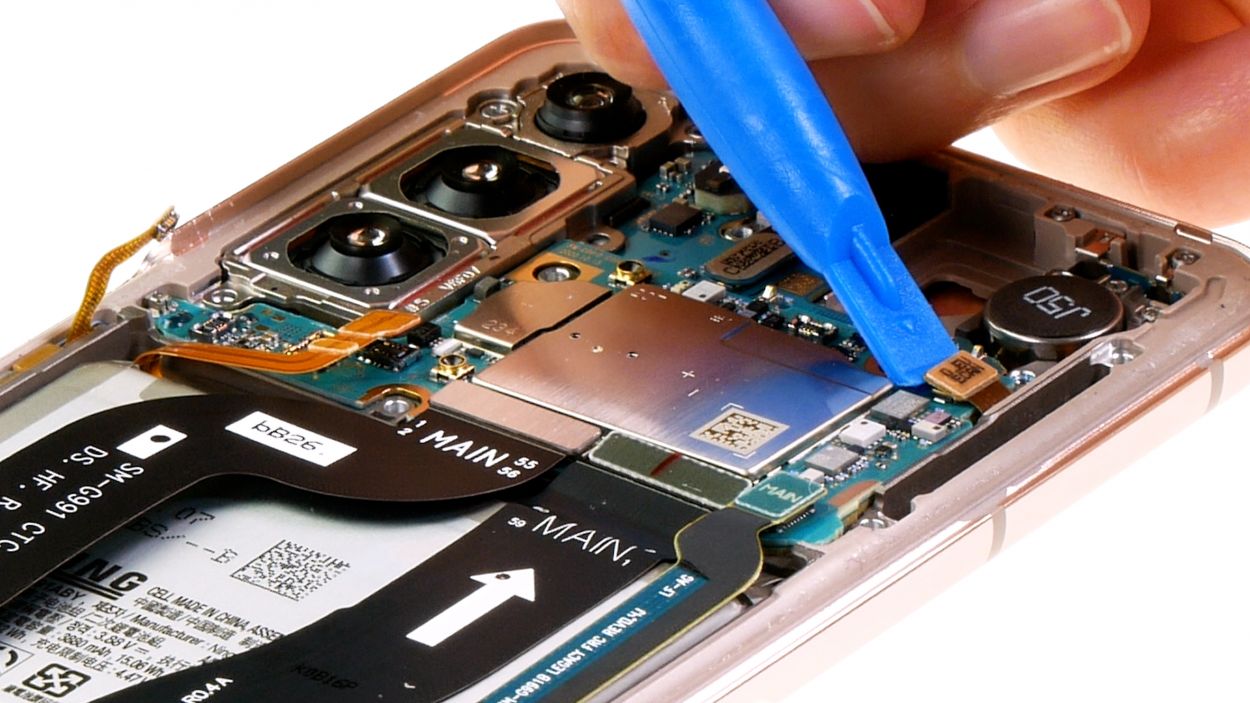
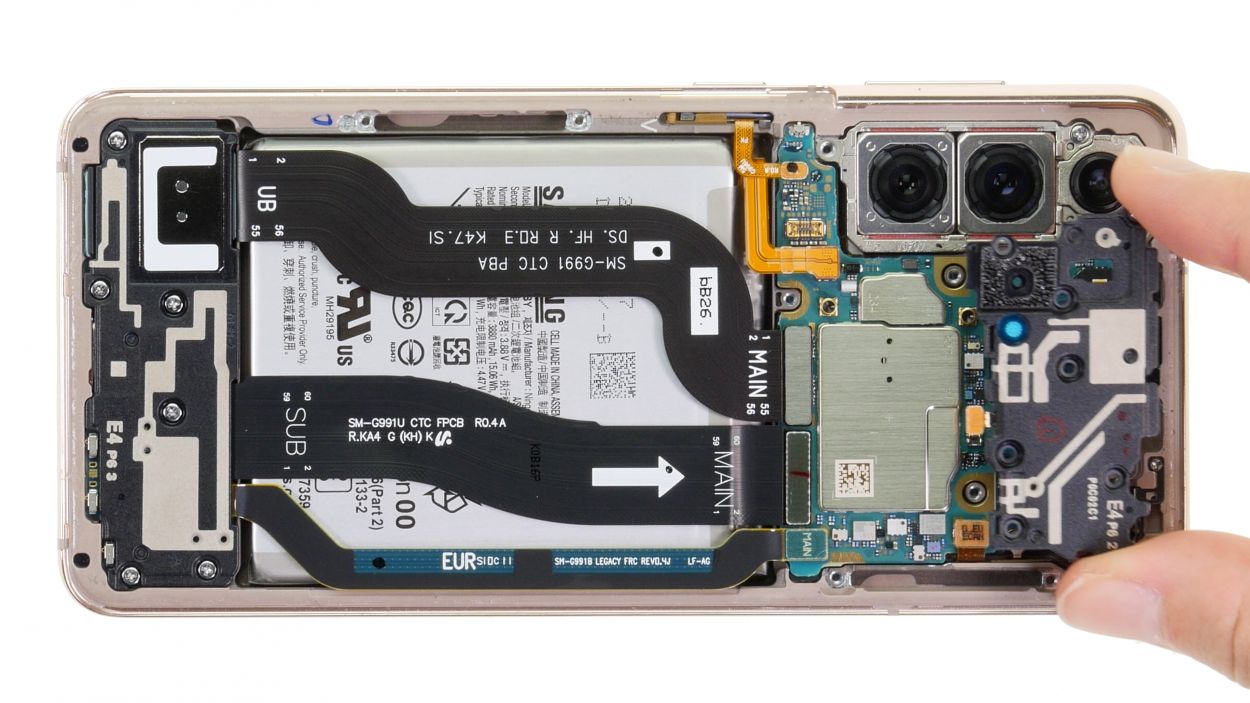
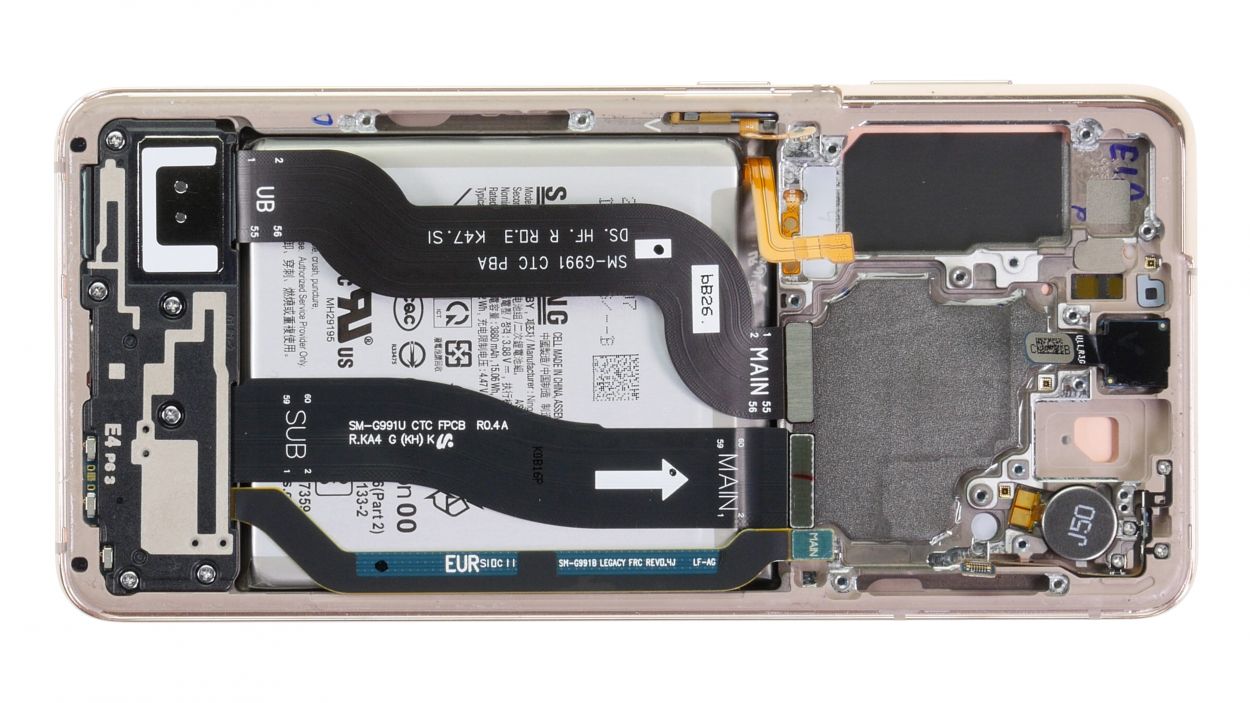
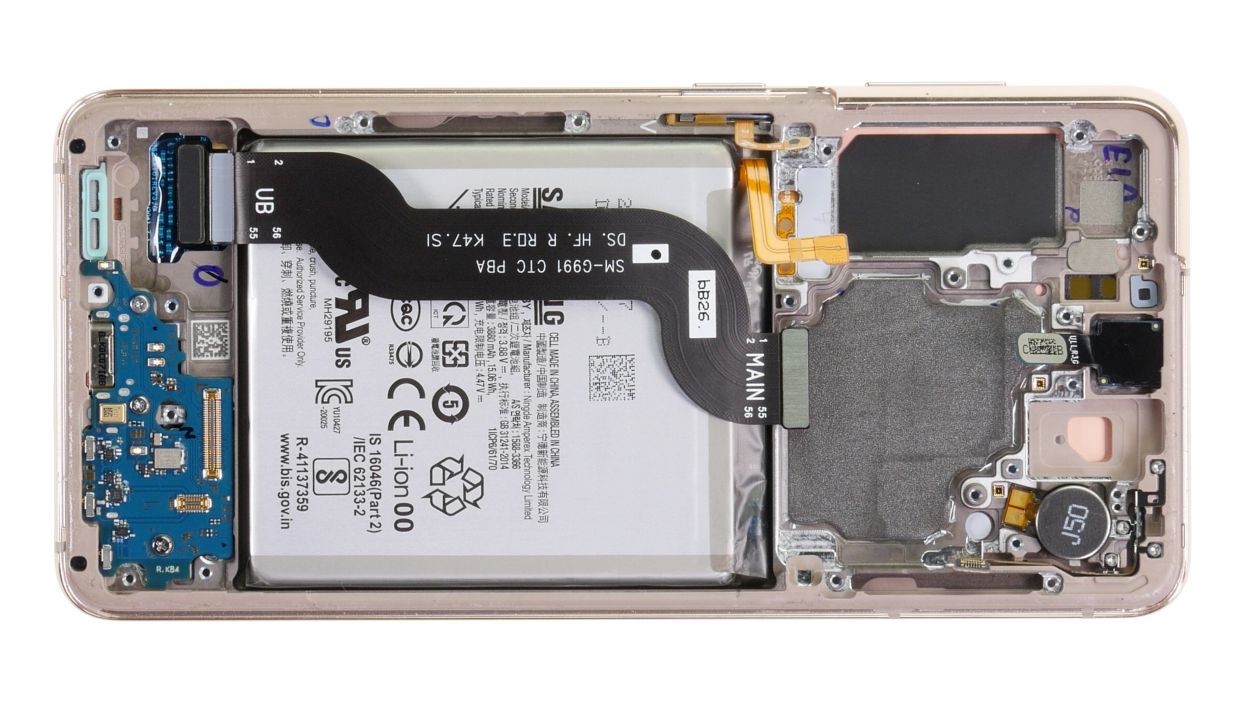
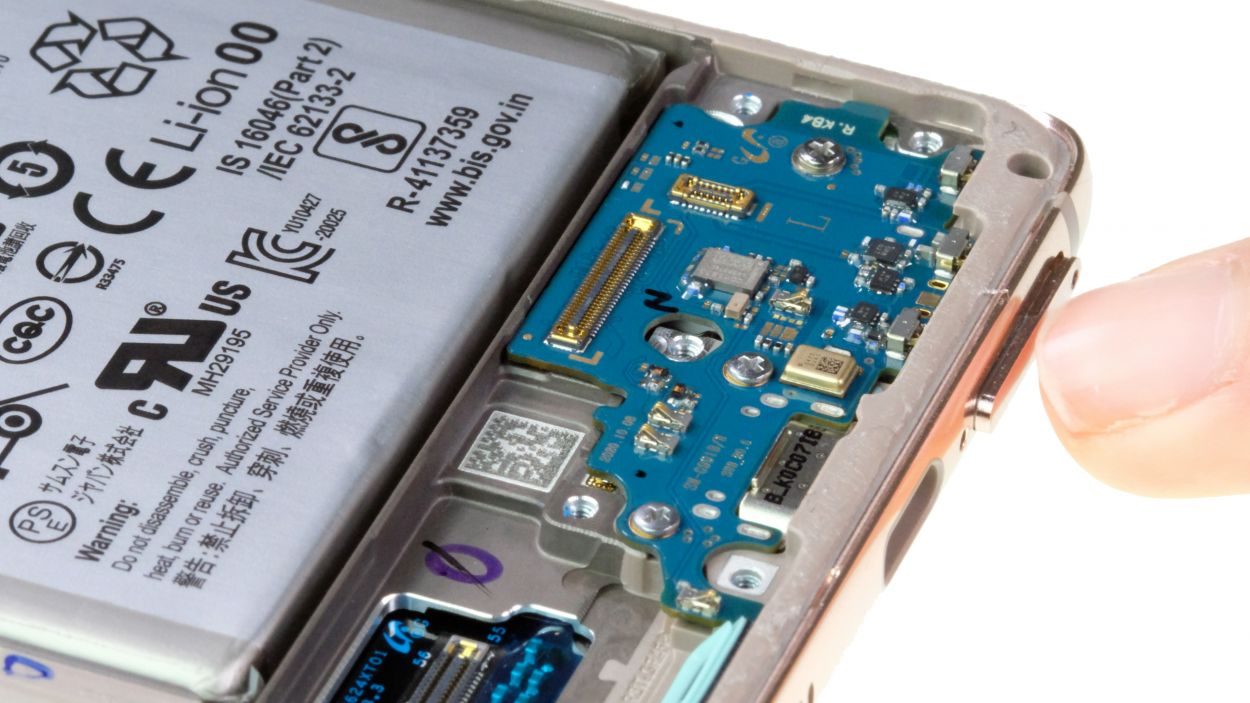
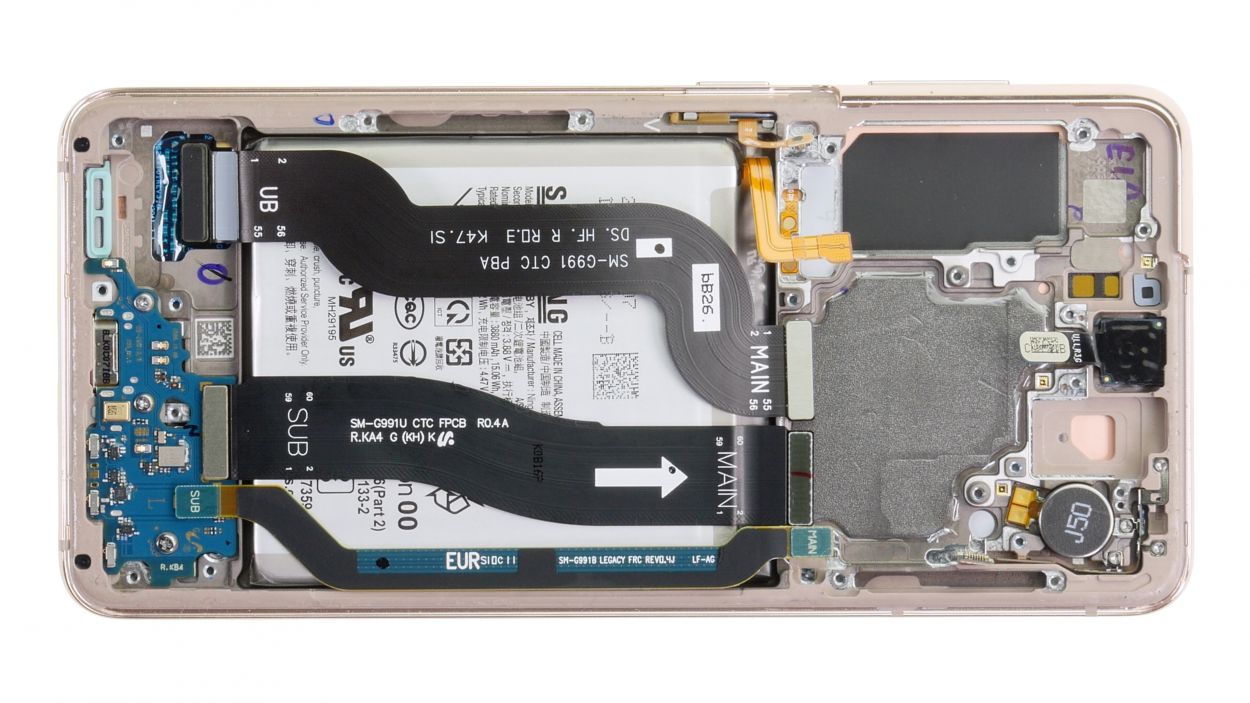
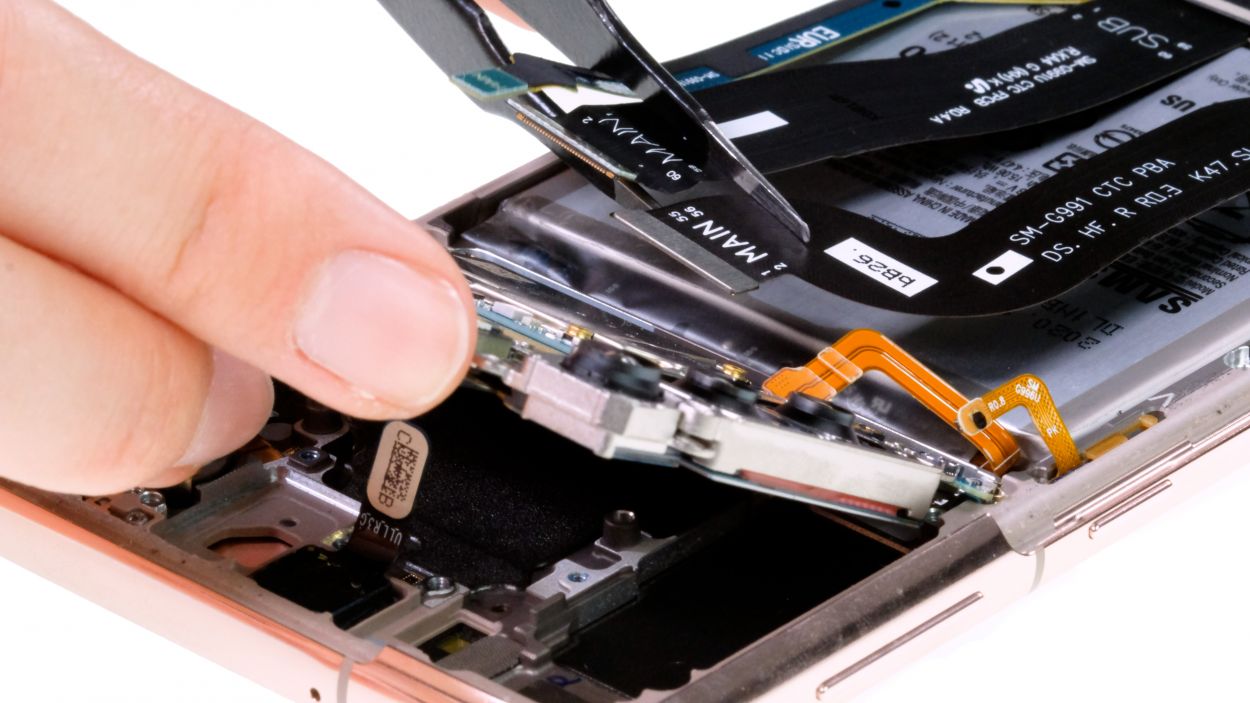
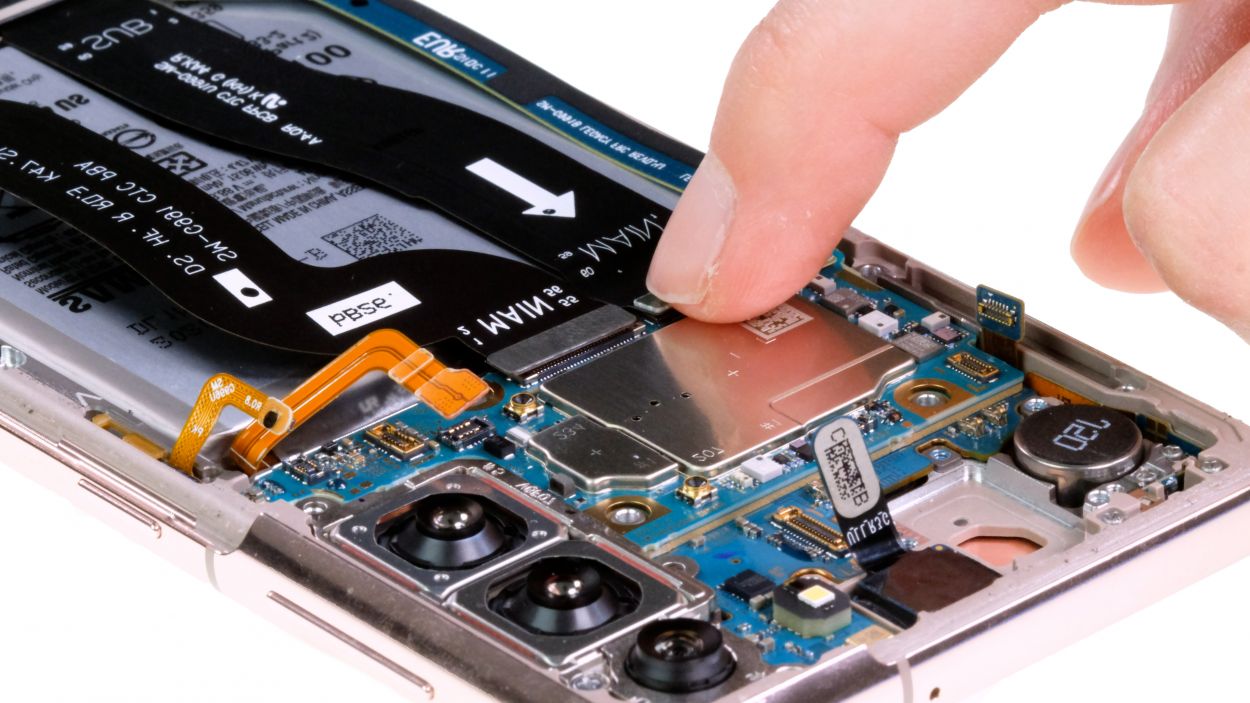
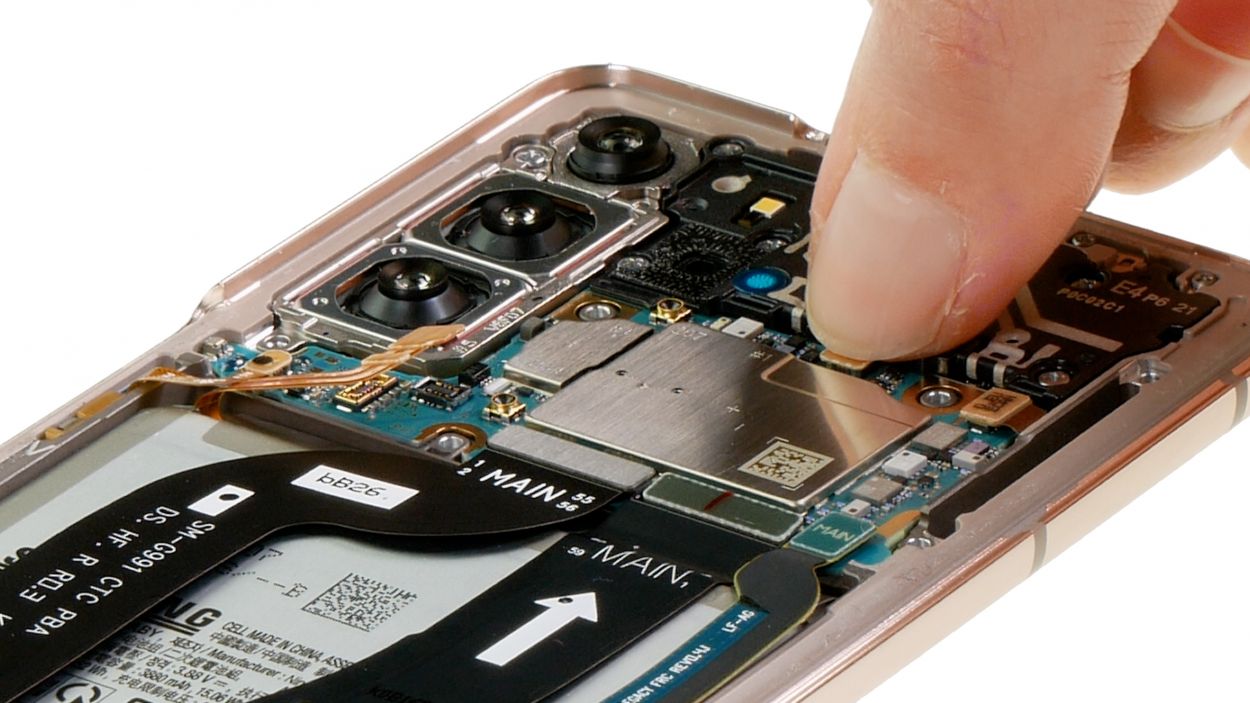
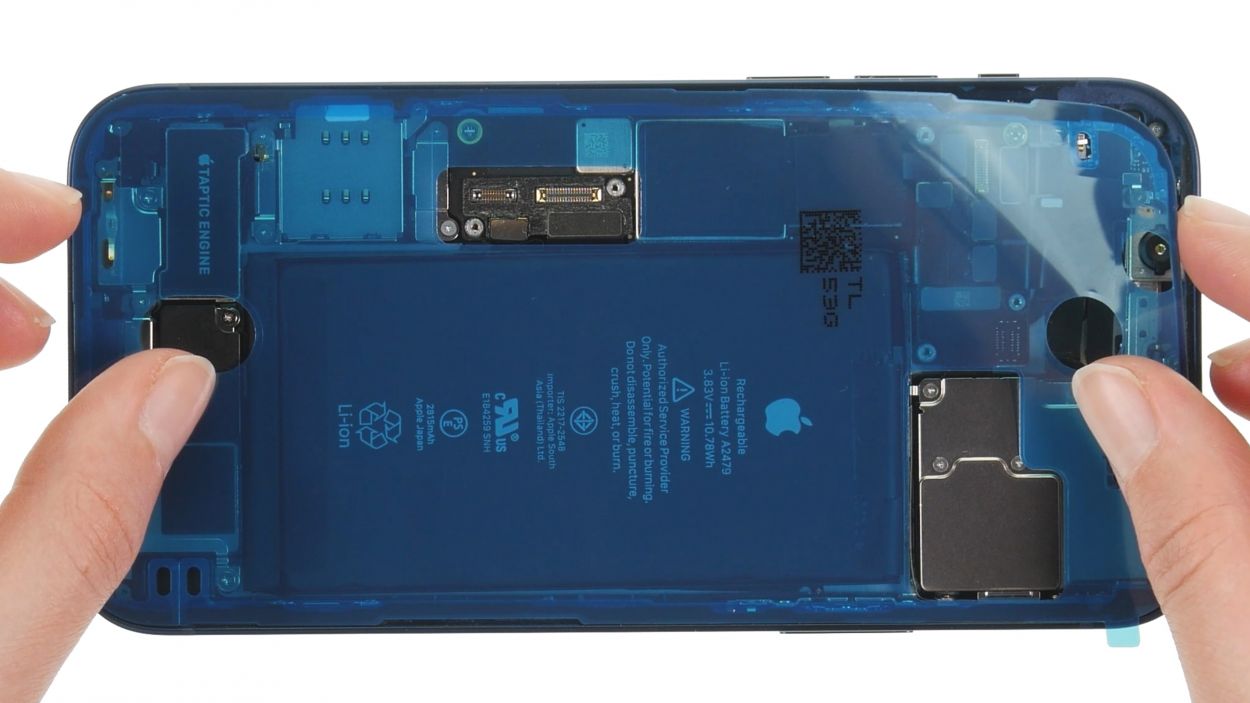
The leftover connections on the motherboard are for two snazzy 5G antennas, the display cable, a couple of connecting cables, and the front camera. Keep your spirits high, you’re doing great!
– Detach all the remaining connectors from the motherboard. Gently wiggle them loose using the spudger tool, like a dance partner letting go.
Tools Used
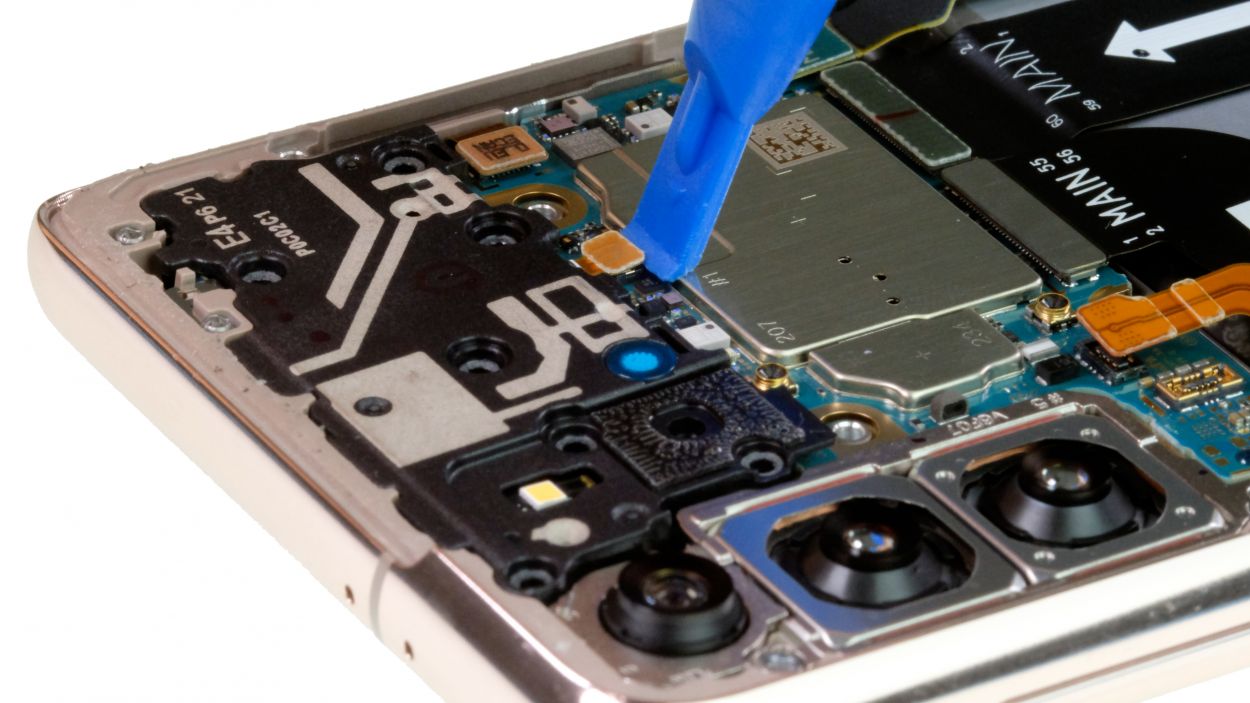
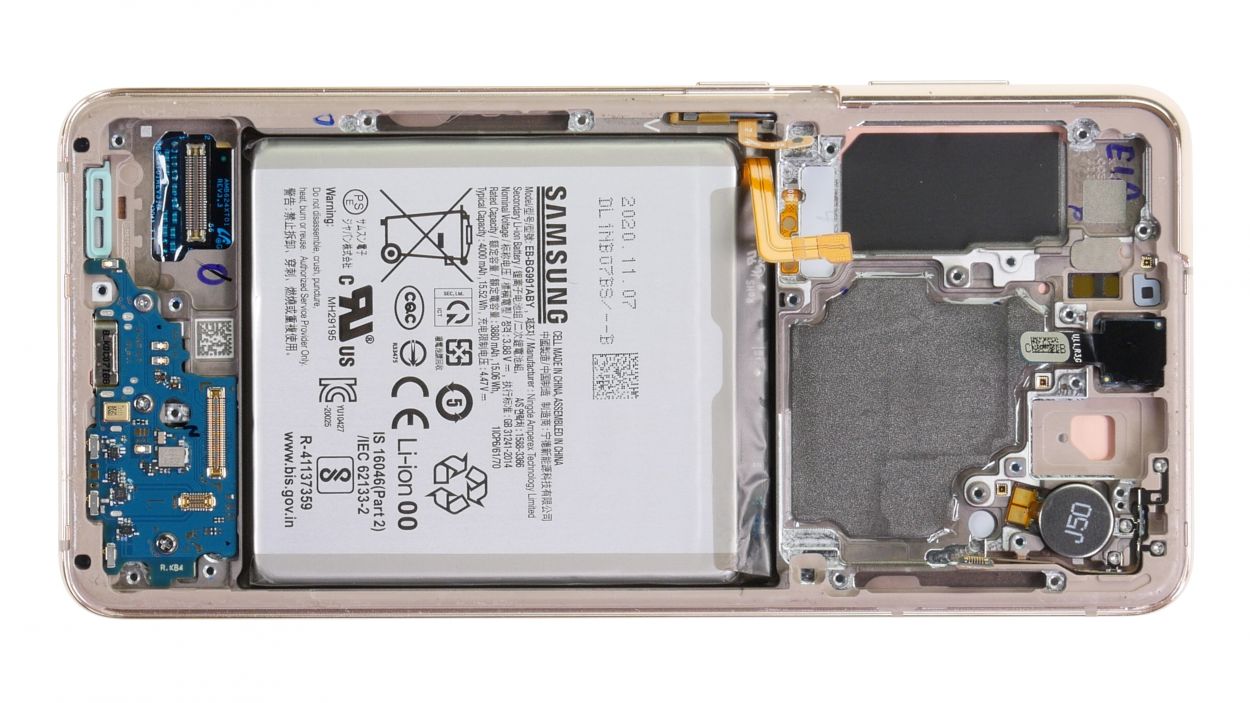
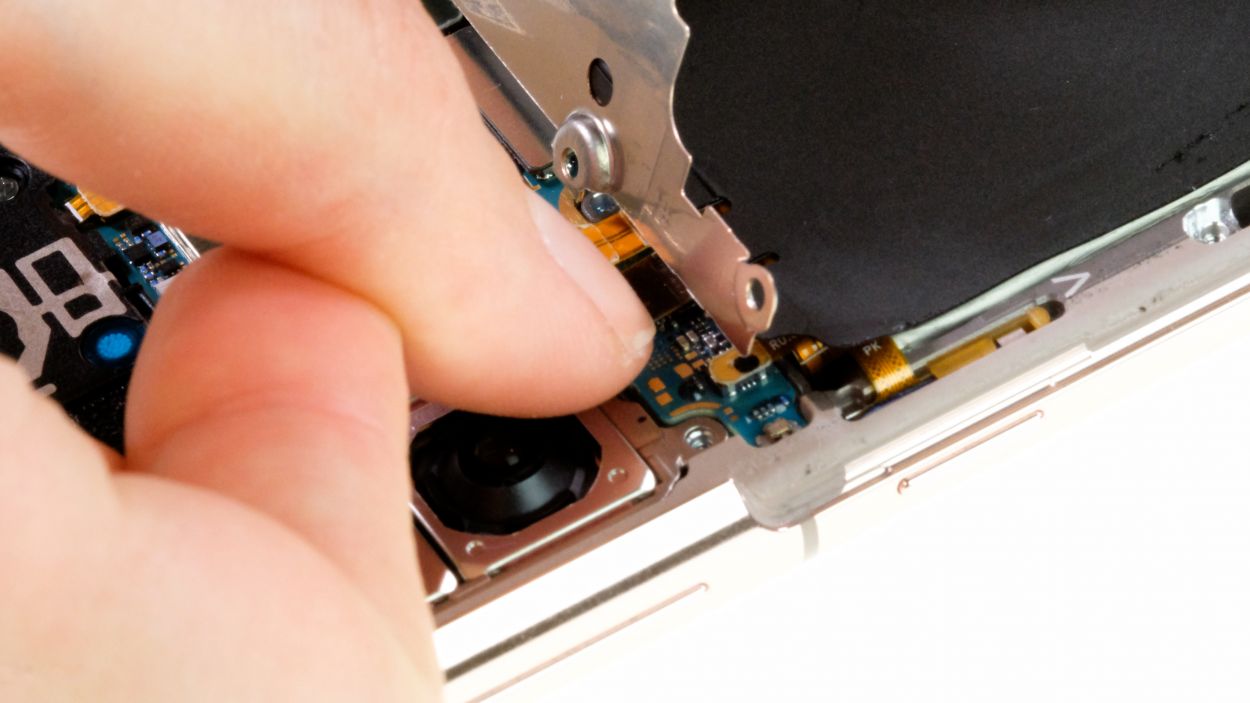
Step 14

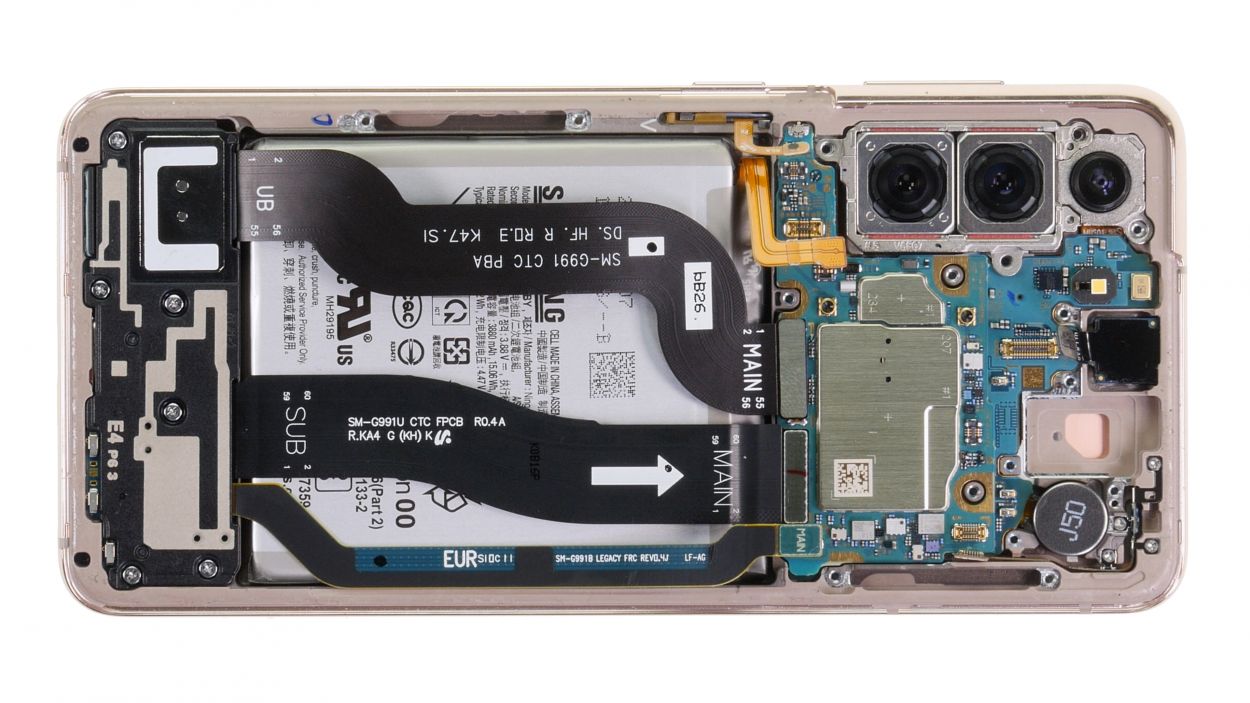
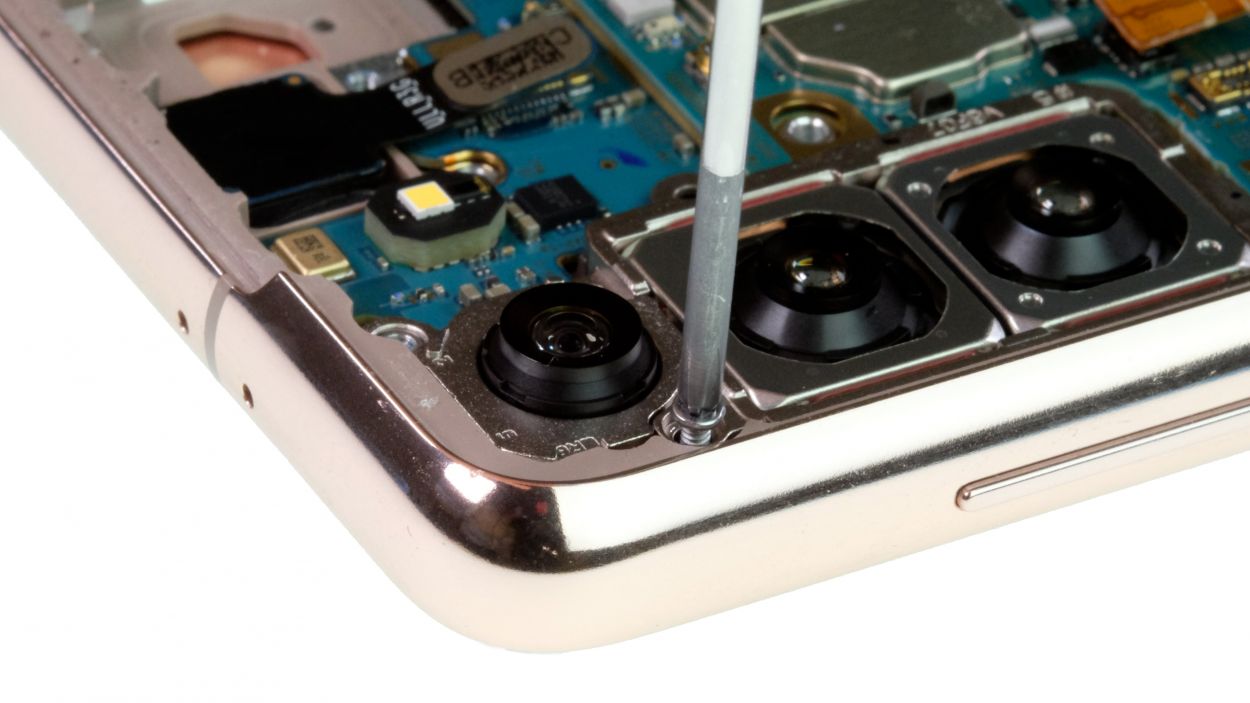
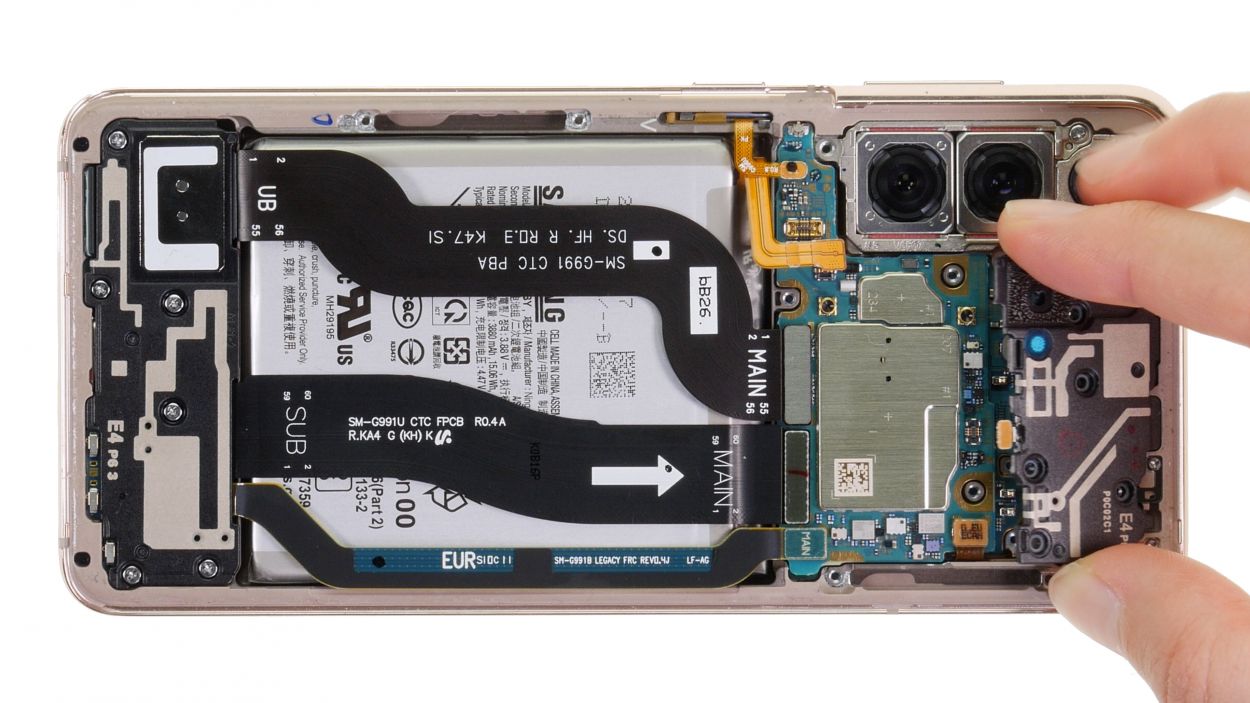
1 × 4.9 mm Phillips
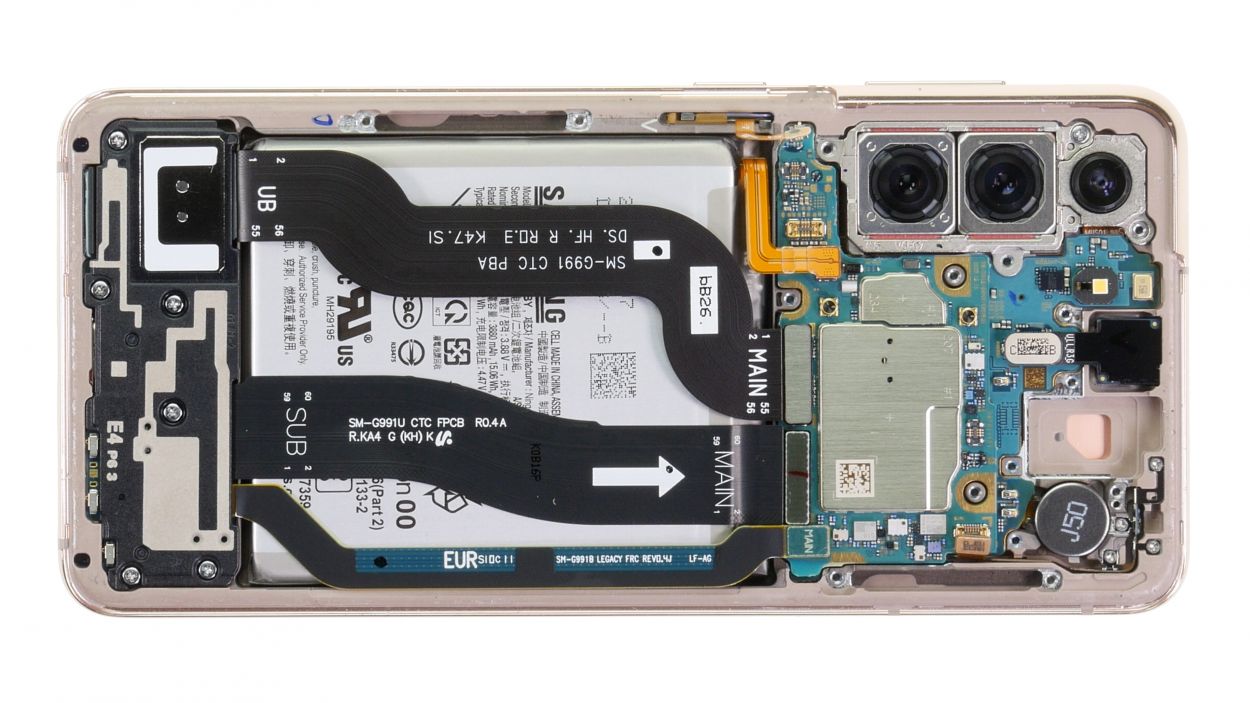
– Gently unscrew the lone Phillips screw holding the camera module in place.
– Set it down on the magnetic pad so it doesn’t wander off.
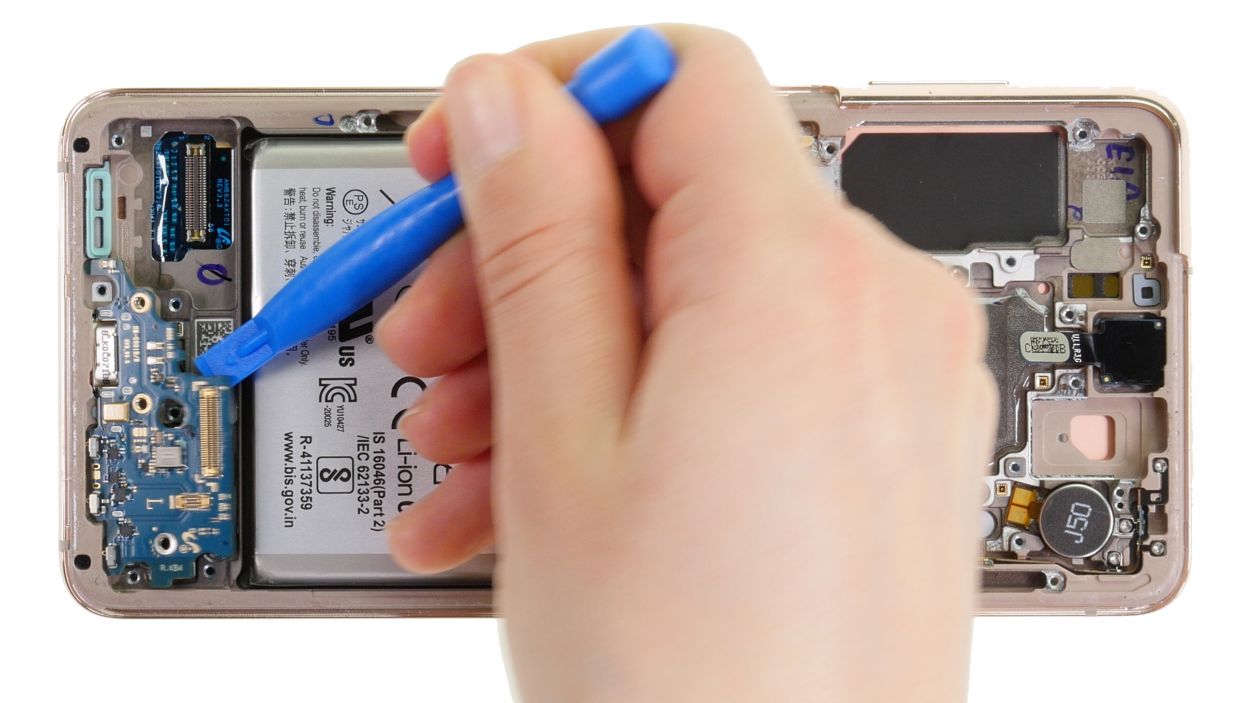
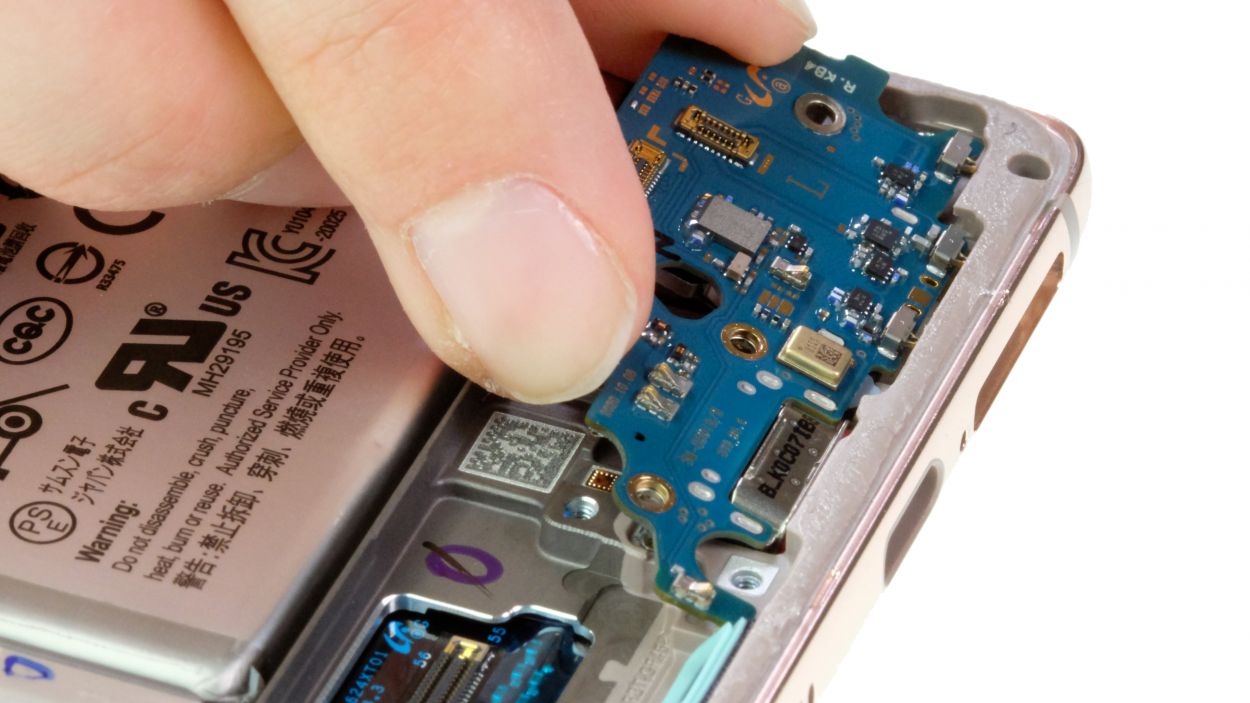
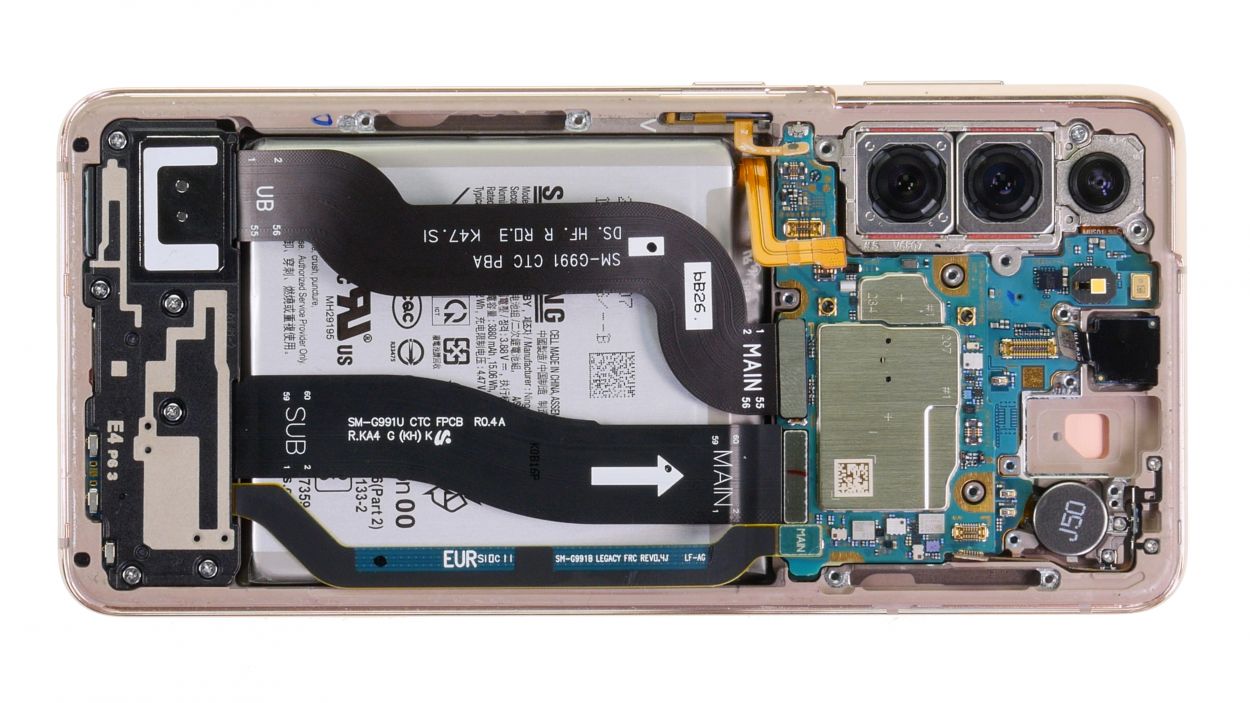
Step 15
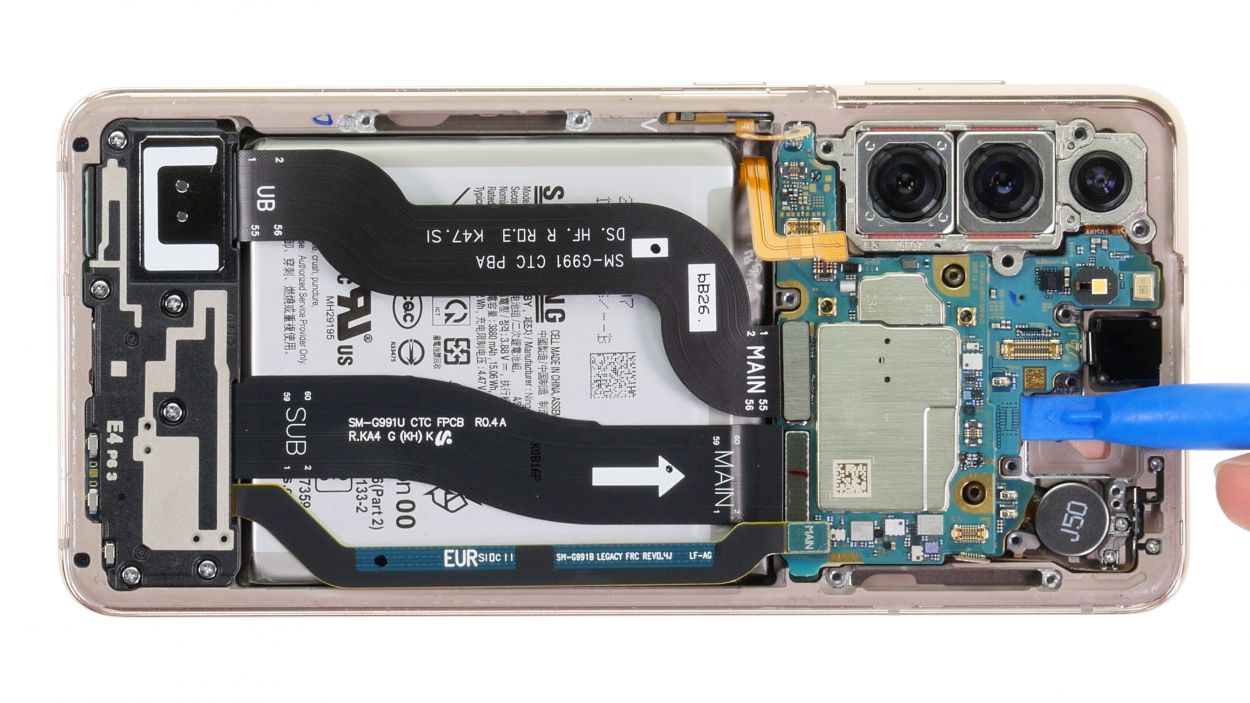
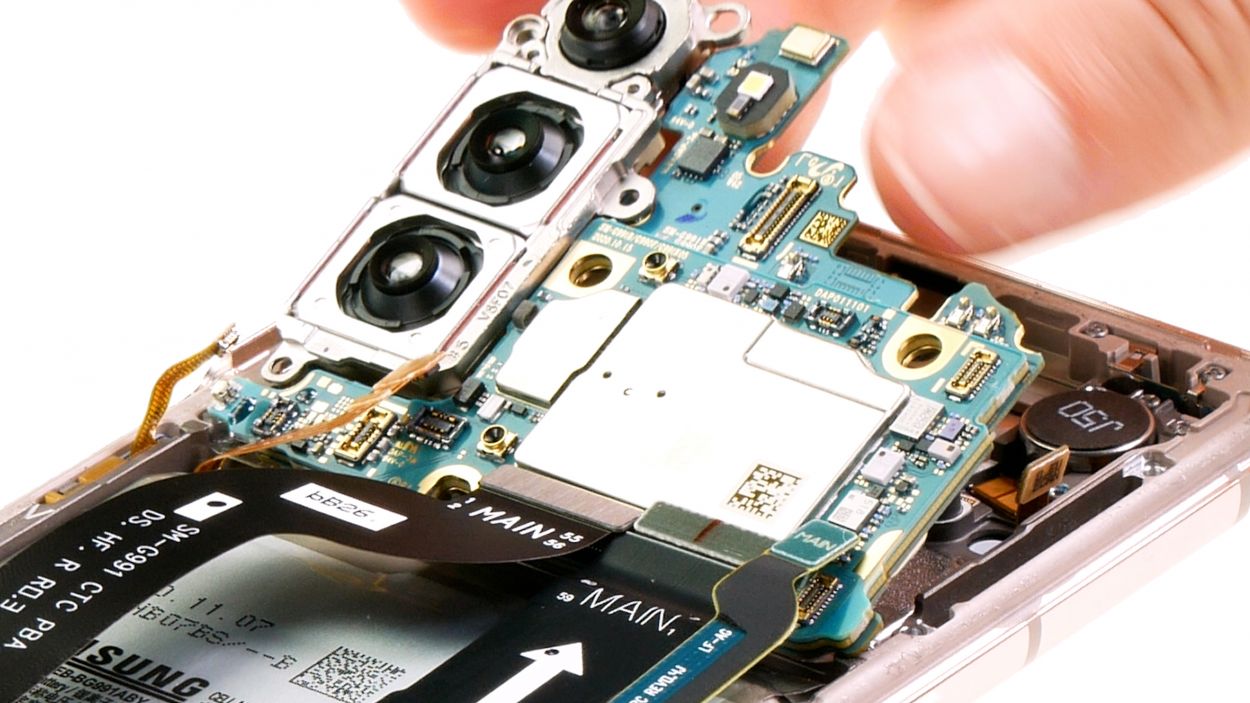
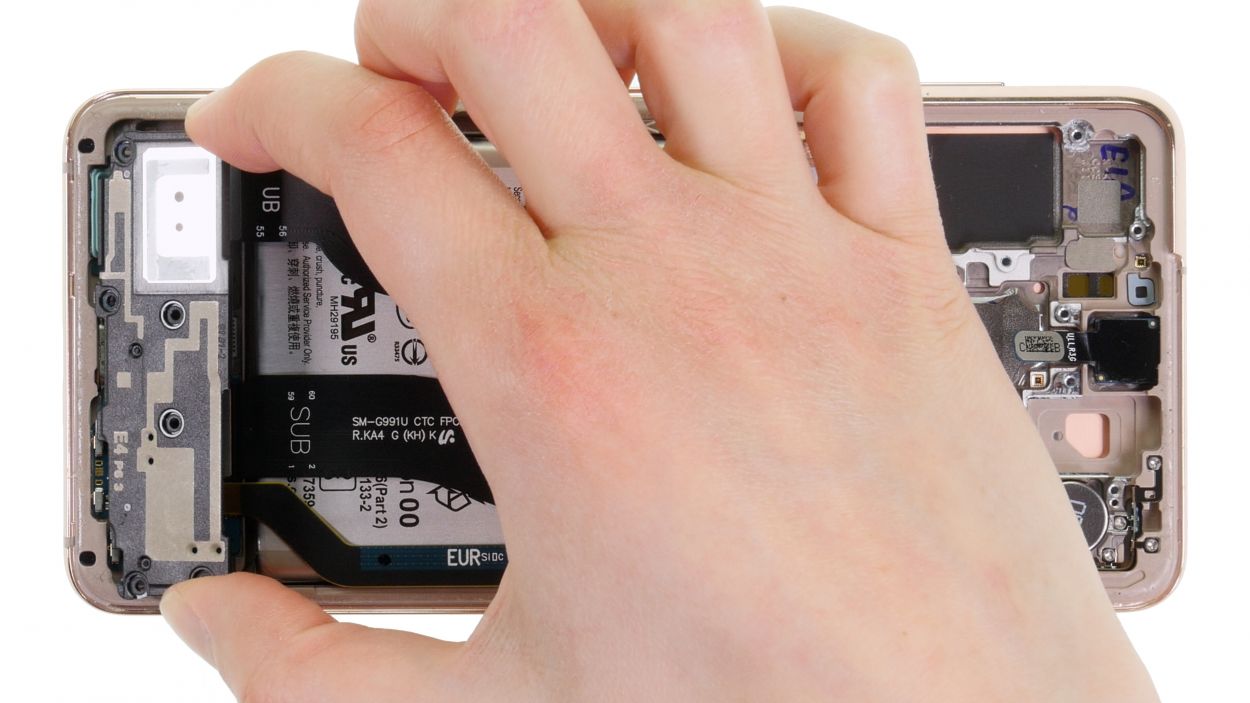
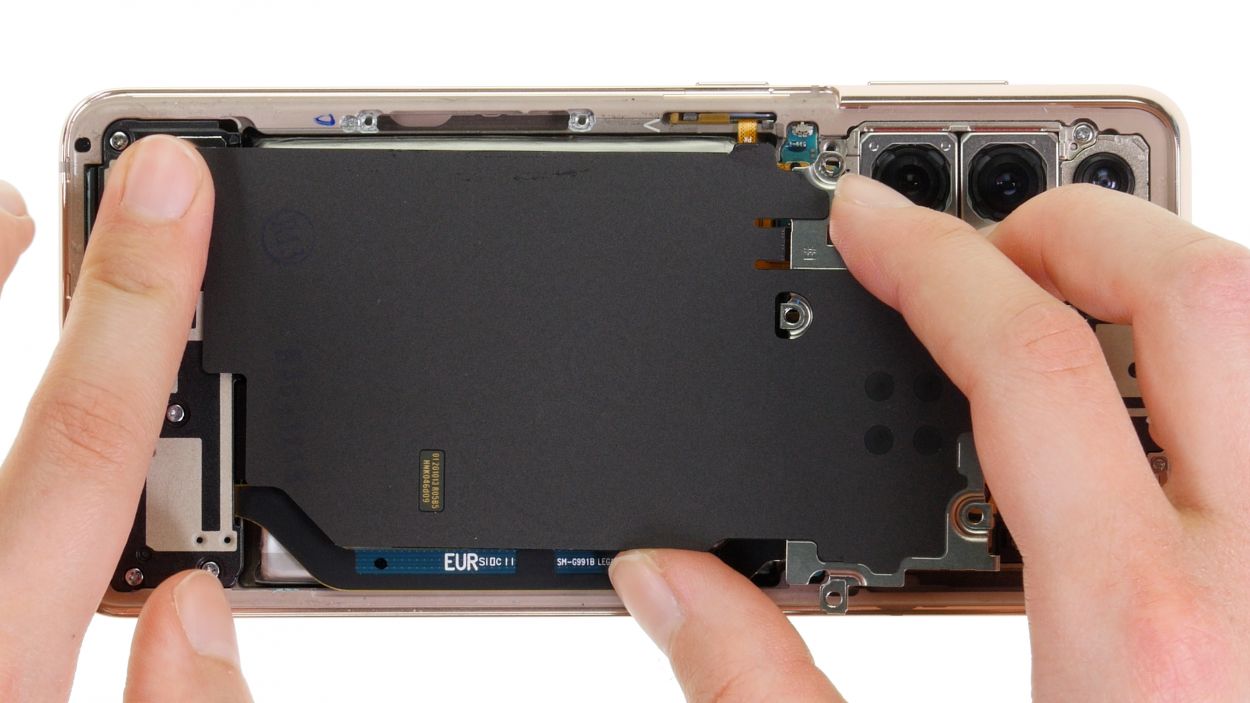
– Gently nudge the motherboard upwards with your trusty spudger and lift it out of the device. You’re almost there!
Tools Used
Step 16
6 × 4.9 mm Phillips
– Time to tackle those six Phillips screws from the speaker module! Unscrew them with care.
– Once they’re free, give them a cozy spot on the magnetic pad so they don’t wander off.
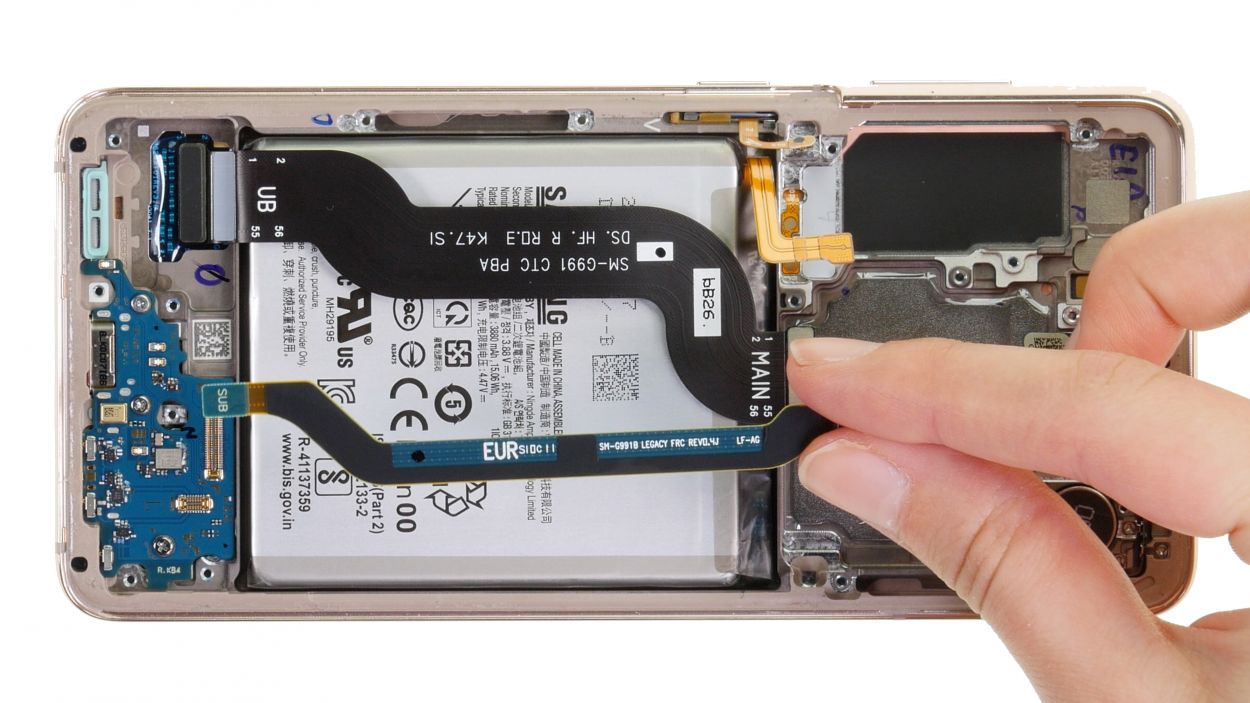
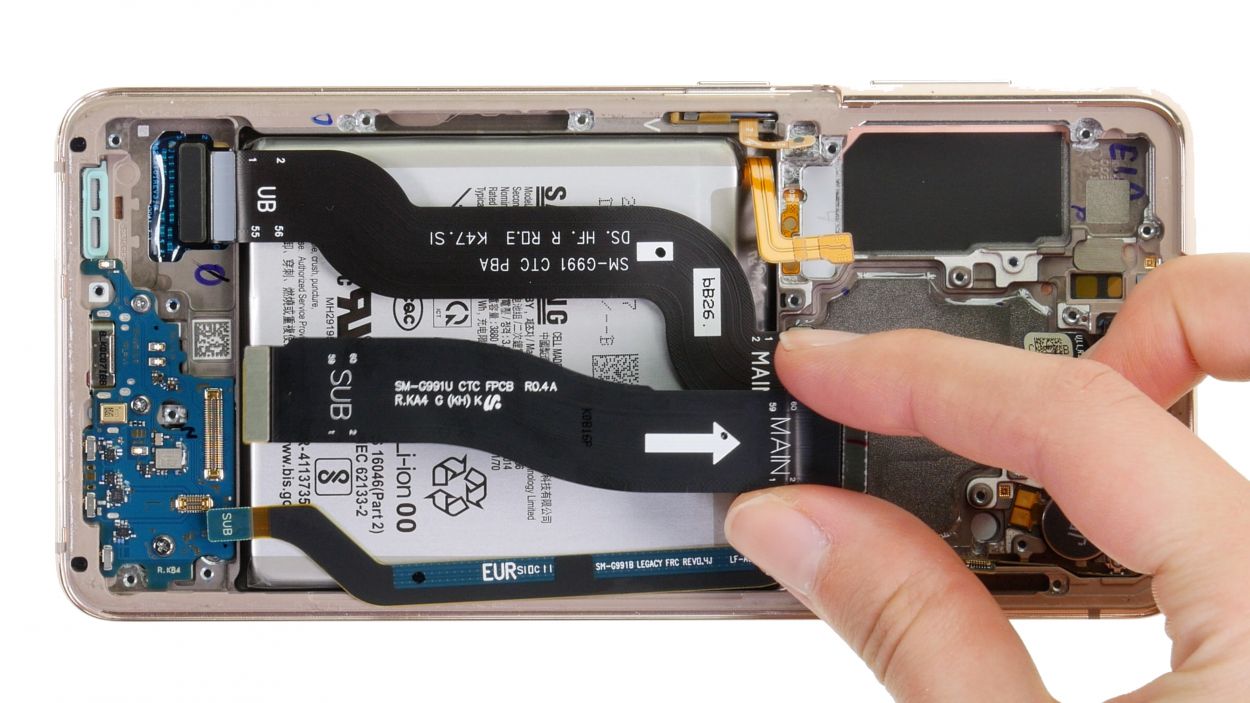
Step 17

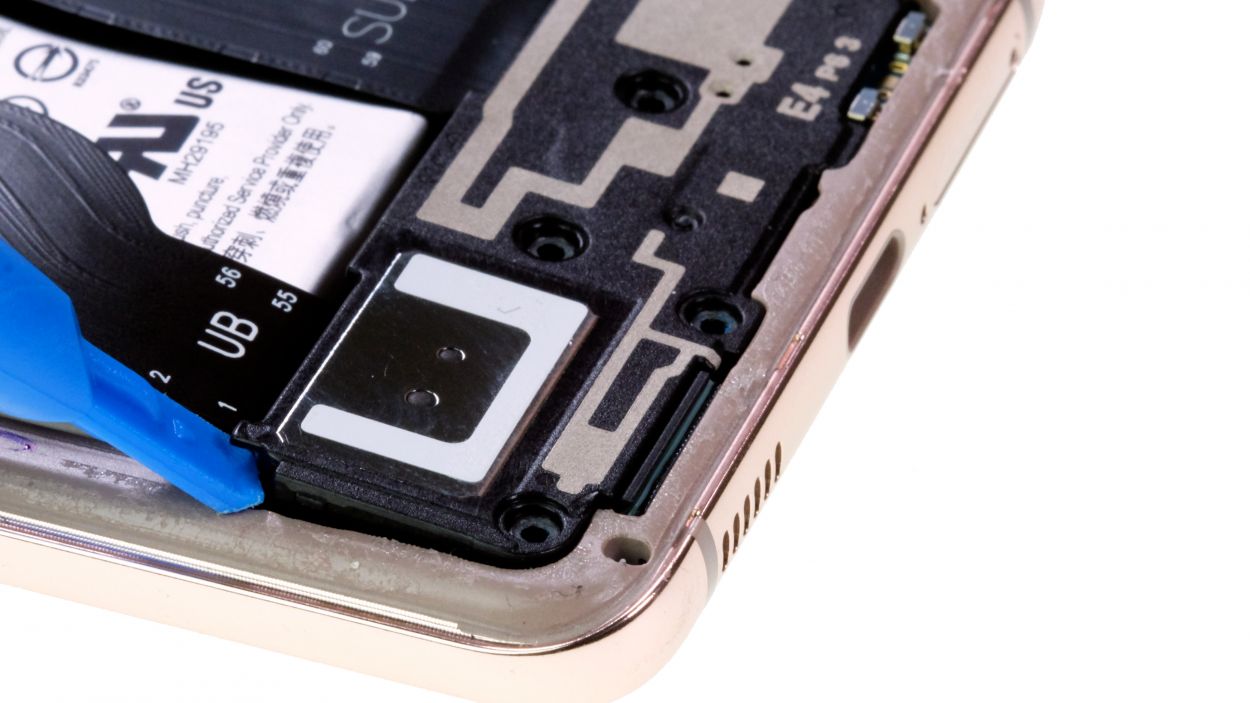
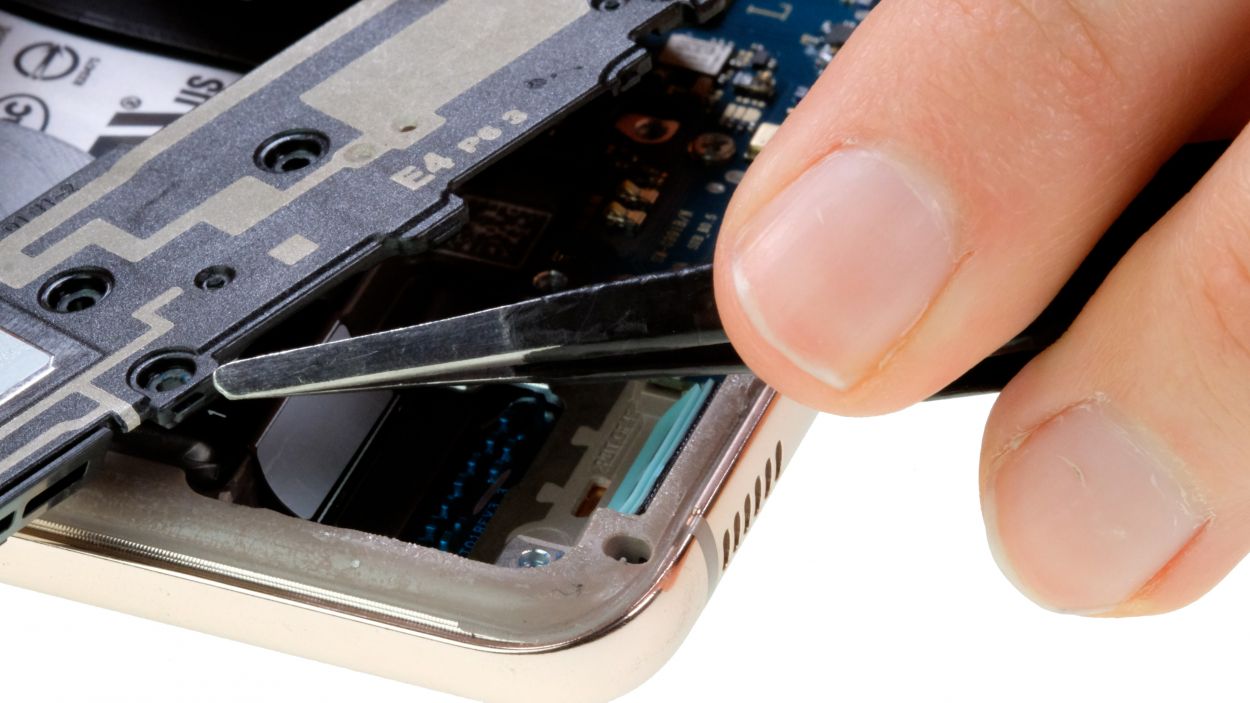
Look out for that little arrow in the upper left corner – it’s your trusty guide for where to put your tool. You’ve got this!
– Gently pop the speaker module out of its cozy little home and set it aside for now. You’re doing great!
Tools Used
Step 18
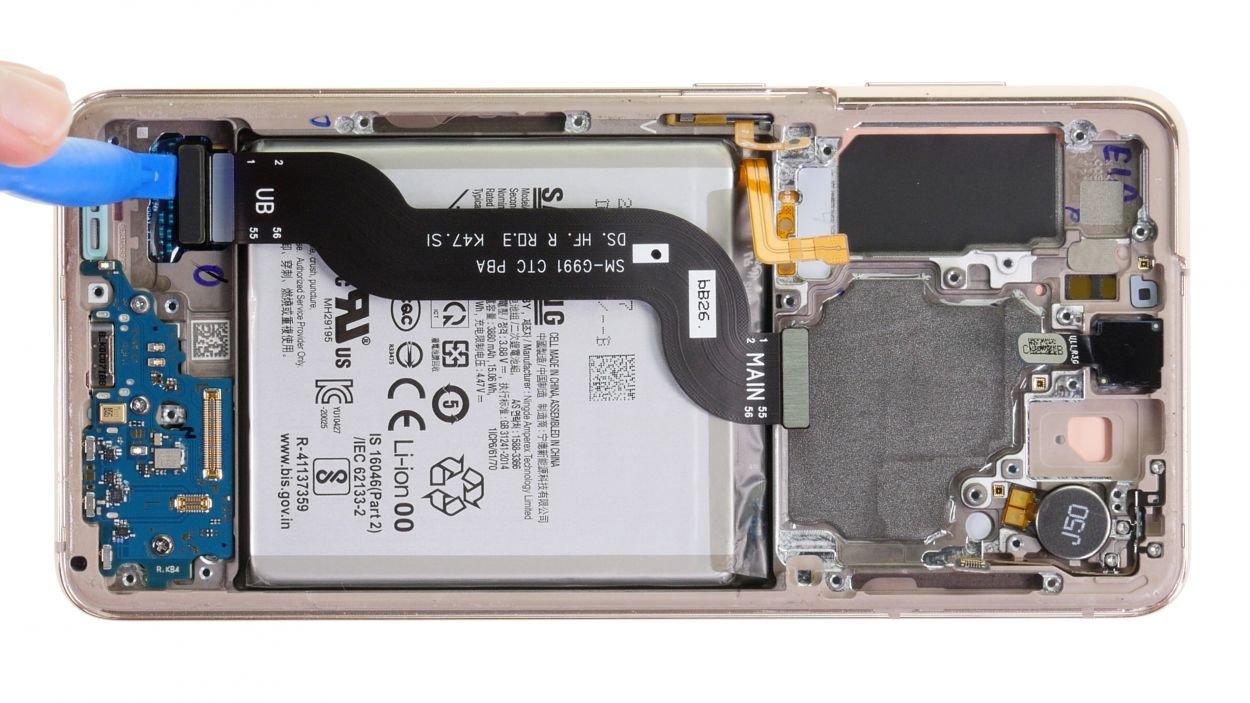
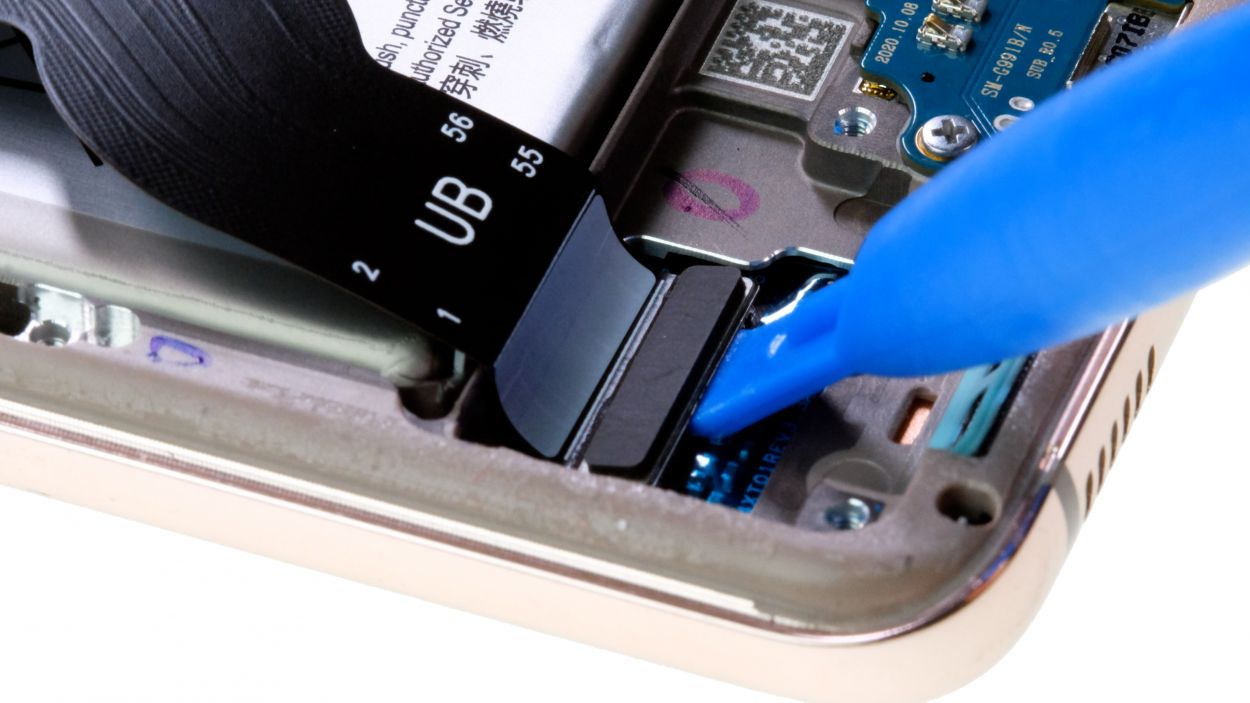
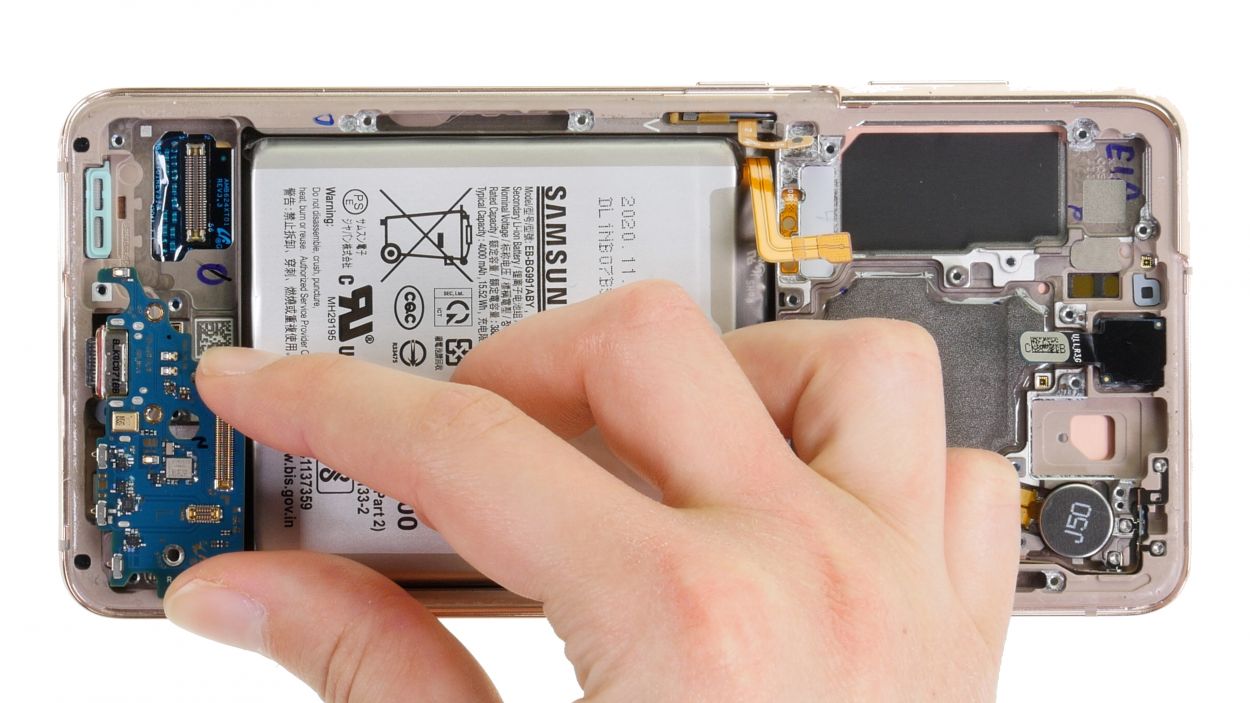
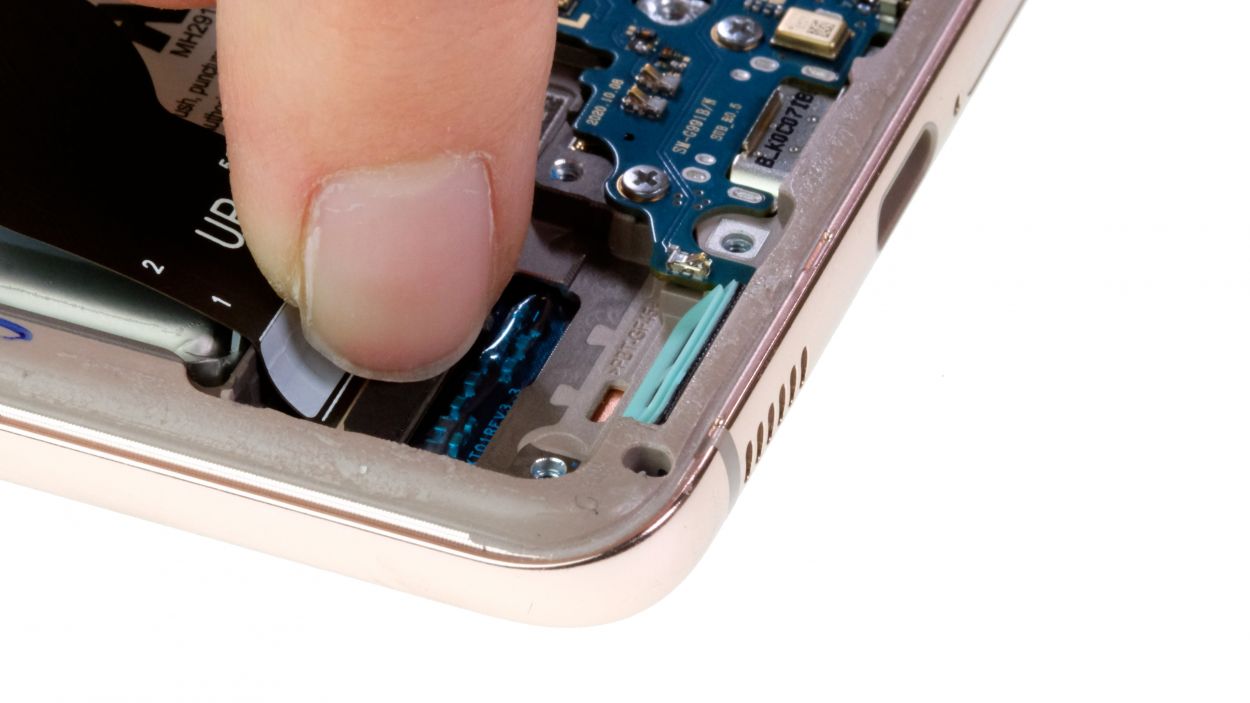
– Gently pop off the lower connecting cables from the USB board, giving them a little nudge to set them free.
Tools Used
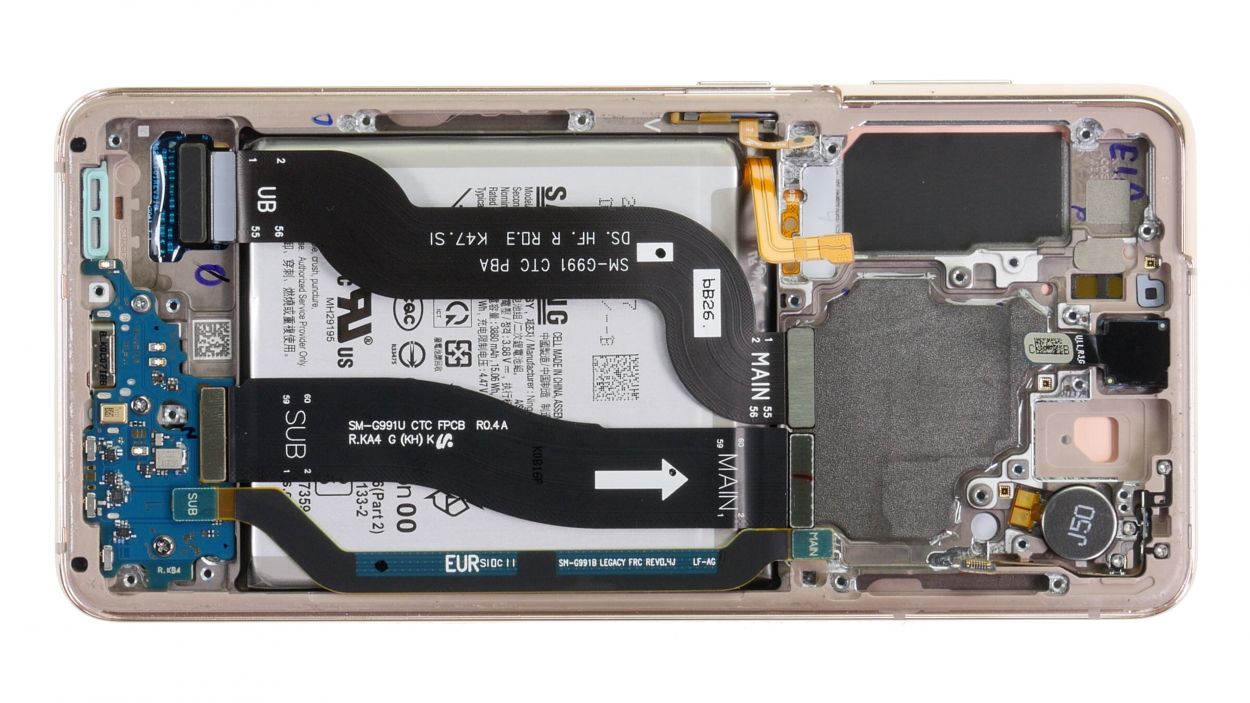
Step 19
– Carefully remove the unplugged cables from the device and set them aside like a pro.
Step 23
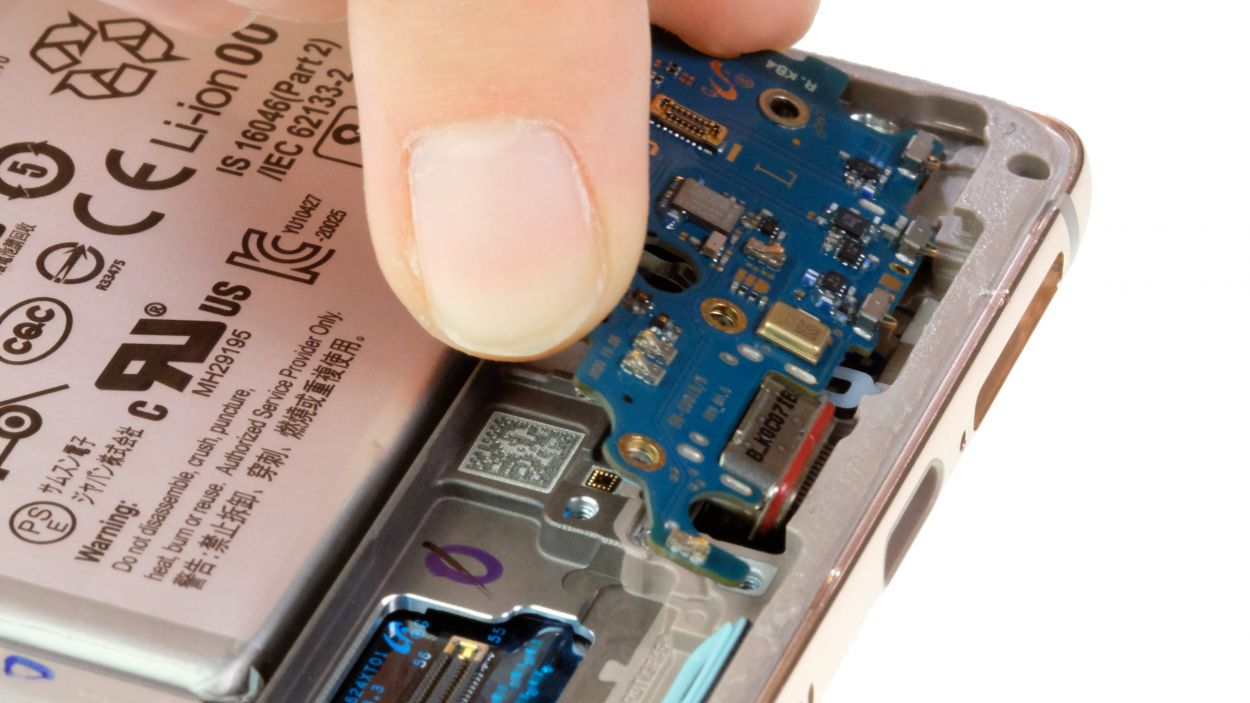
3 × 3.4 mm Phillips
– Carefully unscrew the three Phillips screws holding the USB board in place. Let’s get that board free!
Tools Used
Step 24
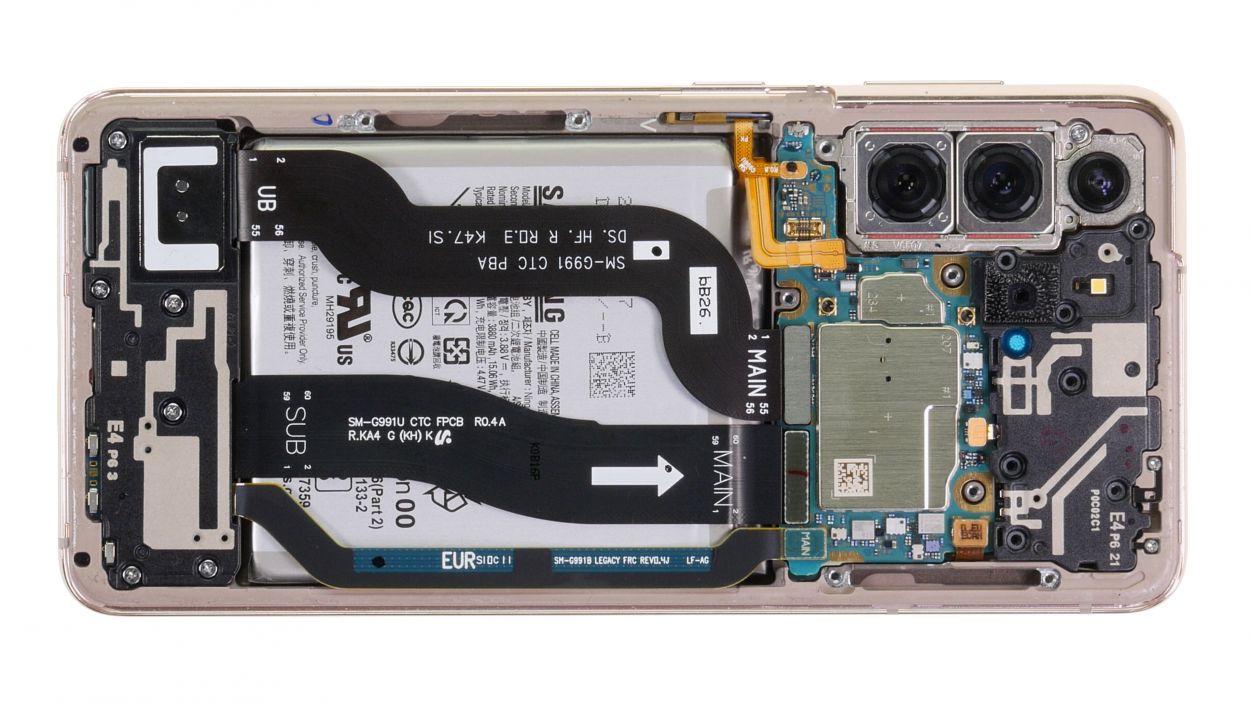
Hey there! Just a heads up: in this guide, we’re using a replacement screen that comes with the battery all set to go. But, hold onto your tools! Newer replacement screens don’t have the battery included, so you’ll need to pop that out and bring it along for the ride. For more battery wisdom, check out our battery guide!
– Gently nudge the motherboard upwards with a spudger and lift it out of the device with care.
Tools Used
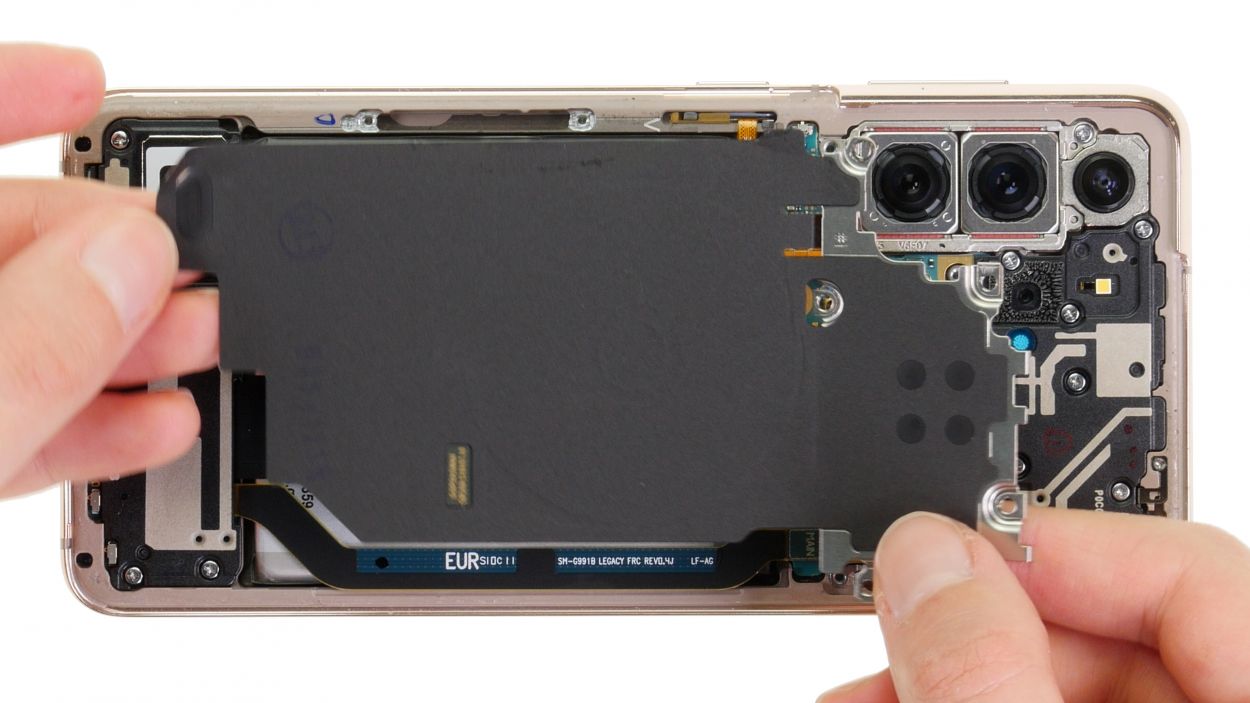
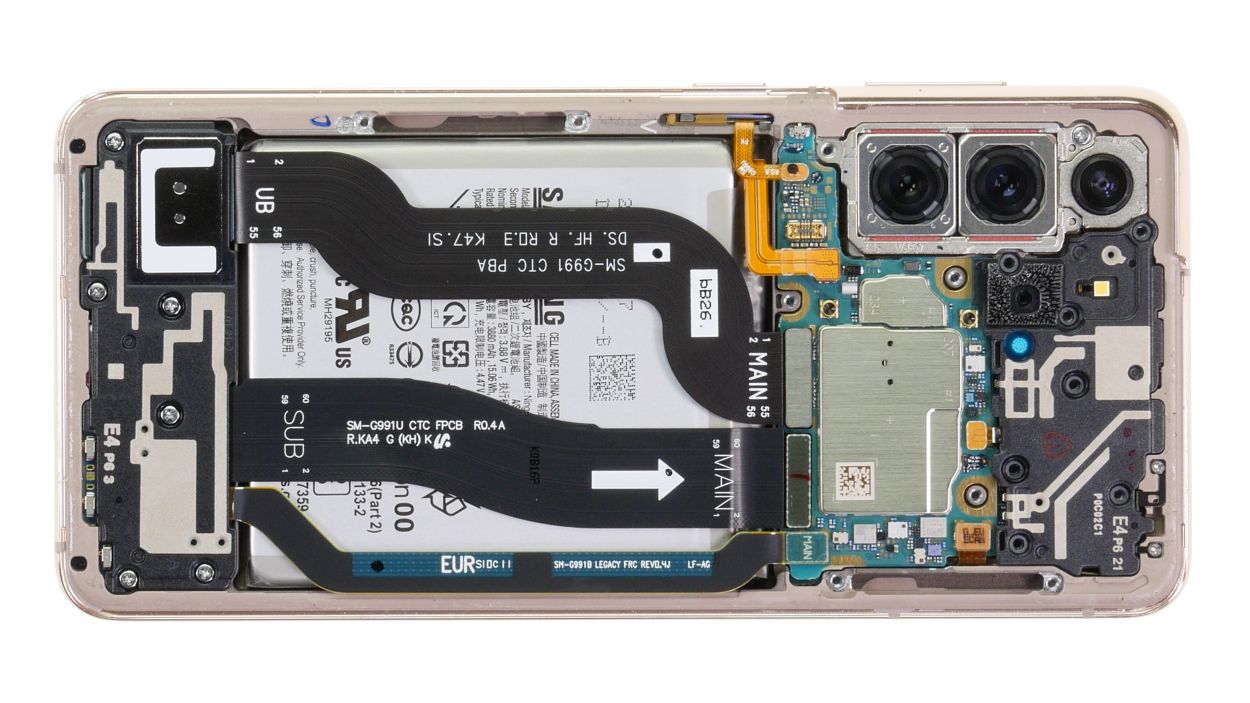
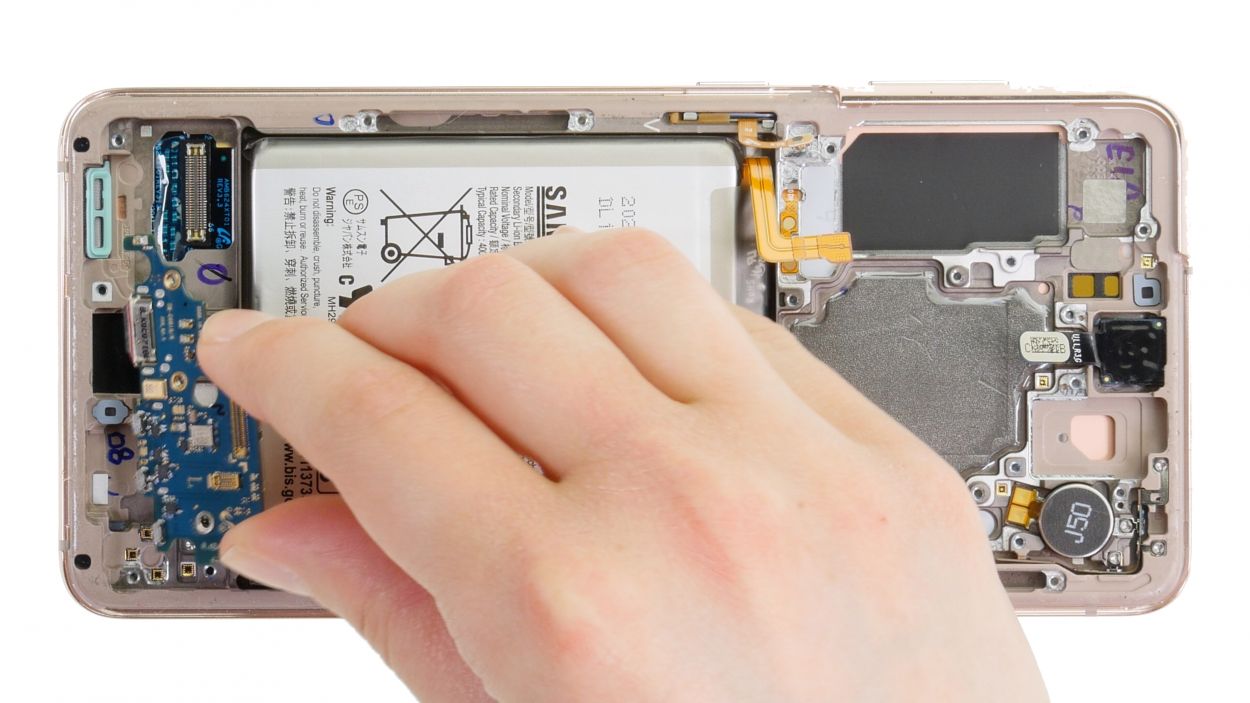
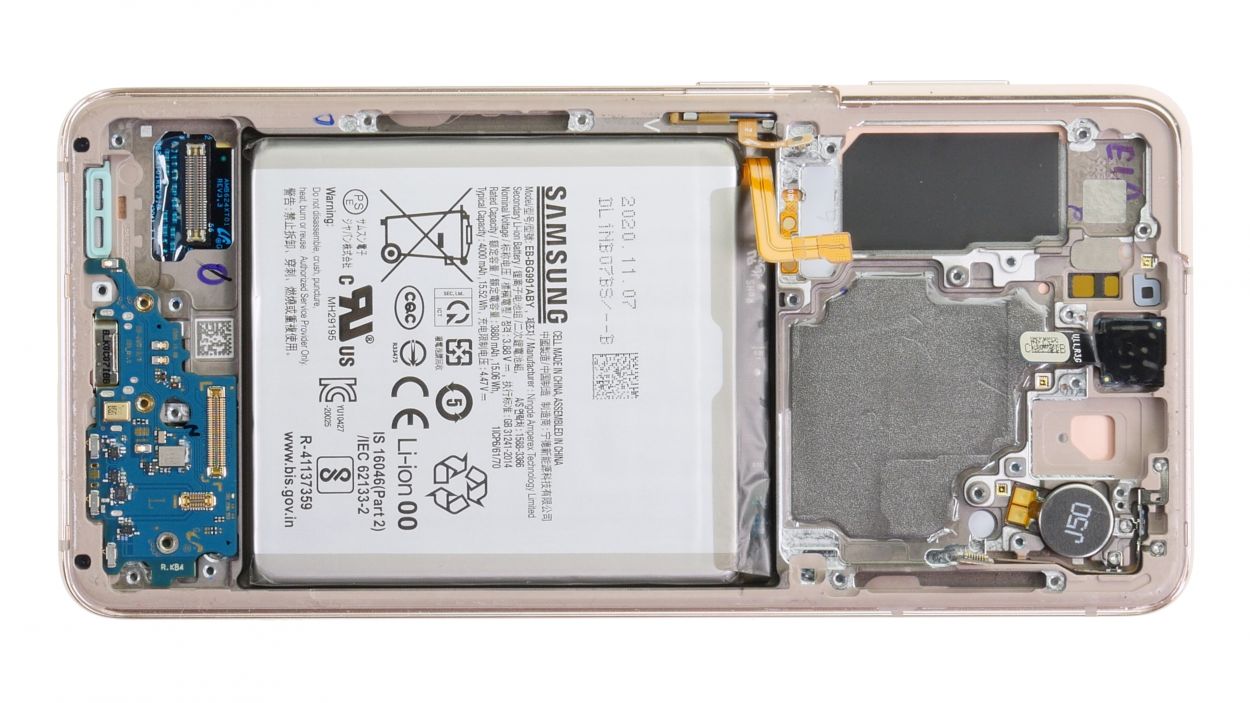
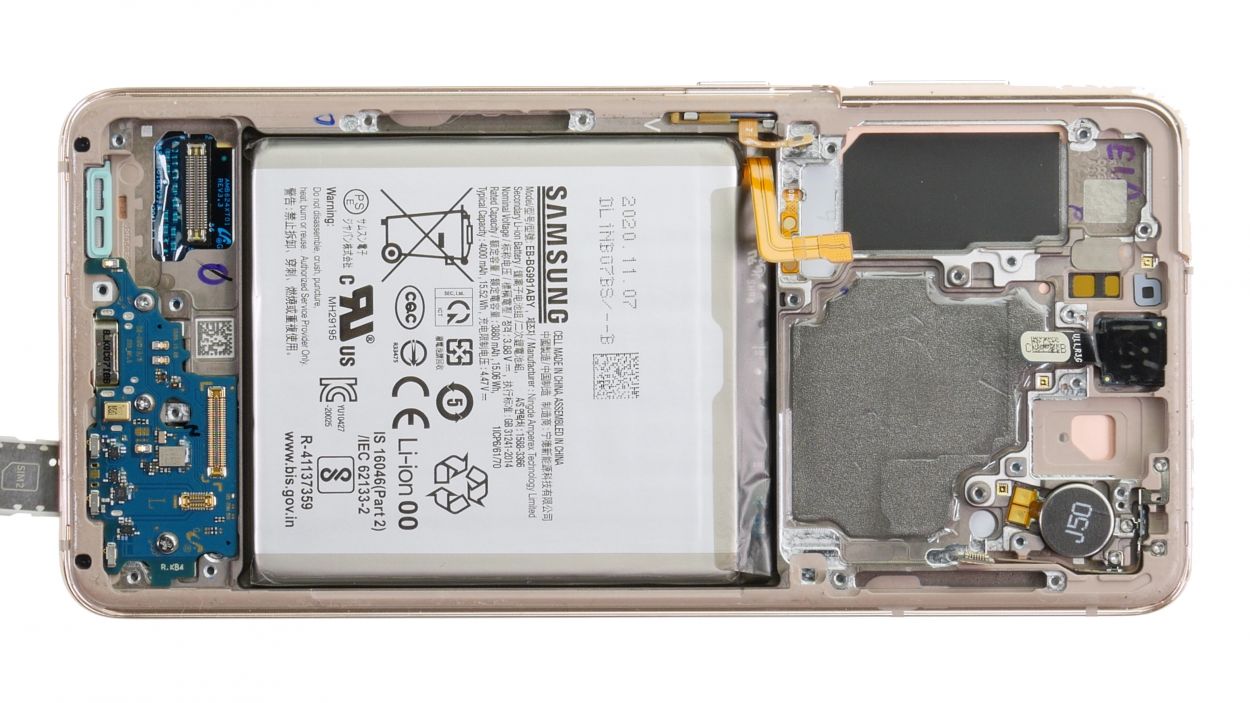
Step 25

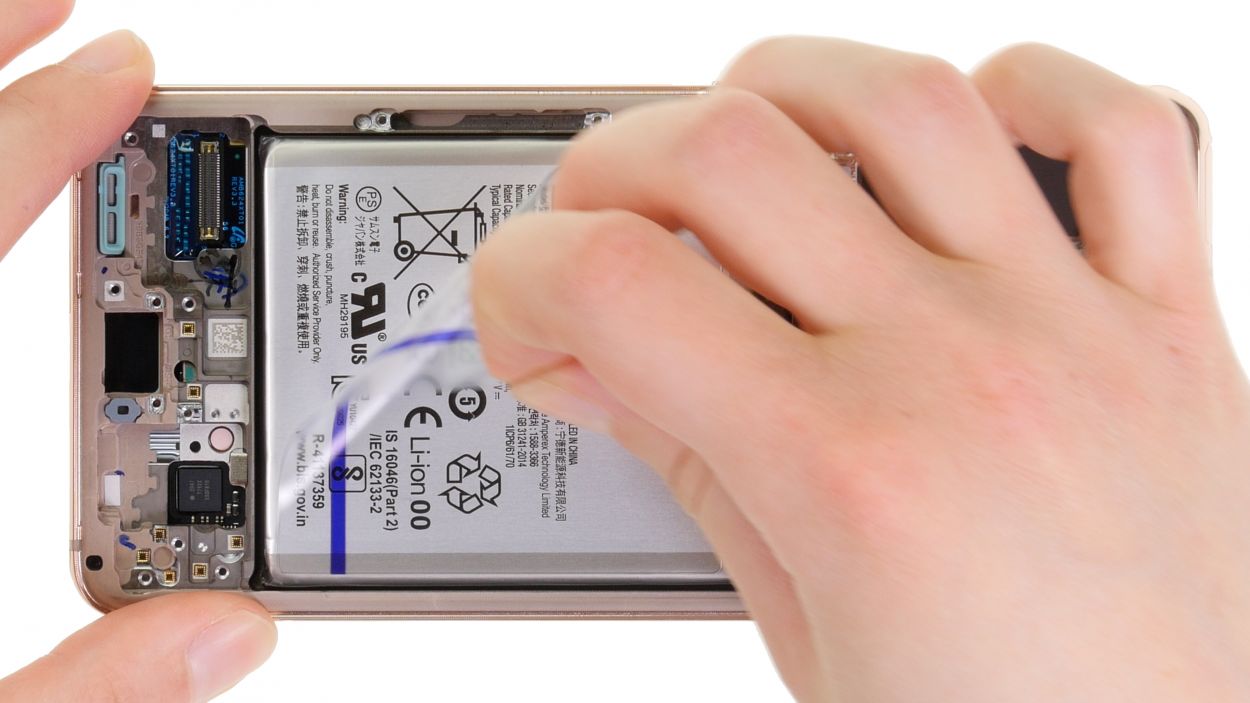
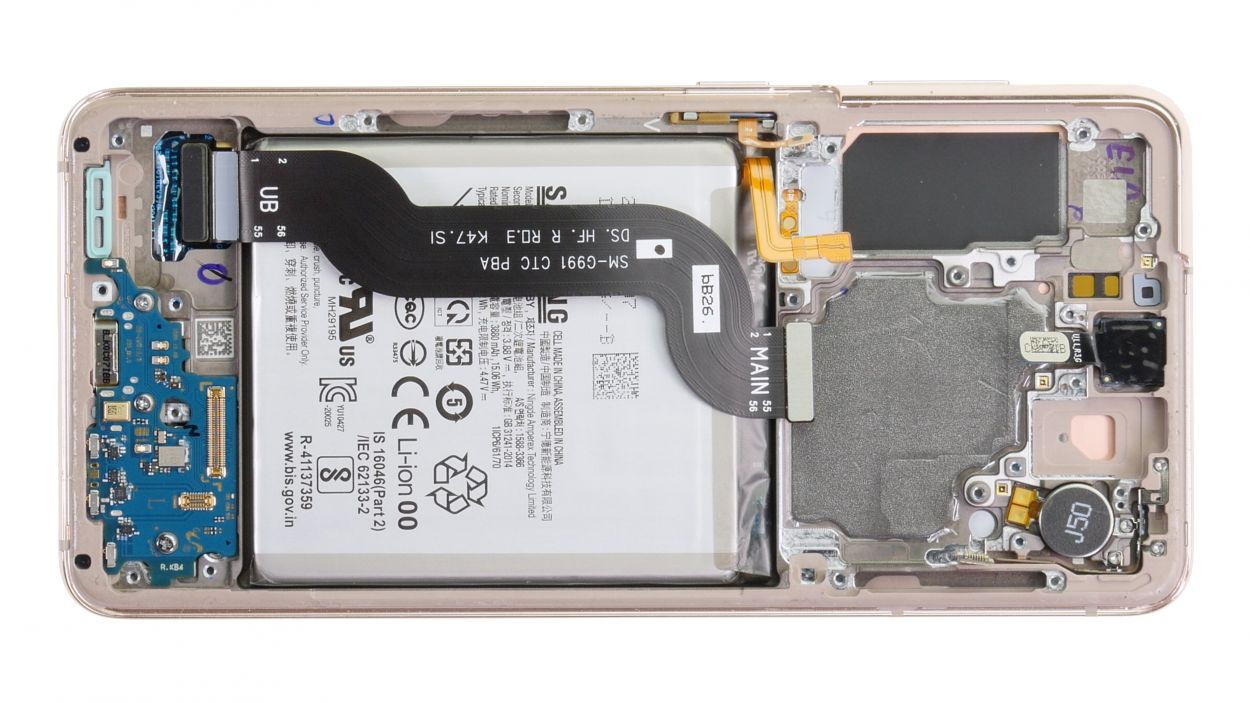
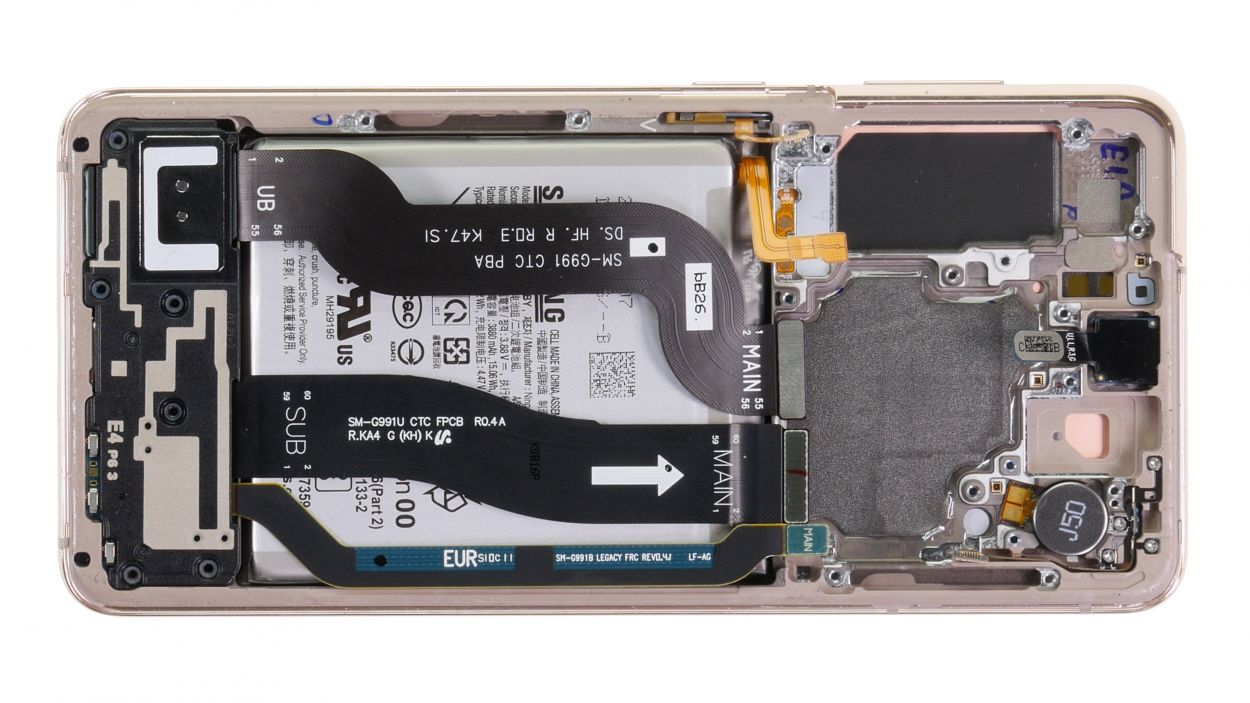
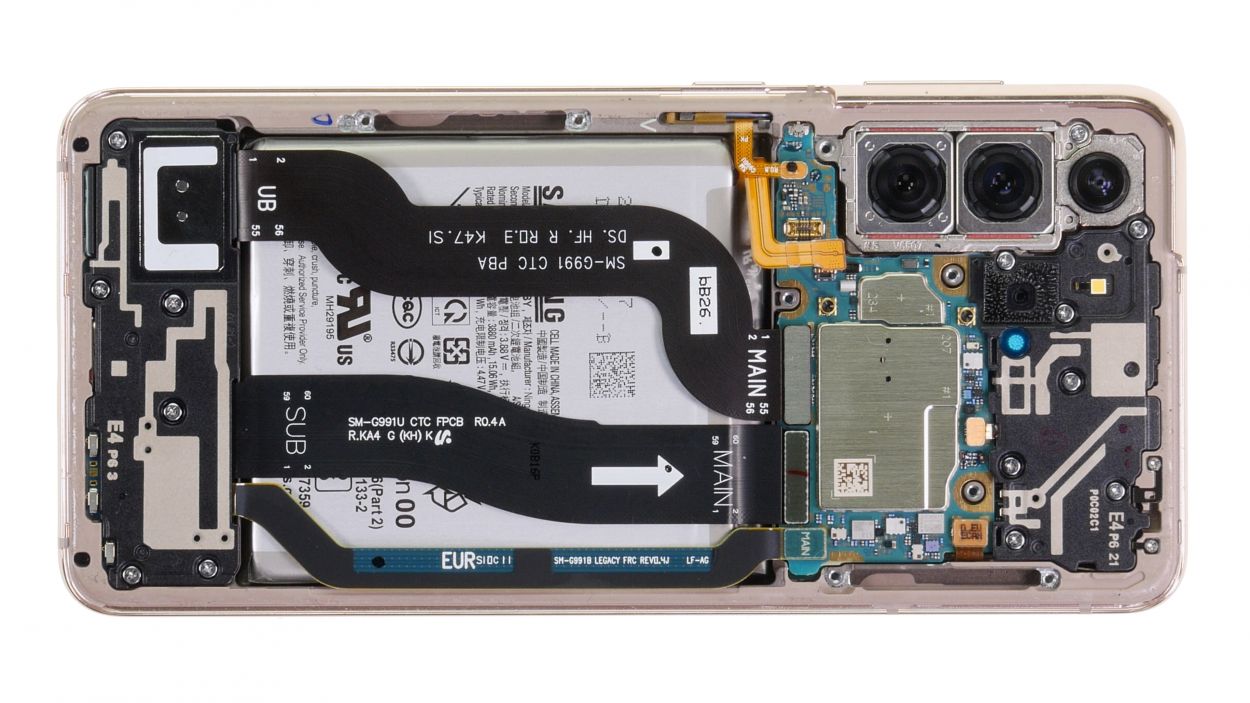
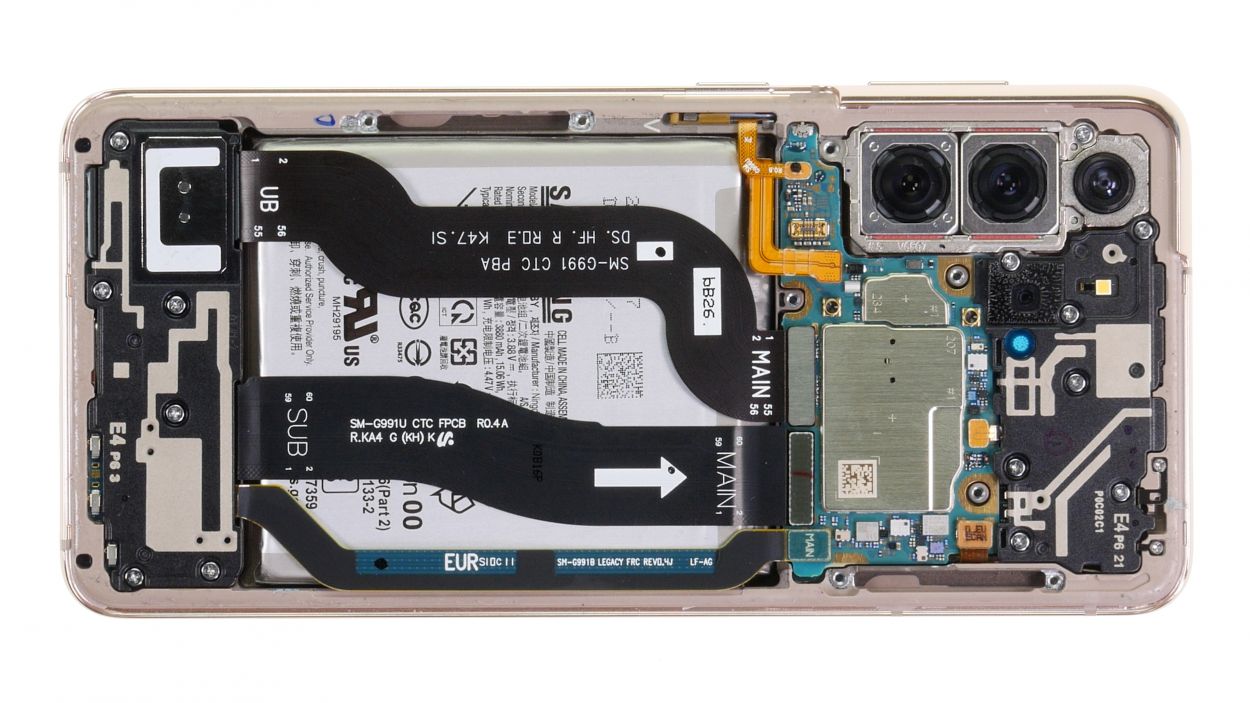
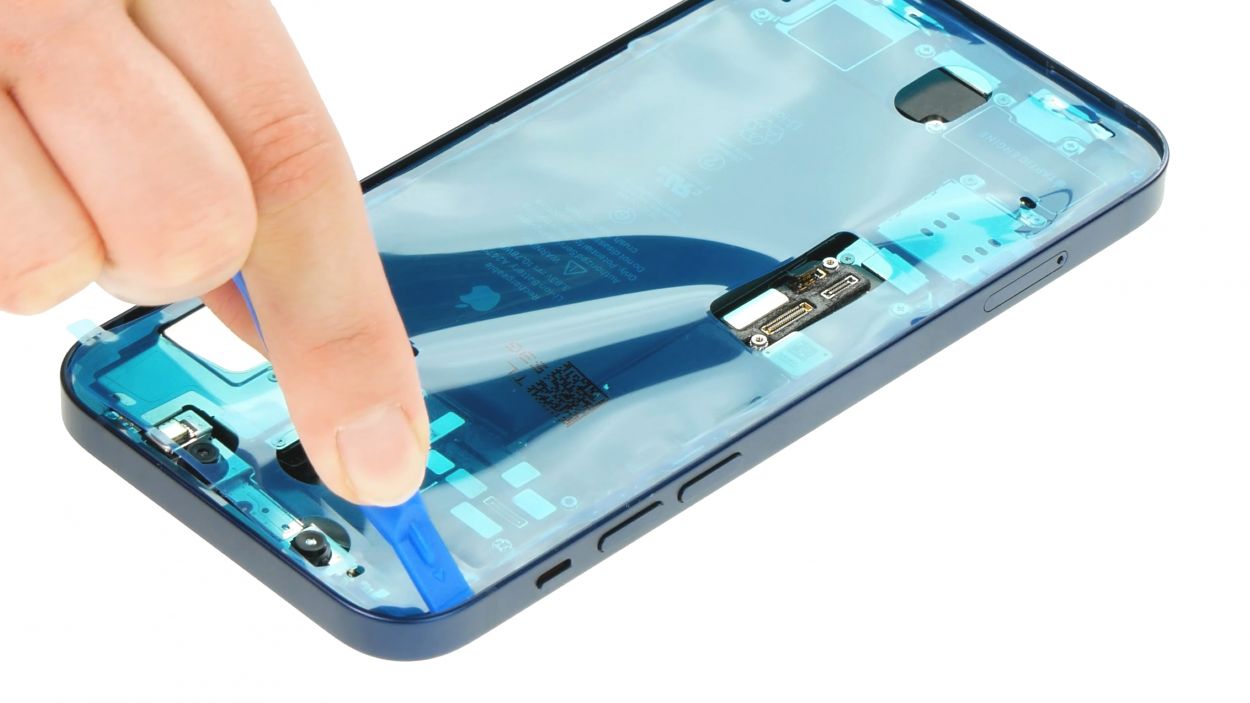
Good news! The replacement screen for your S21 5G comes with the battery, front camera, vibration motor, two 5G antennas, and buttons all set up and ready to go. That means you can skip the hassle of transferring them from your old screen. Easy peasy, right?
– Before diving back into reassembling your device, make sure to peel off that protective film from the battery. It’s like unwrapping a gift, but the present is a fully functioning gadget!
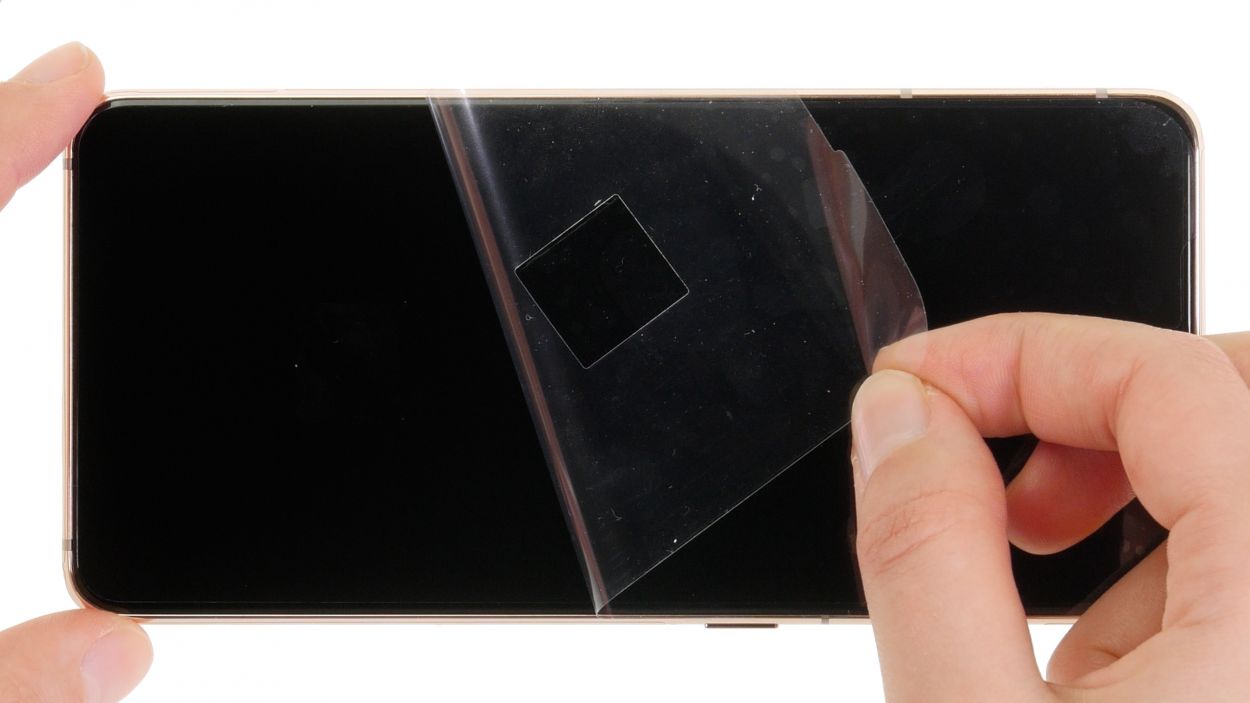
– Feel free to keep the protective film on the display glass until you wrap up the repair. It’s there to keep your screen safe and sound while you work your magic!
Tools Used
Step 27
When you’re fastening those components, remember to keep your screws in their designated spots! Using a screw that’s too long in the wrong area could lead to some serious display drama. So, let’s keep everything in check and avoid any mishaps!
– Attach the USB board back to the screen unit using those three trusty Phillips screws. You’ve got this!
Tools Used
Step 29

Hey there! Just a friendly reminder: don’t force those connectors together. Doing so could cause some serious damage and ruin the whole component. Take it easy and be gentle!
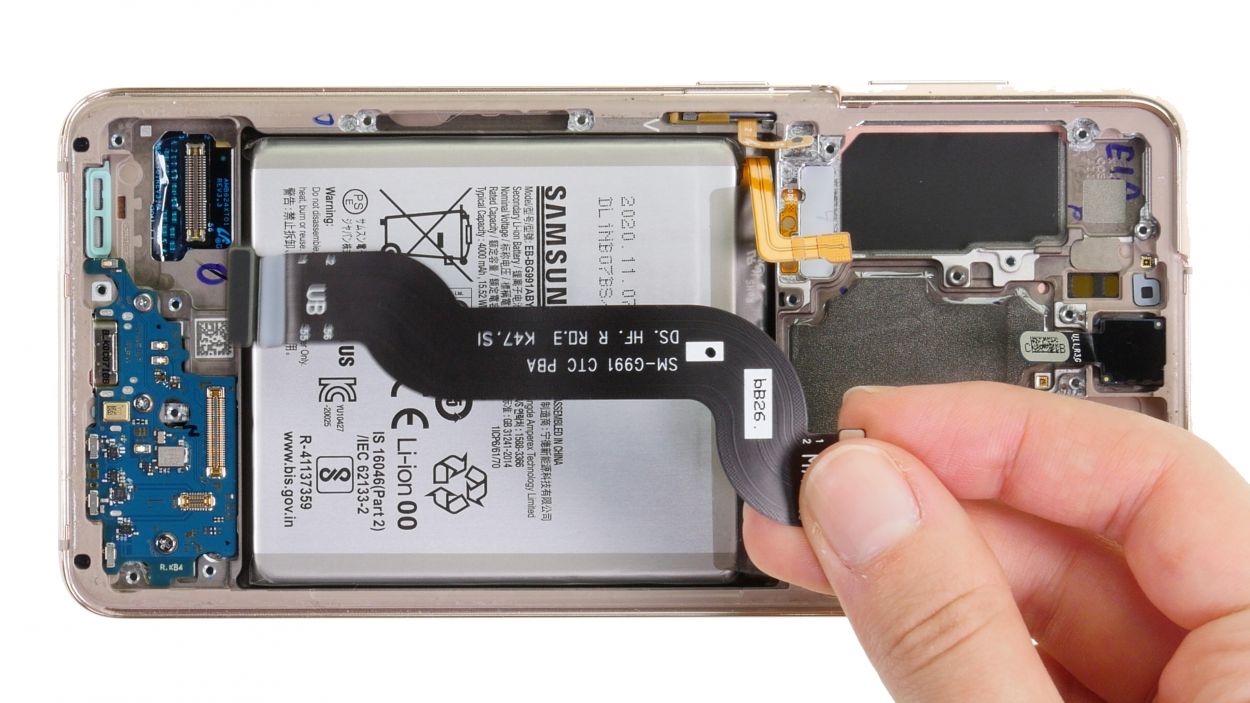
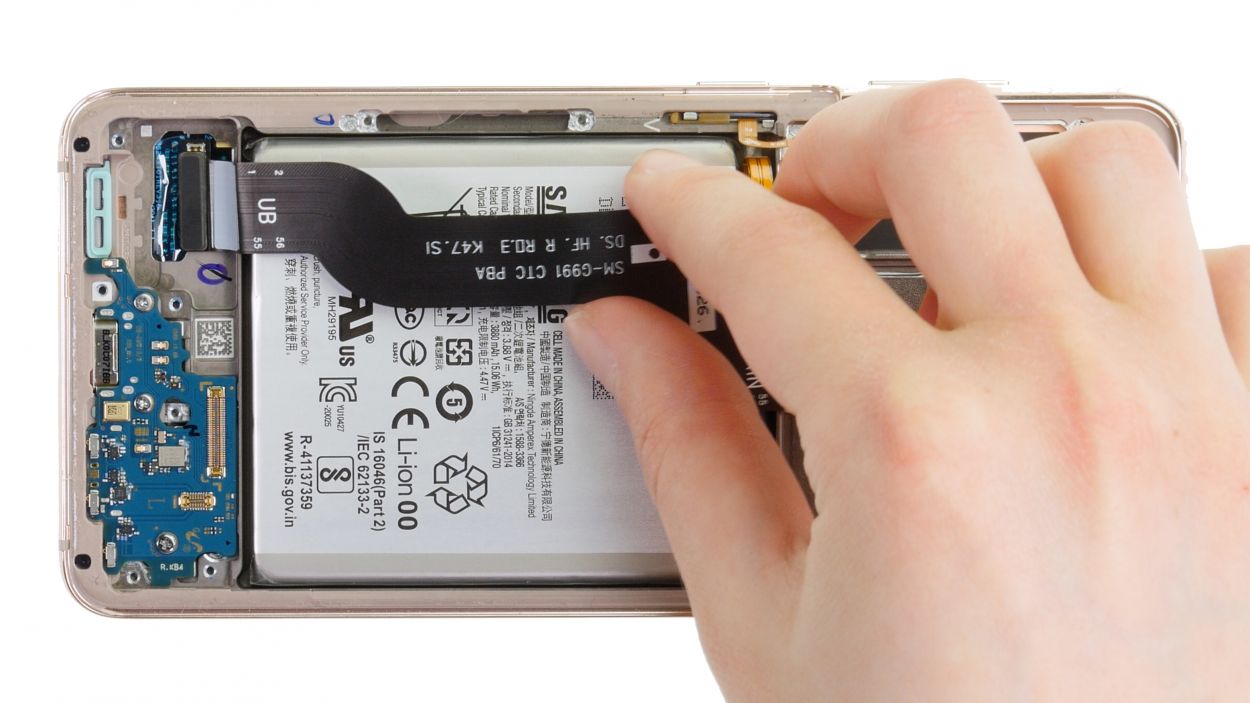
Check out the label on the screen cable; it’s your trusty guide to getting everything lined up just right!
– Carefully place the screen cable in position and reconnect the bottom connector by giving it a gentle press down. You should feel and hear a satisfying click as it locks into place.
Step 30
– Get those two connecting cables lined up like a perfect duo and gently plug the lower connector into the USB board. You’ve got this!
Step 31
– Carefully place the speaker back in its rightful spot.
Tools Used
Step 32
6 × 4.9 mm Phillips
– Secure the speaker module by fastening it with the six Phillips screws. You’ve got this!
Tools Used
Step 33

To keep those delicate flex cables safe while you’re sliding in the motherboard, just grab some tweezers and gently hold them to the side. You’re doing great!
– Gently place the board back in its original spot, just like it was meant to be!
Tools Used
Step 34
1 × 4.9 mm Phillips
– Carefully secure the motherboard back into the screen unit by tightening those screws snugly. You’ve got this!
Tools Used
Step 35
Hey there! Just a friendly reminder: hold off on connecting that battery just yet. We wouldn’t want a surprise short circuit crashing the party!
– Gently press down all connectors back onto the motherboard, leaving out the battery and NFC connector. You’ve got this!
Step 37
7 × 4.9 mm Phillips
– Carefully reattach the earpiece by securing it with the seven Phillips screws. You’re almost there!
Tools Used
Step 38
– Now, let’s get that earpiece connector back in action by reattaching it to the motherboard!
Step 39
– Gently nudge the NFC antenna back into its cozy spot in the screen unit, giving its rear end a little press to help the glue make some new friends and stick together again.
Step 40

– Gently lift the metal cover of the charging coil to connect its black connector hiding beneath it. You’ve got this!
Step 41

Remember to connect that battery connector last! It’s like the grand finale of your repair party—keeping everything safe and sound from potential short circuits.
– It’s time to give that orange battery connector a warm hug back to the motherboard!
Step 42

5 × 4.9 mm Phillips
– Now that you’ve reconnected the battery and the charging coil, it’s time to put that metal cover back on. Screw it in nice and snug, and you’re one step closer to having your device back in action!
Tools Used
Step 43
If things aren’t quite right during your testing phase, take a moment to ensure that everything is snugly installed and securely connected. A little check can go a long way!
– Power up your Galaxy S21 and get ready for some fun!
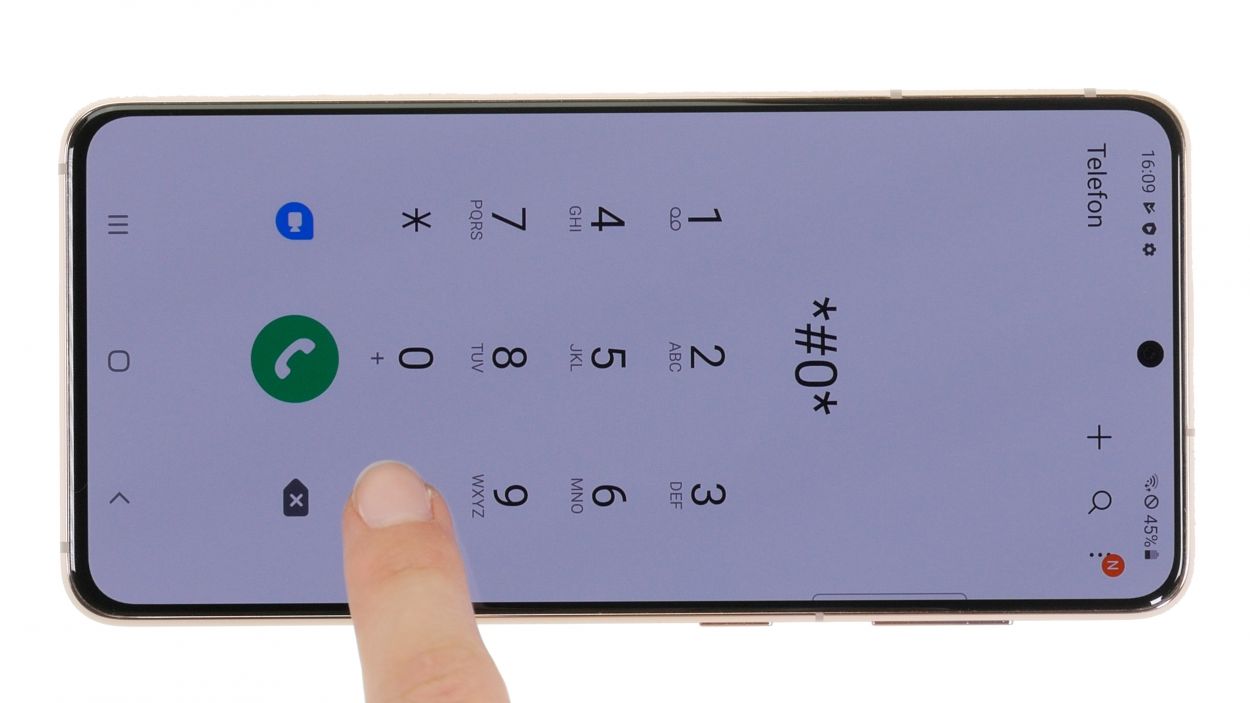
– Dial *#0*# in the phone app to access the Samsung test menu.
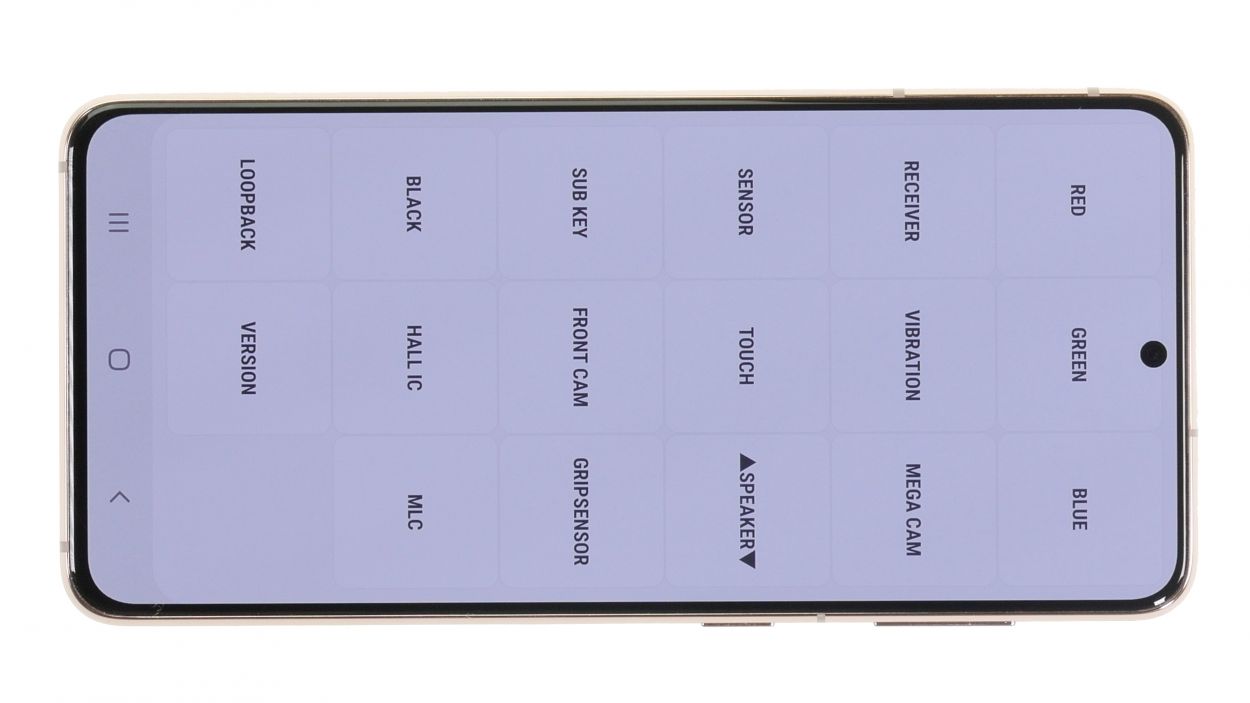
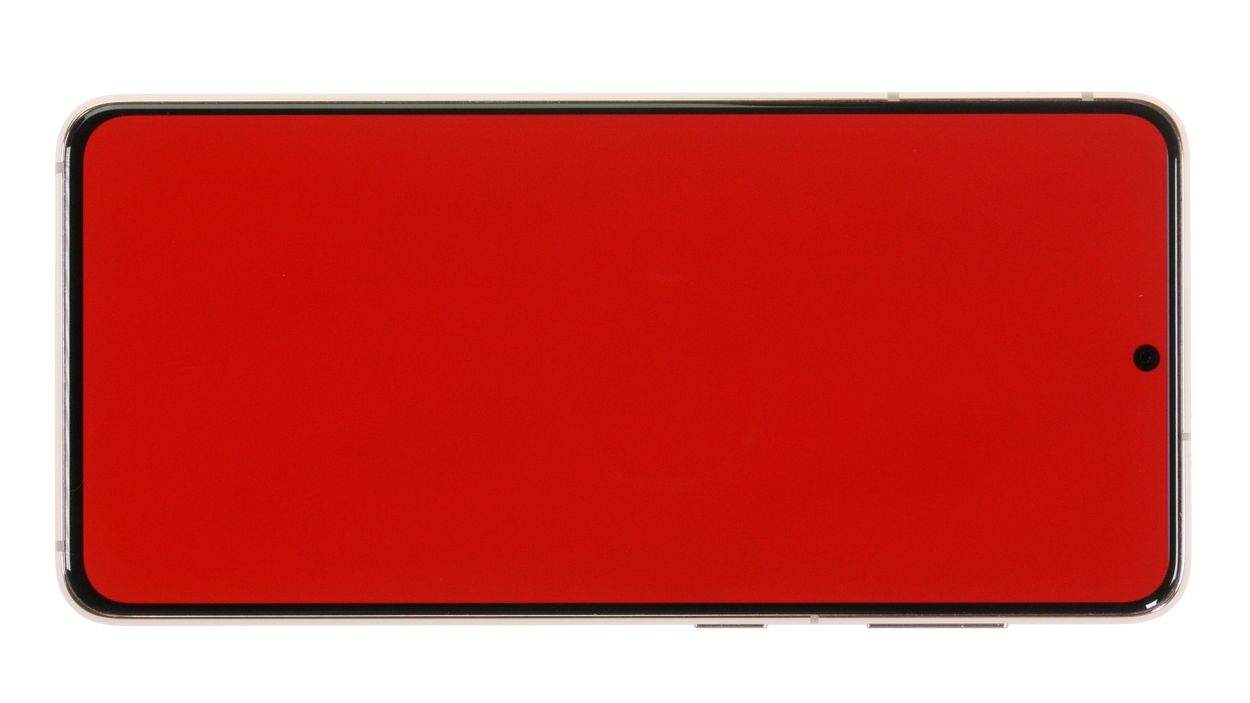
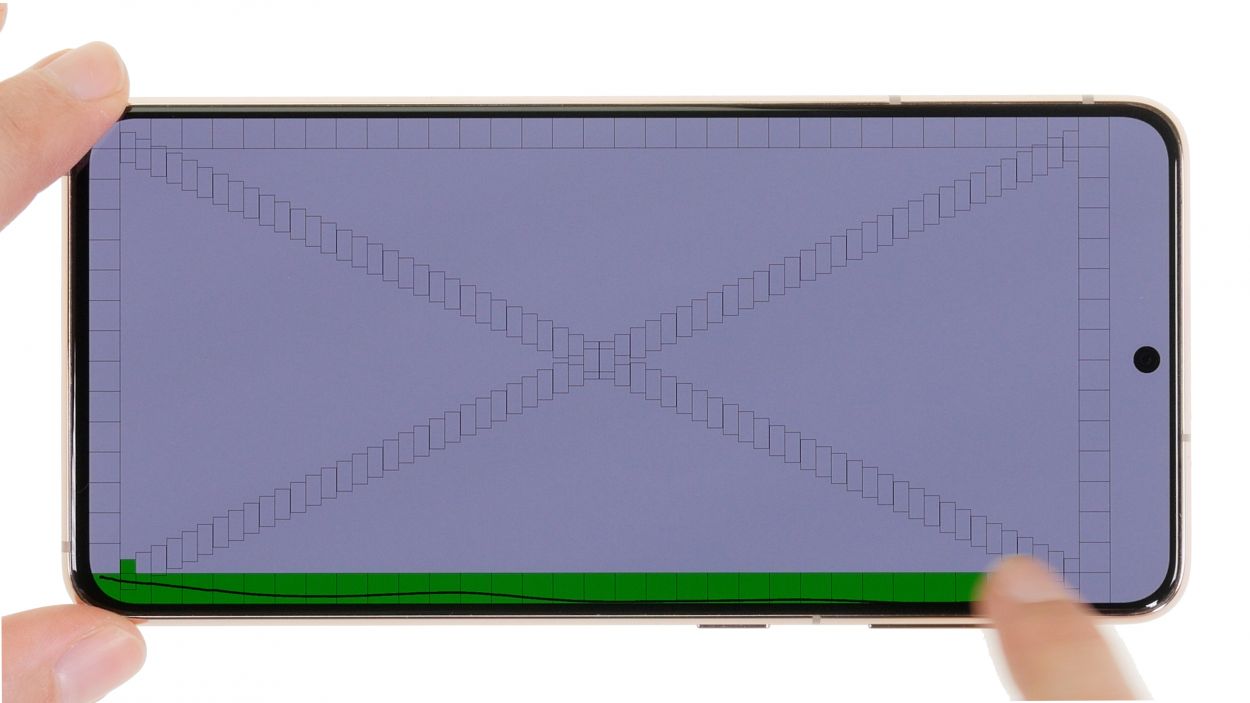
– Give your replacement screen a whirl by checking the color display and touch function.
– Explore other components using the test menu, or for a handy guide, feel free to check out our checklist. If you need help, you can always schedule a repair.
Step 44

Adding a new adhesive frame is totally up to you! If your current one is still holding strong, there’s no need to swap it out. But if it’s looking a bit worse for wear or not sticking like it used to, we suggest getting a fresh adhesive frame to keep everything snug. Remember, if you need help, you can always schedule a repair.
Tools Used
Step 45


Give that back cover some extra love by running hot air along its edge one more time to ensure the glue sticks like it should. For a little extra help, you can place some books on your device for a few minutes or use a clamp, just like we showed you in the example. You’re doing great!
– Wrap up your Galaxy S21 5G repair by gently pressing the back cover onto the display unit. You’ve got this!