DIY Google Pixel 3 Charging Assembly Replacement: Step-by-Step Guide
Duration: 45 minutes
Steps: 30 Steps
This repair guide is brought to you by the awesome crew at Salvation Repair, and while it hasn’t received a thumbs up from Google, it’s still packed with tips to get you back on track. Want to dive deeper into our repair guides? Check it out here!
Hey there! This repair guide is brought to you by the talented folks at Salvation Repair, and while Google hasn’t given it a thumbs up, we’re here to help you out! Ready to swap out the charging assembly for your Pixel 3? Awesome! The charging assembly is where you’ll find the USB-C port and a few antenna connectors, all snuggled beneath the loudspeaker. Just a heads up, you’ll need to take off the loudspeaker first, and that means the loudspeaker’s ingress gasket will take a little hit. But don’t worry, you’ve got this! And if you ever feel stuck, just schedule a repair with us!
Step 1

– Get that iOpener nice and toasty! Apply it to the bottom of your phone for a minute. It’s like a warm hug for your phone (but way less awkward).
Tools Used

Step 2


Double check that you’re not confusing the screen side with the back cover side. Trust us, it happens!
Avoid using metal tools to pry things open, or you’ll risk cracking or scratching that shiny glass back cover. If the panel isn’t budging, try giving it a little more heat with a hair dryer or heat gun. Patience is key!
If your back cover is sporting some serious cracks, a layer of clear packing tape might just be your new best friend, giving that suction cup the grip it needs!
Depending on the age of your phone, getting that cover off might require a little muscle. No worries if it’s stubborn—just apply some more heat and give it another go!
– Grab a trusty suction cup and stick it to the warm bottom edge of the back cover.
– Give that suction cup a solid, steady pull to open up a little gap.
– Slide an opening pick into that gap and get ready to dig deeper!
Step 3

When you’re slipping an opening pick above the power button, just be gentle and don’t push it in too far – you don’t want to accidentally damage that fingerprint sensor cable. If you need help, you can always schedule a repair
Step 4


– Gently glide your tool along the bottom edge of the phone and around that right corner like you’re slicing butter on a warm day.
– Pop a pick in the bottom edge to keep that adhesive from playing hard to get again.
Step 5


The adhesive can be quite sticky. Use a gentle sawing motion with the pick to help slice through it easily.
– Warm up the right edge with an iOpener, then keep slicing through the adhesive using an opening pick.
Tools Used
Step 6


When you’re slicing above the power button, remember to keep that pick no deeper than halfway in—it’s a friendly tip to keep your fingerprint sensor cable safe and sound!
– Keep that heat flowing and glide your tool along the phone’s edge. To stop the adhesive from getting cozy again, tuck a pick into each side as you go.
Step 7


Hold up! Don’t try to take off the back cover just yet. It’s still hooked up to the phone with the fingerprint sensor cable. If you need help, you can always schedule a repair.
– After you’ve made a careful slice all around the edge of the phone, gently lift the left side of the back cover.
– Now, flip that back cover over like a pro and set it down, making sure the fingerprint sensor cable is comfy and not stretched.
Step 8

– That’s right, just two lil’ screws holdin’ down this fingerprint bracket of yours. Carefully unscrew ’em and set ’em aside like a little treasure hunt.
– Now, let’s keep this repair a breeze, shall we? Keep those screws in order so when the time comes, they find their original spot like welcoming-home heroes.
– Whoa there, champ! Remember, doin’ up these screws ain’t the time for a workout. Just tight enough, not too much to keep your display smilin’.


Step 10


Those connectors are like tiny little friends, so be careful not to jostle them too much! You don’t want to bump into their surface-mounted buddies nearby. Just take it slow and steady, and you’ll be golden.
– Grab your trusty spudger and gently nudge up to disconnect the fingerprint connector from its cozy little socket. It’s like giving it a friendly high-five!
– To reattach it, just align the connectors carefully and press down on one side until you hear that satisfying click. Then, do the same on the other side—just avoid pressing down in the middle. If things get a bit crooked, you might bend those pins, and trust us, nobody wants that. If you need help, you can always schedule a repair.
Tools Used
Step 11


– Let’s get started by removing the back cover. Easy does it!
– Before you put on a new back cover, make sure to clean up any leftover adhesive from the phone frame. Grab an opening tool and some high concentration isopropyl alcohol to get the job done.
– If you’re reusing the old back cover, give it a good cleaning to get rid of any leftover adhesive, and then apply some fresh back cover adhesive to get it sticking like new again.
– If you’re installing a brand new back cover, take a minute to compare it to the original part and transfer over any extra bits, like the flash diffuser, to your shiny new replacement.
– To get that new back cover adhesive on just right, follow our simple guide and you’ll be golden. And if you need help, you can always schedule a repair with the pros at Salvation Repair.
Tools Used

Step 12

– Take a grin: You’ve got this! Remove those five little tightroopers, we’re talking screws, to uncover the funky wireless charging coil. Couldn’t be easier – just 3 cousins (screws that is), 1.9 mm, 4.2 mm, and 4.3 mm, to be exact. If you need help, you can always schedule a repair with our cool crew!
Step 13

– Time to give that wireless charging coil a little lift! Gently remove it, and we’re ready for the next step.


Step 15

– Hey there, tech hero! Let’s make this loud speaker connection pop with a little spudger magic. Slide into home with the pointy end of your spudger to gently nudge that loudspeaker connector apart from its socket, just snuggled up to the right side of your device’s motherboard. If you need help, you can always schedule a repair!
Tools Used
Step 16


Don’t forget to put this insert back in before screwing down the daughterboard.
– Let’s get started by removing the four Phillips screws – it’s time to take your device apart!
– Next, carefully remove the tiny grounding clip from the left screw hole. Don’t worry, it’s small, but it’s an important step – just be sure not to misplace it.
– Now, gently remove the small plastic insert from the right side of the USB-C port. Easy does it!
– You’ll need to remove one 1.9 mm screw – just one to go!
– Time for another screw – remove one 4.3 mm screw and you’re making progress!
– Almost there – remove two 4.3 mm screws with thinner shanks. You’re doing great!
– When it’s time to put everything back together, remember that the grounding clip installs with the contoured edge facing the left side of the phone. If you need help, you can always schedule a repair
Step 17


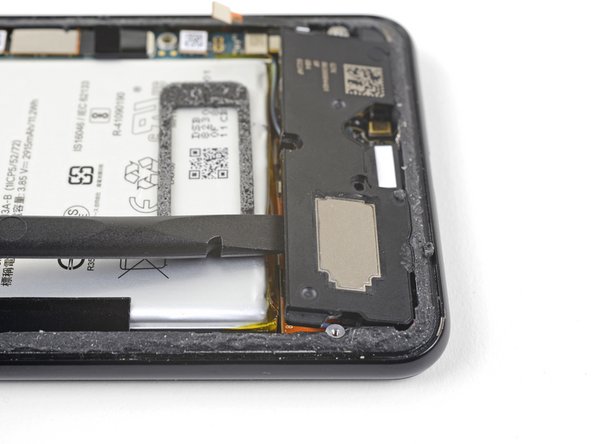
The loudspeaker is still held in place by a strong sticky friend. Before you get started, try prying it up in a few different spots to break the seal. You’ve got this!
– Slip the edge of a spudger underneath the bottom right corner of the loudspeaker.
– Pry it up to free the loudspeaker from the phone.
Tools Used
Step 18


Watch out! Don’t let that spudger poke the battery. If you need help, you can always schedule a repair.
– Slide the tip of your spudger into the top left corner of the loudspeaker for a little gentle nudging.
– Give it a careful pry to set the loudspeaker free and let it dance to the rhythm of your repair rhythm!
Tools Used

Step 20


– First things first, let’s get that loudspeaker out of there! Remove it with care.
– Before you pop in a shiny new loudspeaker, take a moment to inspect the adhesive gasket.
– If it’s looking good and ready to go, feel free to reuse it! Just make sure it doesn’t block the exit hole.
– If the gasket has gone rogue and is out of place, no worries! Just take it out and stick in a fresh adhesive strip or some Tesa tape.


Step 22


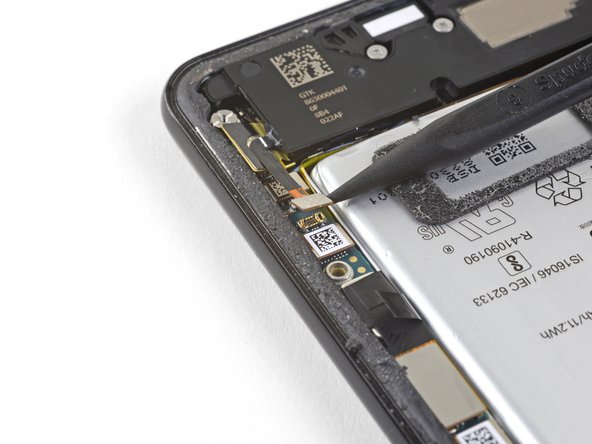
Hey there, that cable is a bit delicate, so be gentle! If it feels stuck, you can use a spudger to give the clip a little nudge and try again. You got this!
– Alright, let’s get this party started! Grab your trusty spudger and give that blue antenna cable a little nudge. Gently pry it up and free it from its grounding clip. You’ve got this!
Tools Used
Step 23
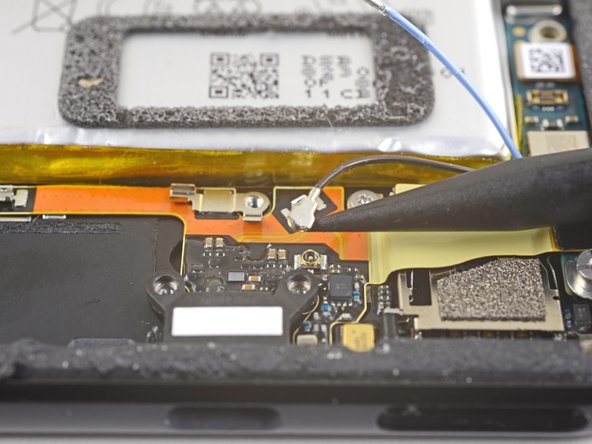

– Use the pointy end of your spudger tool (the one that looks like a tiny spatula) to gently lift and disconnect the black antenna cable from its connector near the USB-C port. It’s like giving the cable a little high-five, but with more precision!
Tools Used
Step 24

– Gently reroute both antenna cables and set them aside, making sure they’re clear of the charging assembly. No need to rush; take your time and keep everything organized!
Step 25


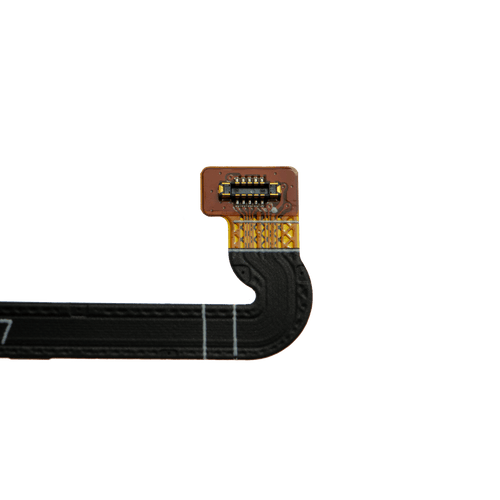
– Grab a spudger, aim at the charging assembly’s connector near the right edge, and carefully pry it up from its motherboard socket. Smooth moves, you got this!
– Gently lift the flex cable off the top of the SIM card reader. You’re almost there, keep it going!
Tools Used
Step 26

– Alright, let’s loosen things up! Remove those two tiny Phillips screws holding the charging assembly to the phone’s bottom. You’ll need a 1.9 mm screwdriver for this step. If you need help, you can always schedule a repair
Step 27

– Let’s get this repair started! Apply some heat to the bottom edge of your phone with a heated iOpener for about a minute. This will help loosen the adhesive that’s holding the charging assembly in place, making it easier to remove. If you need help, you can always schedule a repair
Tools Used
Step 28

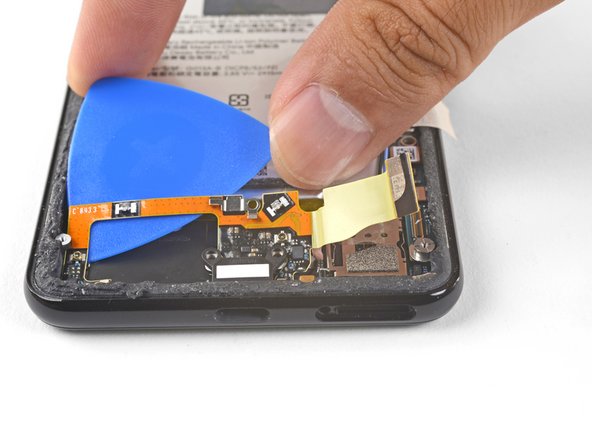
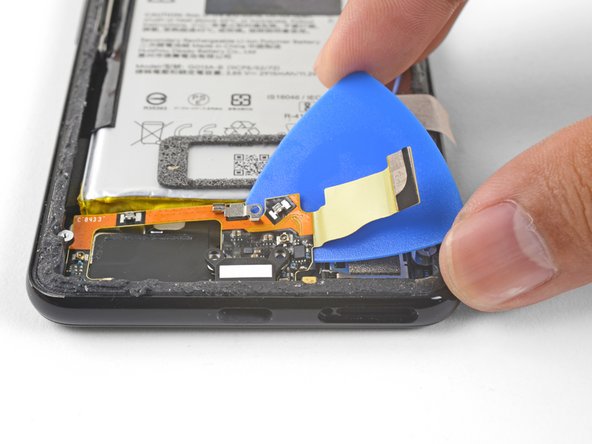
– Gently slide an opening pick under the flex cable of the charging assembly.
– Wiggle that opening pick beneath the charging assembly to help it break free from the phone.


Step 30
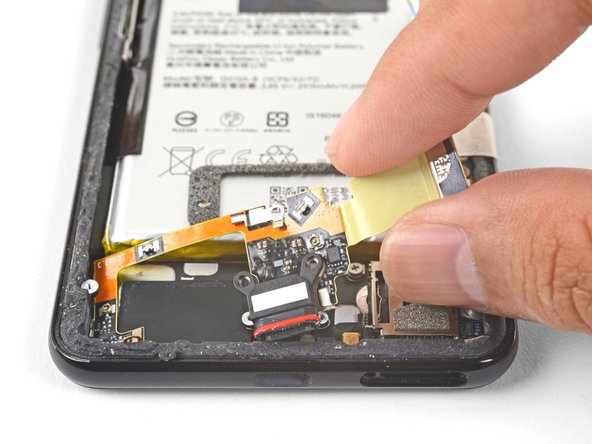

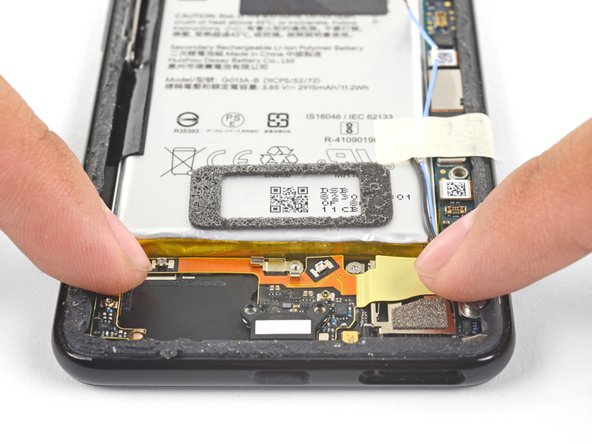
– When you’re ready to install the replacement assembly, let’s get started:
– First, remove all the plastic liners from the assembly to expose the adhesive – this is a crucial step to ensure a secure fit.
– Next, align the assembly’s bottom left corner with the frame and gently guide it into place.
– Now, carefully lay the rest of the assembly in place, making sure the USB-C port is properly seated in its cutout – take your time and double-check to avoid any issues.
– Finally, use your fingers to press the assembly onto the frame, applying gentle pressure to secure it in place. If you need help or feel unsure at any point, you can always schedule a repair with Salvation Repair for expert assistance.